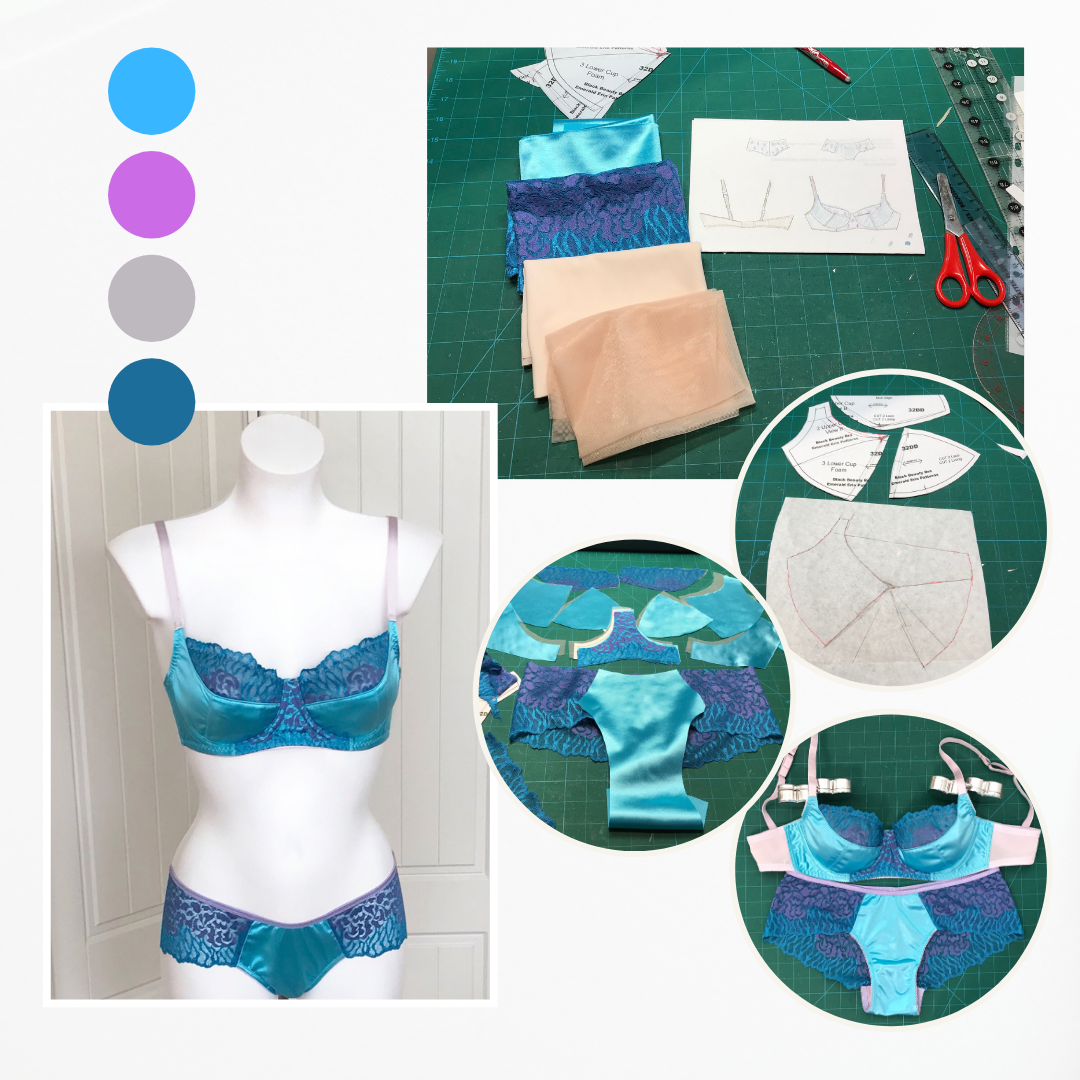
Matching Bras for my Great Bra Sewing Bee Panty Inspiration Class

Some of you may have watched my “Panty Inspiration” class on the Great Bra Sewing Bee where the brief was to show how to recreate the look of your favourite rtw with commercially available patterns and supplies. I made up some of the designs from the class into finished makes, they turned out so gorgeous that I decided to make bras to match. So here is a round up of the sets, the patterns and supplies used and the changes I made to the patterns to recreate the look.

2FDBADCE-3779-4FE8-8E56-3B2843177218.PNG

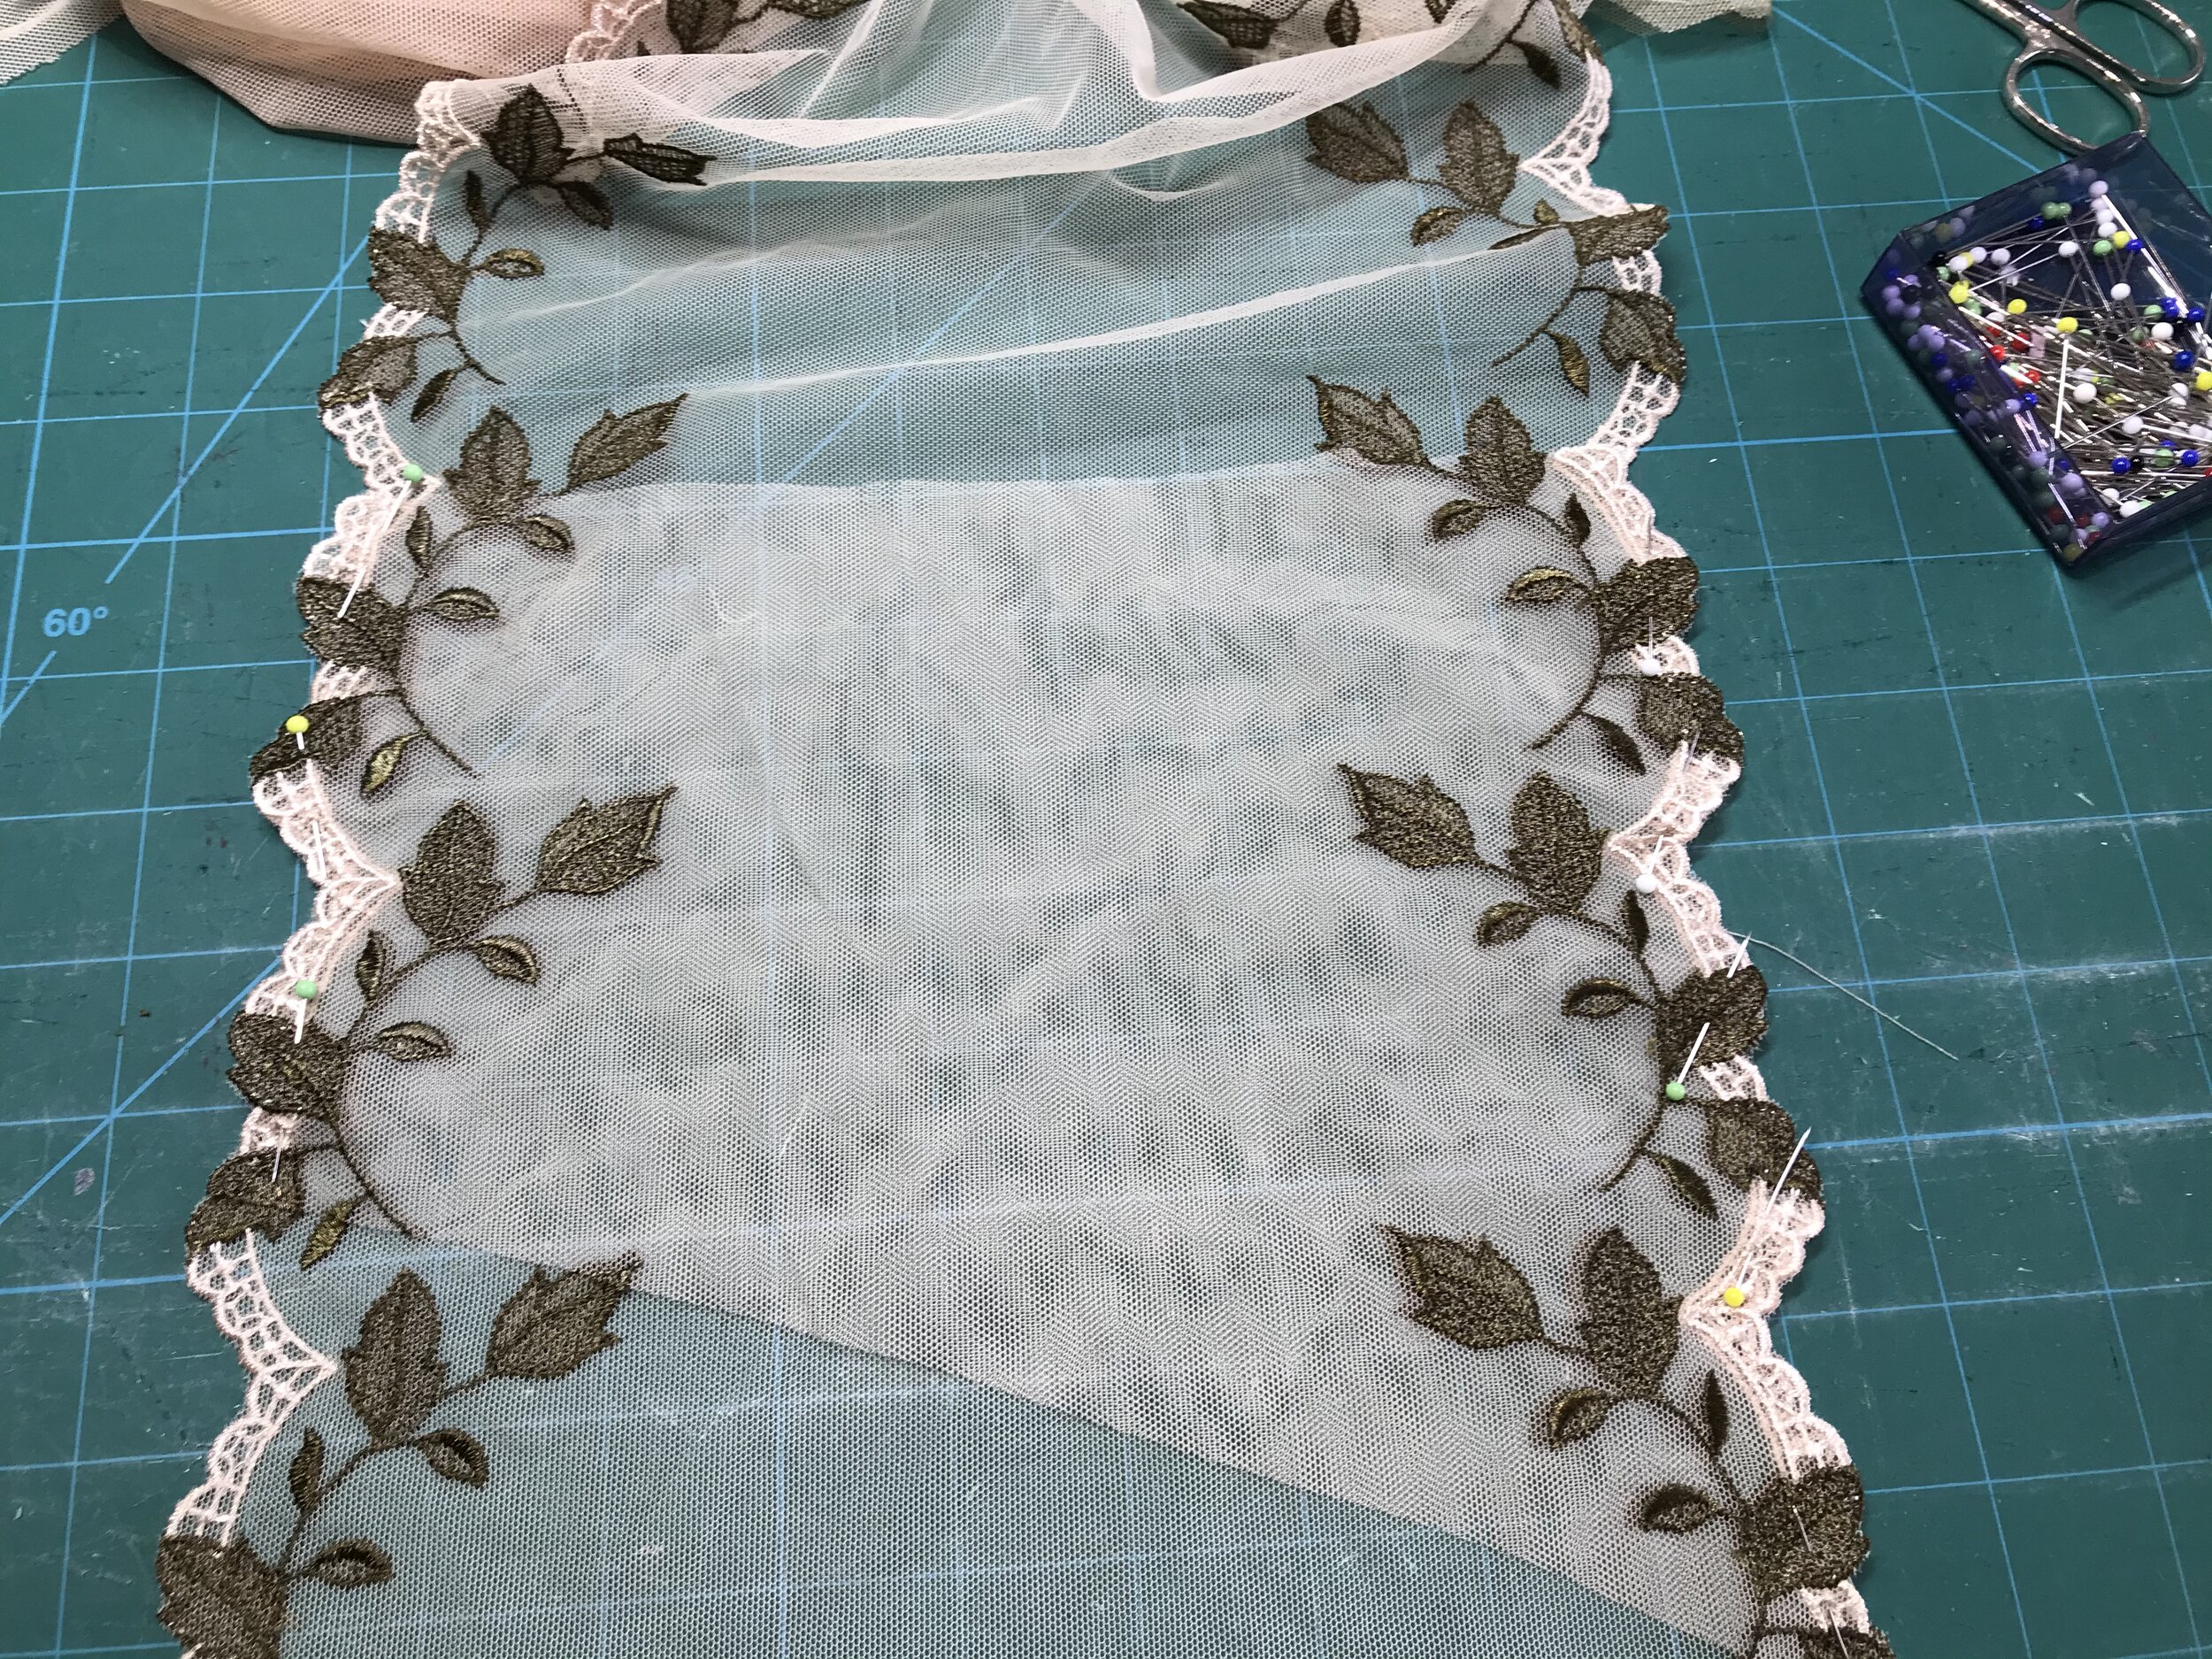
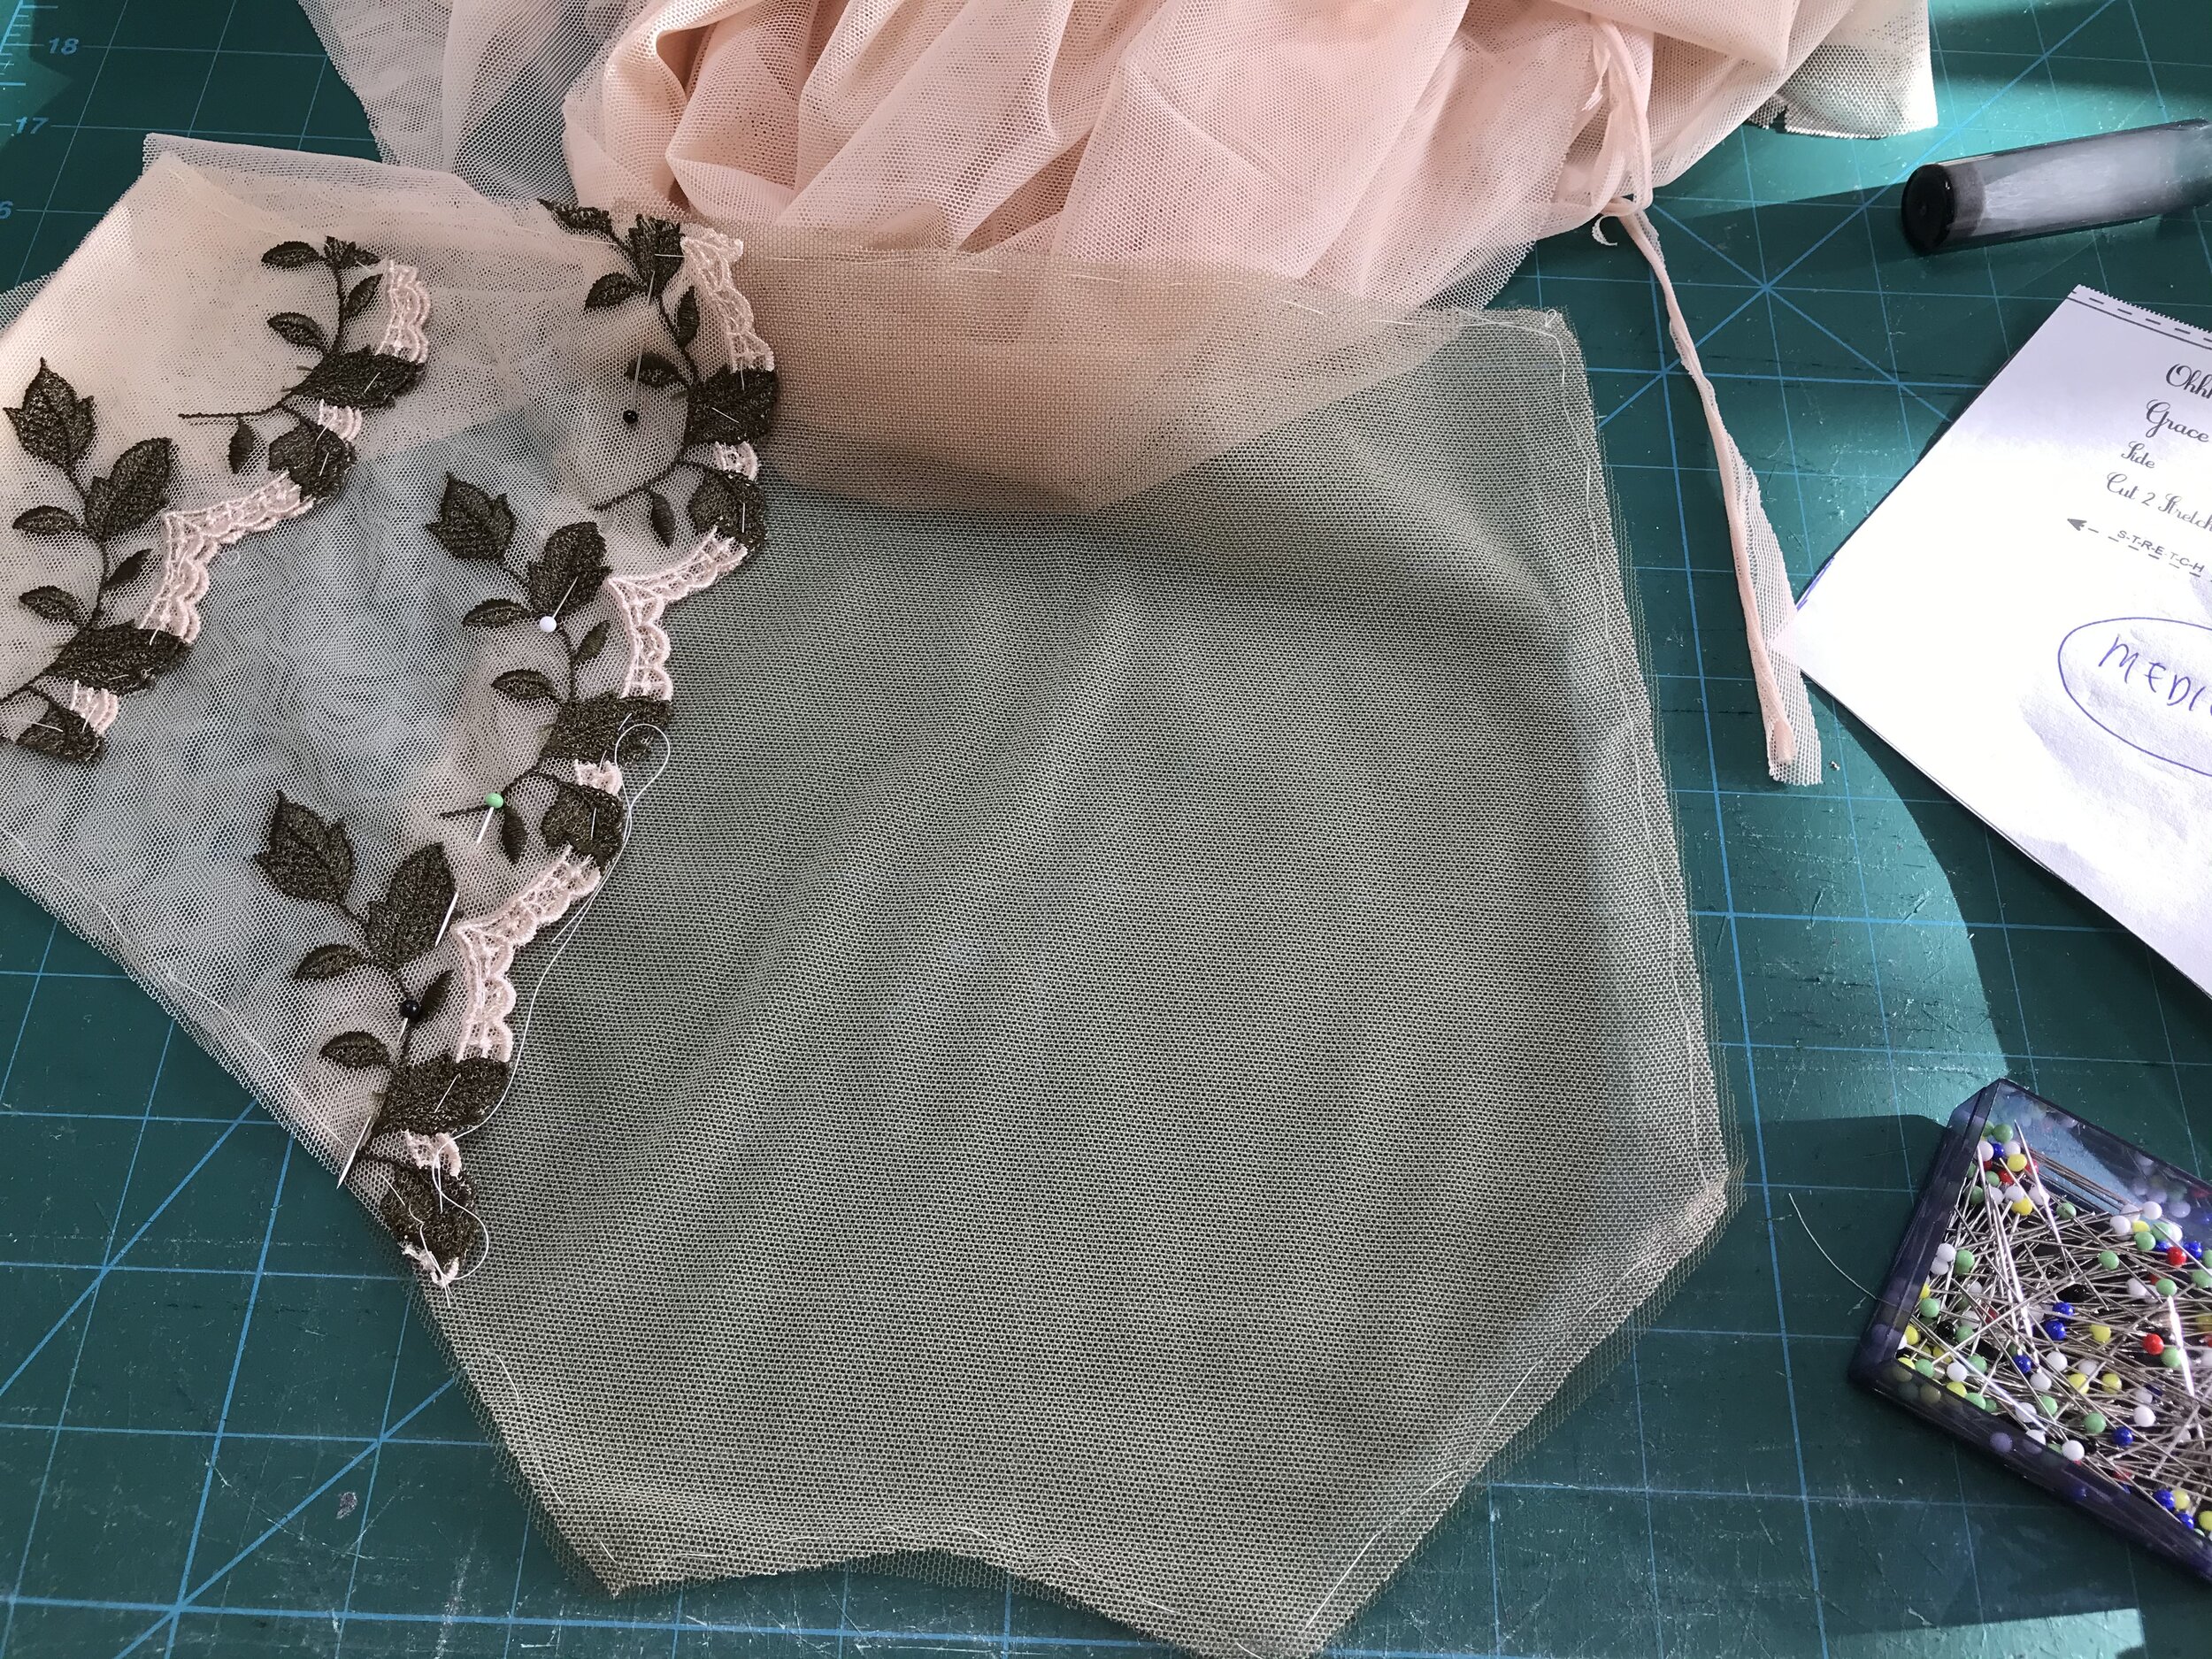
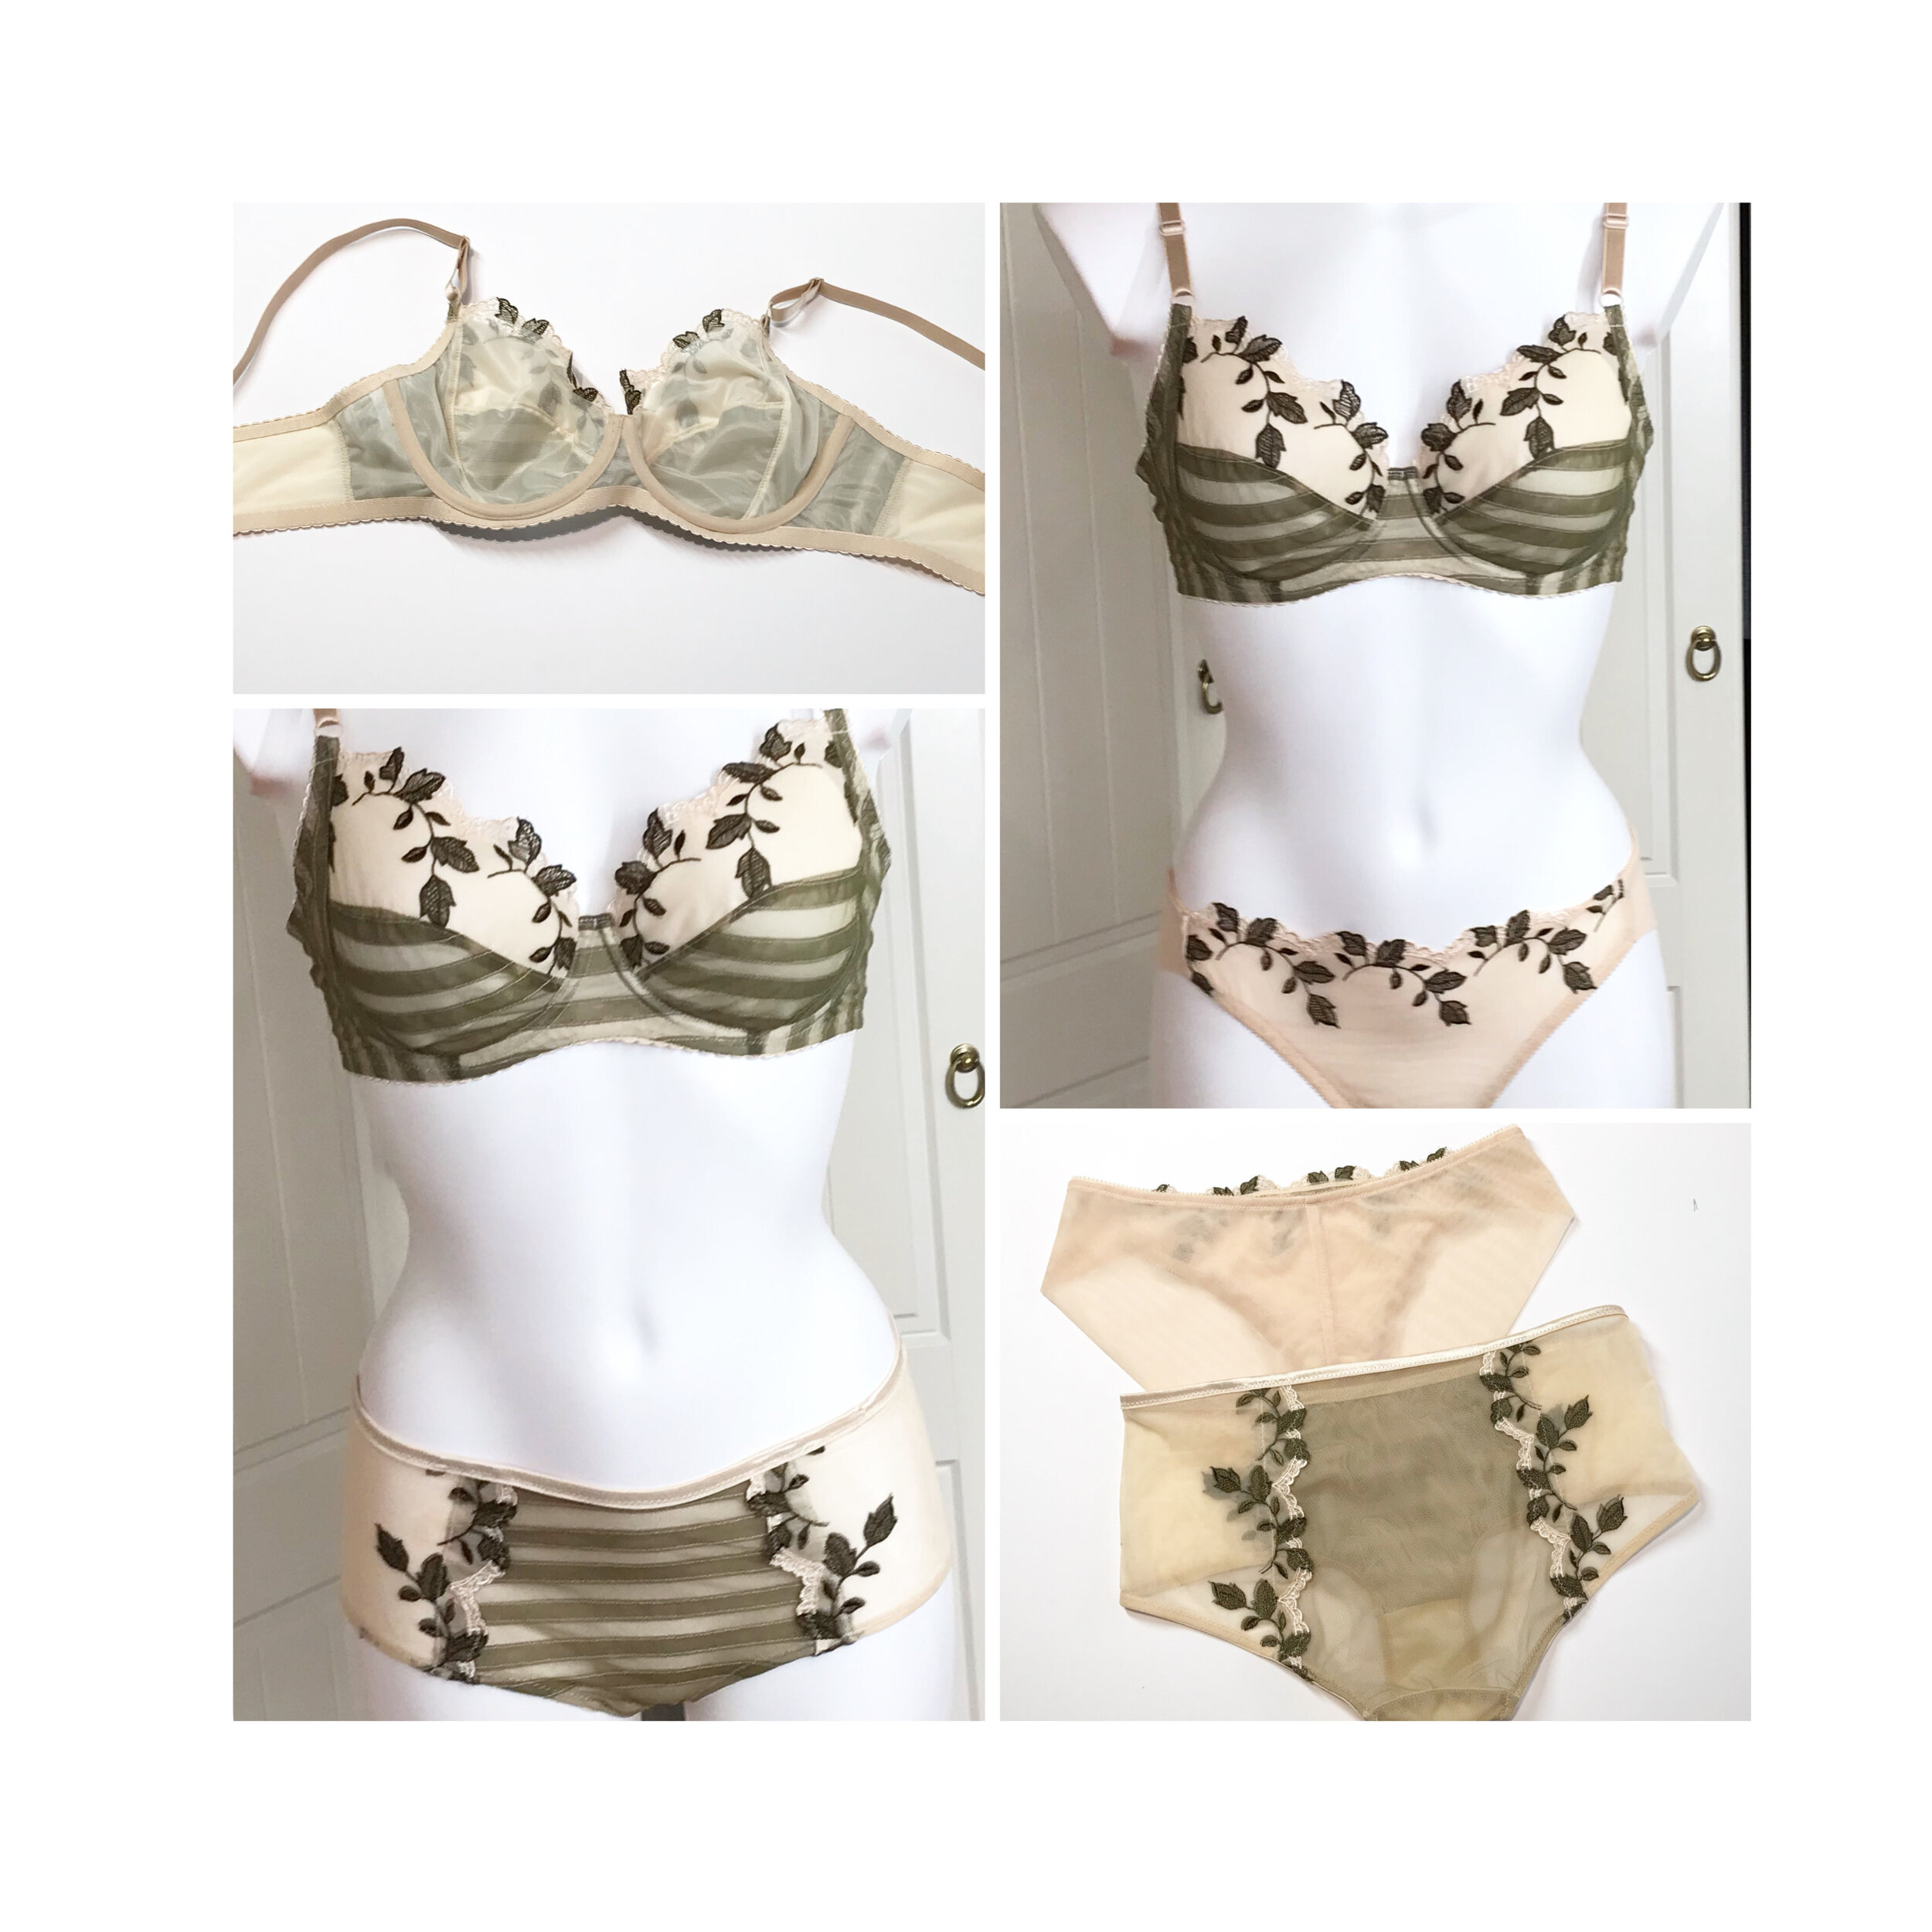
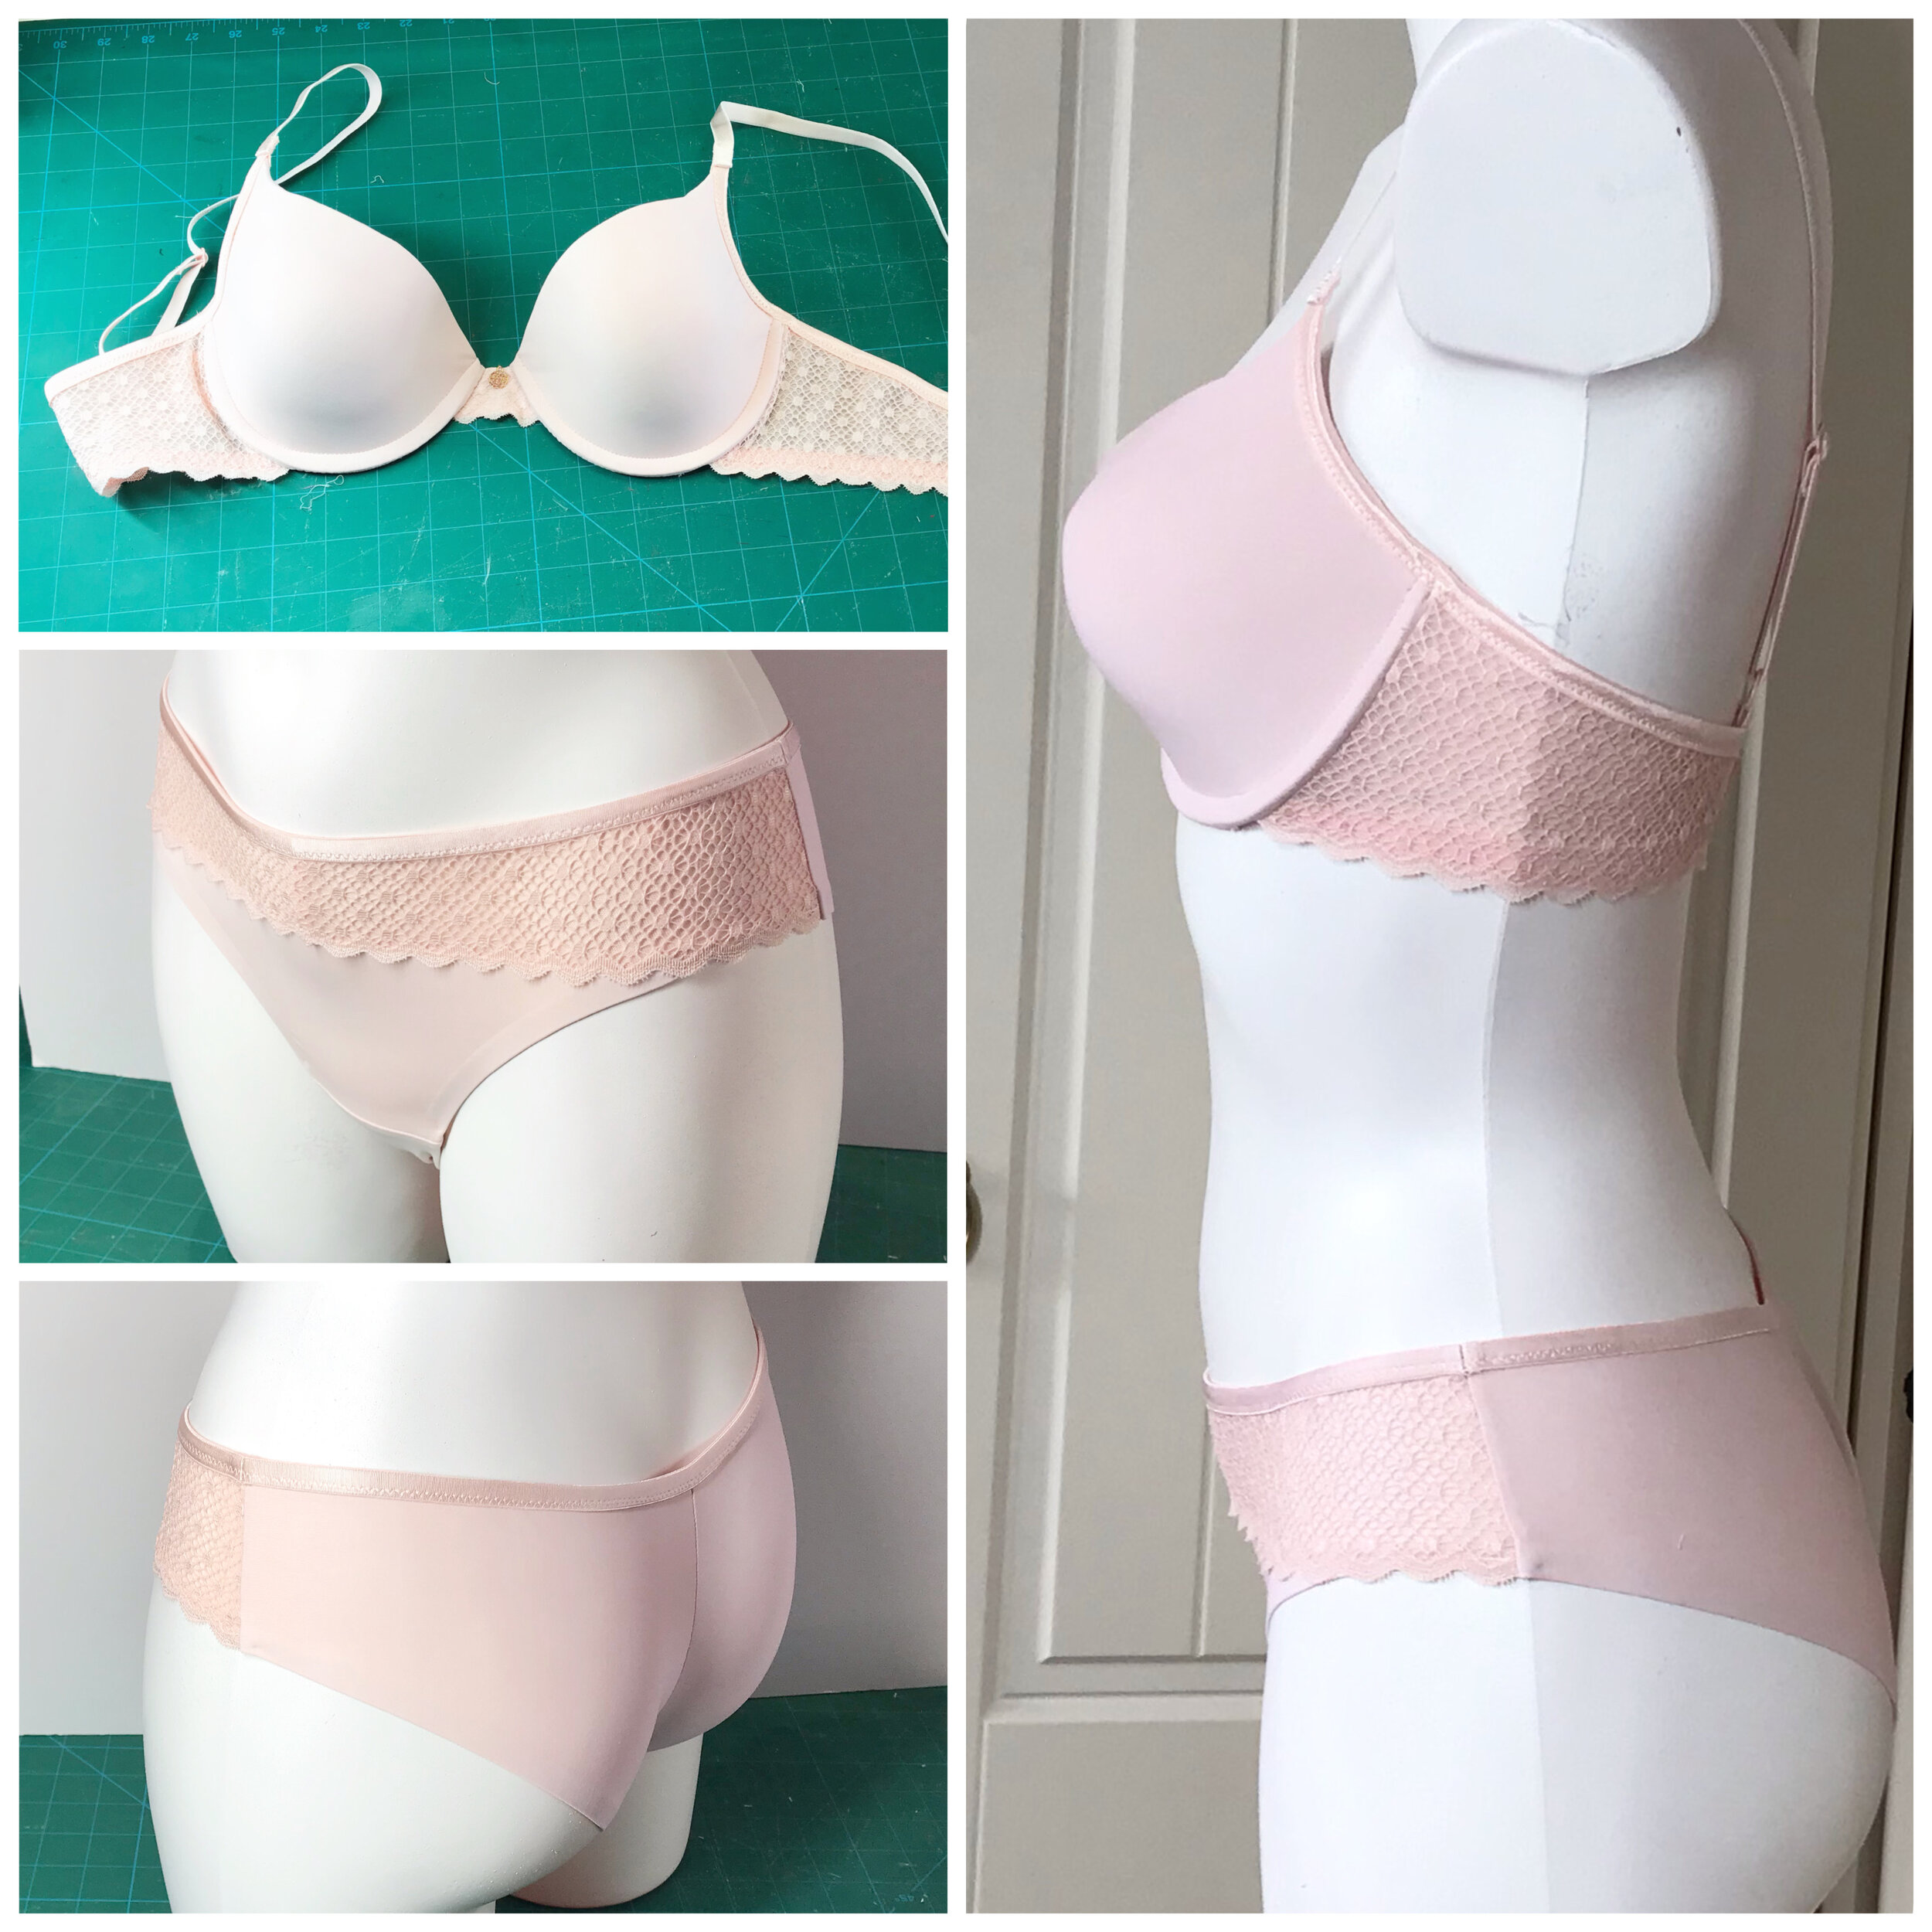
This first set is inspired by the Maison Lejayby Nufit range which is described as “undetectable under the slimmest clothes” and in particular those with a combination of plain jersey and floral stretch tulle. I had a lot of requests for “pretty and comfortable” and I thought these fit the bill perfectly. Just prior to preparing the class I had received my order including this beautiful floral mesh from Madalynne which is really super soft. Already in my stash I had a similar wide tri-band elastic from Bra Builders. The look is described as “sporty chic” so I opted to use mesh rather than jersey for a completely sheer look.

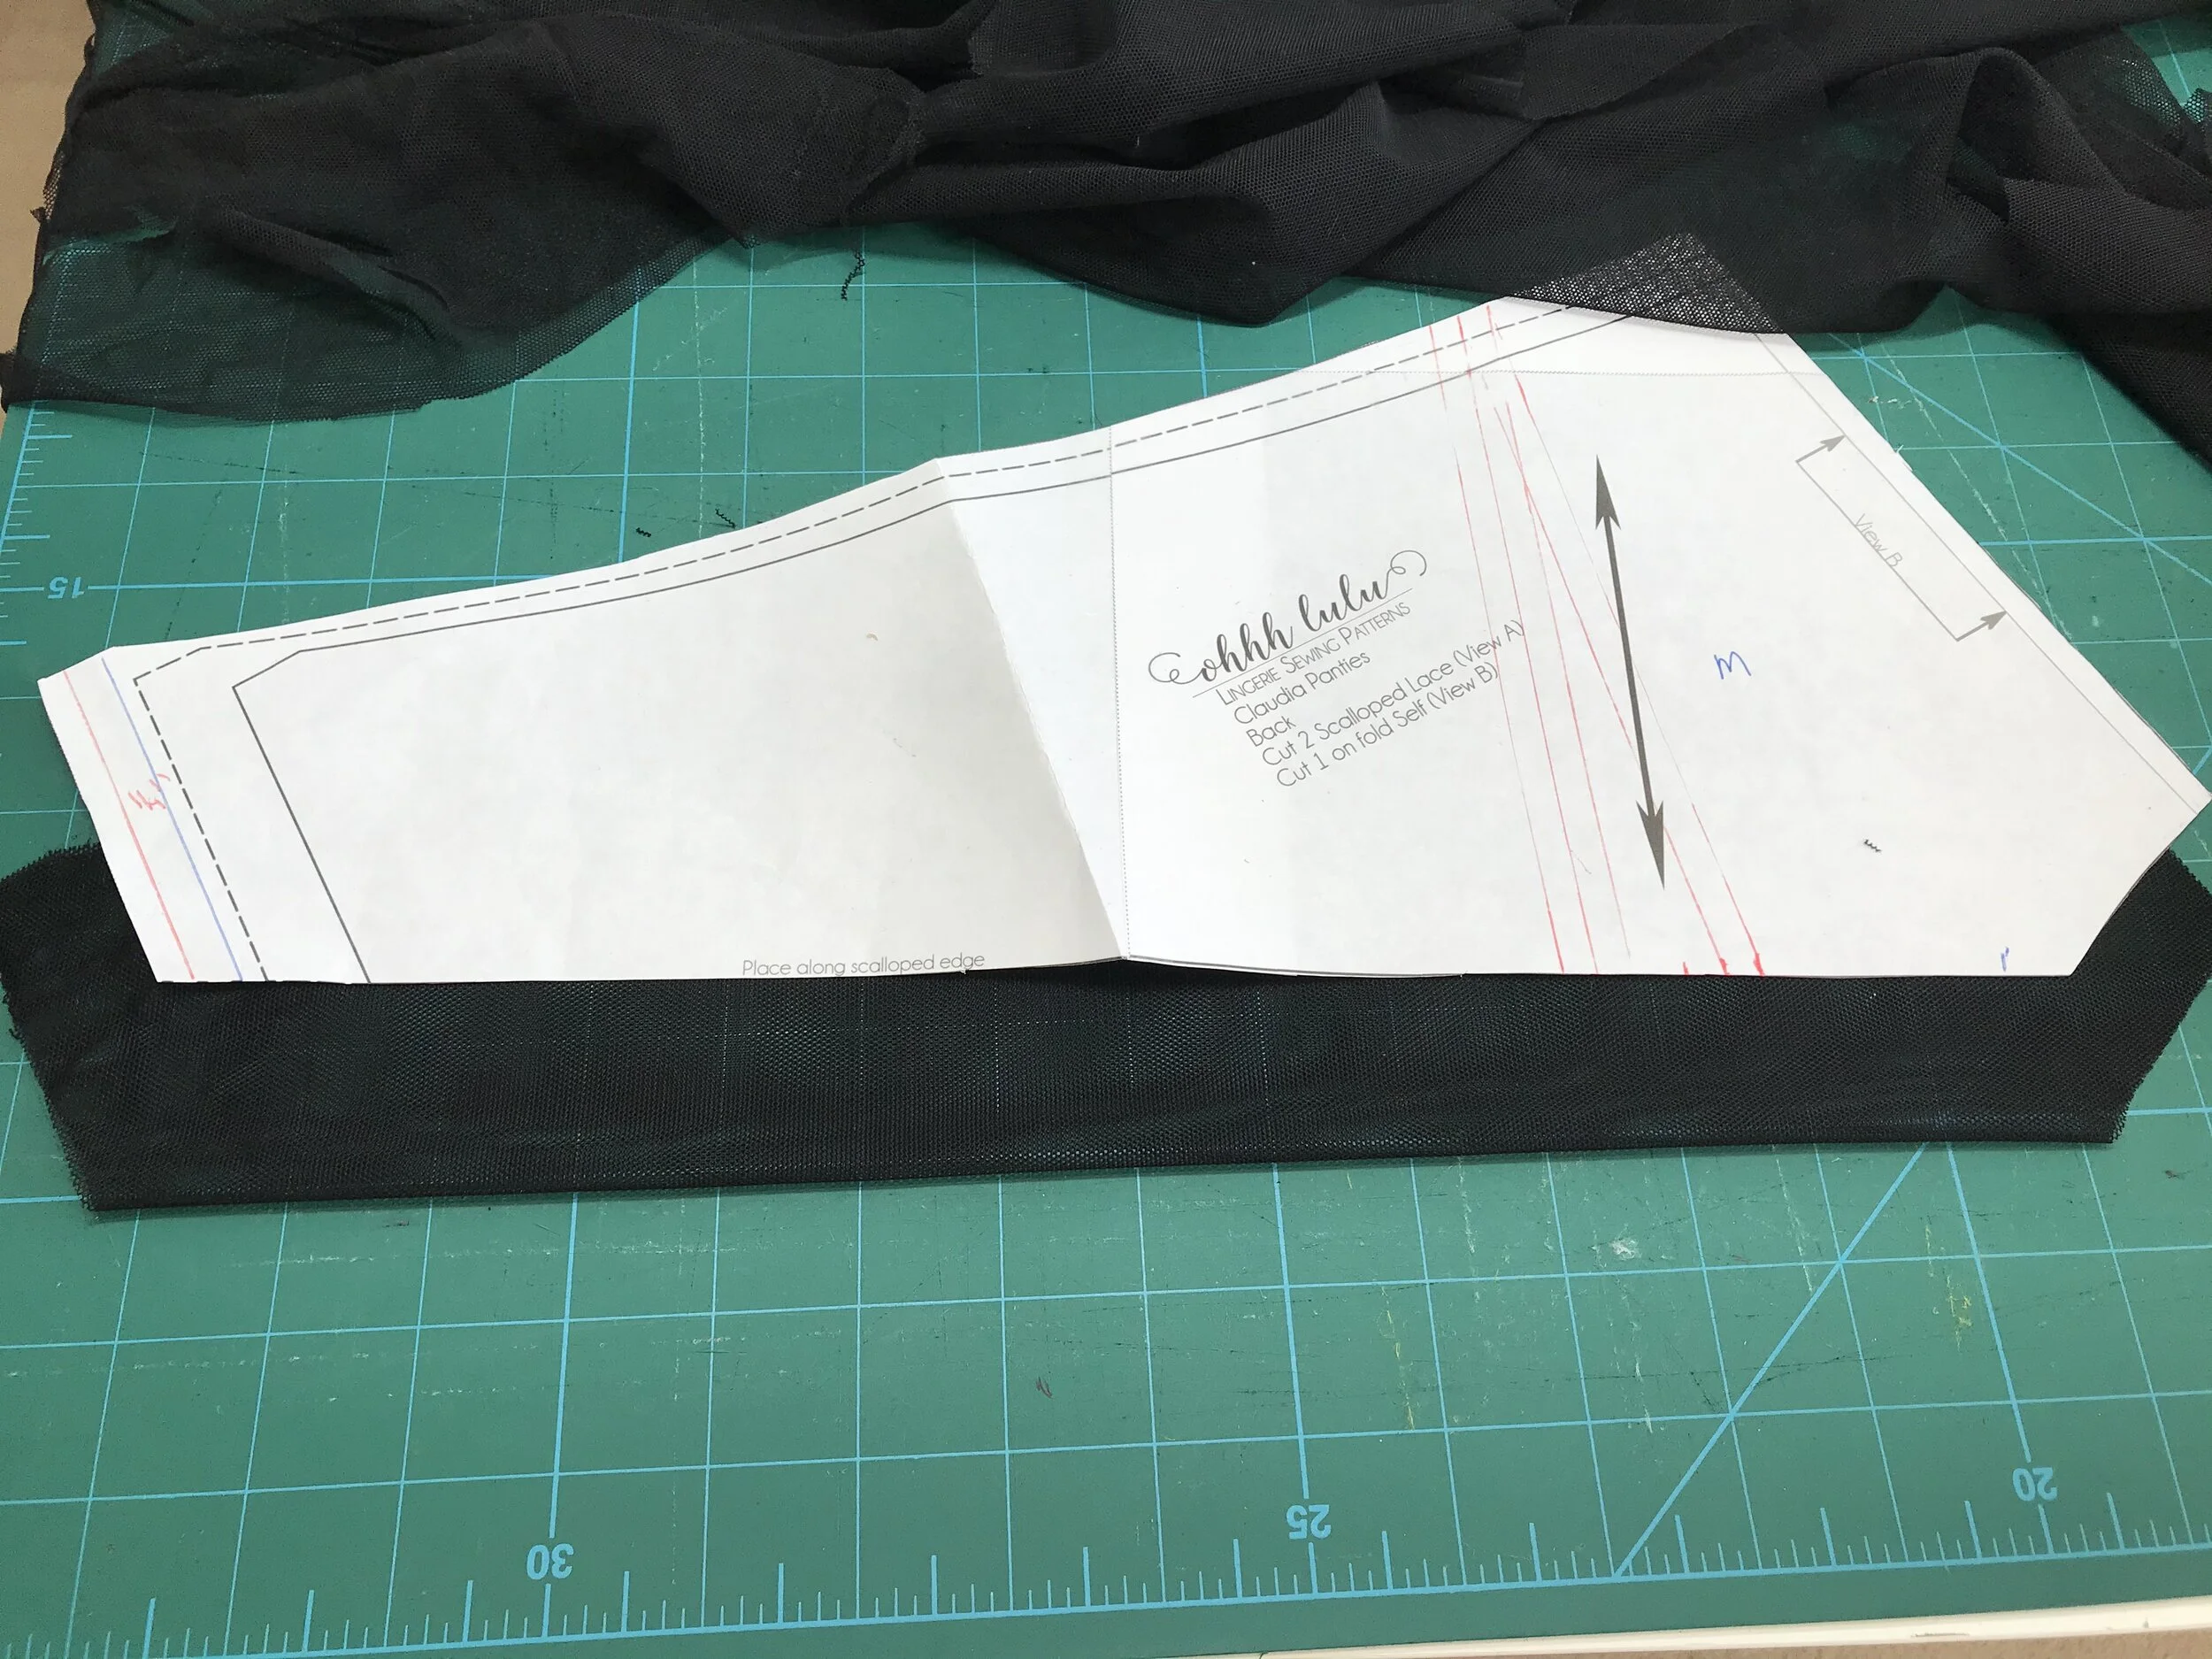
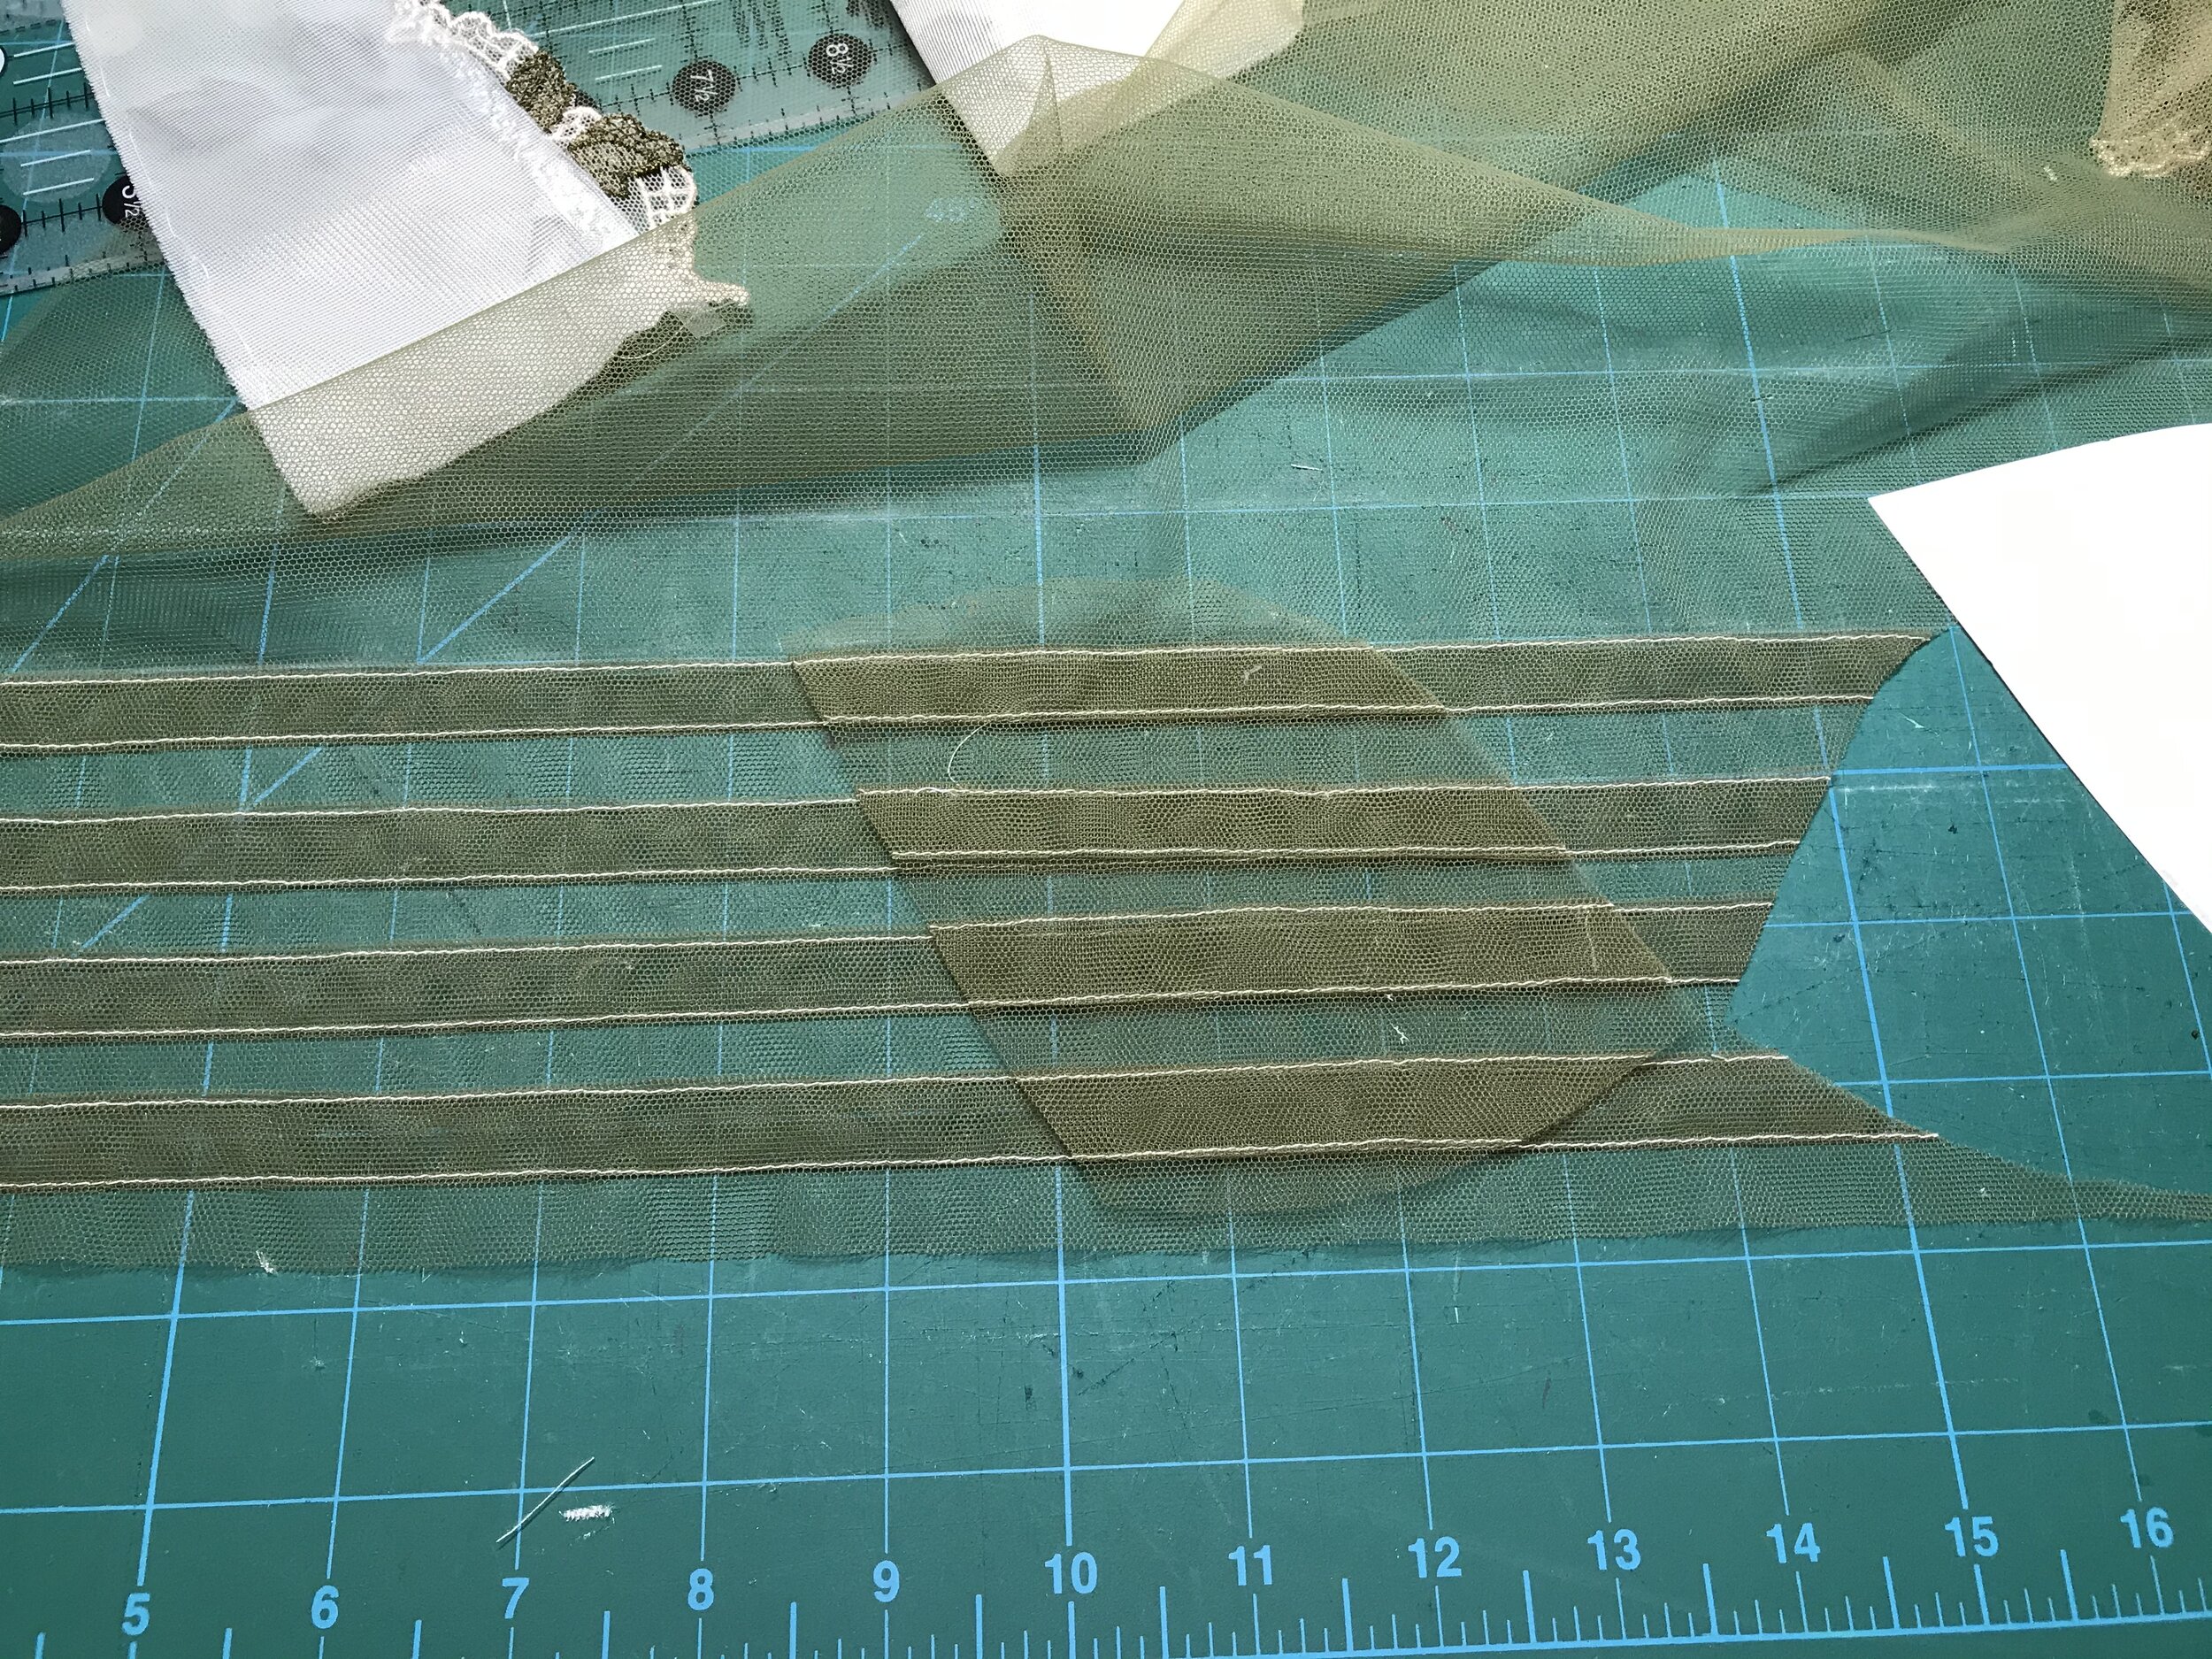
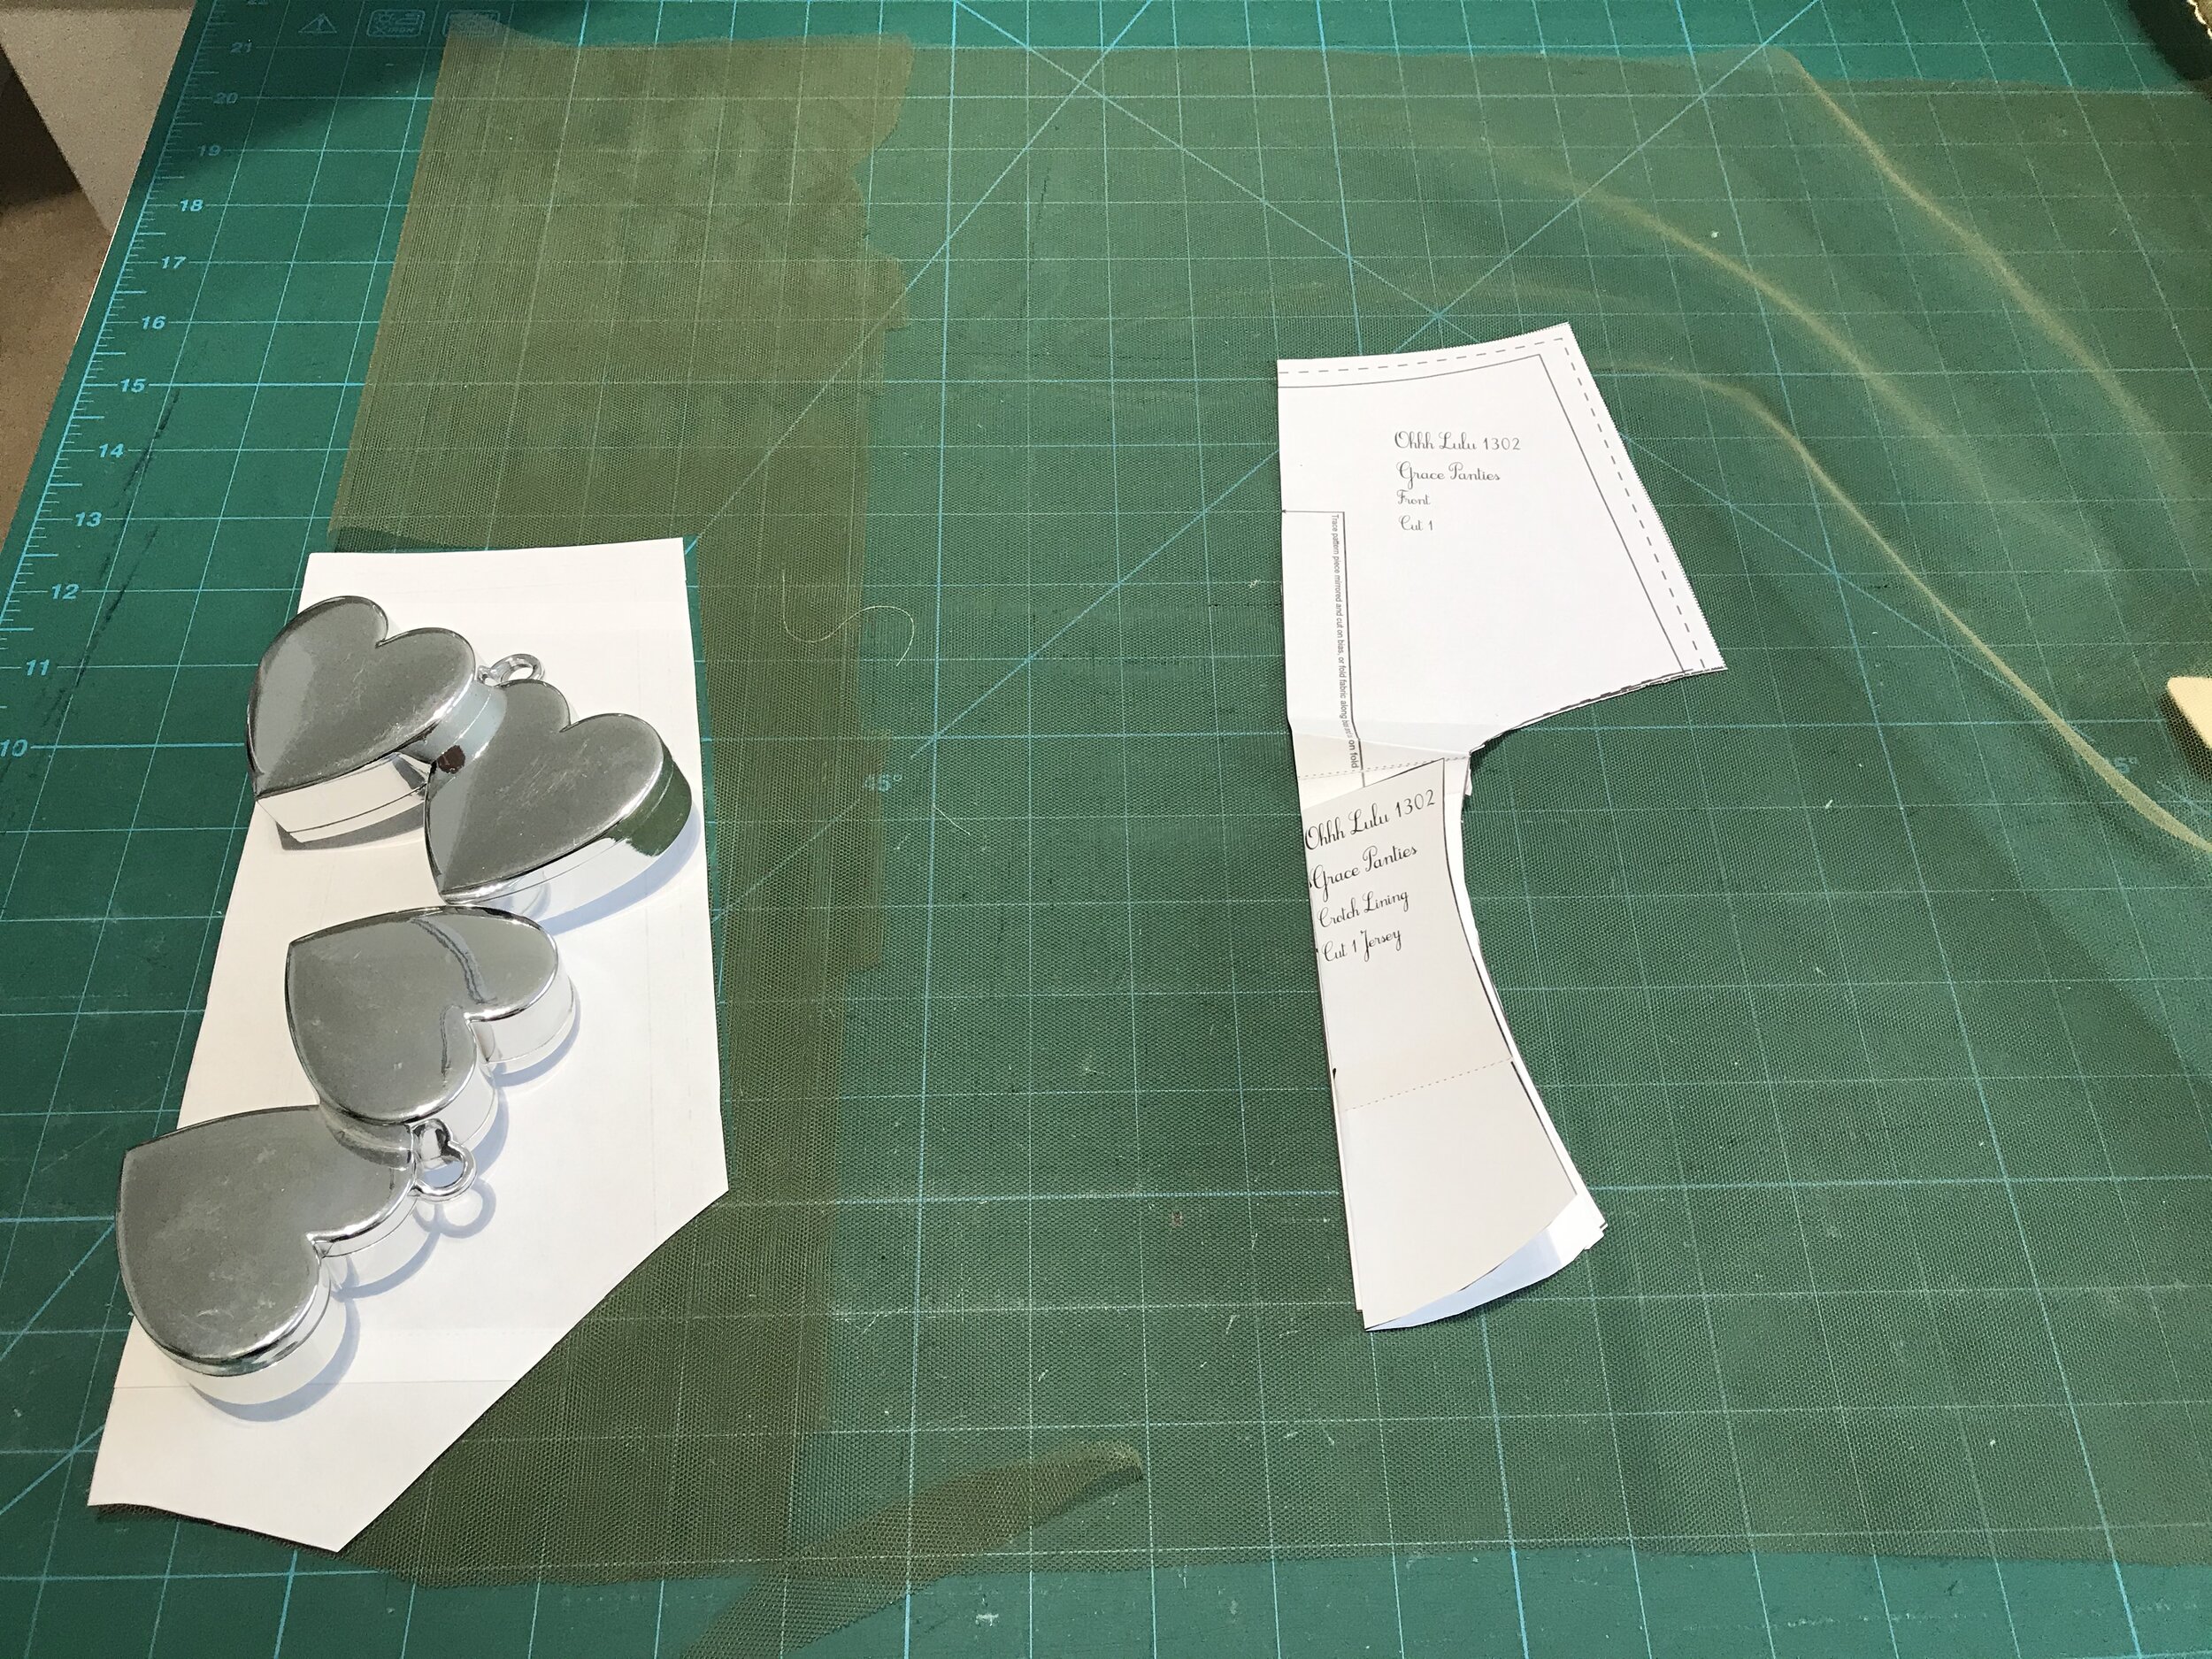
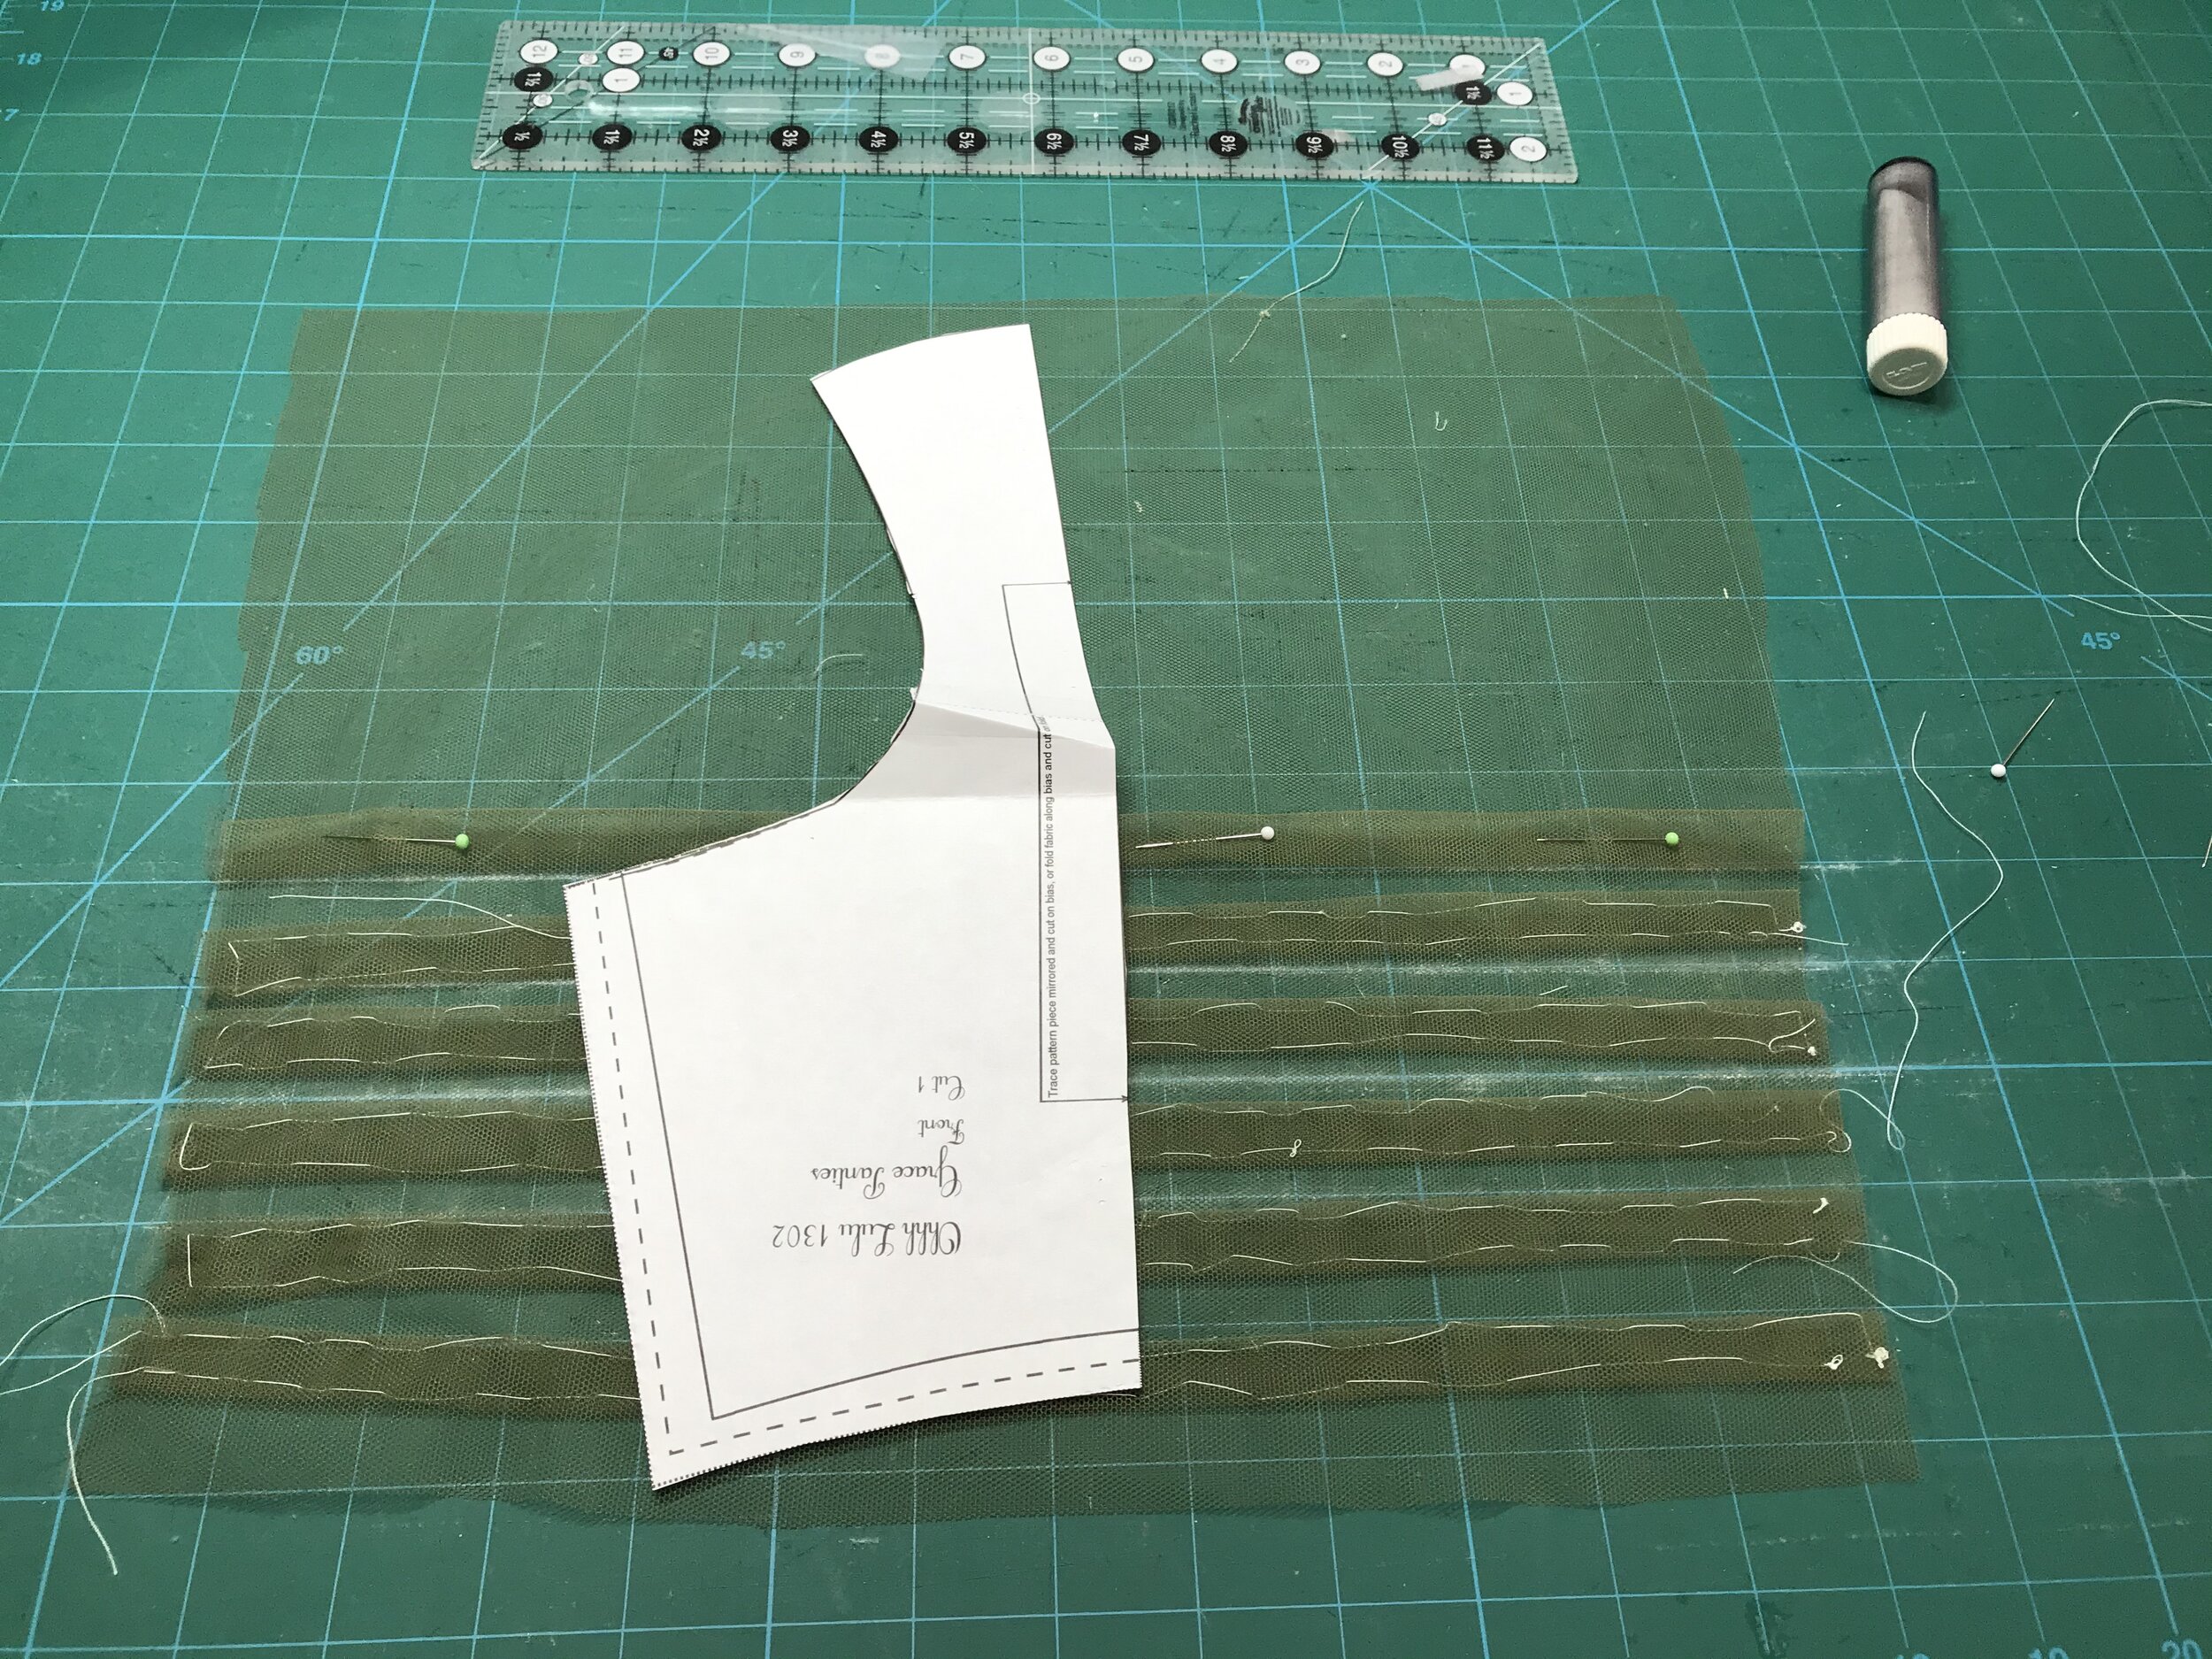
For the high waist full coverage briefs I used the Ohhhlulu Grace which is a hipster but when you add the wide band elastic it sits at the same place on the waist as the rtw. I reshaped the front pieces as the pattern has a straight seam and I wanted to introduce the curve.

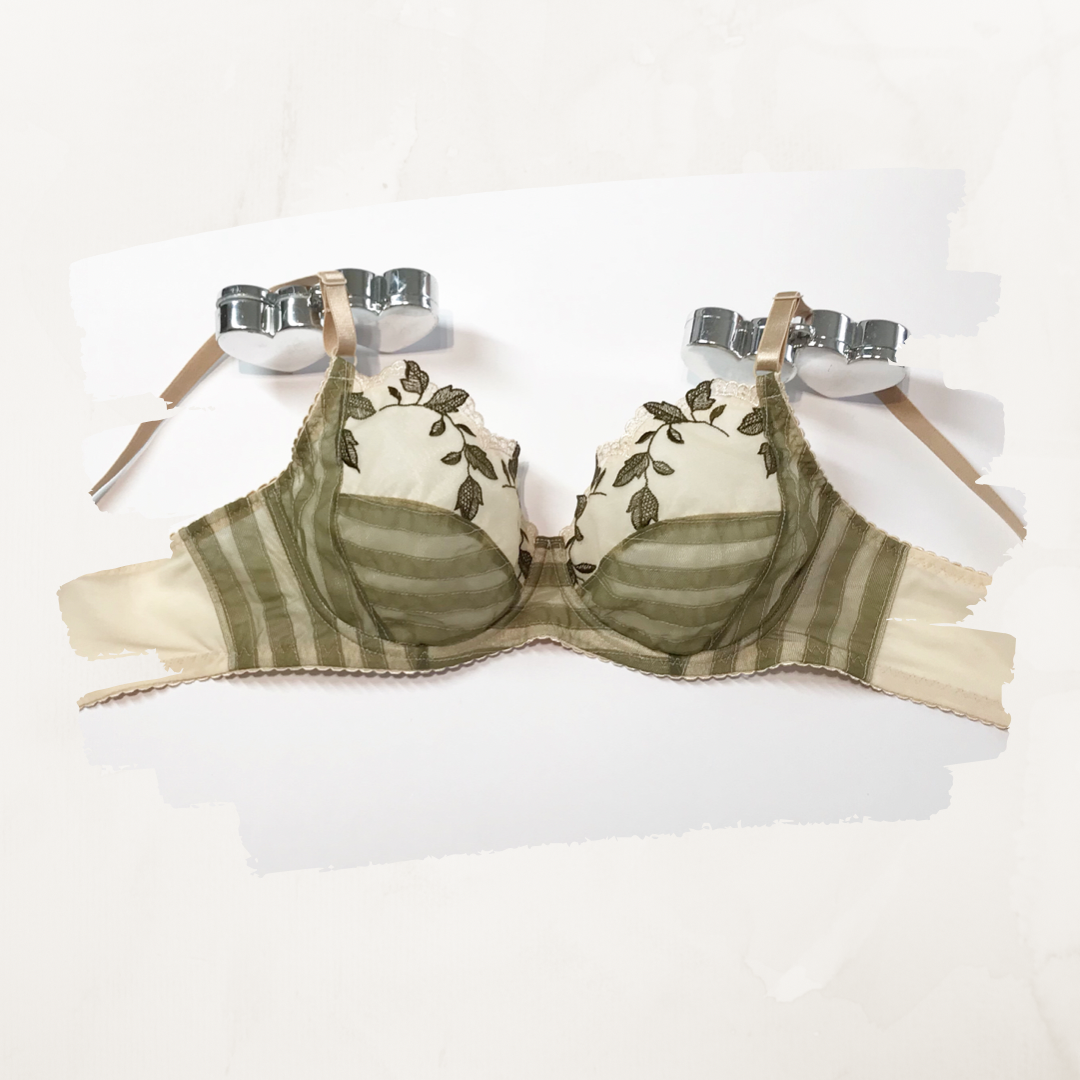
The bra, described as a triangular soft cup, is a darted one piece cup finished with fold over elastic and partially adjustable straps. The pattern that immediately came to mind was the Emerald Erin Jordy which is a triangular two piece sitting on a wide elastic band. I do love this pattern and have made all the versions but for this make I was looking for more coverage around the side so I decided to adapt the free Madalynne Barrett pattern which is described as “sporty femme”. You can adapt most patterns to be a darted one piece cup but they can end up a little pointy if you are not careful.

I didn’t used fold over elastic for two reasons. Firstly, I didn’t have enough in the right colour and secondly, I prefer the support of plush picot when using stretch fabrics in the cups.

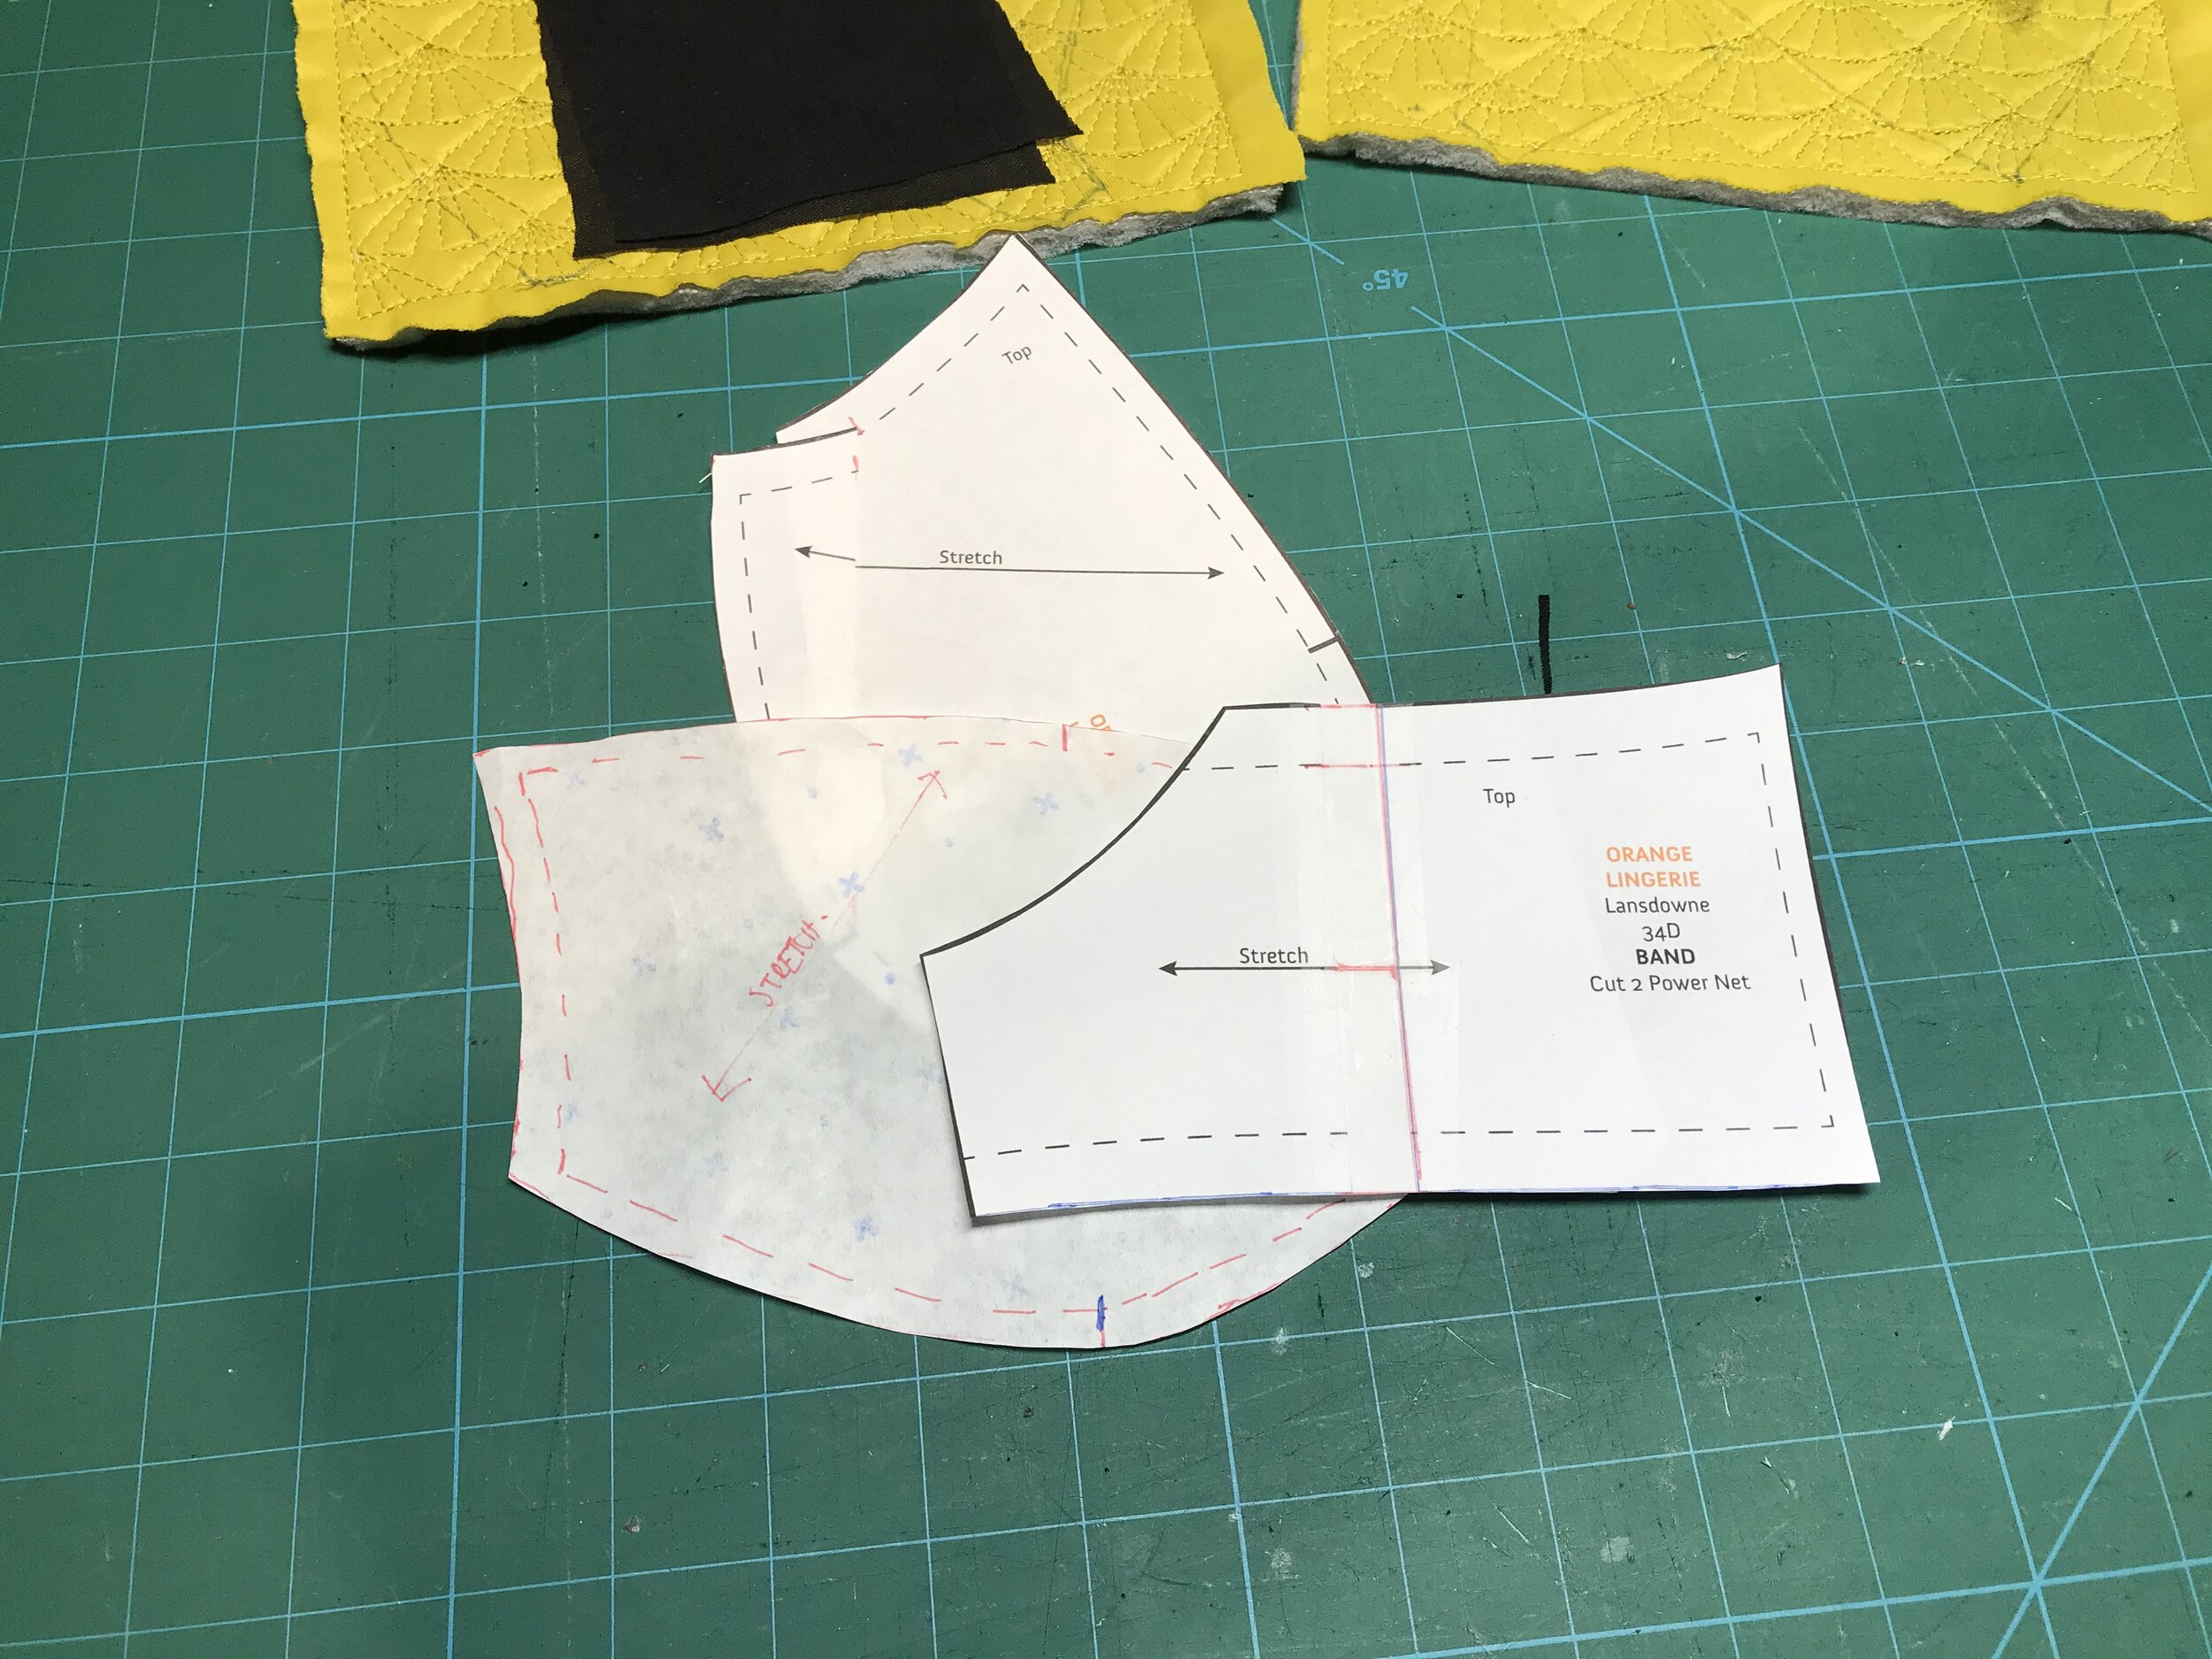
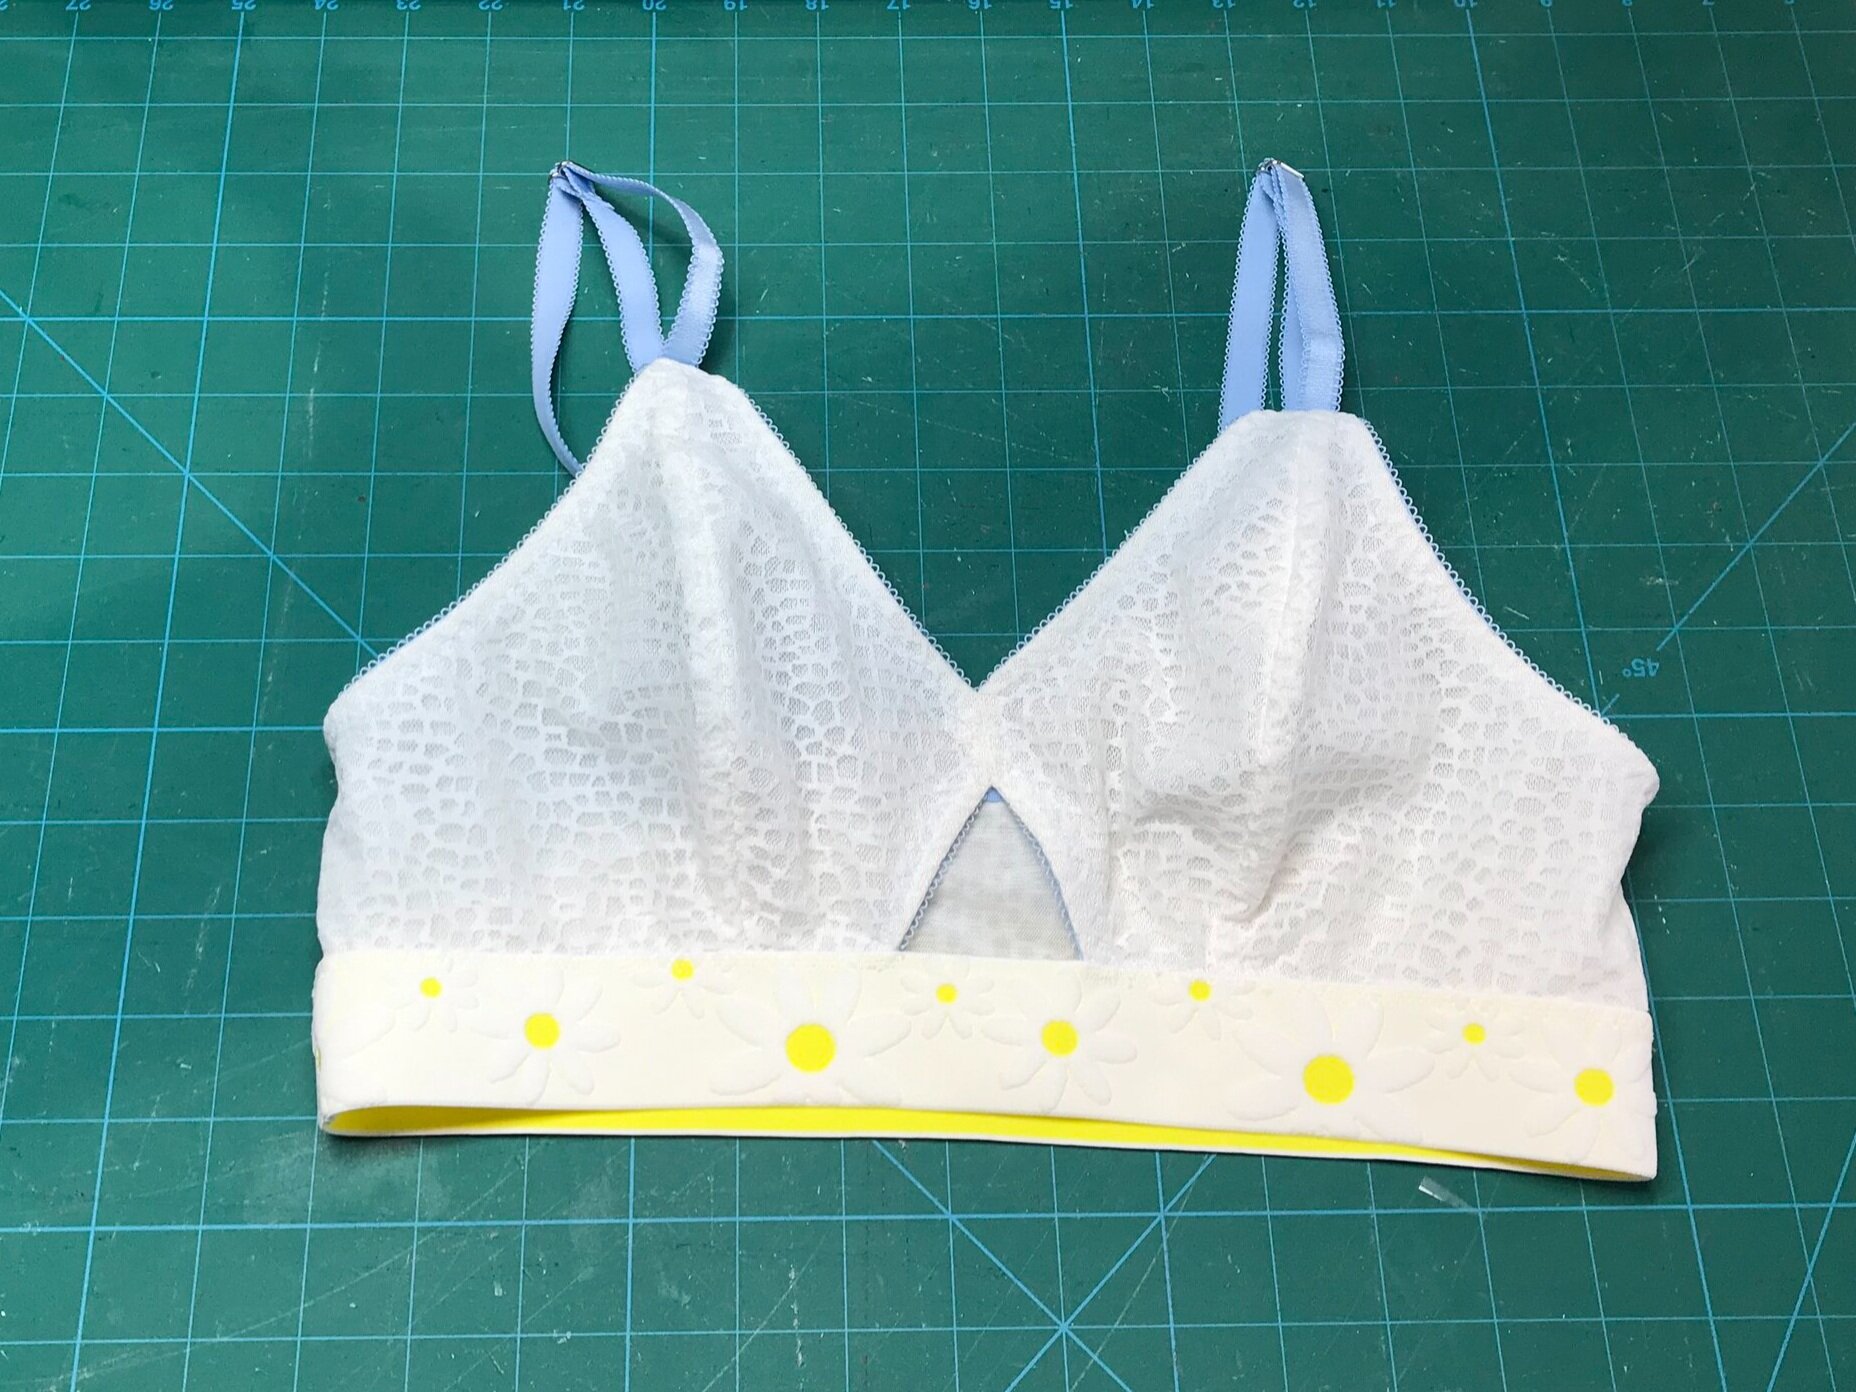
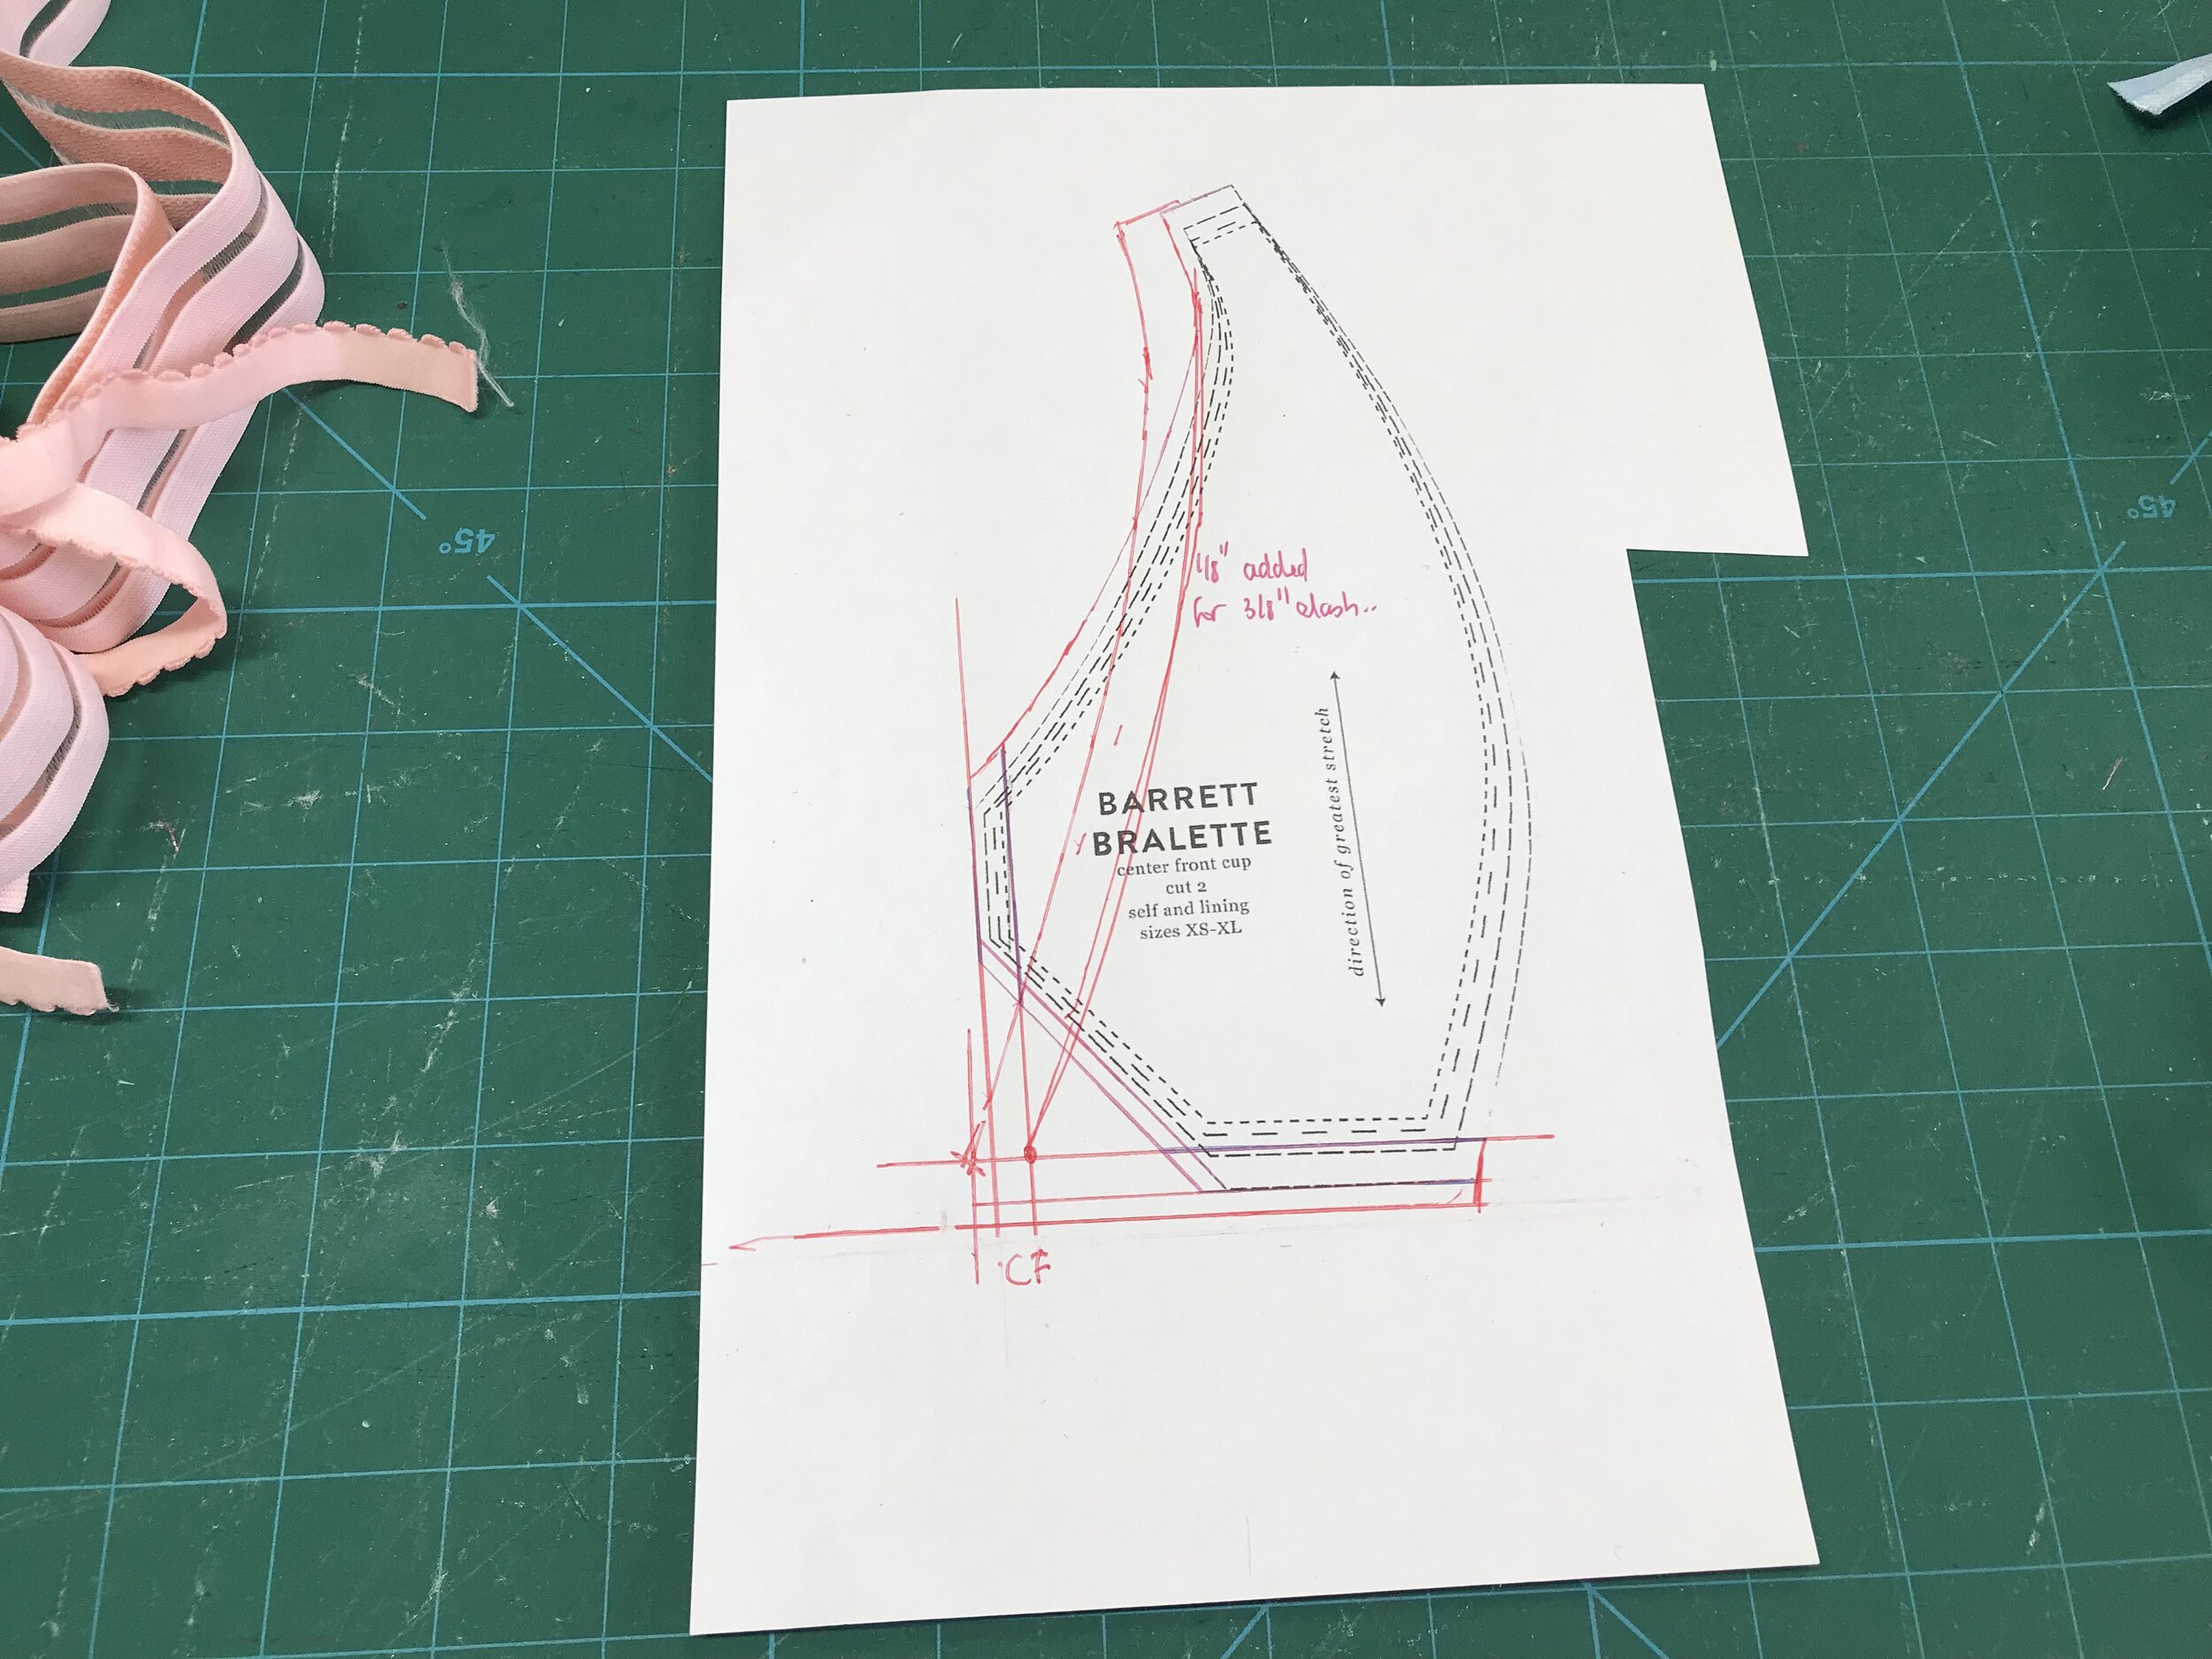
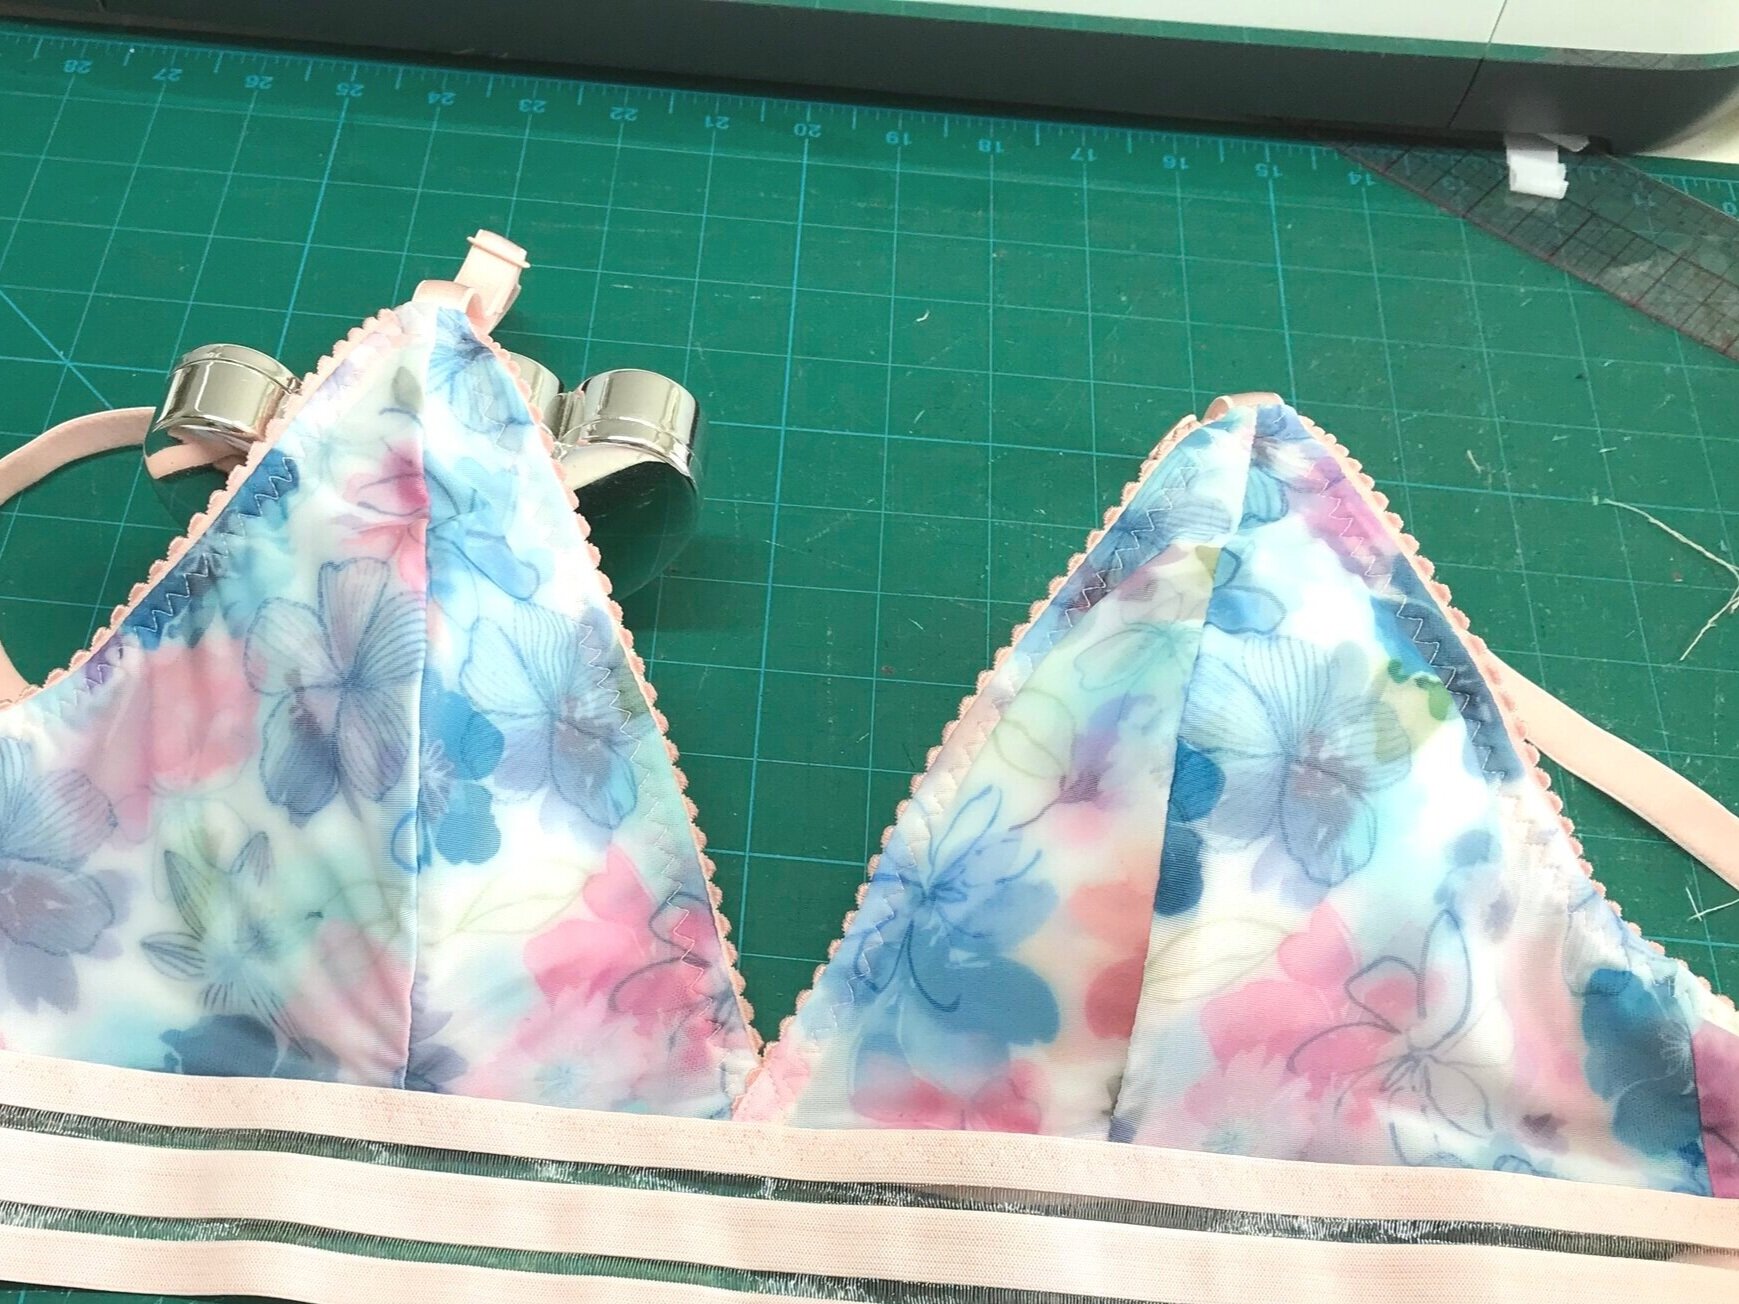
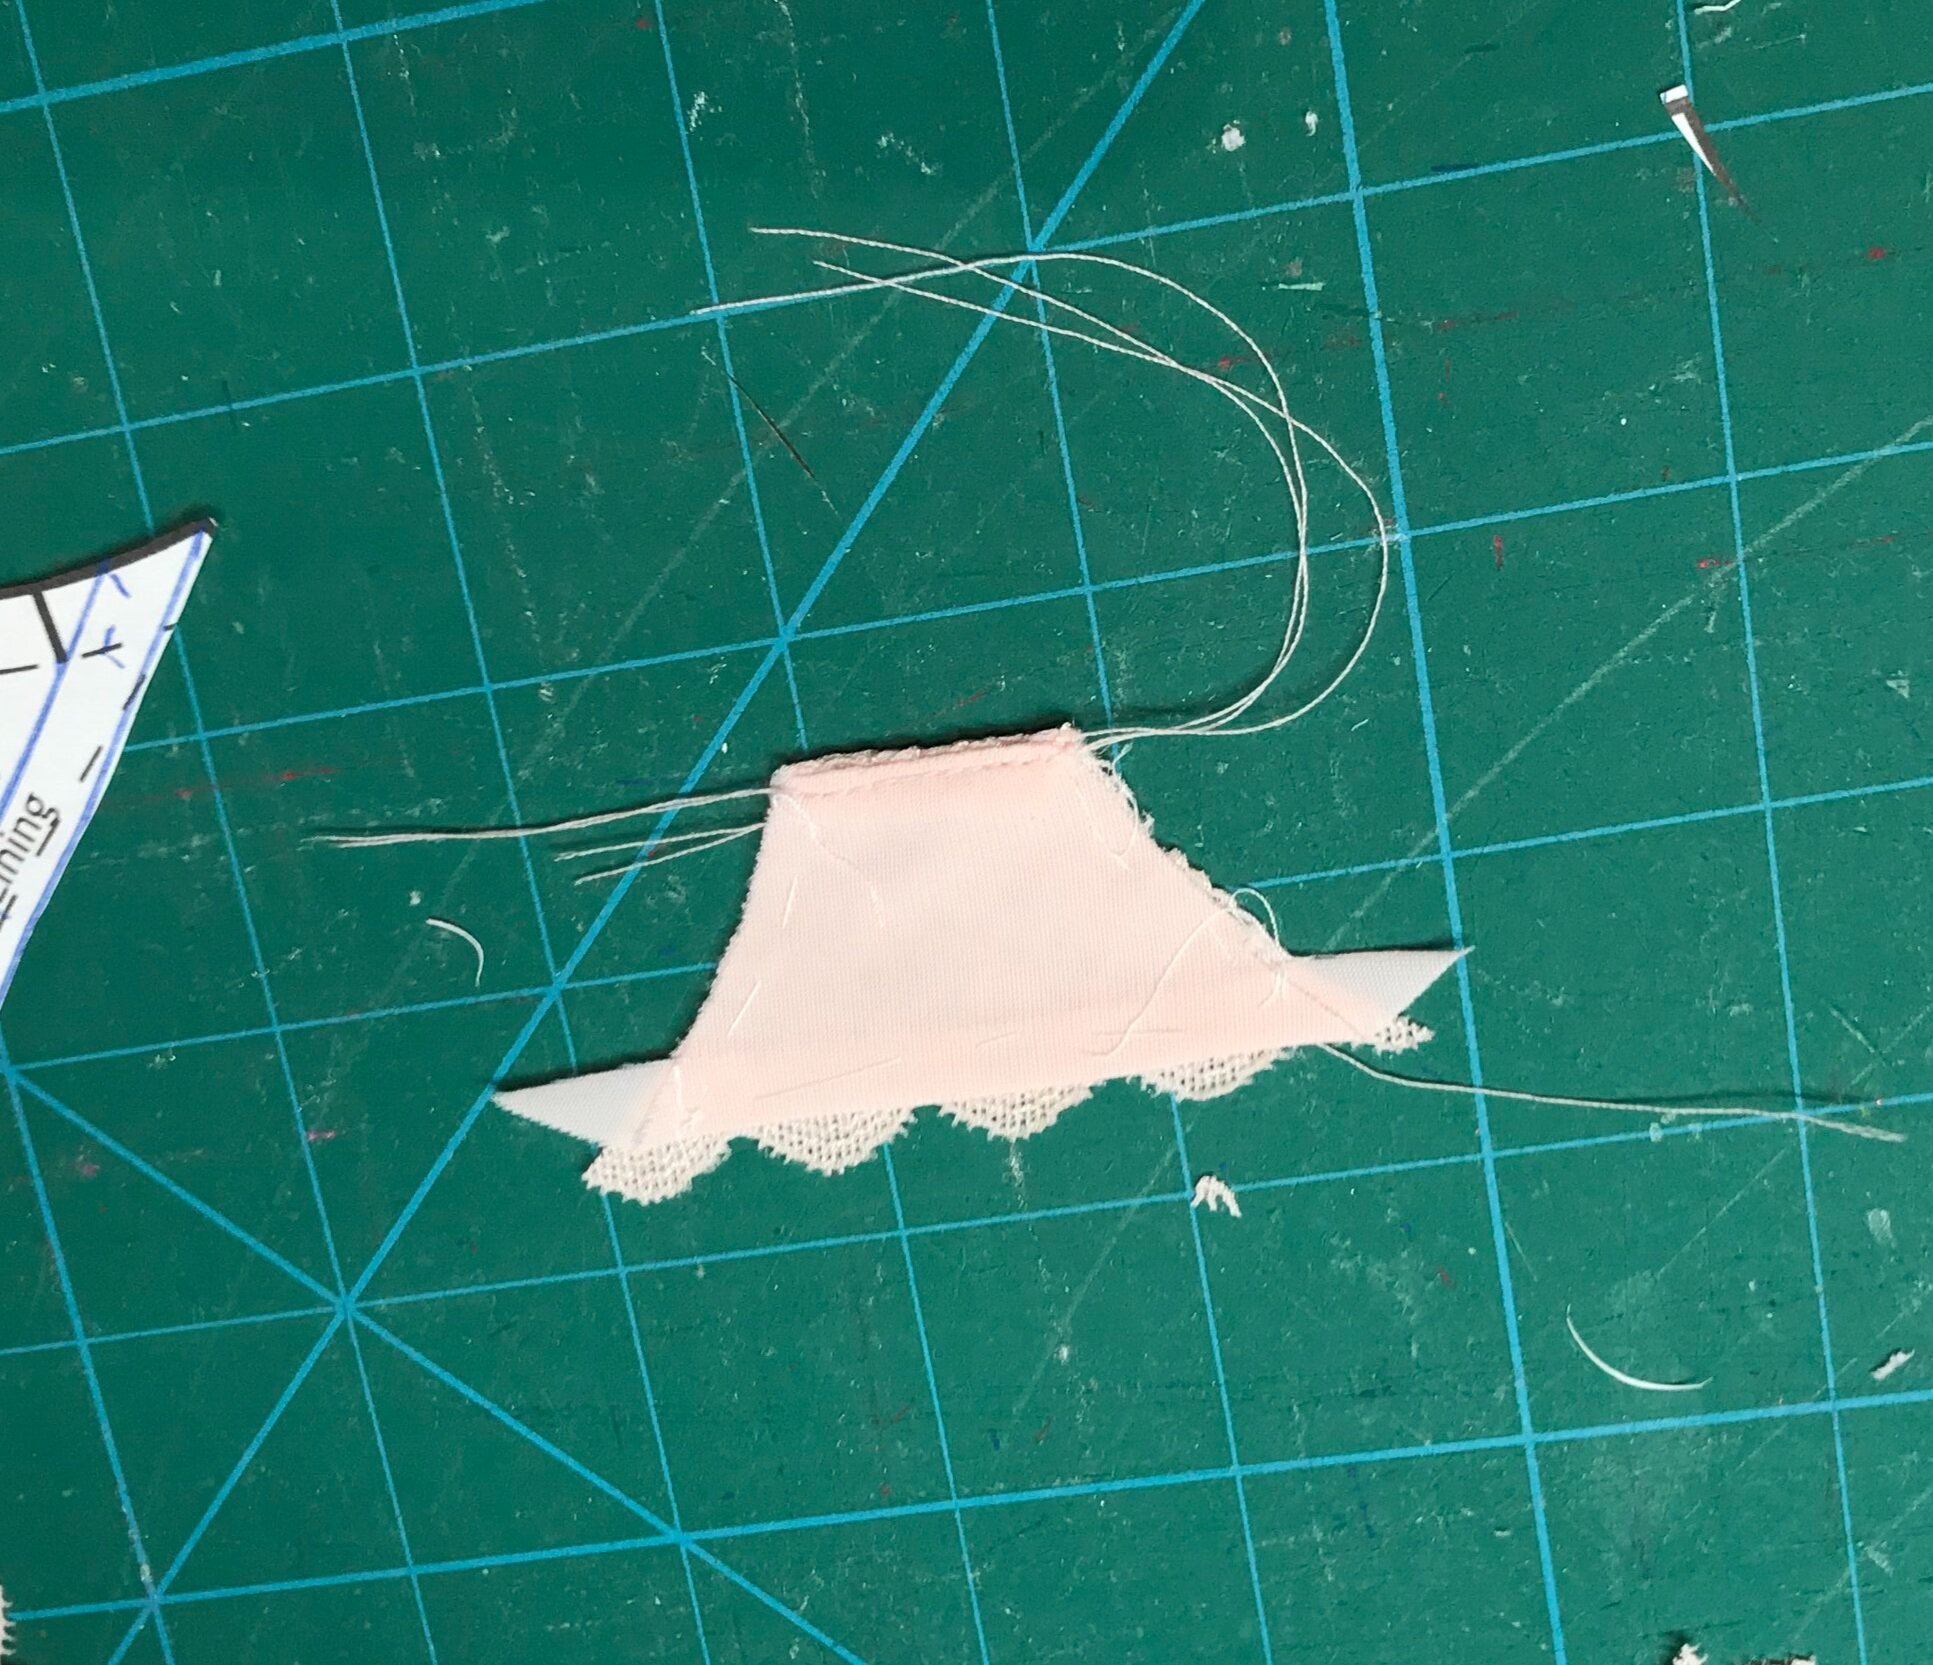
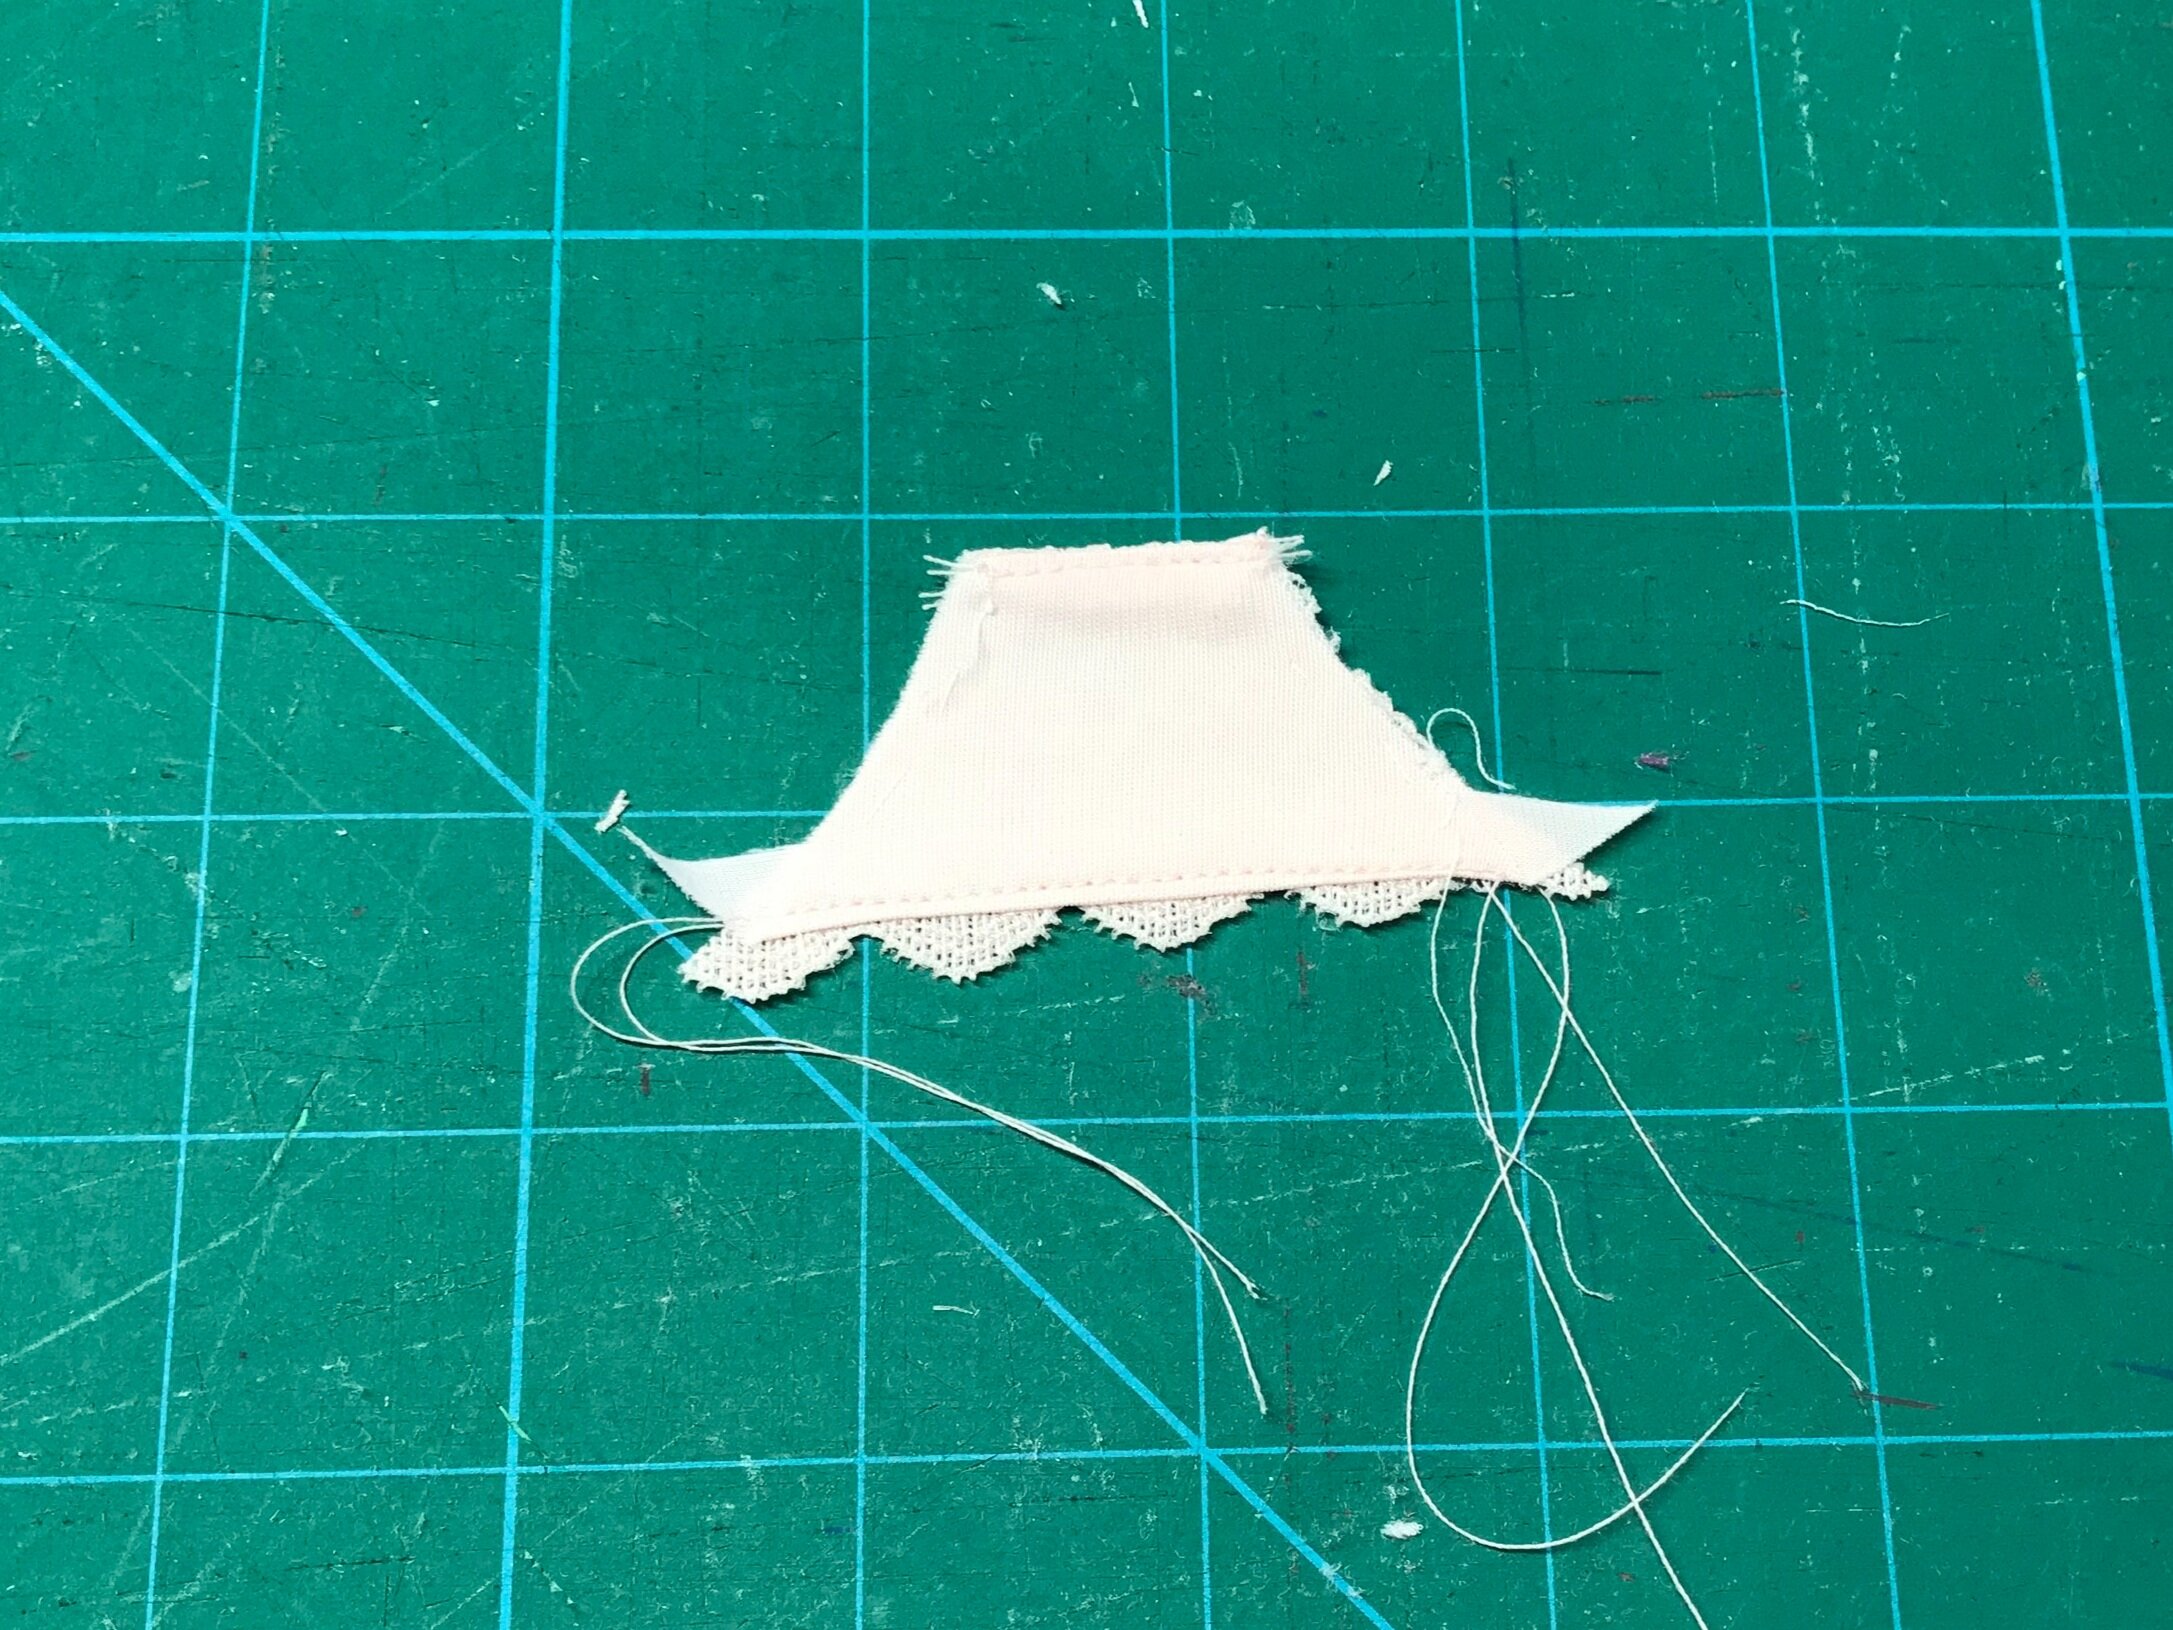
I started with the changes to the Barrett front.` As you can see from one I made a few weeks ago, the centre front has a triangular cut out. So on the pattern piece I drew a line down to establish the centre front. Next using my curved ruler I shaped the front to drop to the bottom edge for a plunge neckline and then added the width of my picot elastic. On the bottom edge I added 1/8” as I wanted slightly more overlap than the 1/4” seam allowance.

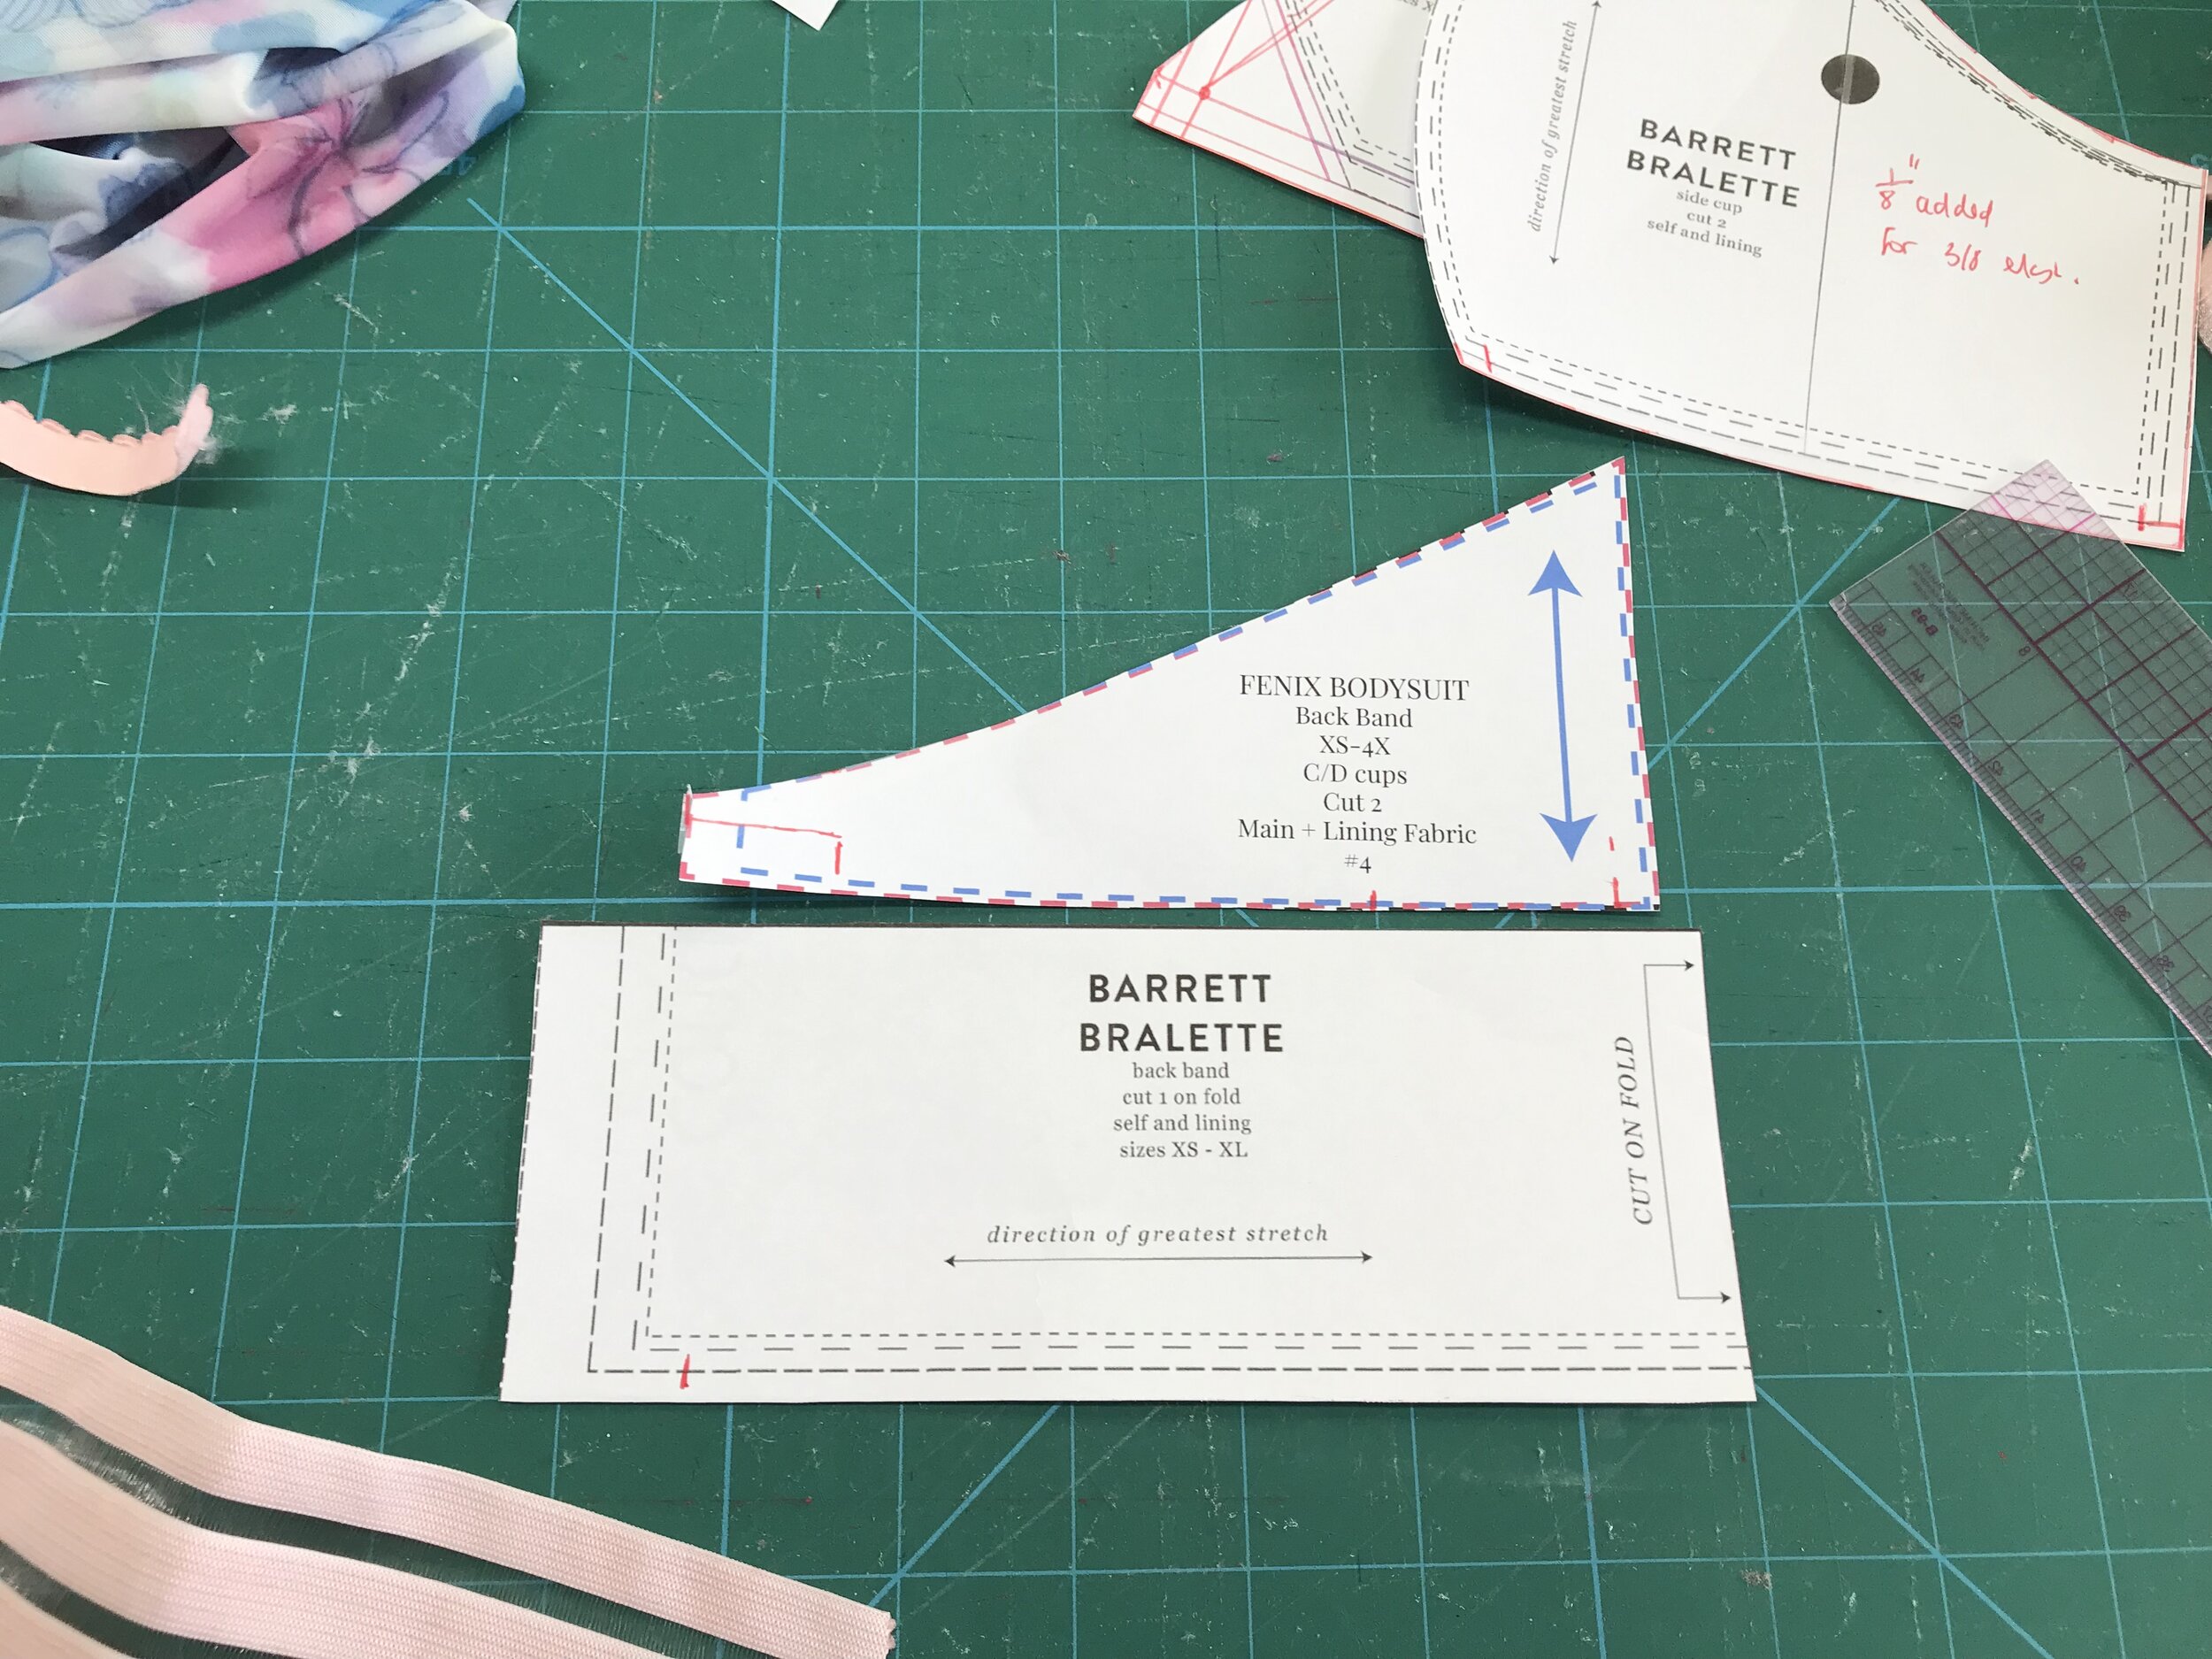
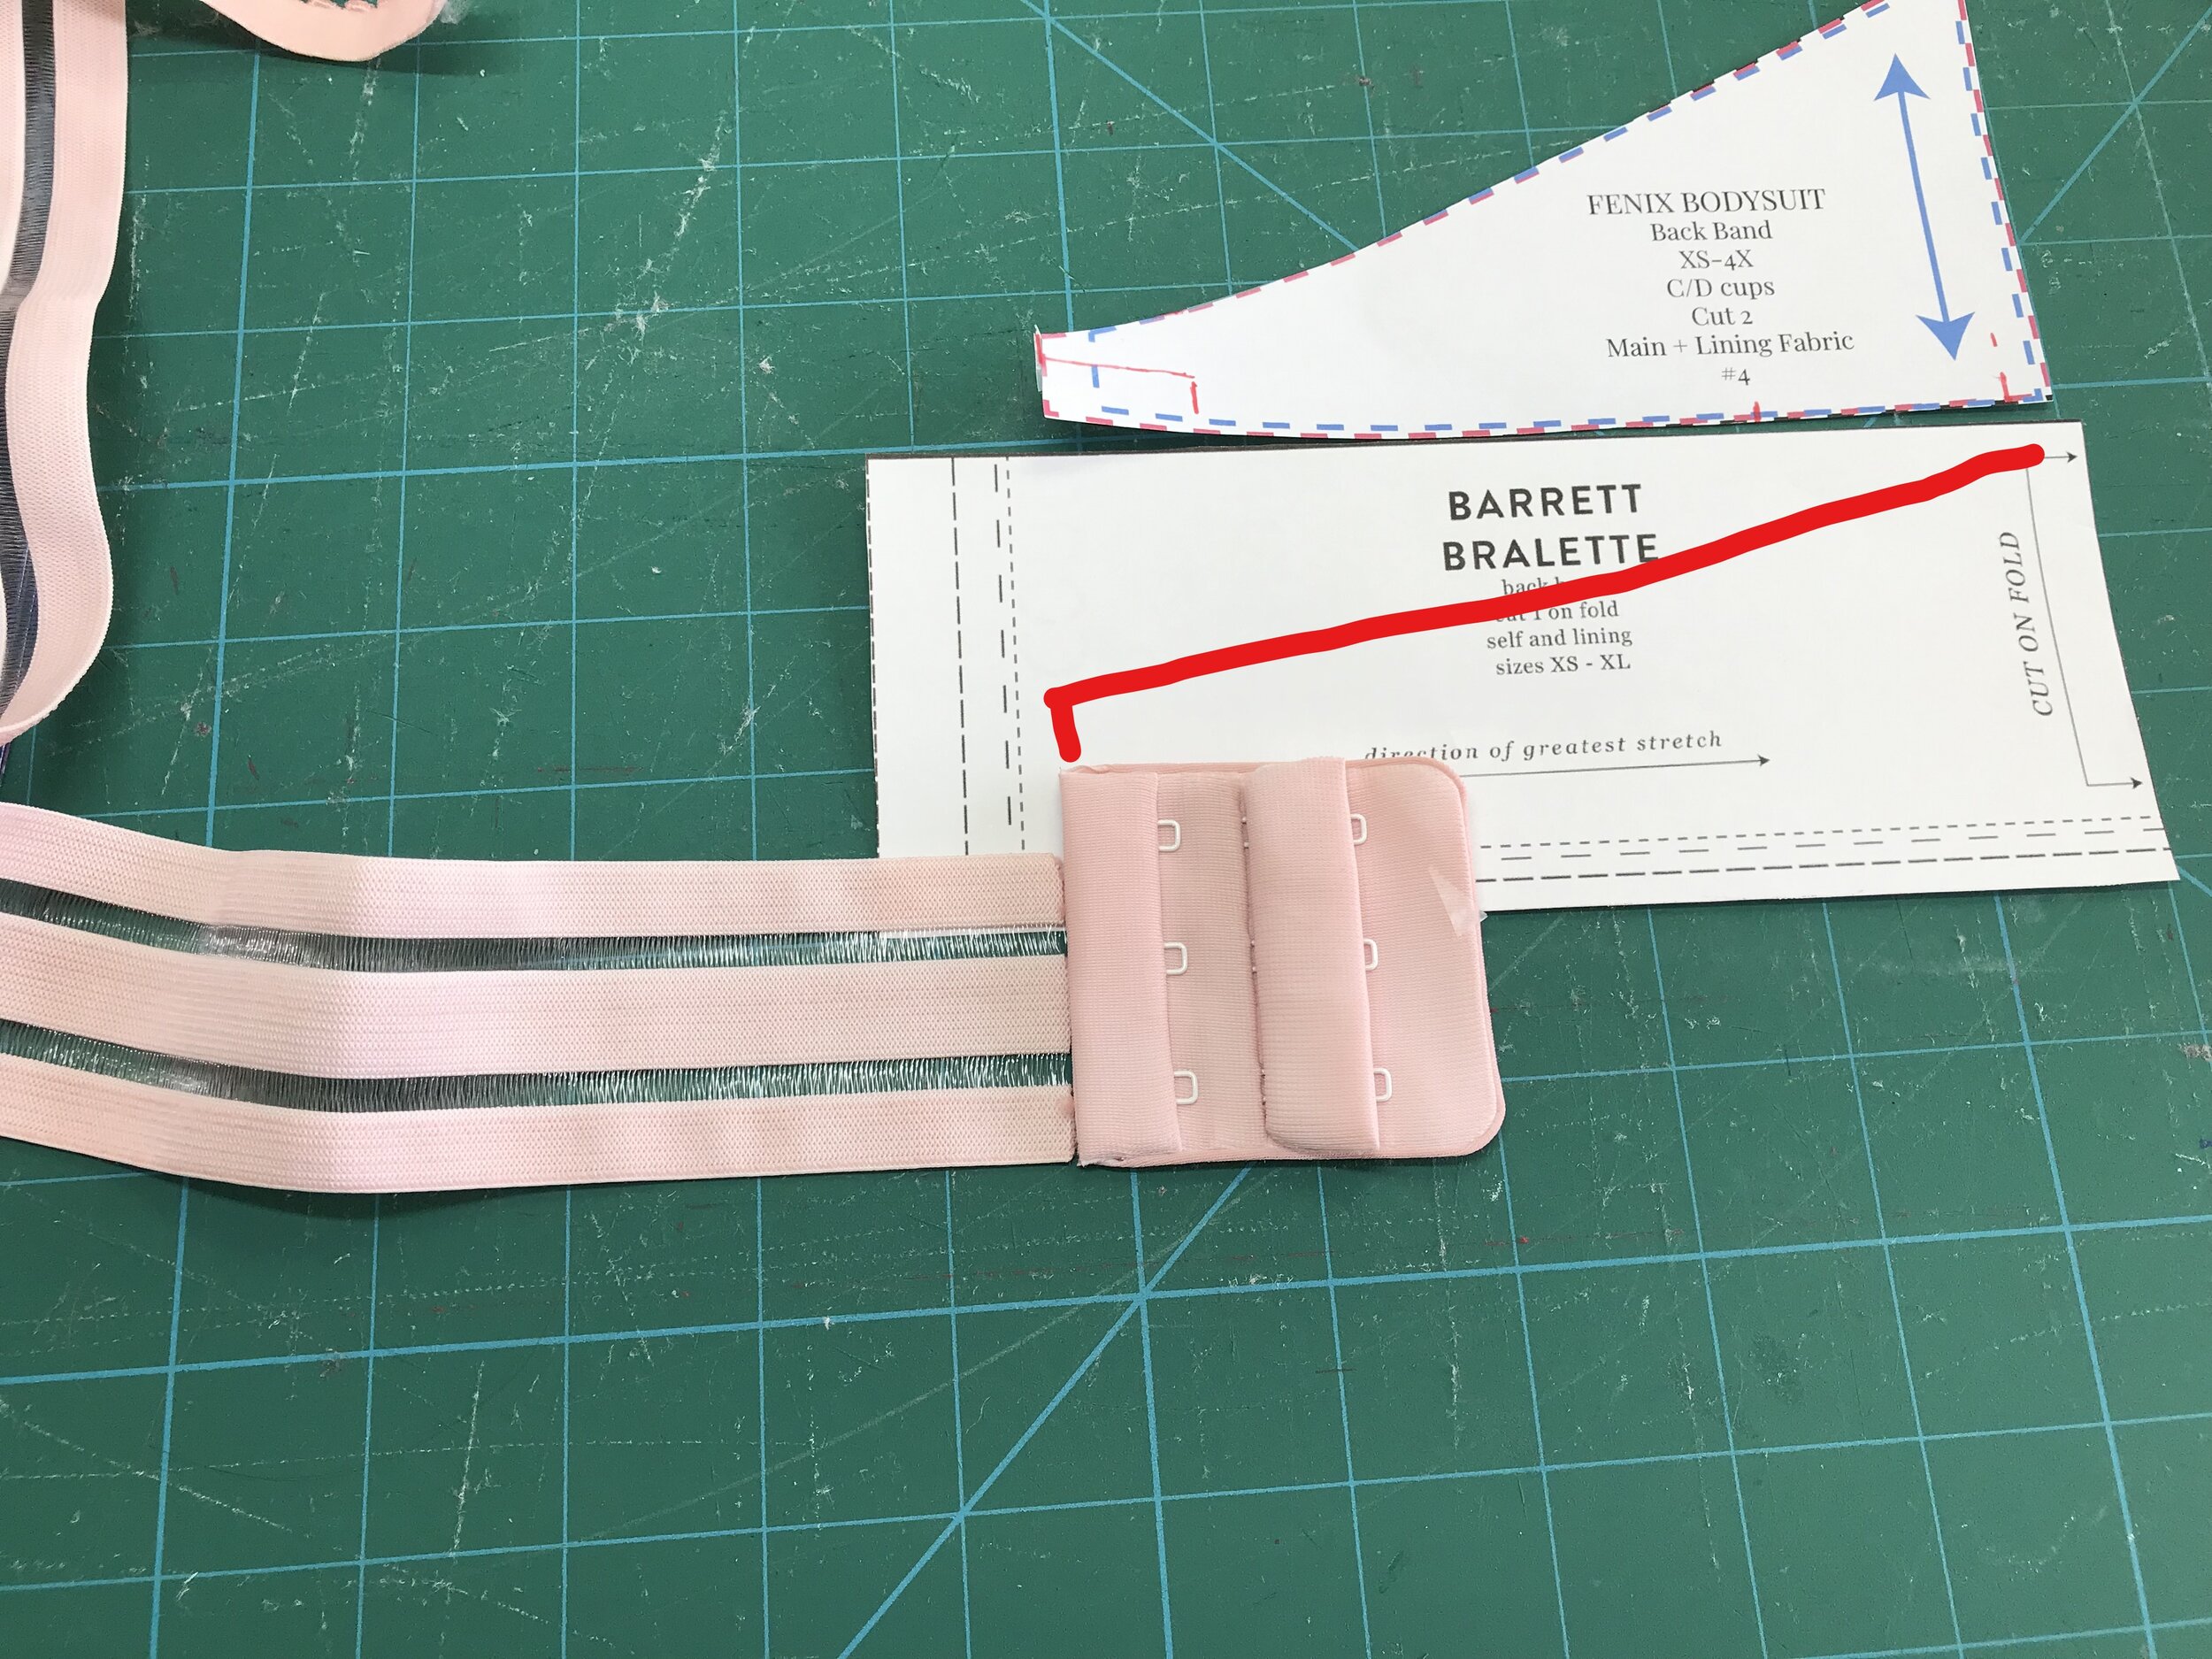
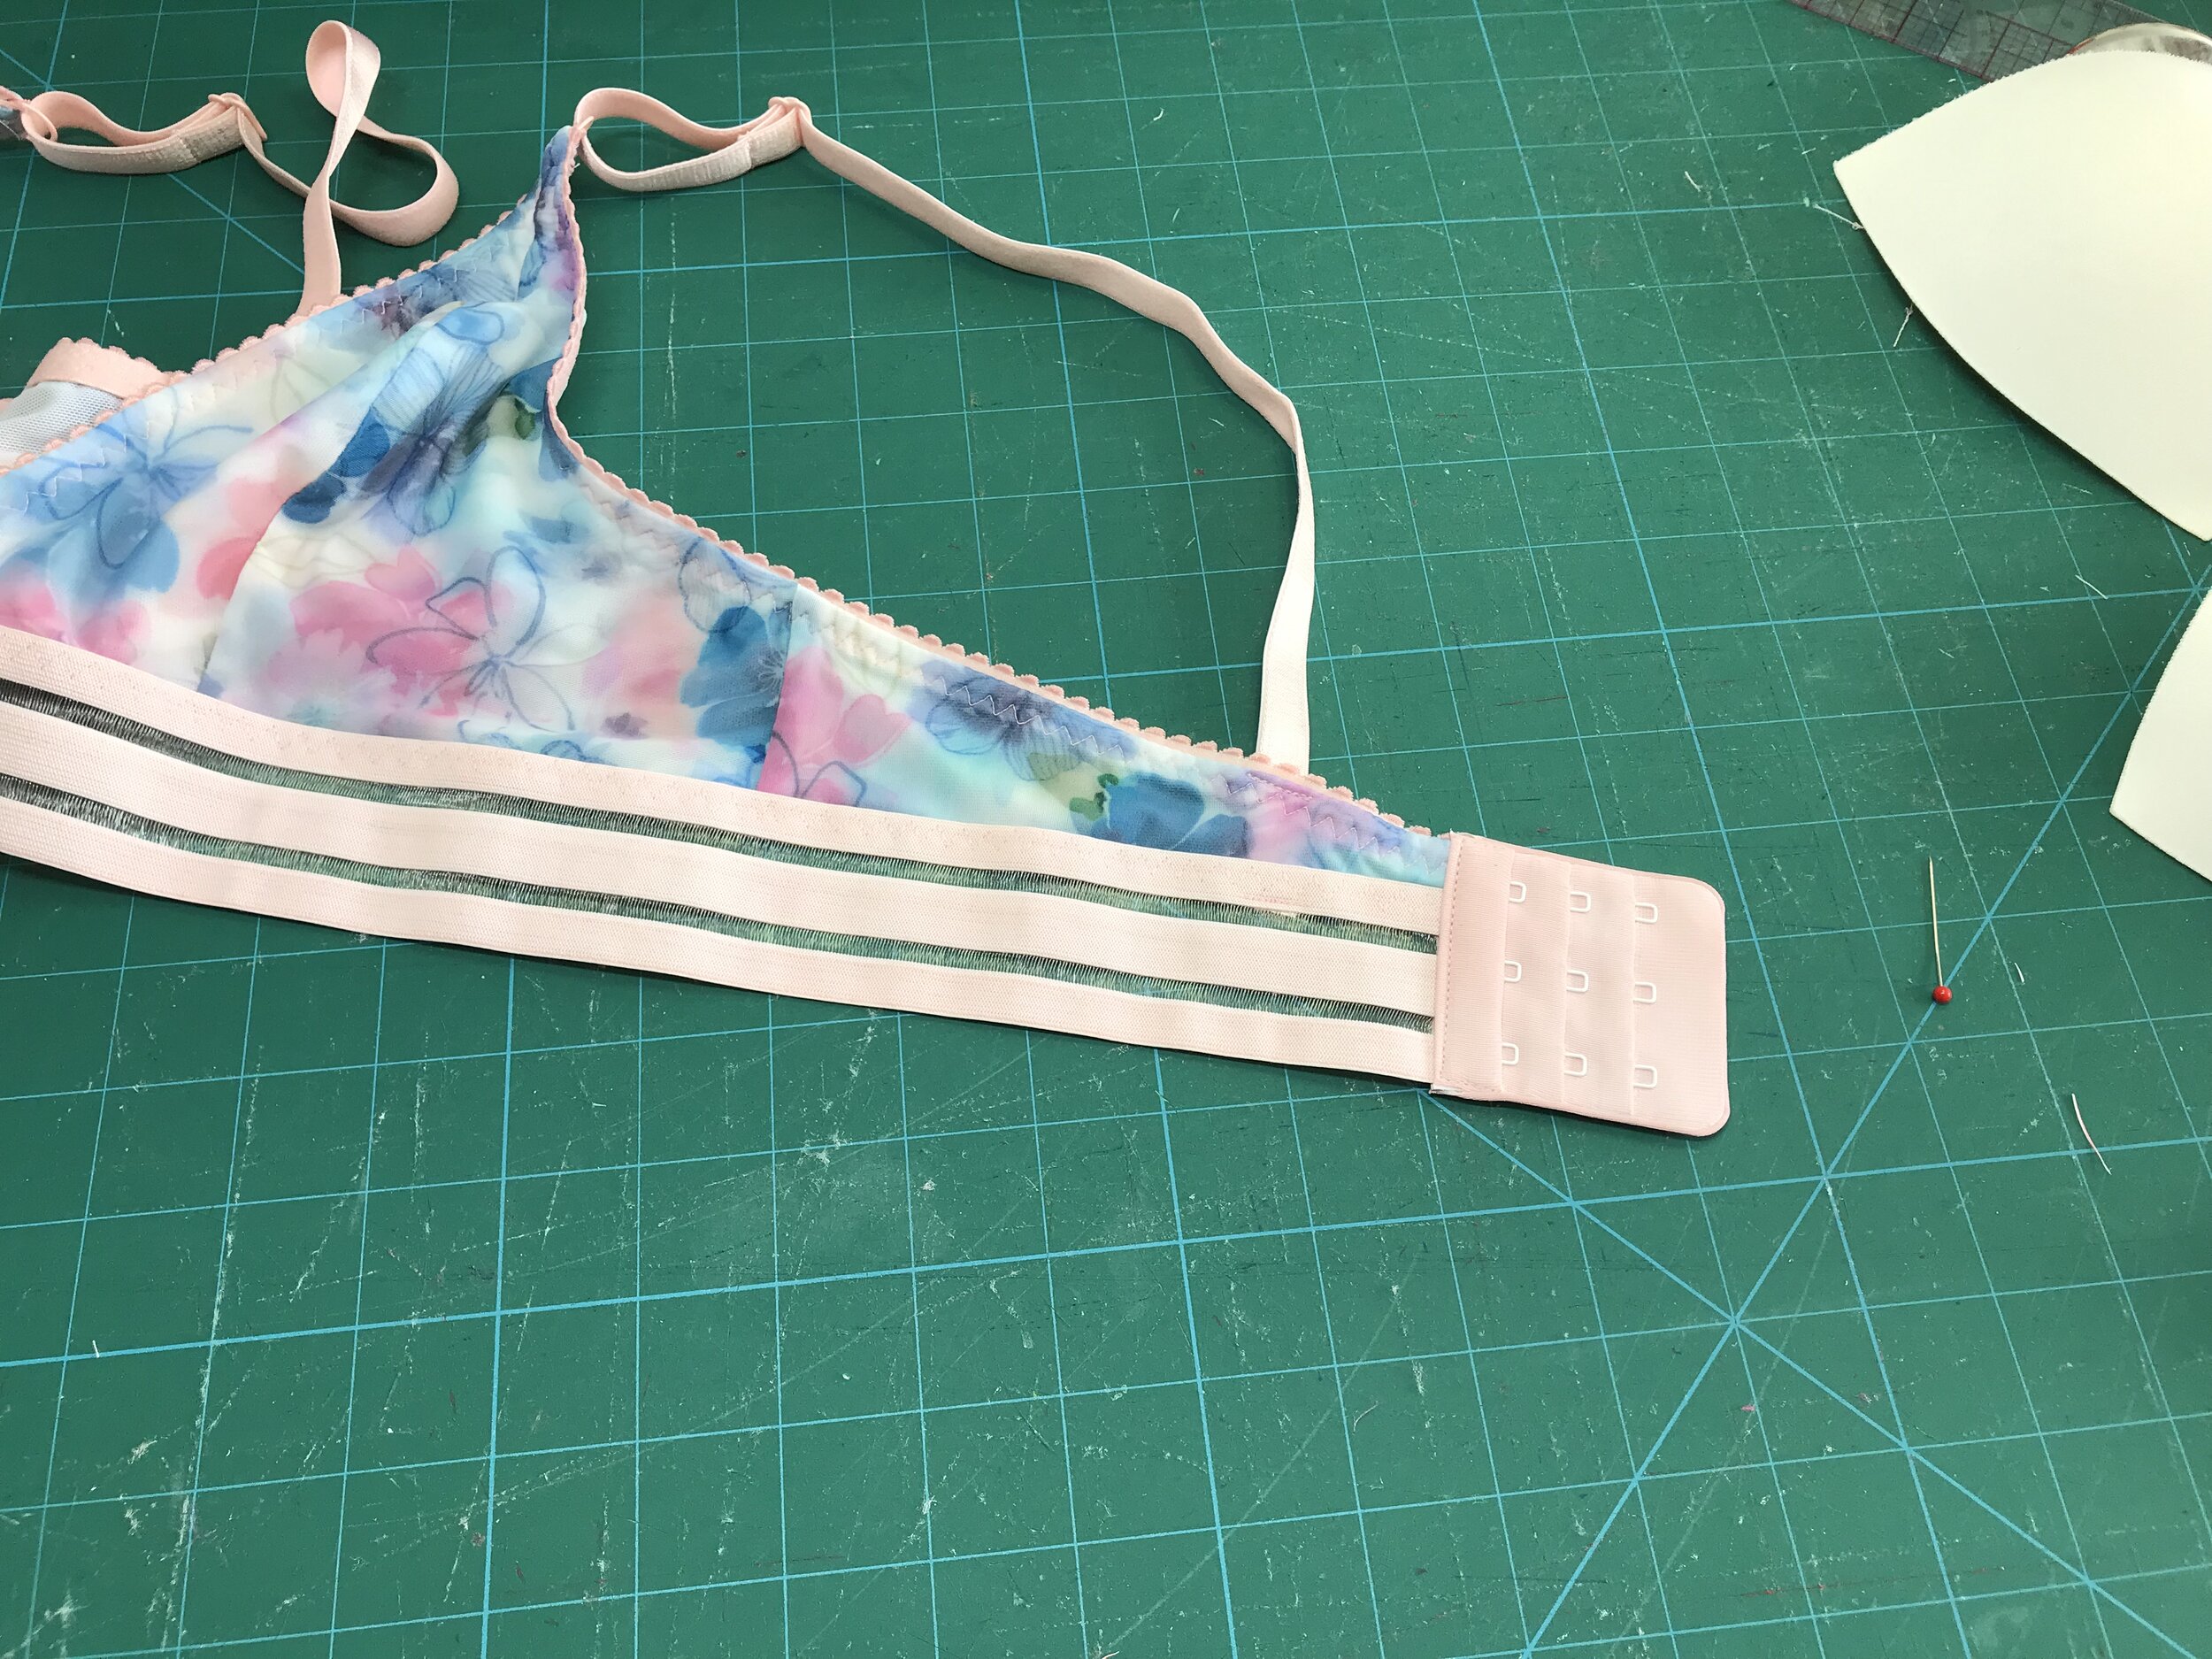
The Barrett is a pull on bralette but I wanted a back closure so I used the back piece from my Madalynne Fenix Bodysuit as a size guide. I put my fastener and elastic on the line to work out the depth of the band needed at this point and then I added on the width of my elastic and drew a straight line up to the top edge.

With my pattern pieces ready I proceeded to make up as normal. To stop any spillage I like to overlap the cups at the centre front. Firstly, I basted in place before overlocking along the bottom edge. Overlocking not only finishes off the raw edges but acts as a guideline for overlapping the band elastic. Then for reinforcement, after I attached the band, I stitched in a triangle around the overlap.

A42963B3-1244-46FF-AF2A-E1DE93FAD158.JPEG

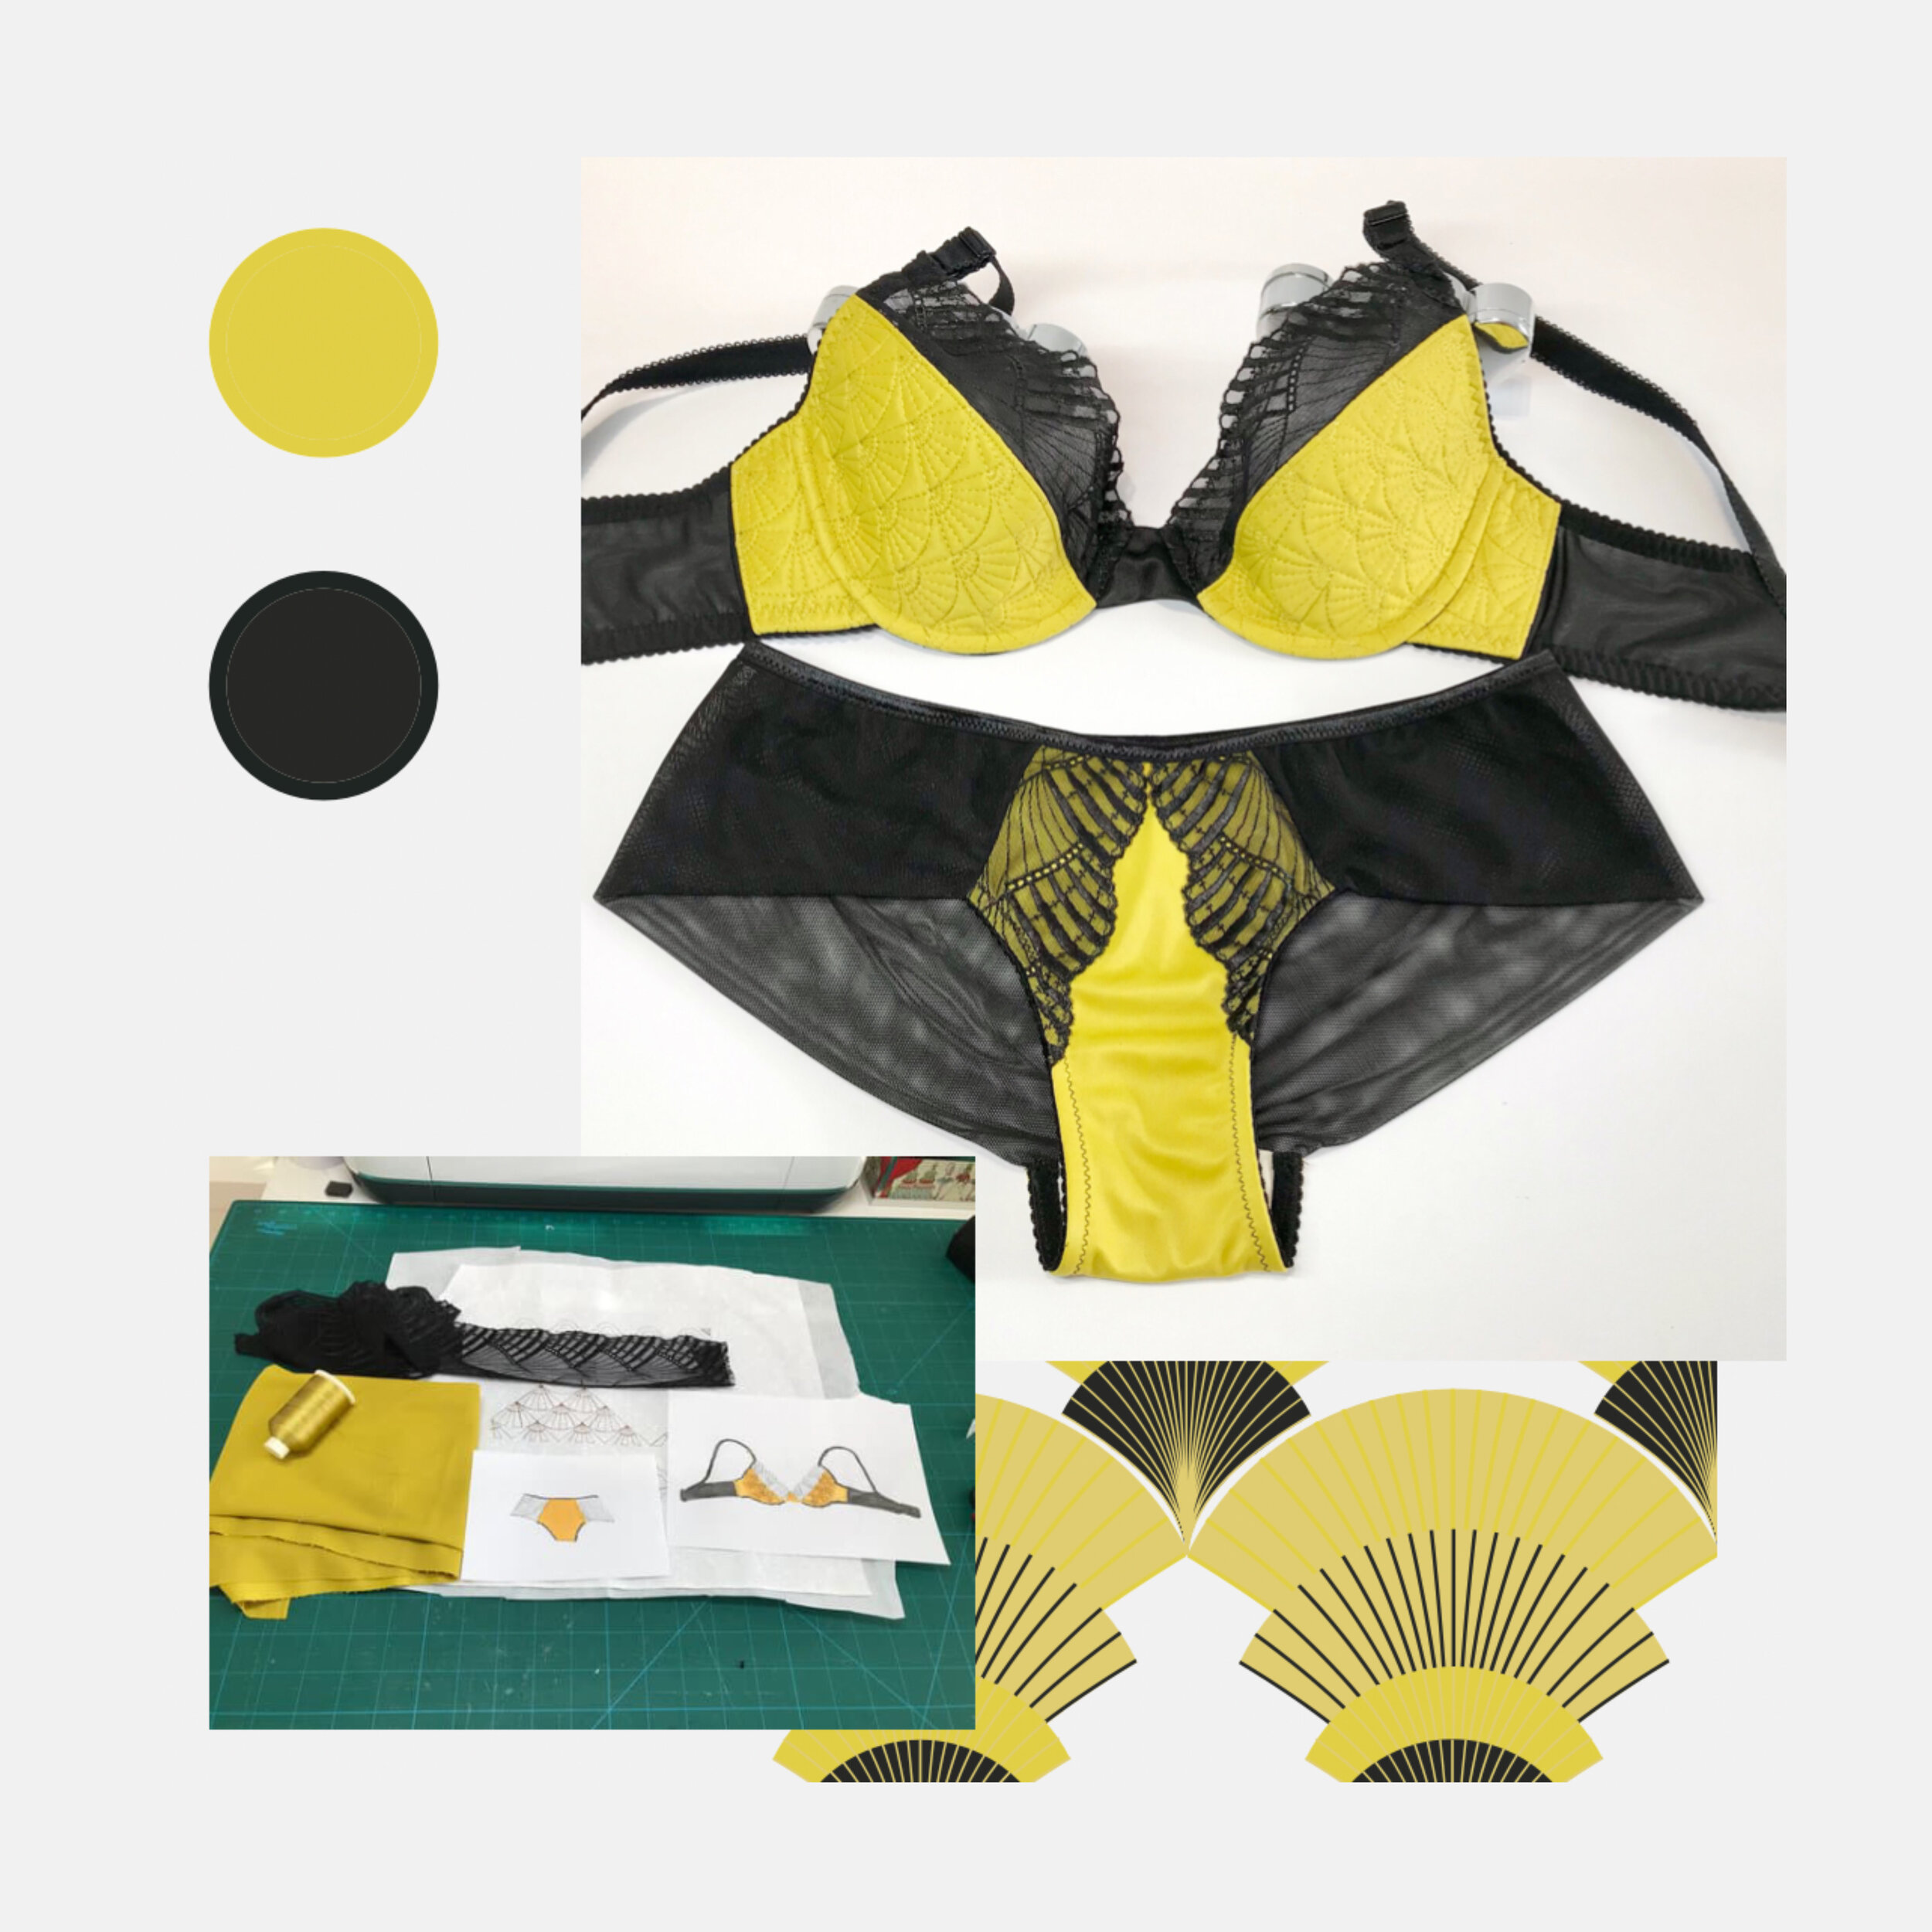
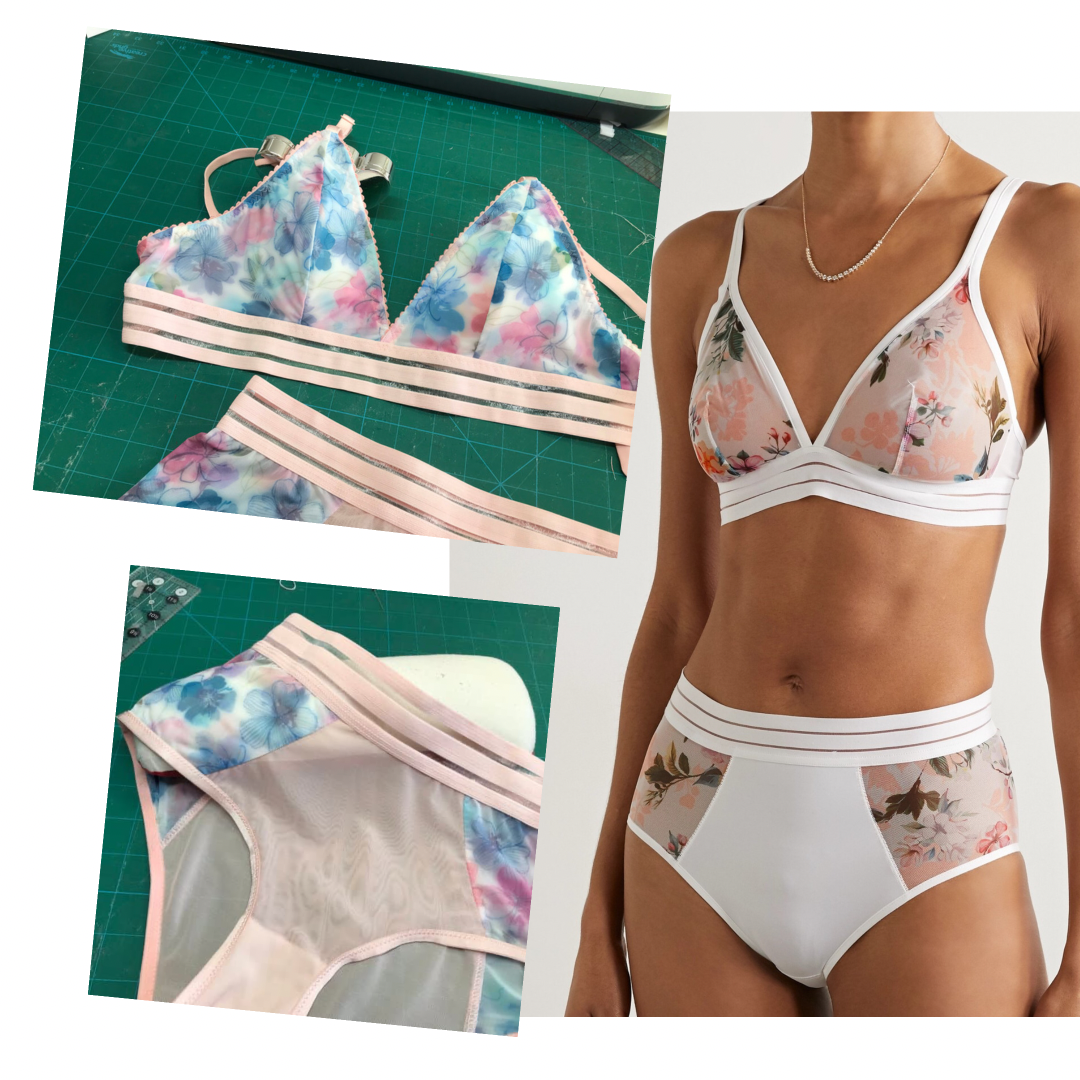
Moving on to the next set which took a little more thinking through. Hannah, of EvielaLuve, had classes on both strappy bralettes and panties so I decided to go for something a little different. The satin ribbon detail of the Aubade Courbes Divine Short, which translates to divine curves, is another cute design without compromising the comfort and/or fit. I love the description for this one, “The contrast in lace panelling creates alternating transparency which shows the skin and combined with the cut-out detail with decorative lattice creates the ultimate sexy brief.

I adjusted the Studio Costura Eva for the brief by lowering the waist and creating a fabric panel for the front as well as extending the lace panels to meet the bottom of the ribbon detail.

E071A017-0986-4DE0-B01D-5BEA5B20DB19.JPEG

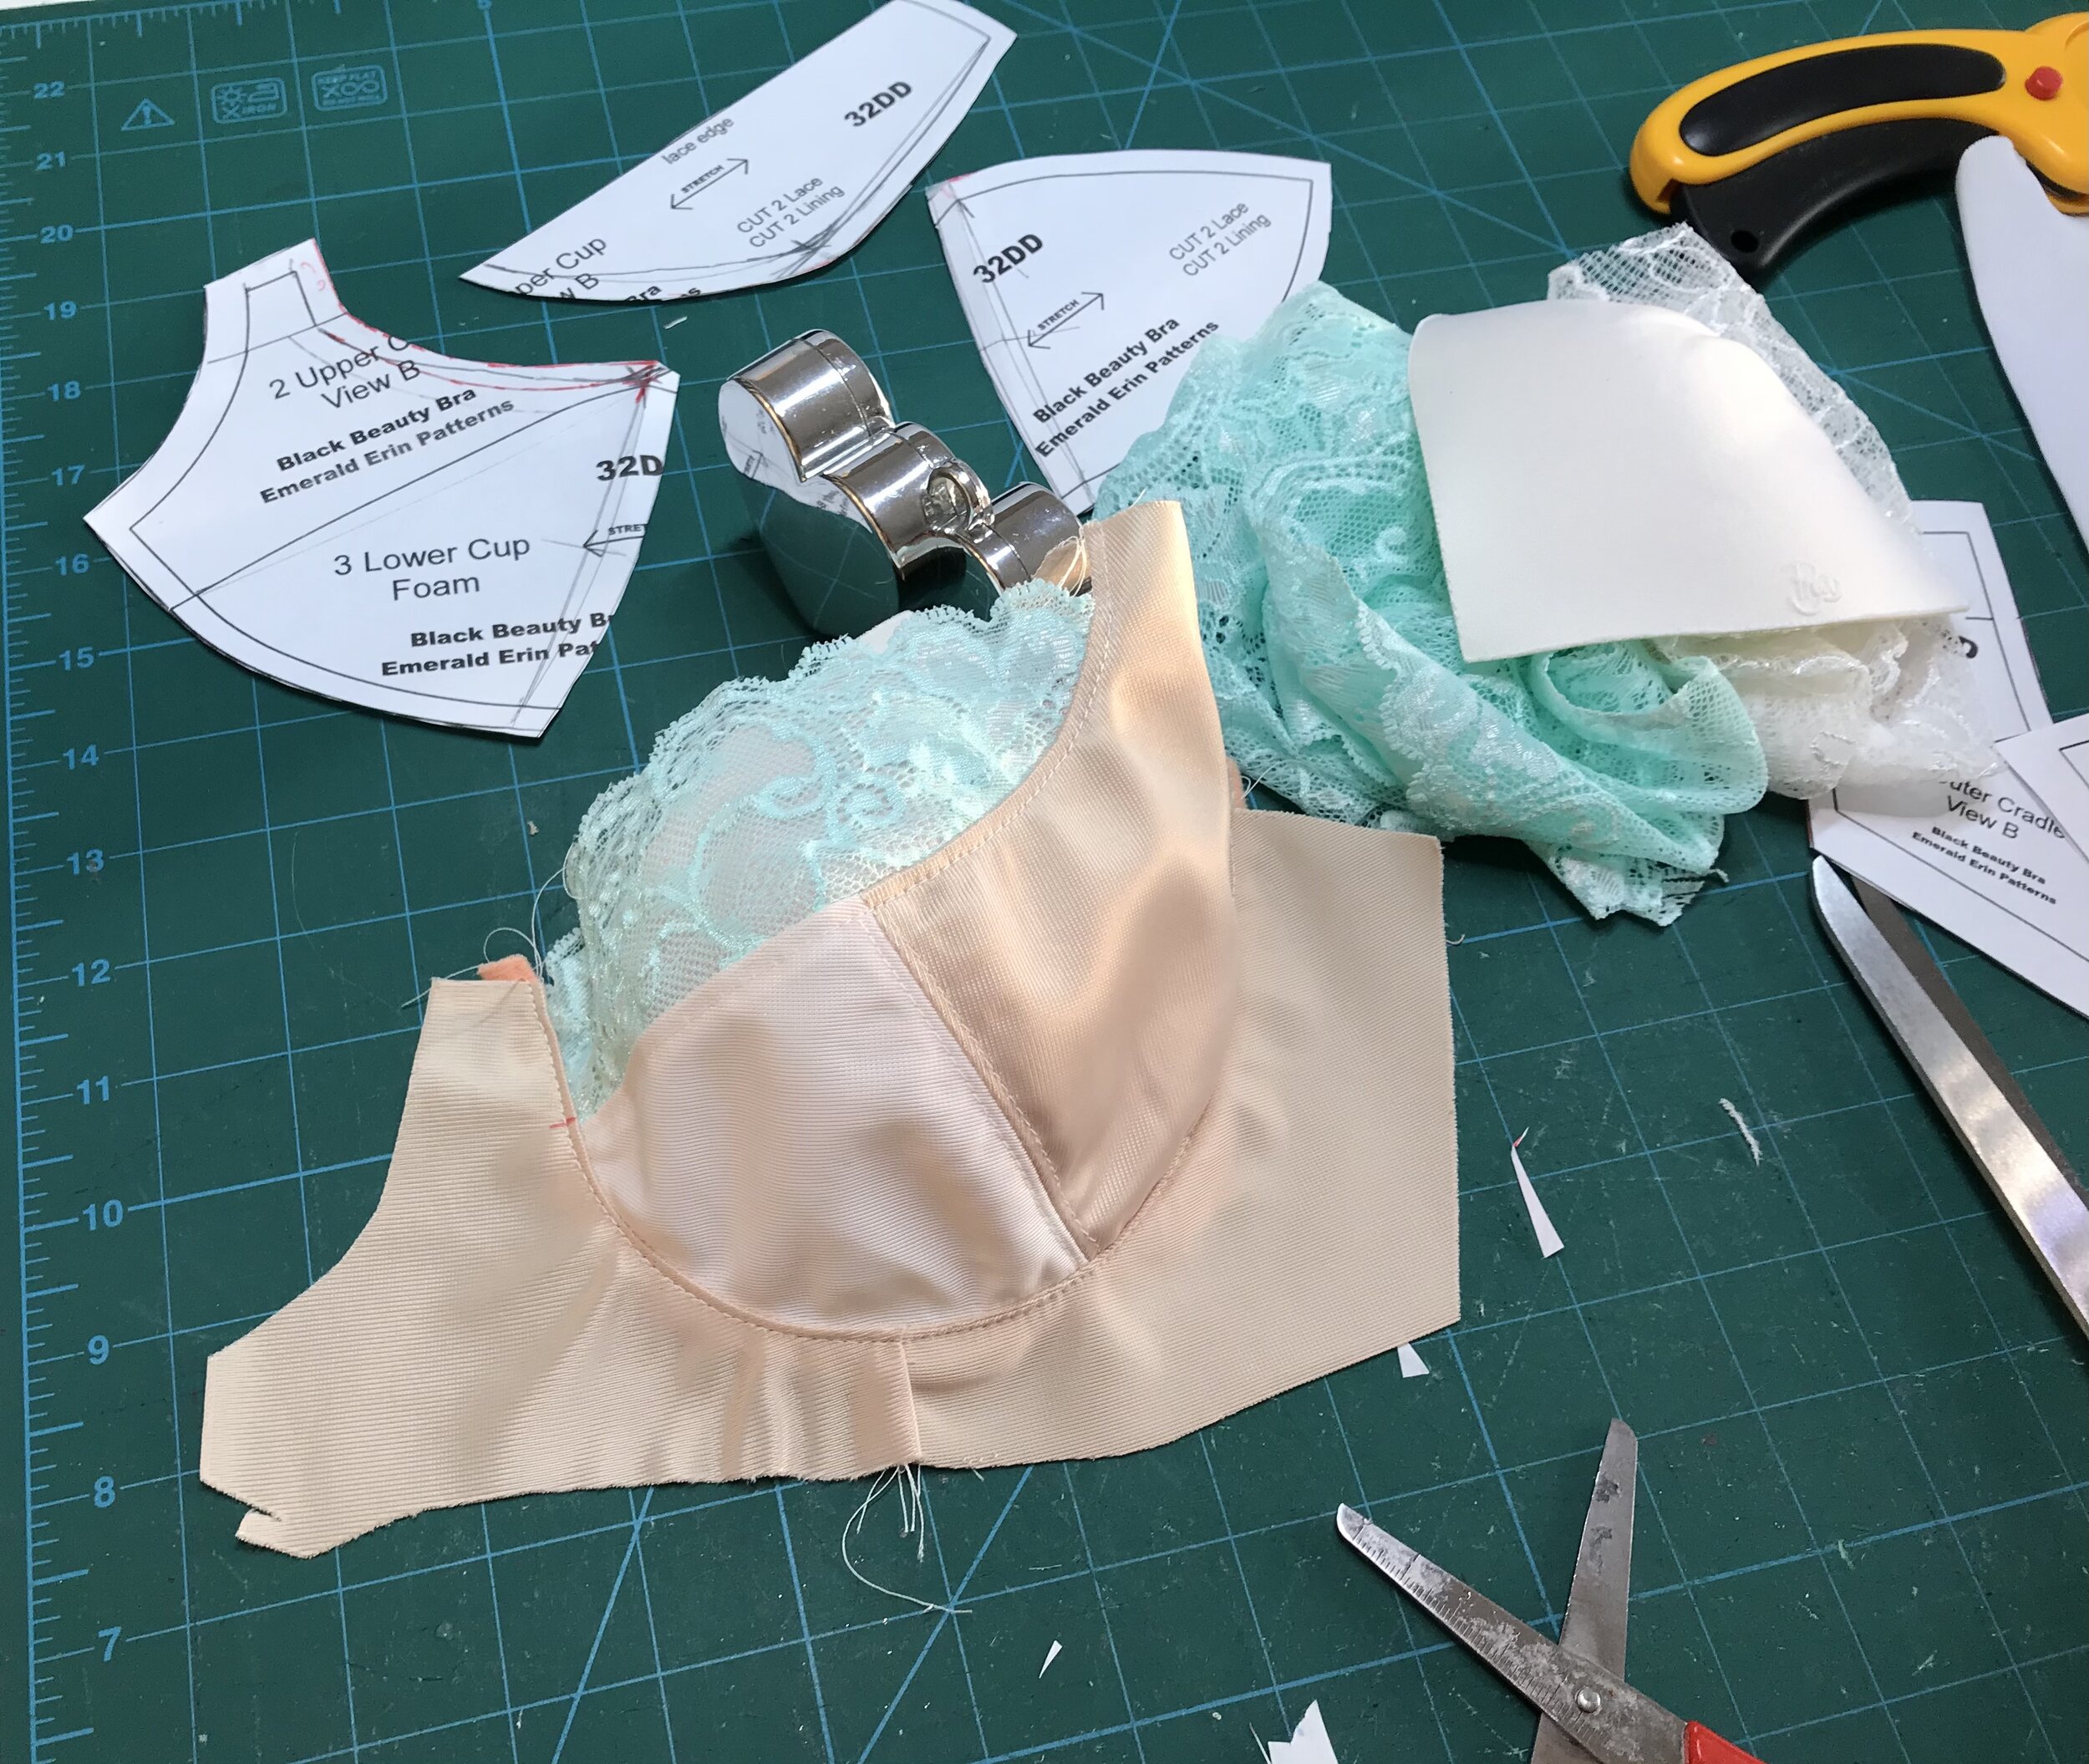
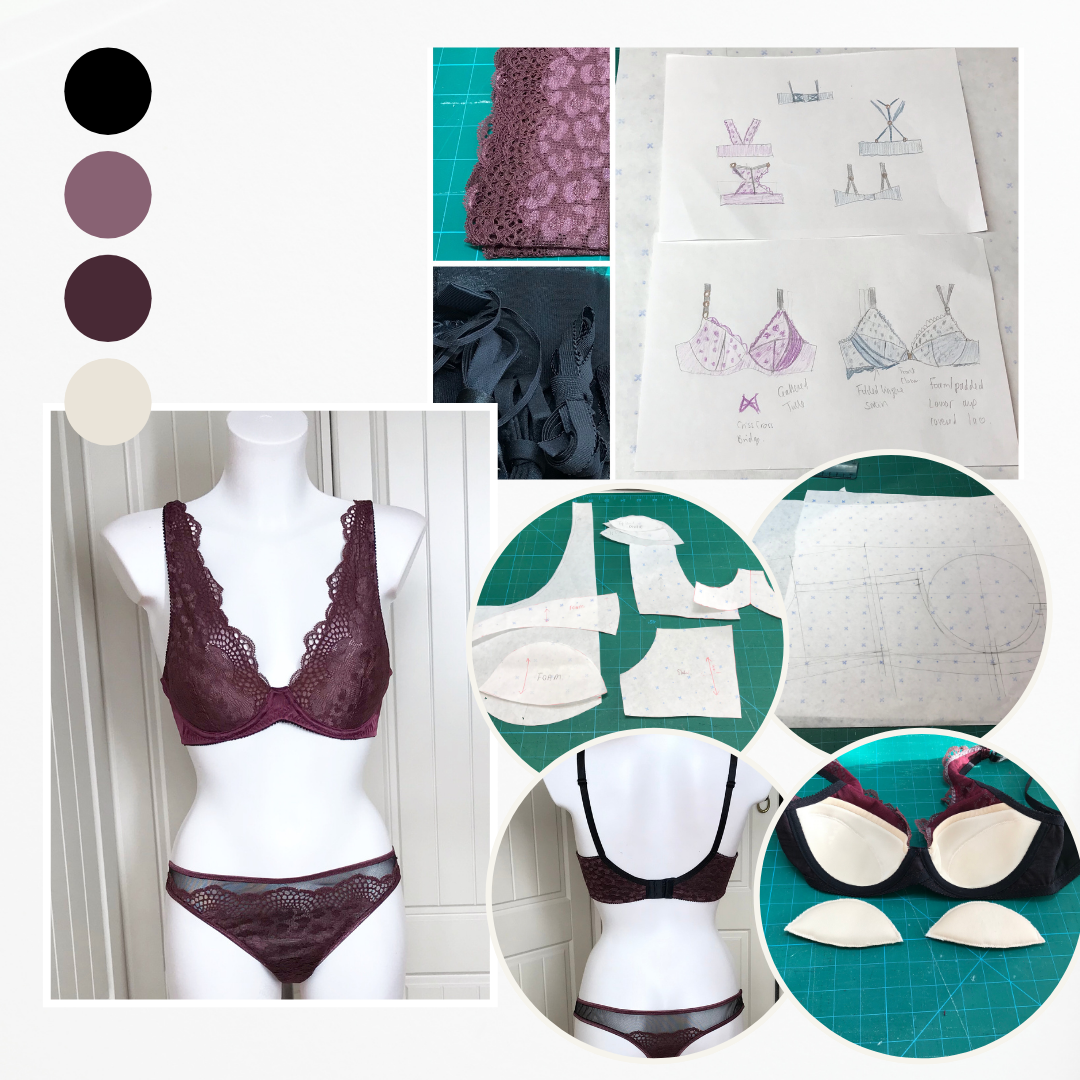
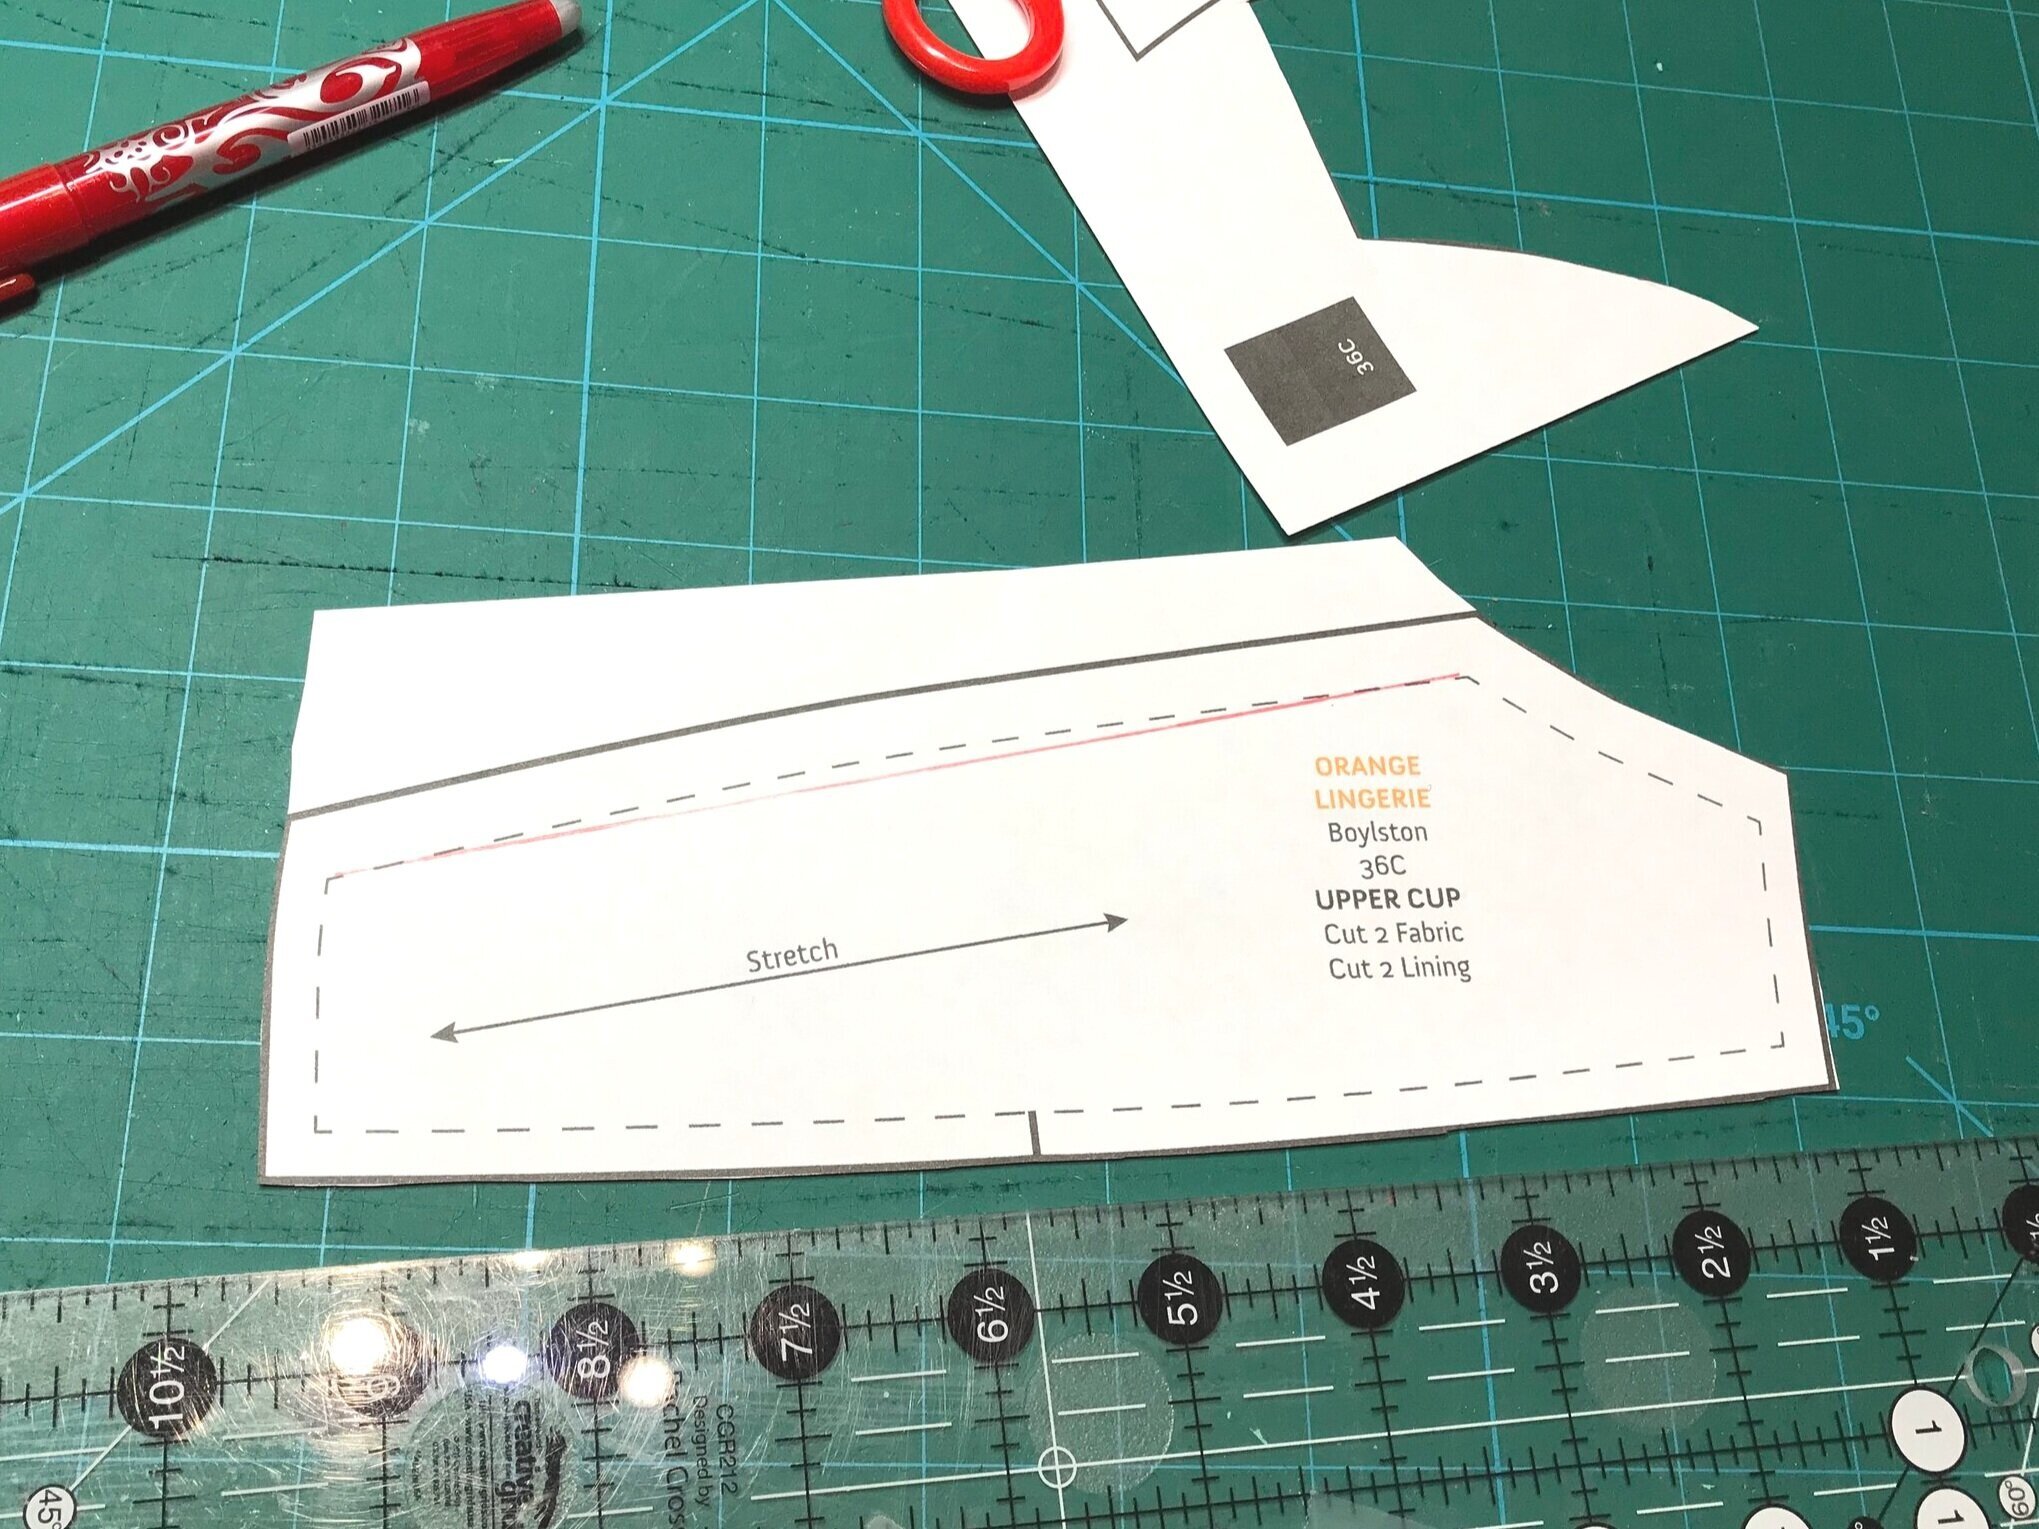
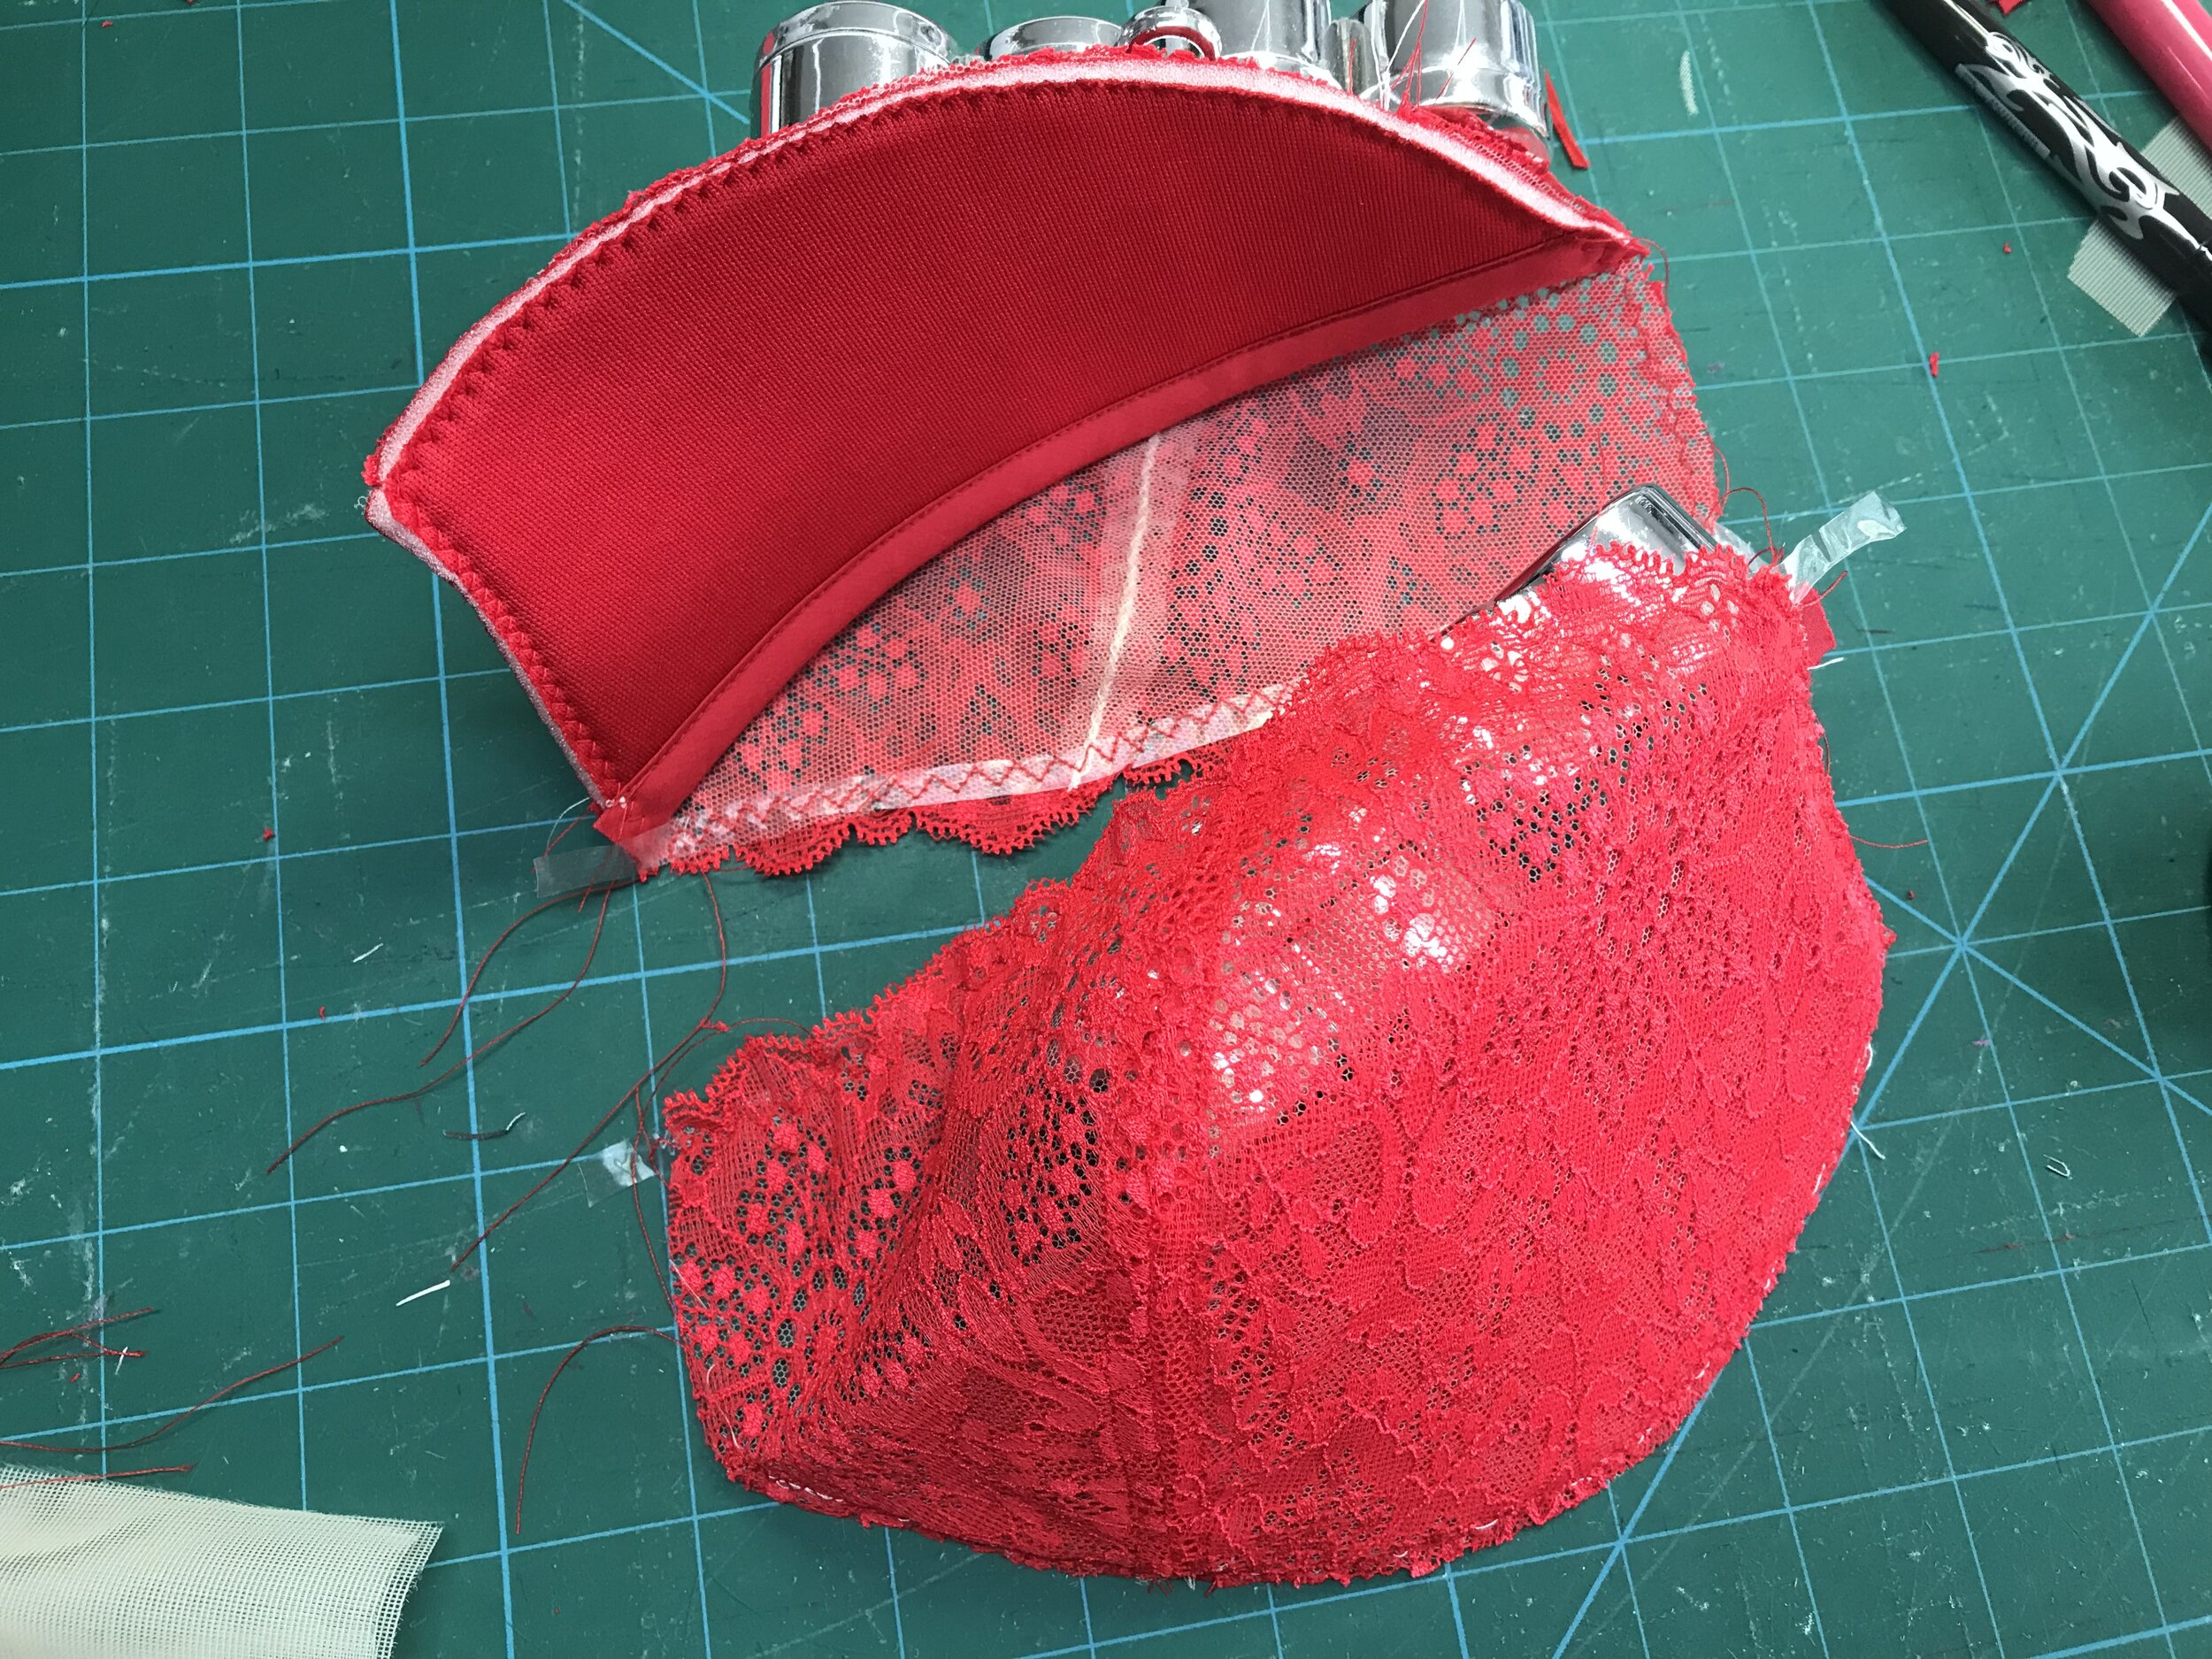
The collection has two bra styles, a plunge and a half cup. With the plunge the lattice detail was accommodated on the side which is mostly hidden so I thought I would try to recreate a lattice bridge. In putting together the class I became very aware of how different camera angles affect the look. It wasn’t until I scrolled through the images that I could see that the padding curved up into the arm. I have previously used the Orange Lingerie Devonshire to alter from a balconette to a half cup but for my size this wouldn’t leave enough room for the lattice so I made it as the balconette. I took a little out of the curve of the vertical seam using the 34C overlaid over the 34D pattern pieces but kept the height for the coverage I prefer. Vertical seams are great for uplift.

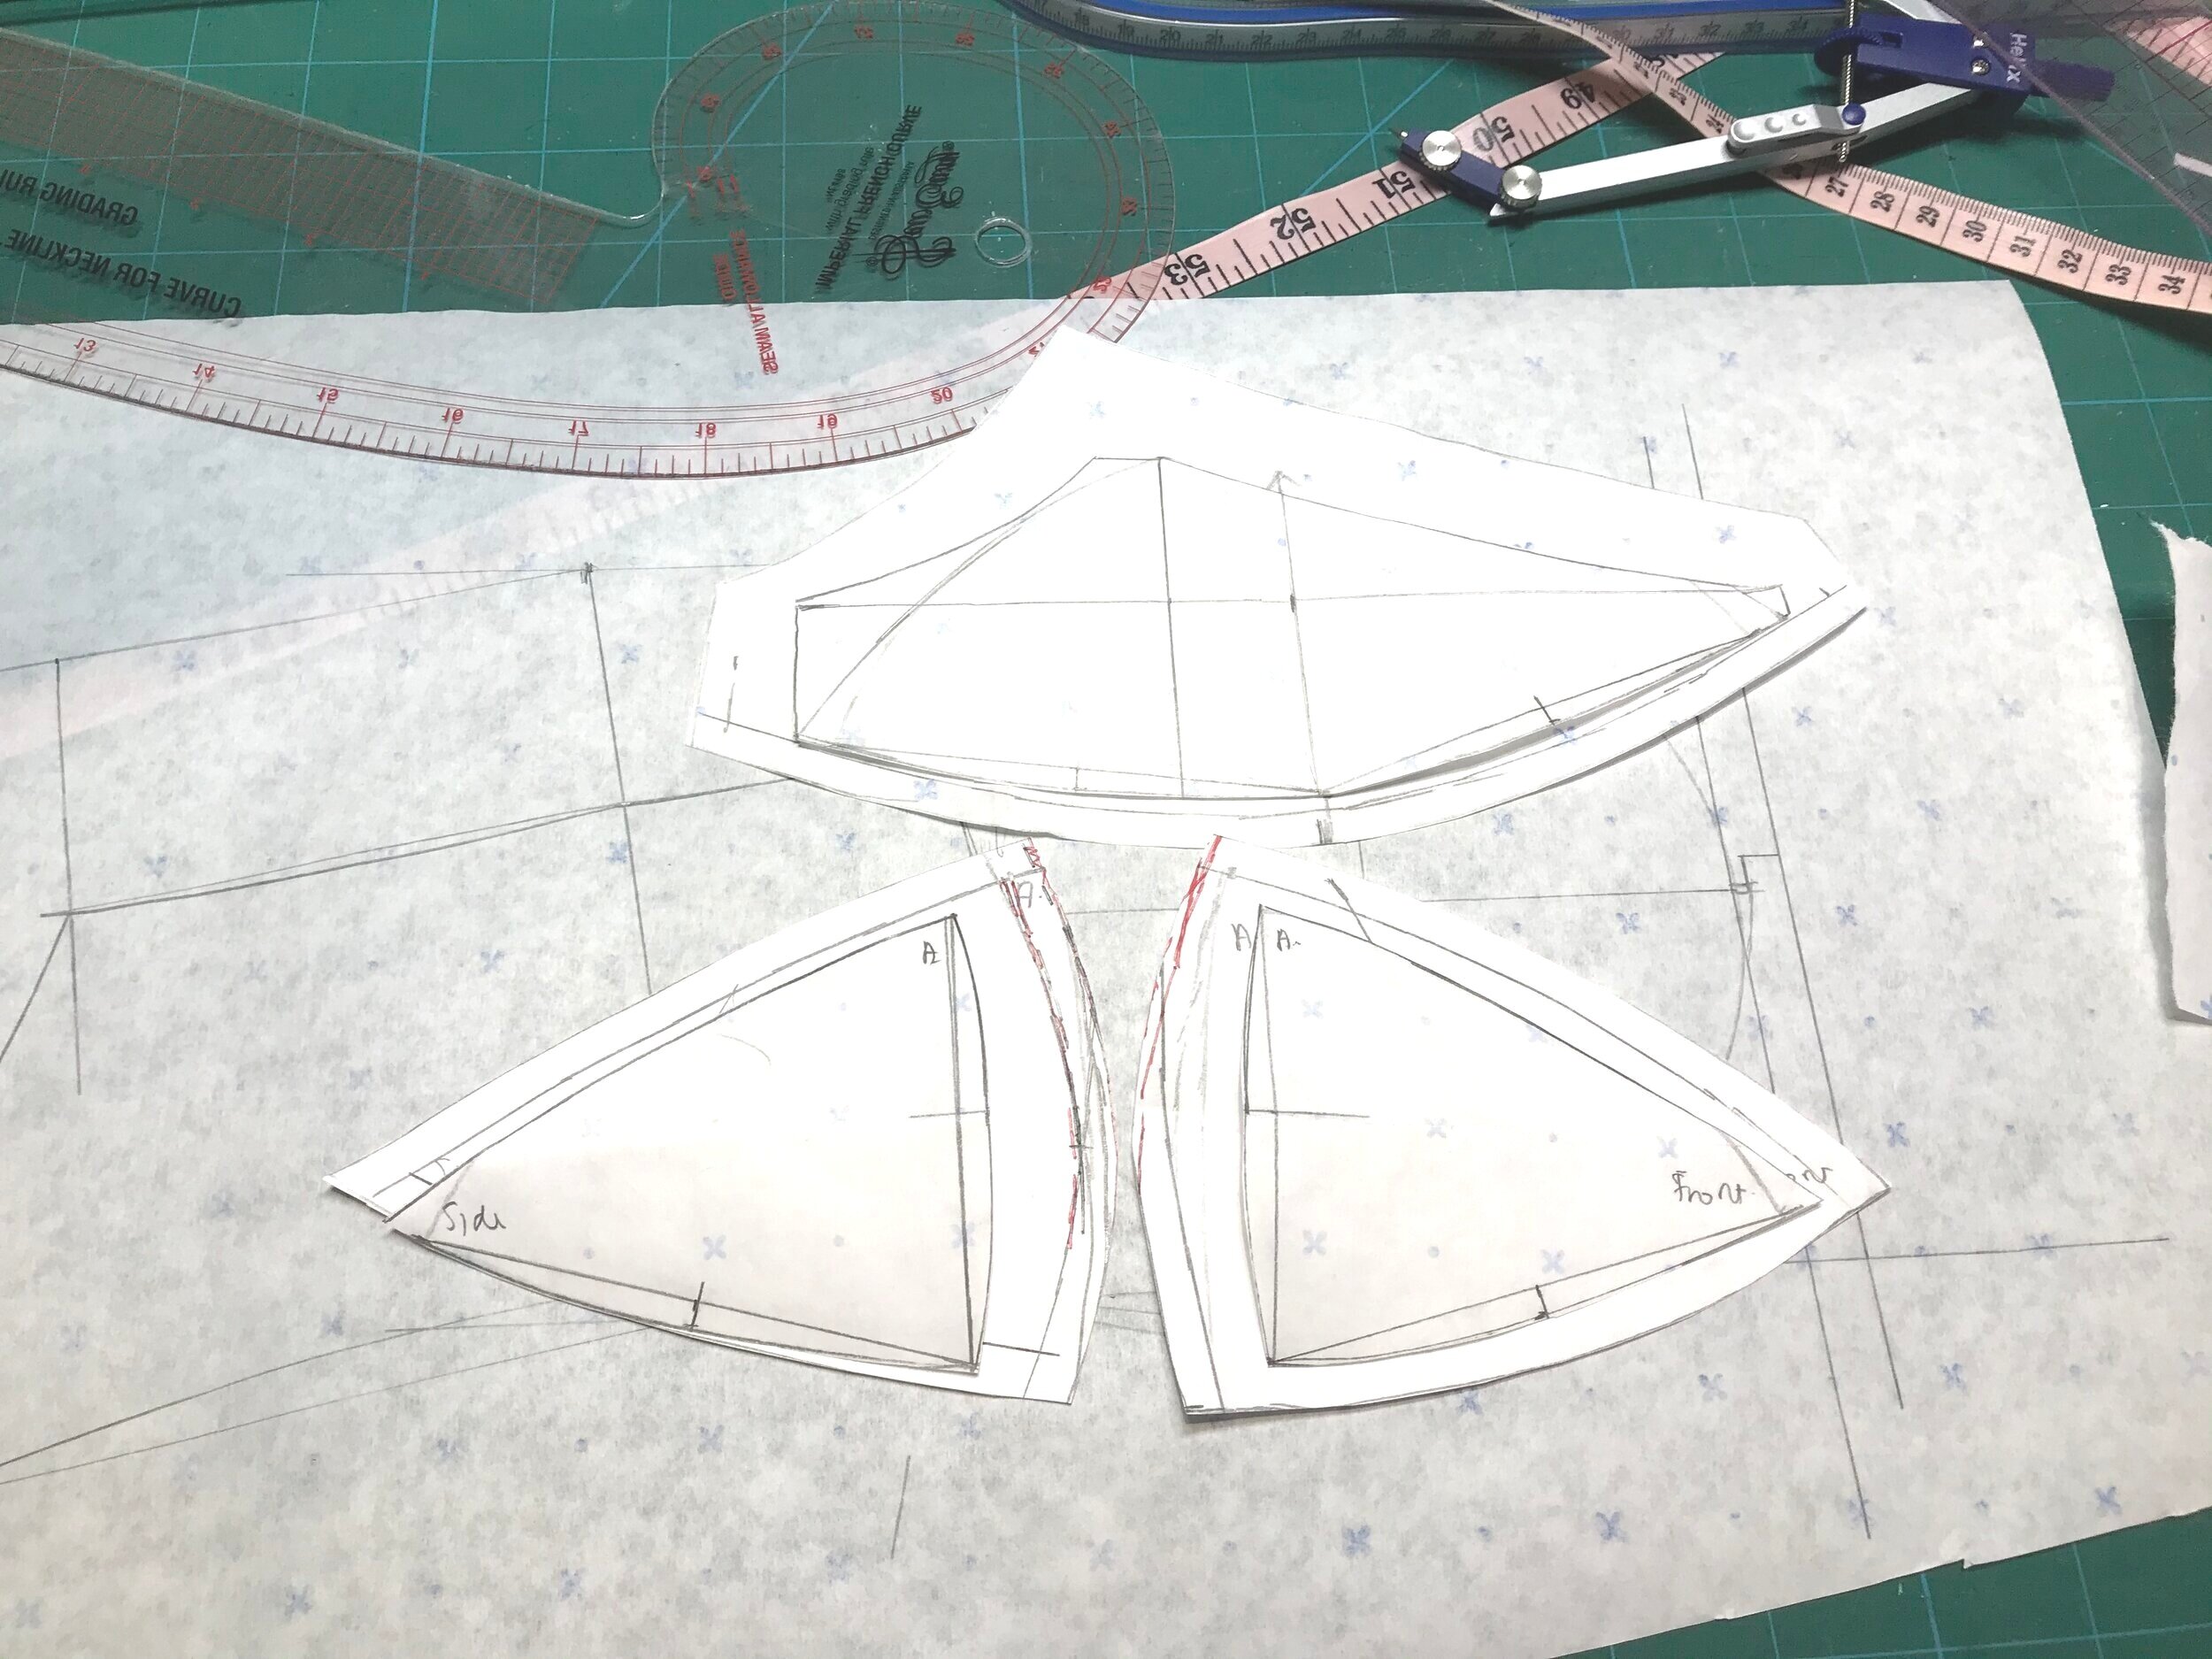
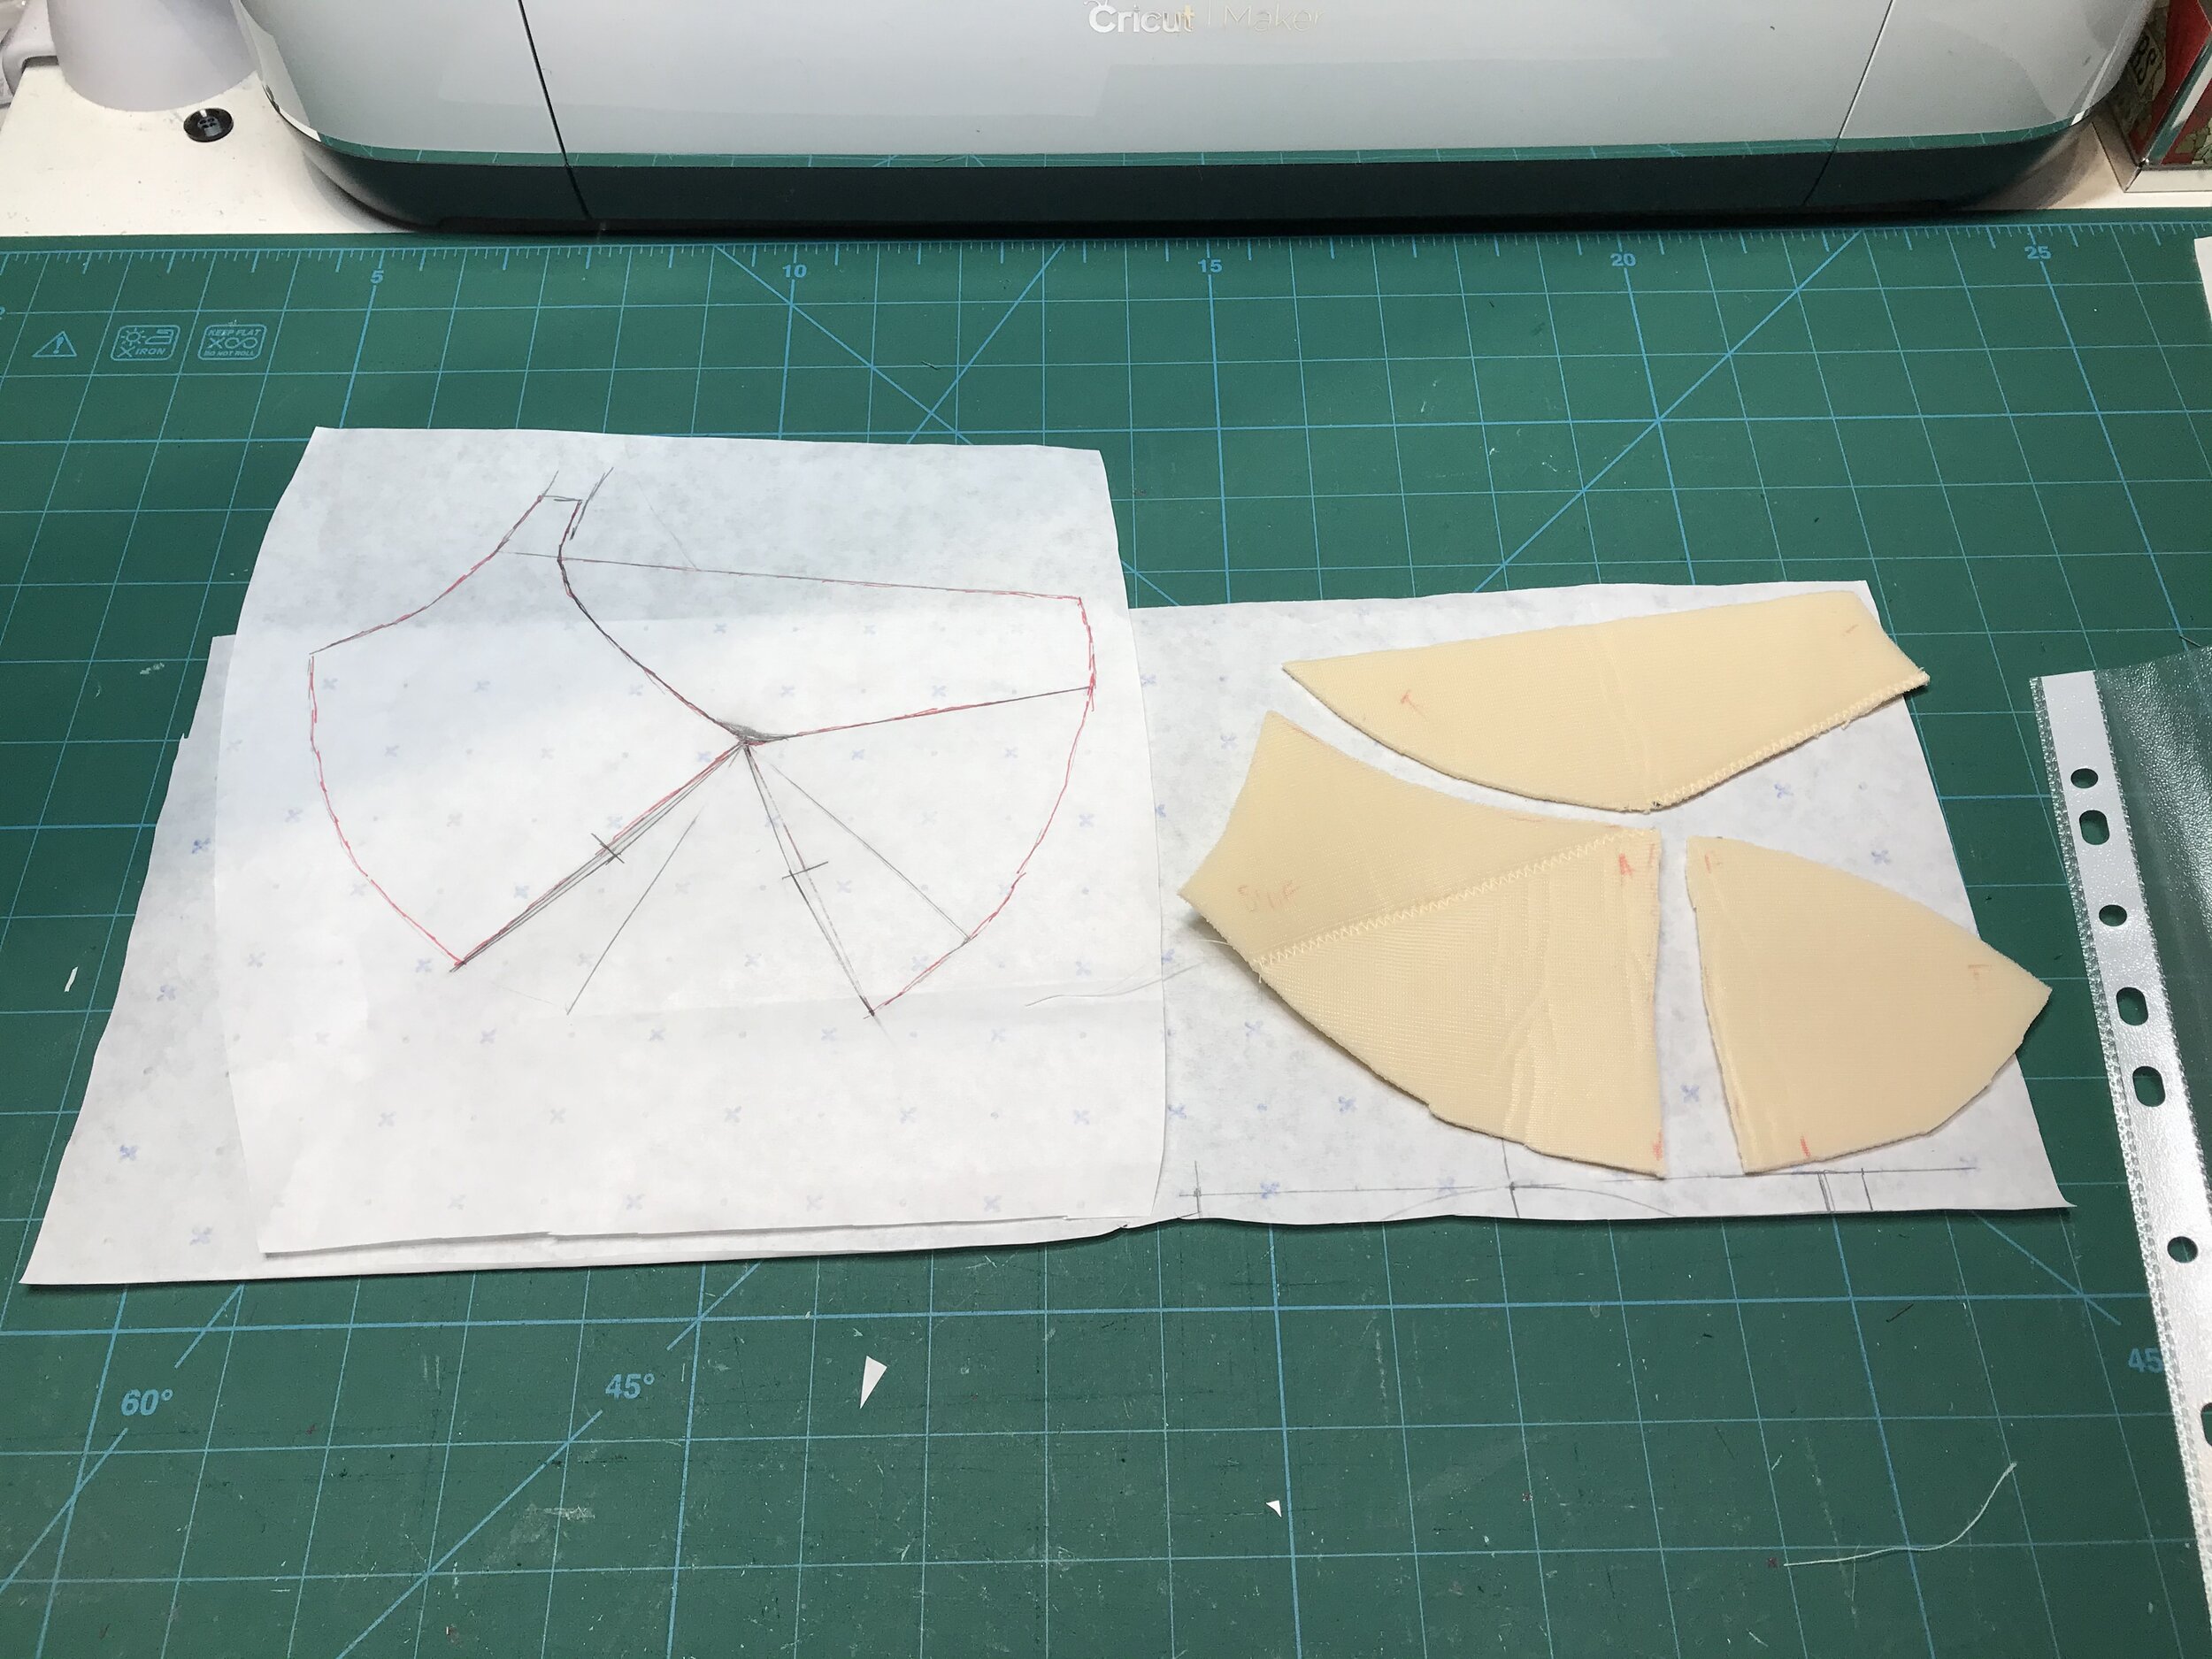
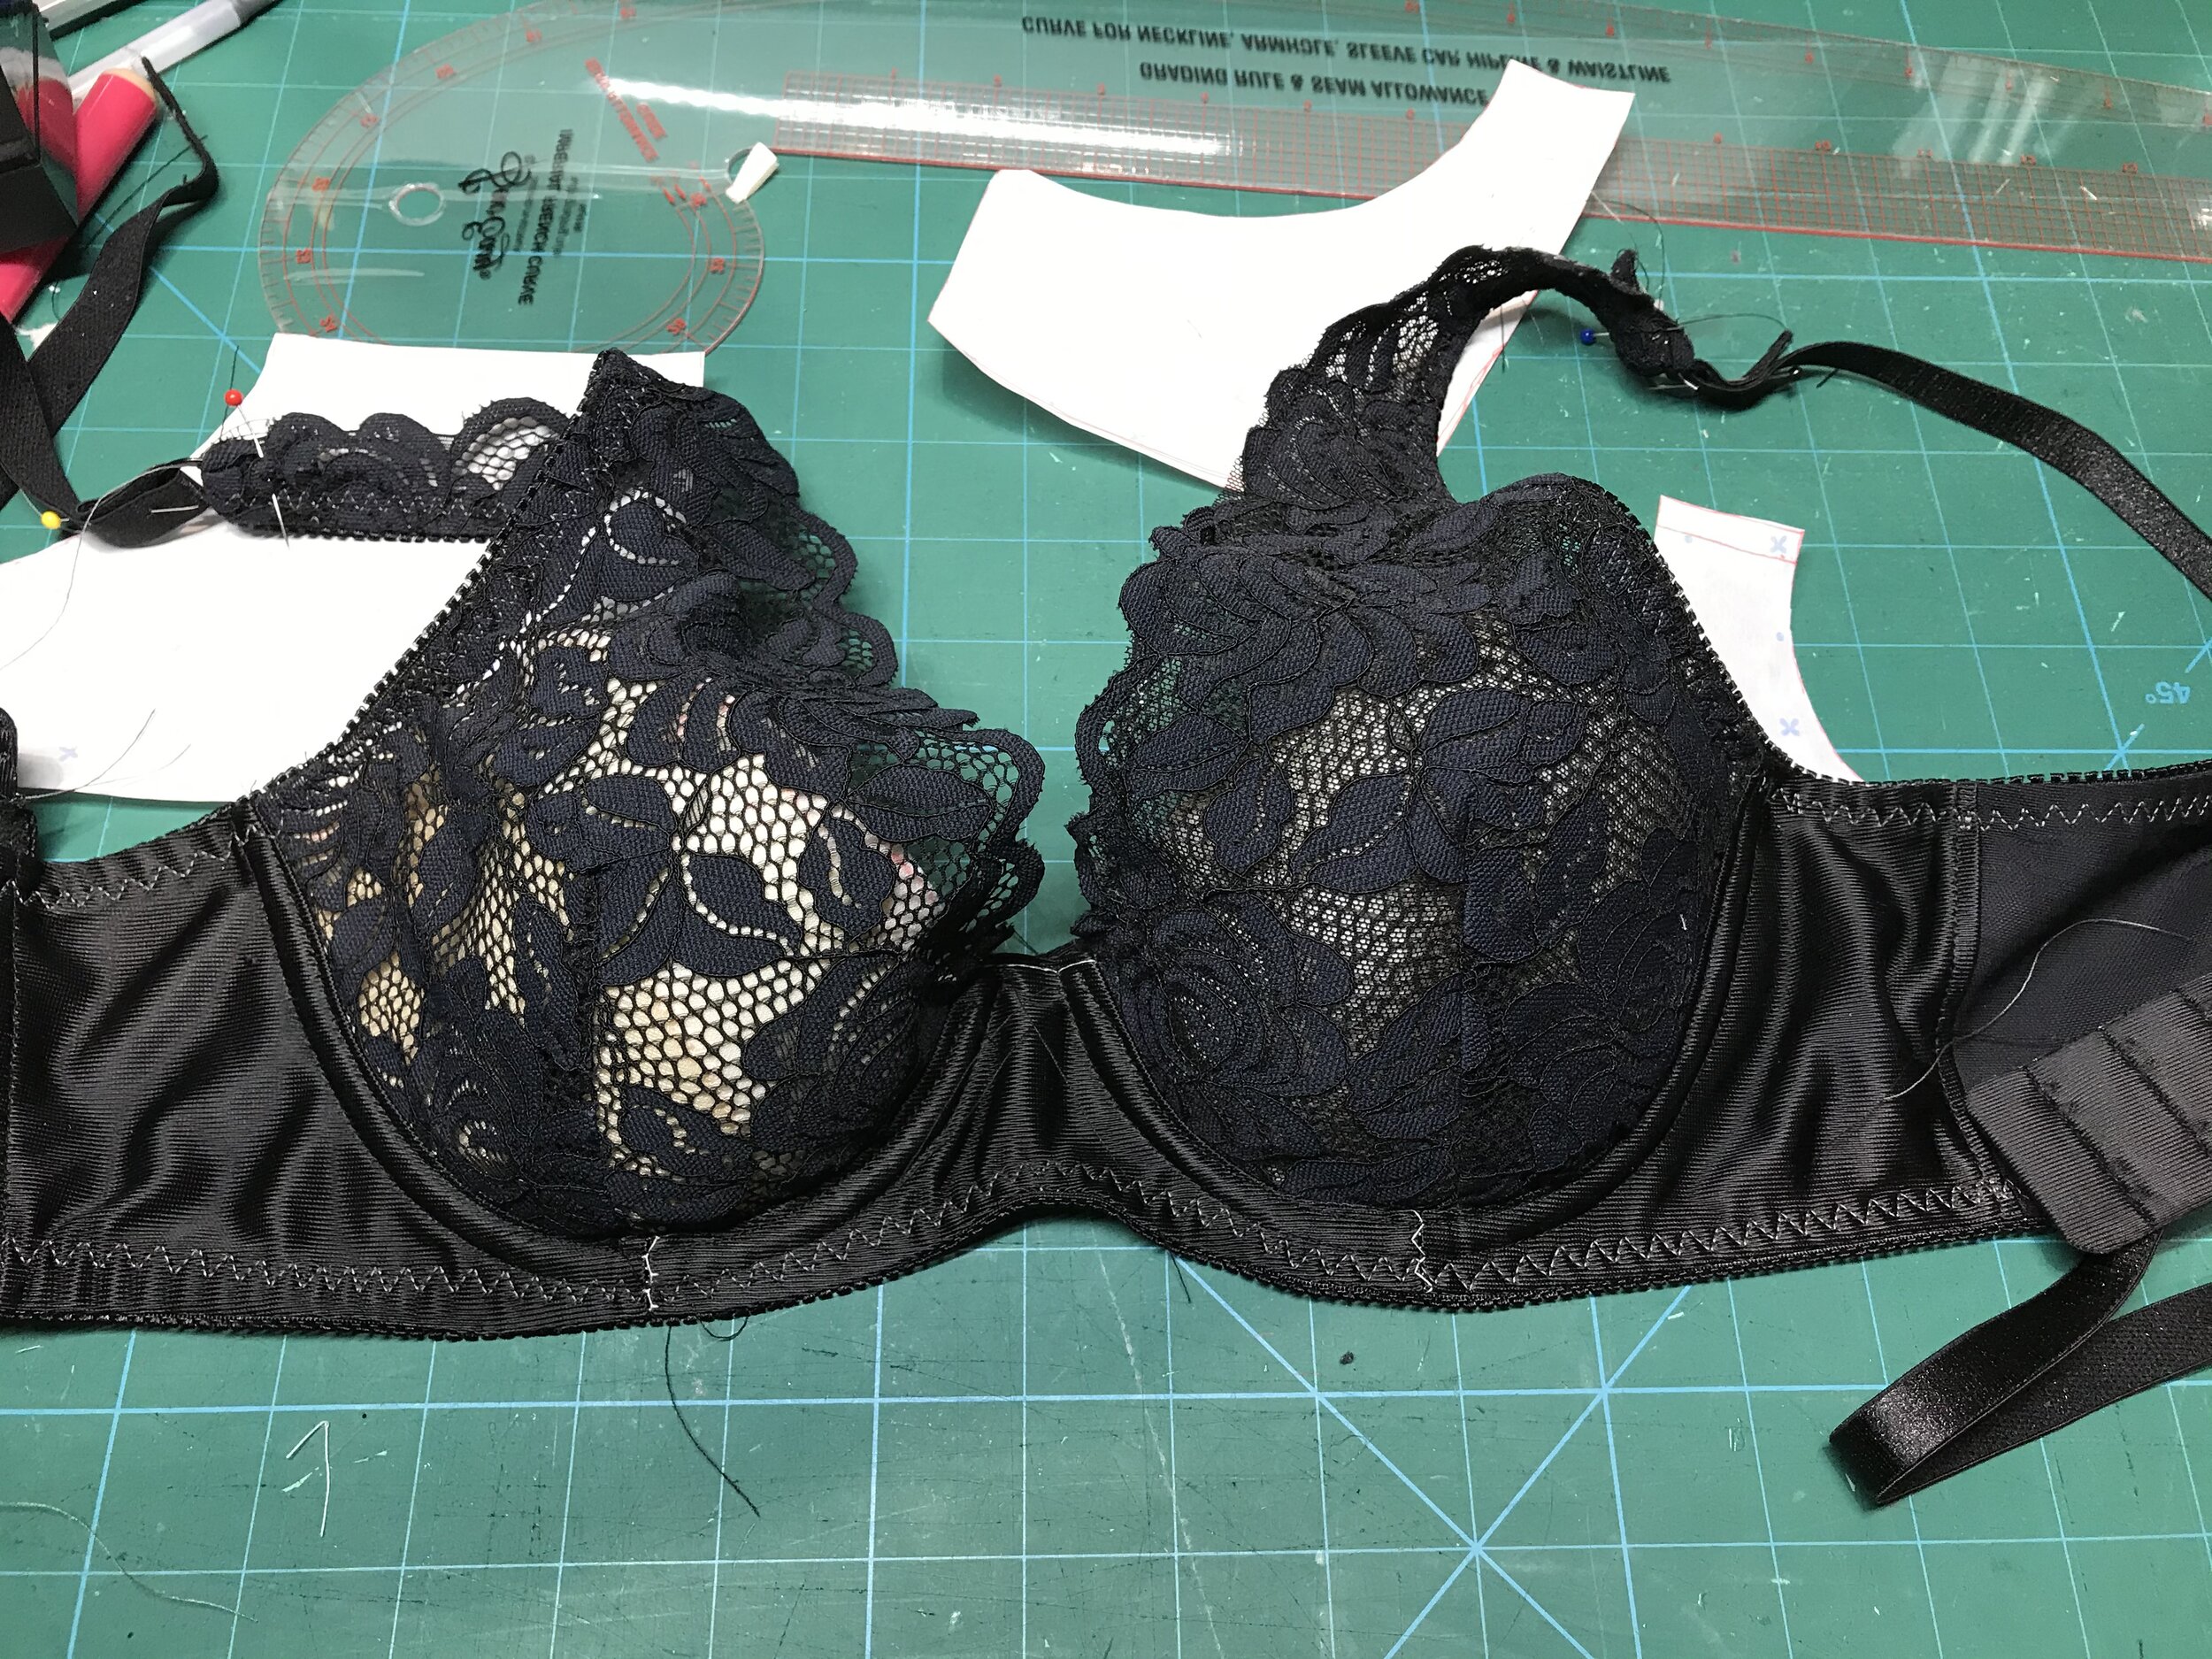
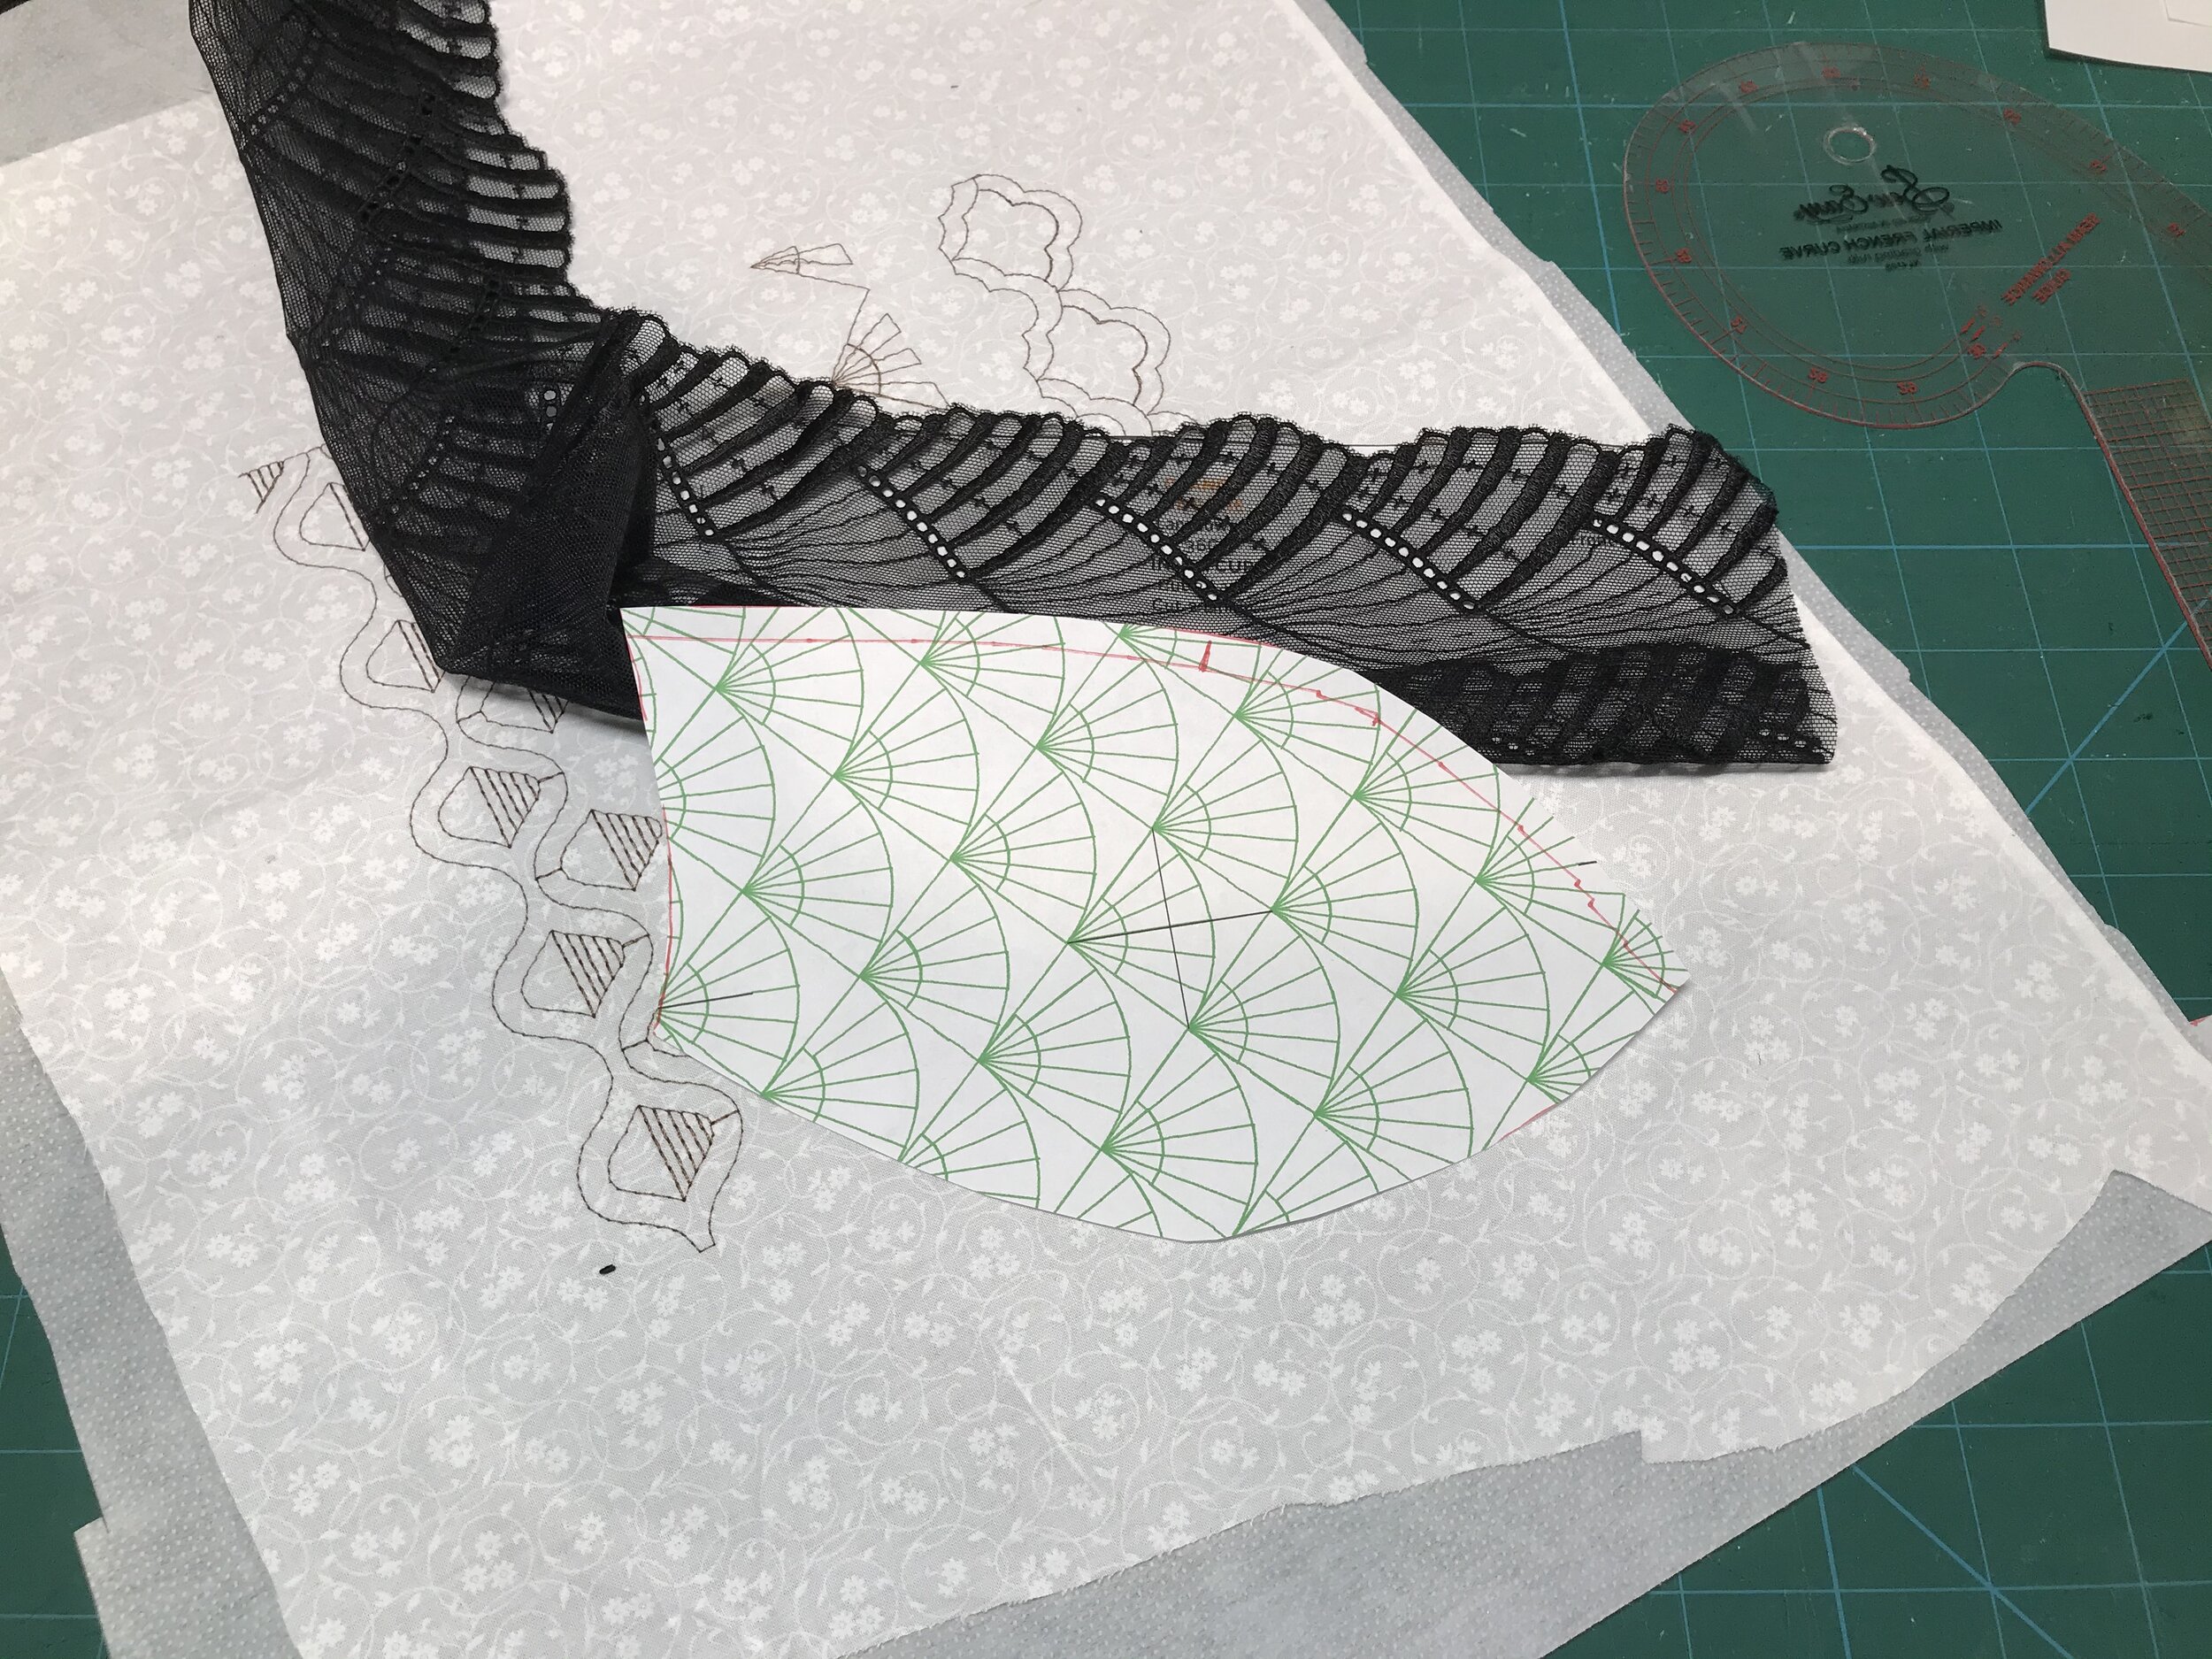
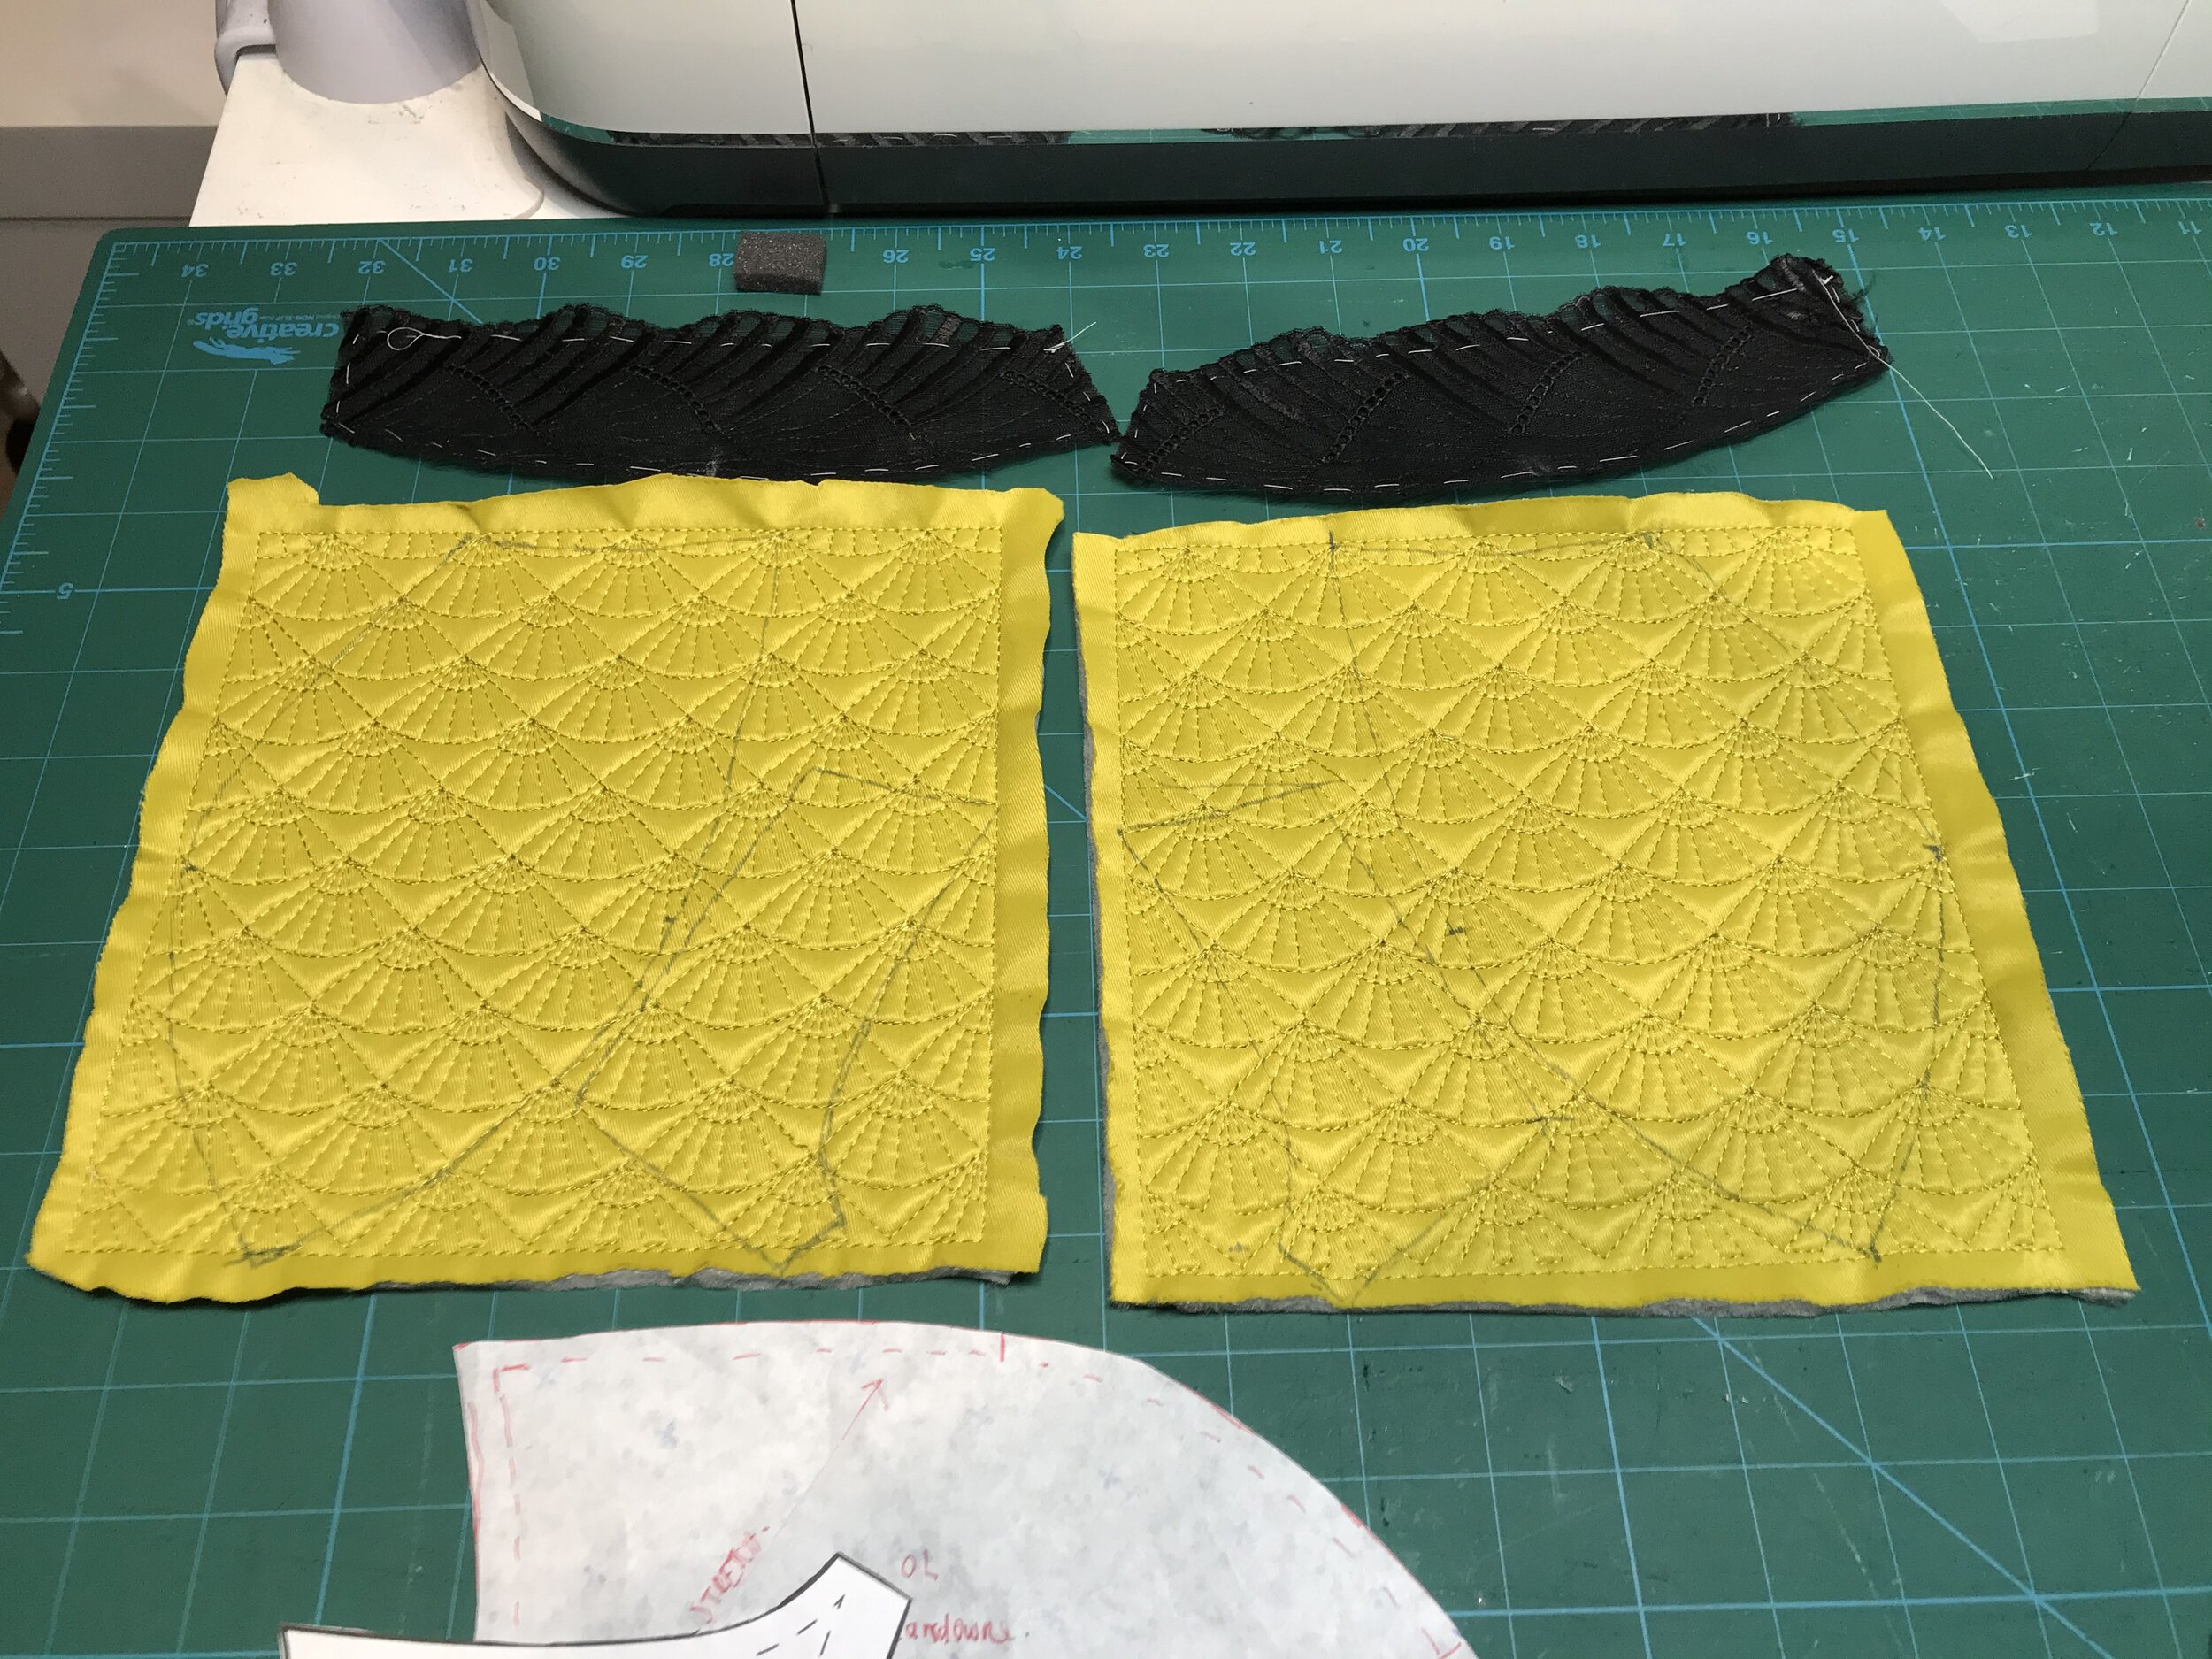
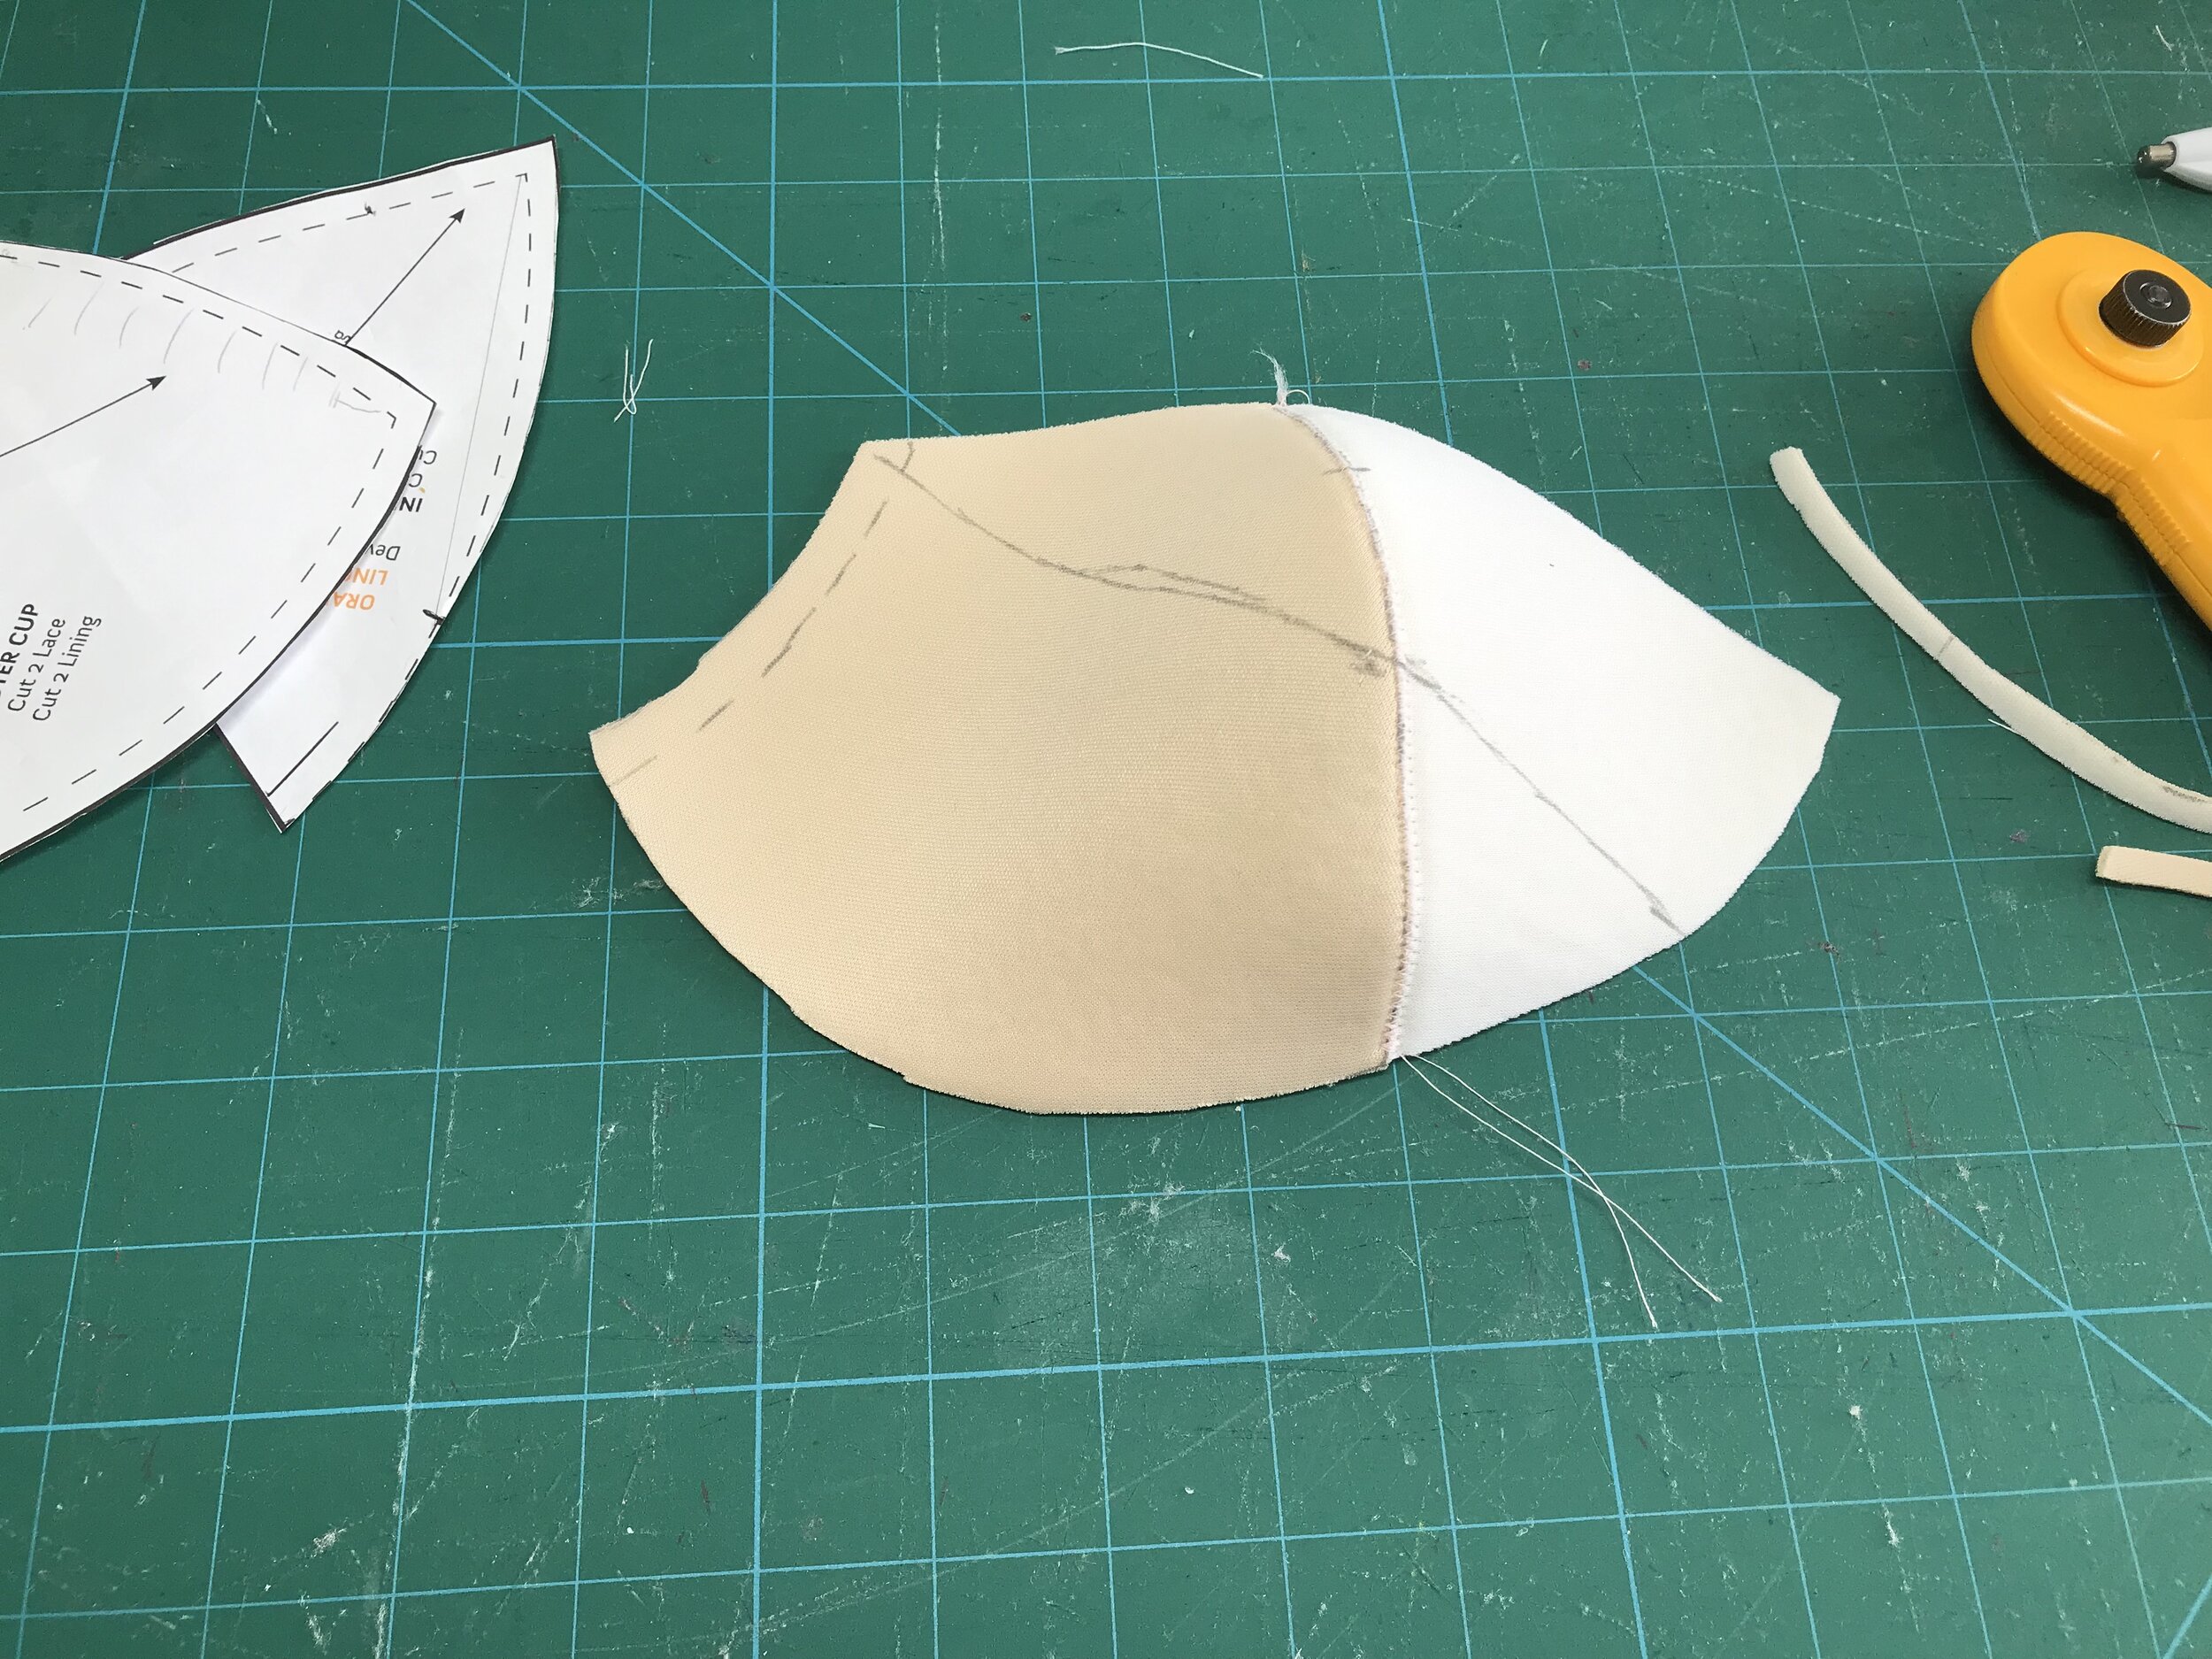
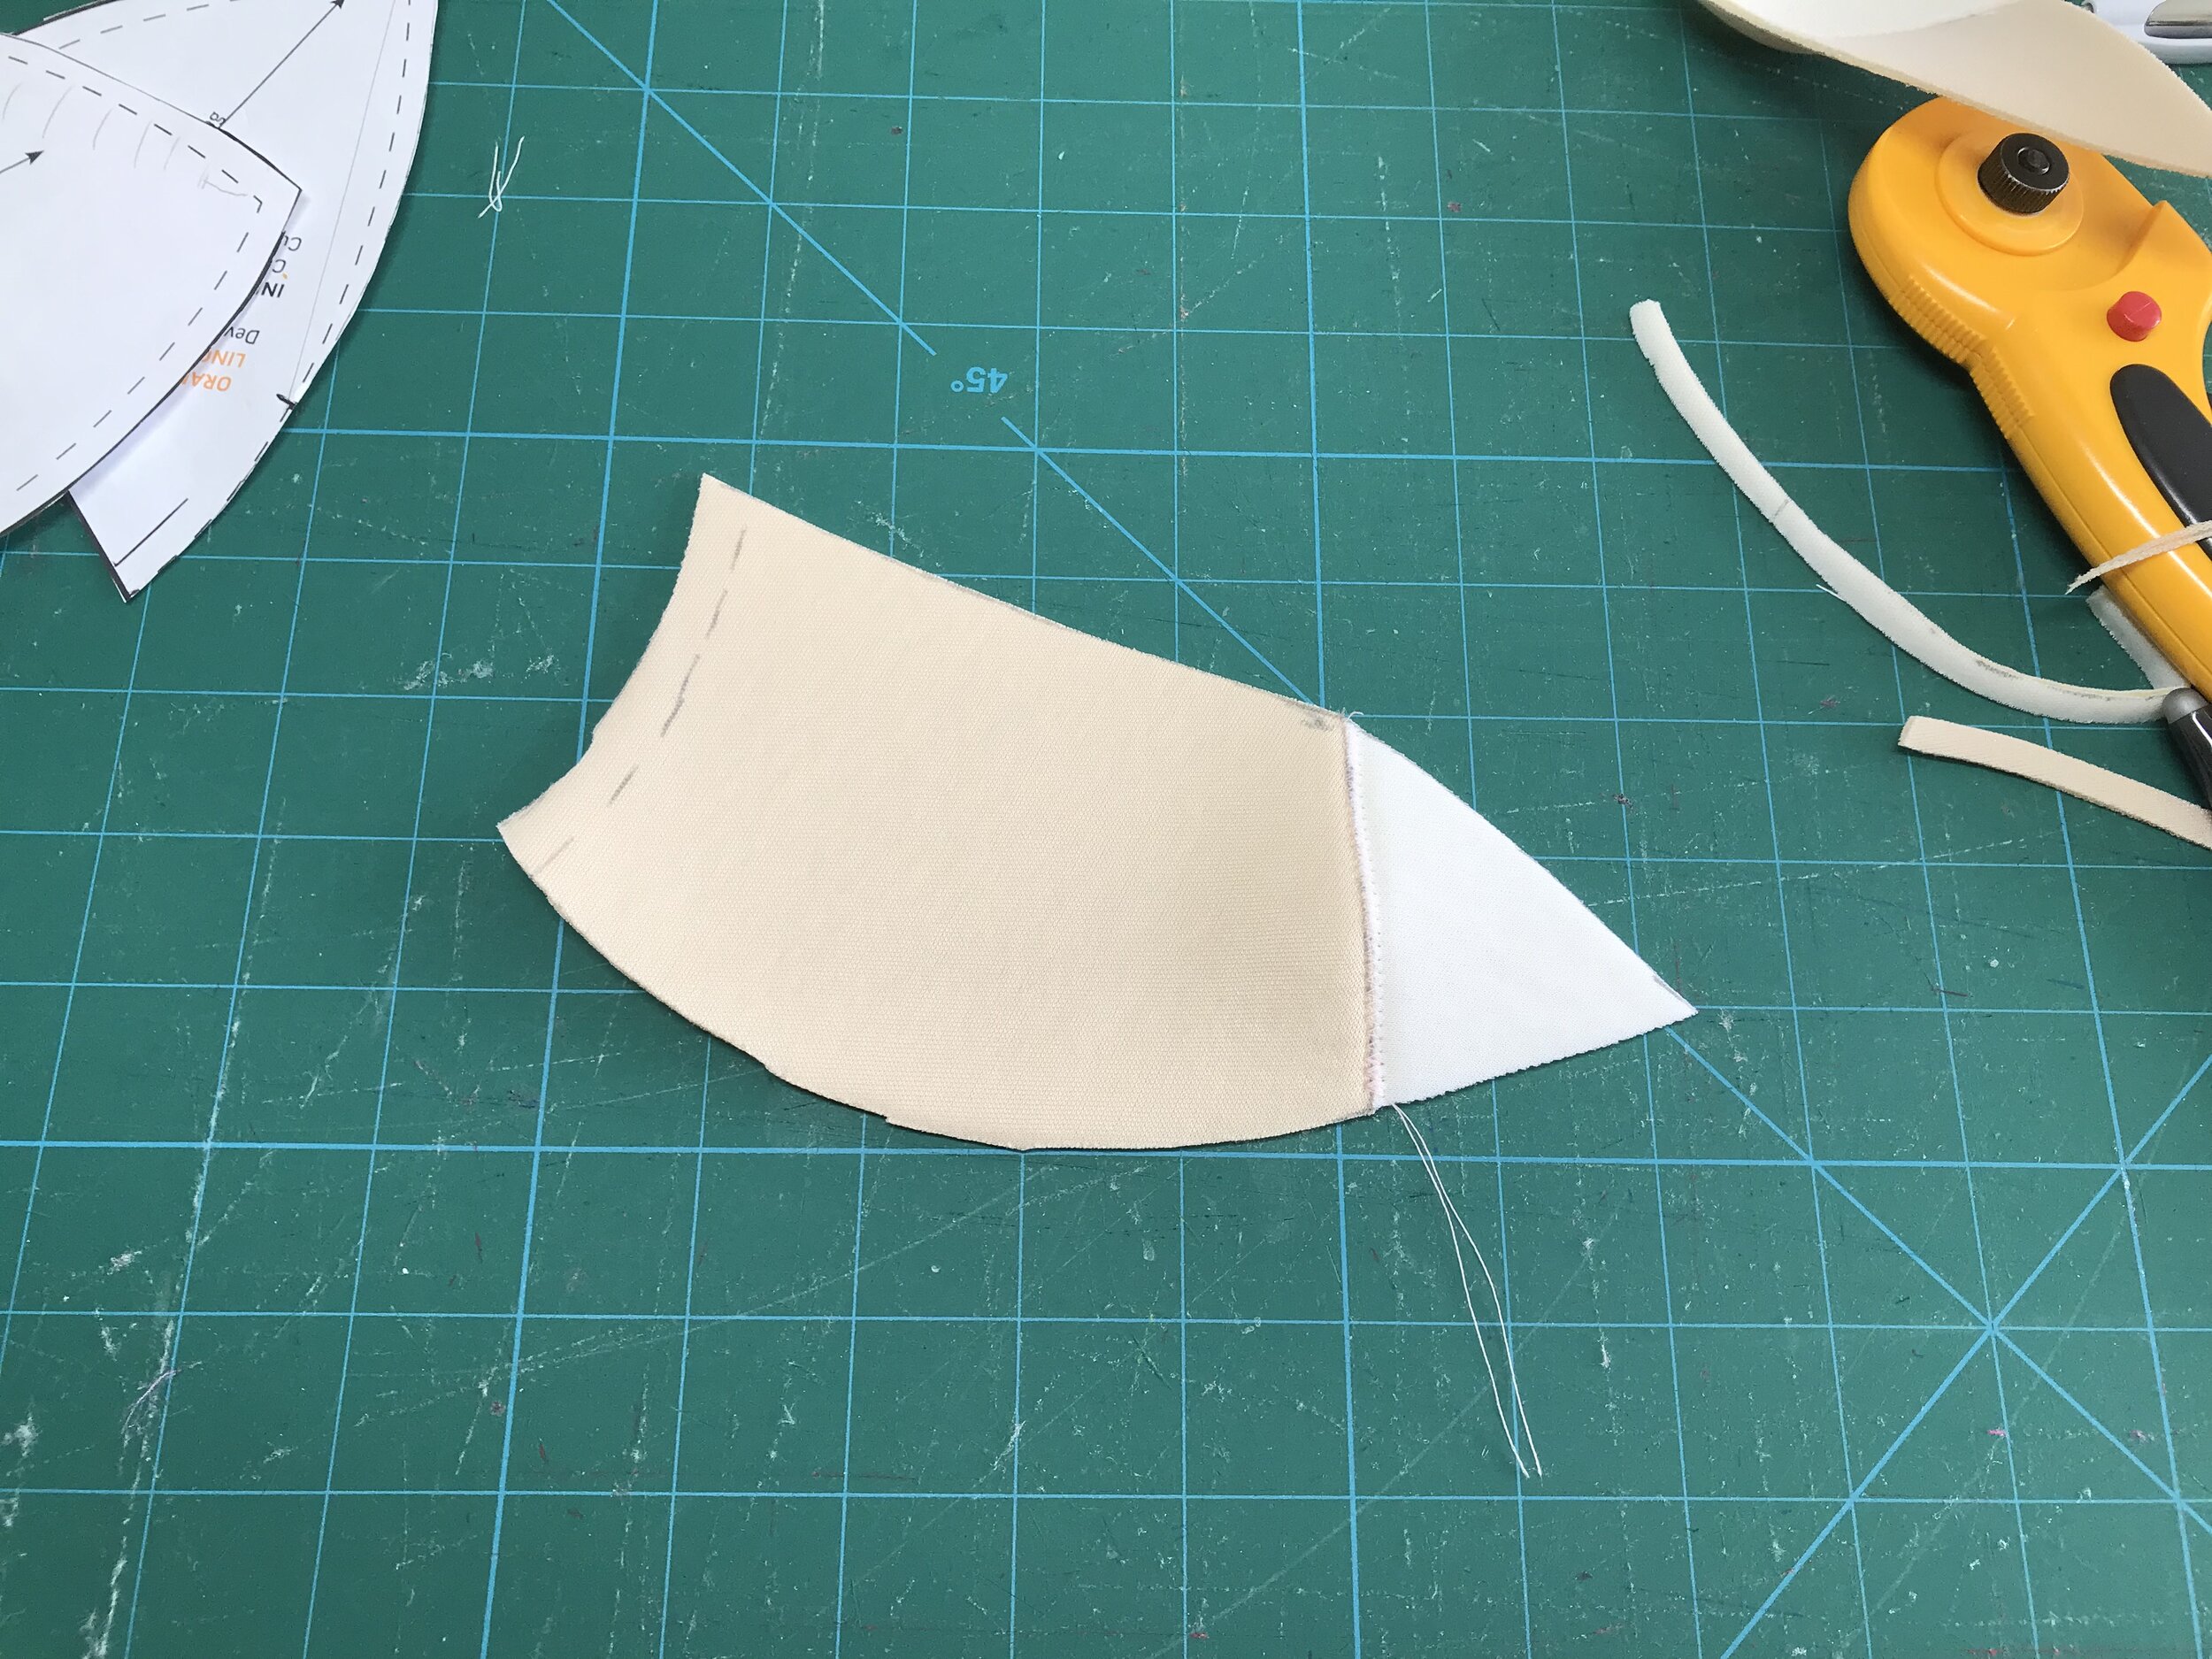
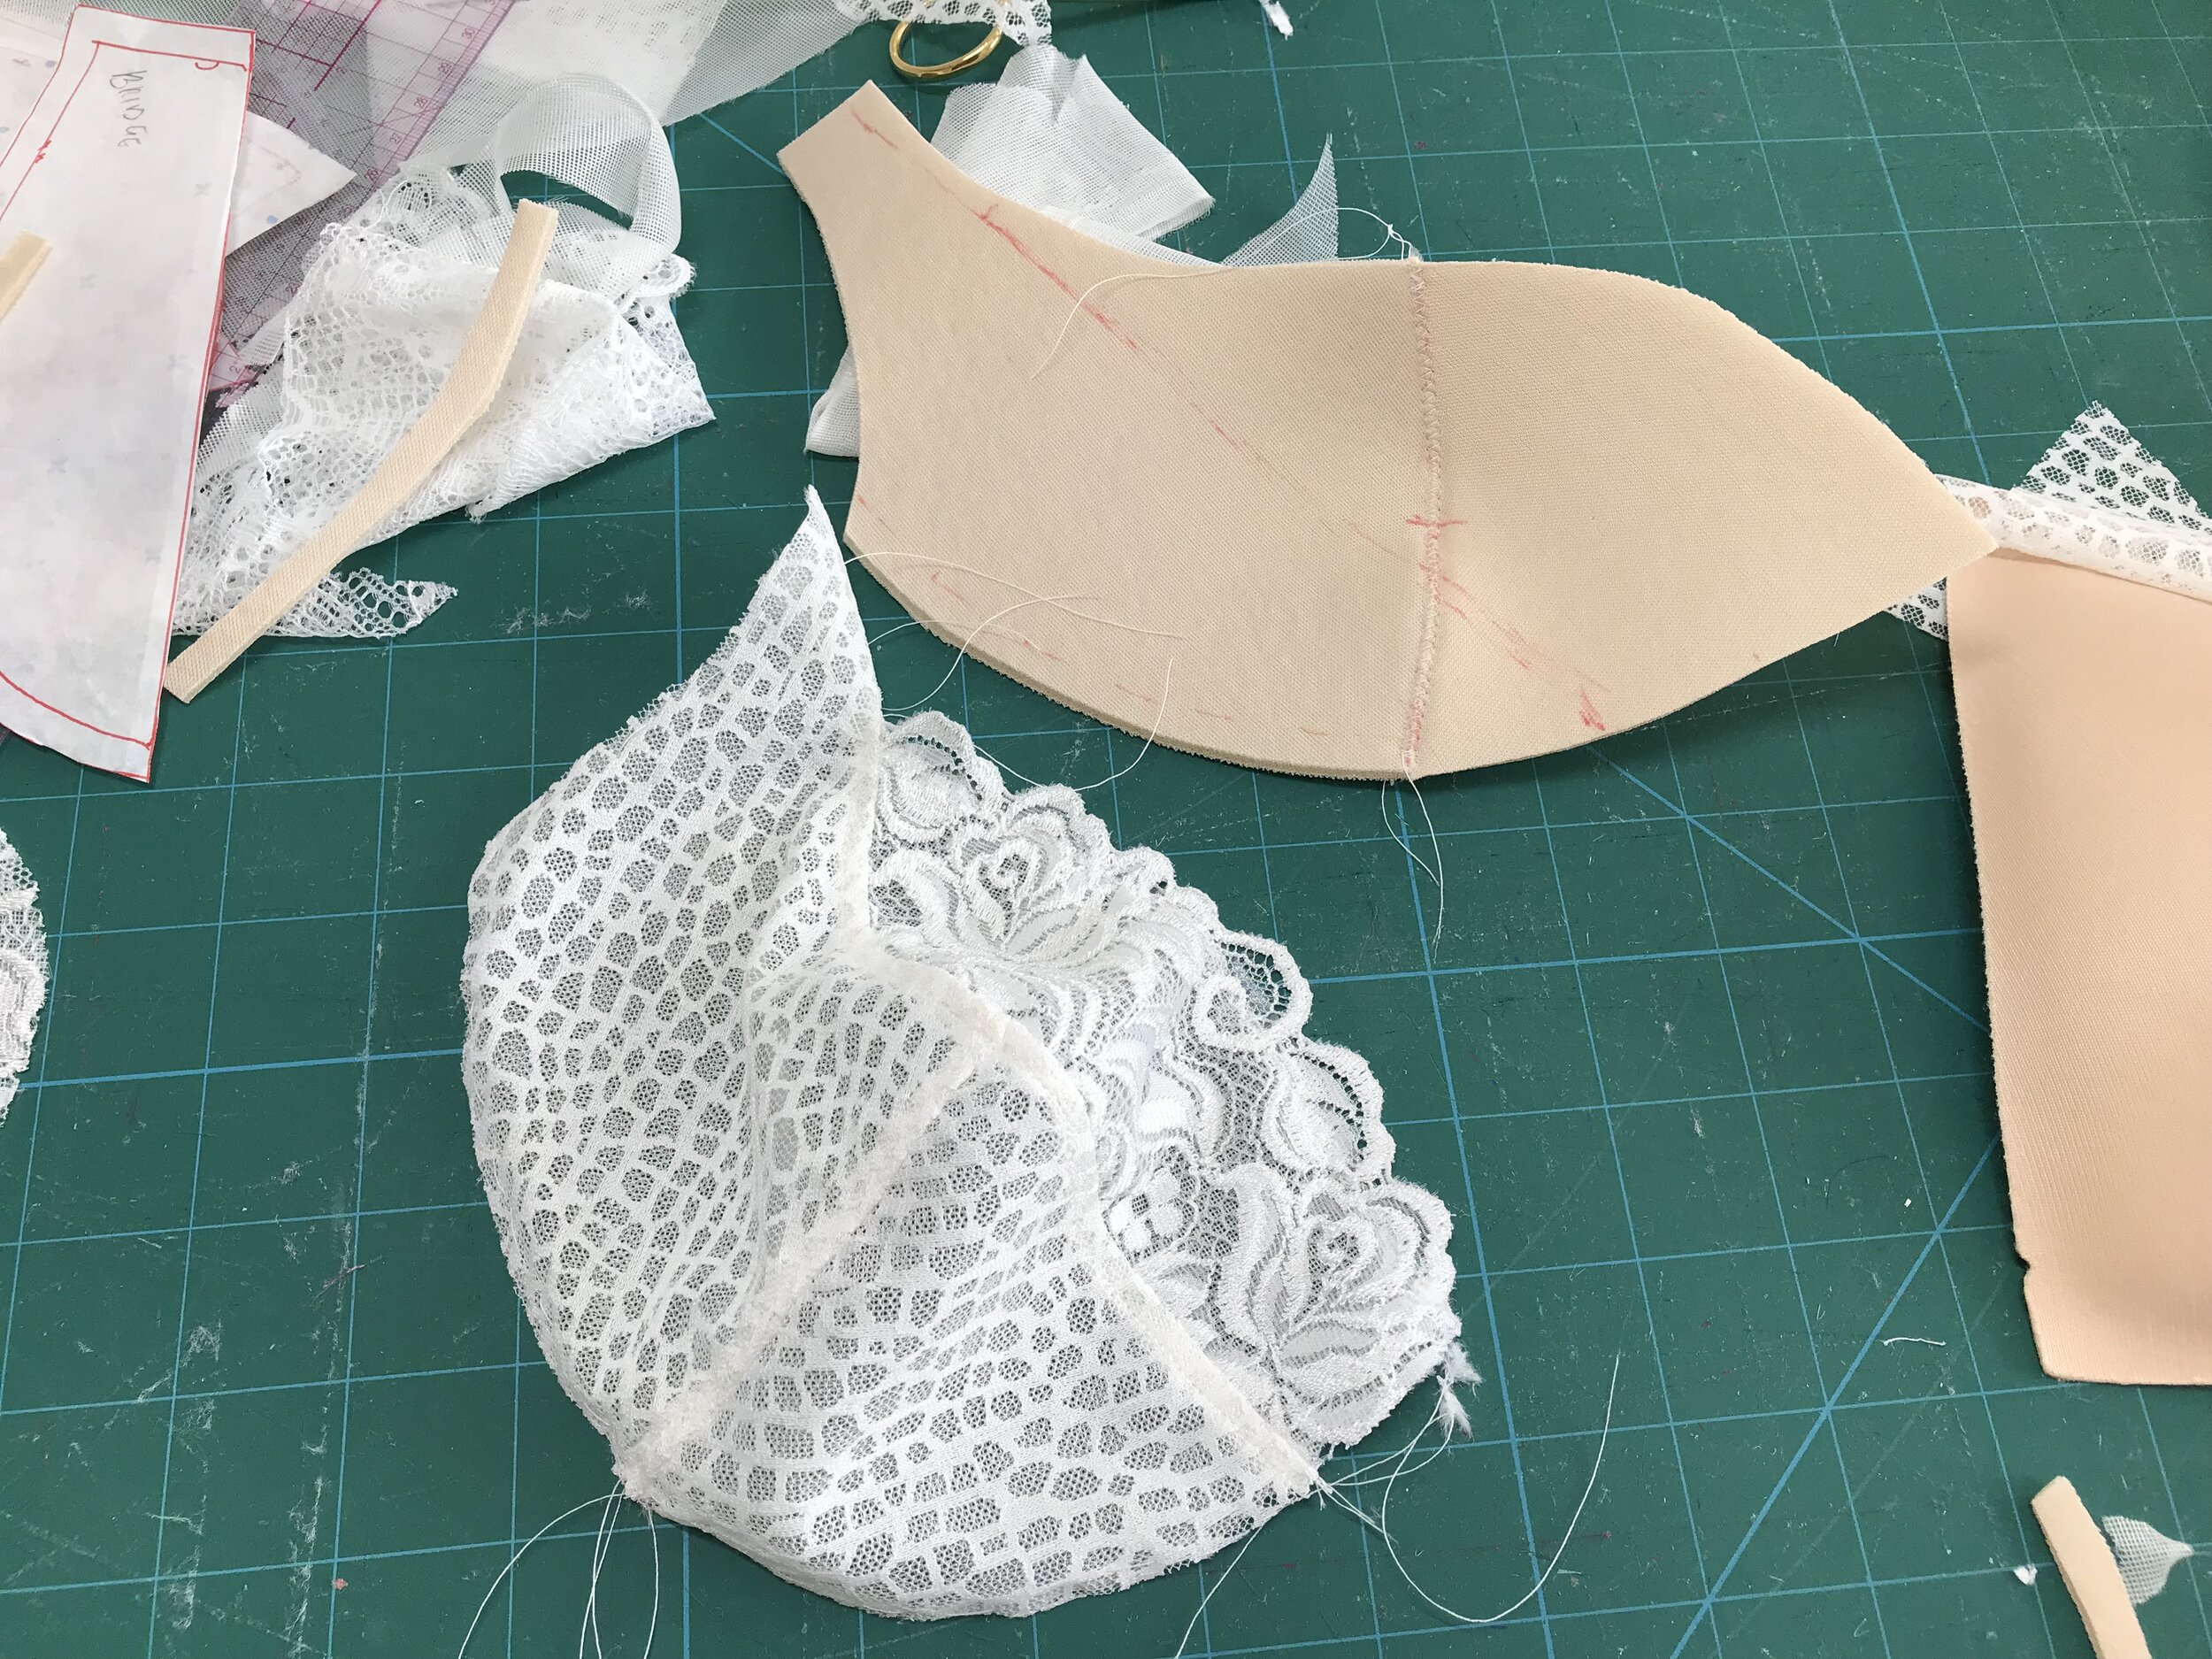
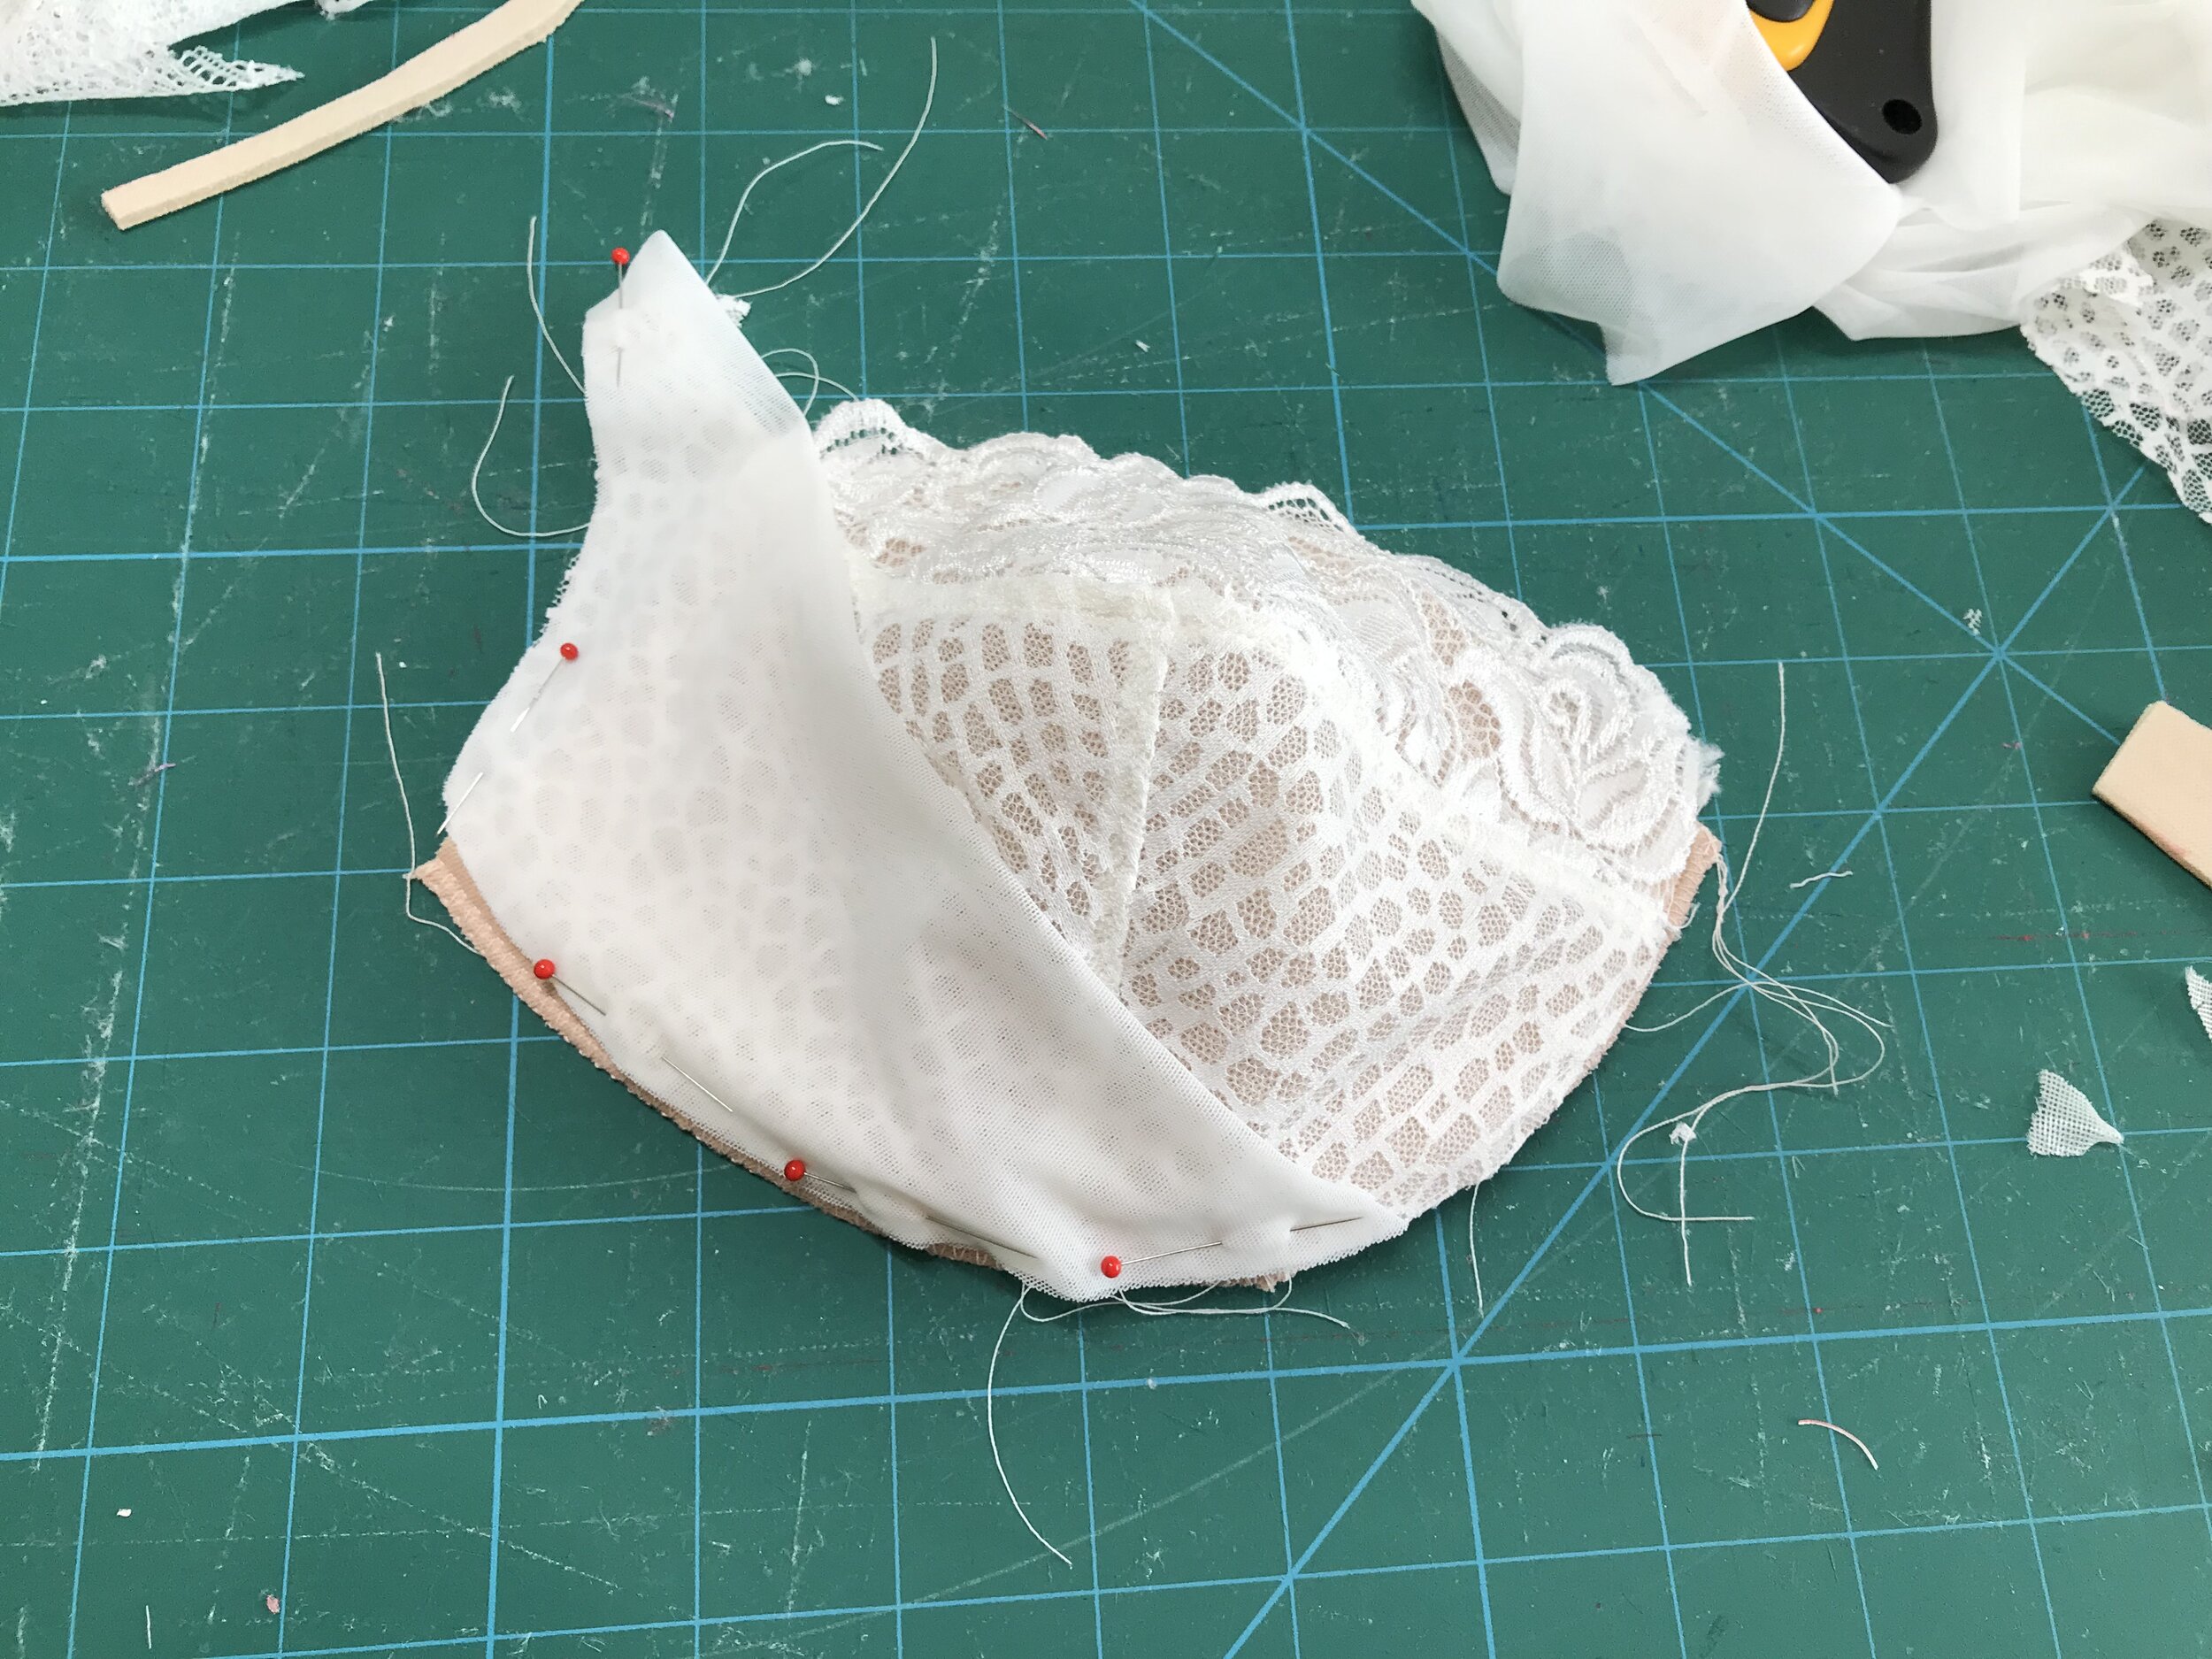
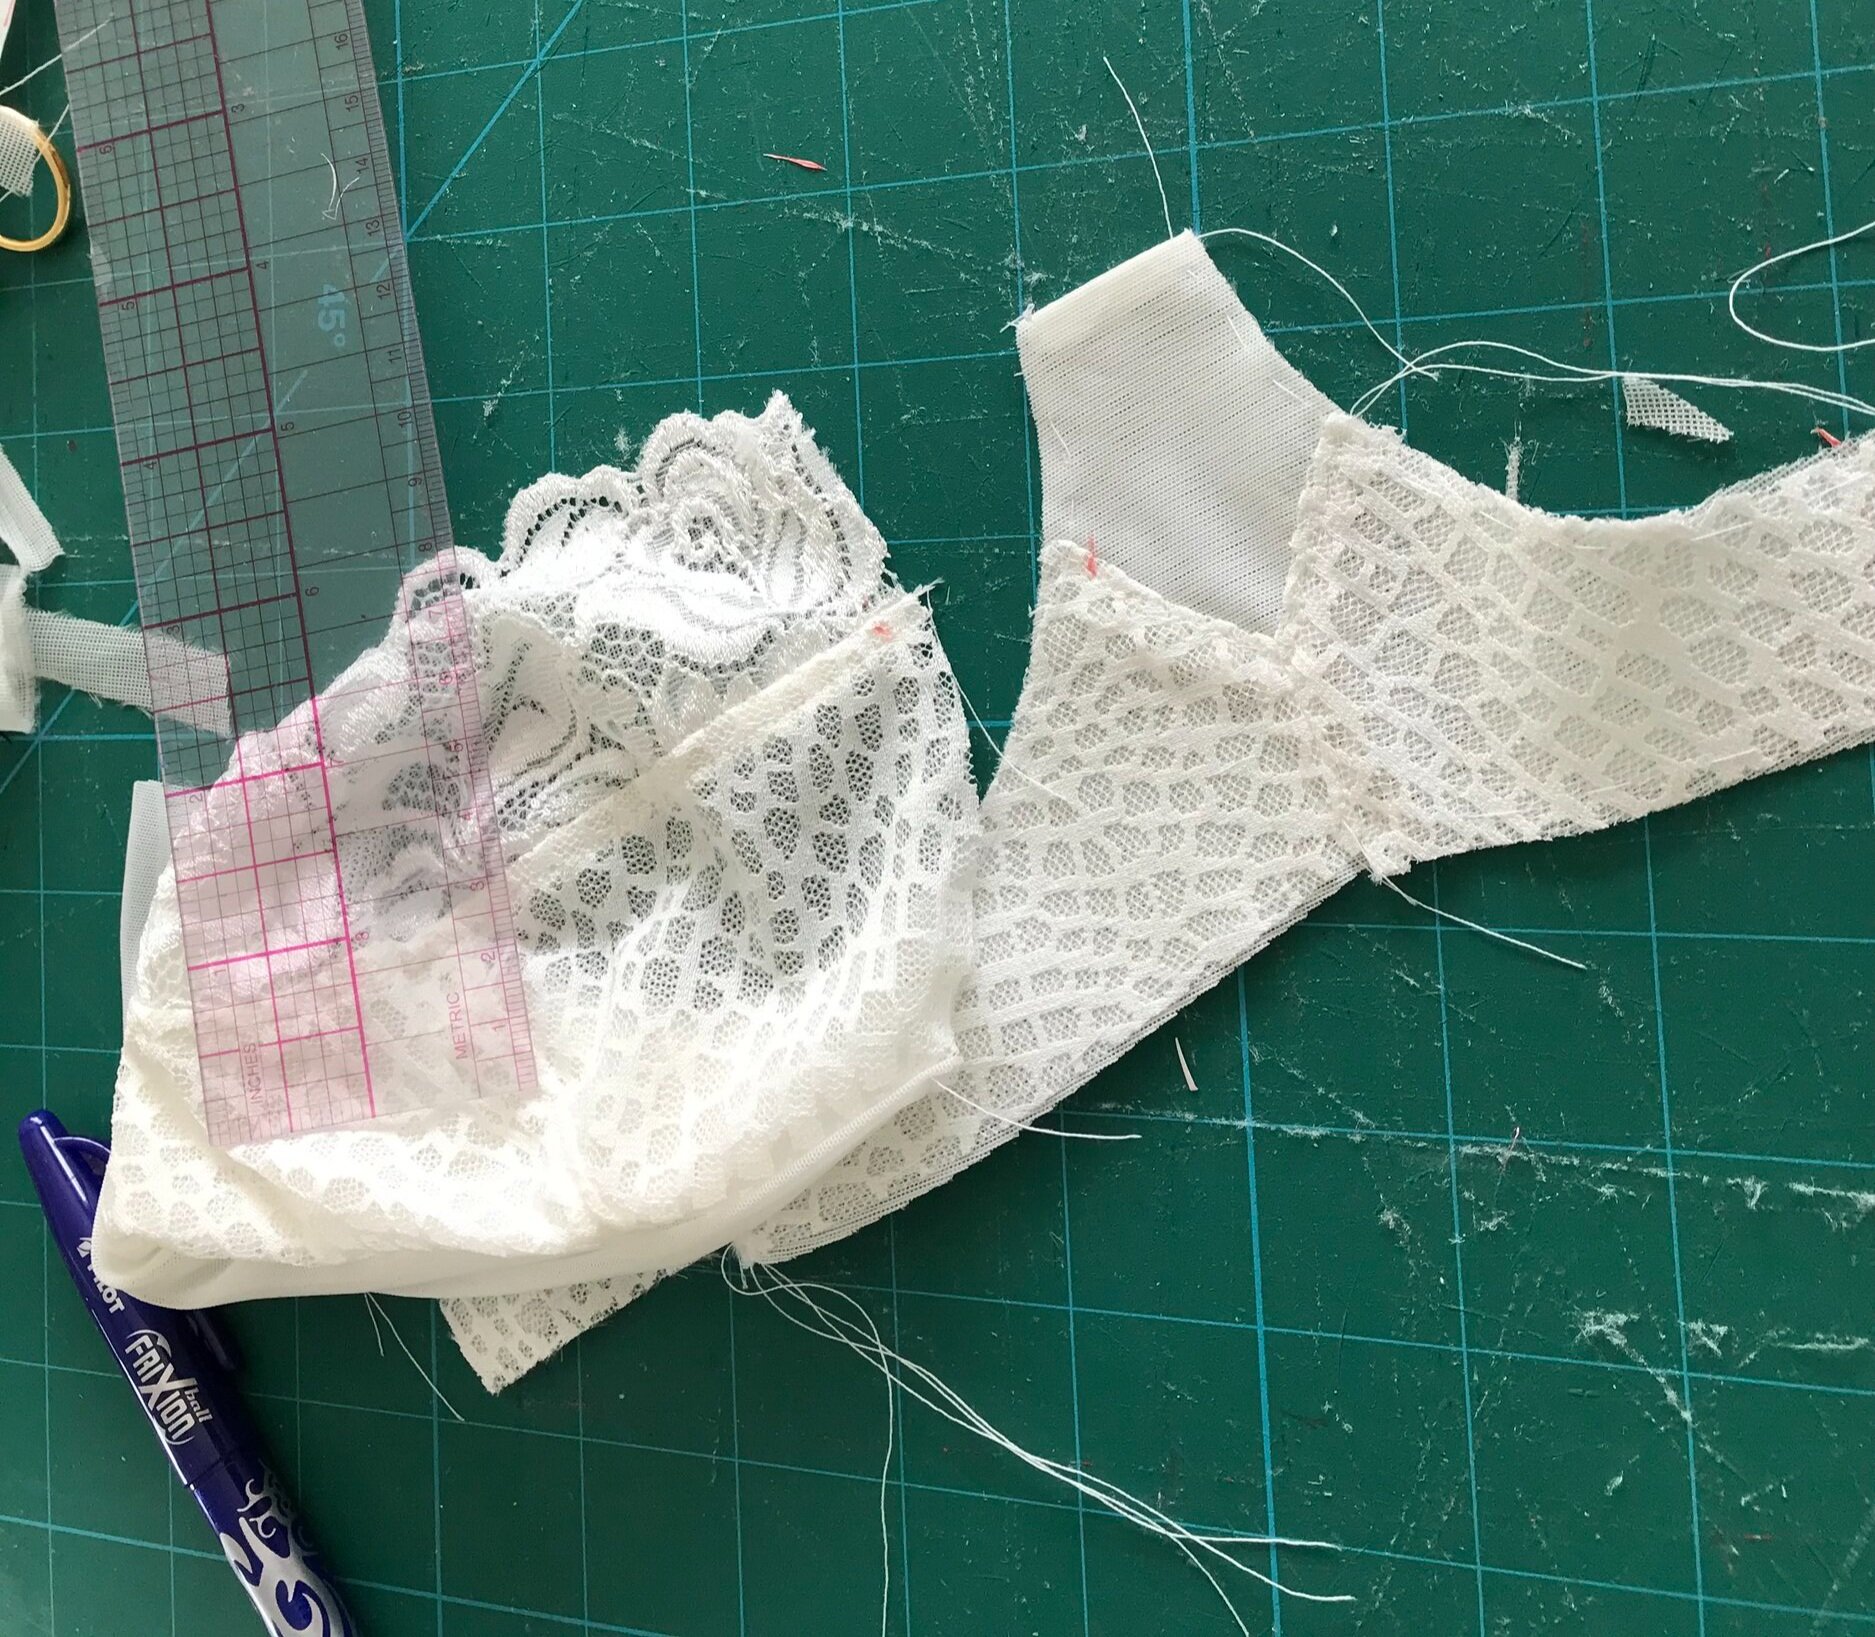
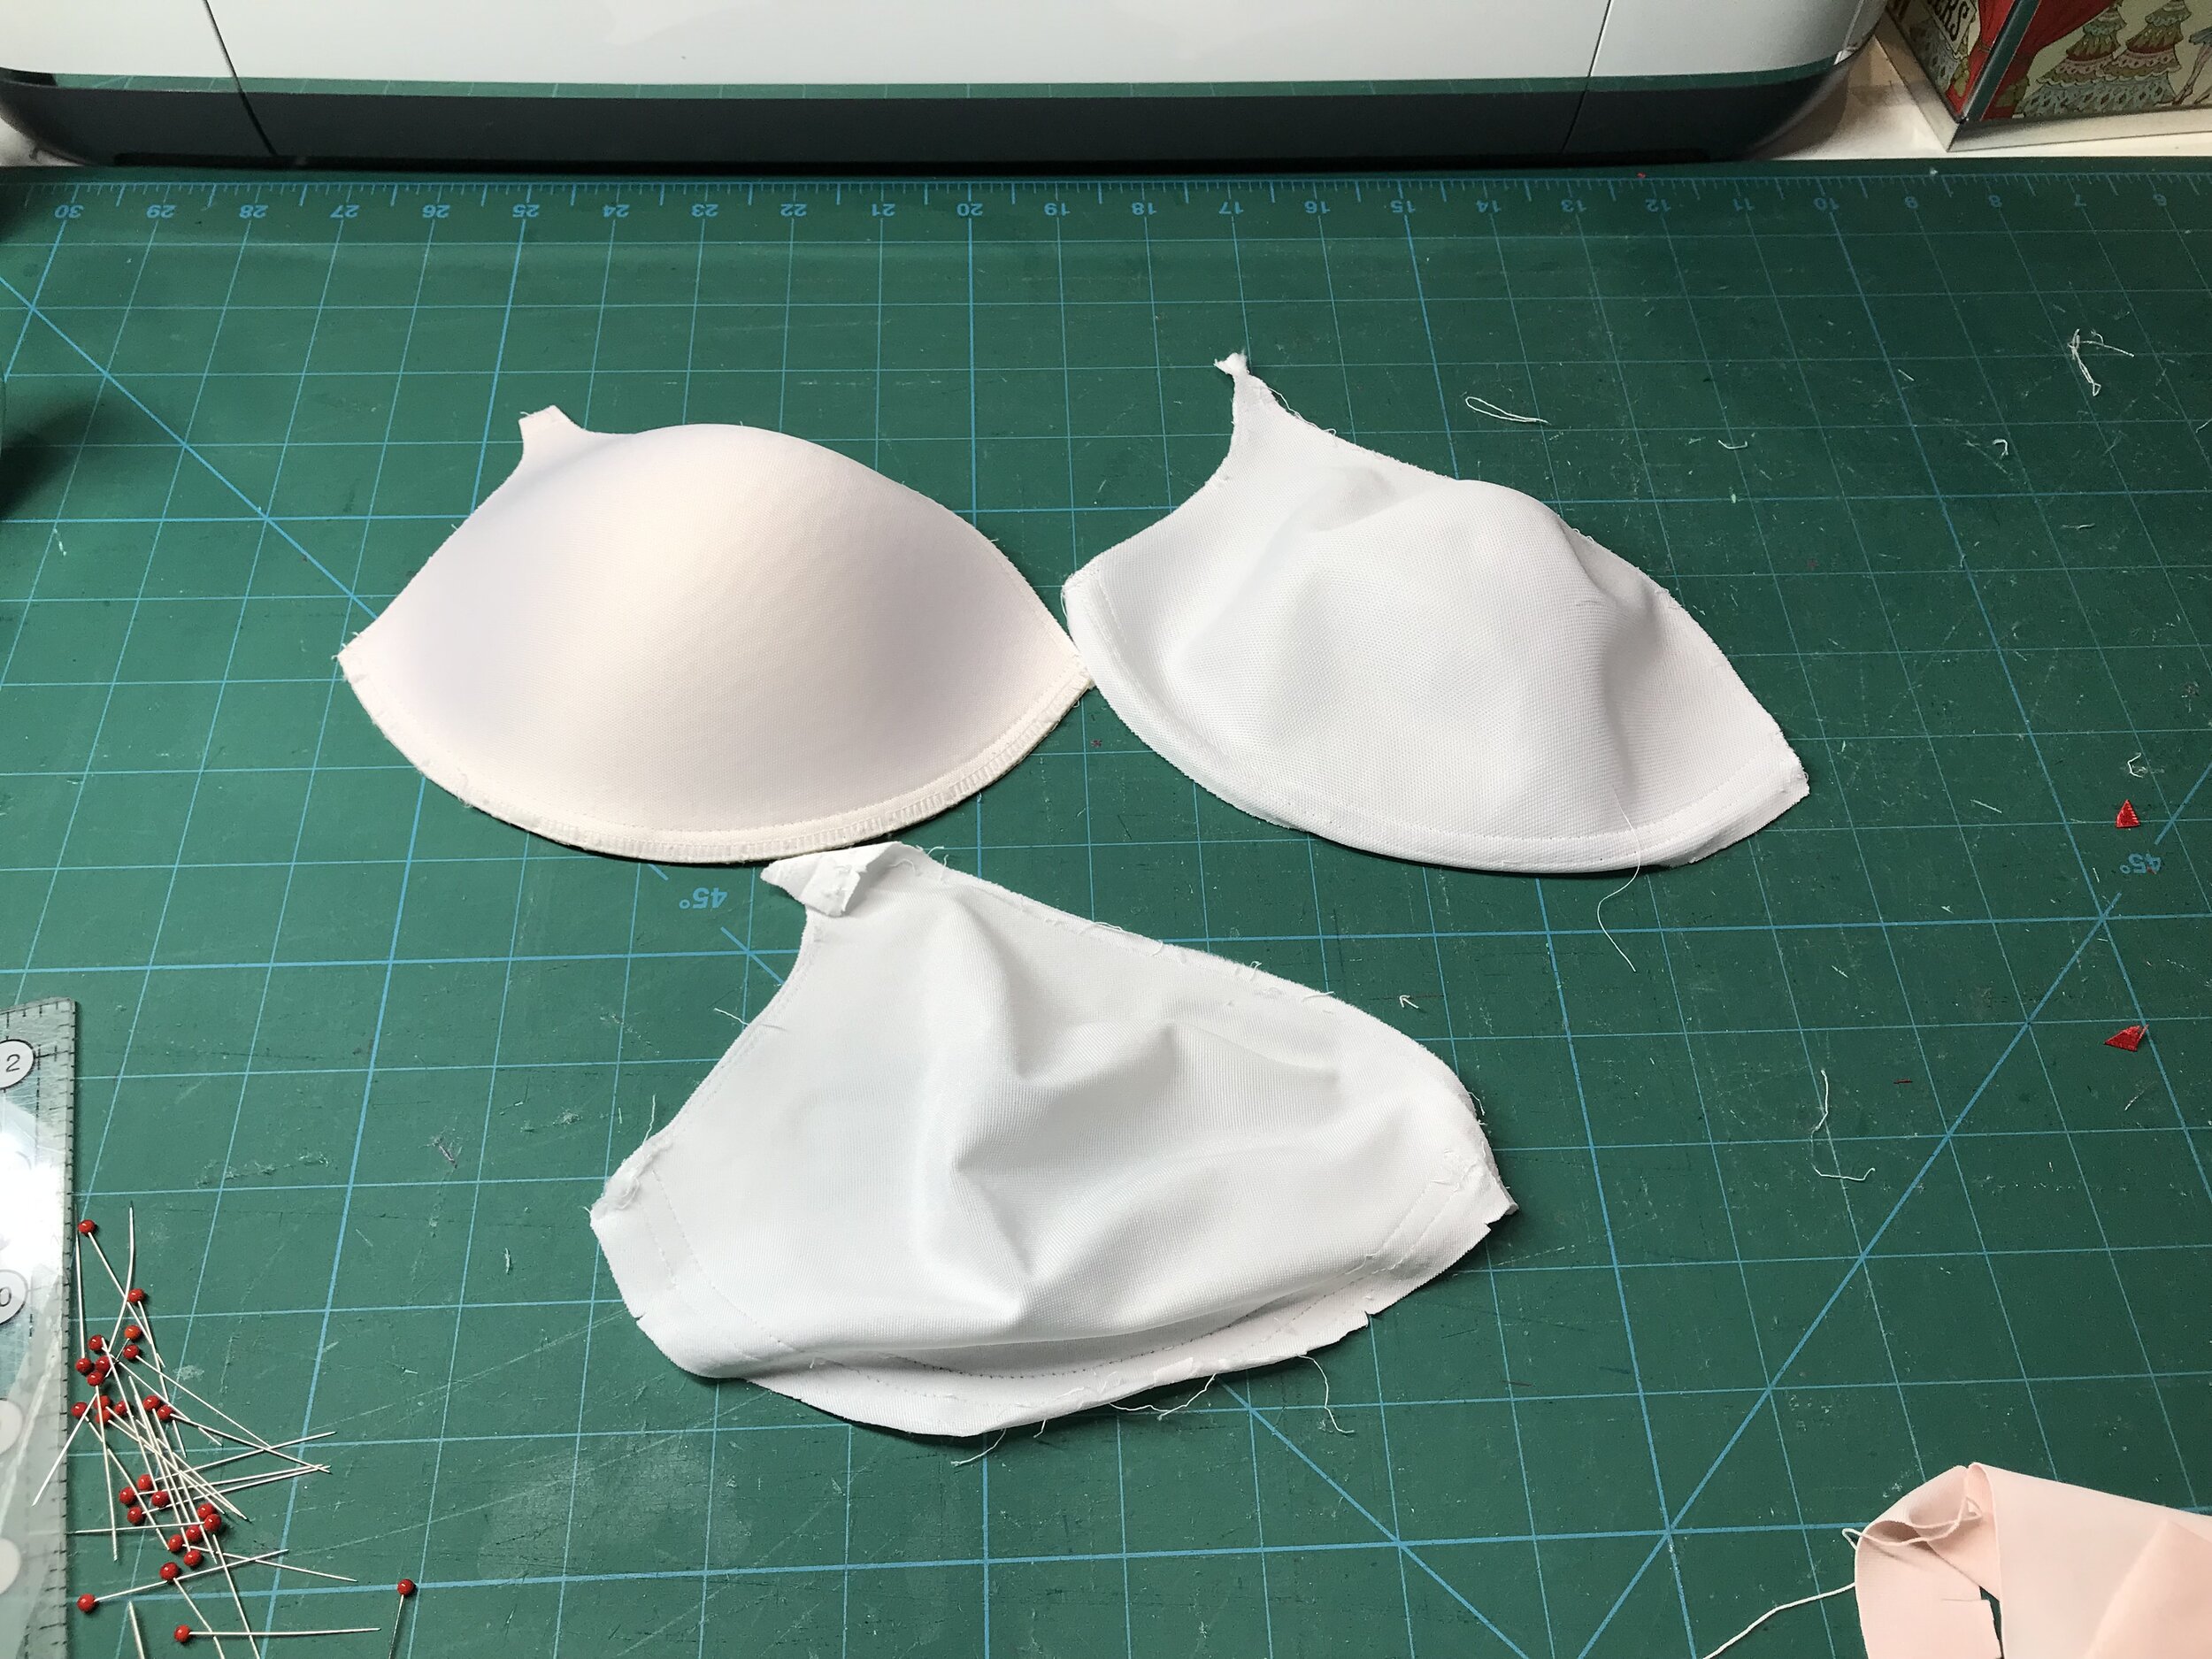
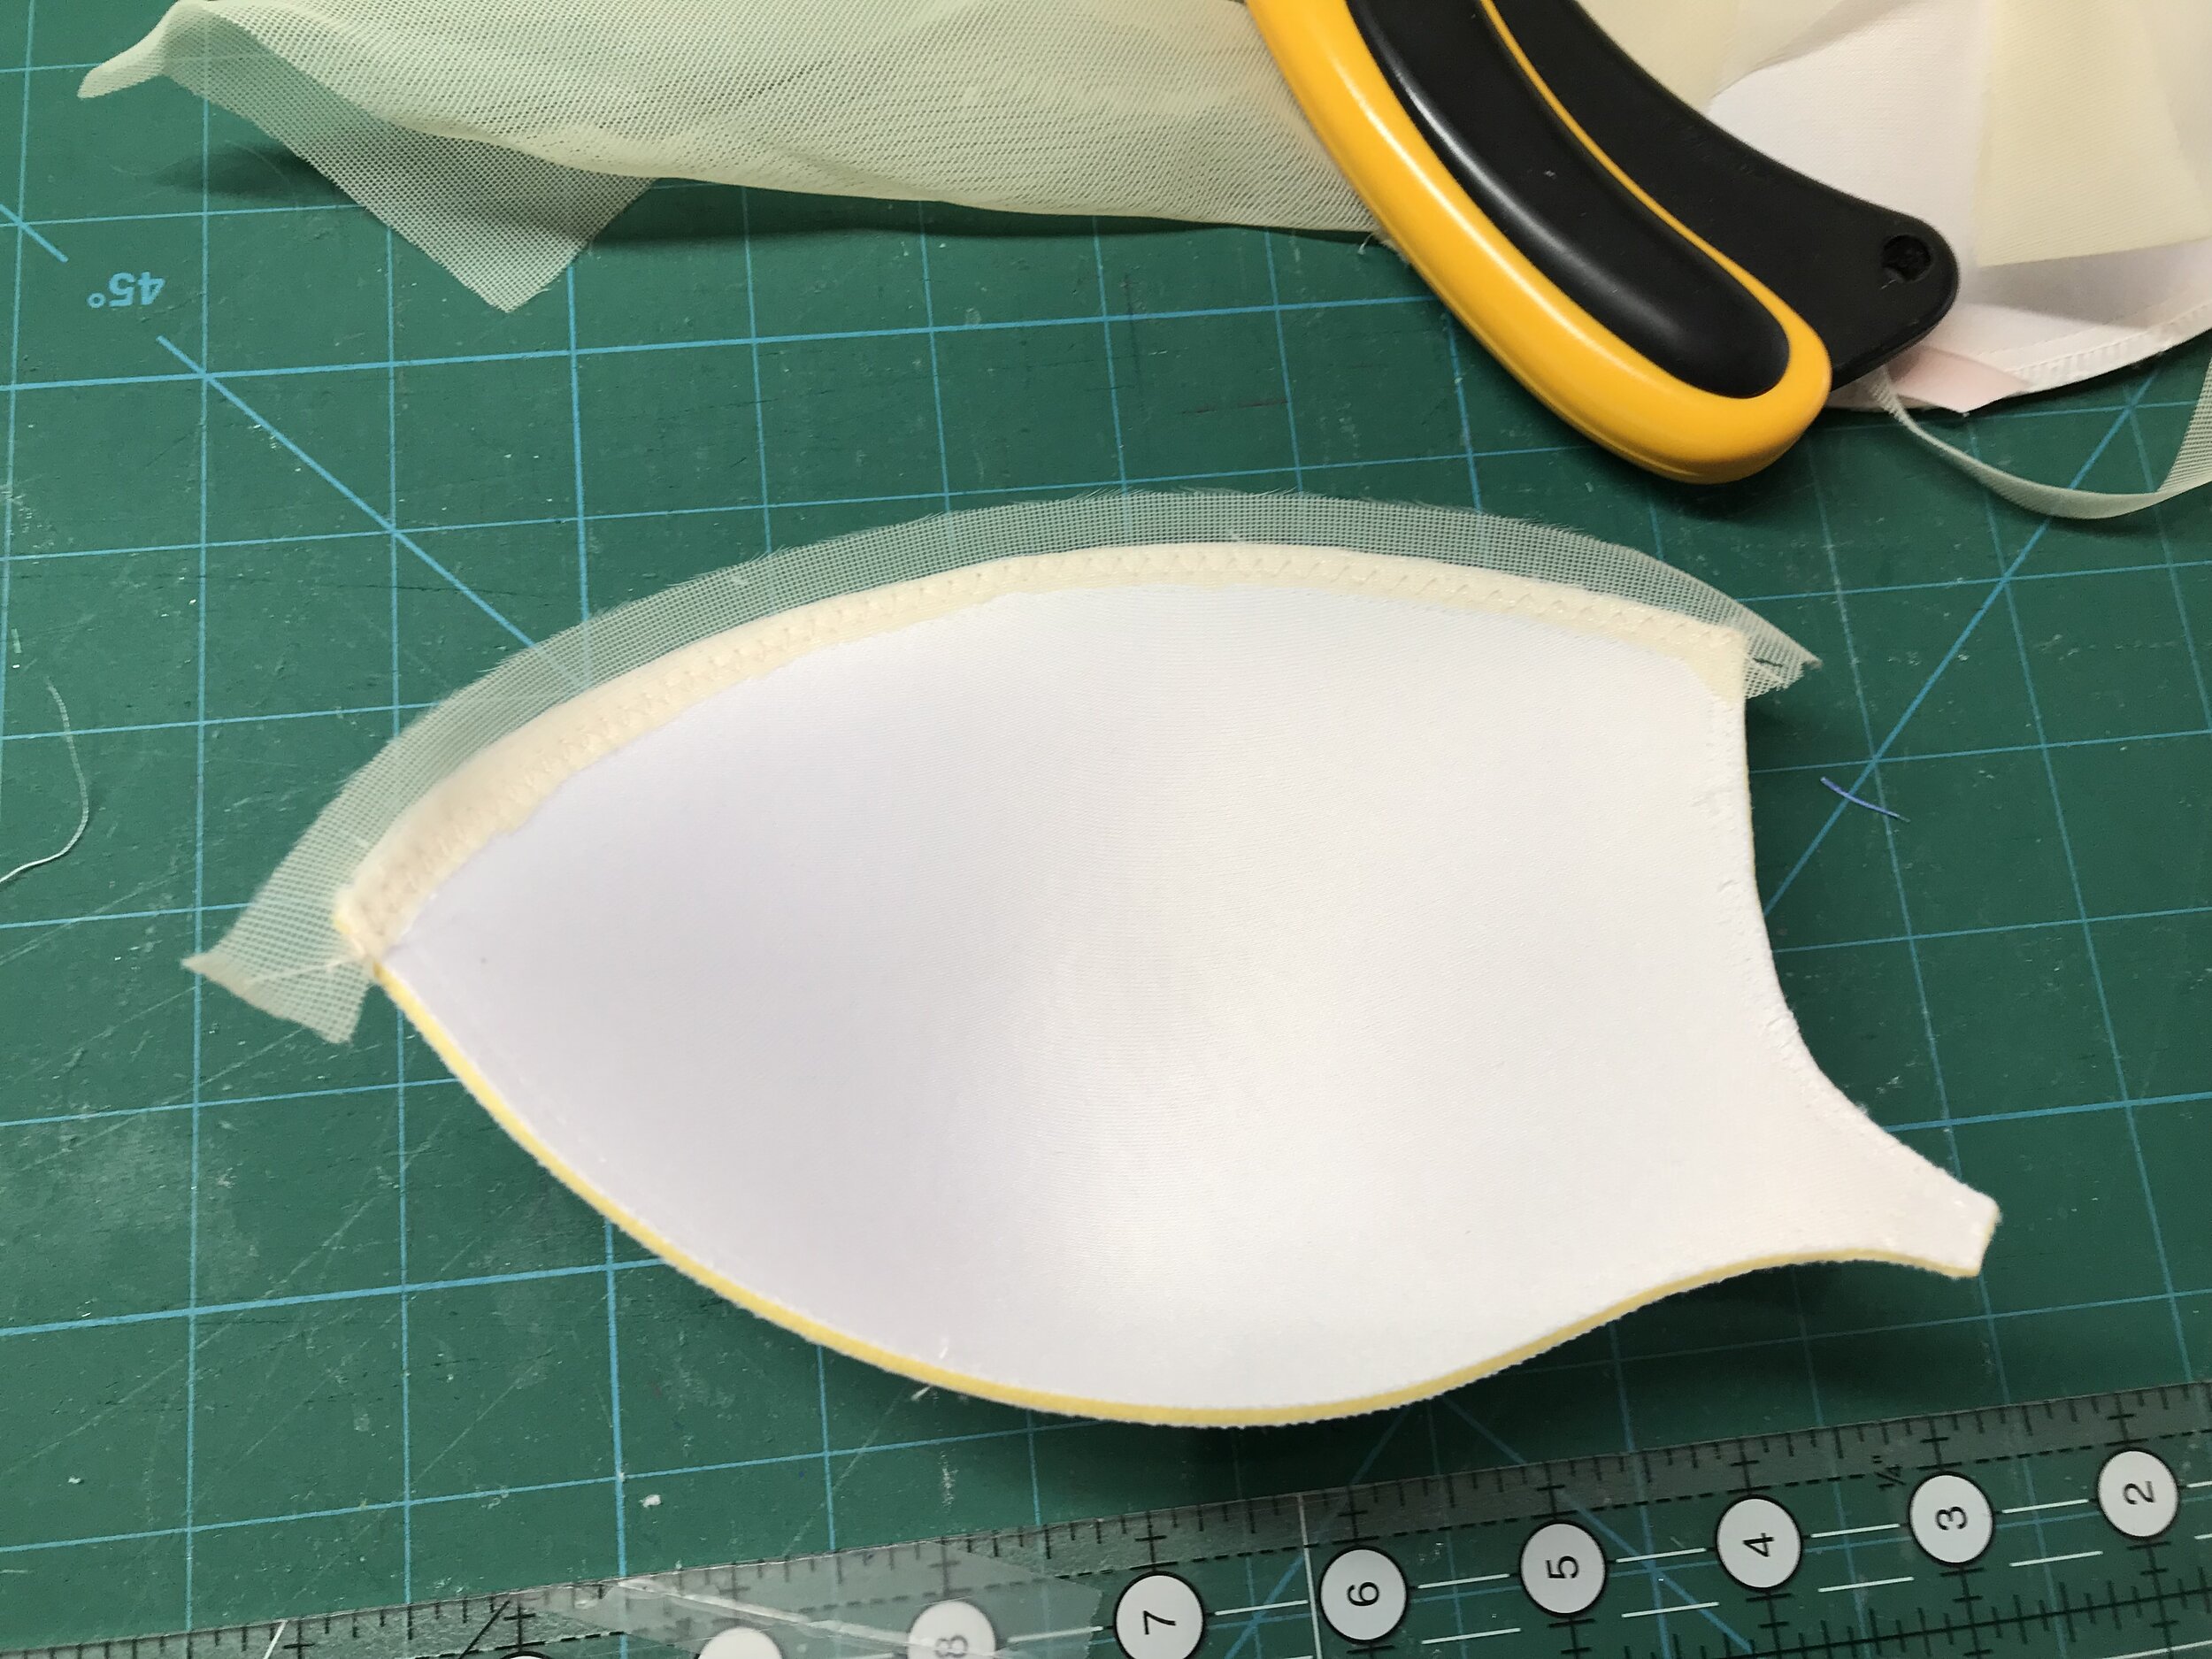
First, I made up the lace cup as per the pattern instructions and then moved on to the shaped padding. Then I used my usual method of making up a full foam cup, holding it against me and drawing on the shape I am looking for. Next I cut along the drawn line and this became my pattern piece. I didn’t have a good enough colour match with the sheer lining I had so I used some bias binding I had in my stash to cover the top edge of the foam.

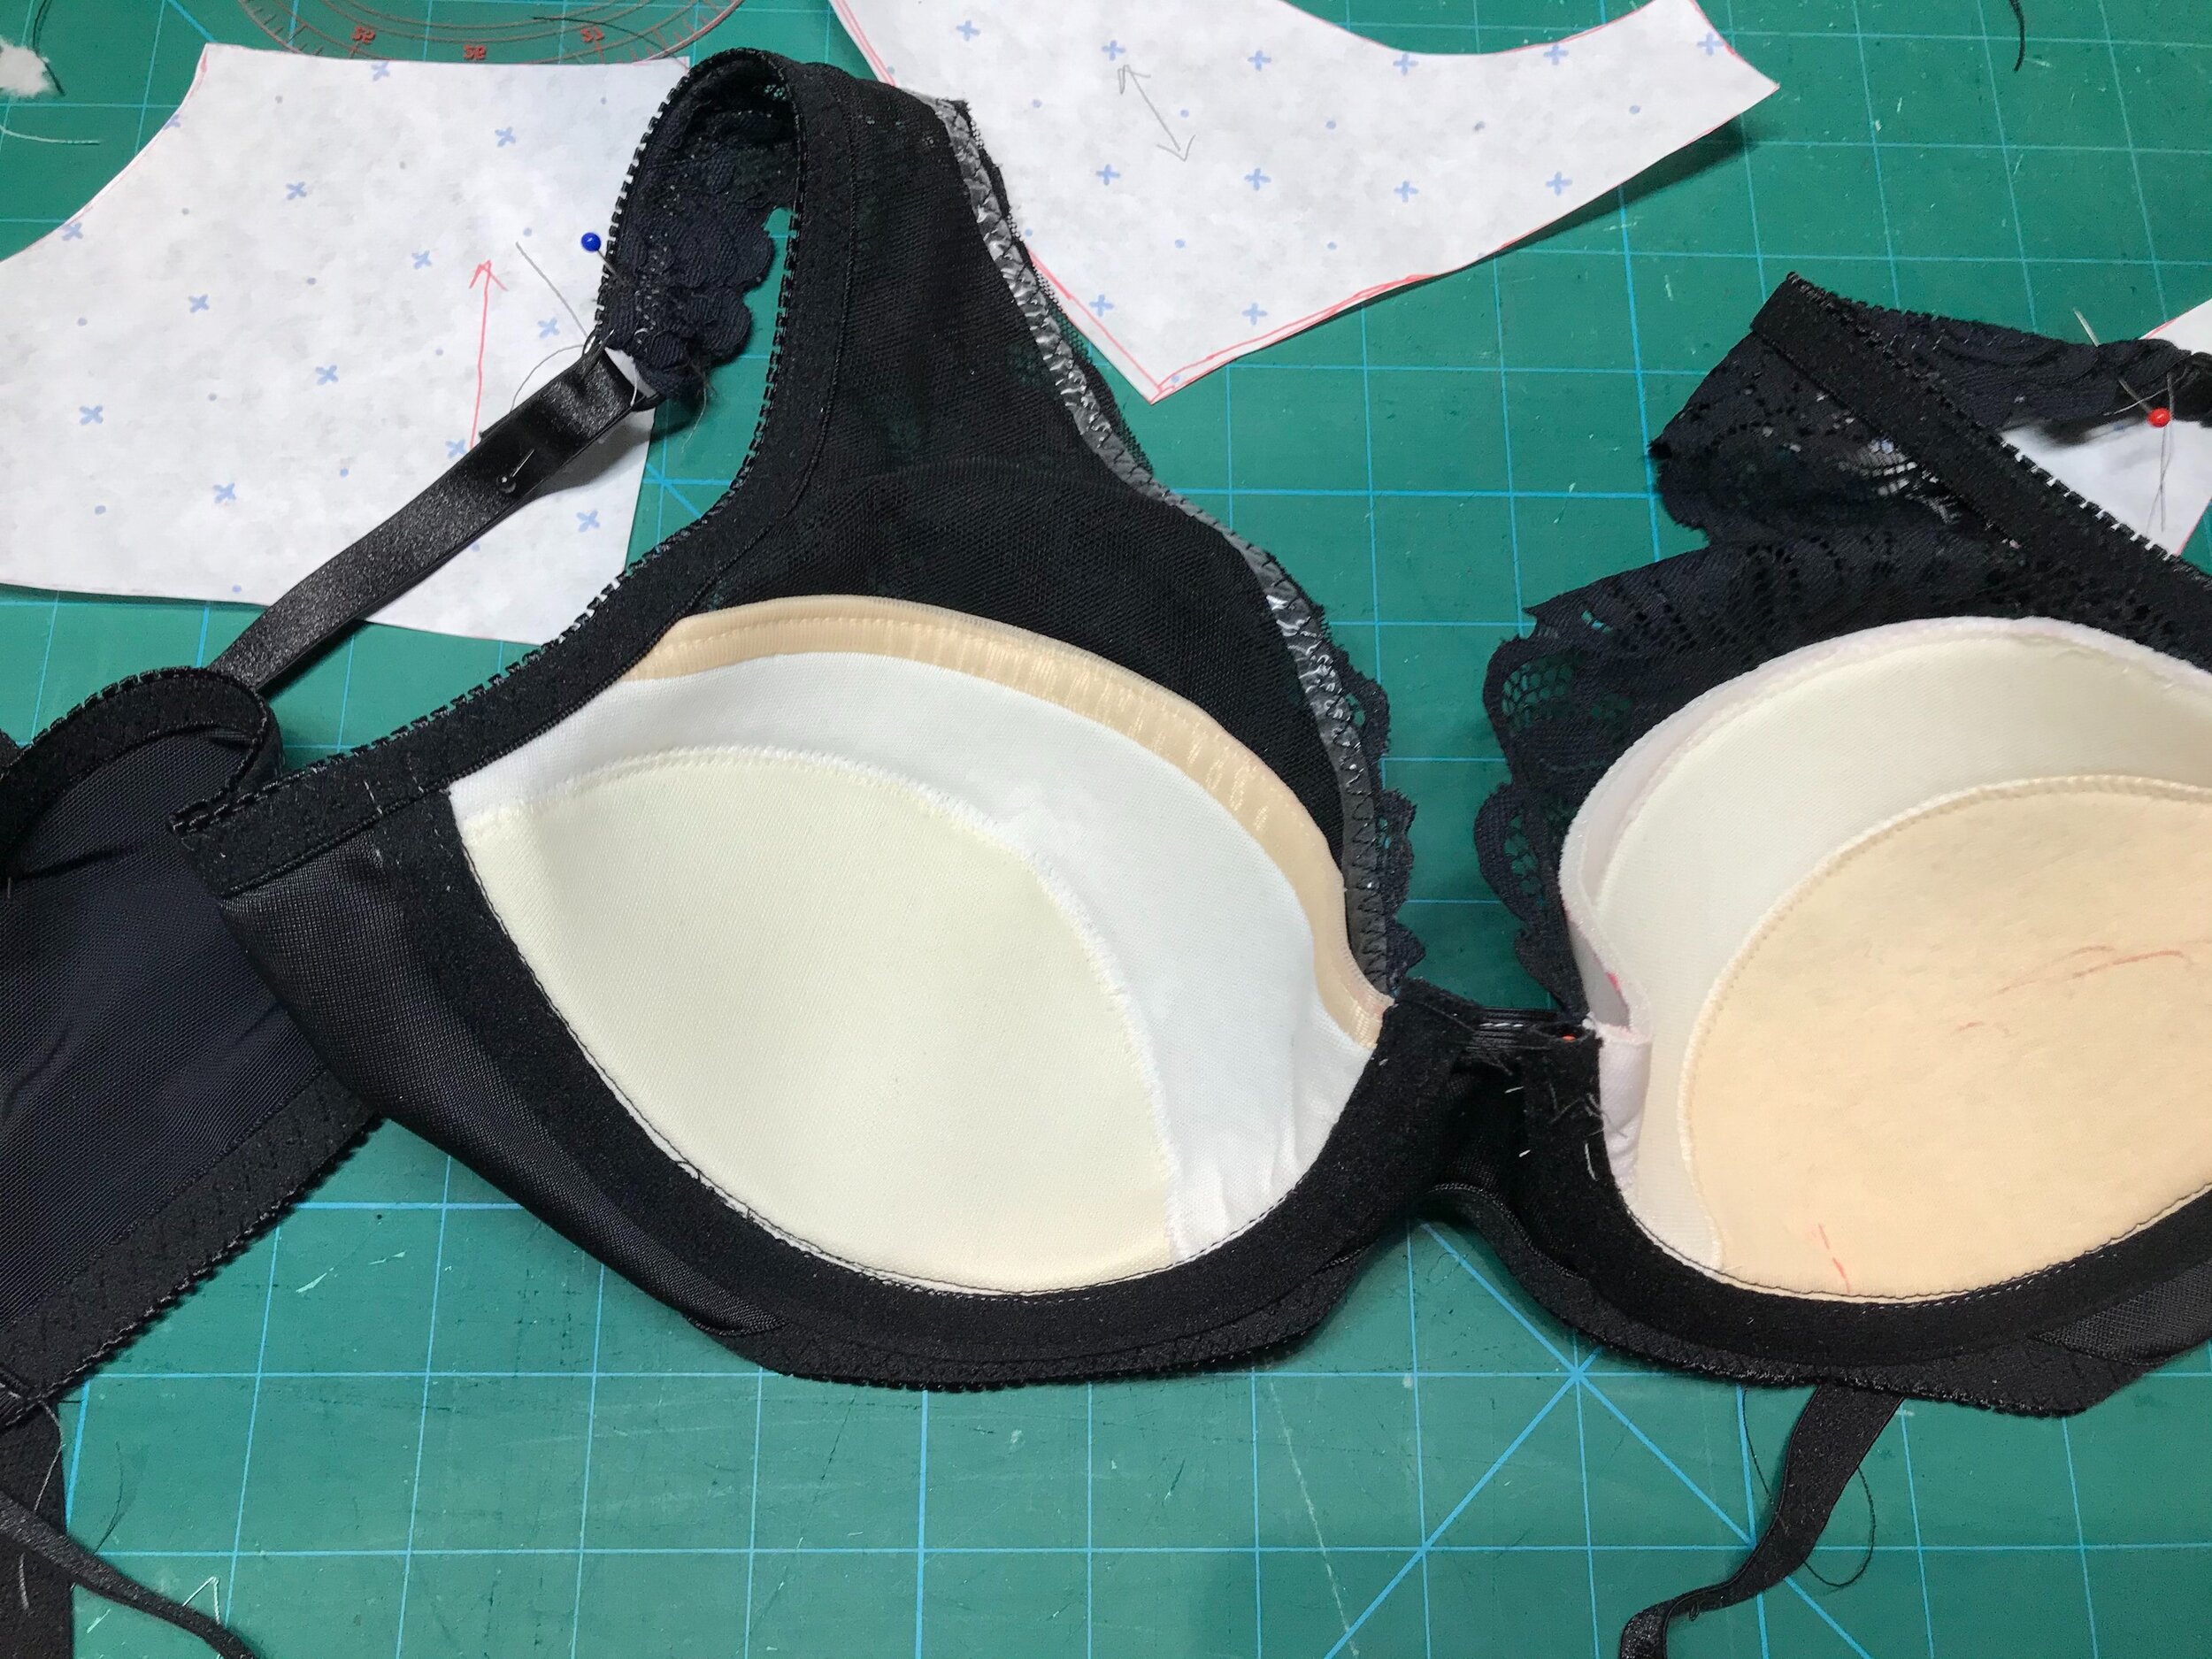
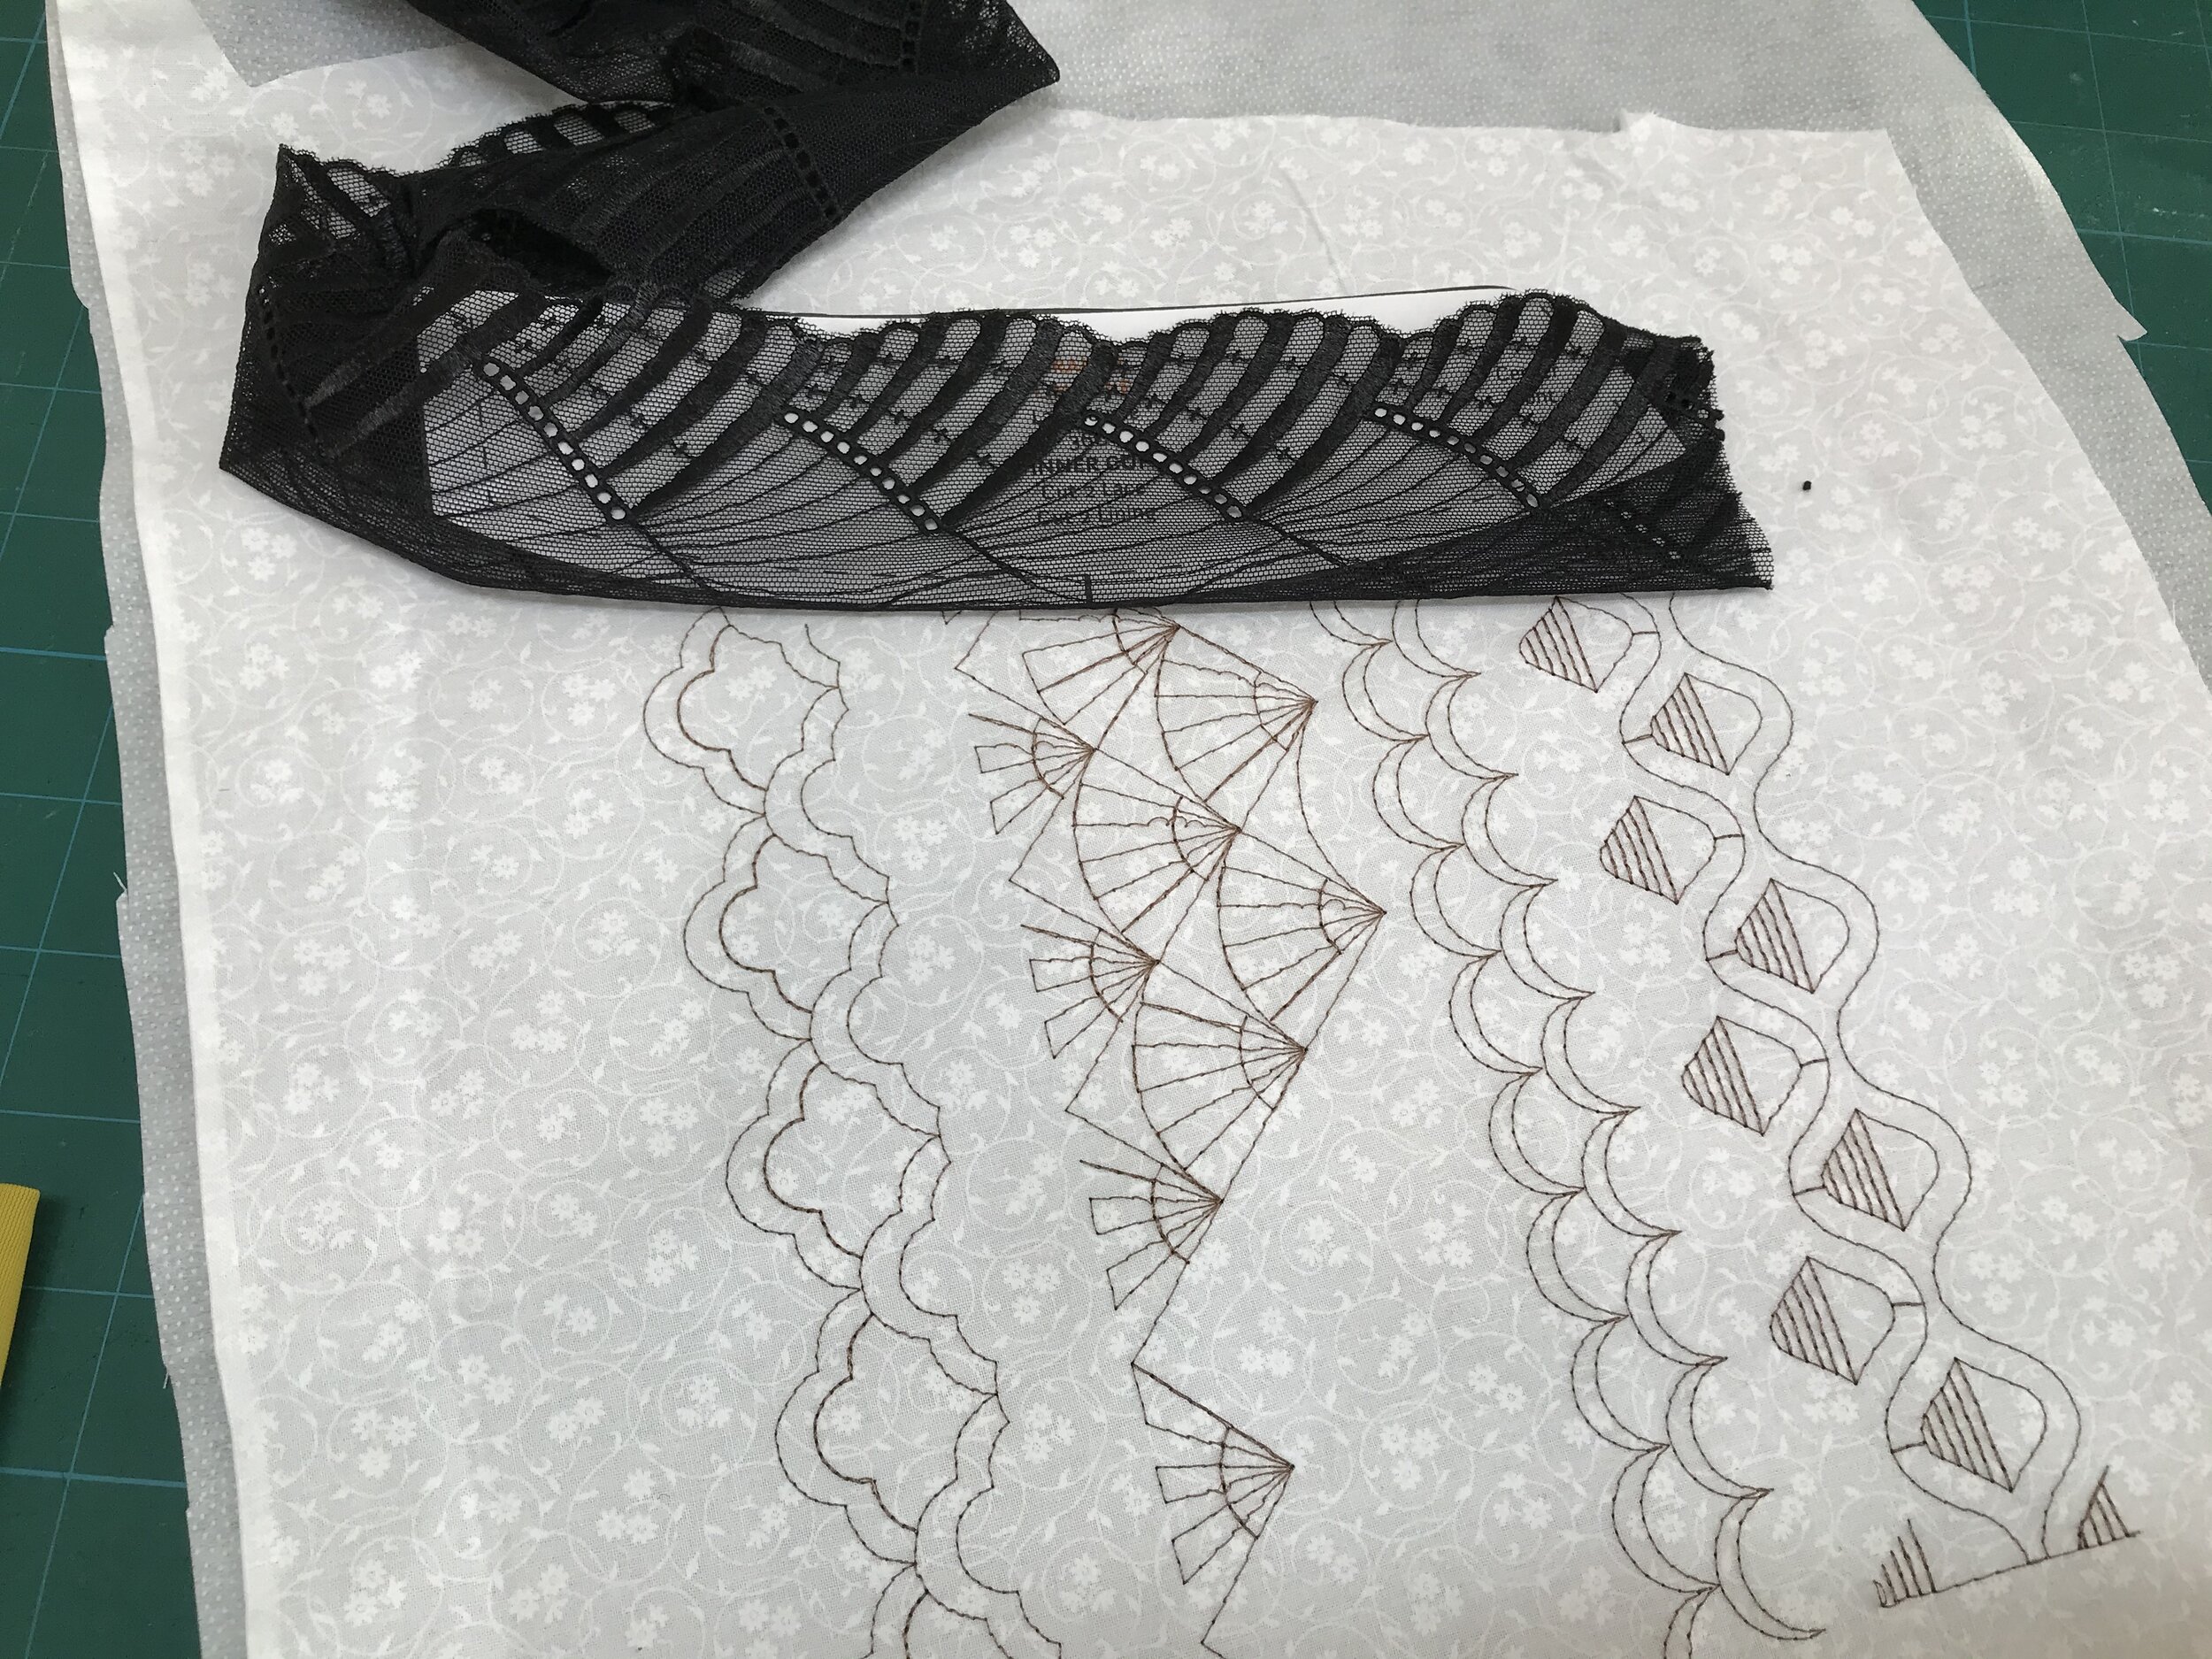
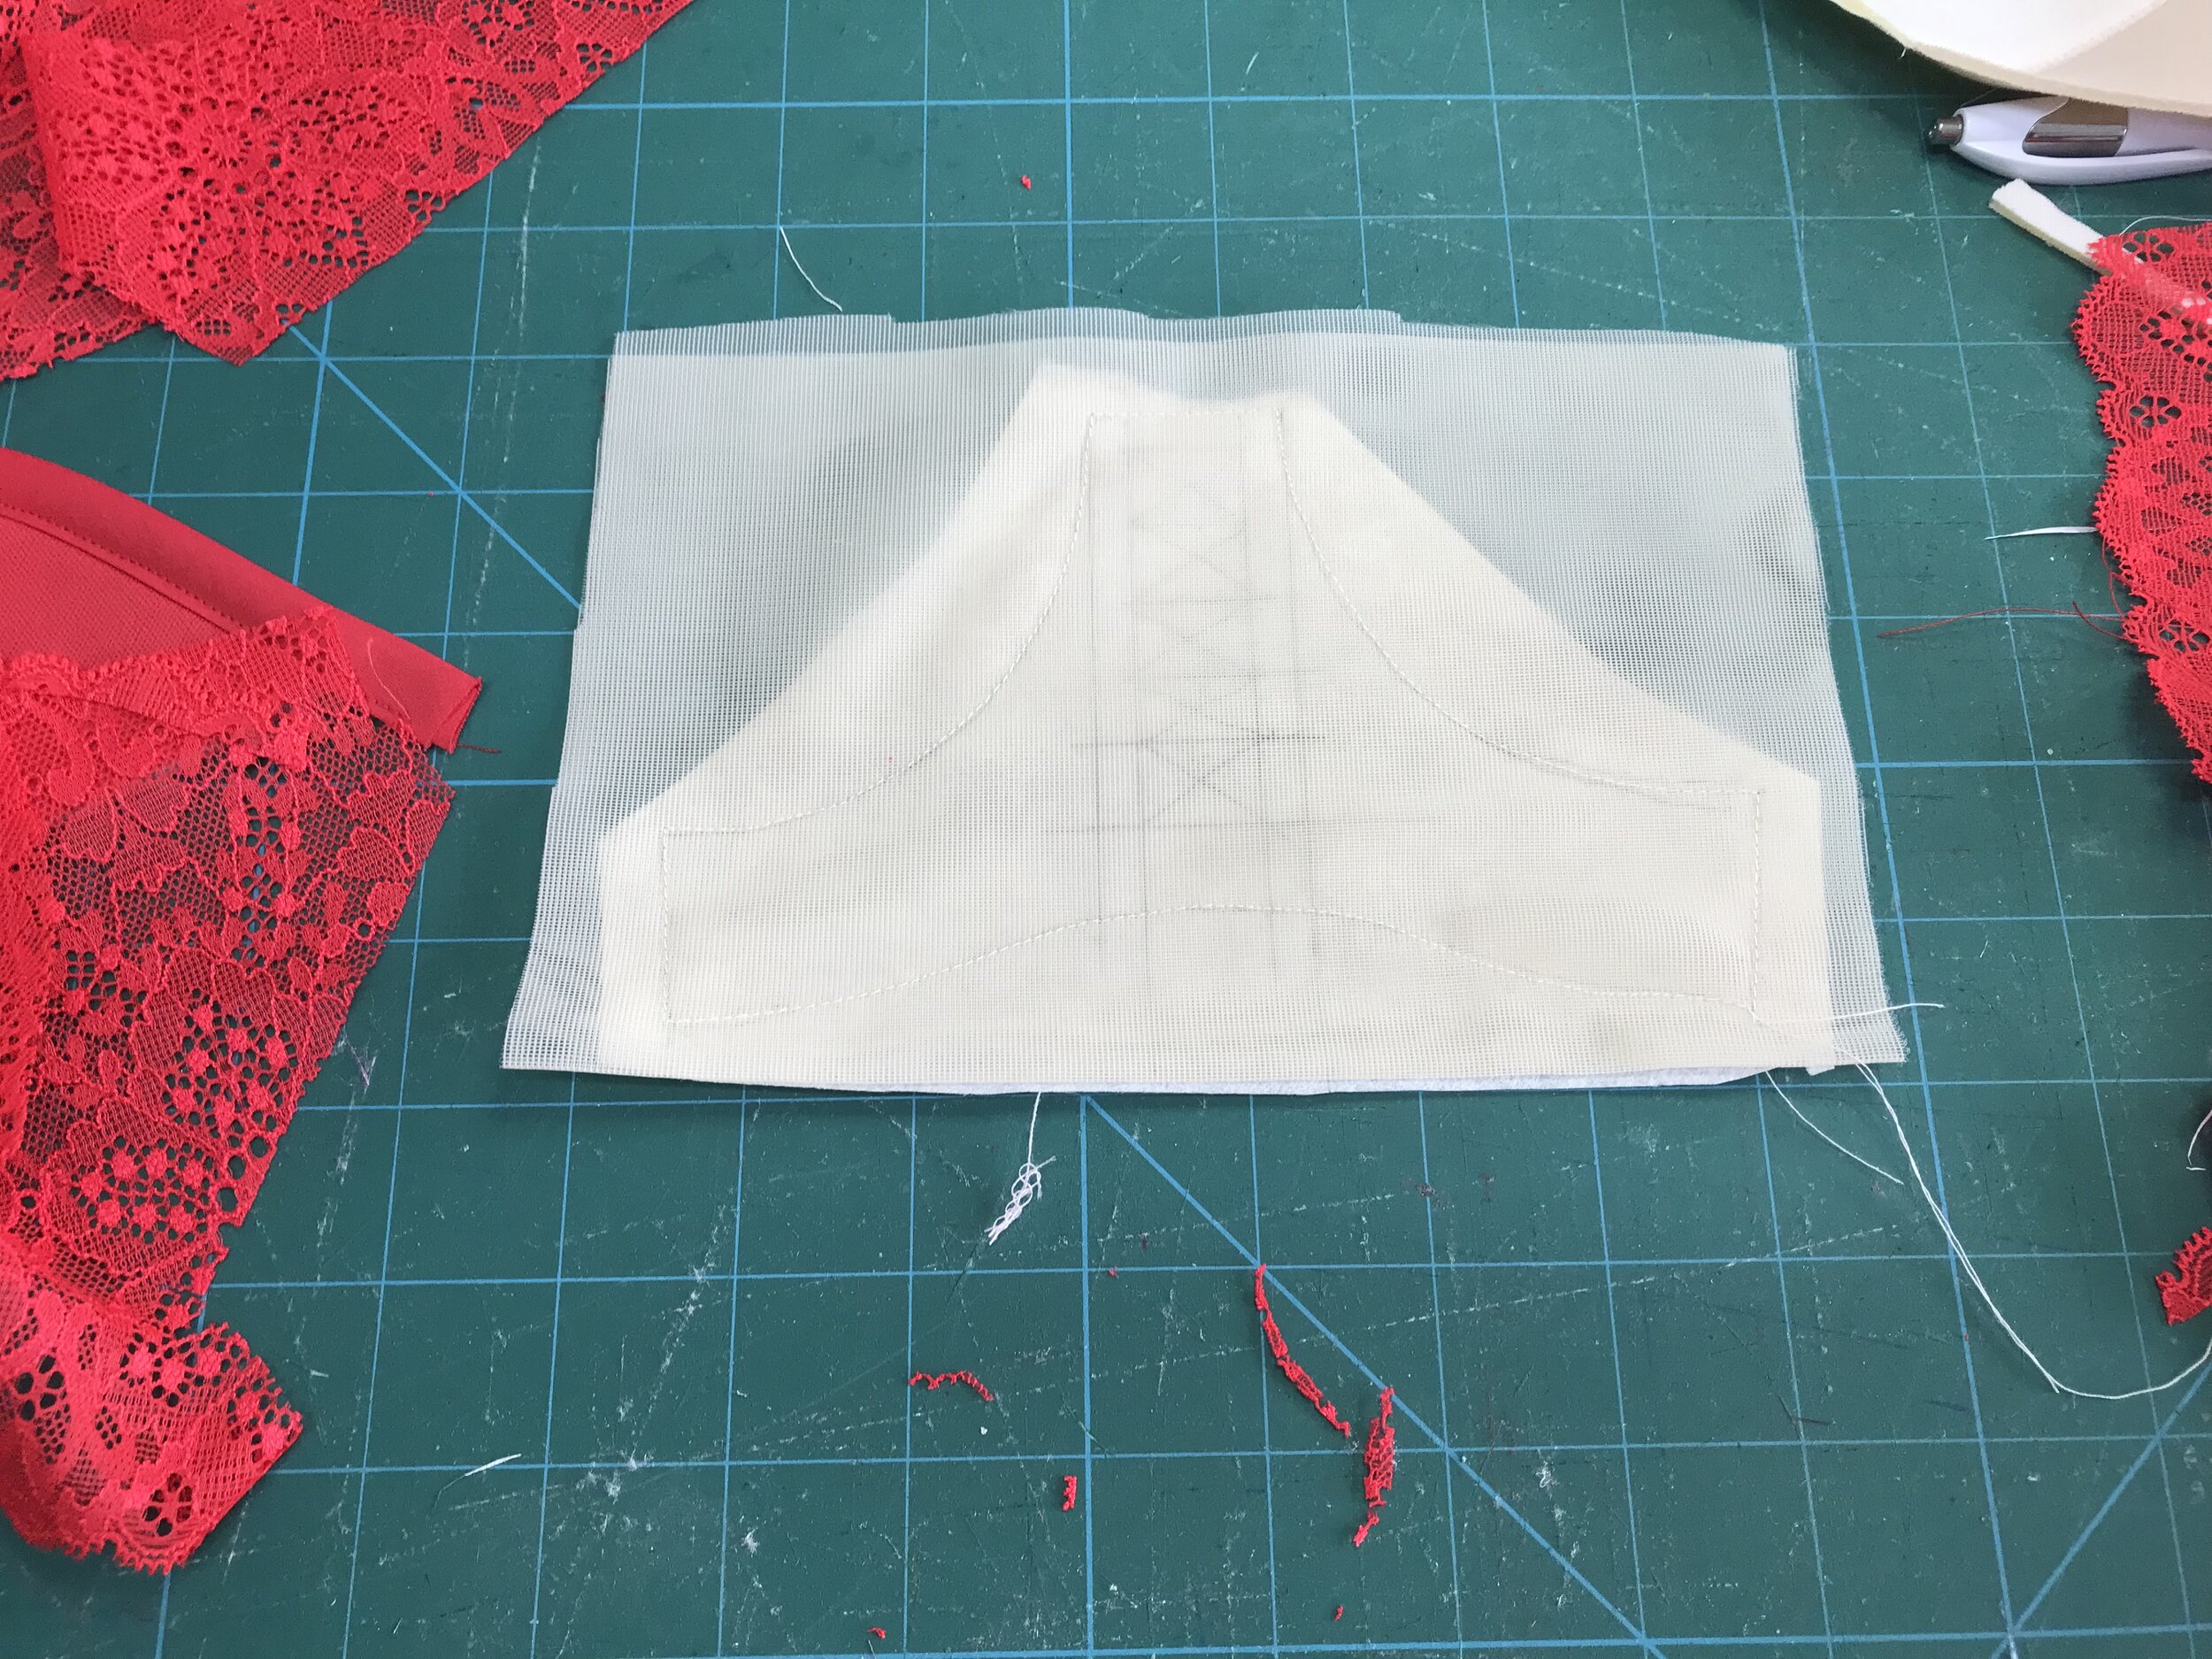
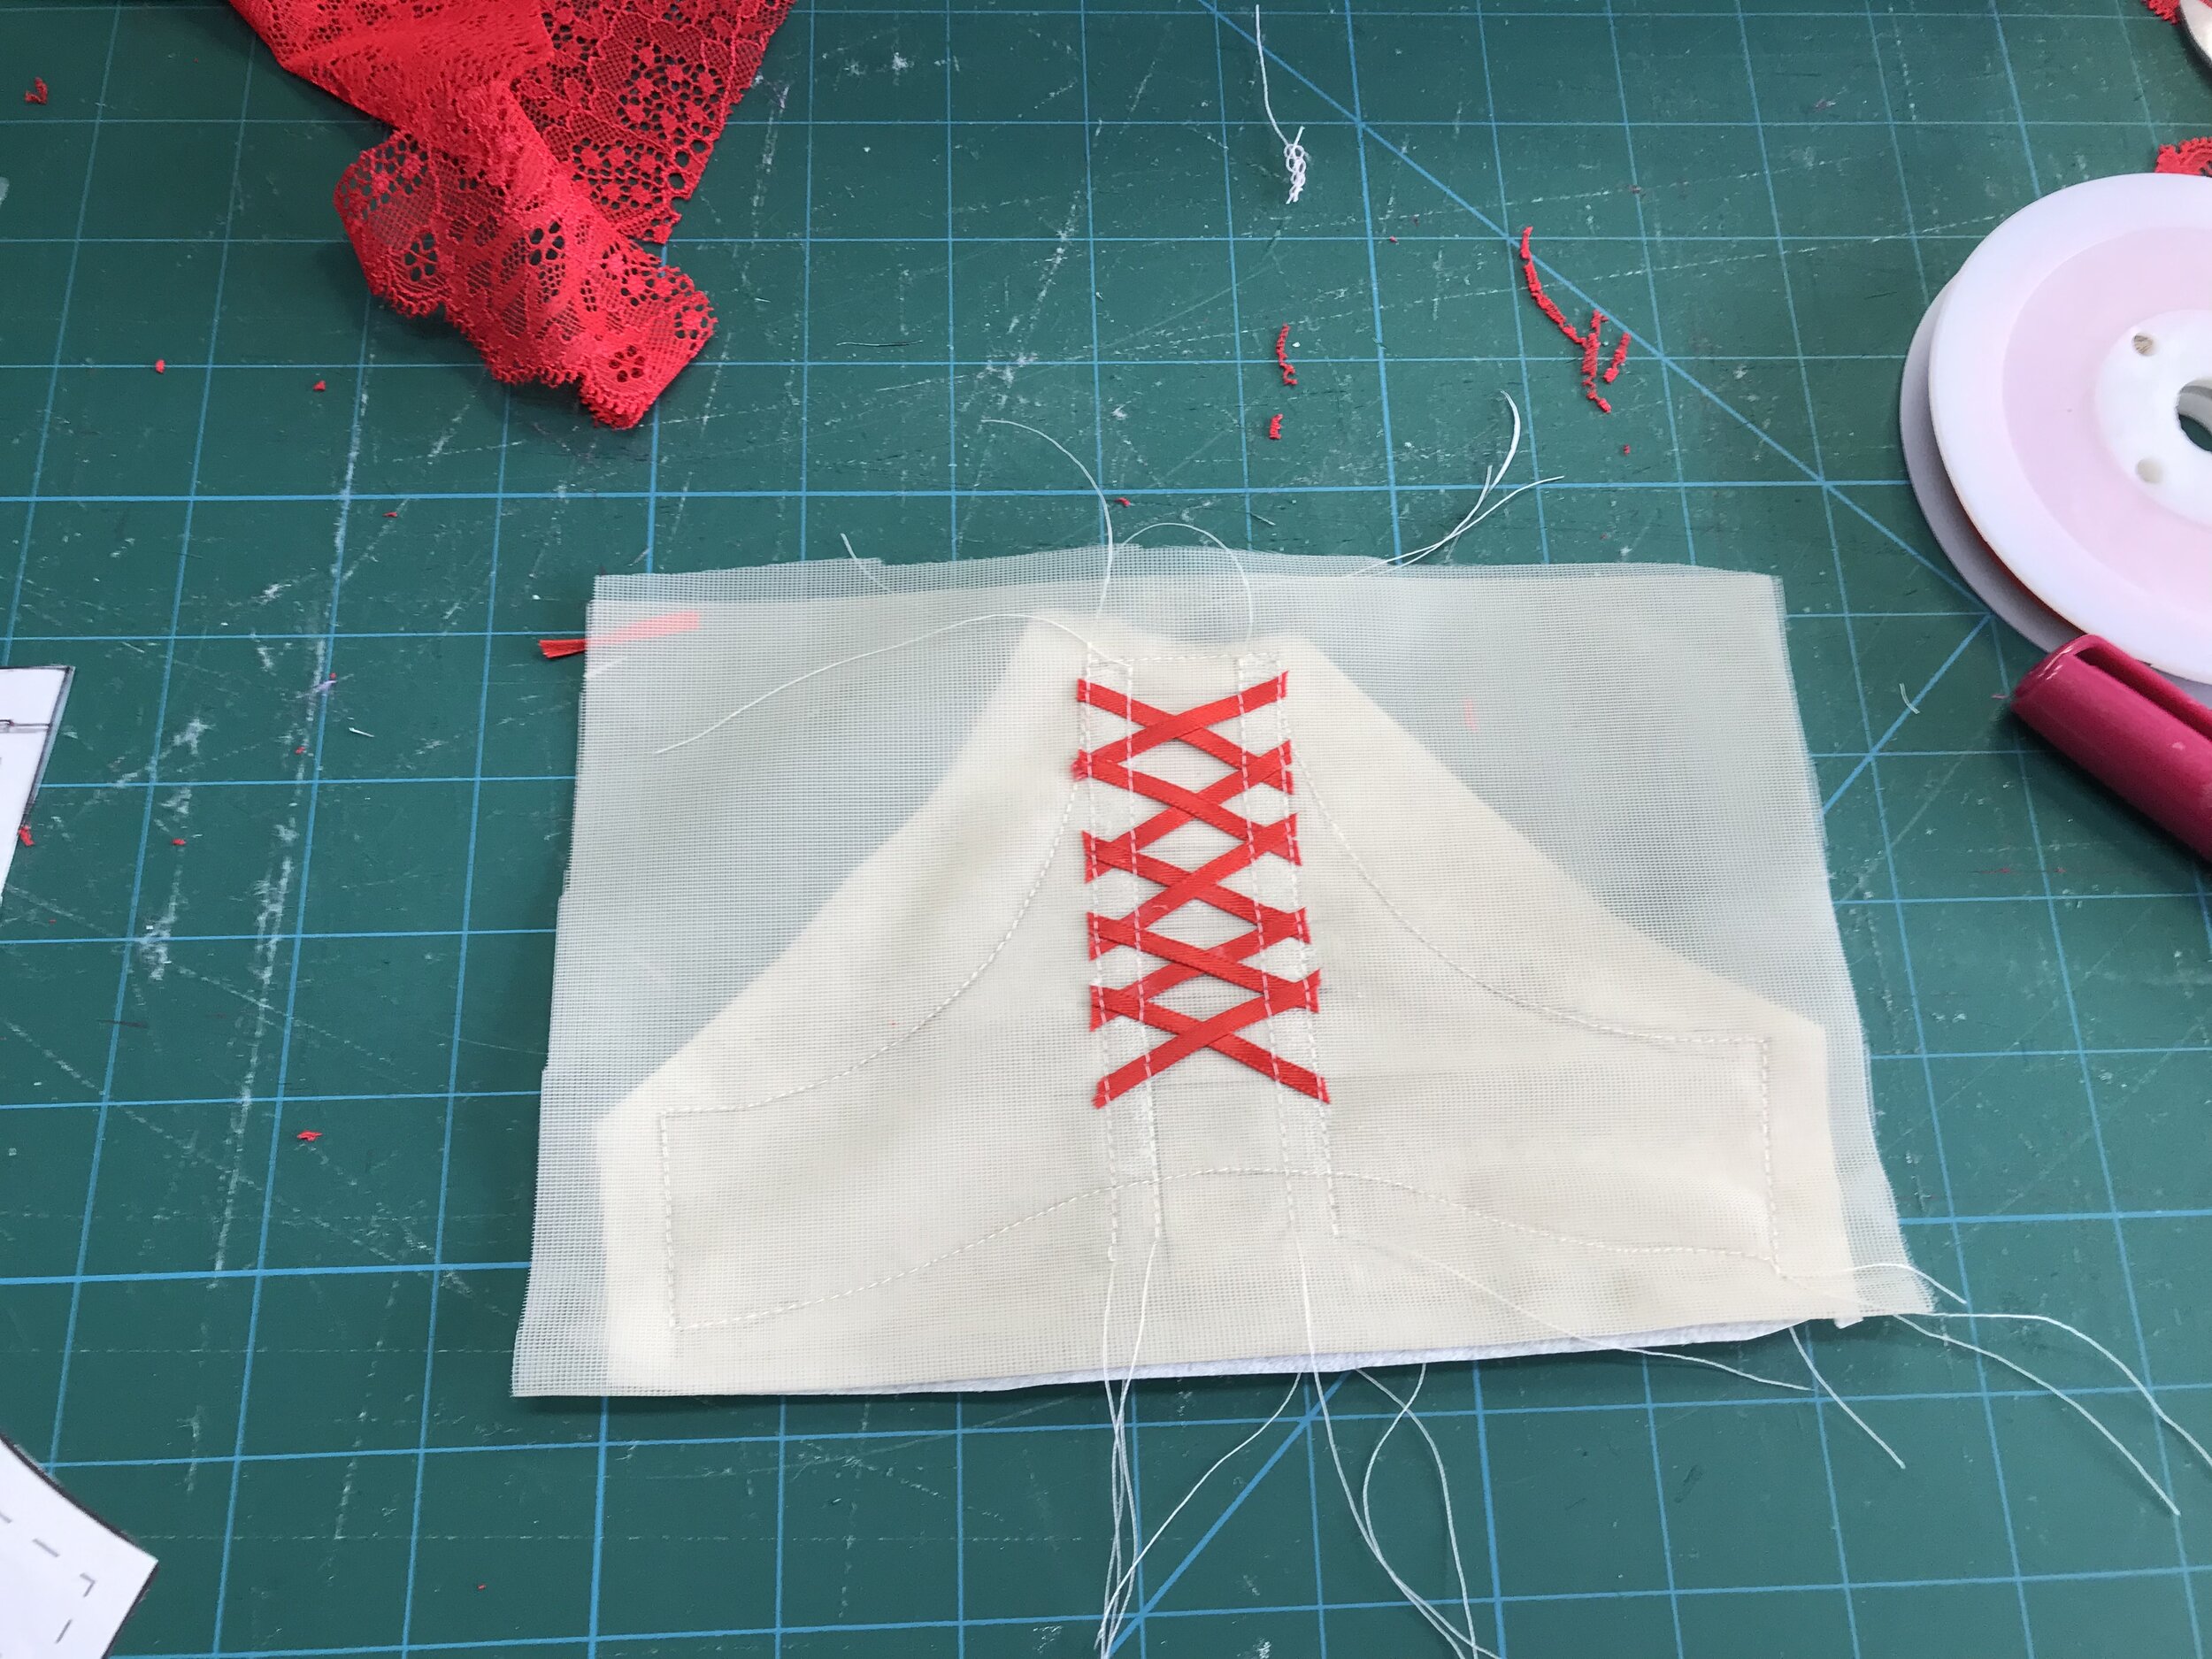
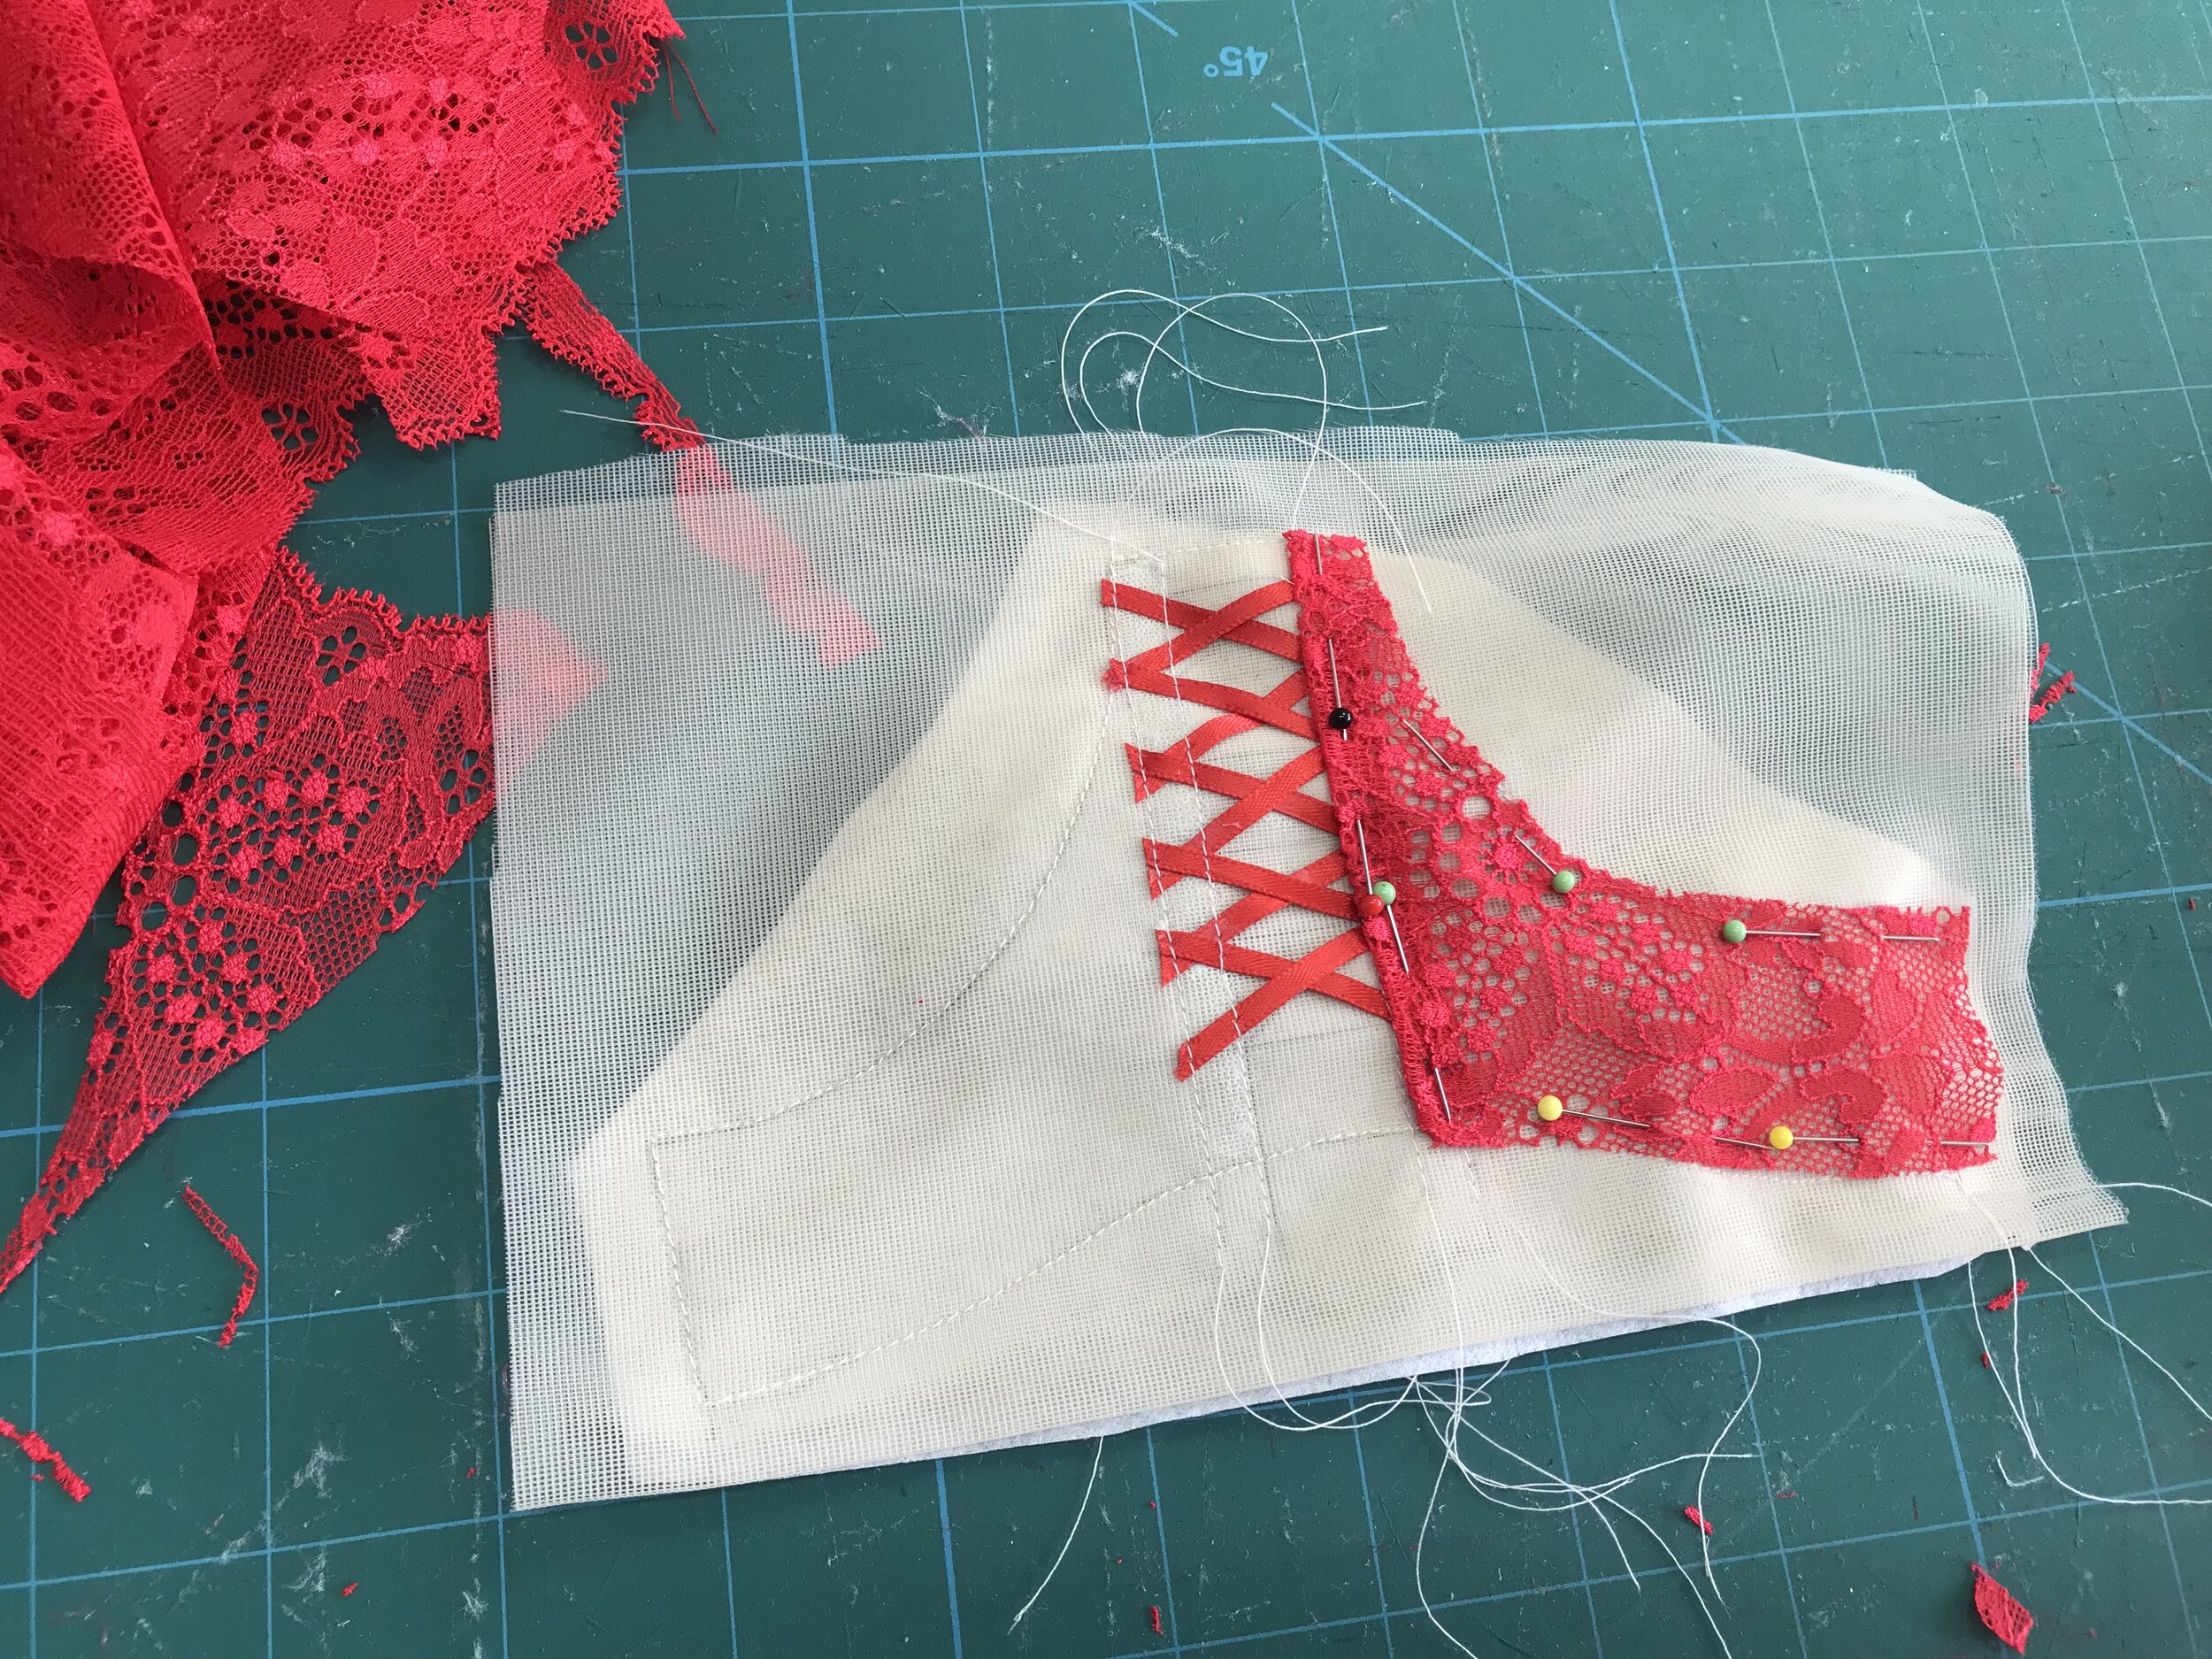
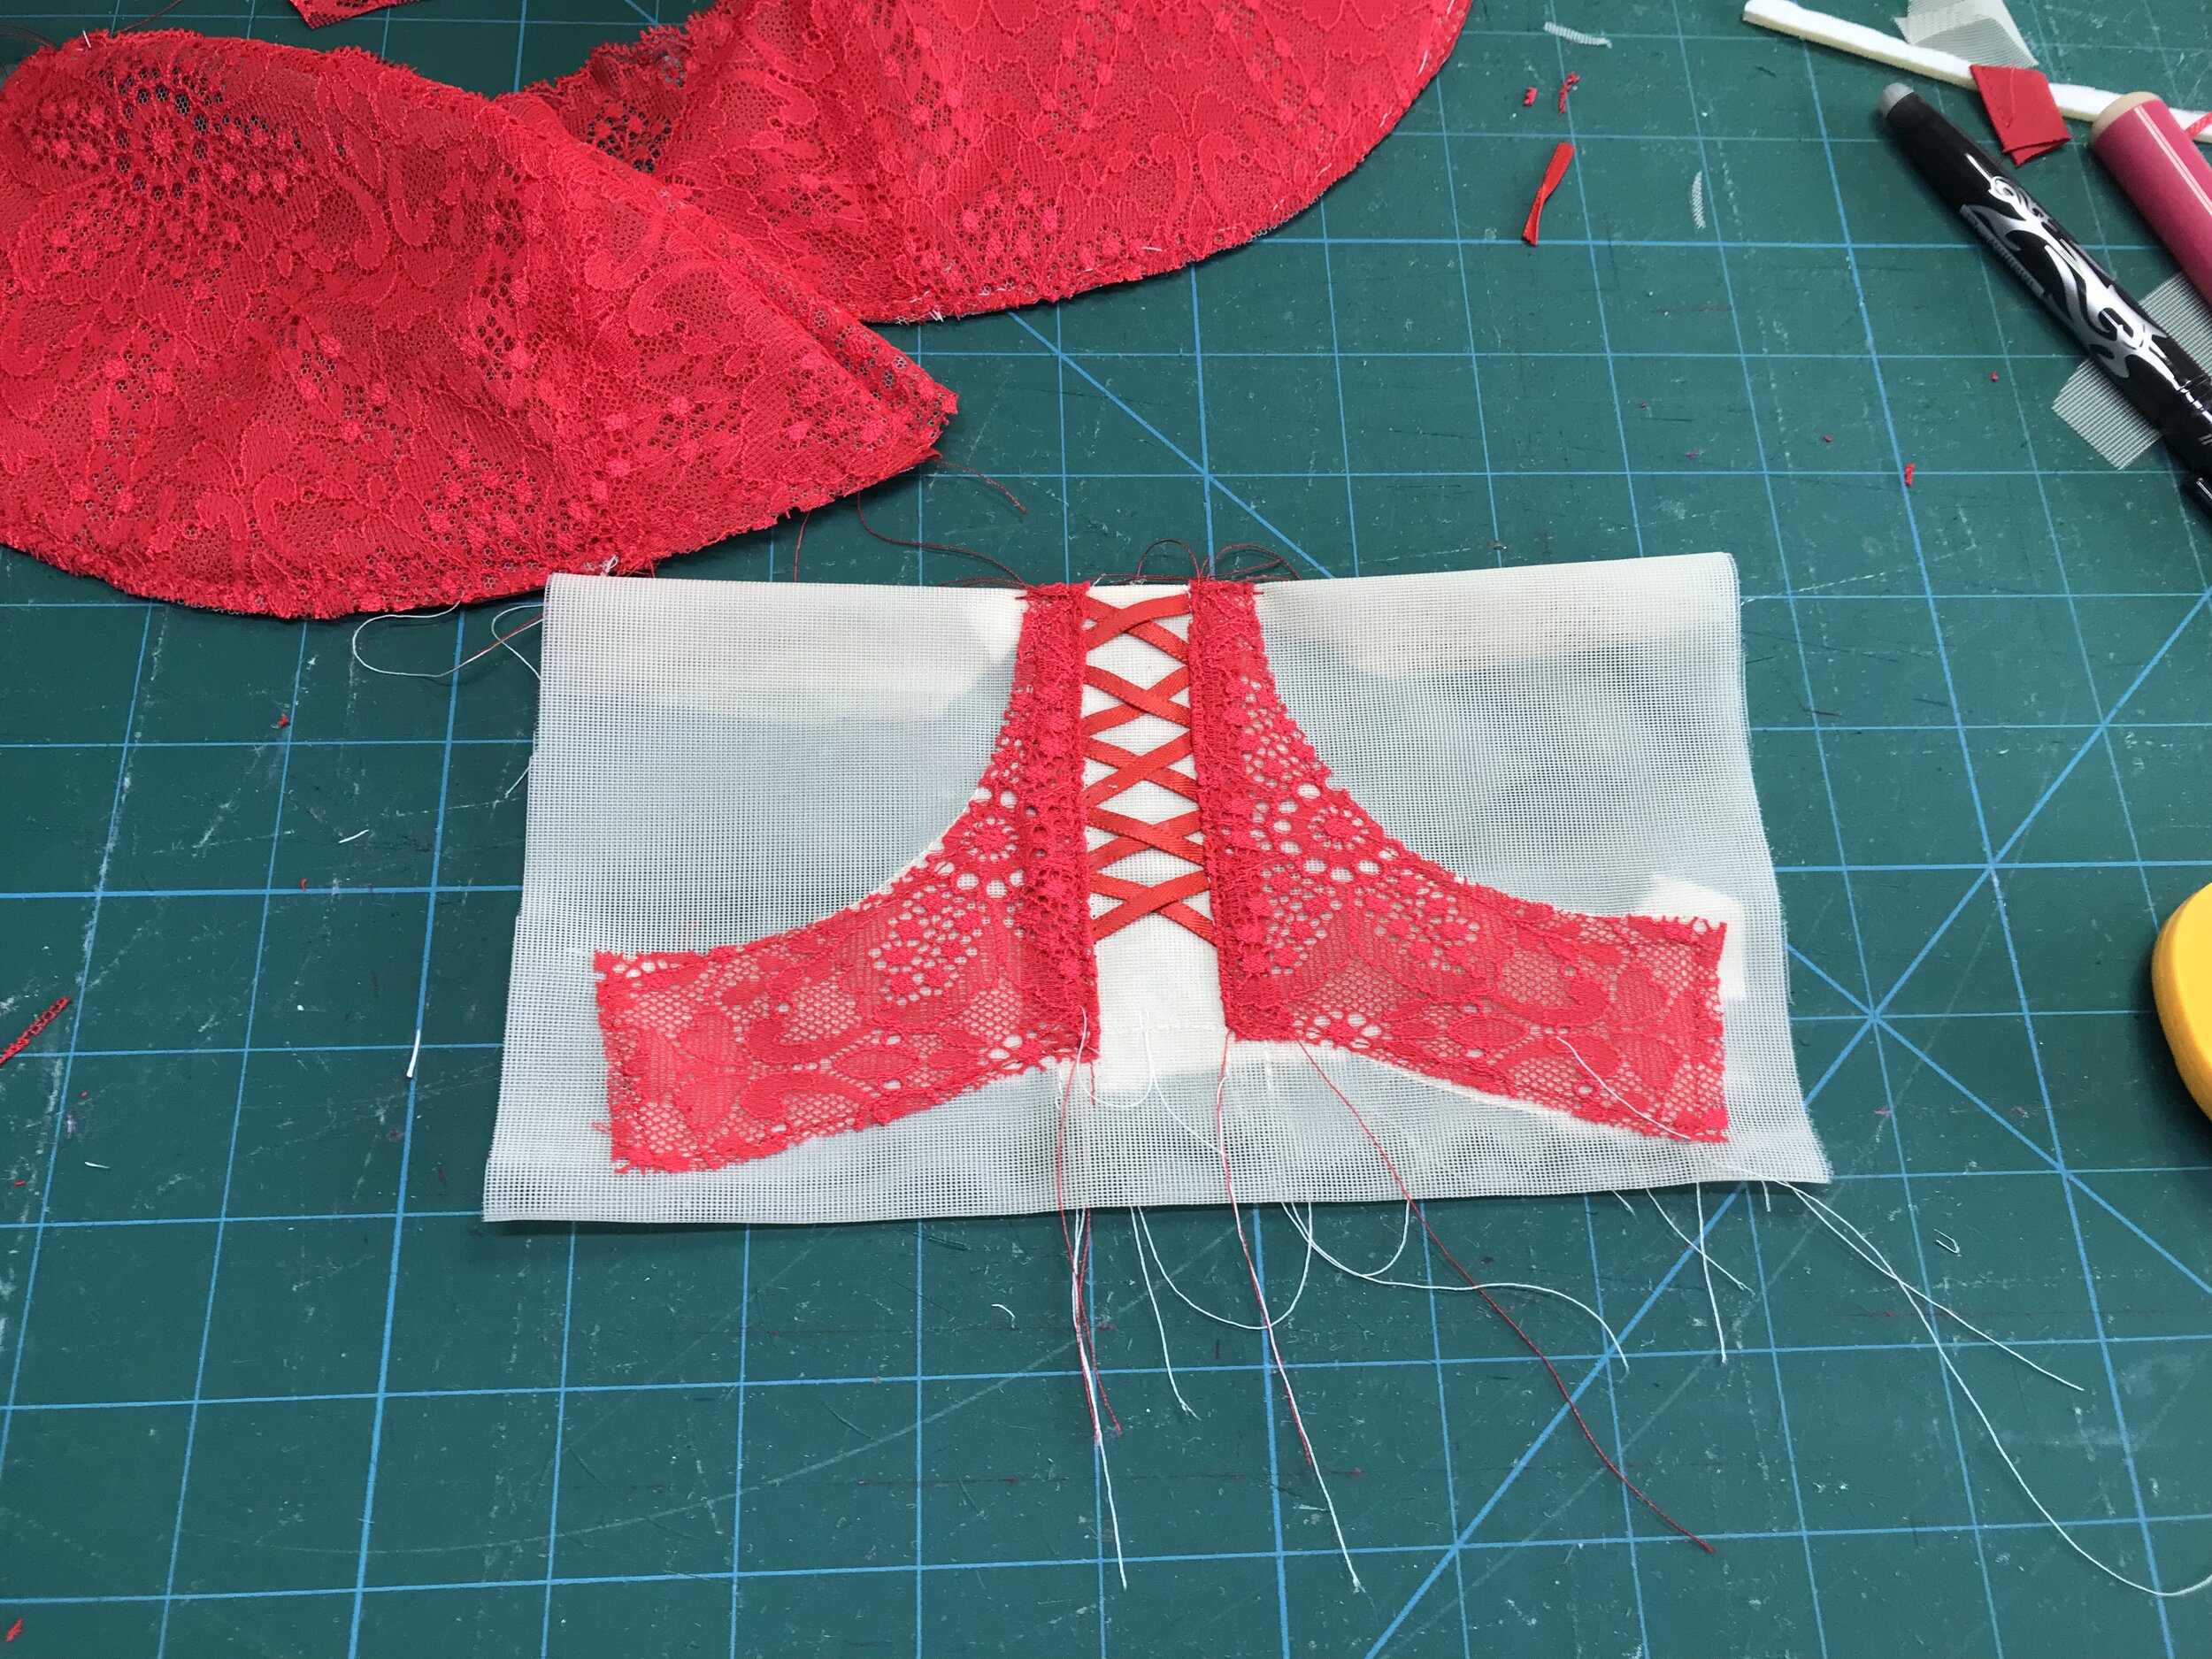
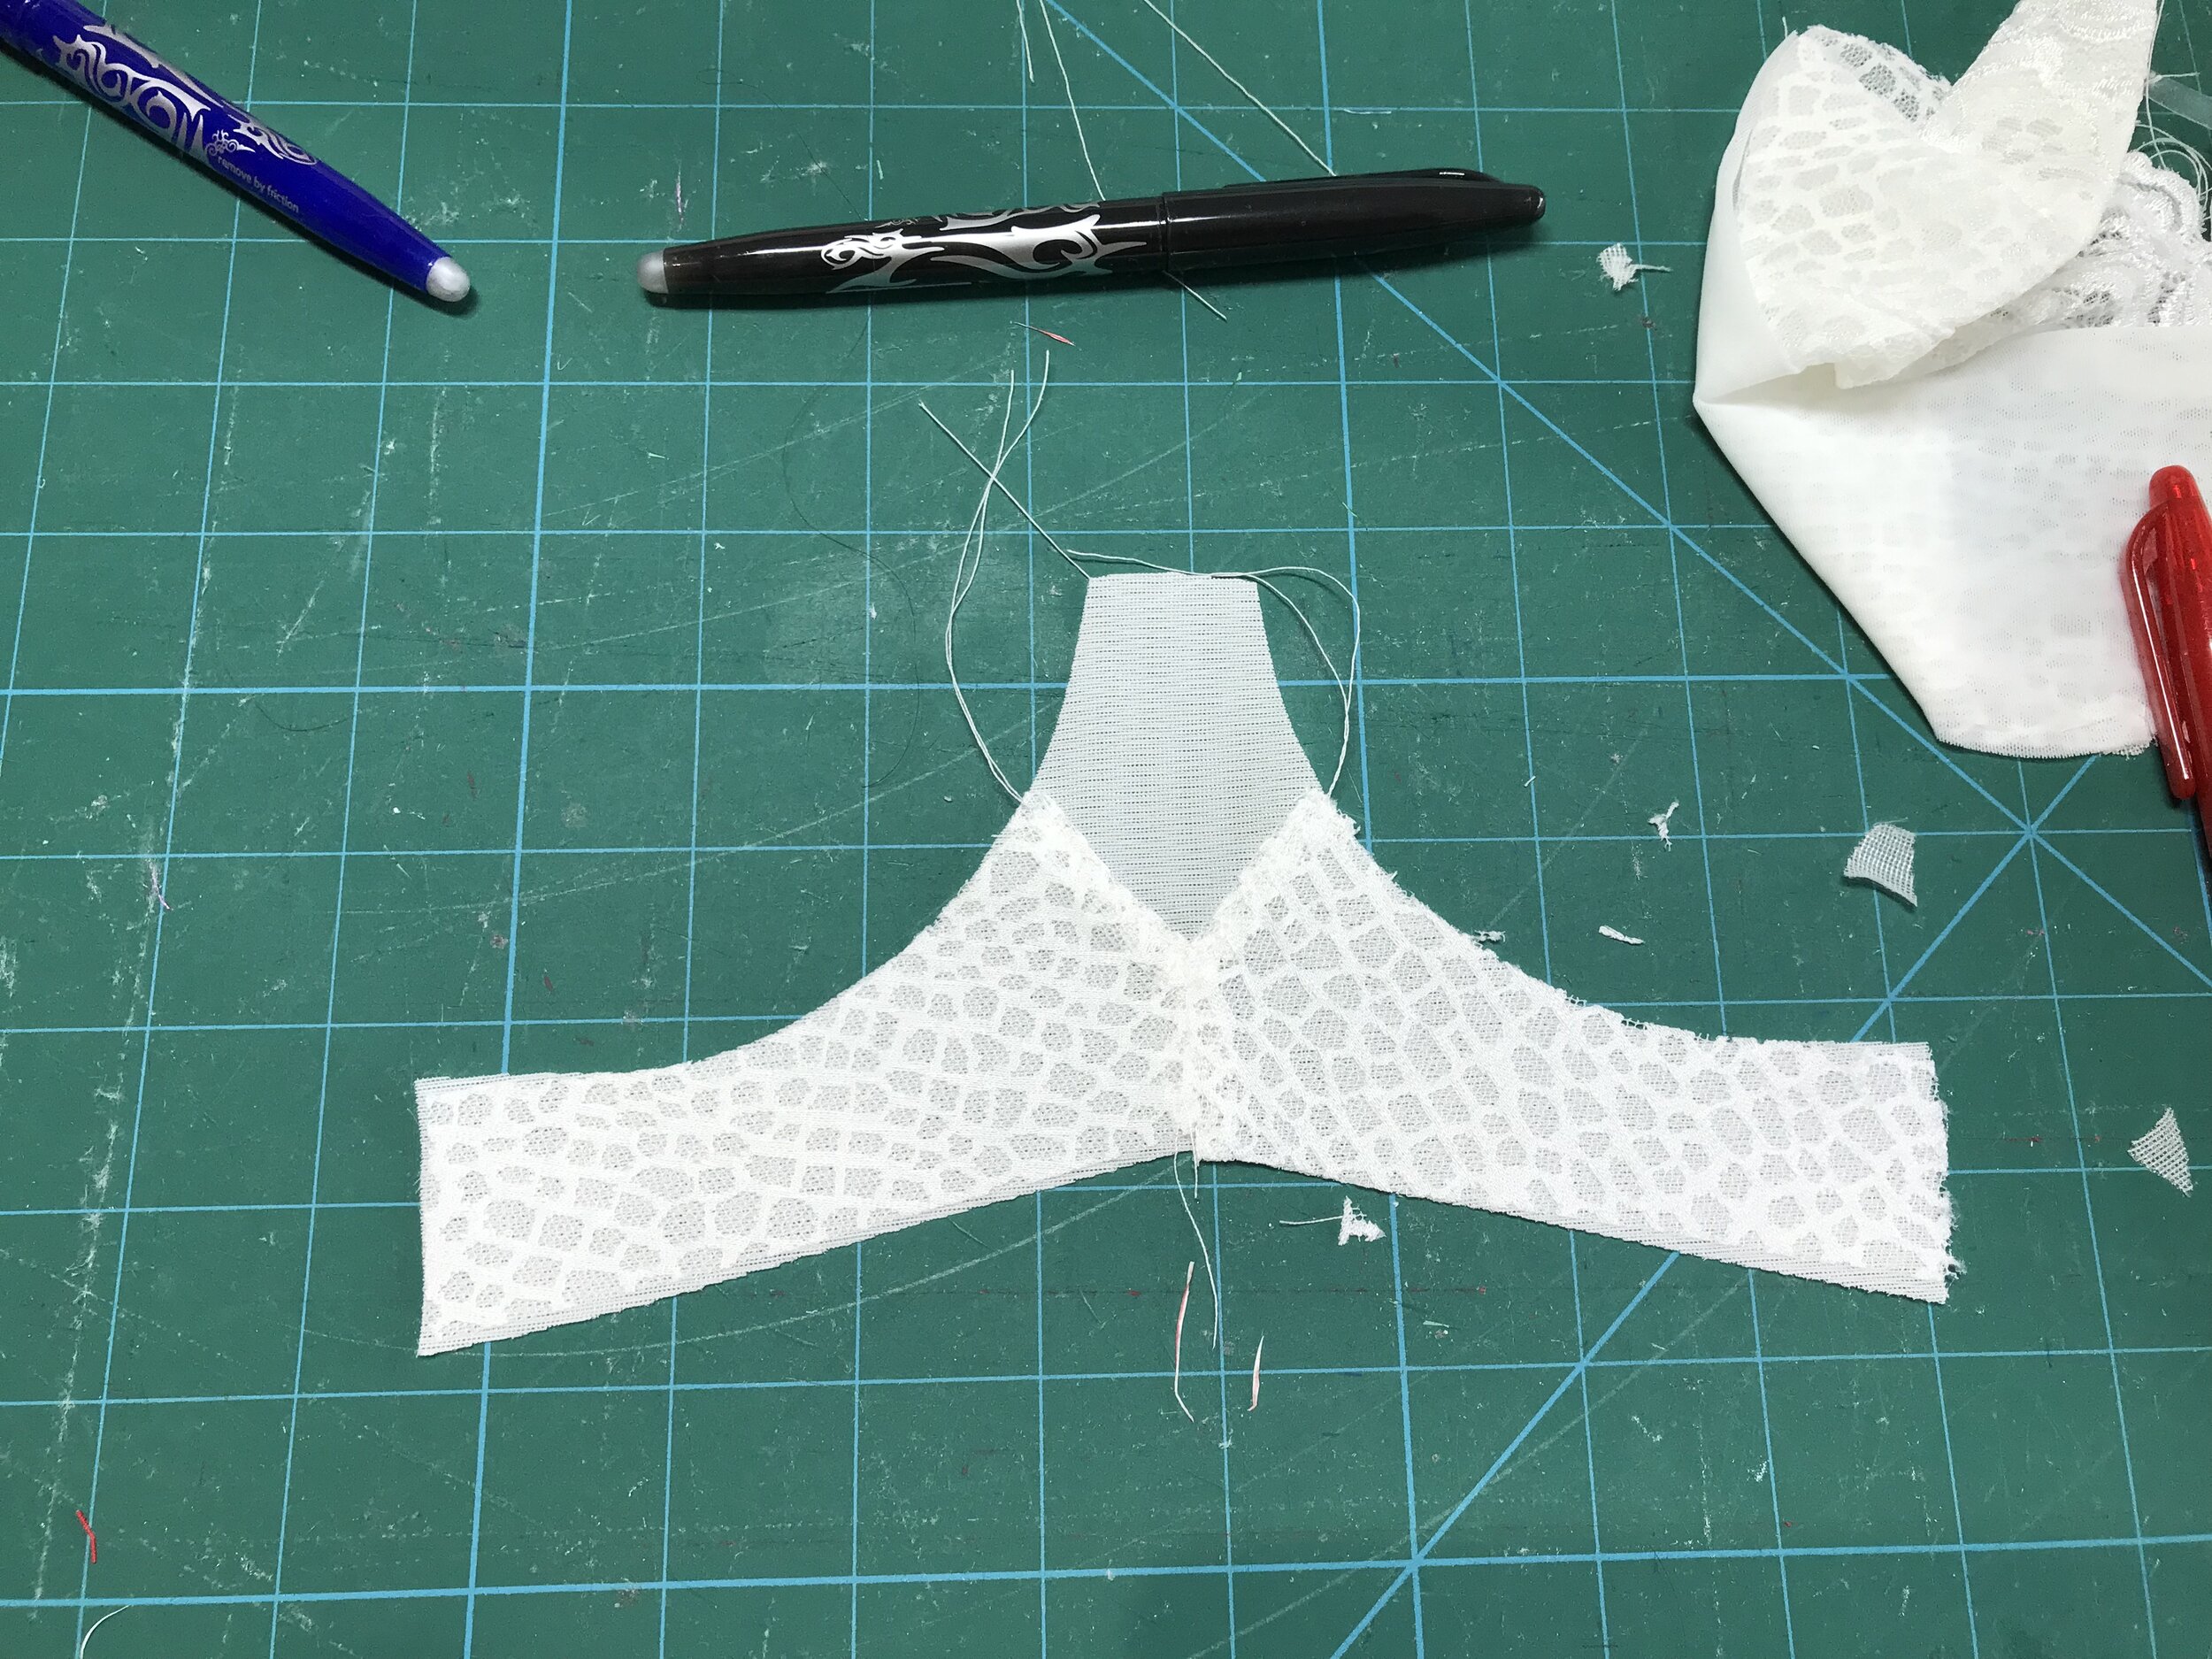
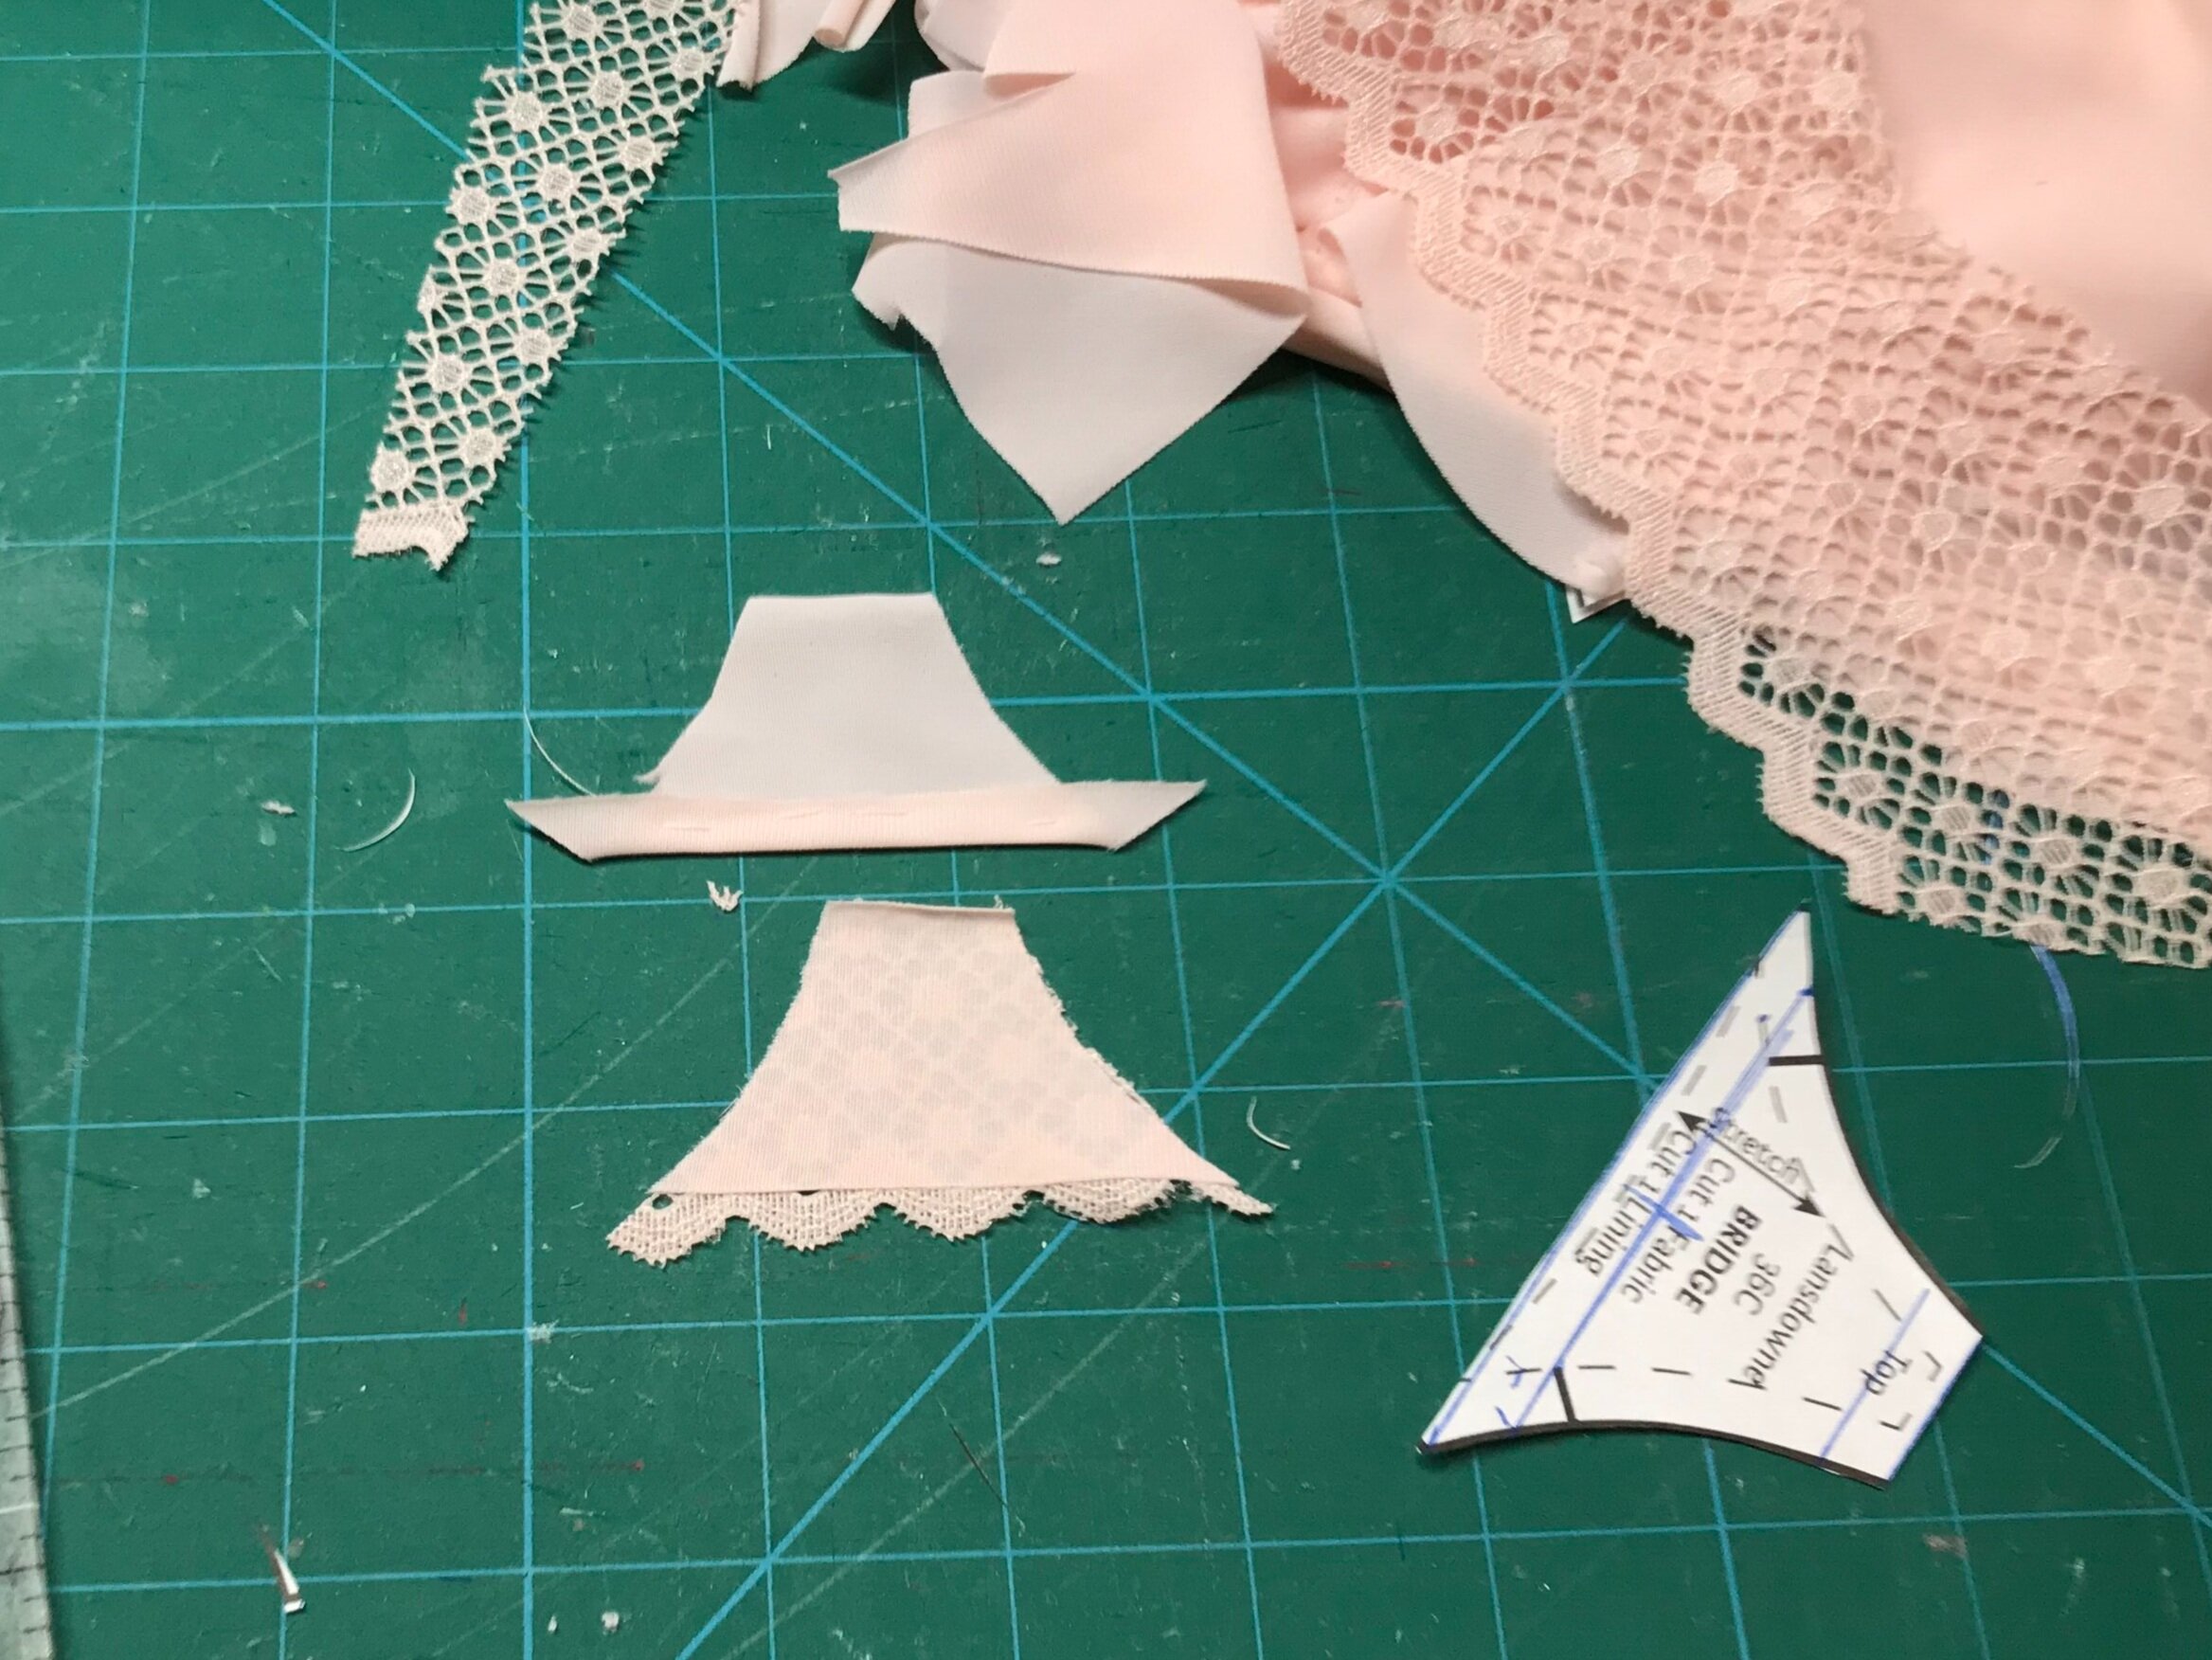
I used a similar method for the lattice but, unlike the open back of the brief, the bra needed a backing to the ribbon so it would retain it’s shape. To design the lattice I drew the bridge on tear away stabiliser in similar proportions to the brief but I had to narrow slightly to fit the crisscross within the width at the top of the bridge. I placed two layers of sheer lining over the stabiliser and stitched along the outline of the pattern piece. Next I attached the ribbon, stitching in place along the marked lines. Then I placed fabric pieces, with the seam allowances folded under, over the ribbon and again stitched in place along the marked lines. Finally, to create the bridge, I cut along the original stitching marking the pattern piece.

7992022D-D586-4CA1-856B-7B7DD4EF9E1C.JPEG

To finish the bra I followed the pattern instructions except on the second pass of the band elastic I didn’t sew over the sheer lining. I stitched from the front with a small zigzag with matching thread so I didn’t have red stitching showing through.

To complete the look I finished with bows at the strap attachment and I think it turned out pretty perfect. The shape is amazing. Red is always a difficult colour to match but the elastic and lace from Sew Wardrobe were a perfect match. So on to the next set.

8D30BBE4-7755-4173-B2E0-1013CA8A265A.JPEG

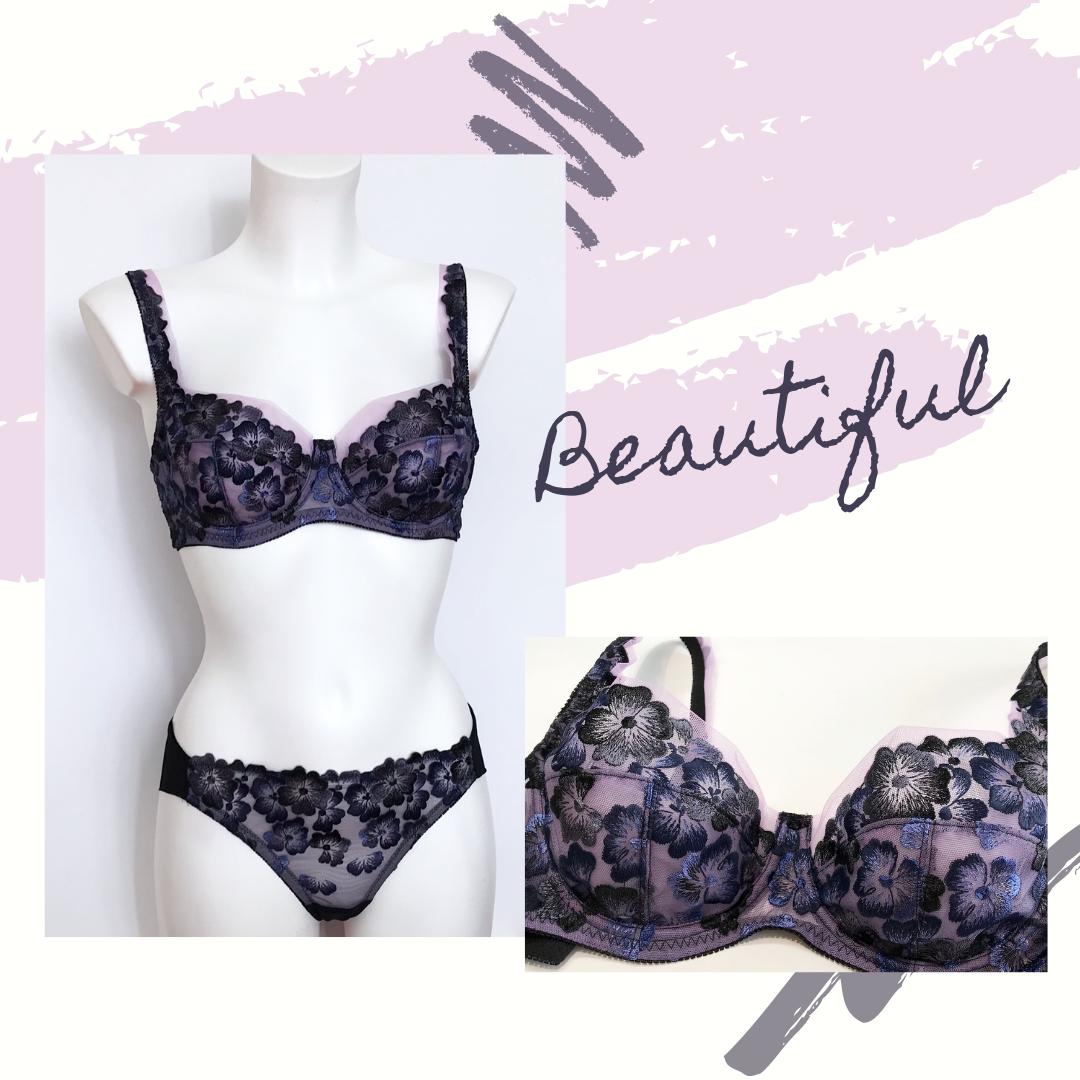
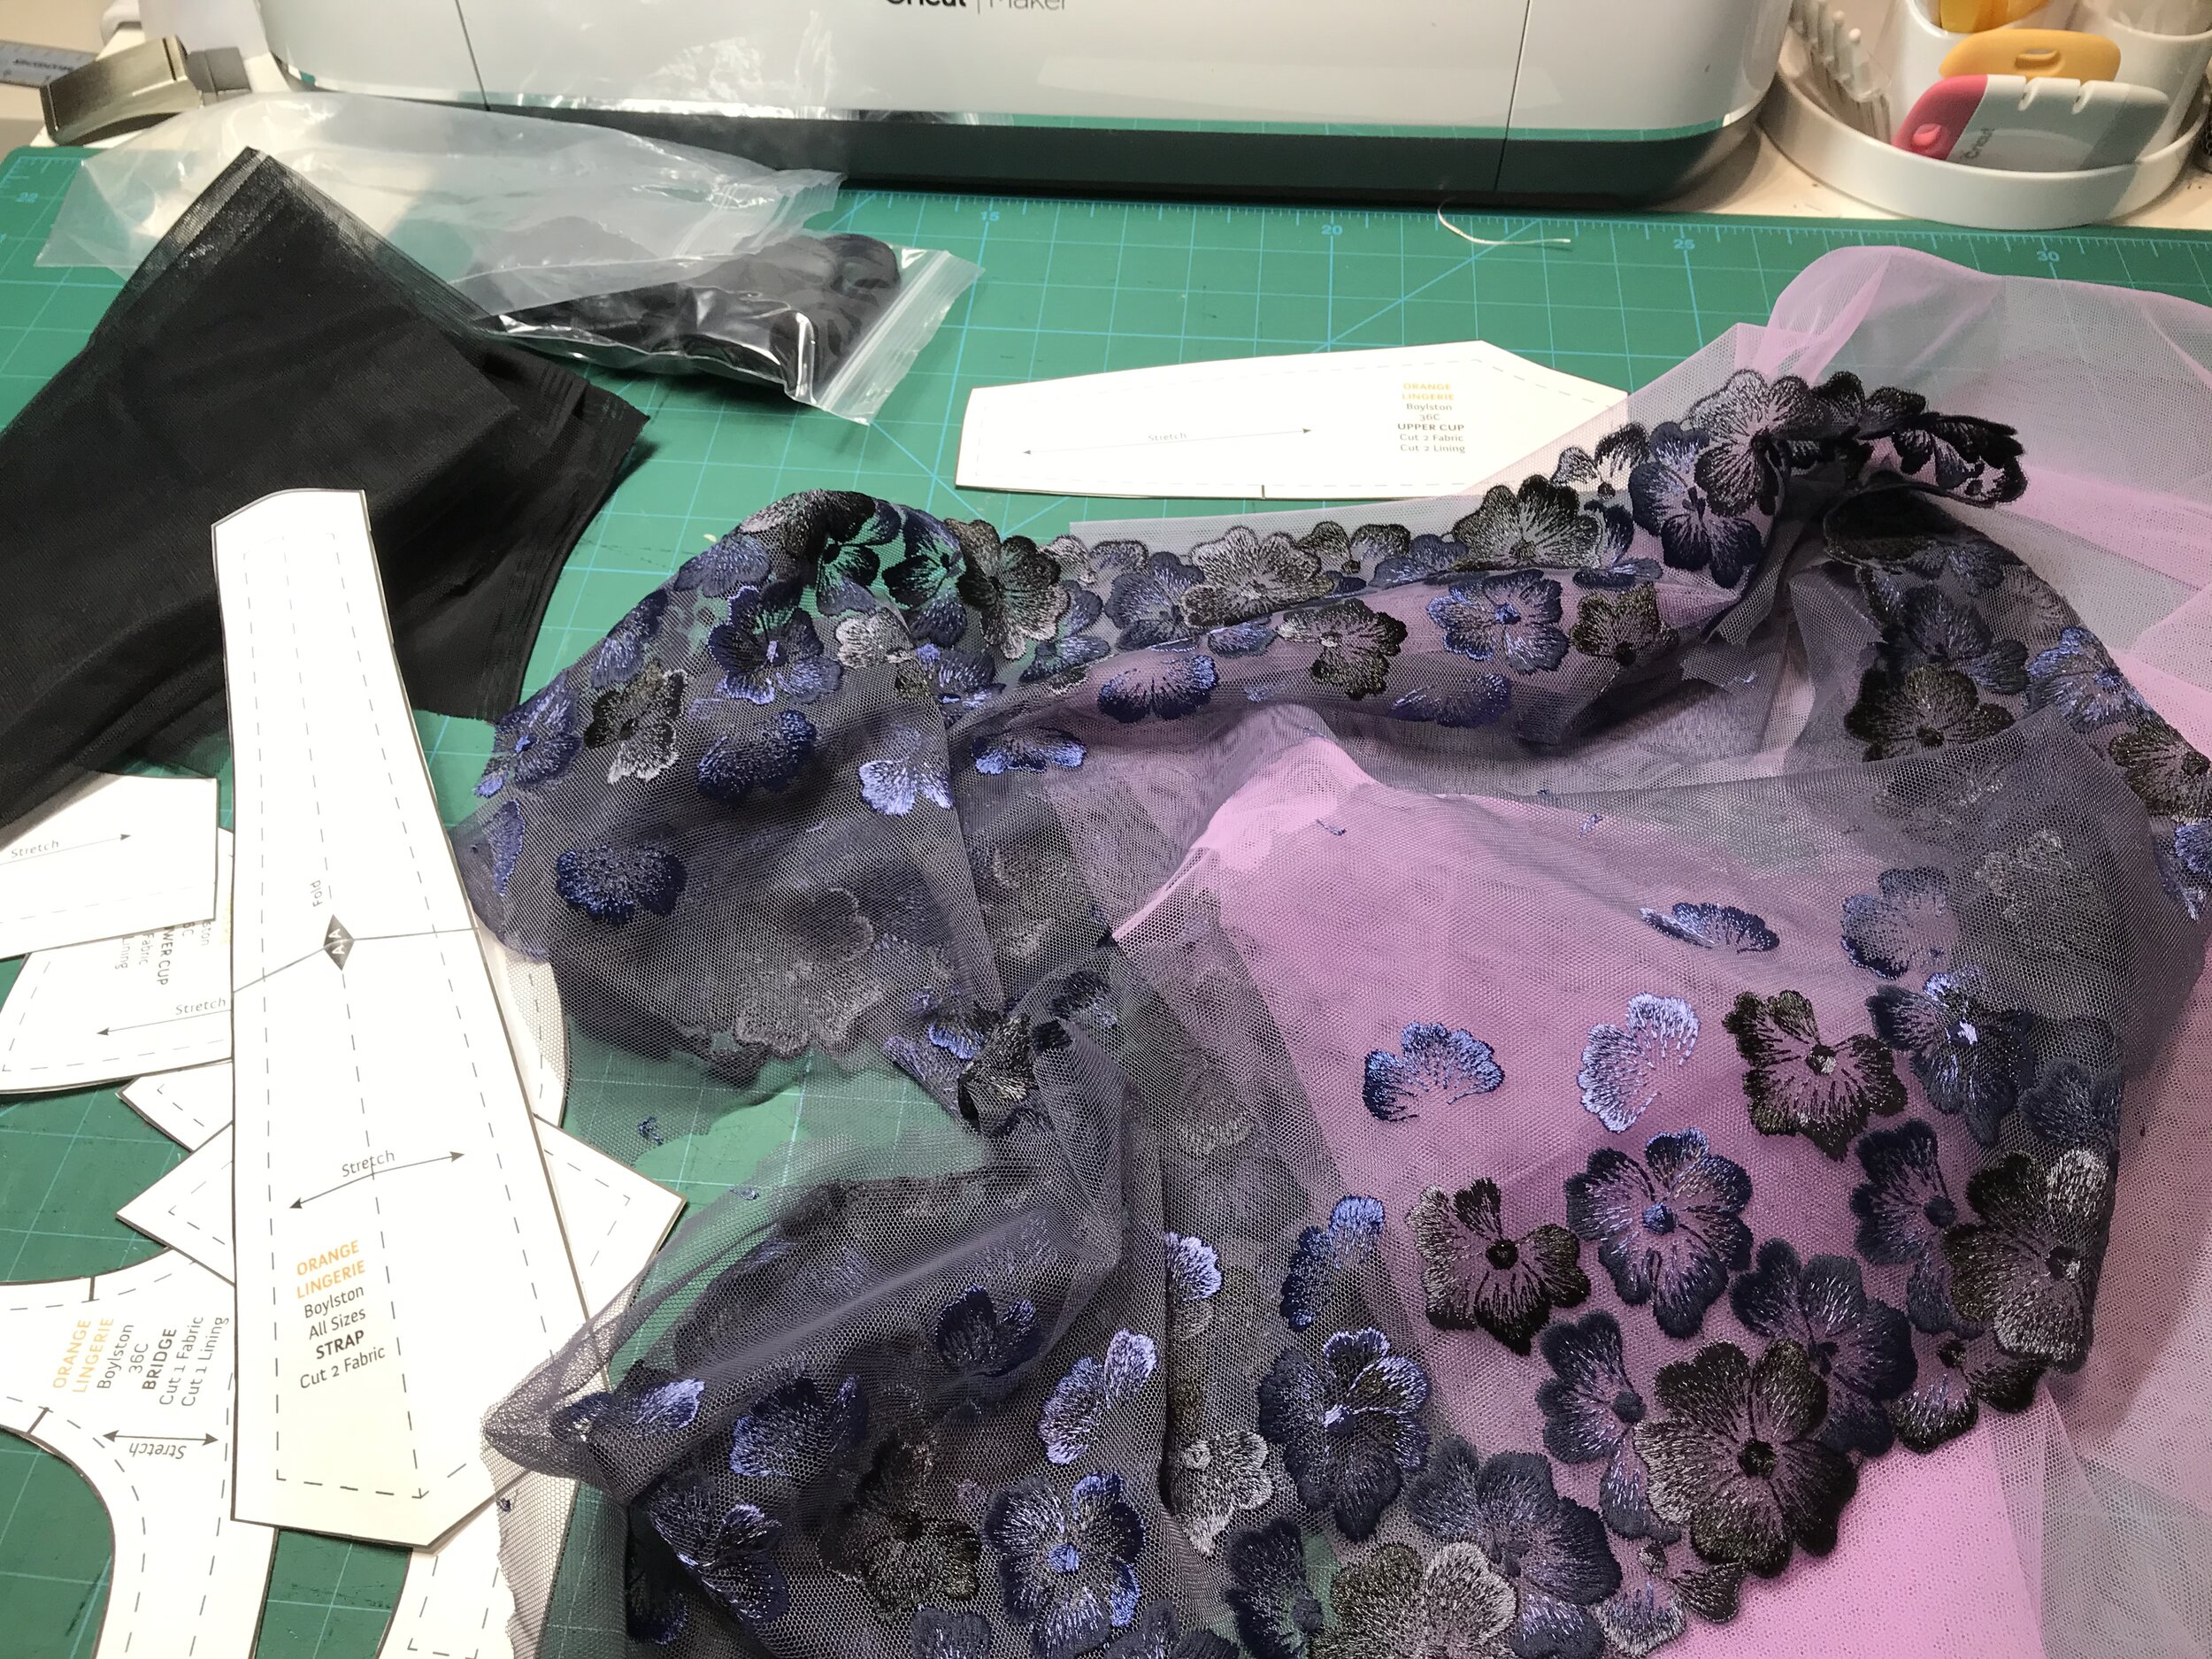
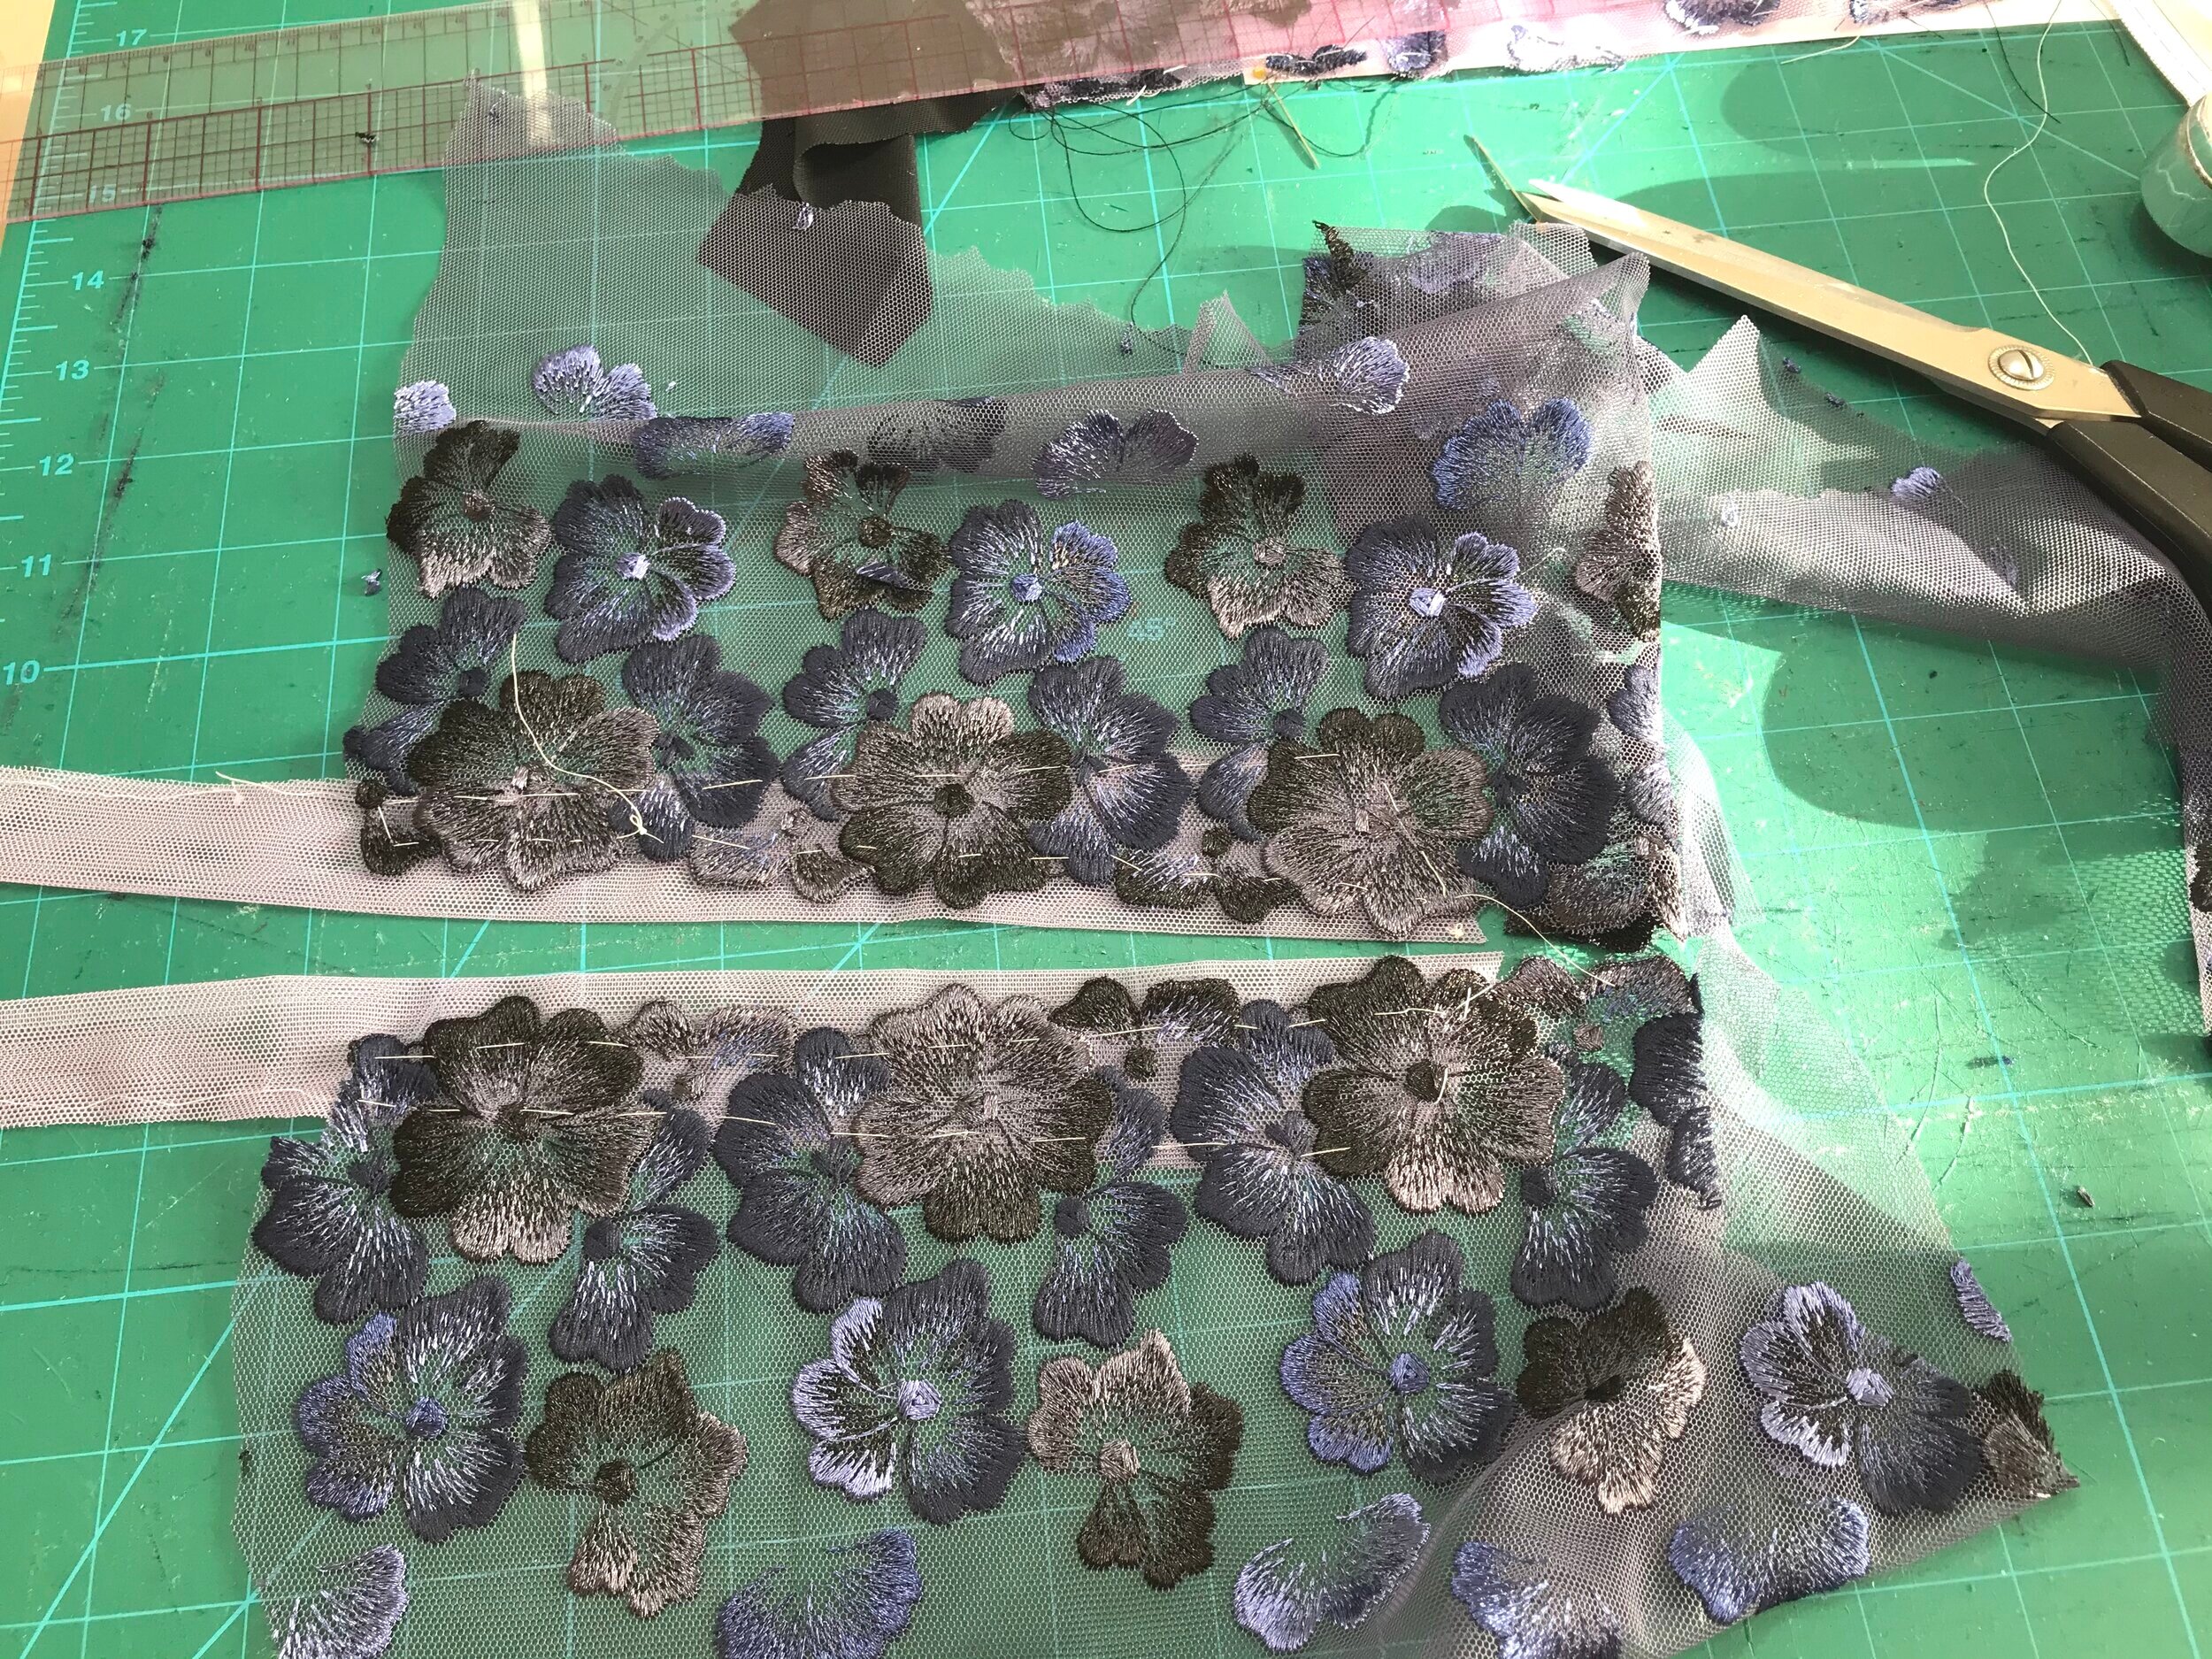
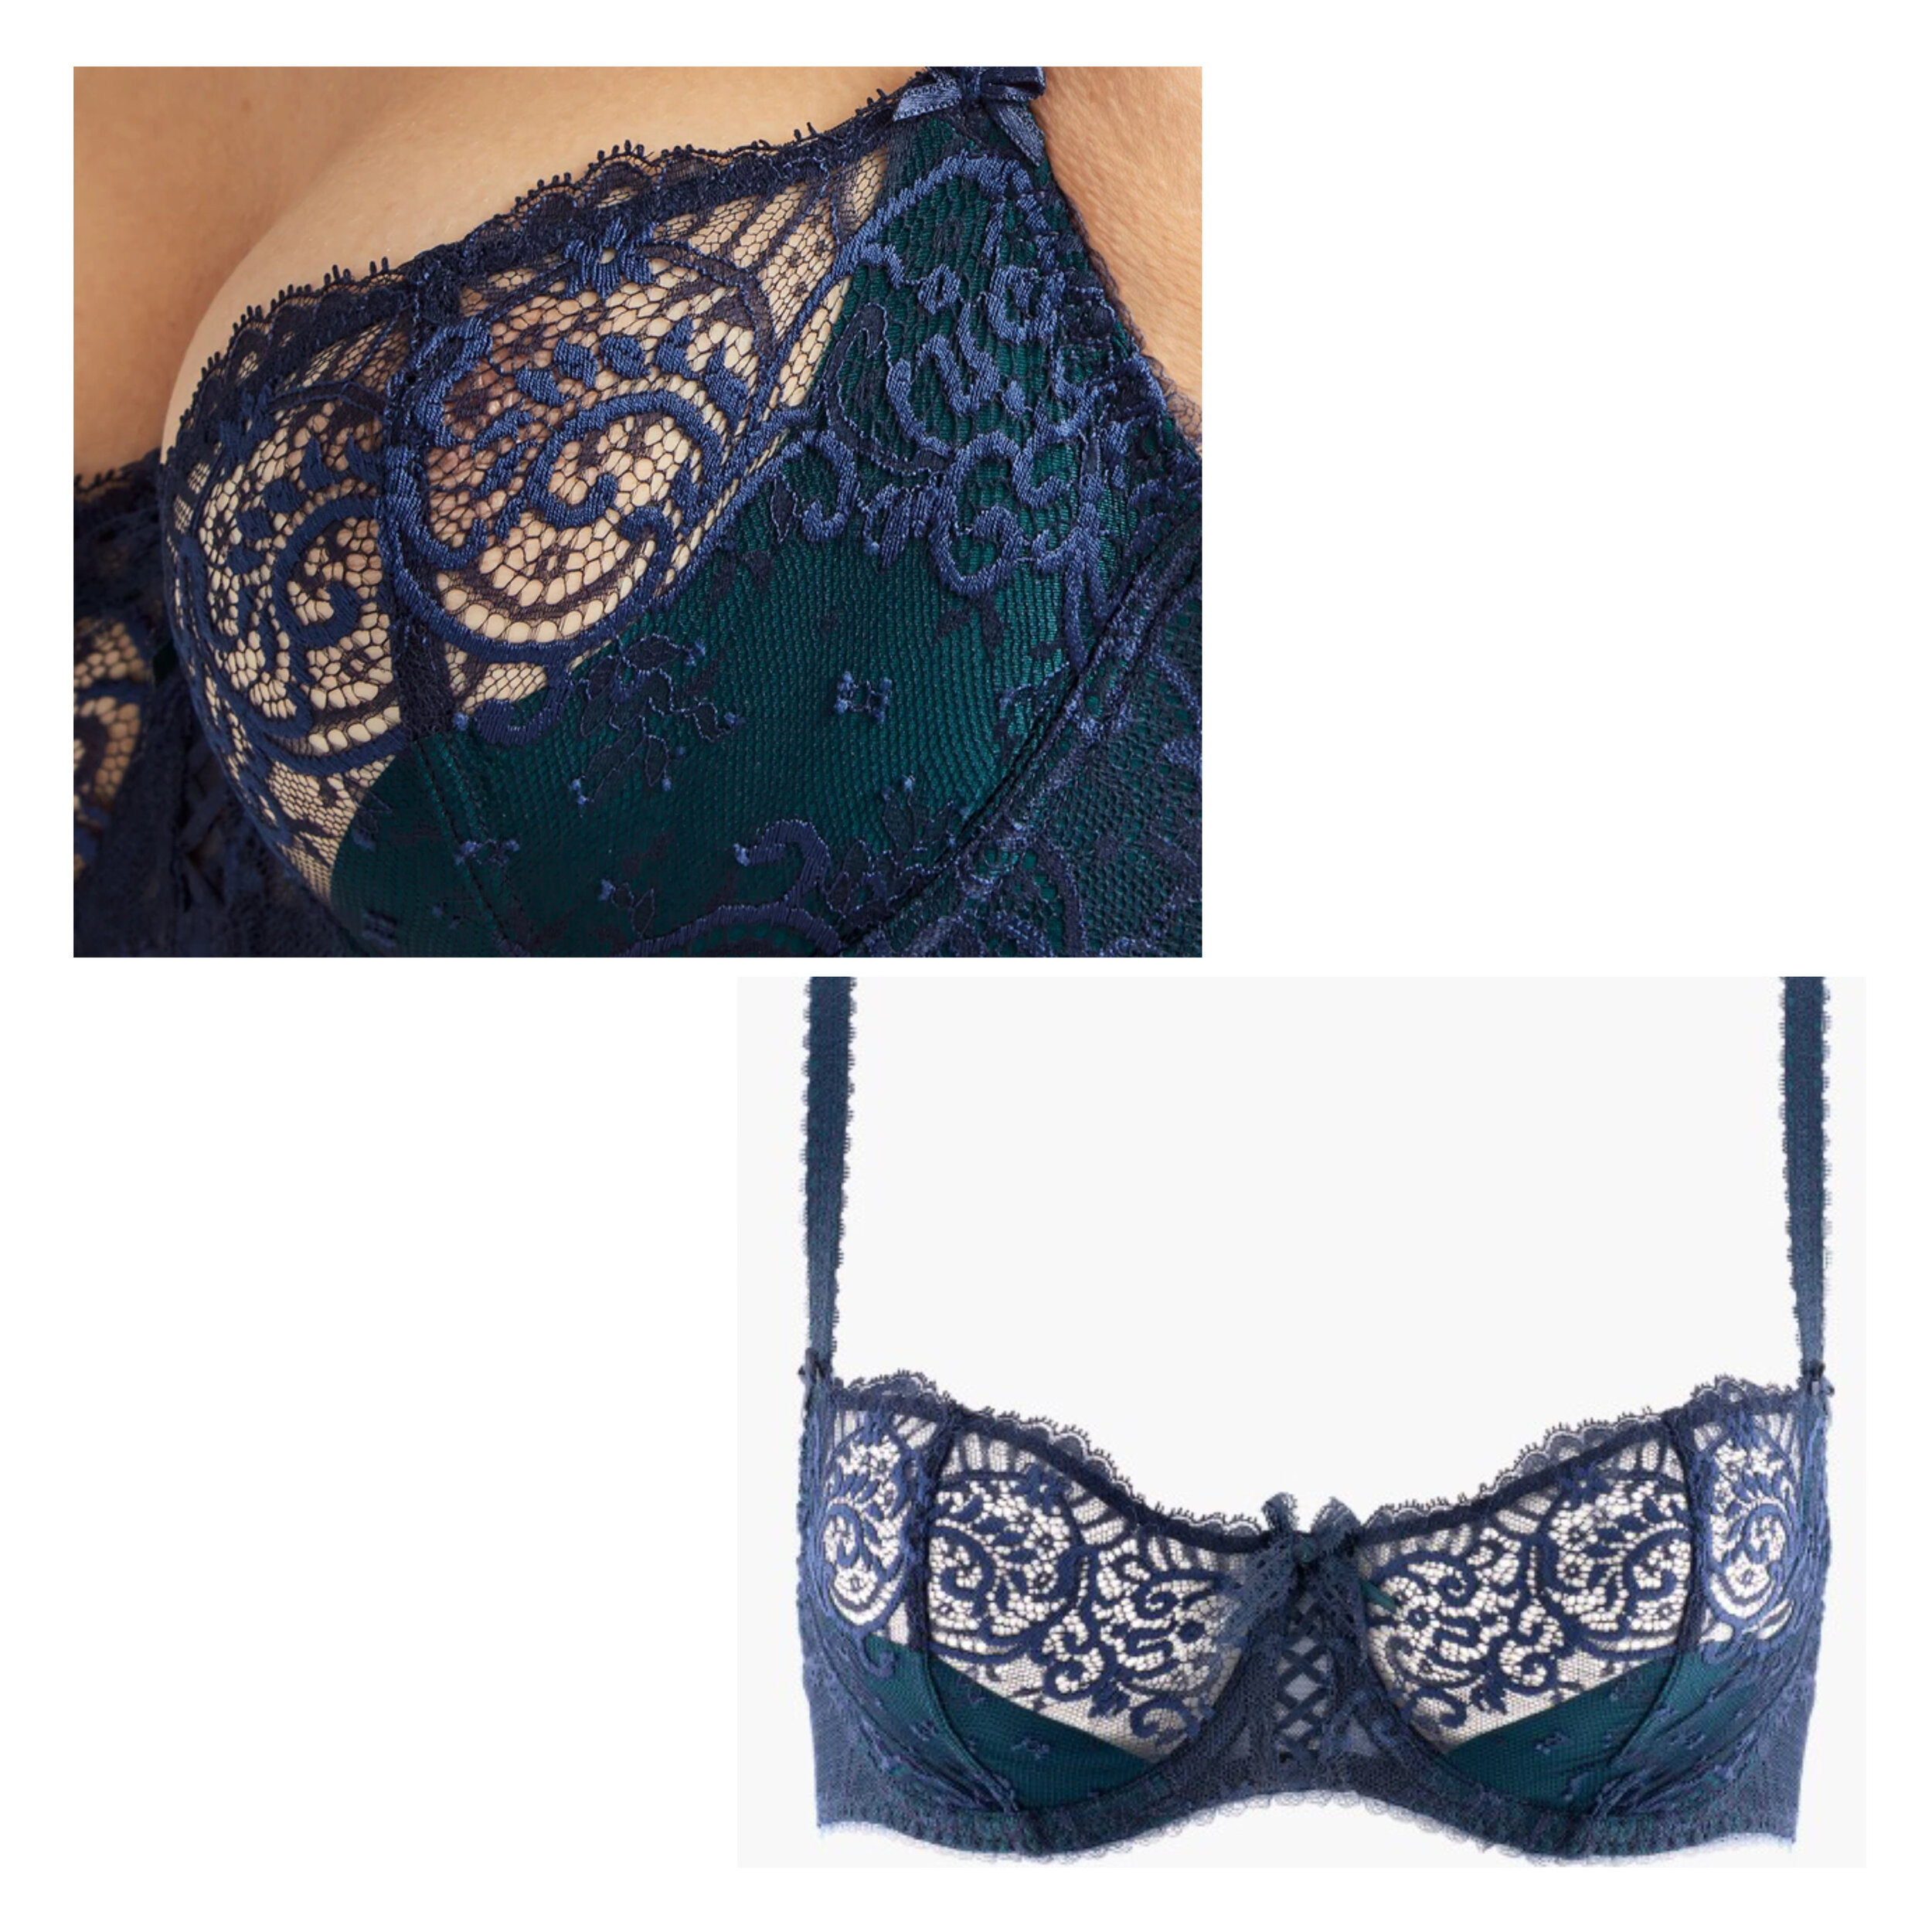
This set is recreating the look from another Aubade design called the Aubade à l’Amour Pearlized collection. For the class I made both a shorty using the Day Dream Nora hipster, with the detail on the back as shown, and the brief, with the detail on the front. There are three bras in the collection, a push up half cup, a bandeau and what is described as a comfort full cup. My initial thought was to make the bandeau version with mesh gathered across the front using the Afi Atelier Exquisite Butterfly addon but it wouldn’t really require much adjustment and I wanted a bra with smoother lines for under clothing. Also I didn’t want another padded bra so I went with the look of the full cup using fabric and lace I had left.

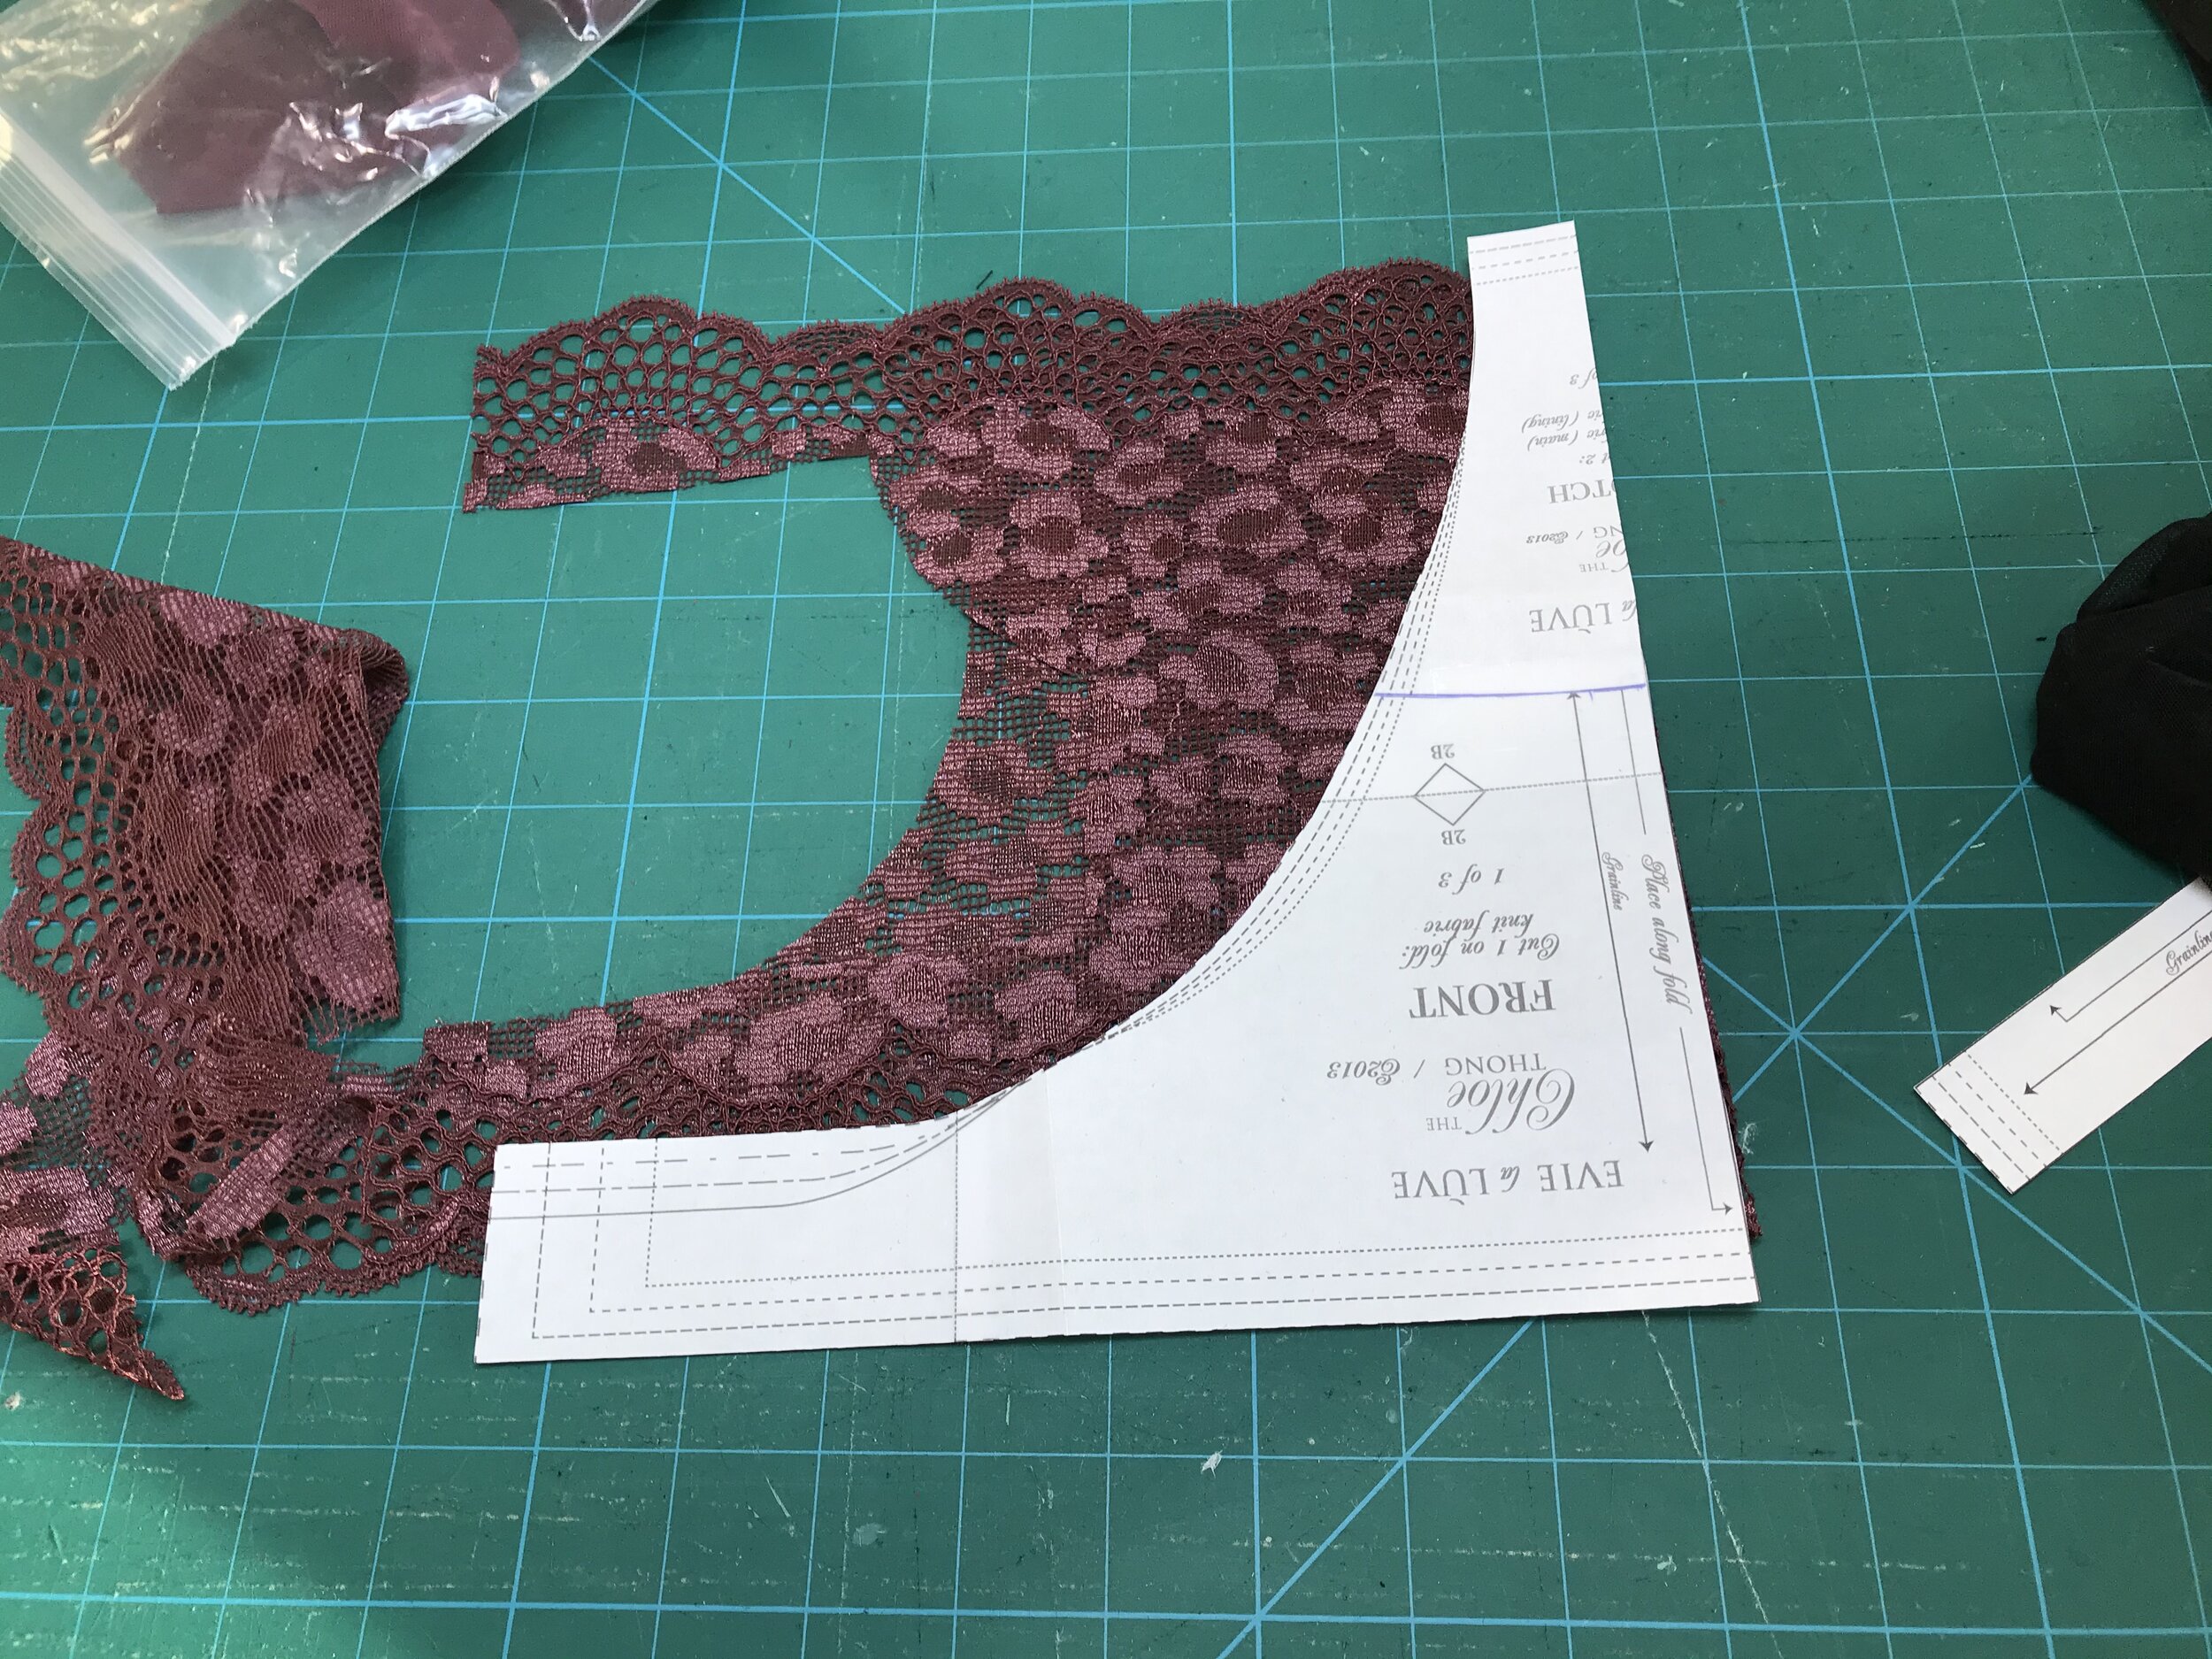
The pattern I had which was most like the design was The BraMakery Chloe but I knew I needed to take some of the fullness out for a better fit so I decided to use a similar pattern, the Merckwaerdigh Wings. I had bought this at the start of my bra making journey but never got around to making other than a test size but was recently reminded that I had bought quite a few of Merckwaerdigh’s patterns when I saw a post on Instagram.

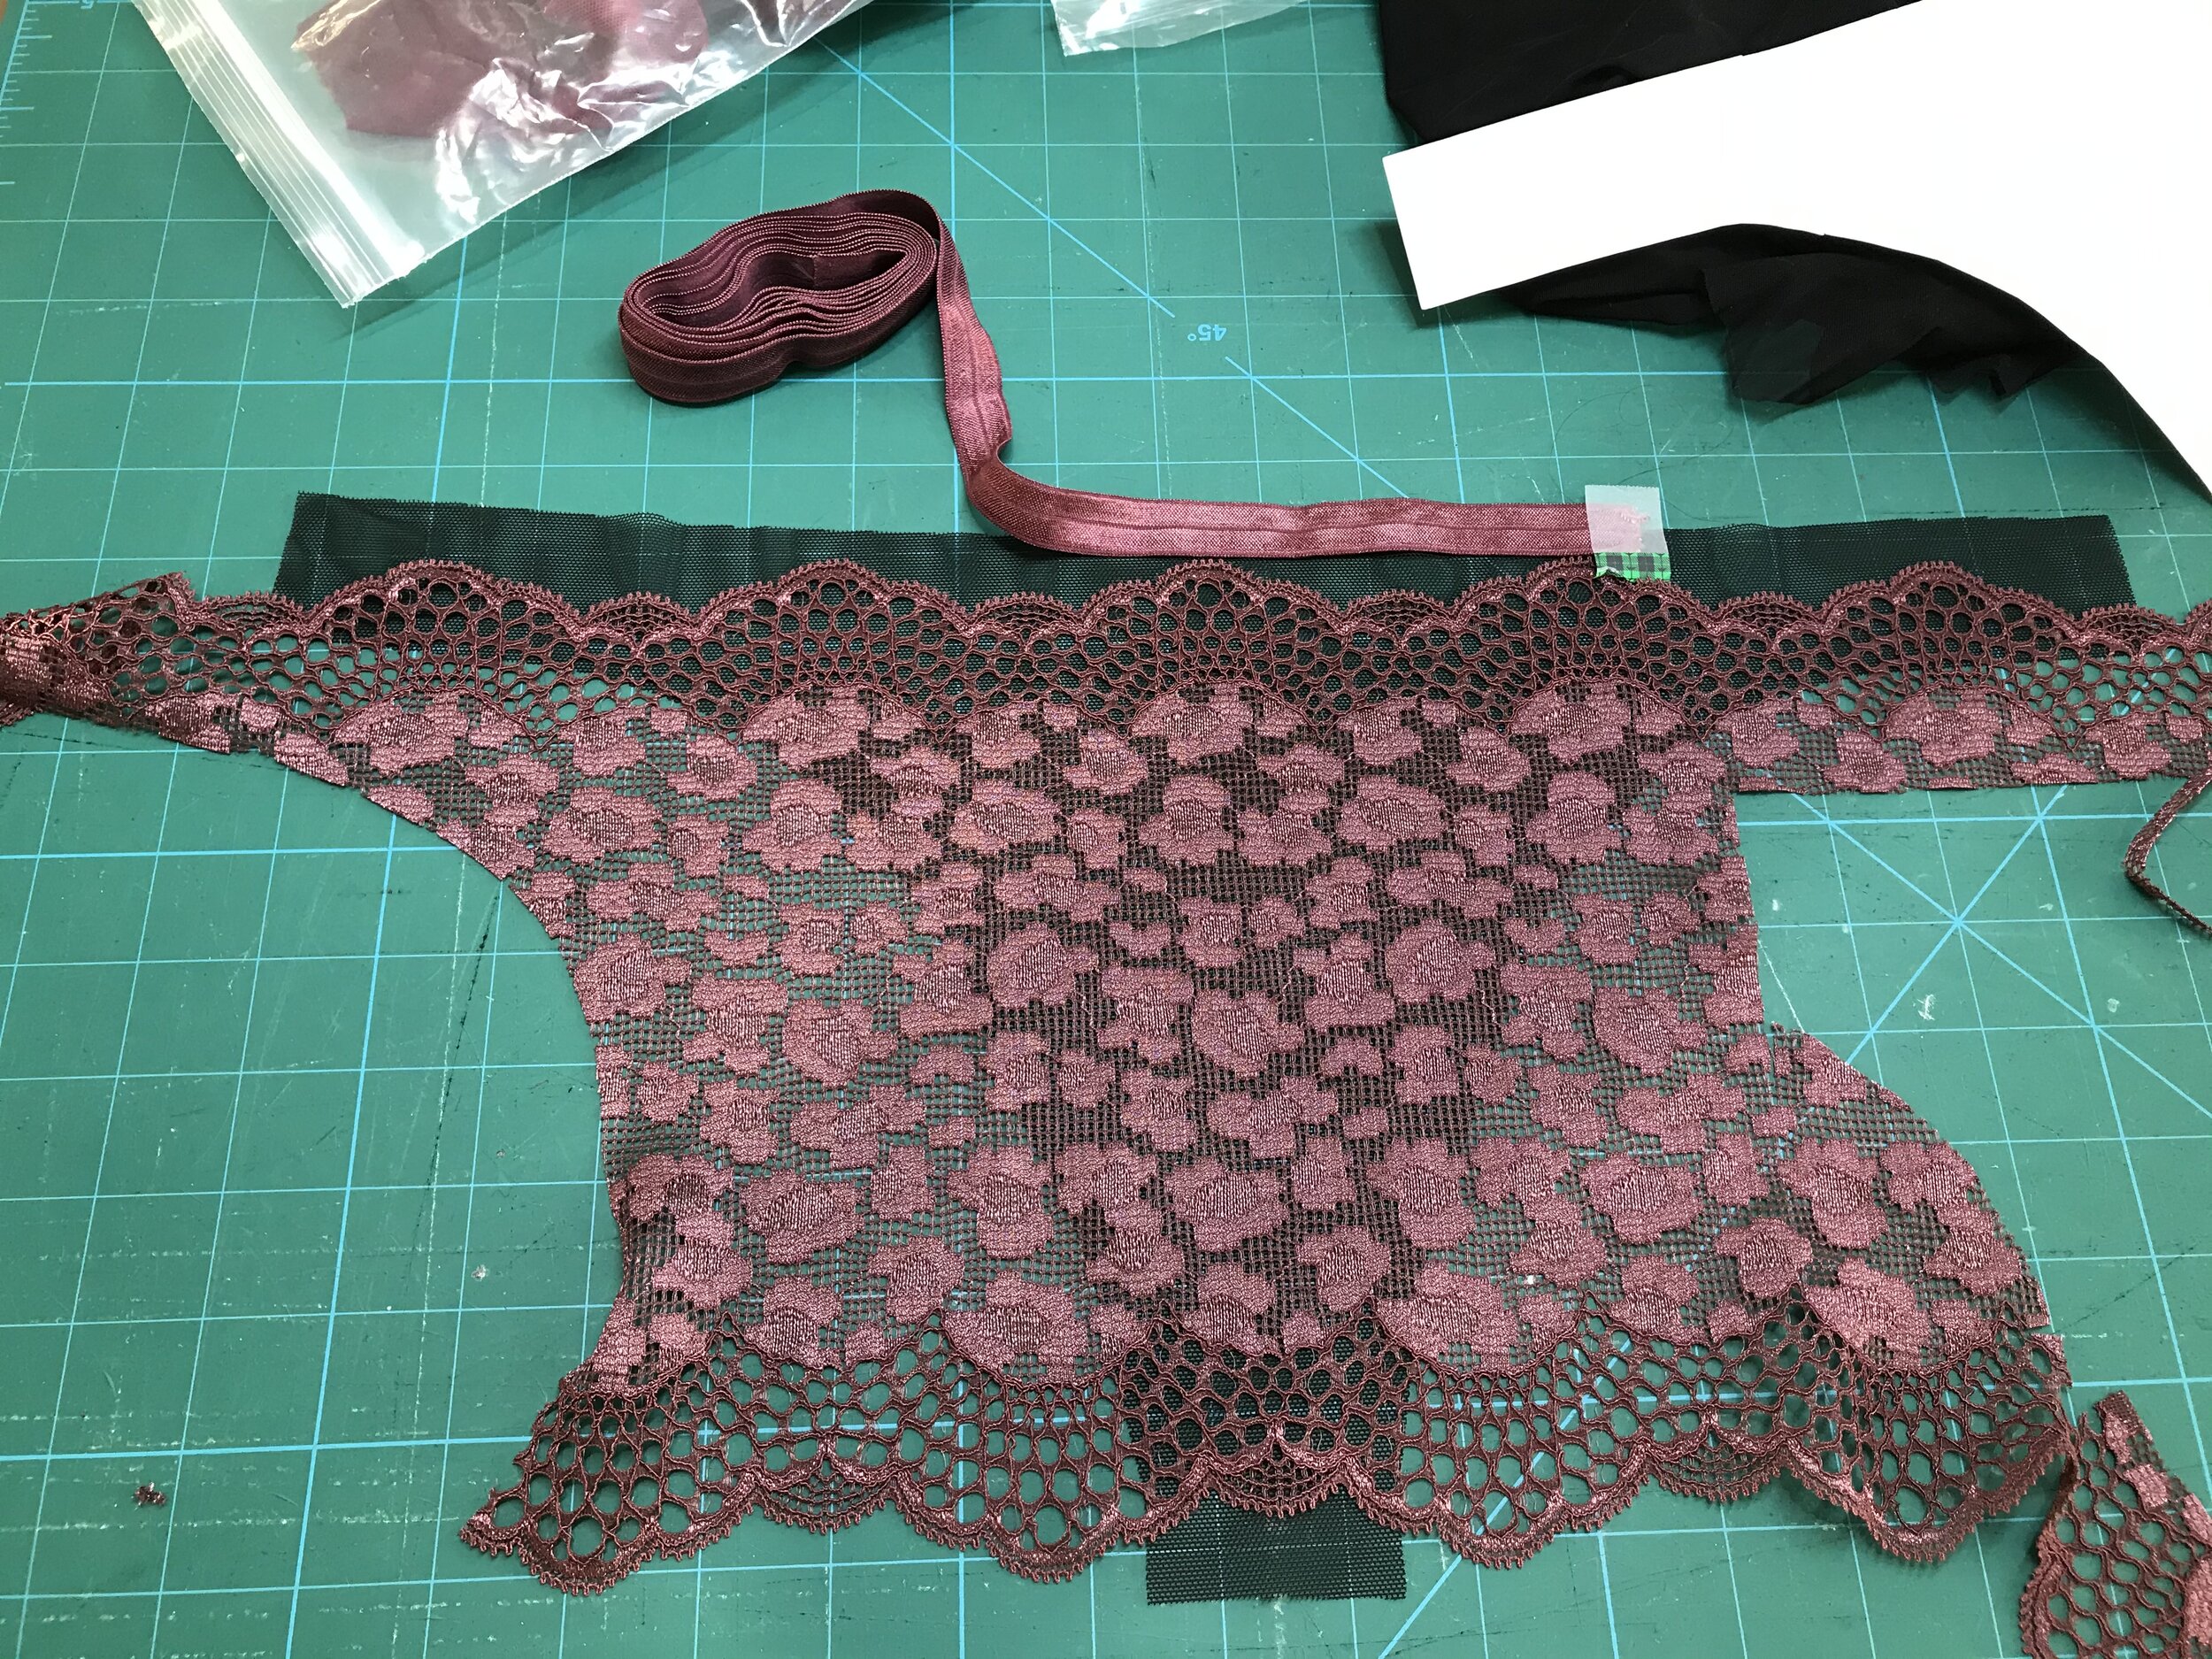
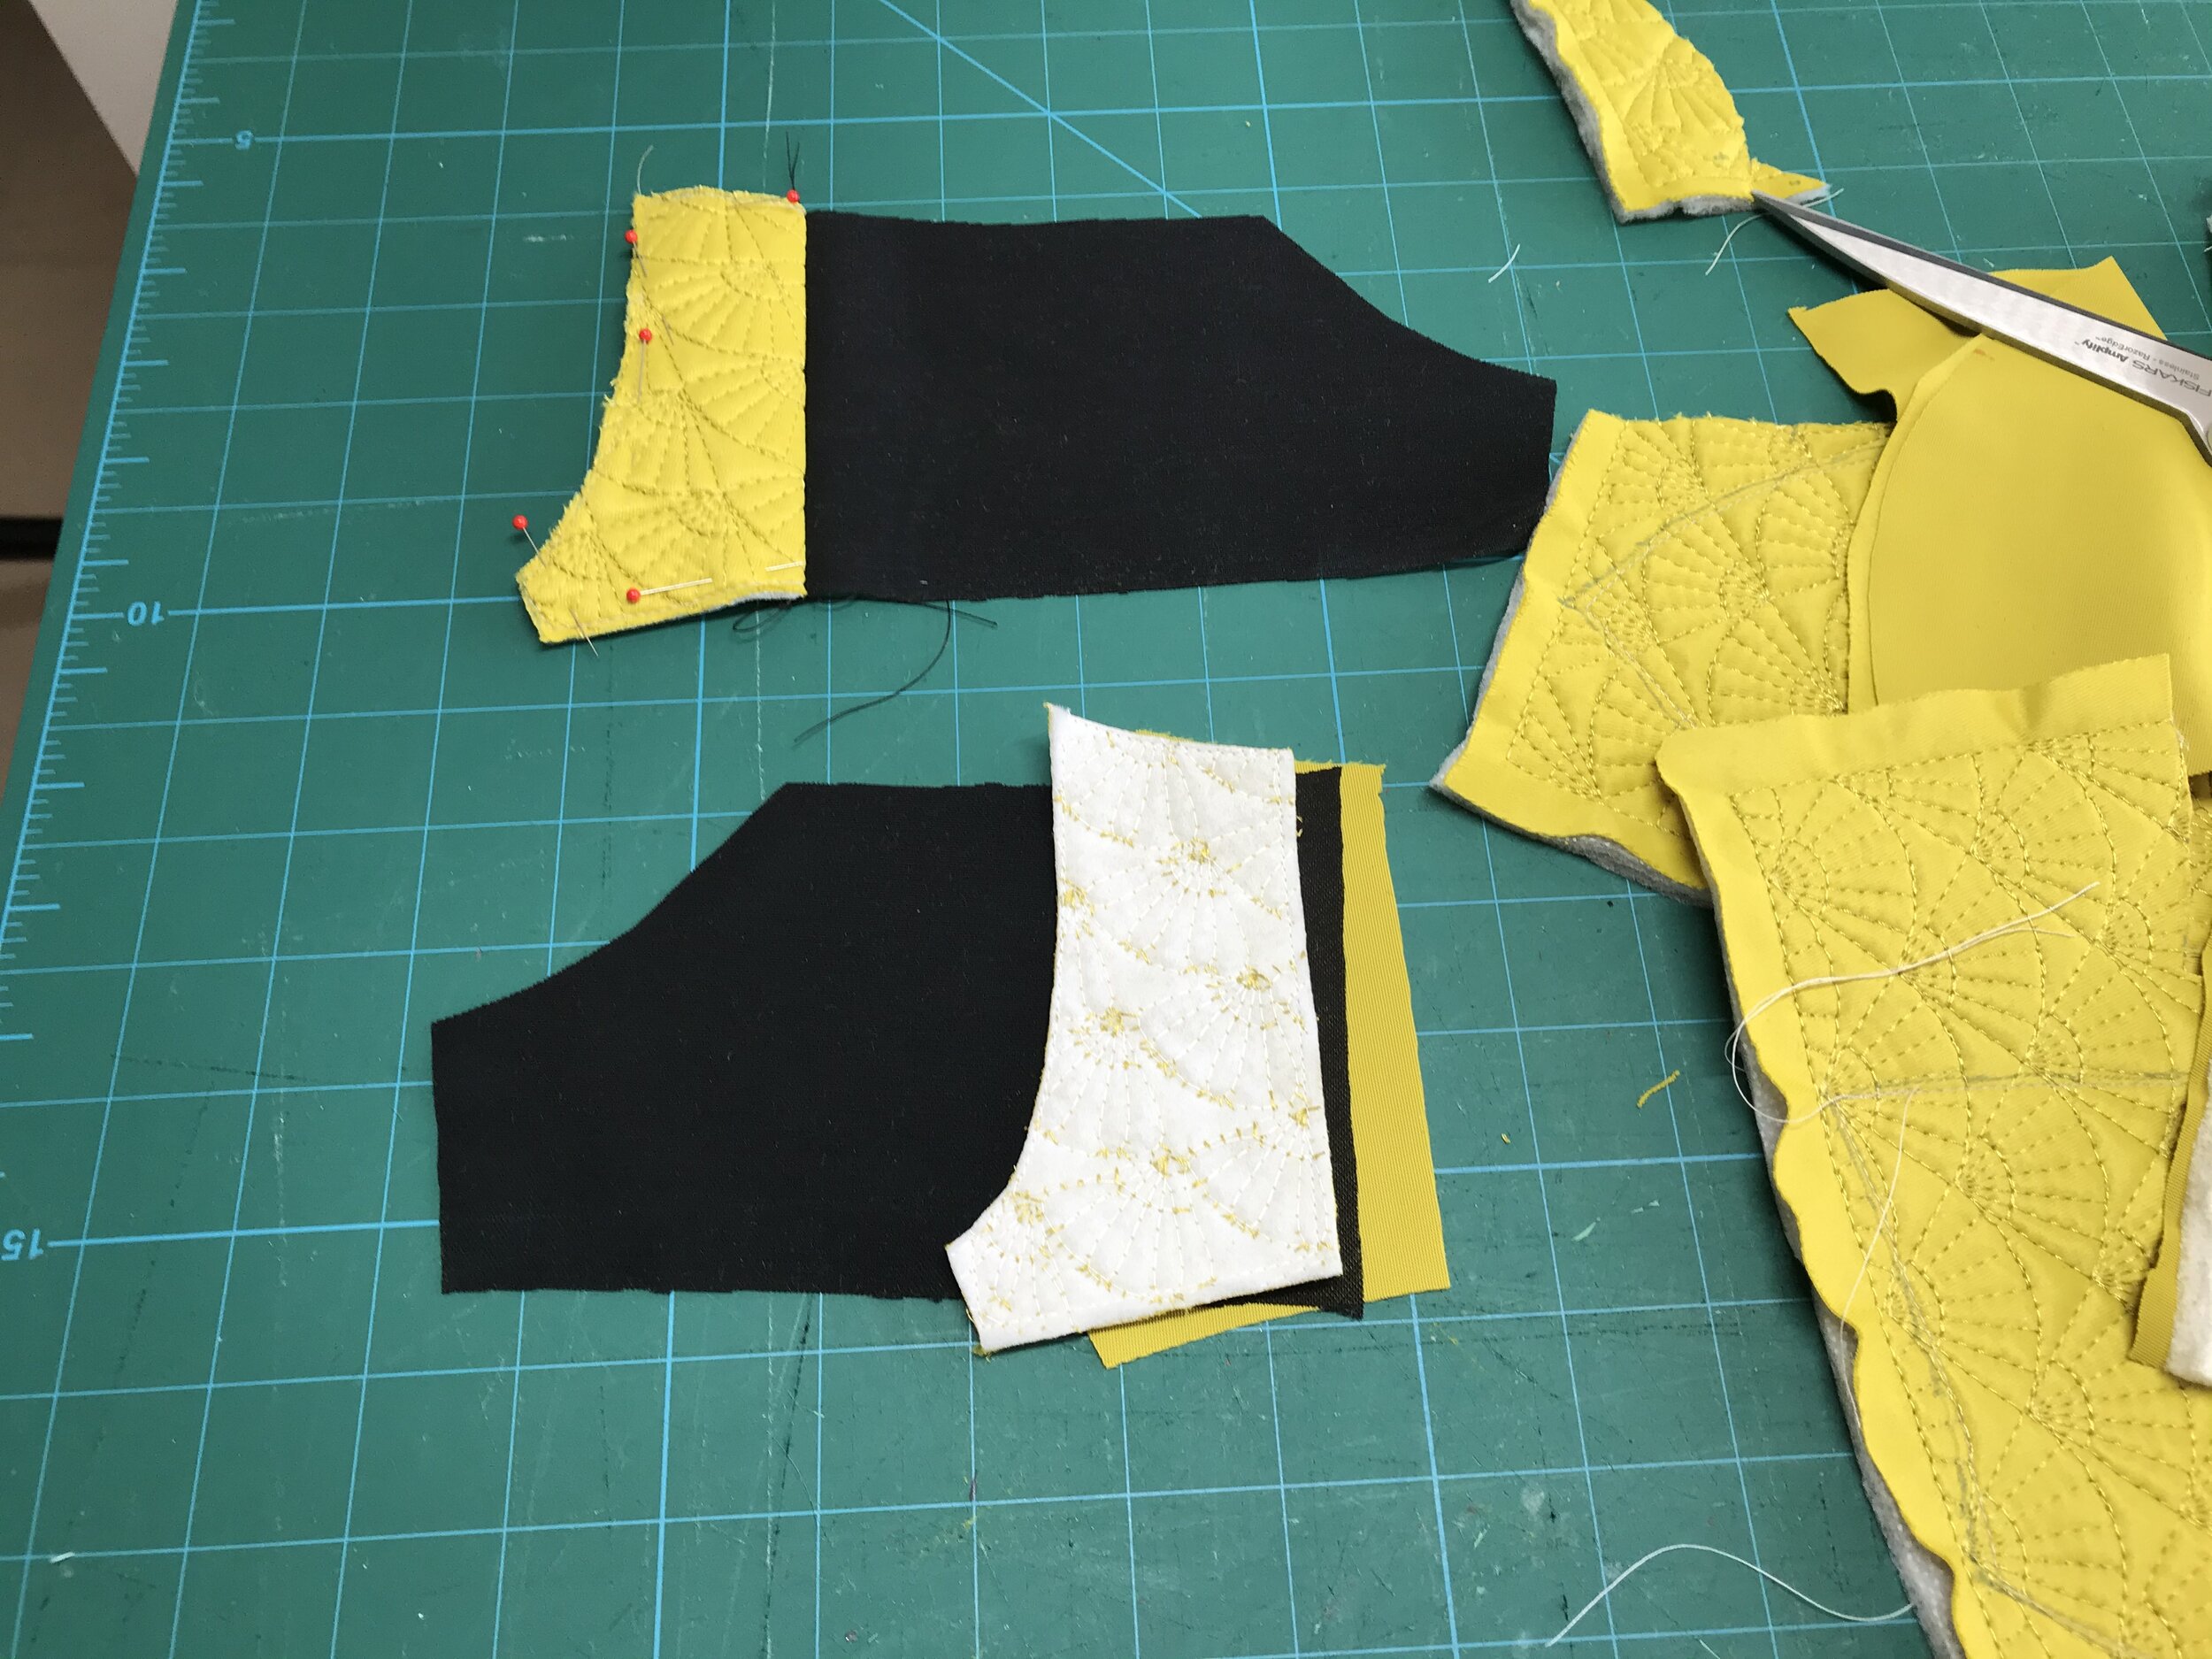
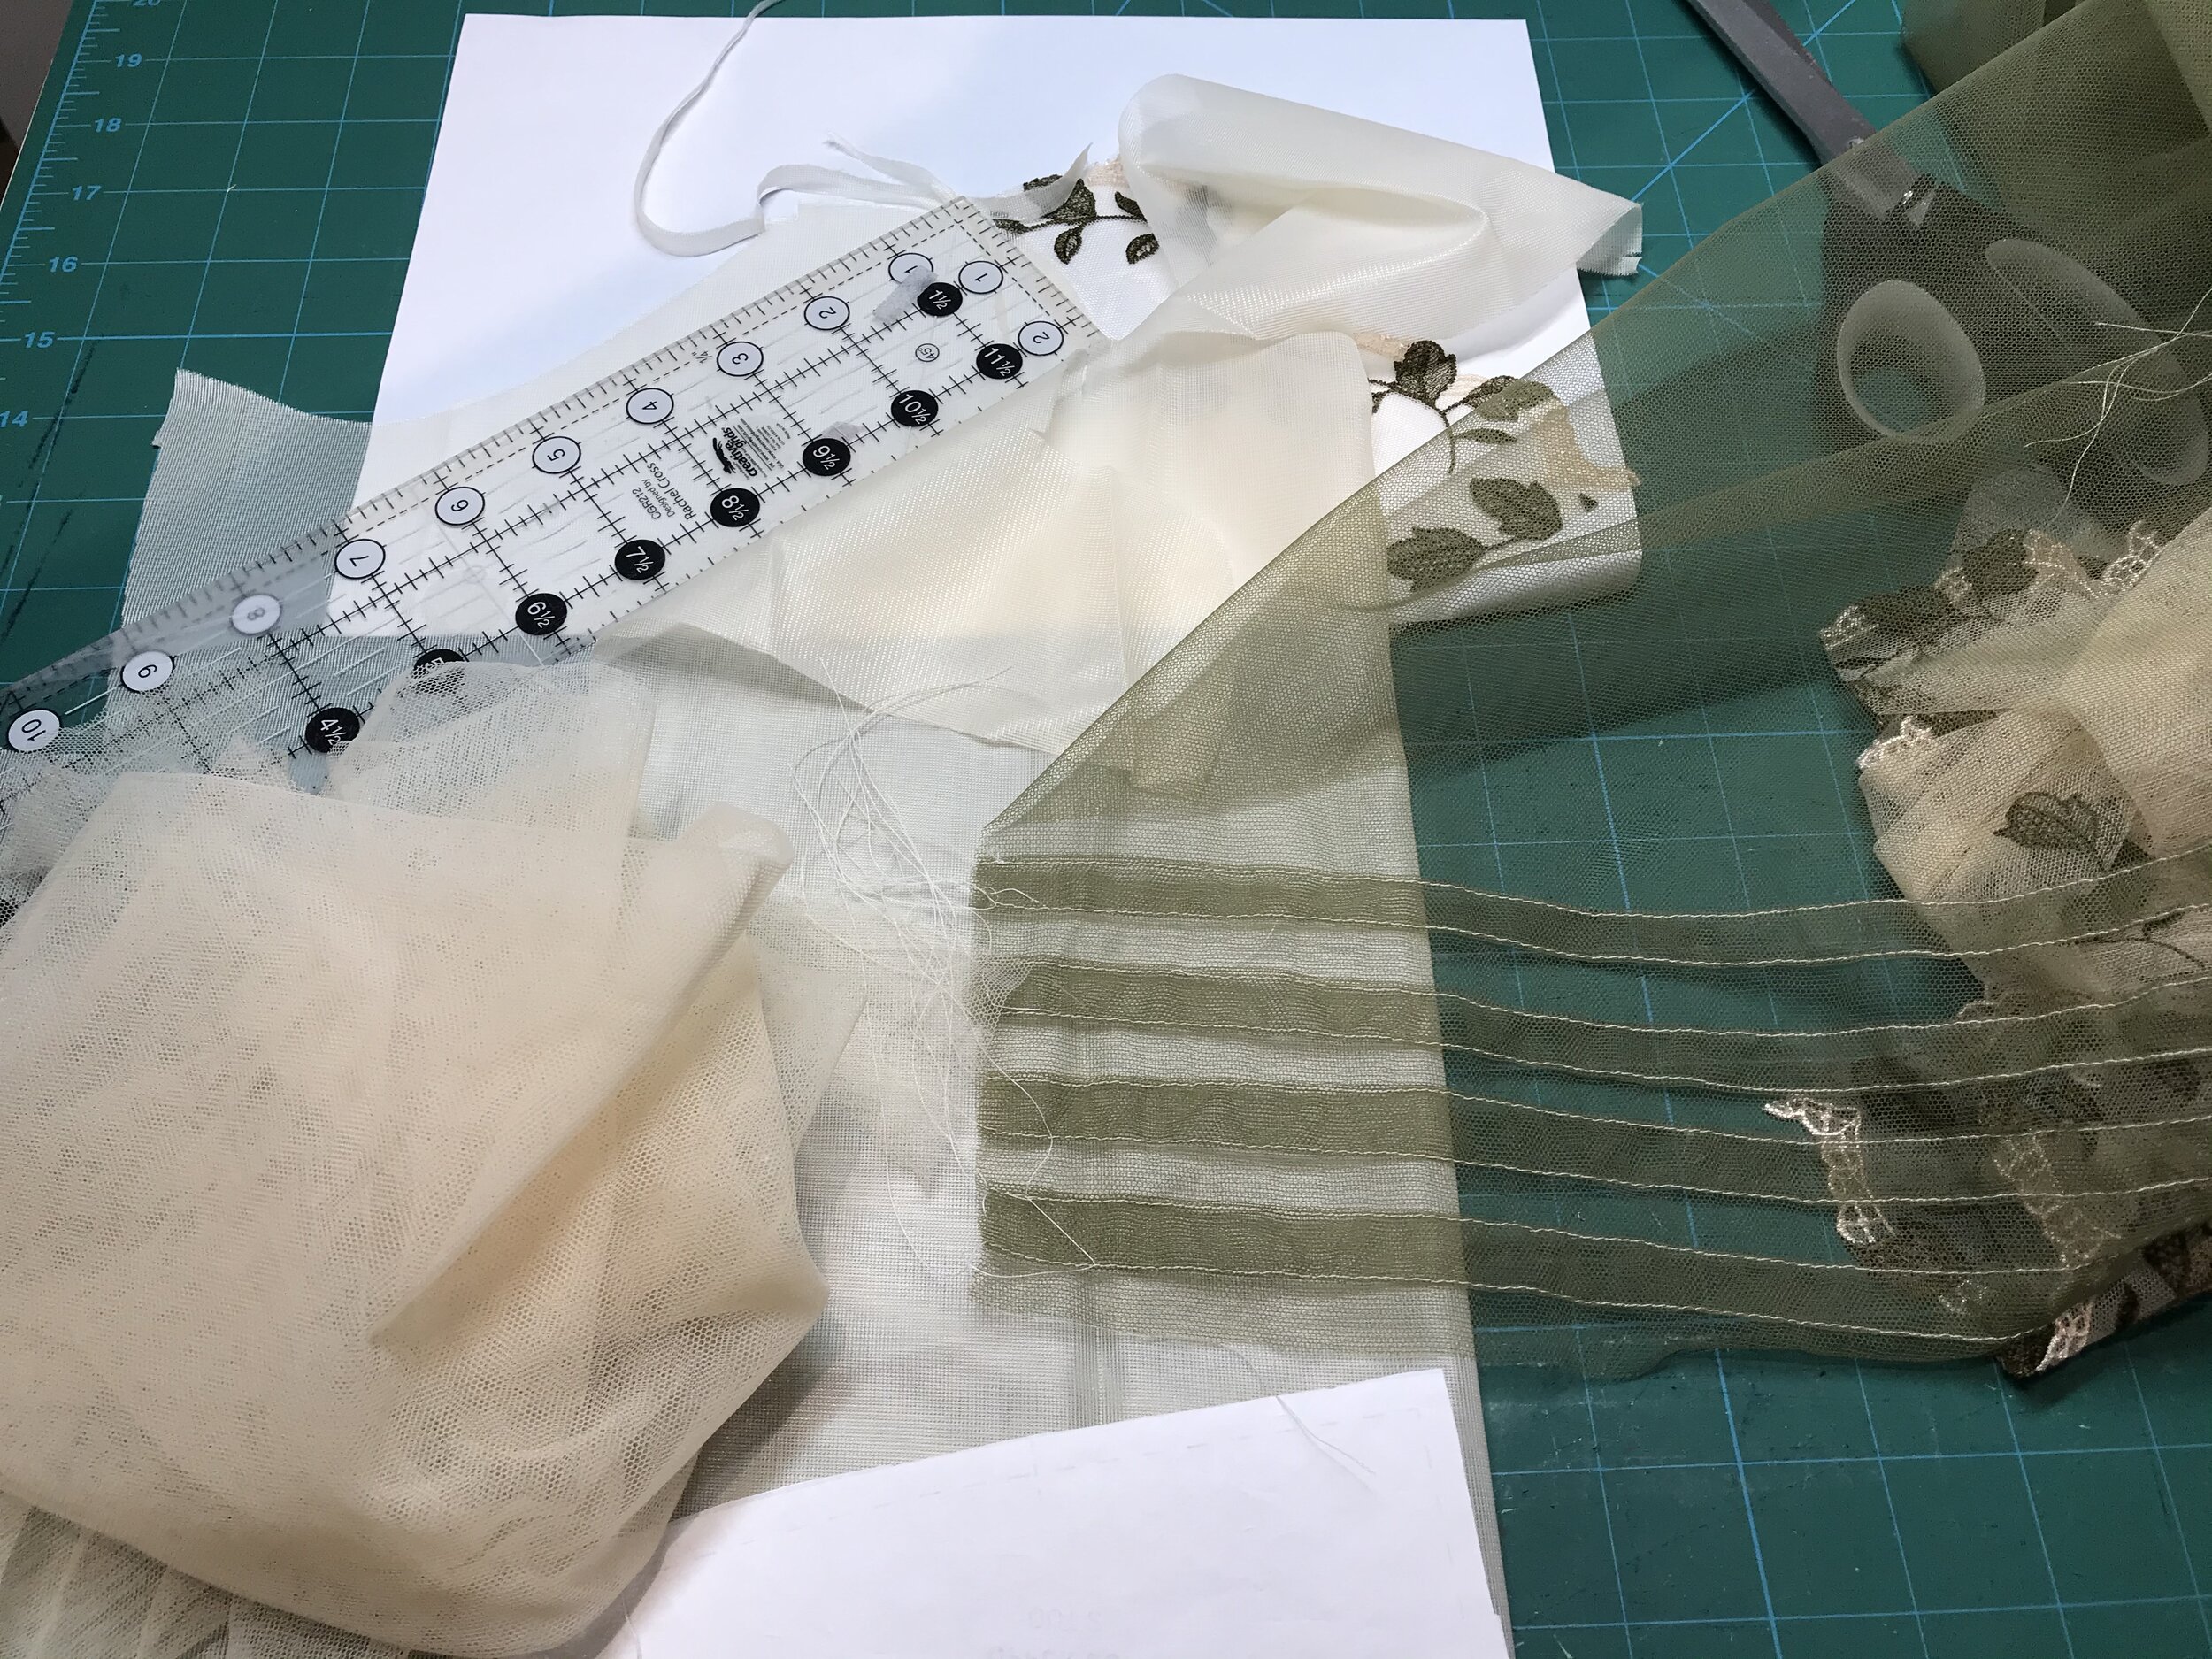
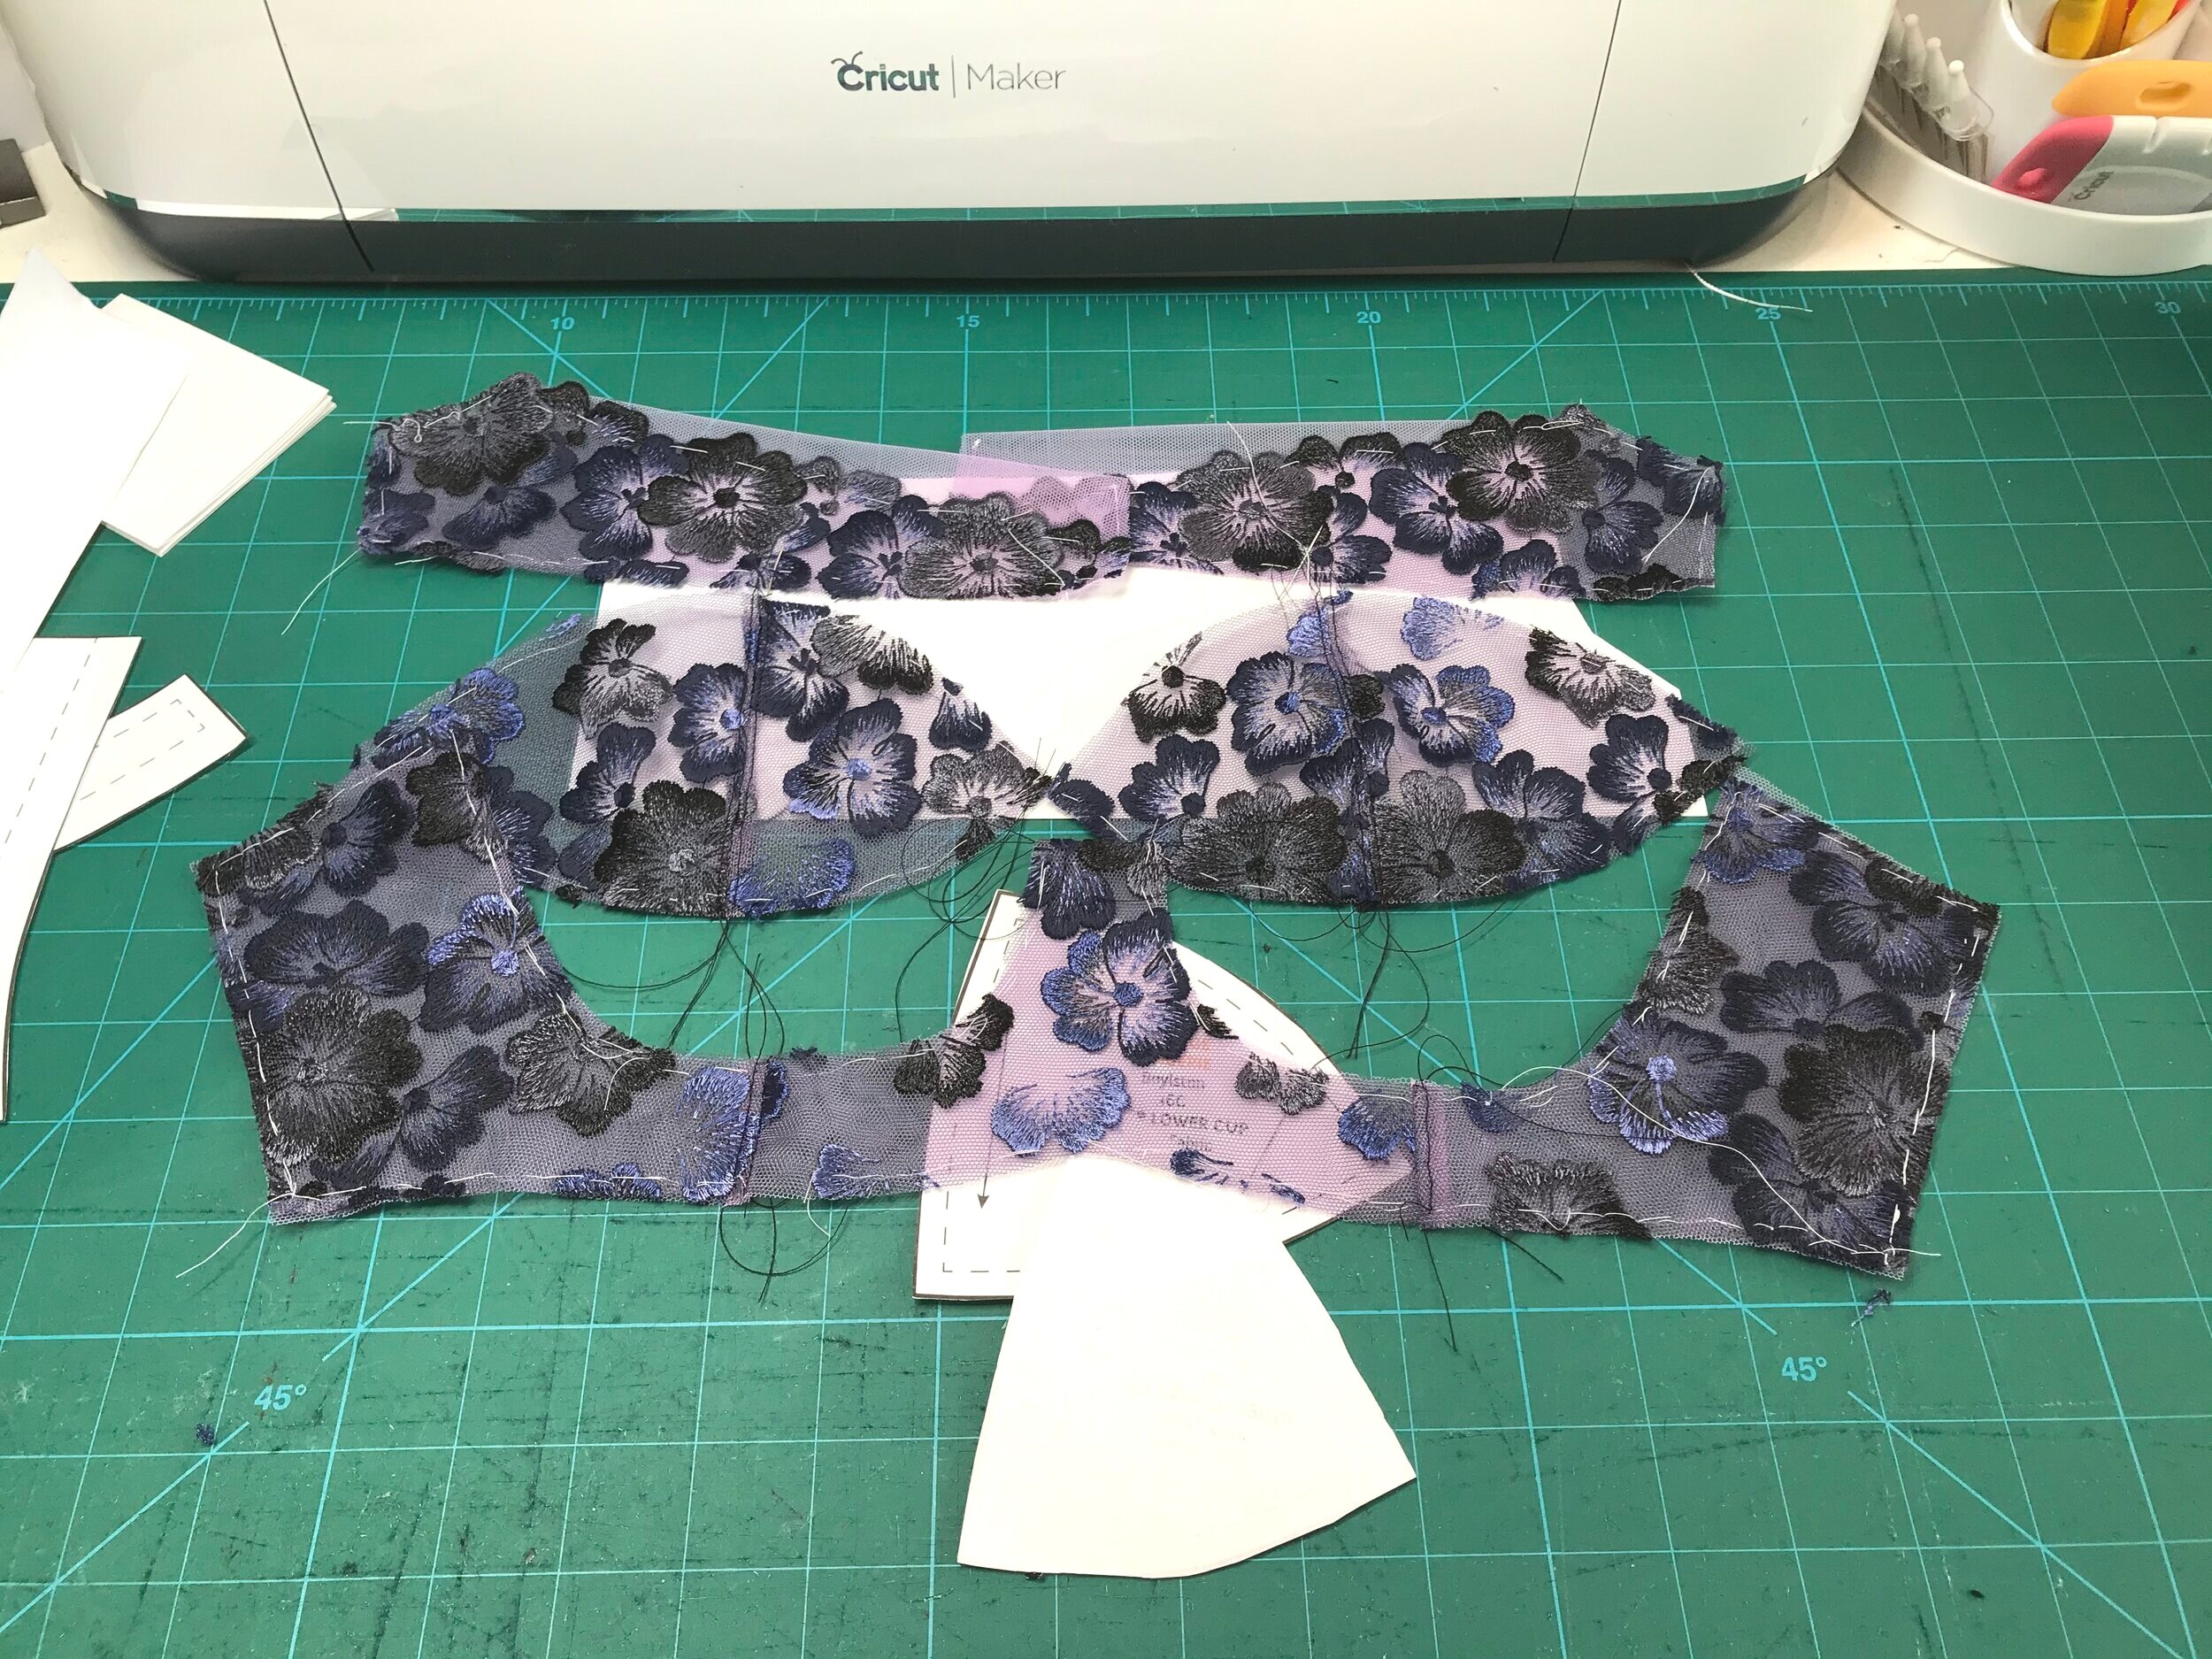
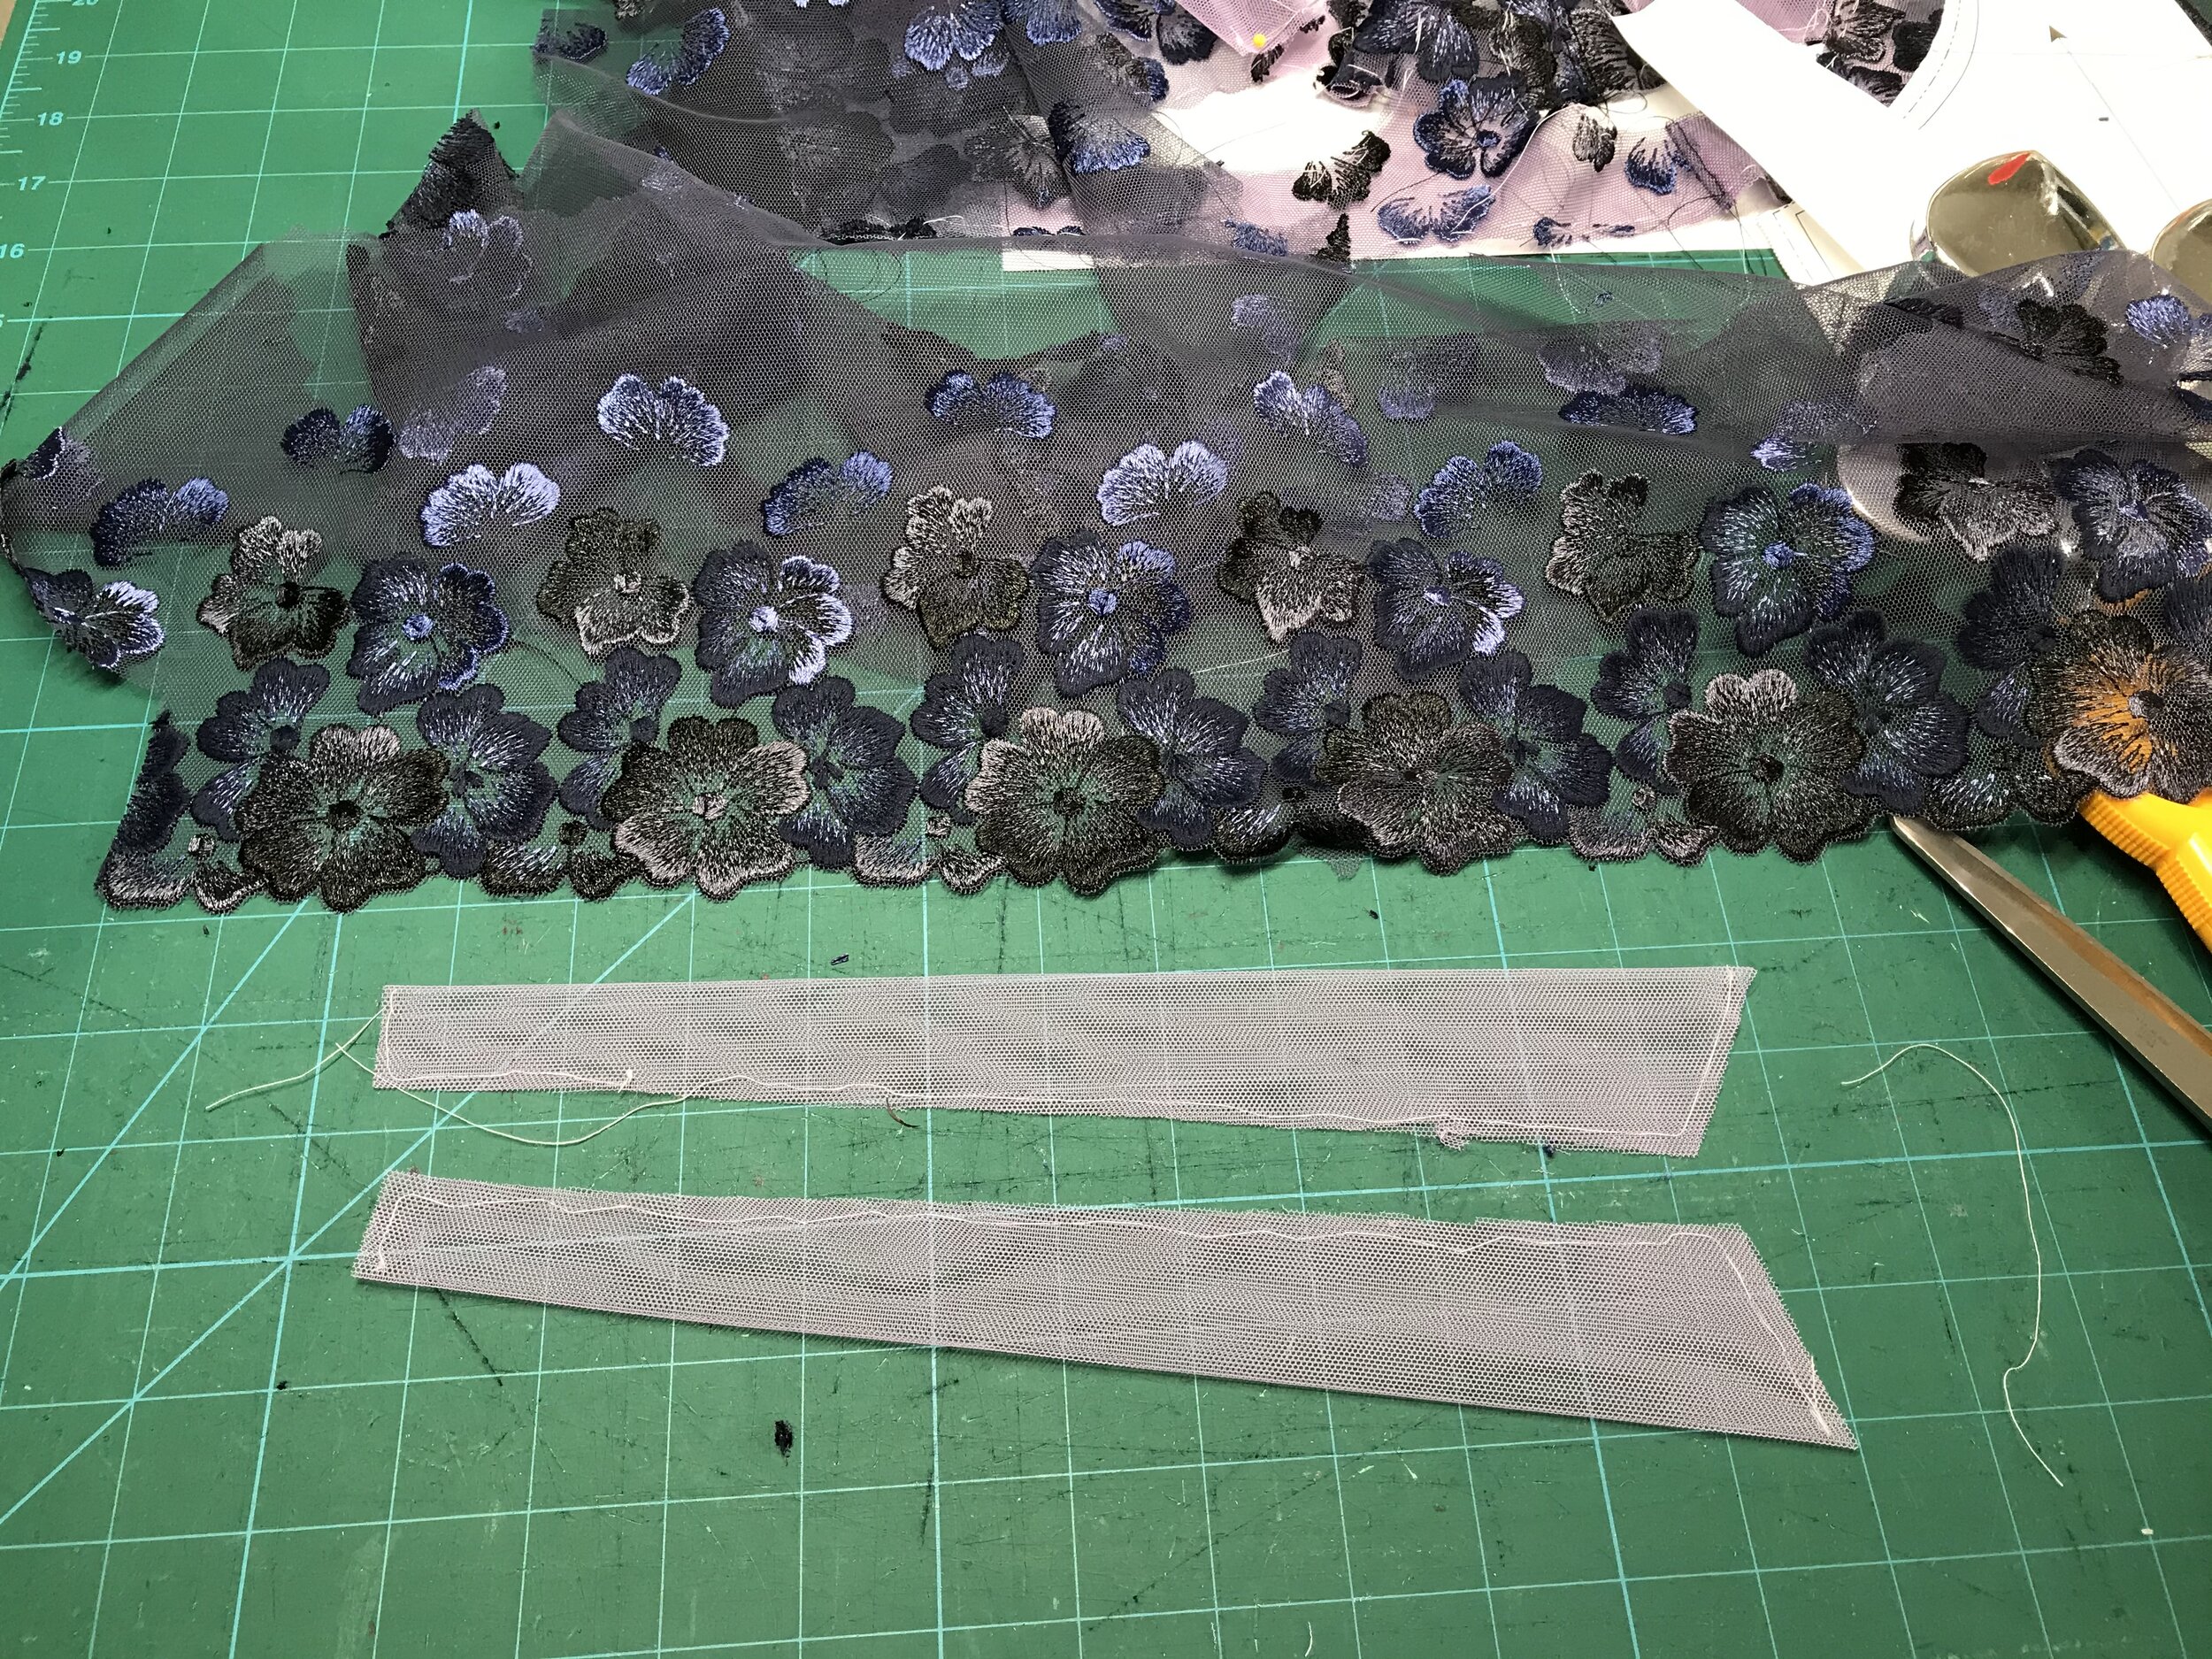
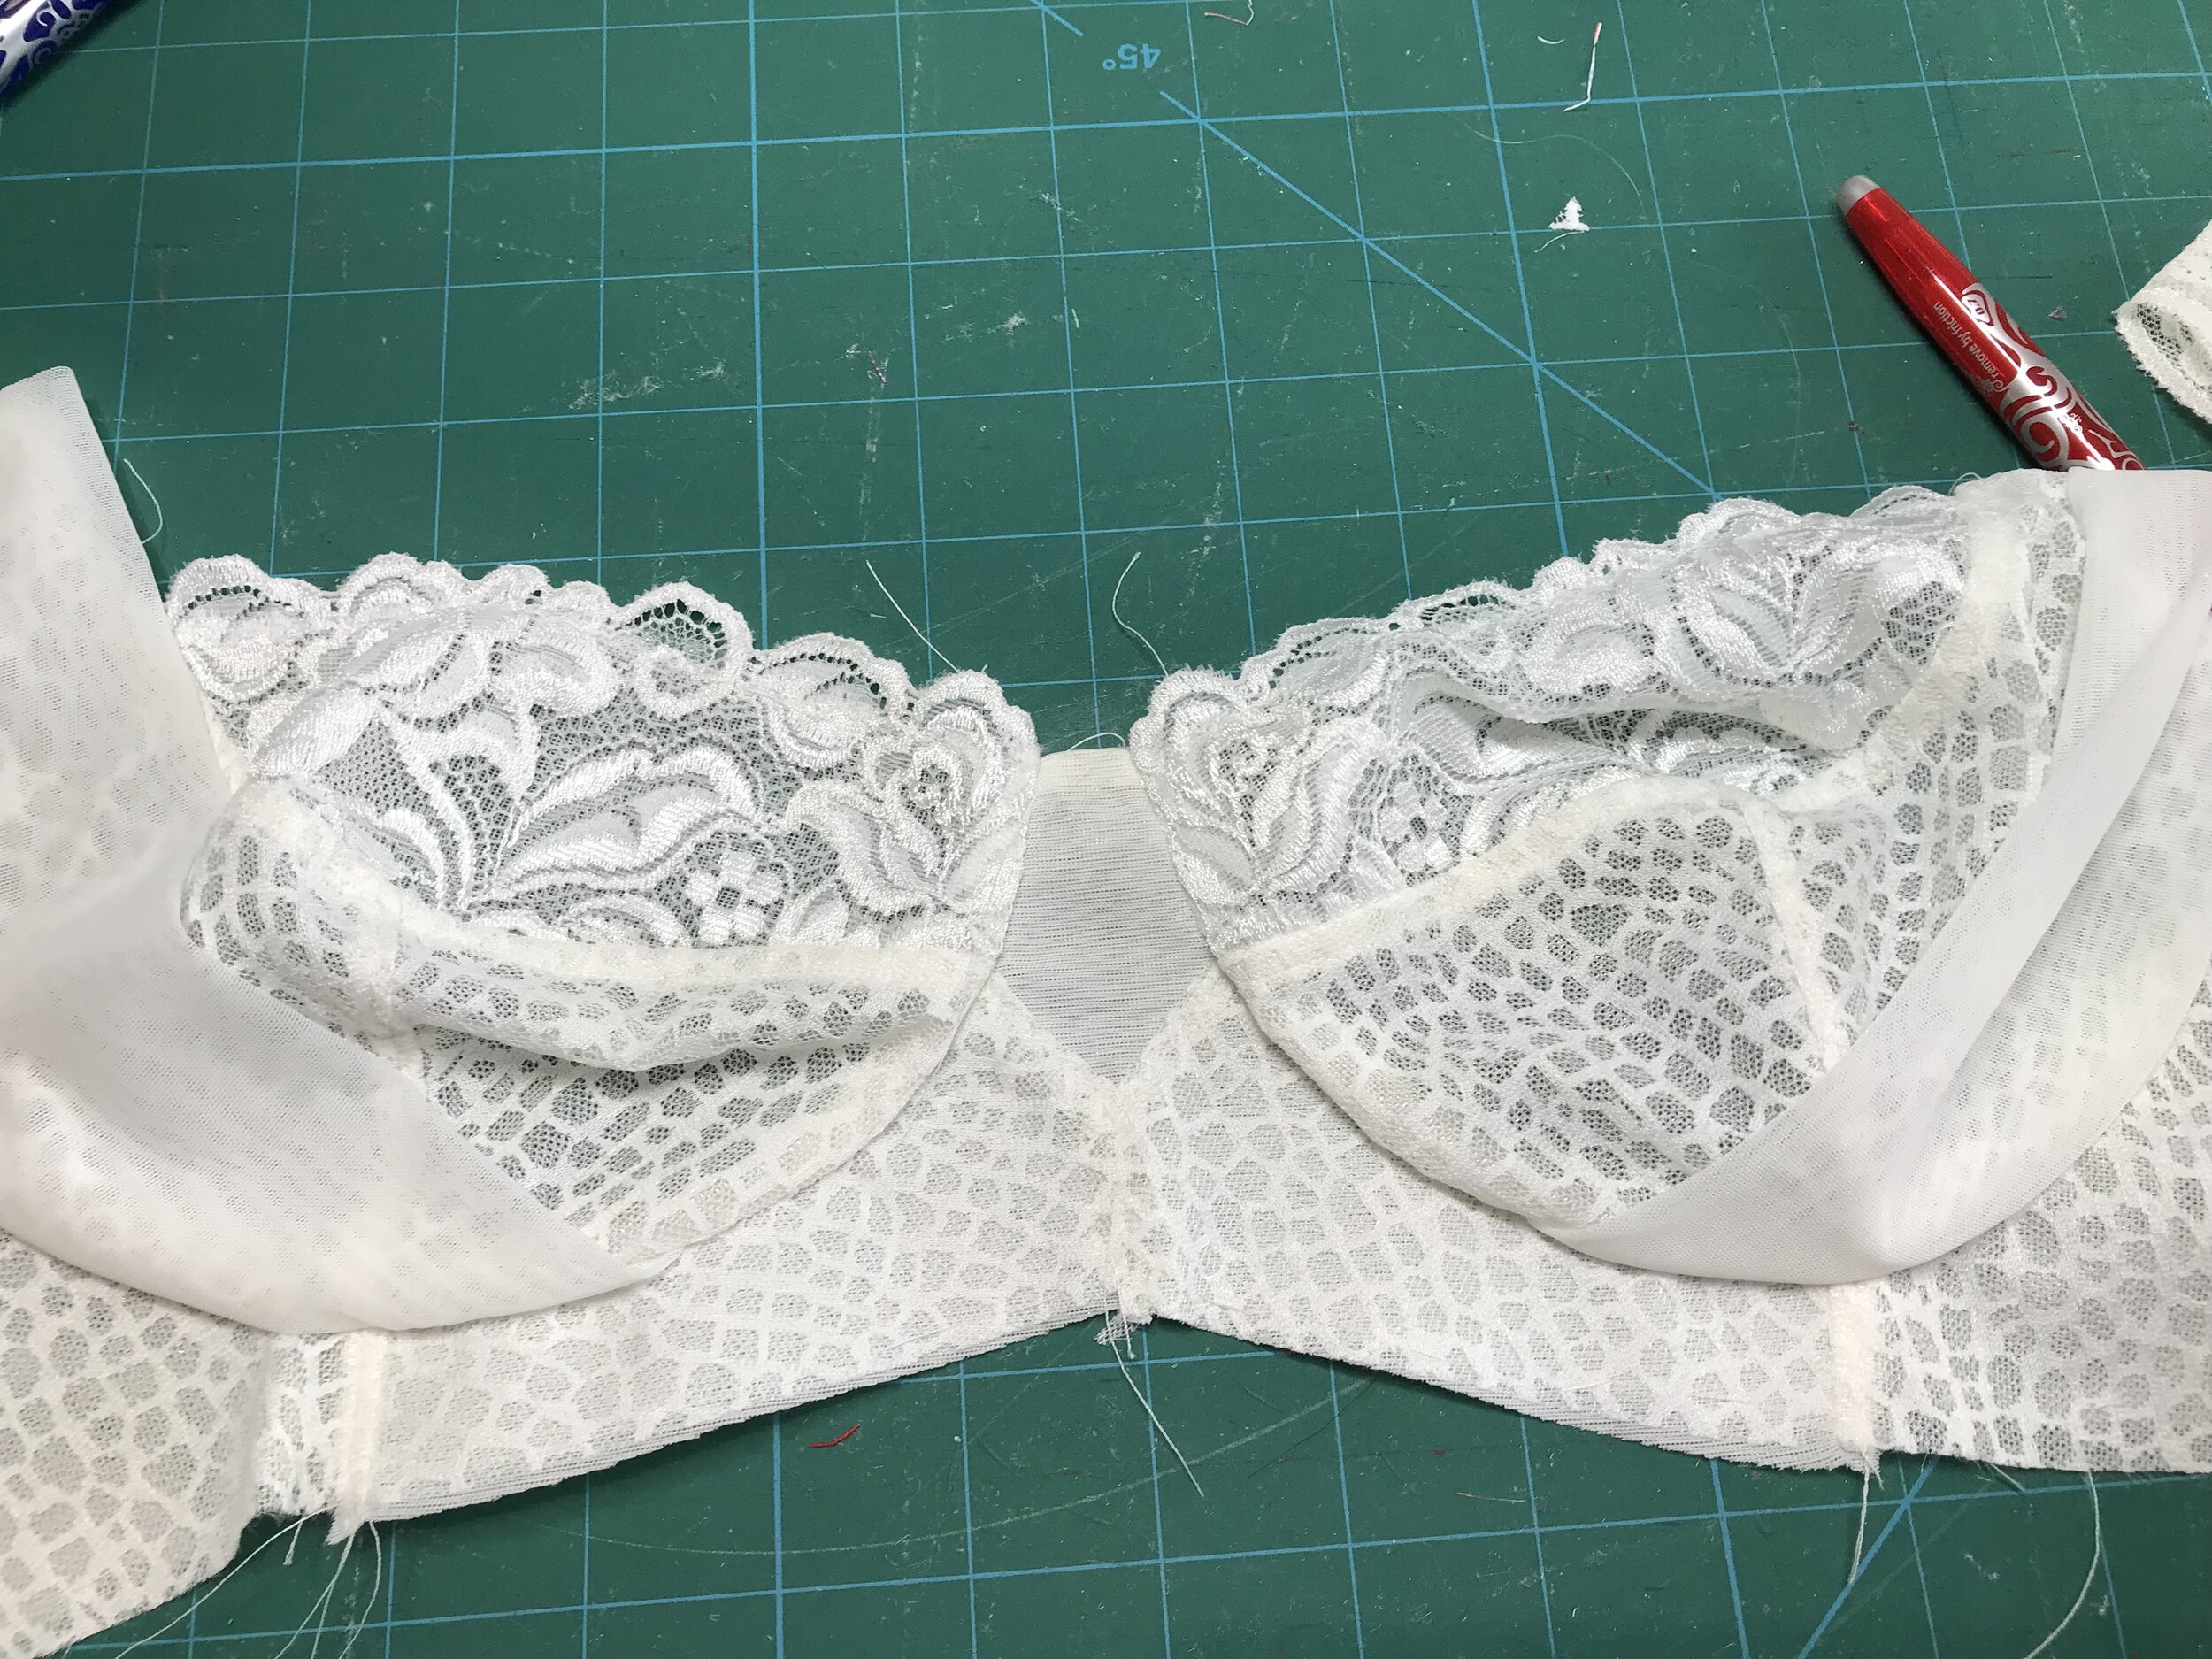
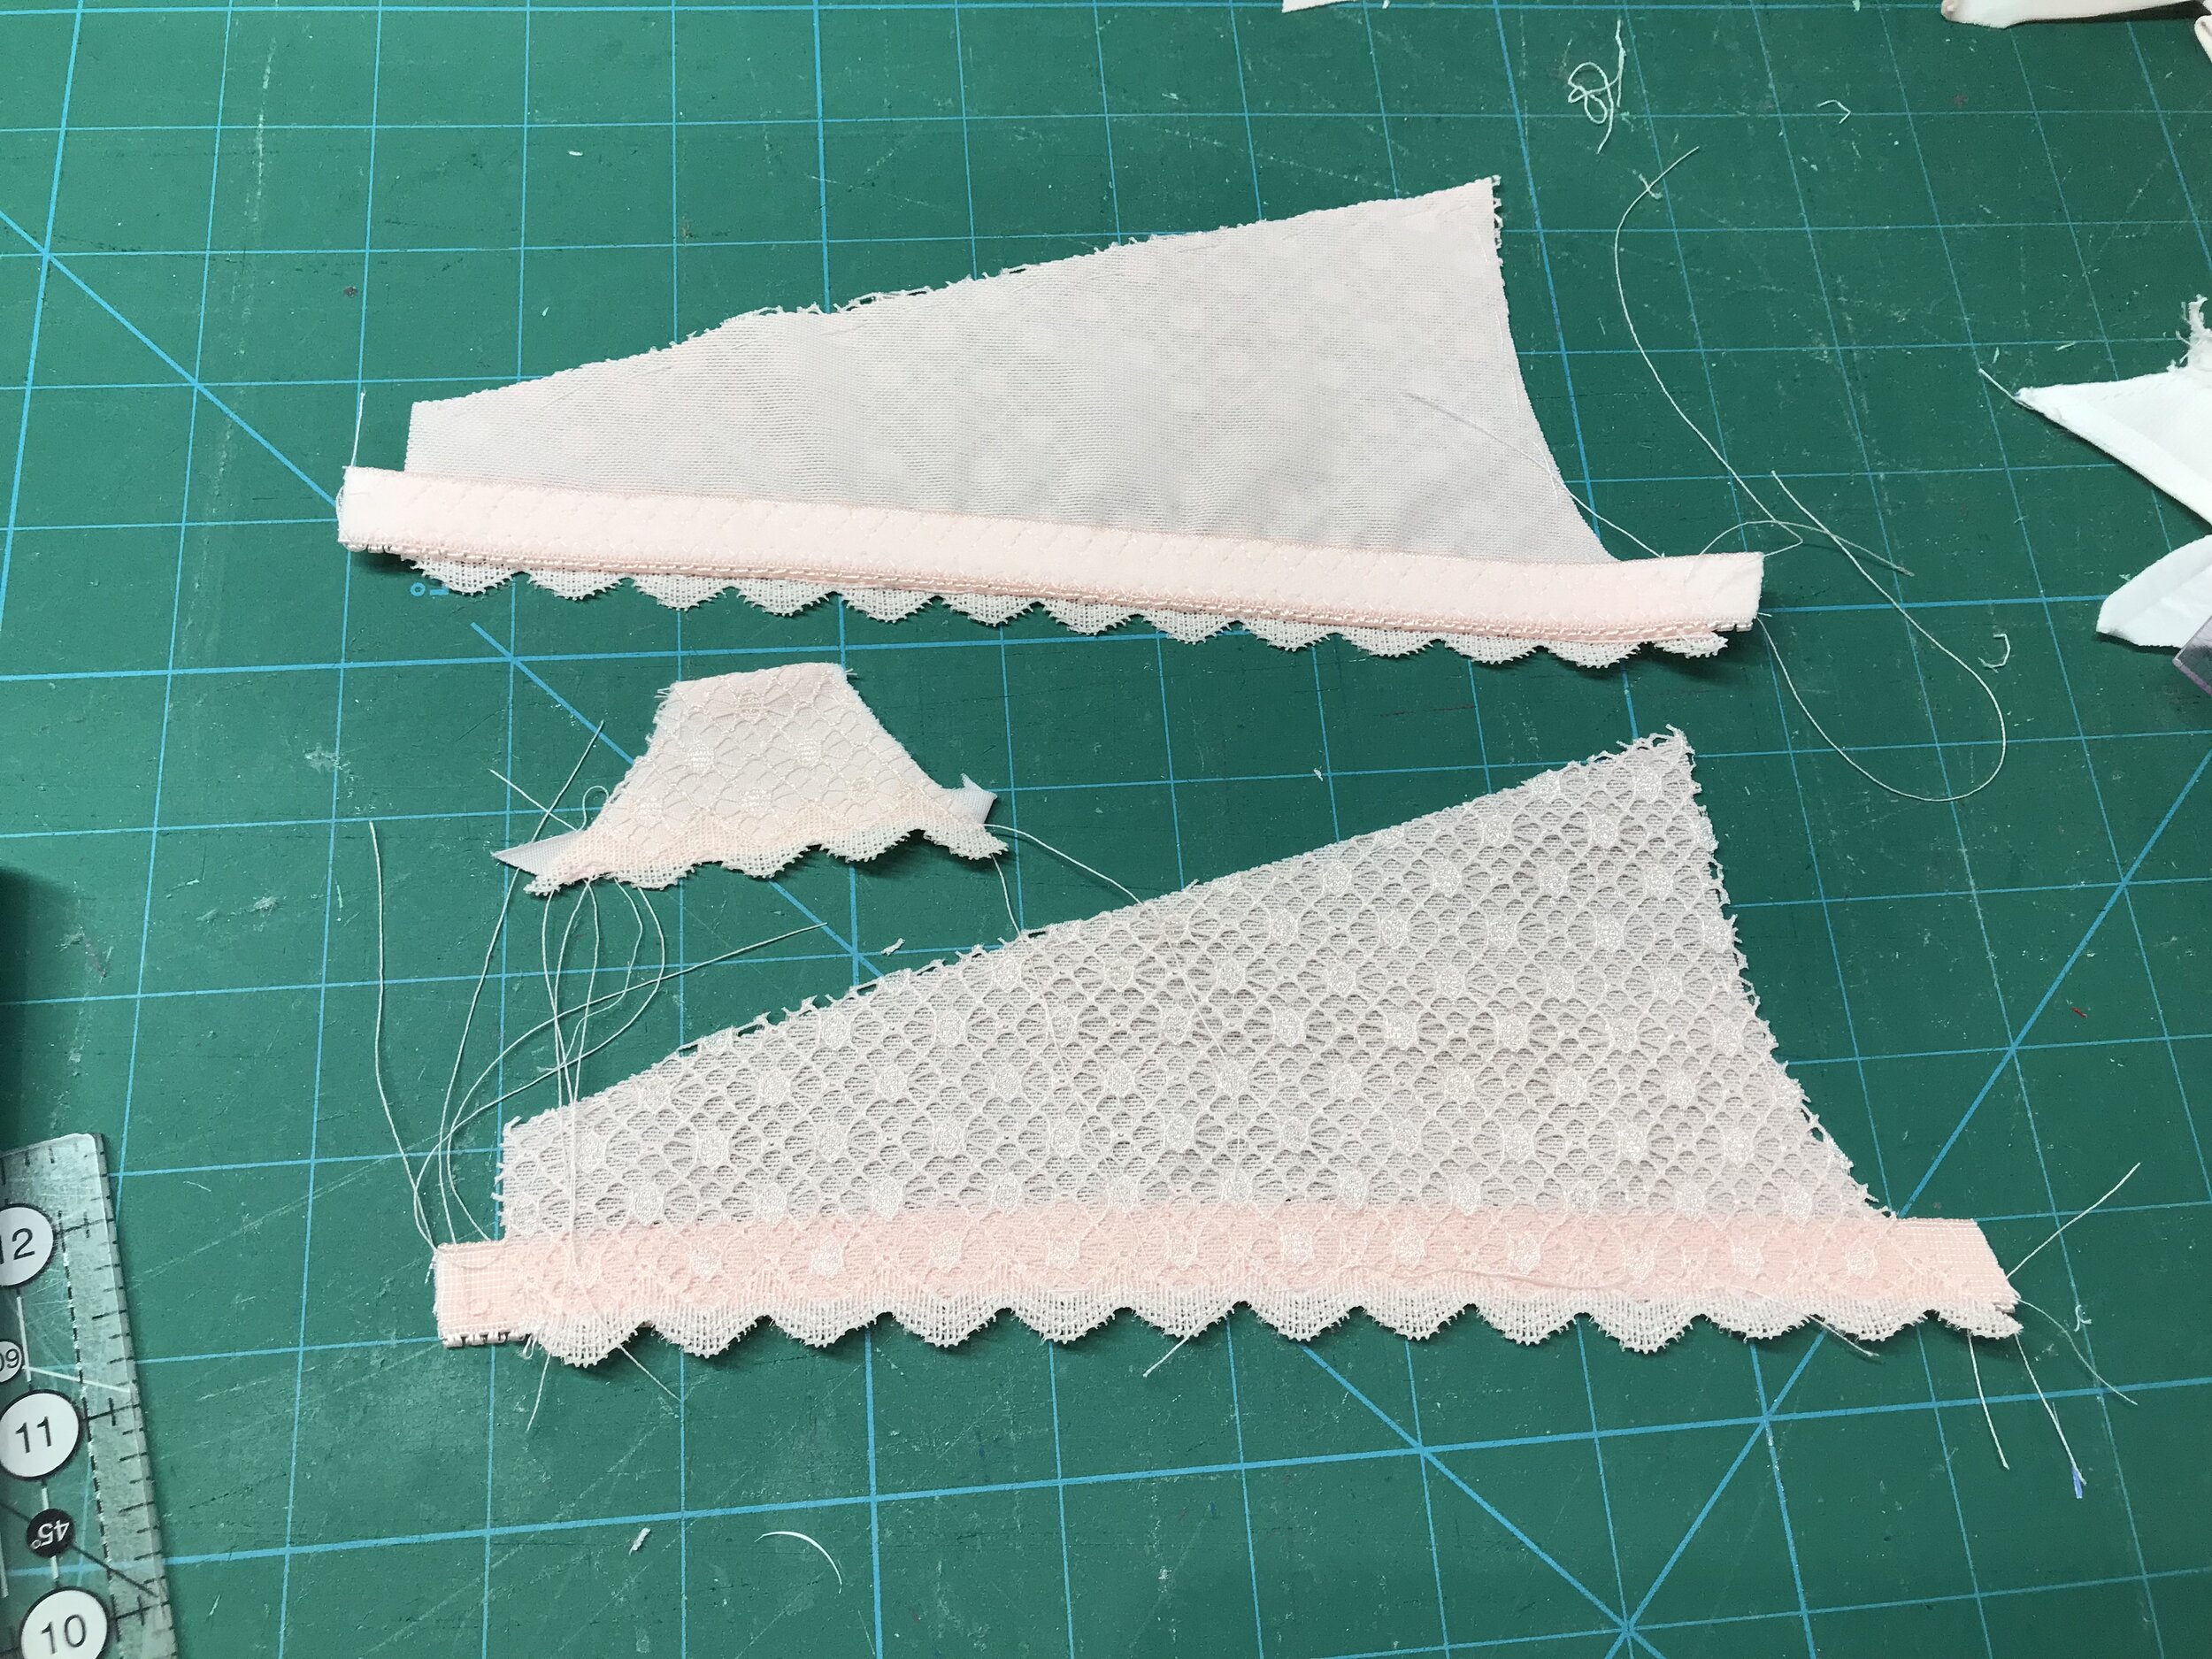
To match the shorty I was going to use the scalloped edge lace for the upper cup only and then the honeycomb stretch mesh for the rest. I also didn’t have enough lace to use on the band. To start with I made the lace cups and then I made the side and lower cup in foam to place around the cup. This was to help me decide the shape and size of the mesh panel and again I drew a line and cut along for the pattern piece. After studying the various images I decided the mesh wasn’t actually gathered but the stretch fabric would do this with the pull from the strap when worn.

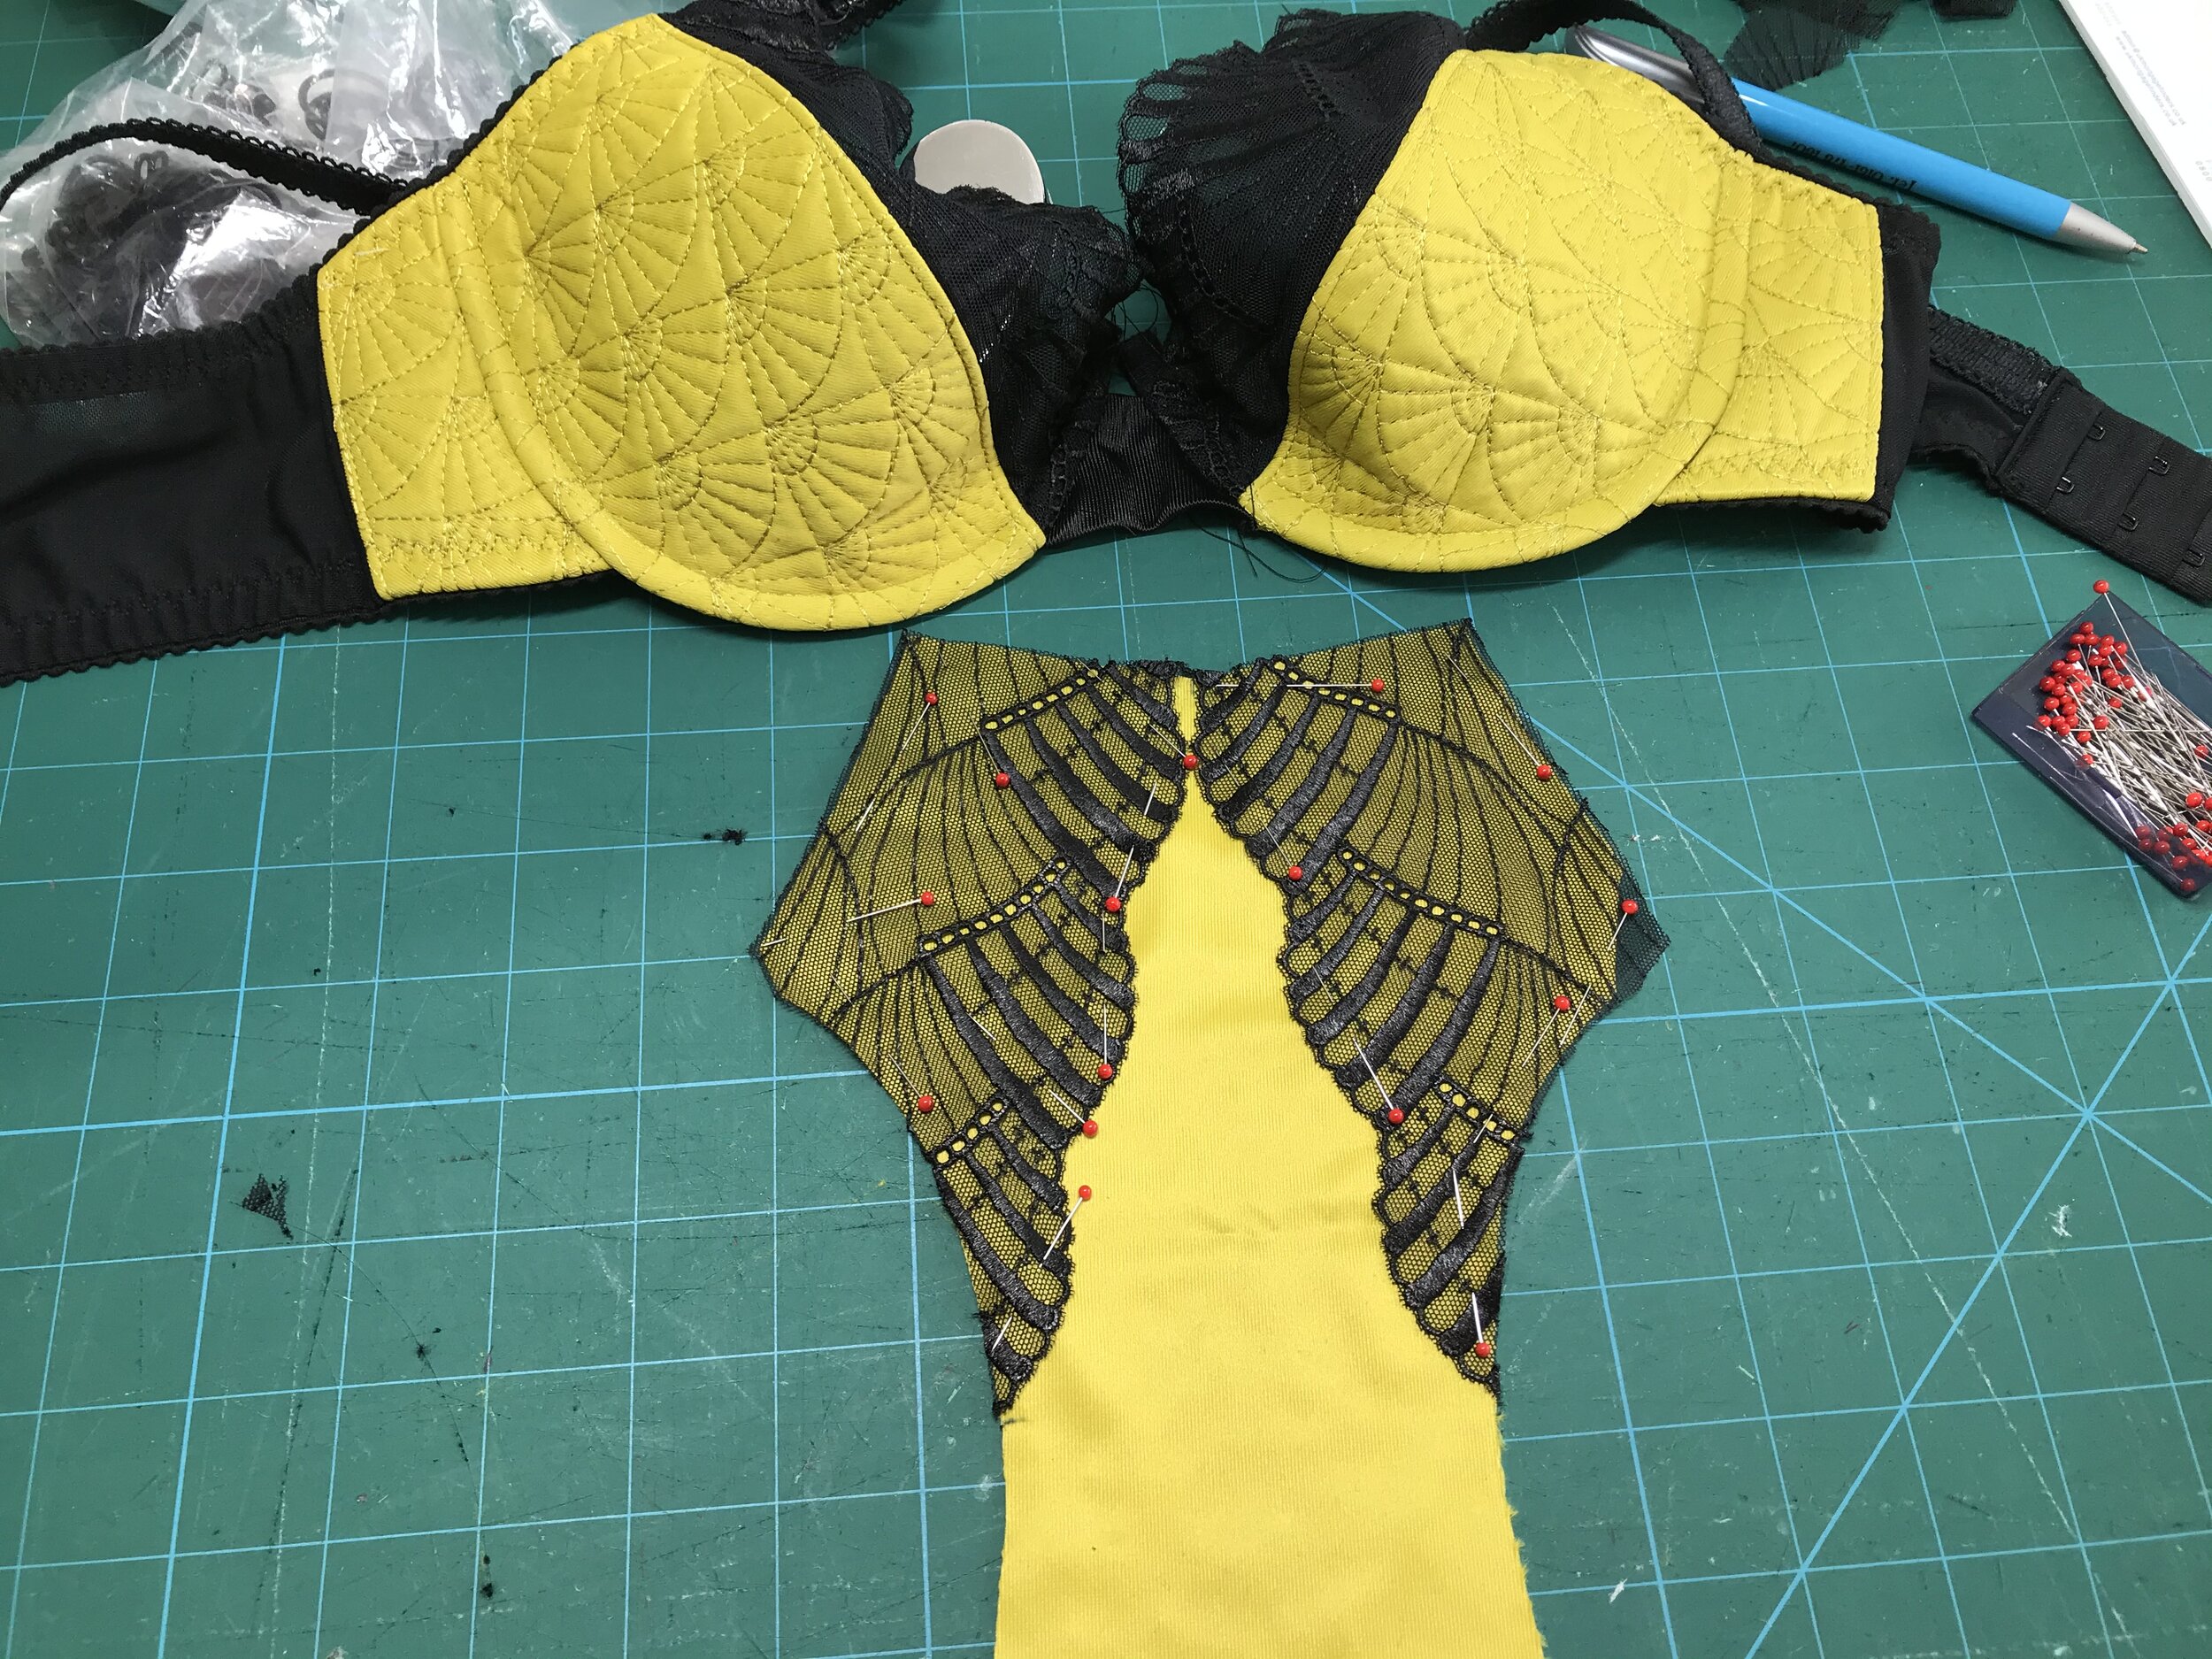
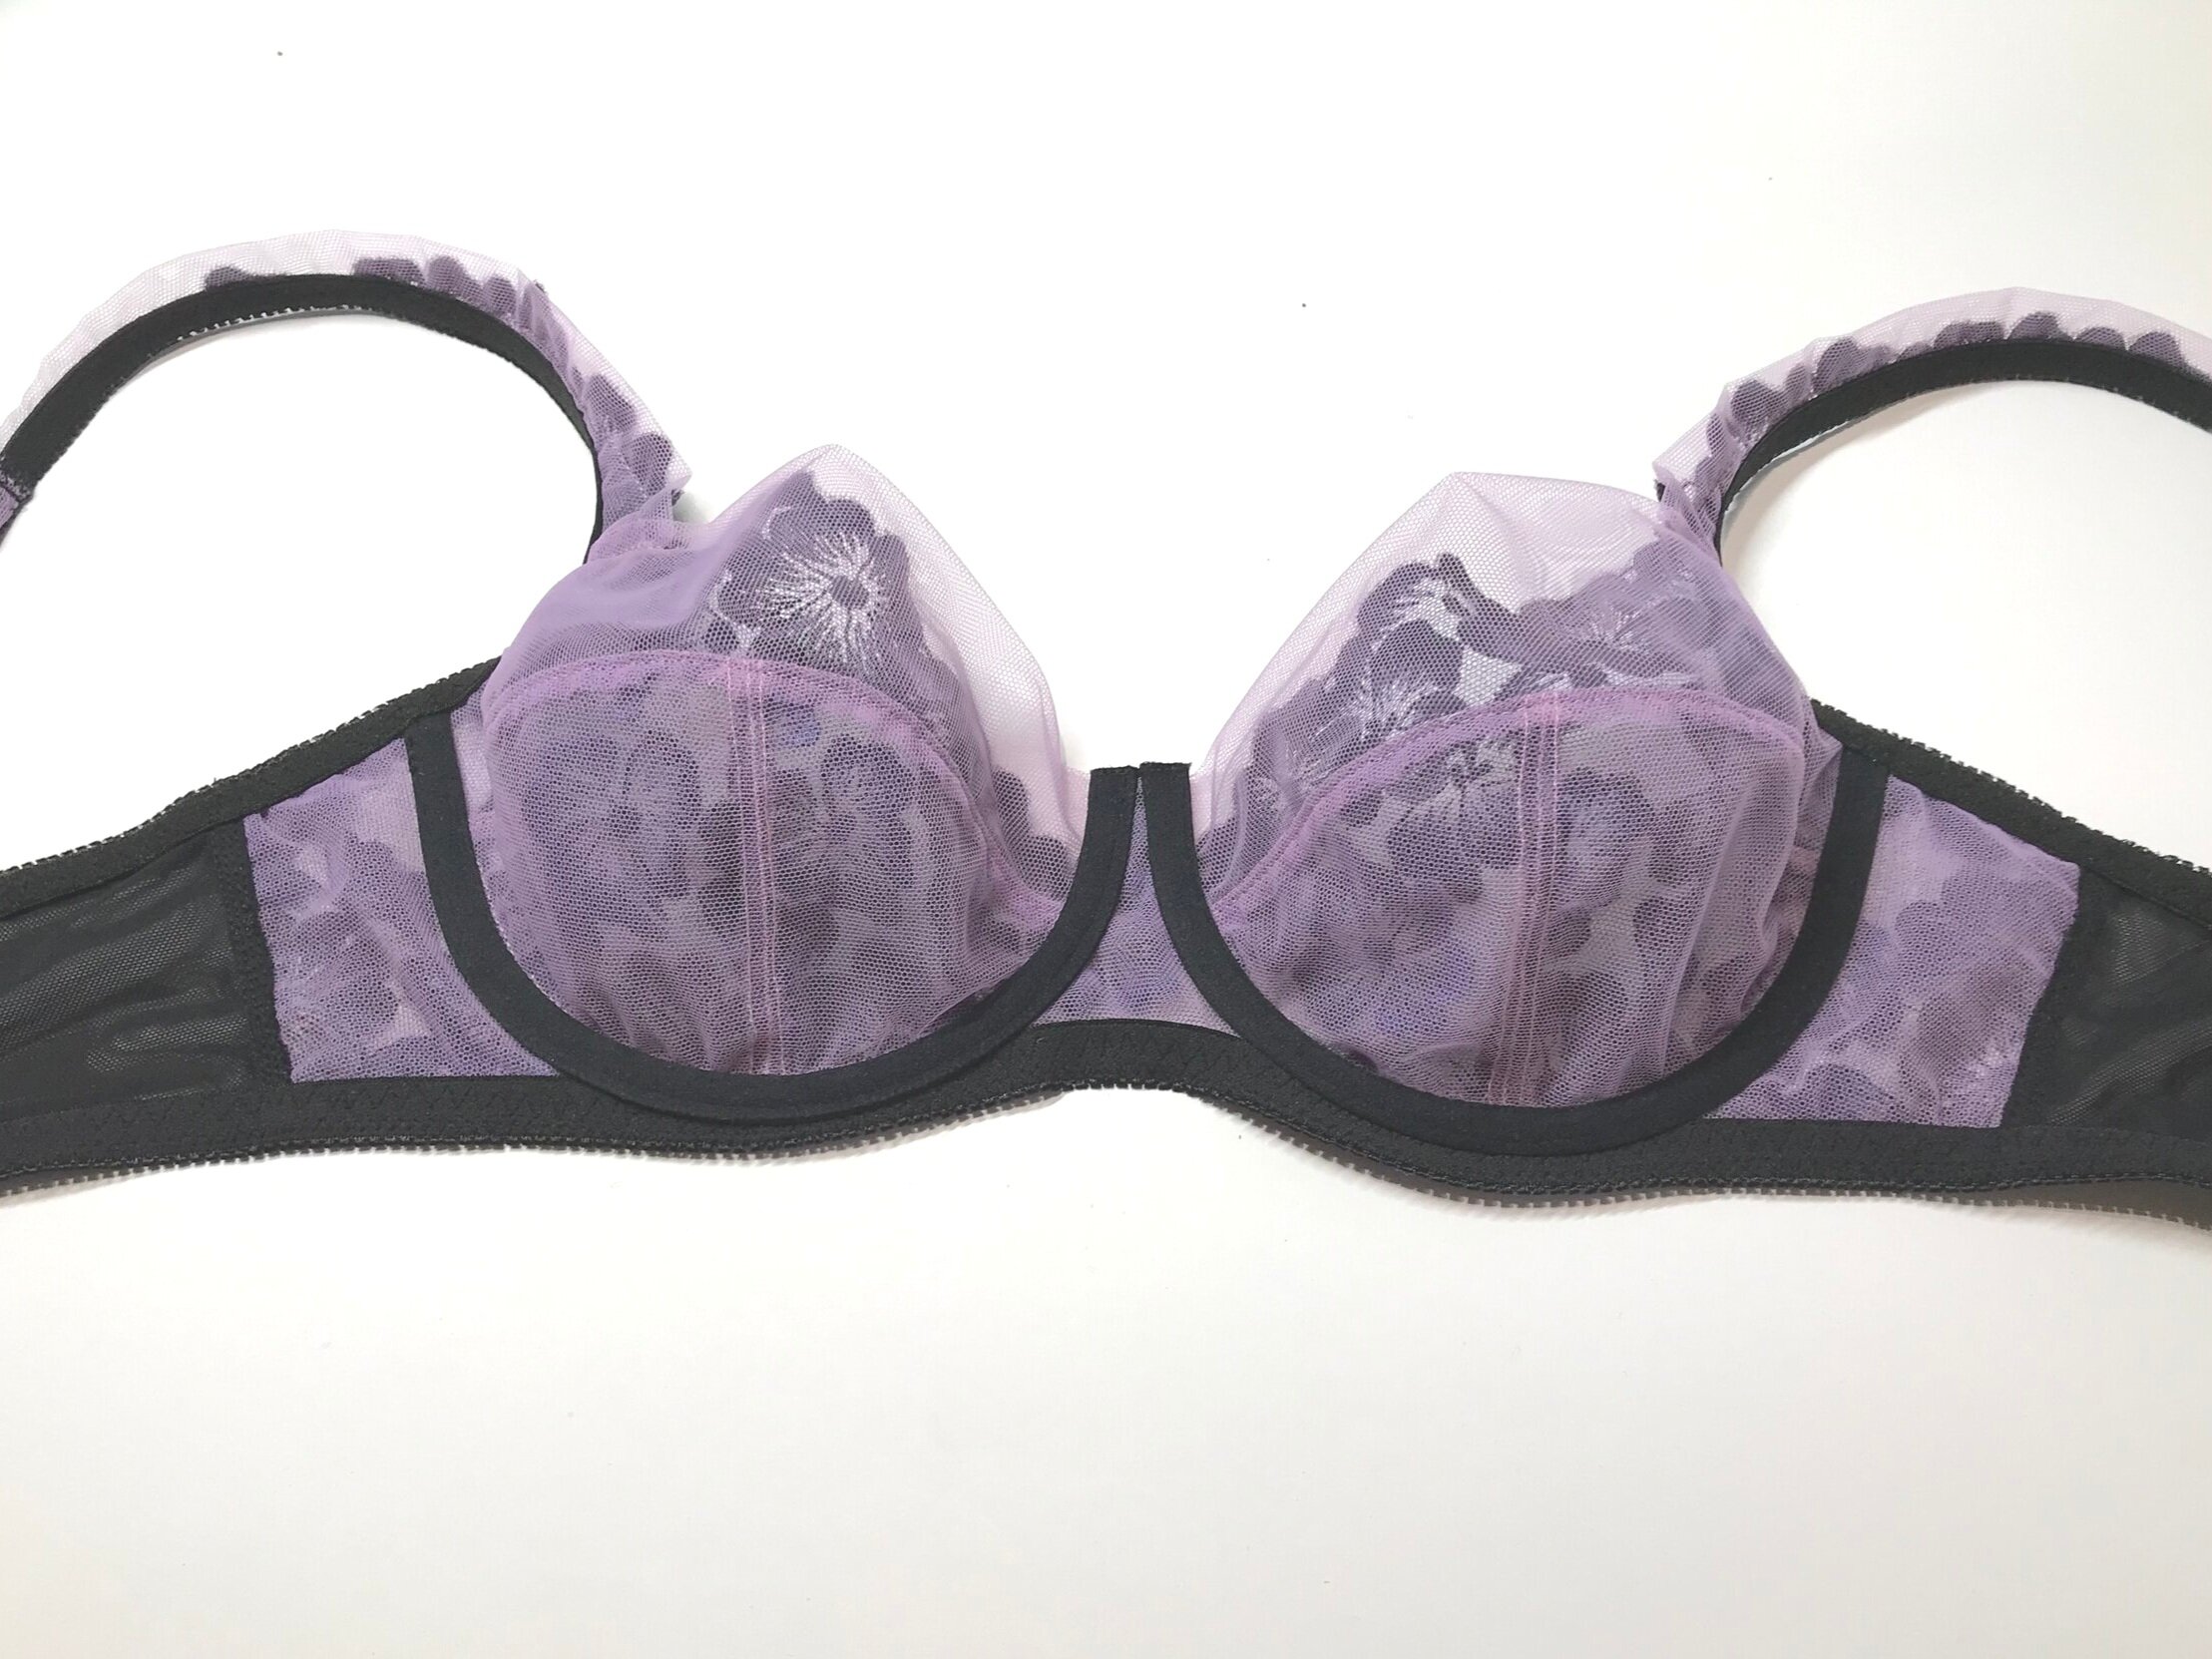
To use the mesh for the base of the bridge I fused to sheer lining with Misty Fuse. I marked on the bridge where the lace cup piece would end. Then I cut two pieces of the fabric to create the v adding a seam allowance to be folded over and then sewed the centre seam again using Misty Fuse to stop the stretch fabric moving. I carefully marked on both the cup and bridge where the pieces would meet.

IMG_6922.jpg

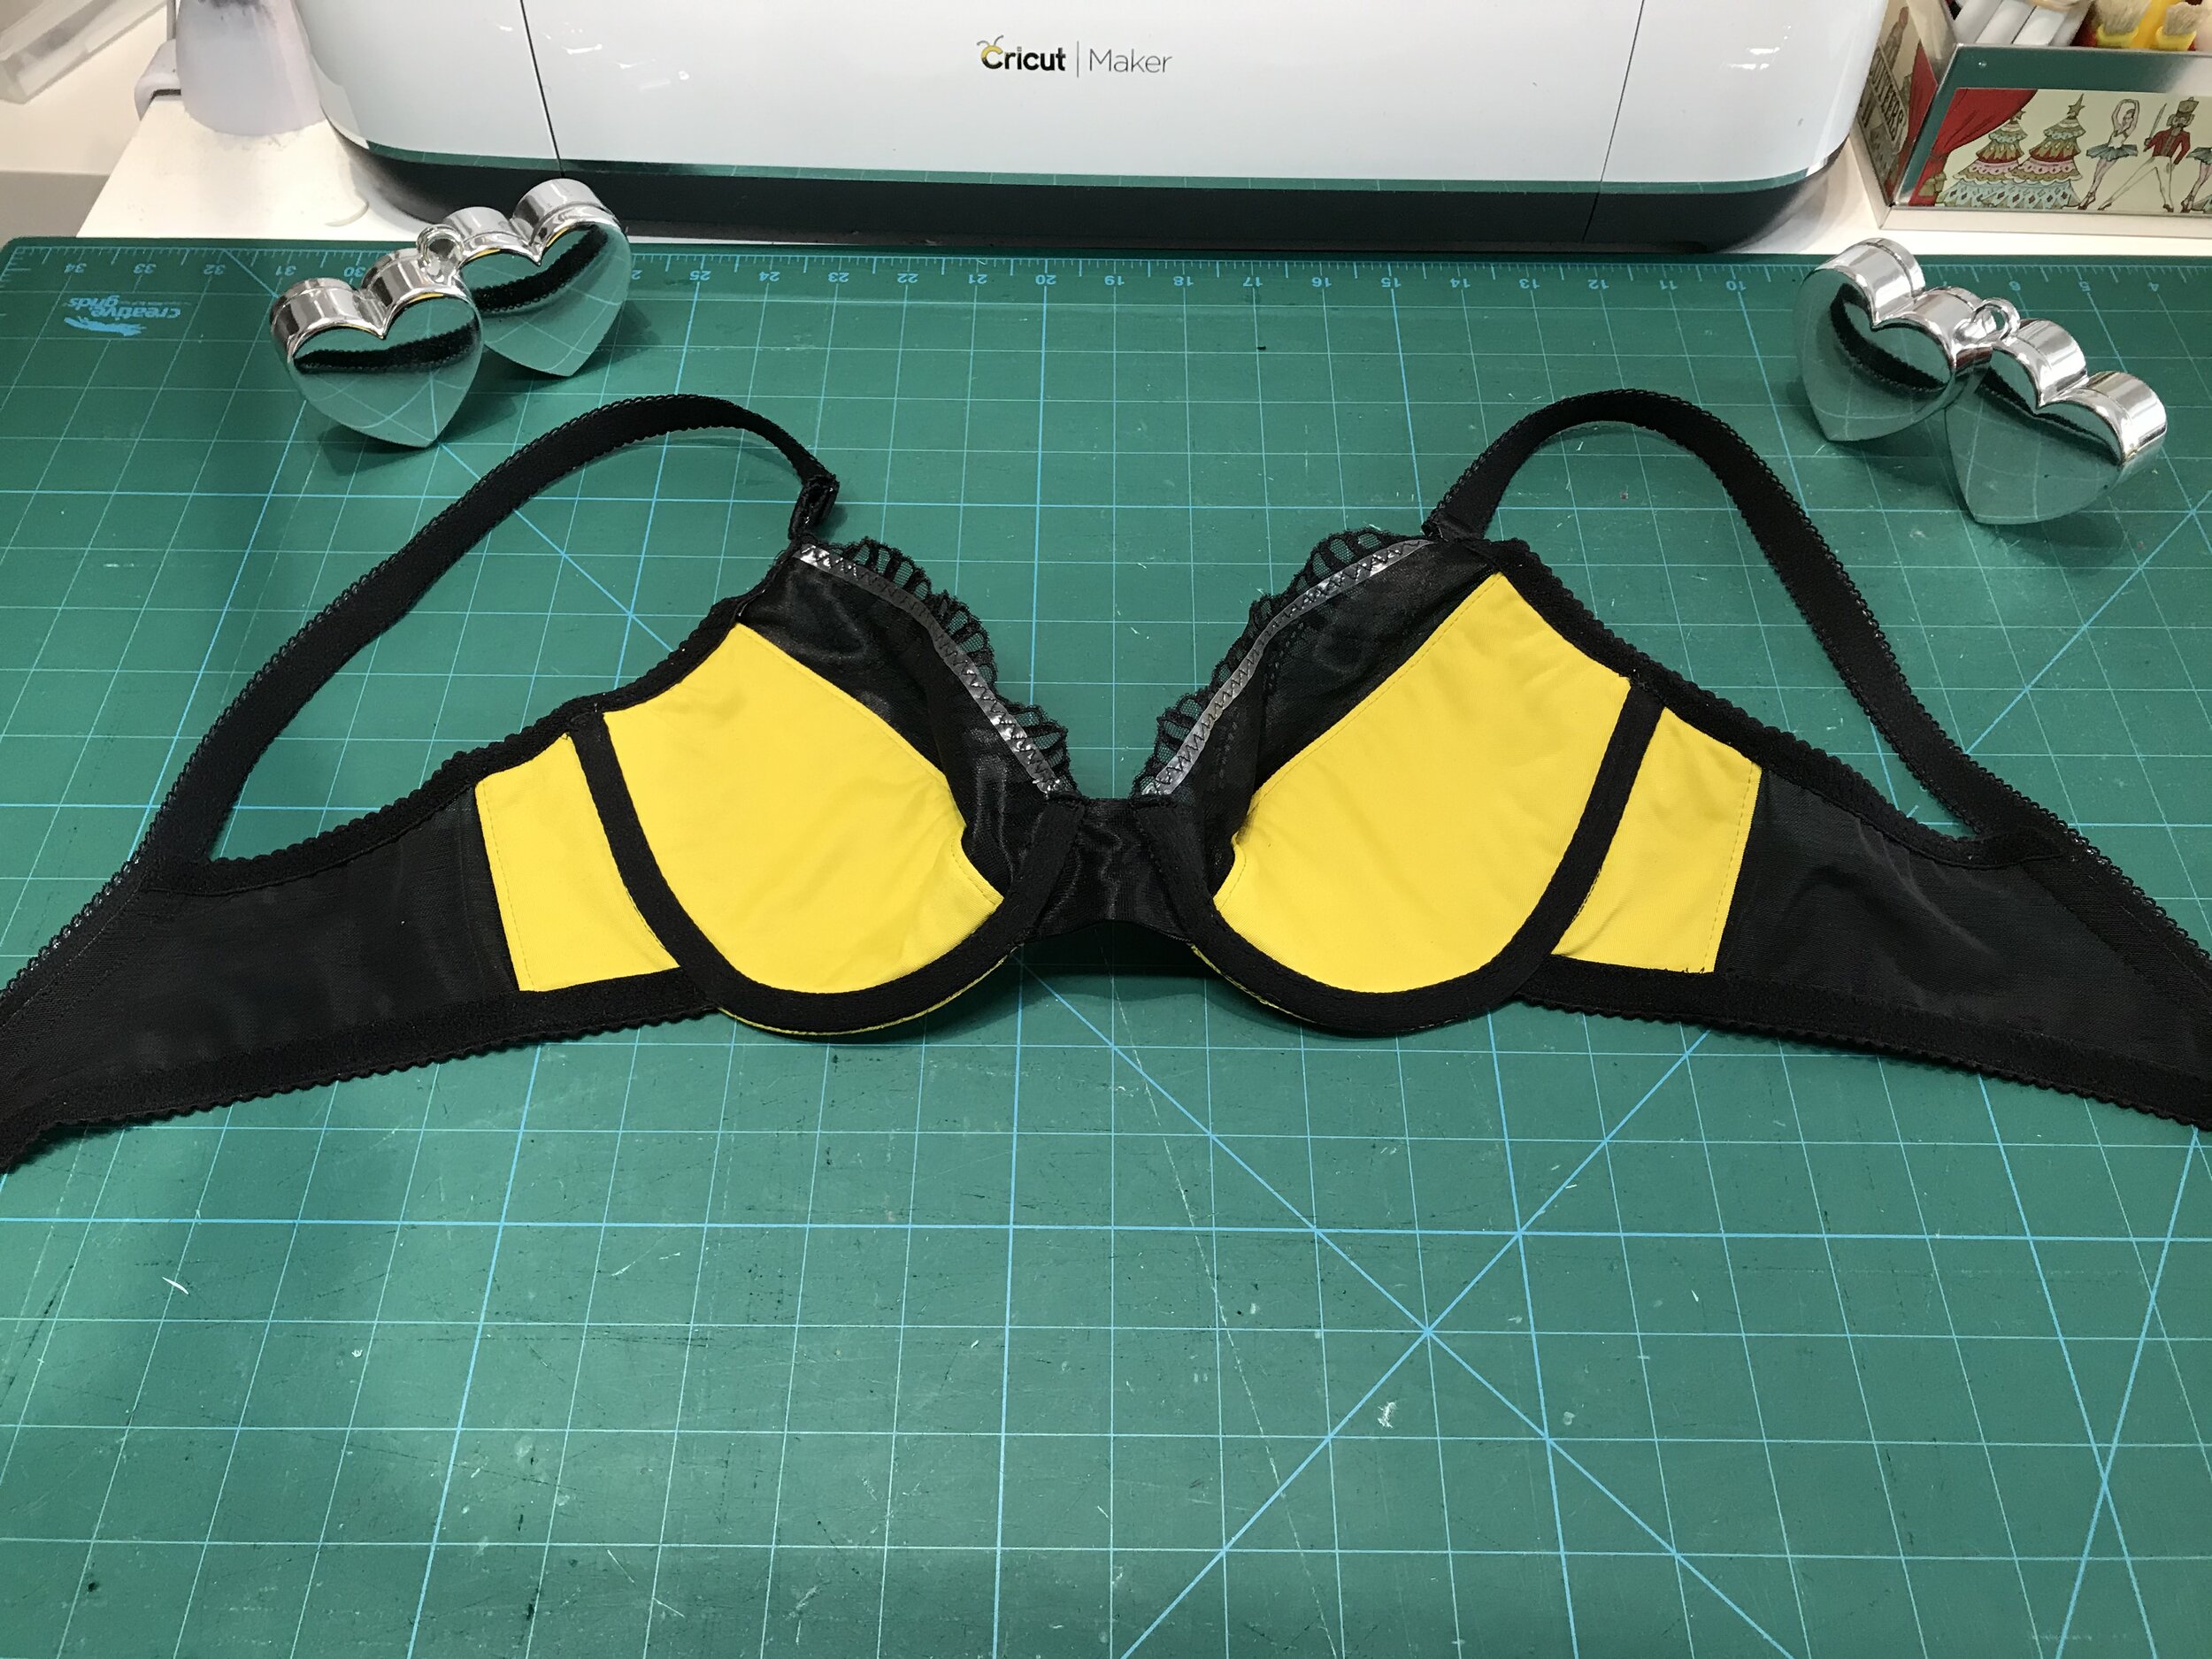
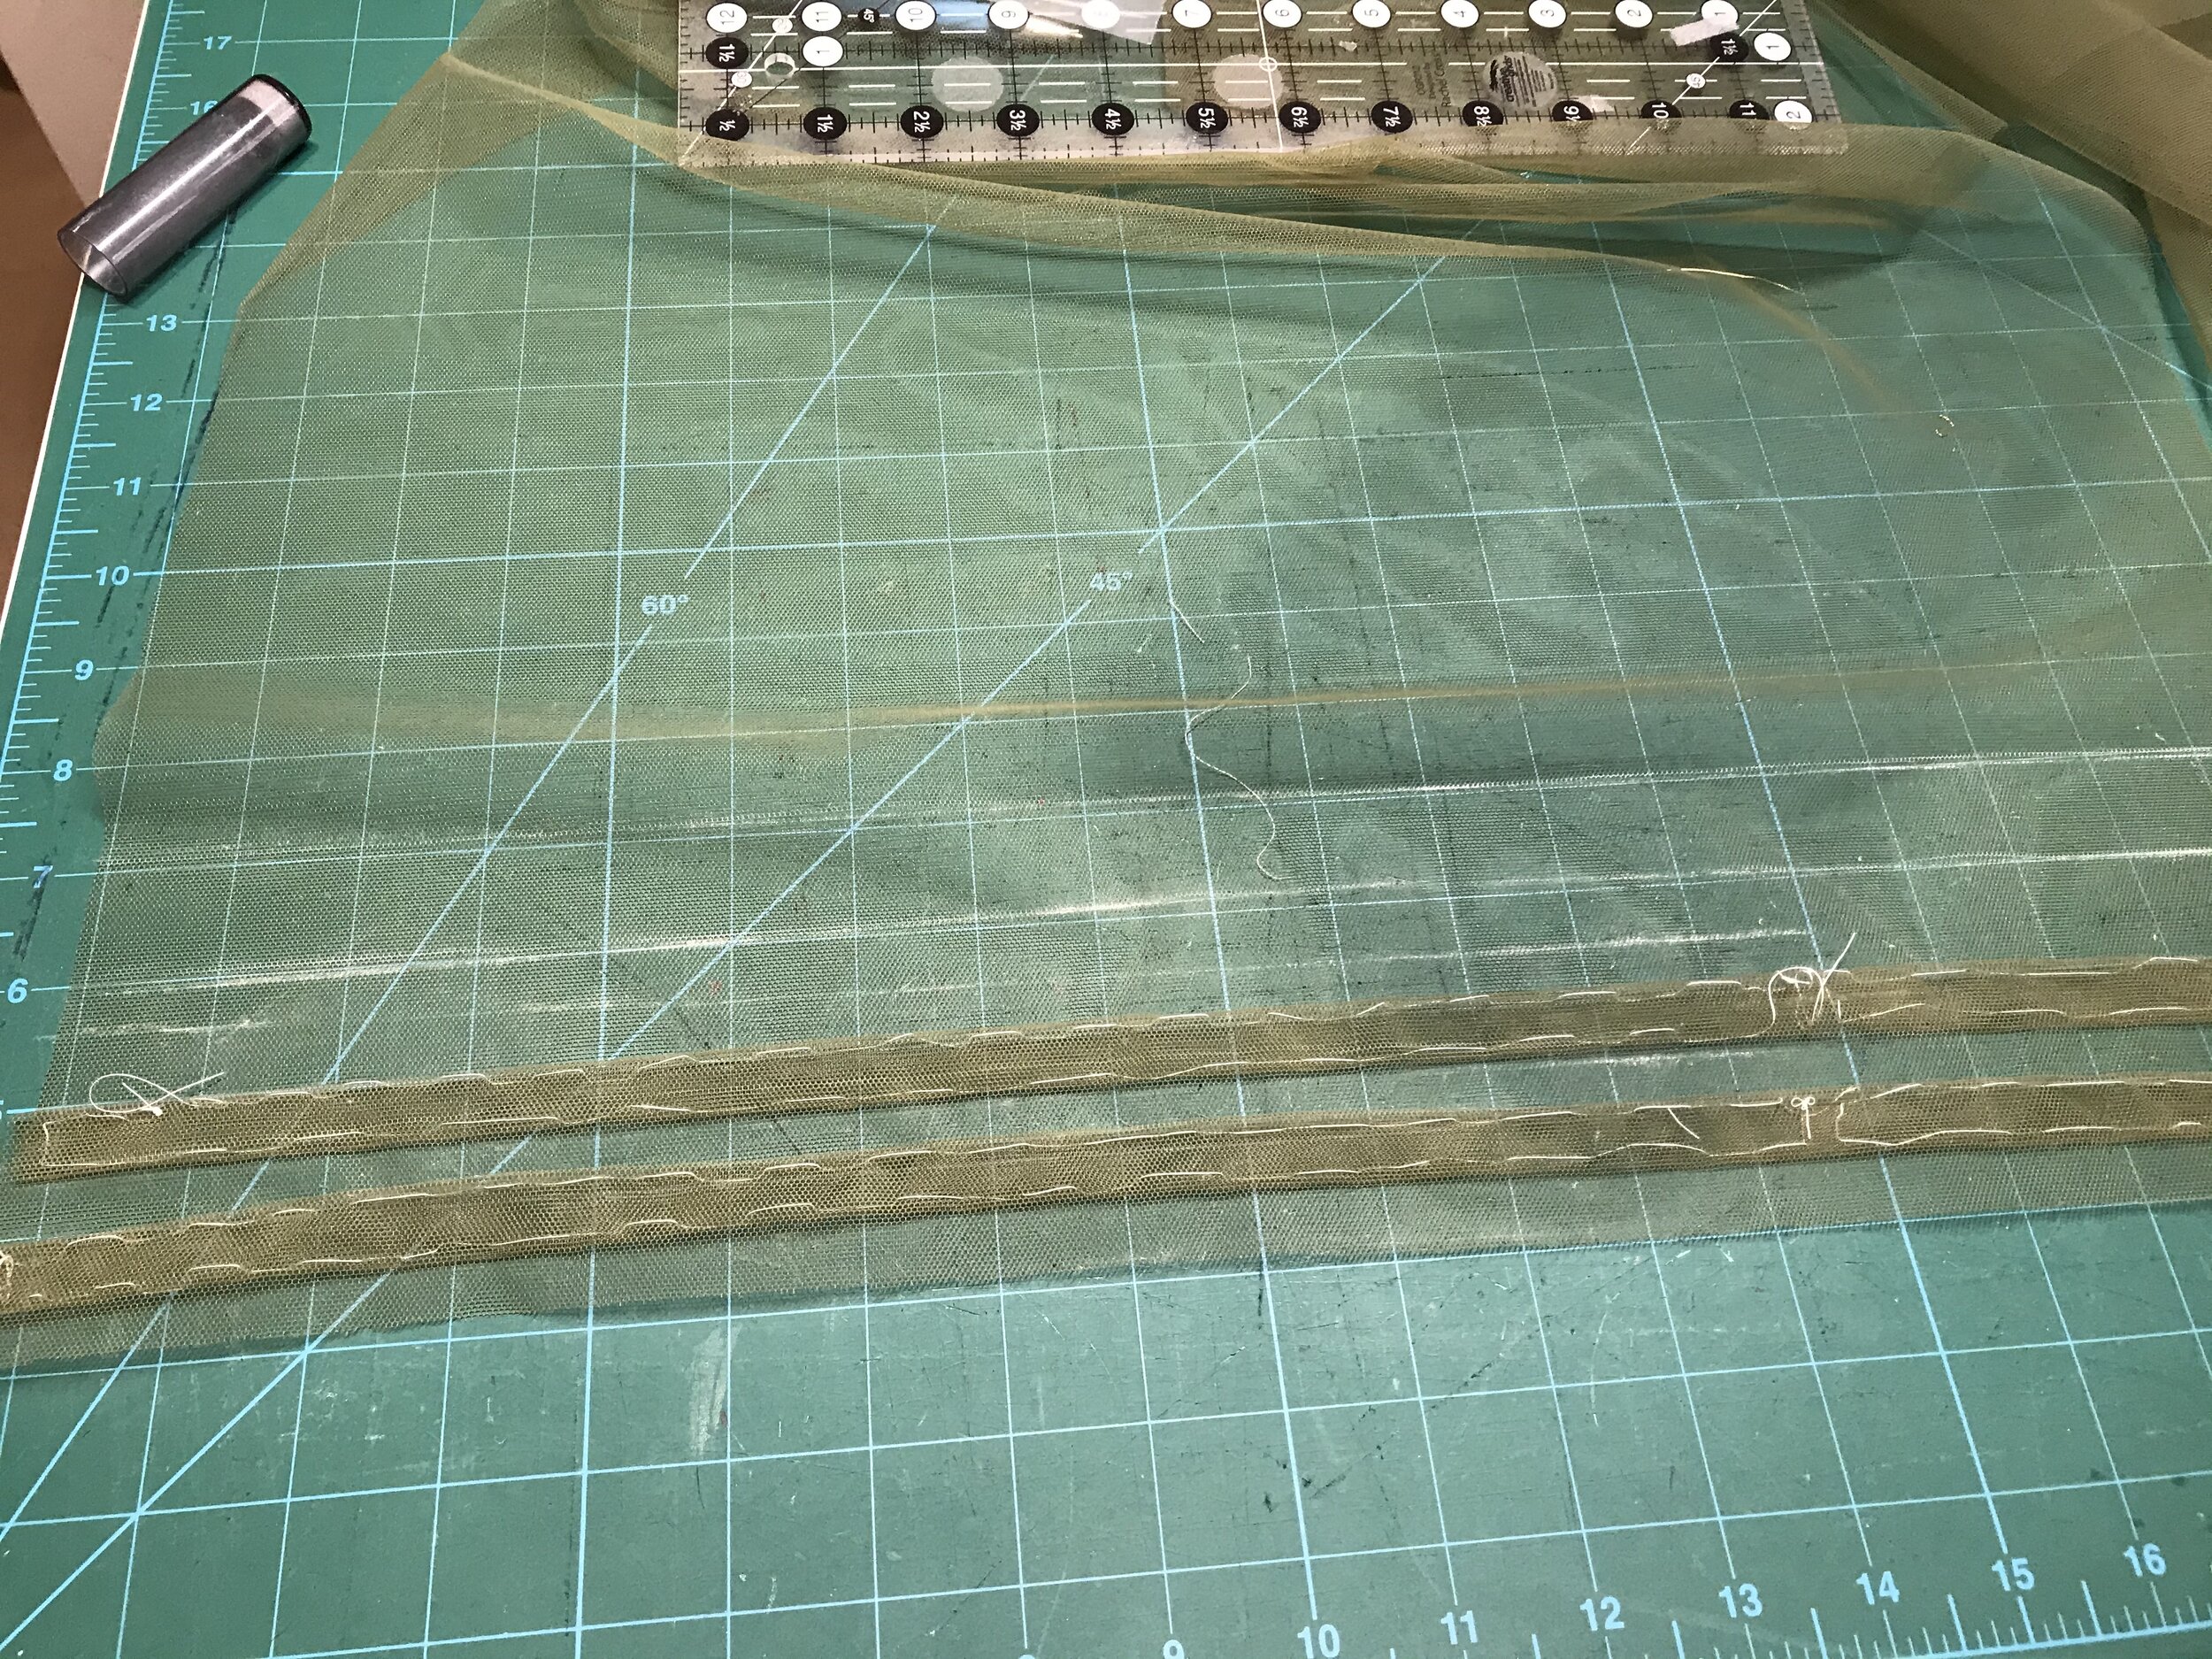
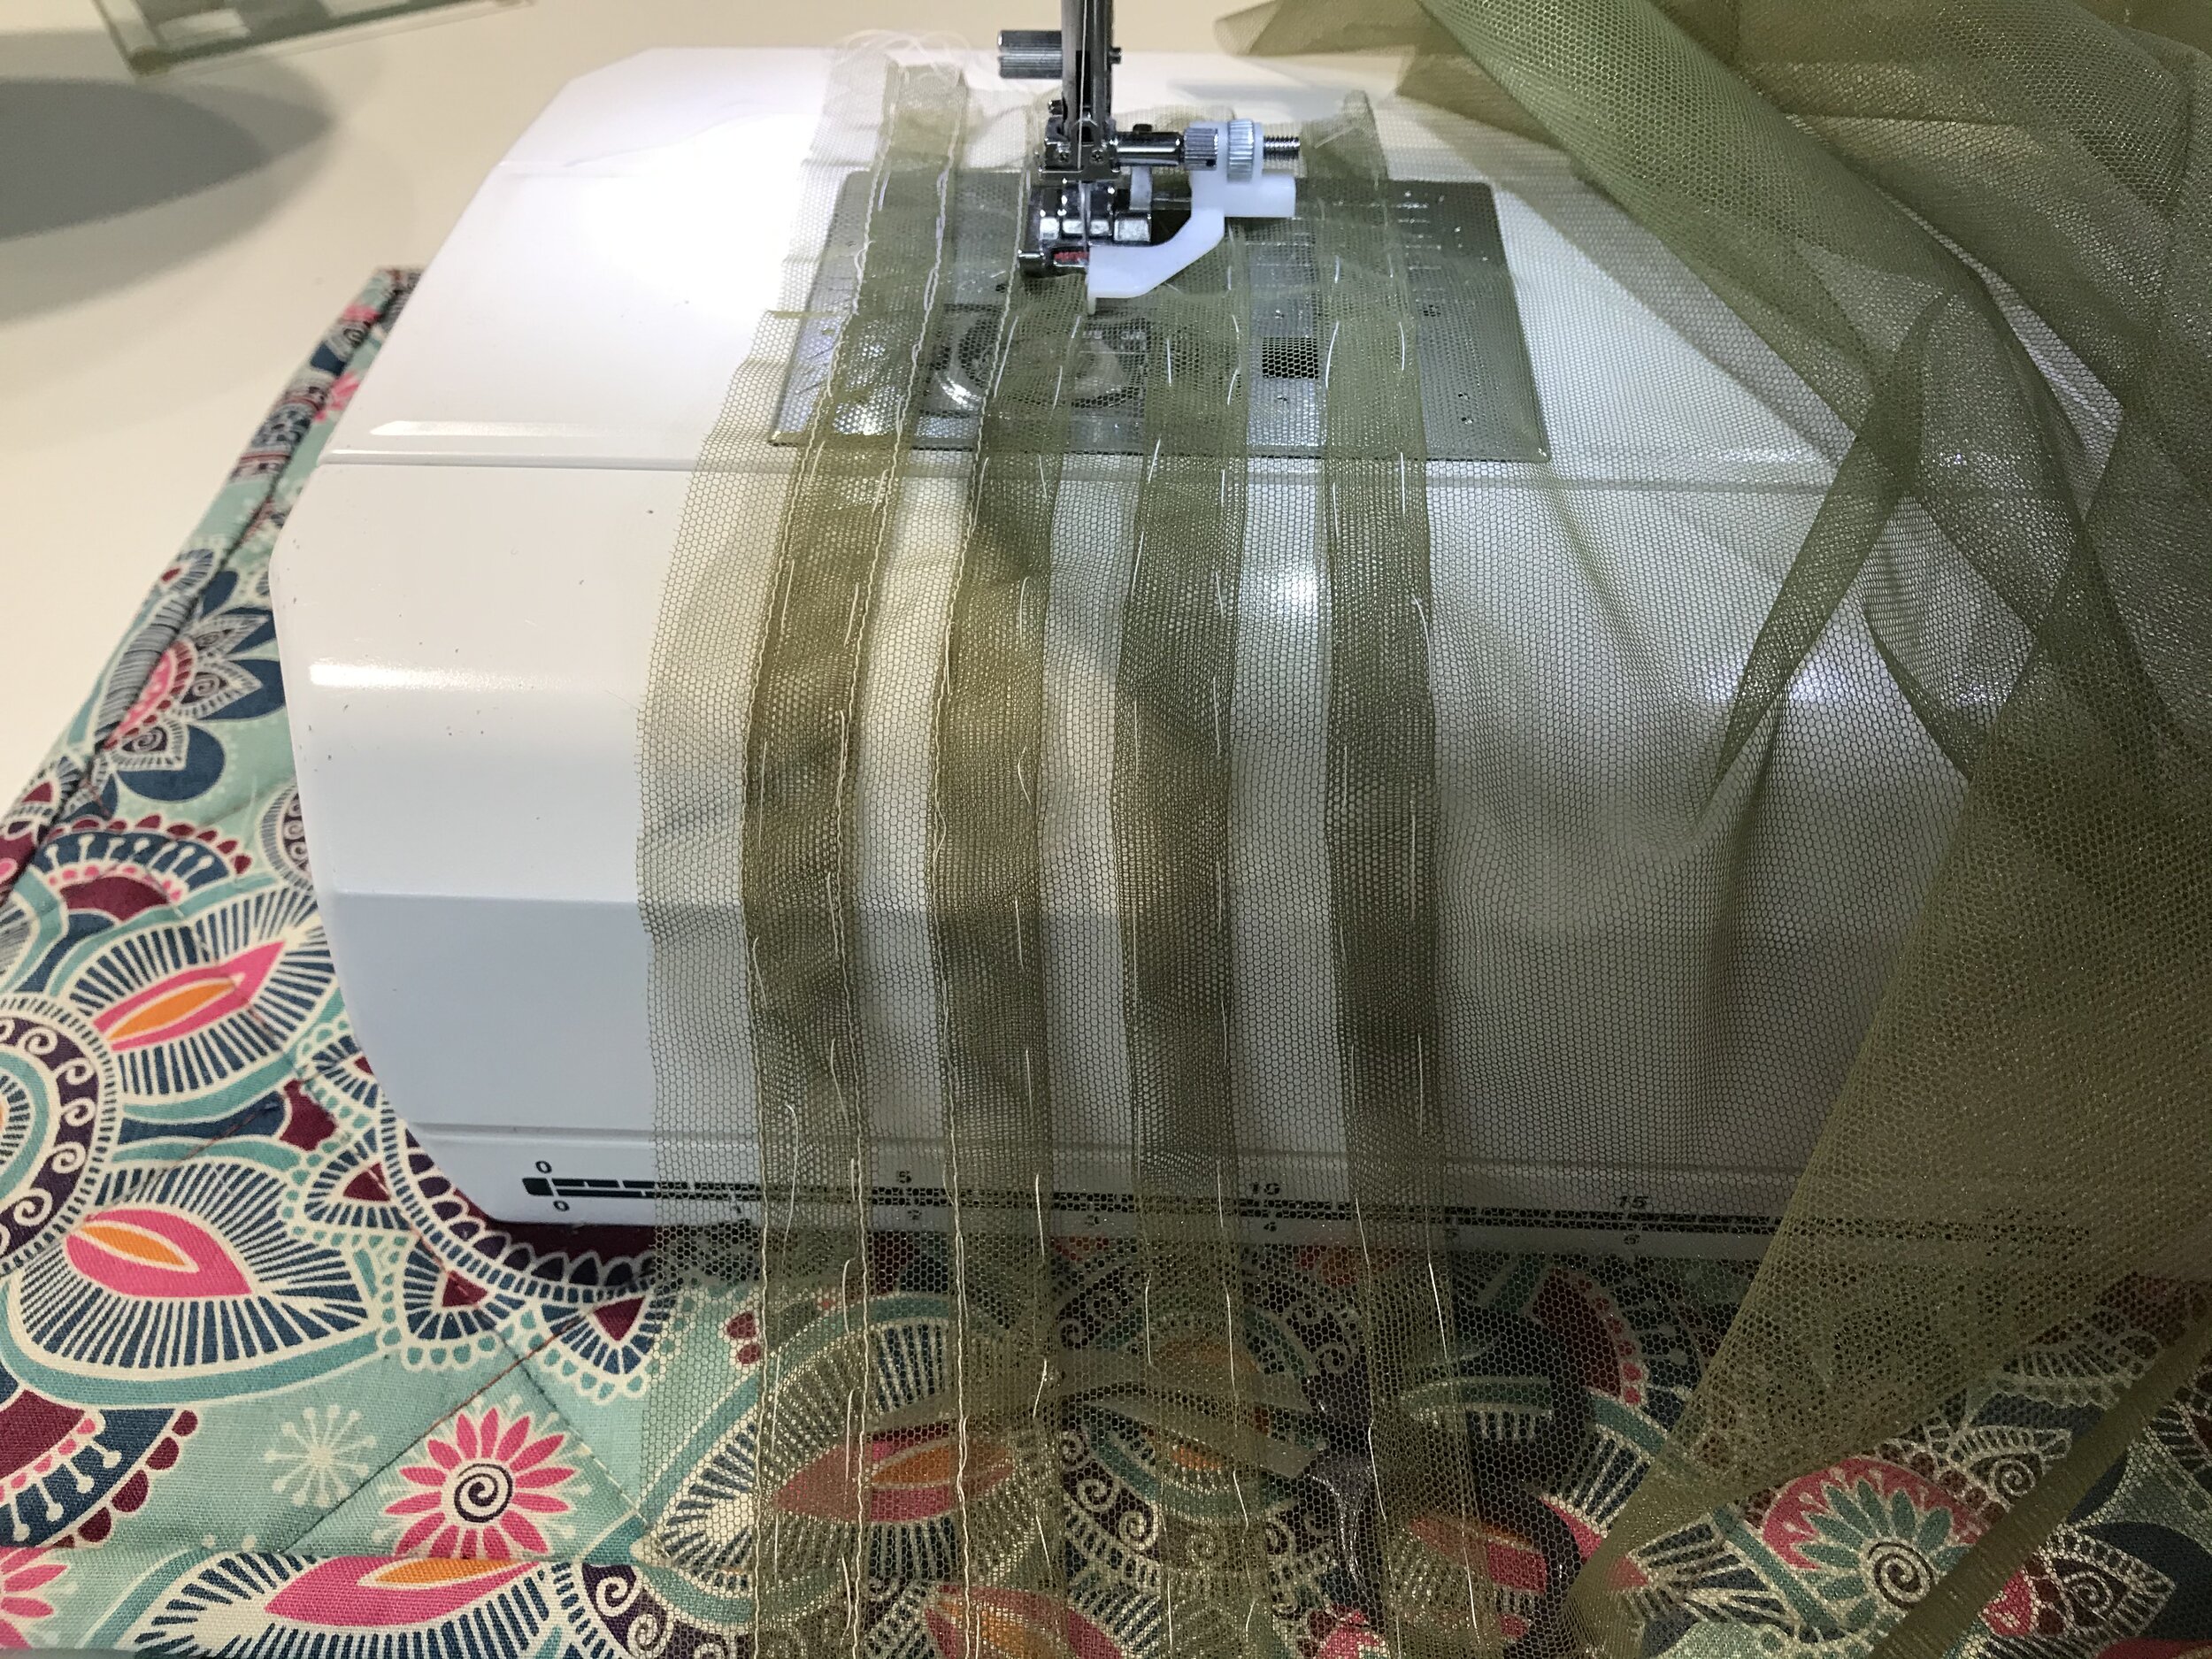
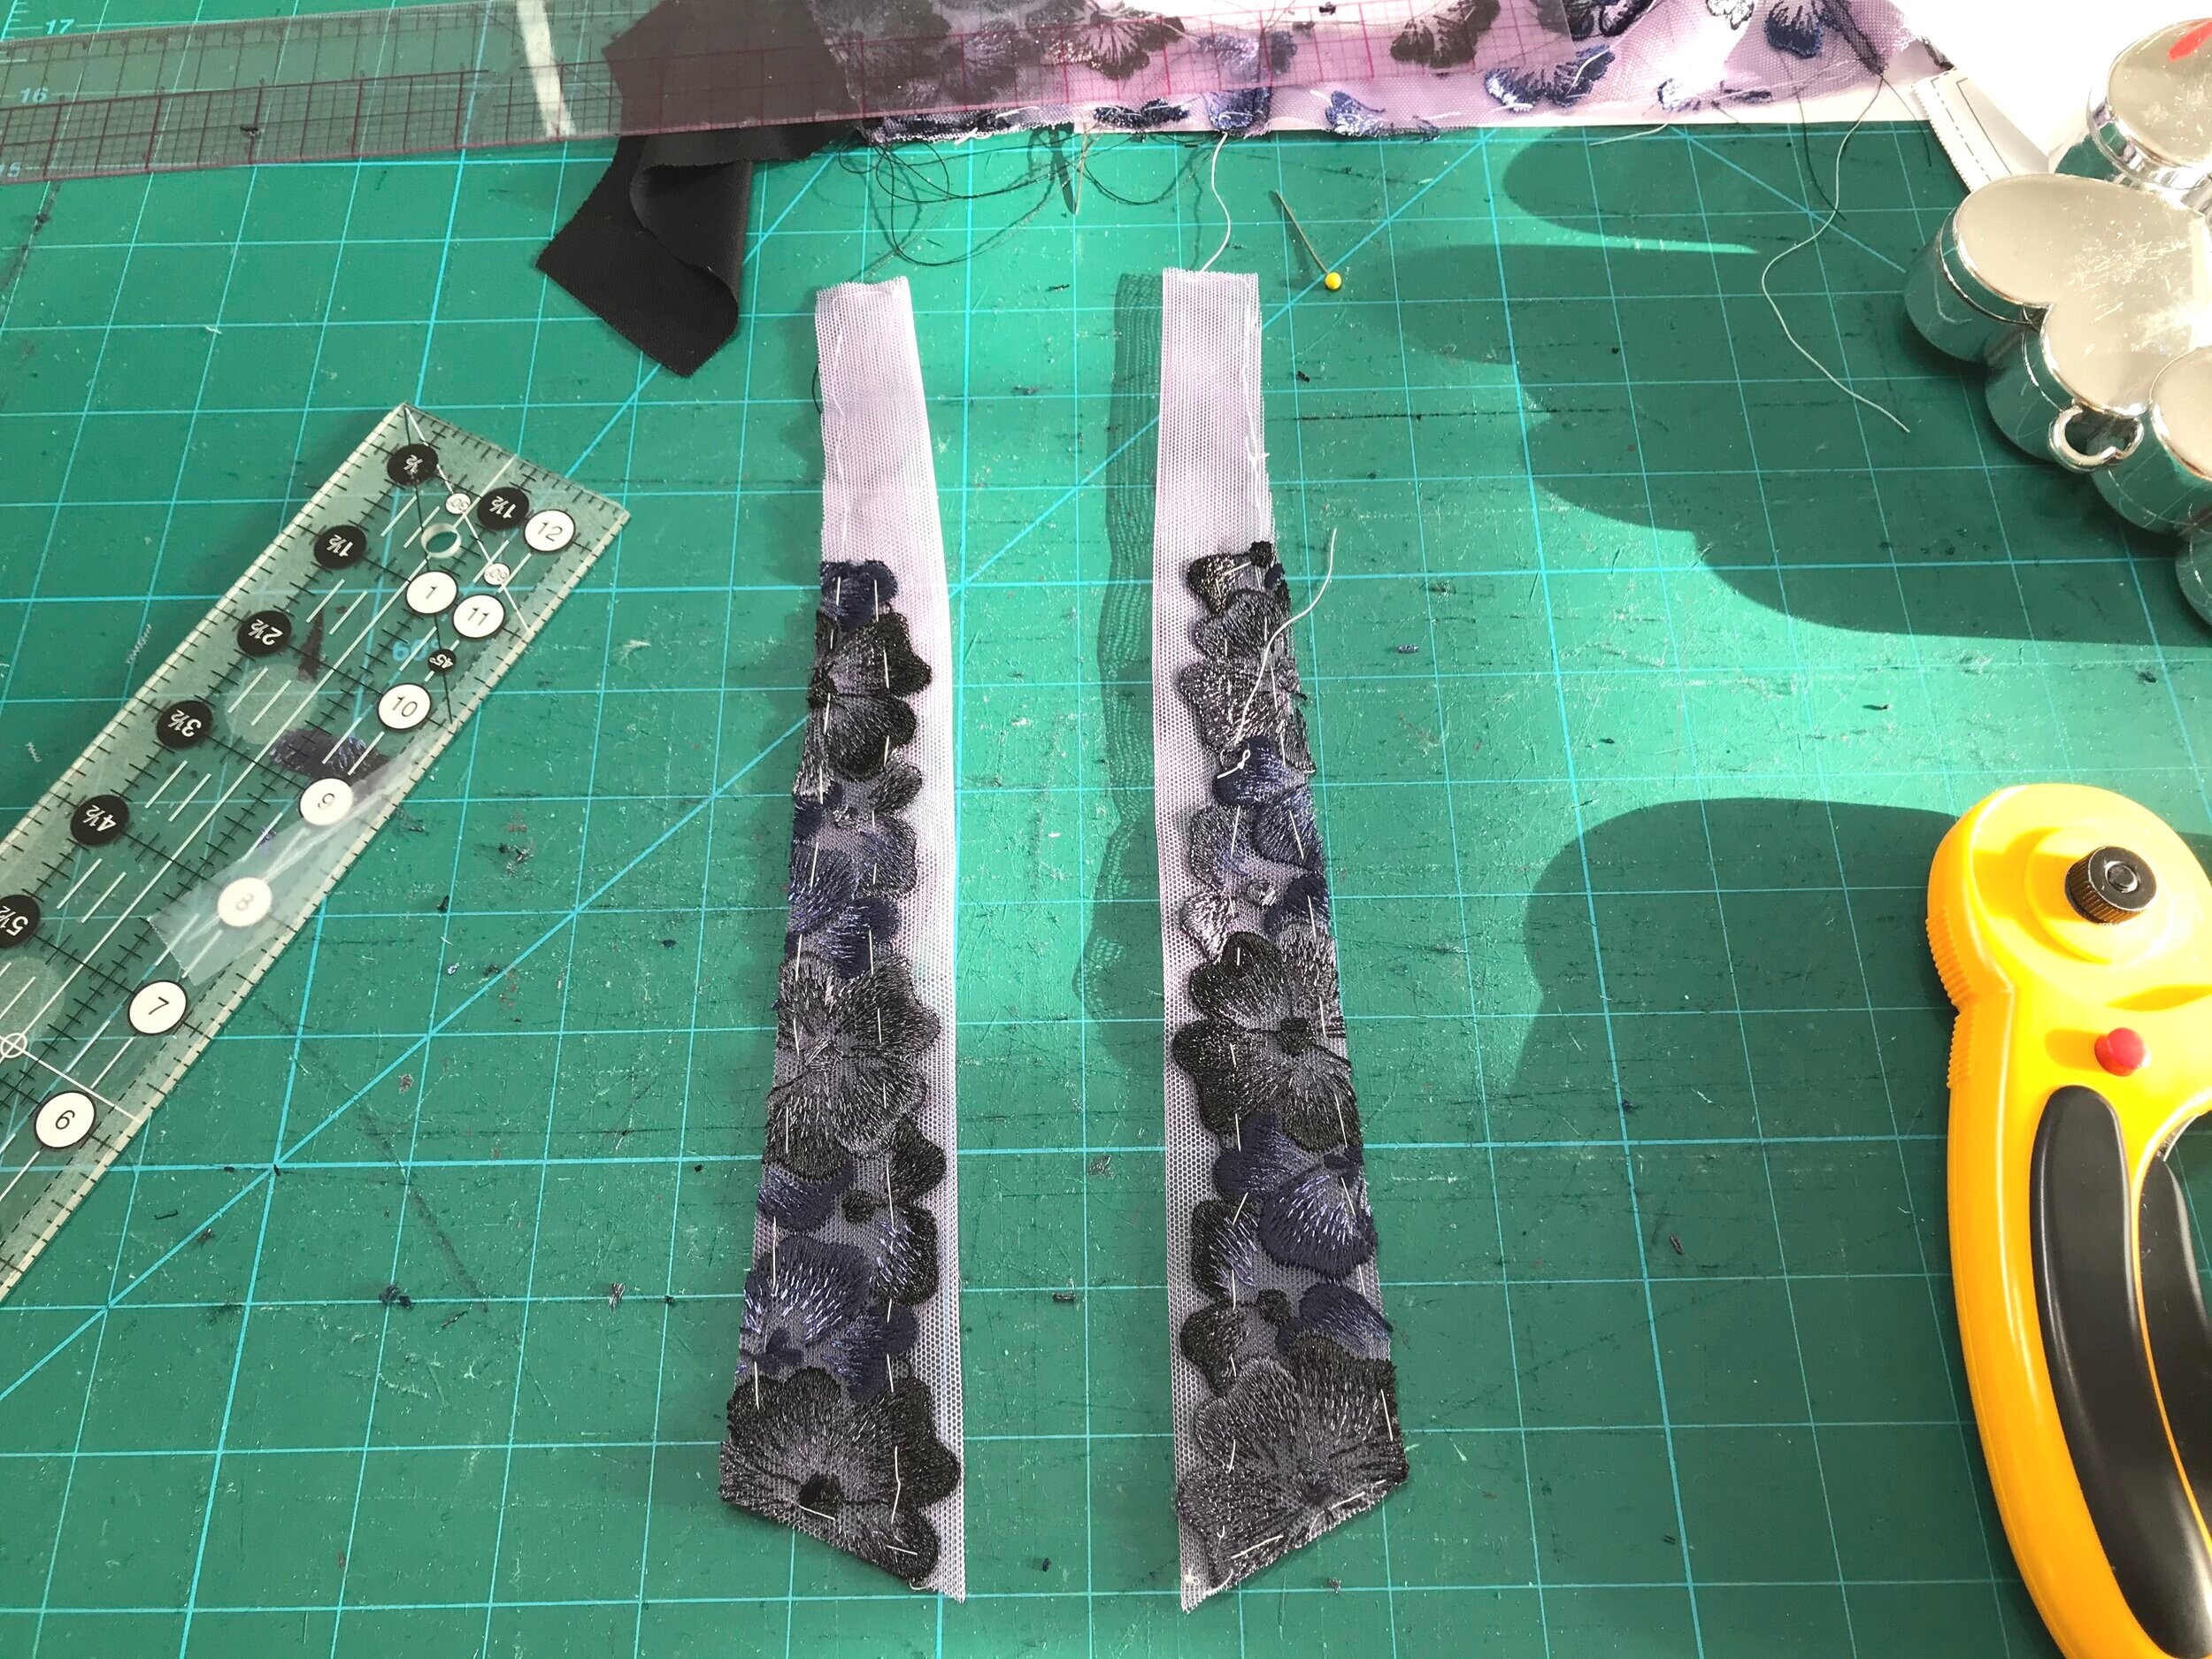
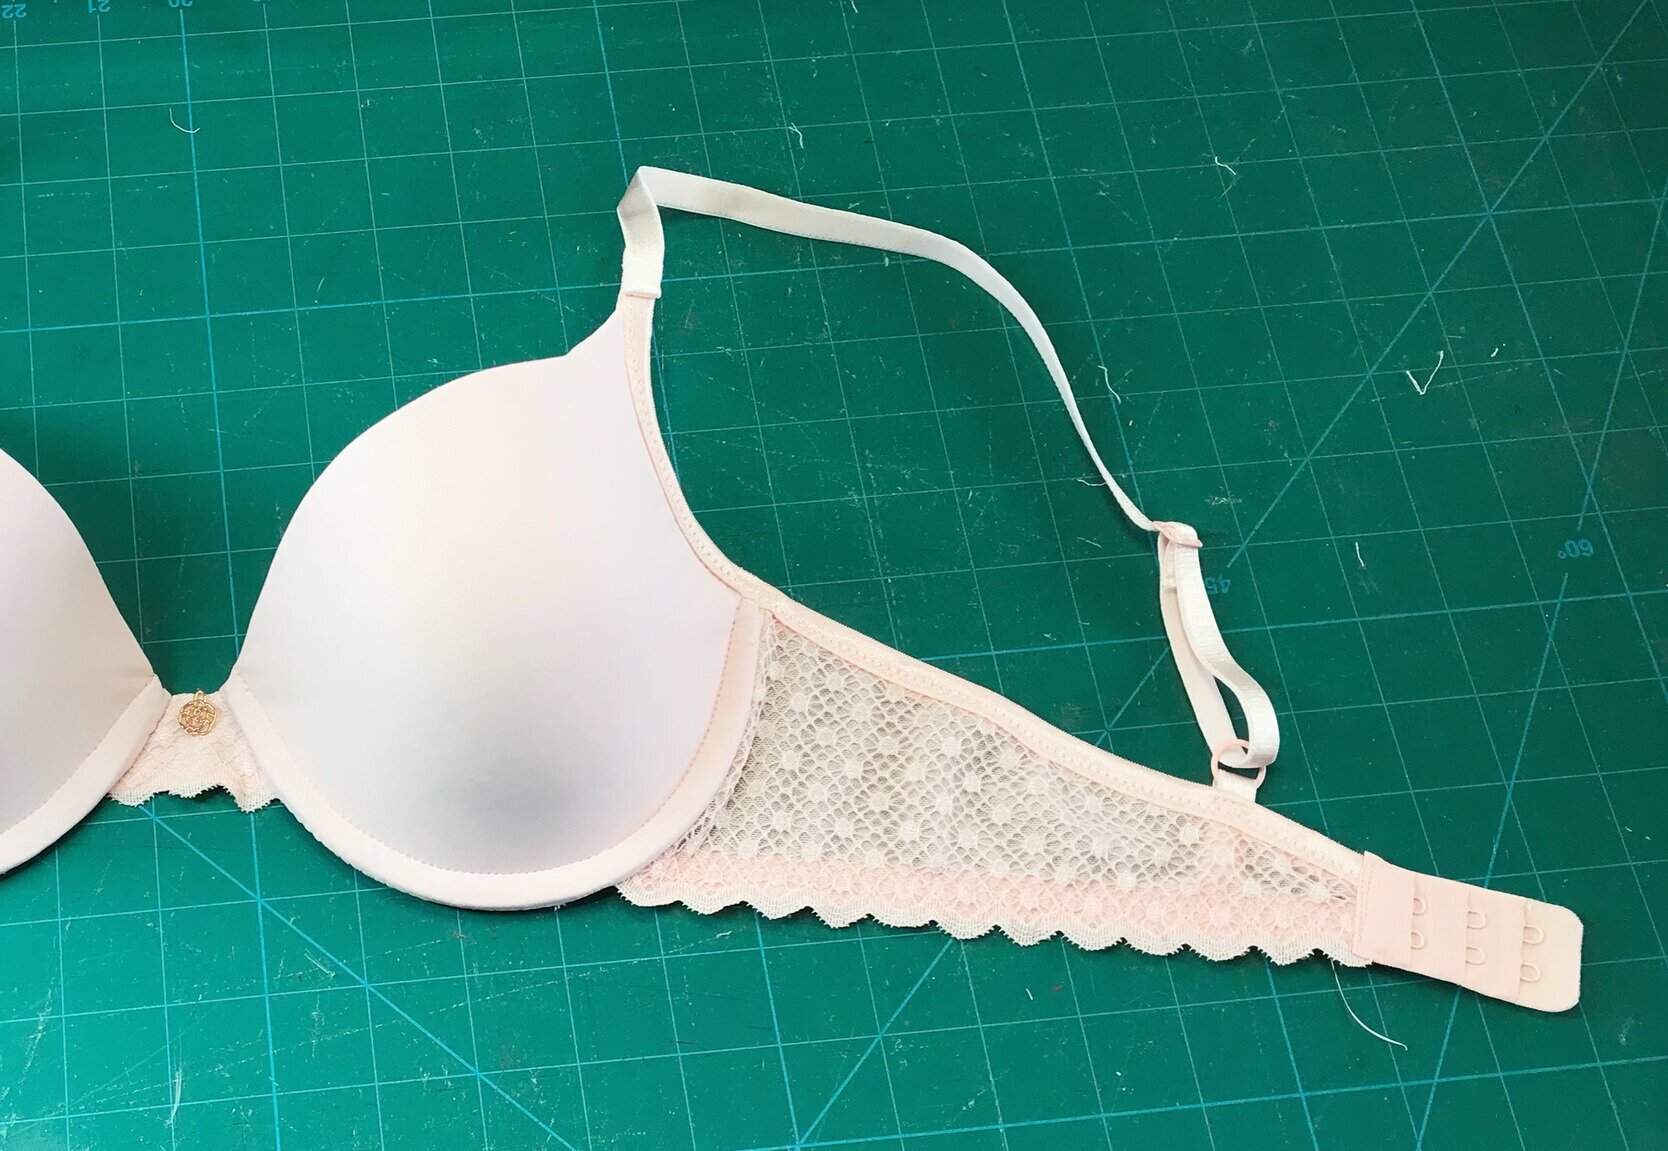
I made the side pieces the same way fusing the fabric to the sheer lining and enclosed the seams using another layer of sheer lining. The perfectly aligned front was well worth the effort. The pattern has large lace wings for a bare back look but with no lace left I adjusted the pattern for a regular leotard shape using just the powernet. The straps also feature gathered mesh. I have made straps similar to this before but decided to use no gathers for a smoother look but still used mesh to create the illusion of continuing up from the mesh sides.

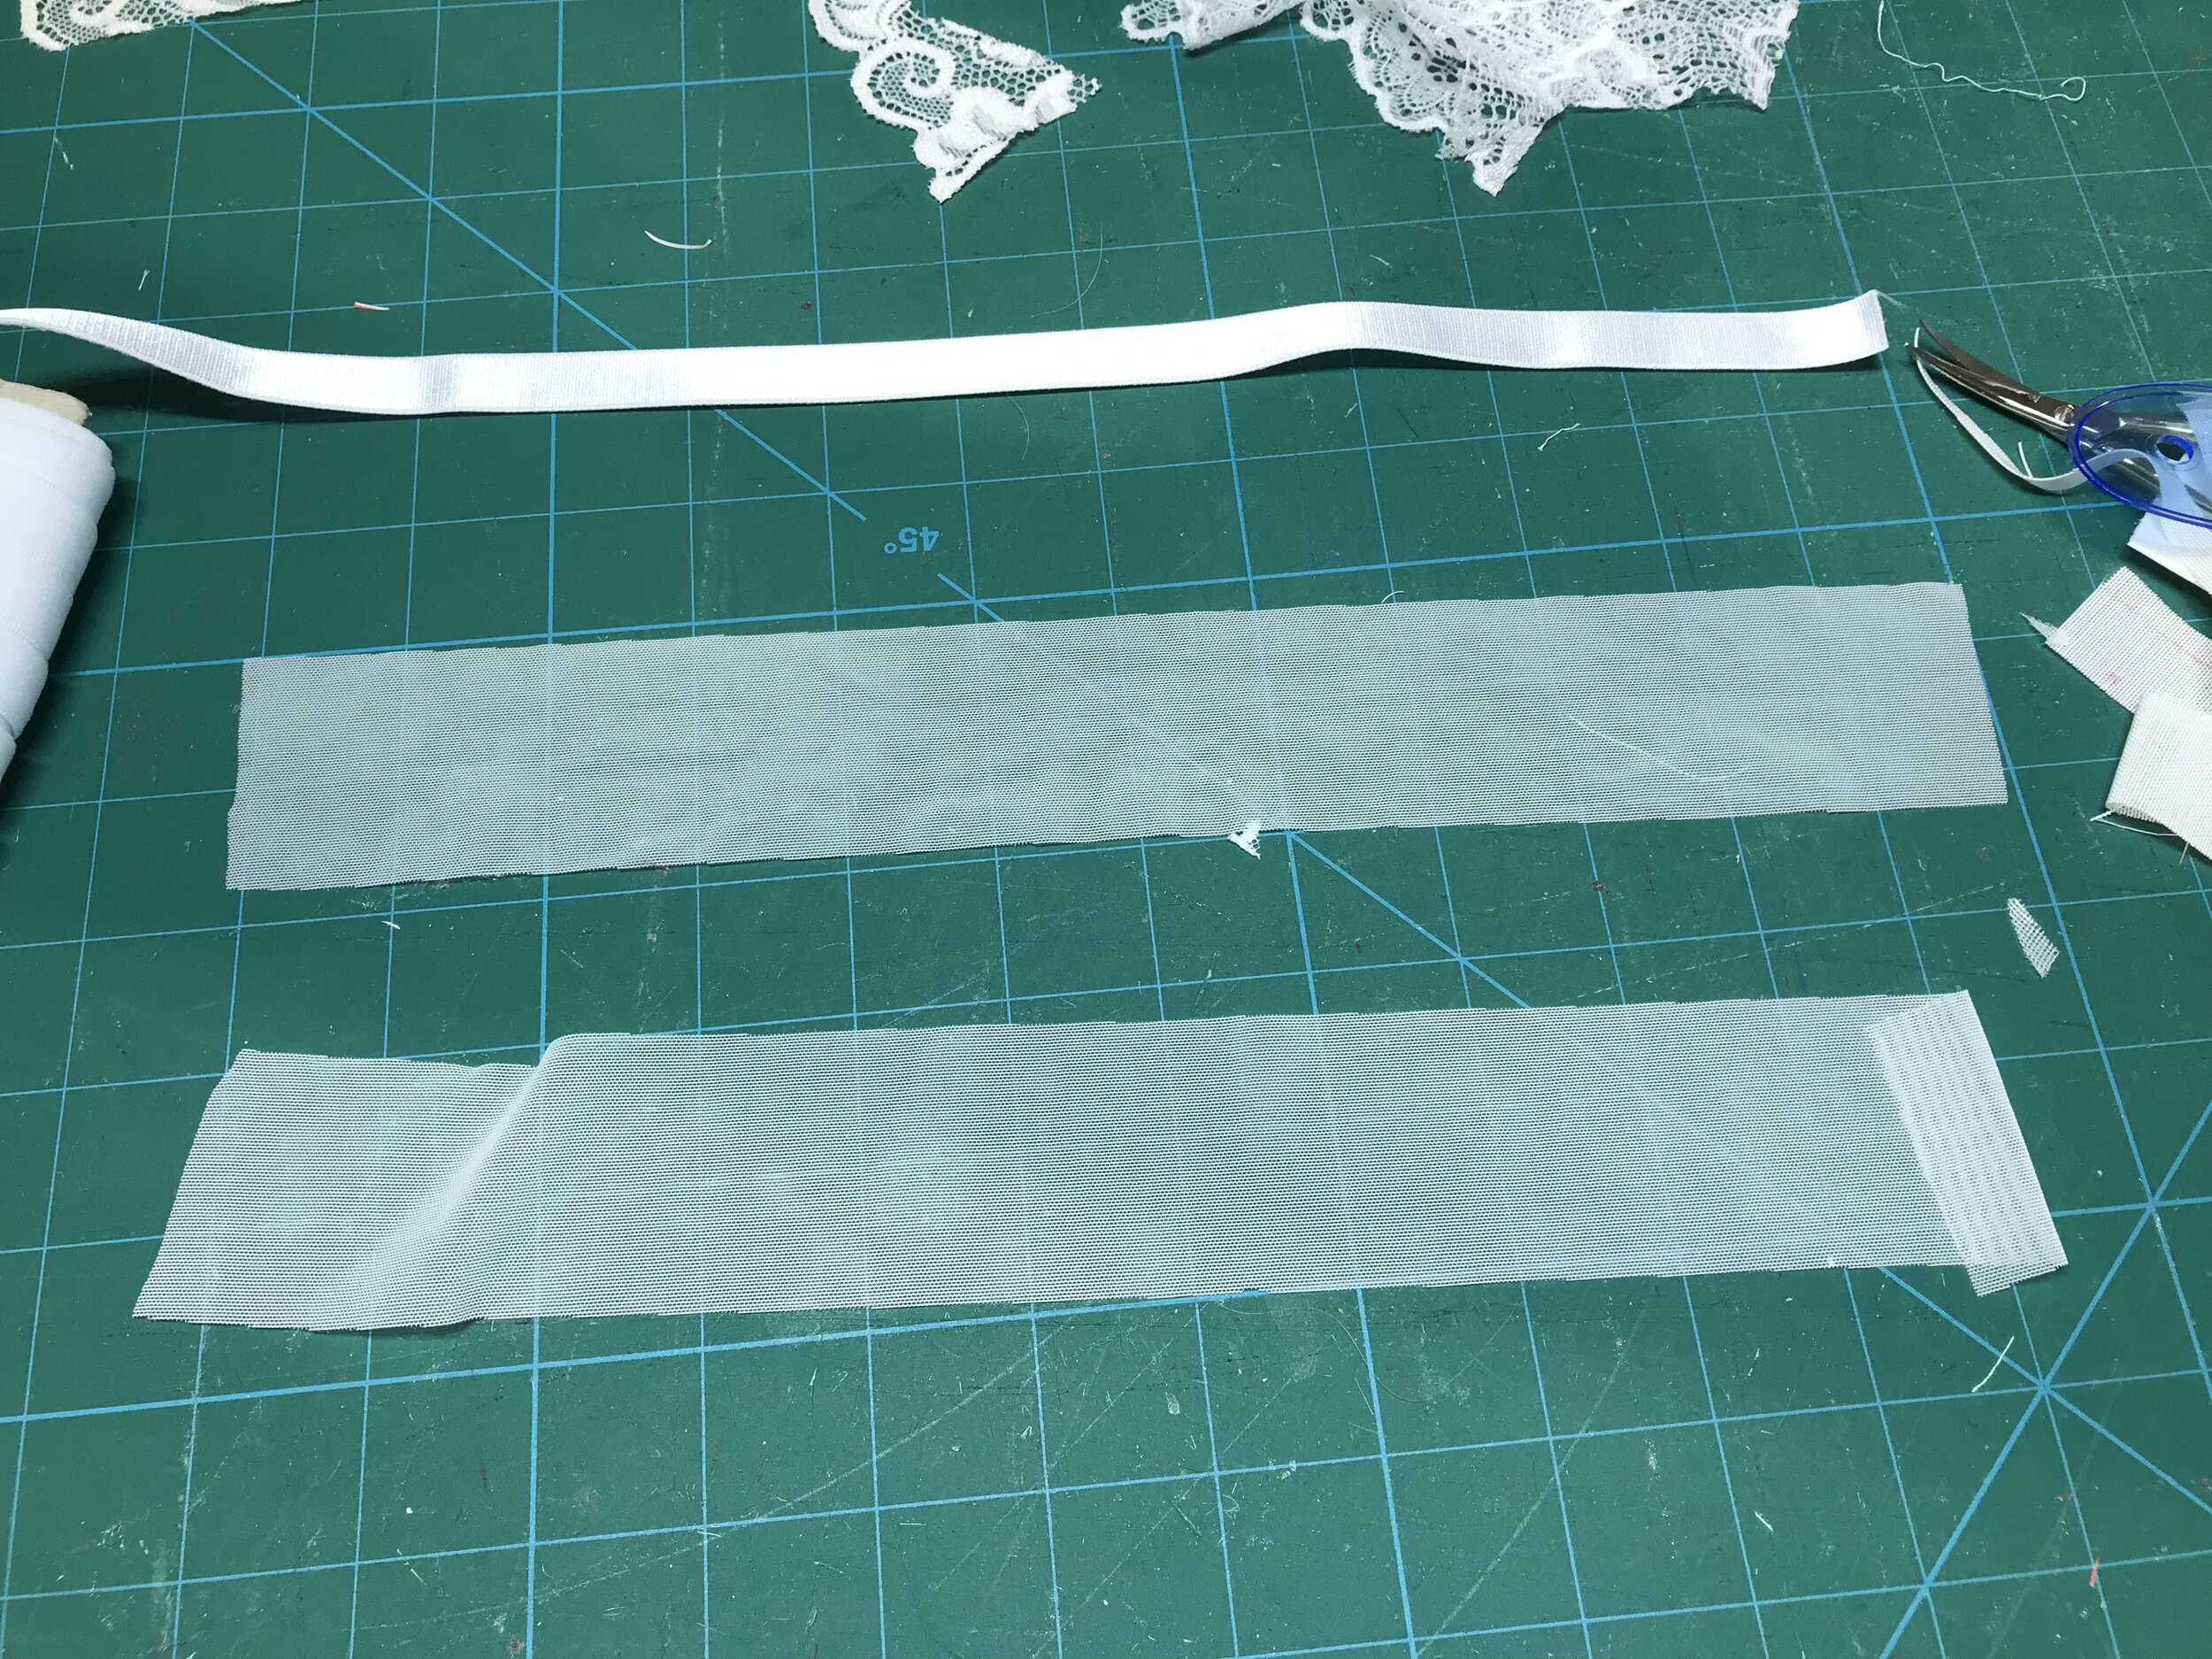
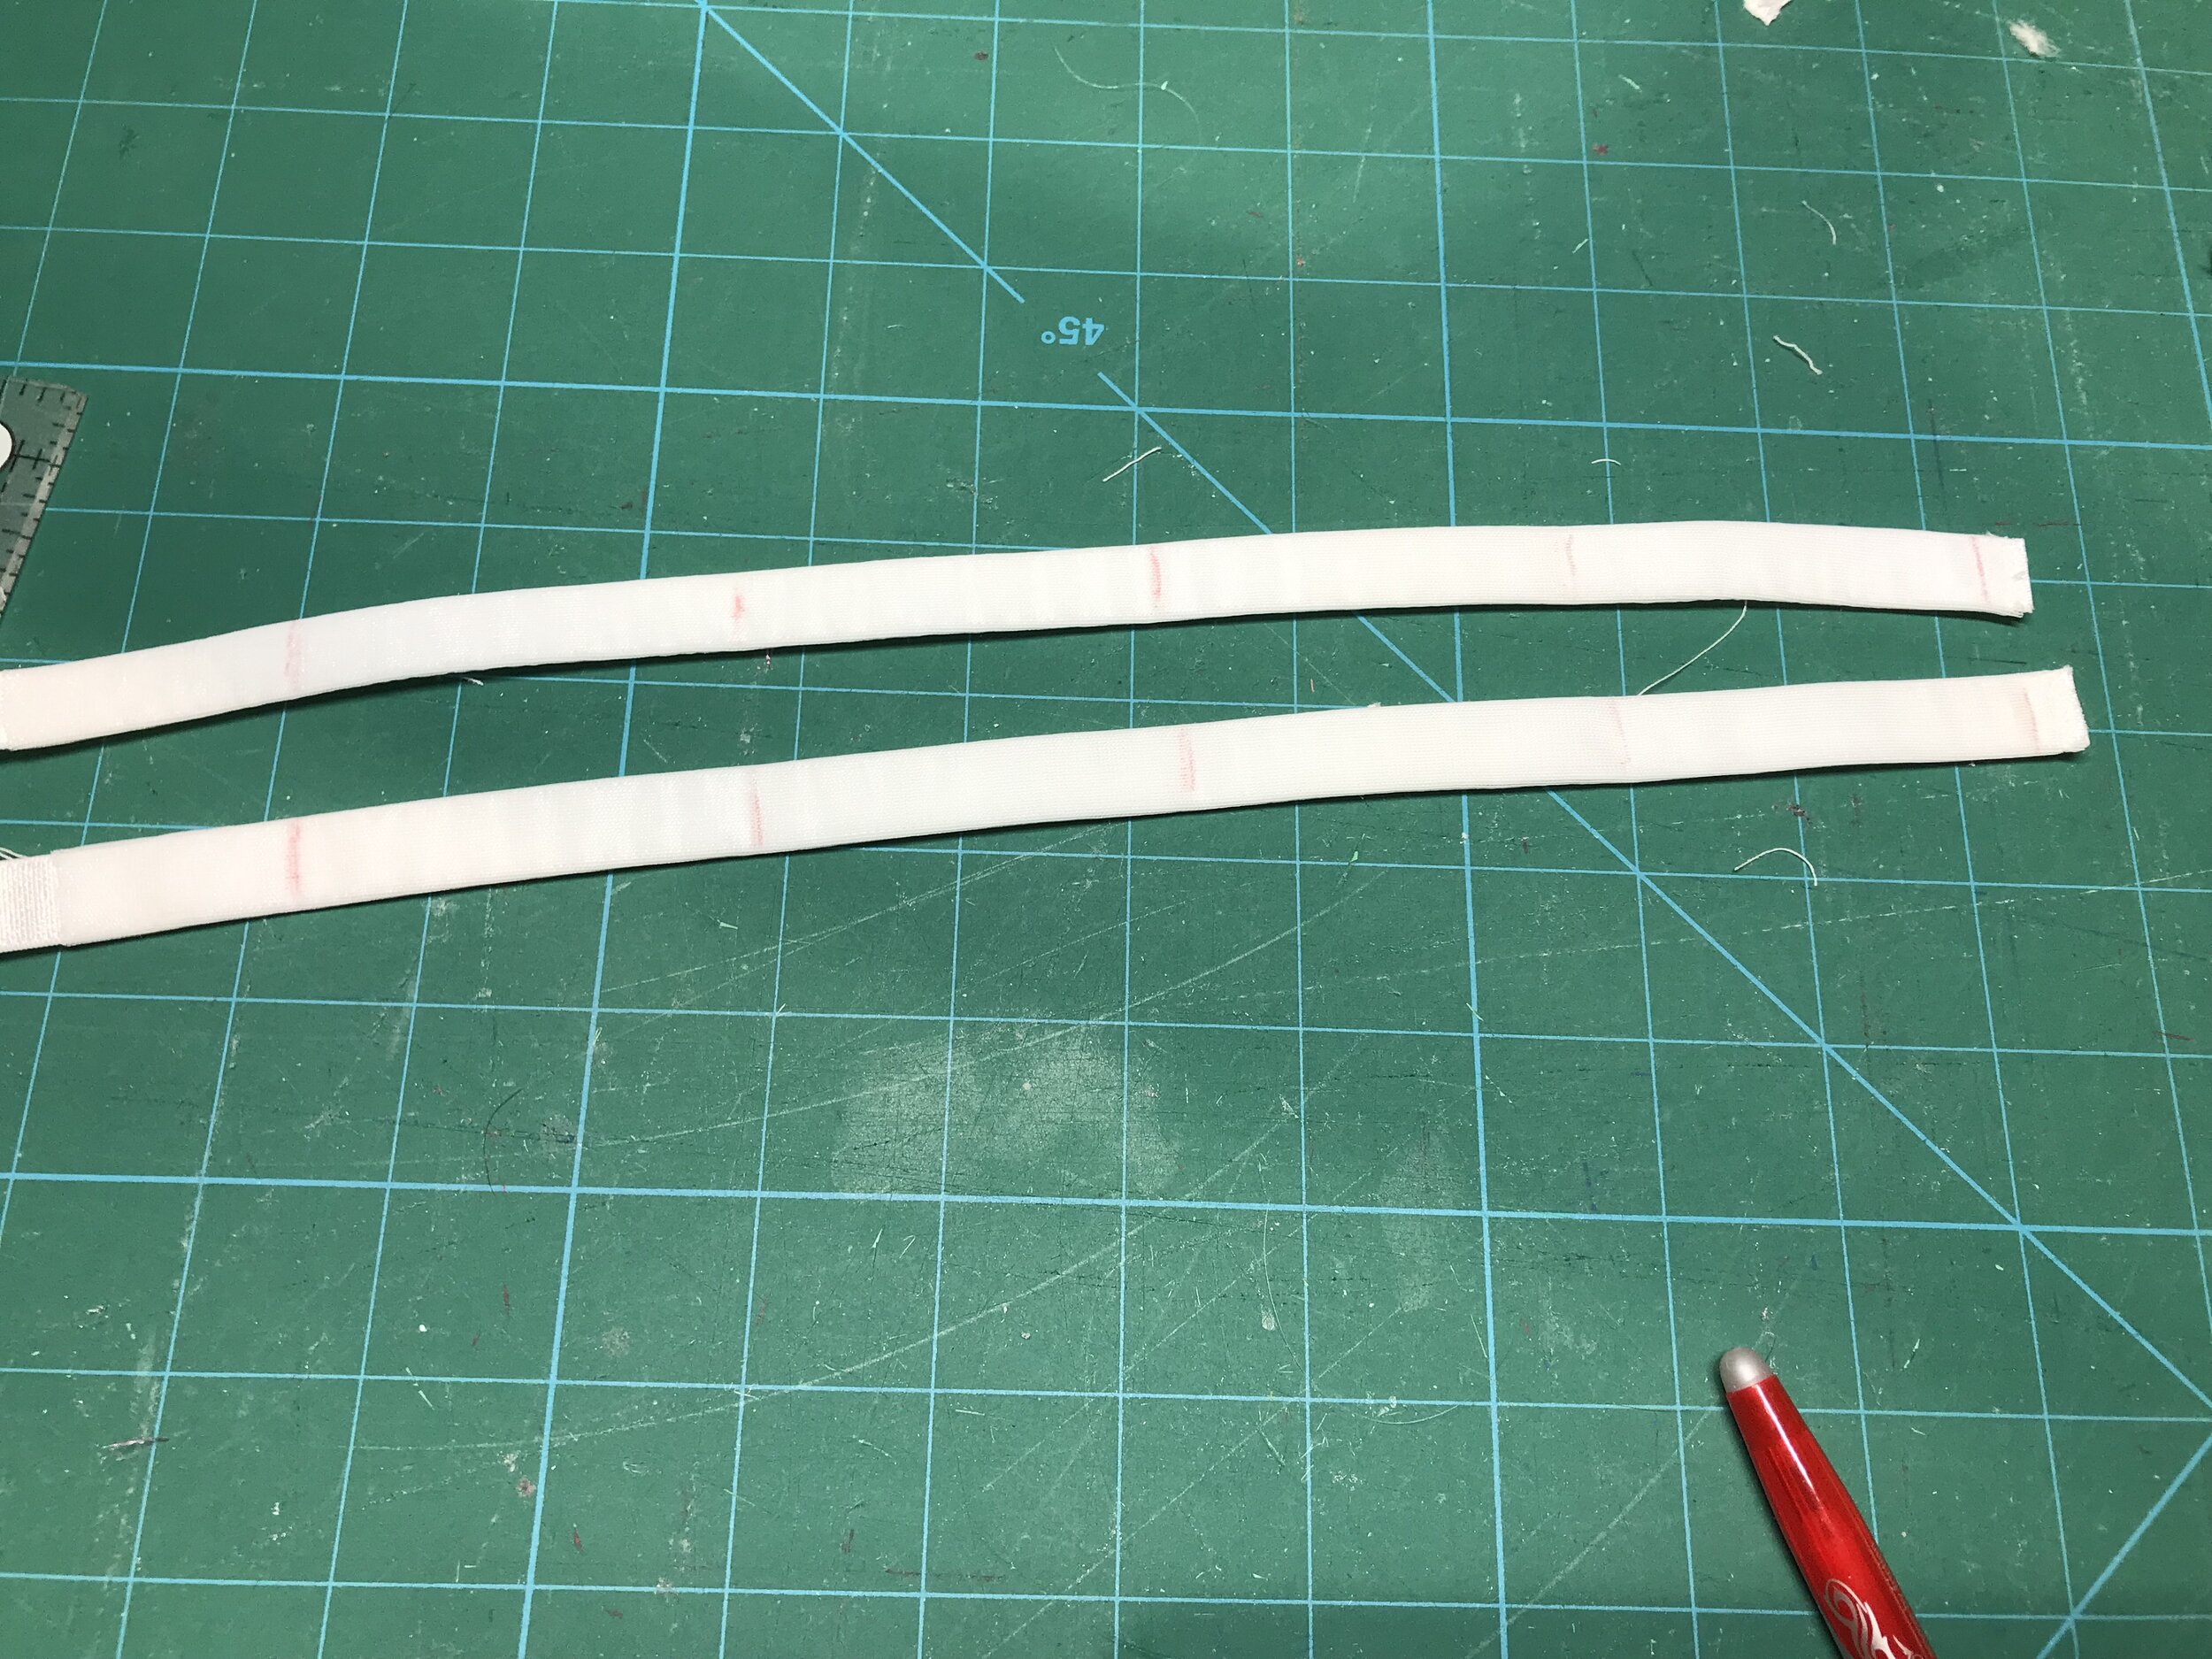
I cut two 12” pieces of elastic the same width as the strap tab and strips of mesh twice the width with seam allowances added. Next I sewed the mesh strips right sides together and then turned through. Then I threaded the elastic through and marked intervals of 2 1/2” to sew across to hold the mesh in place. I attached to the strap tab right sides together and pushed the seam allowance down and sewed through all layers.

Finally I made some plain adjustable straps for the back. I tried on to decide how long to leave the front strap to allow for enough adjustment at the back. I was thrilled with how it turned out especially the soft gathers of the mesh sides when worn. I just to need to embroider some bee decorations for the straps to match the back.

F593FB31-B9D9-45B2-A4ED-A41CACF70CD2.JPEG

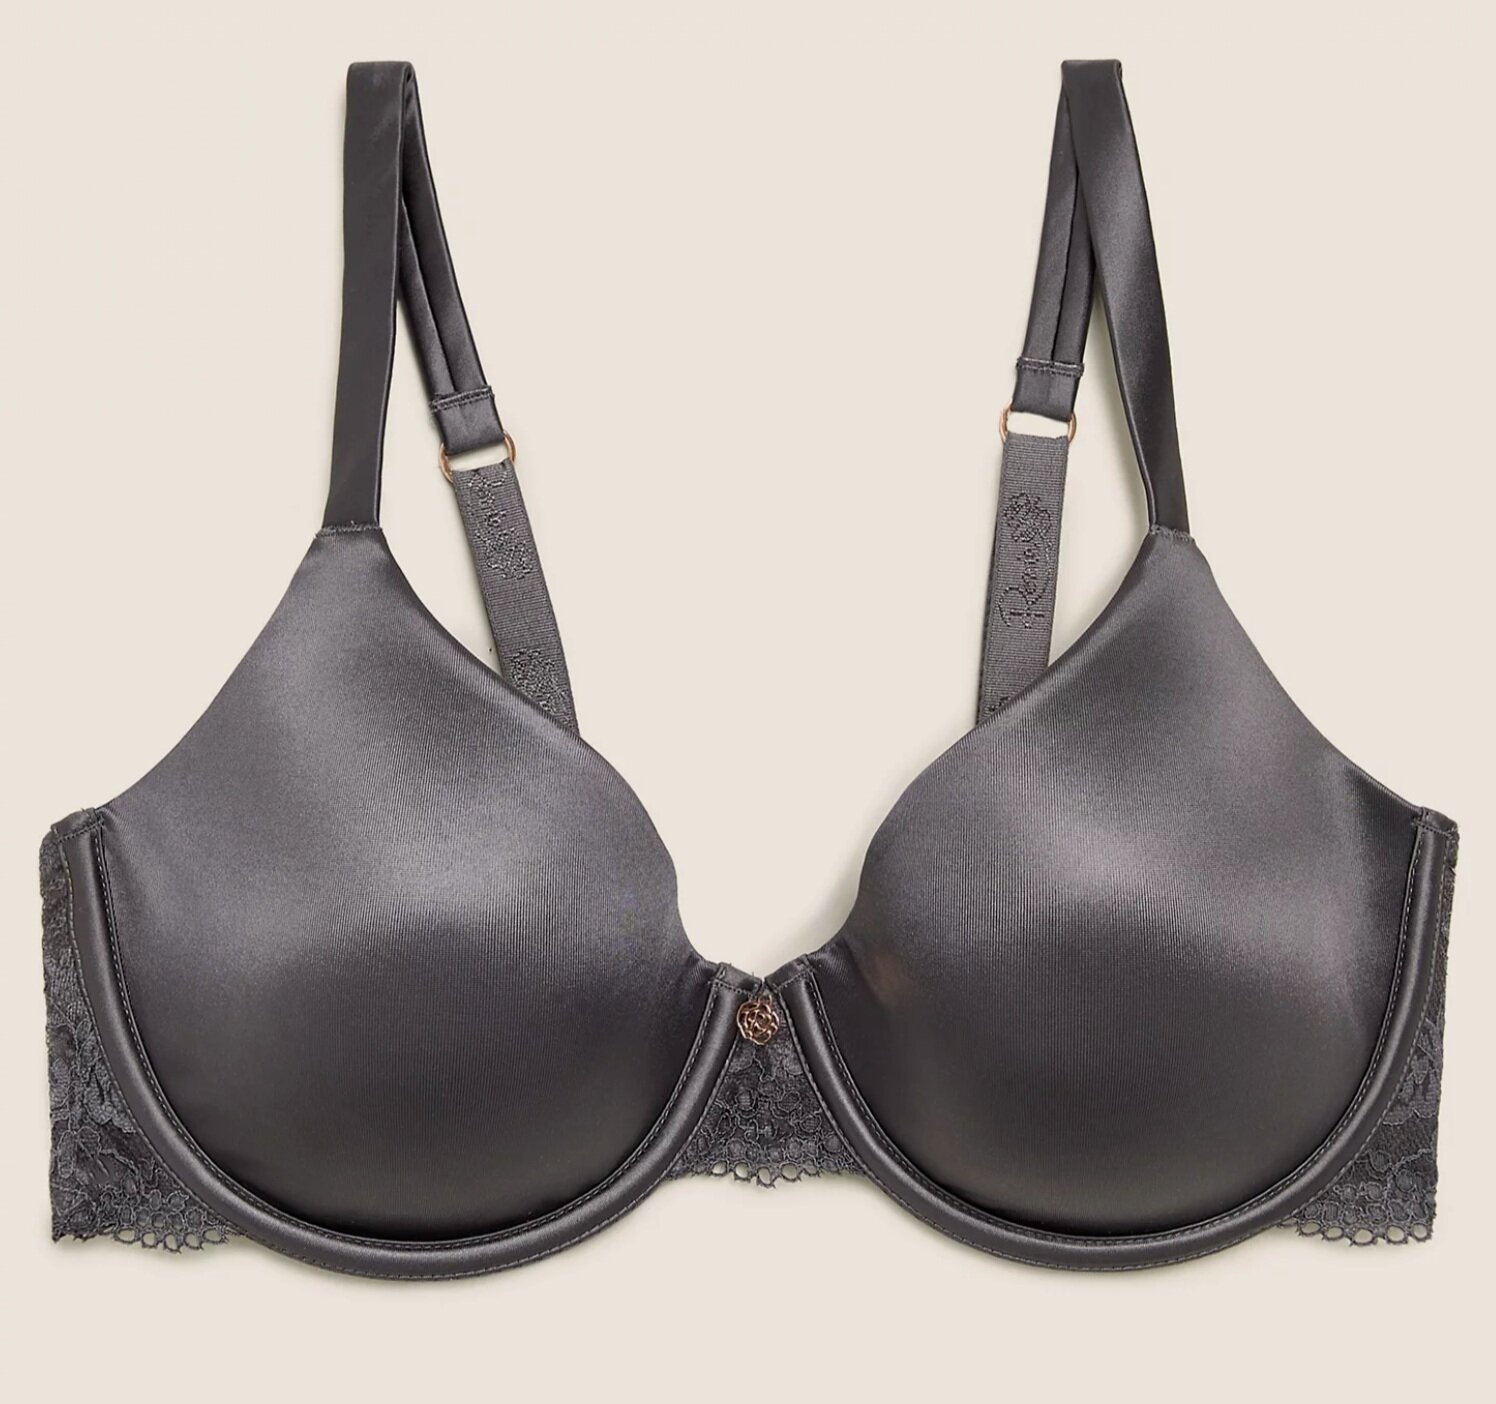
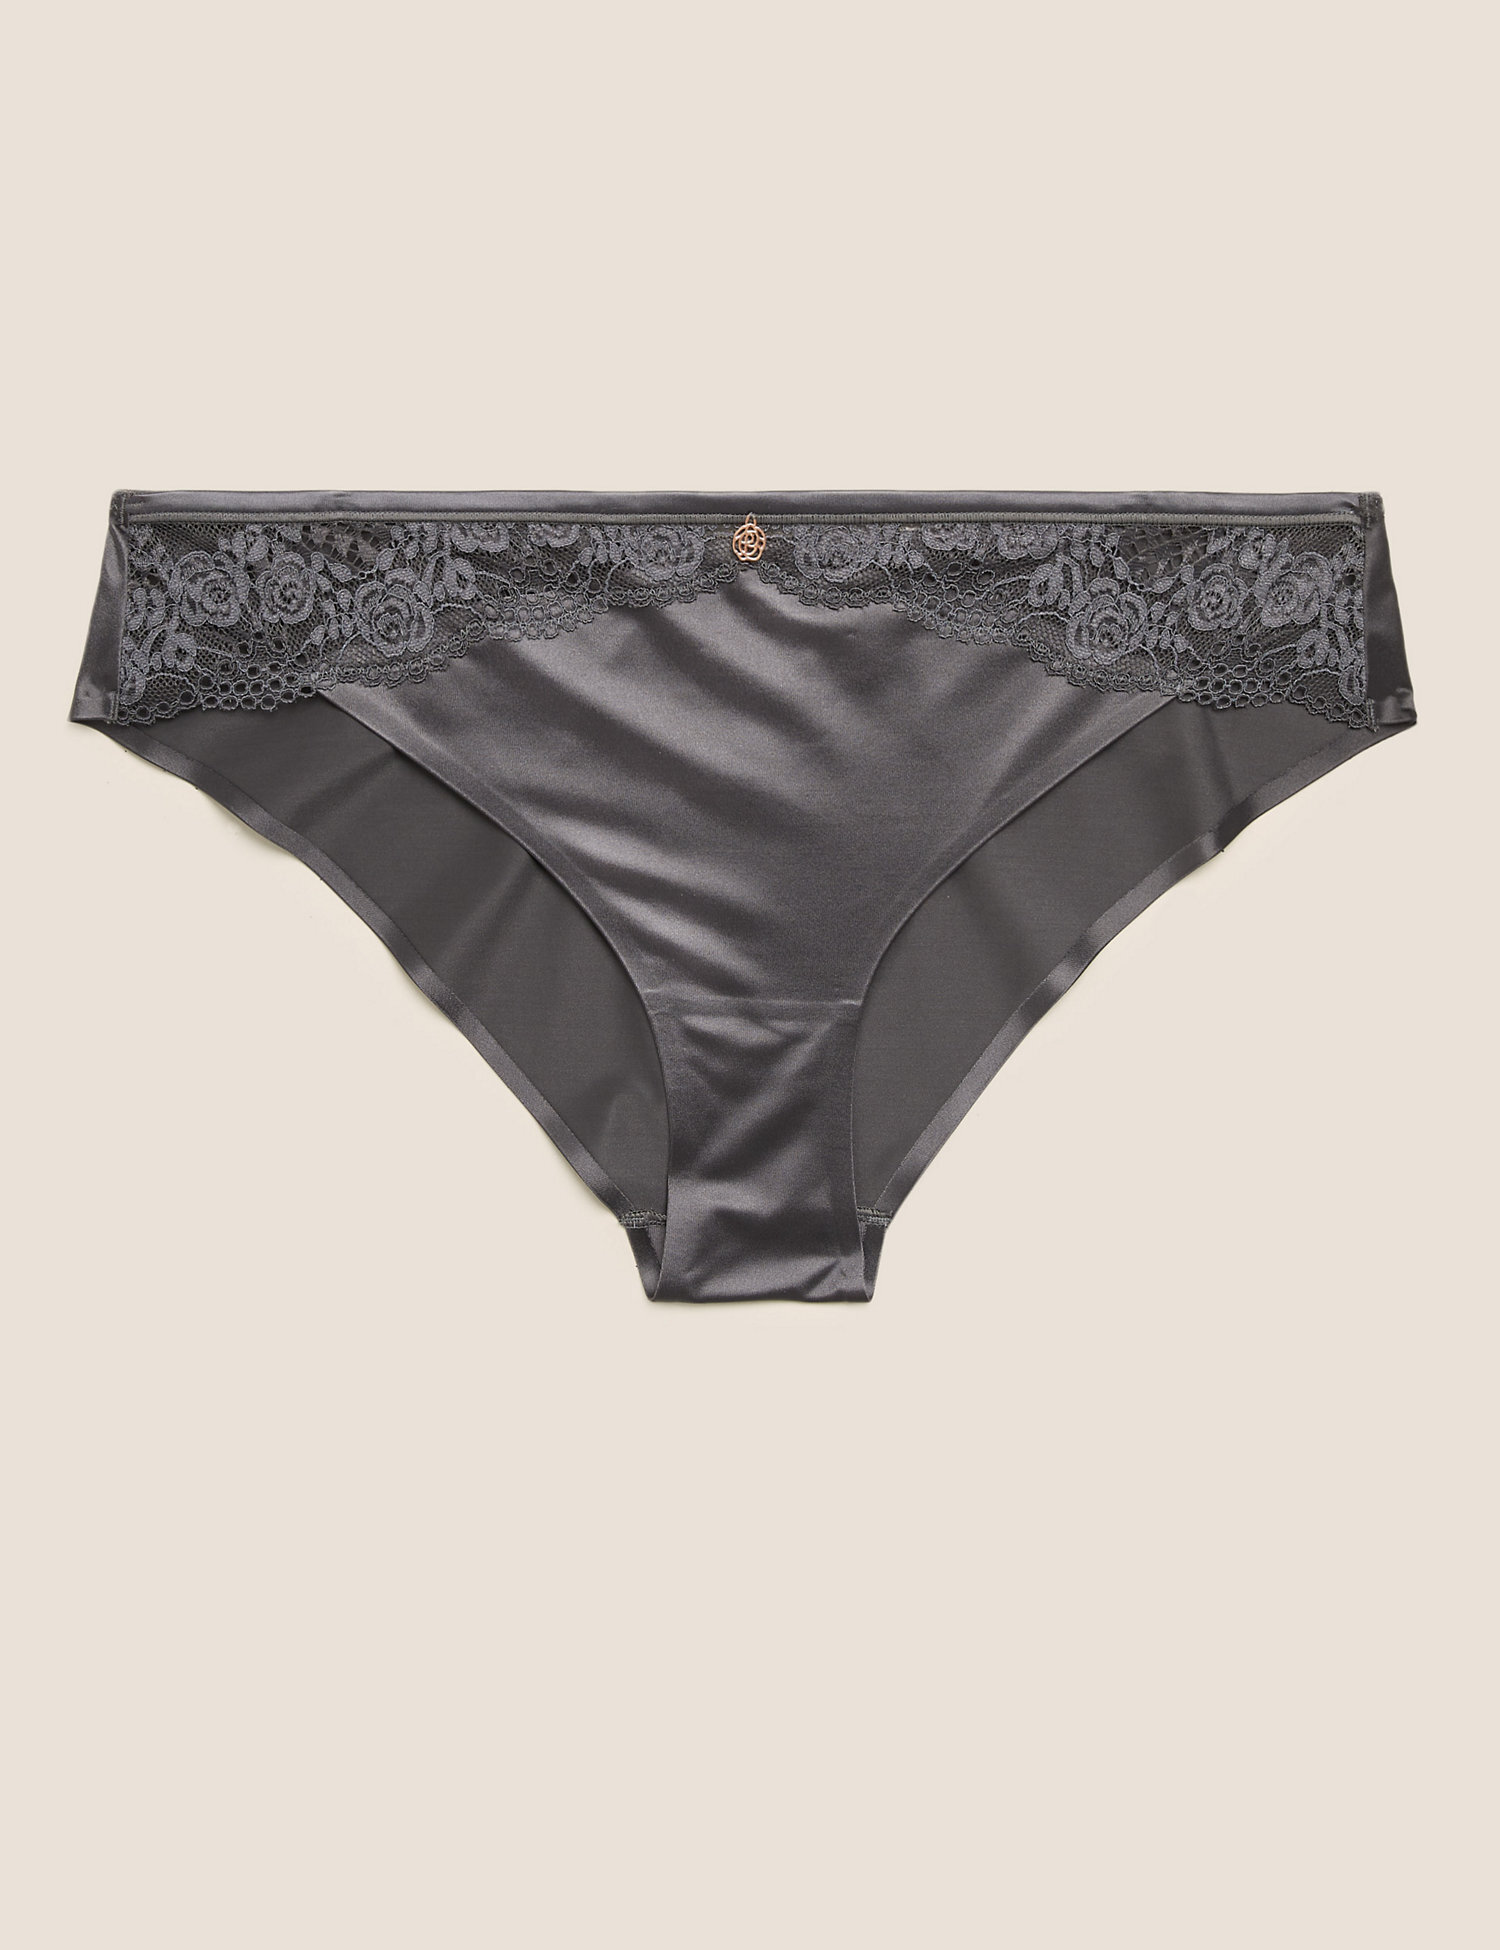
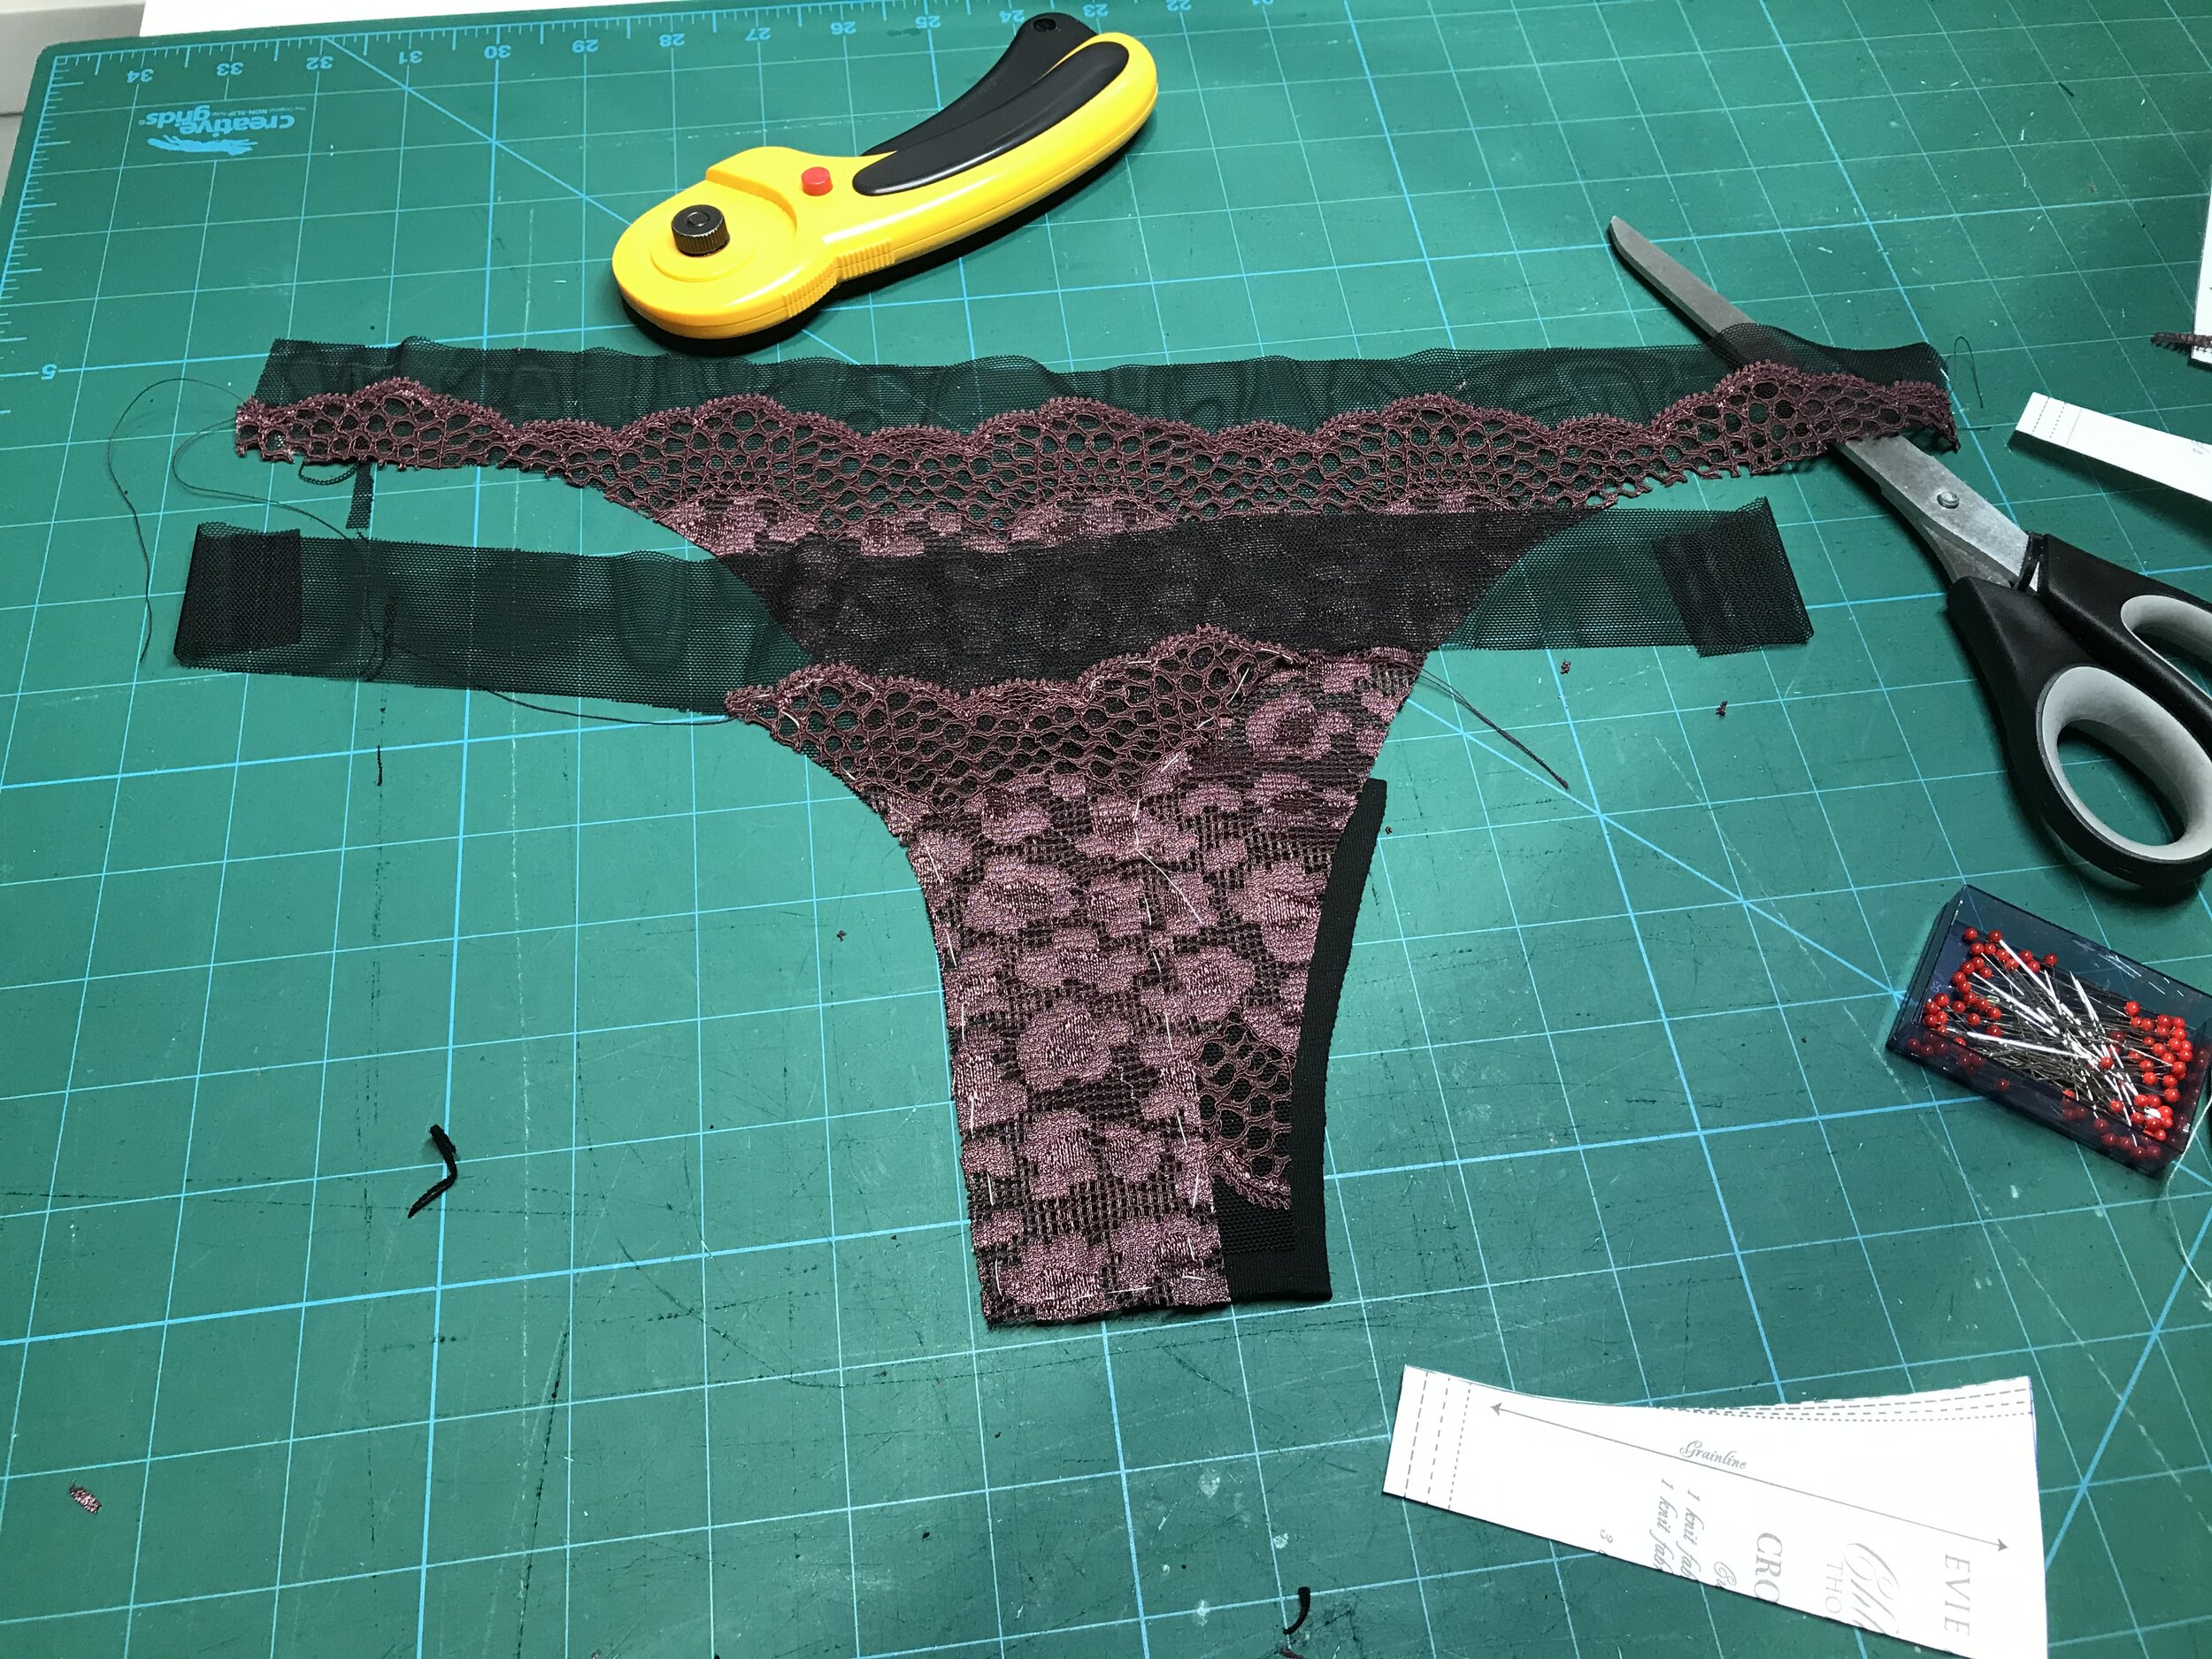
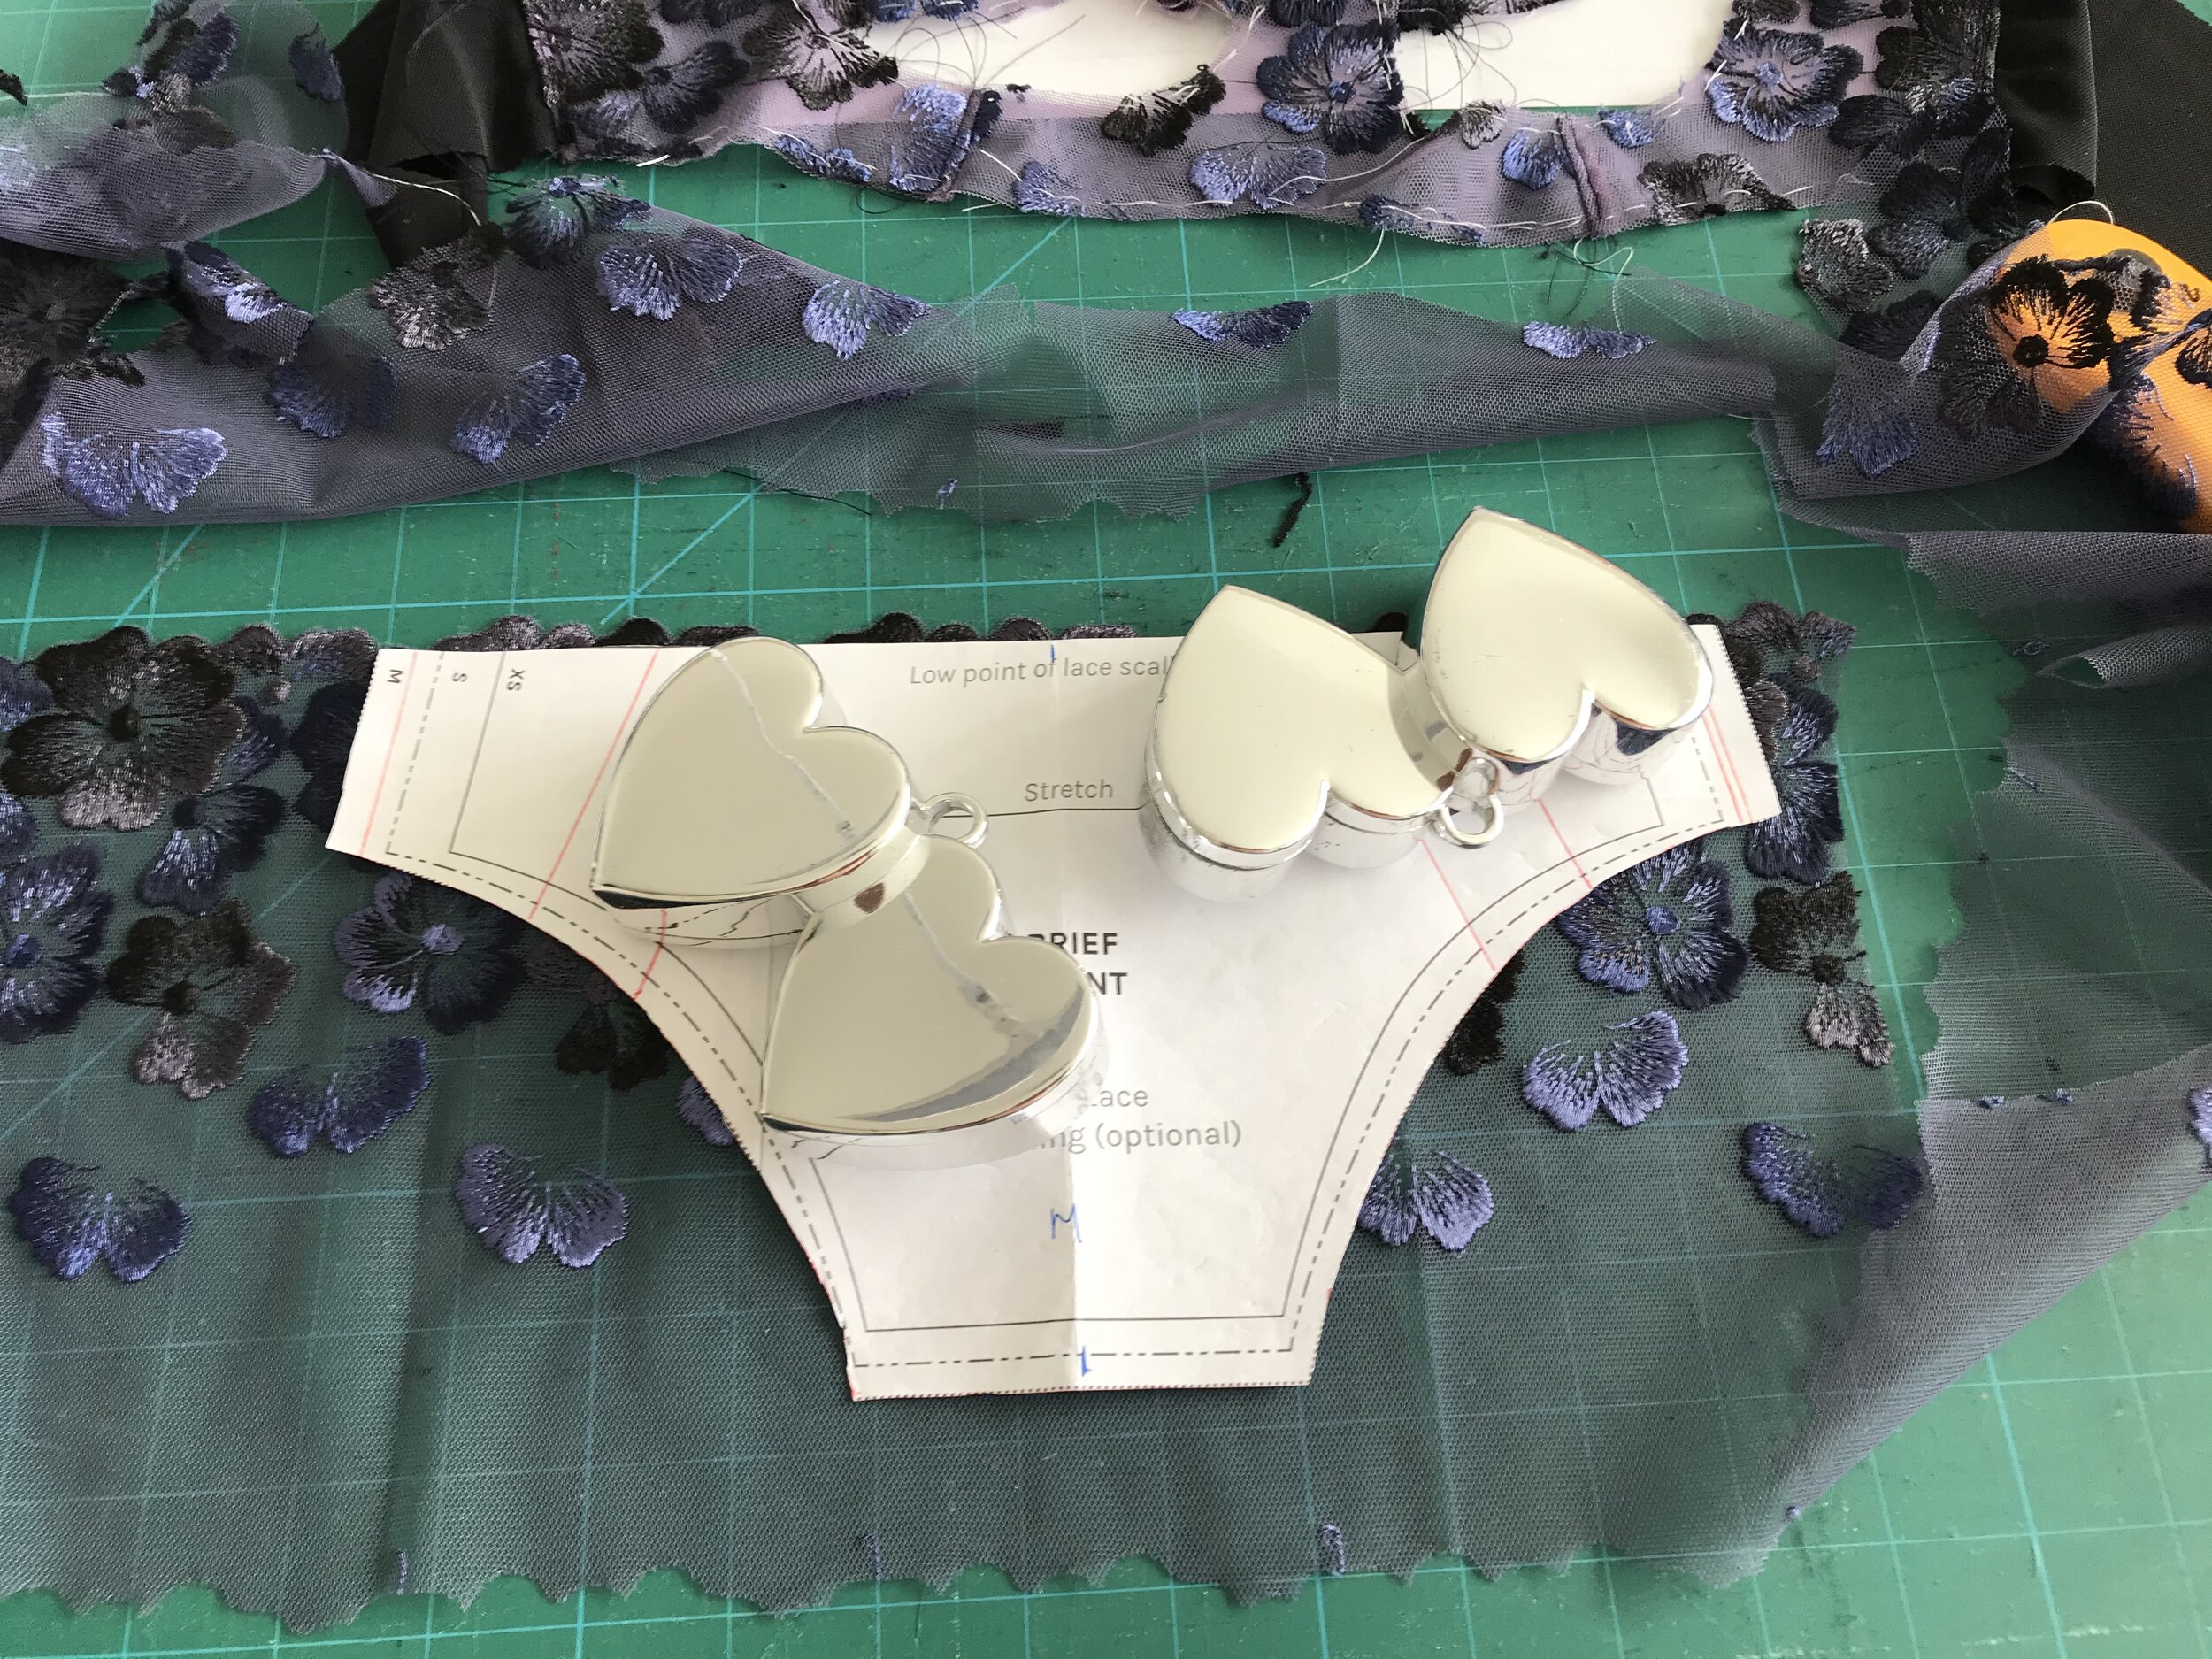
I know it’s a long post but I have one more set to share with you. Another frequent request is how to achieve the look of no vpl briefs. Most designs are very plain but I really liked the Marks and Spencer “Smoothing No VPL Brazilian Knicker”

For the class I used the Studio Costura Mia which is also a brazilian cut. I split out the front into a lace and fabric panel and angled my lace a little lower for more coverage at the front. For the legs I used double sided fusible elastic and instead of a bound waistband I used some really pretty fold over elastic.

I have a couple of patterns that are designed for preformed foam cups which are used in the “Smoothing” bra. Bra Makers Supply have a full frame pattern but I used the Orange Lingerie Mystic which is a partial band and required fewer adjustments.

Moulded cups are really hard to get hold of in my size so I decided to make use of the cups from a rtw where the band and bridge had stretched out after only a couple of wears. I took the bra apart and recycled the wires as well. What I found interesting was that the fabric covers were also moulded.

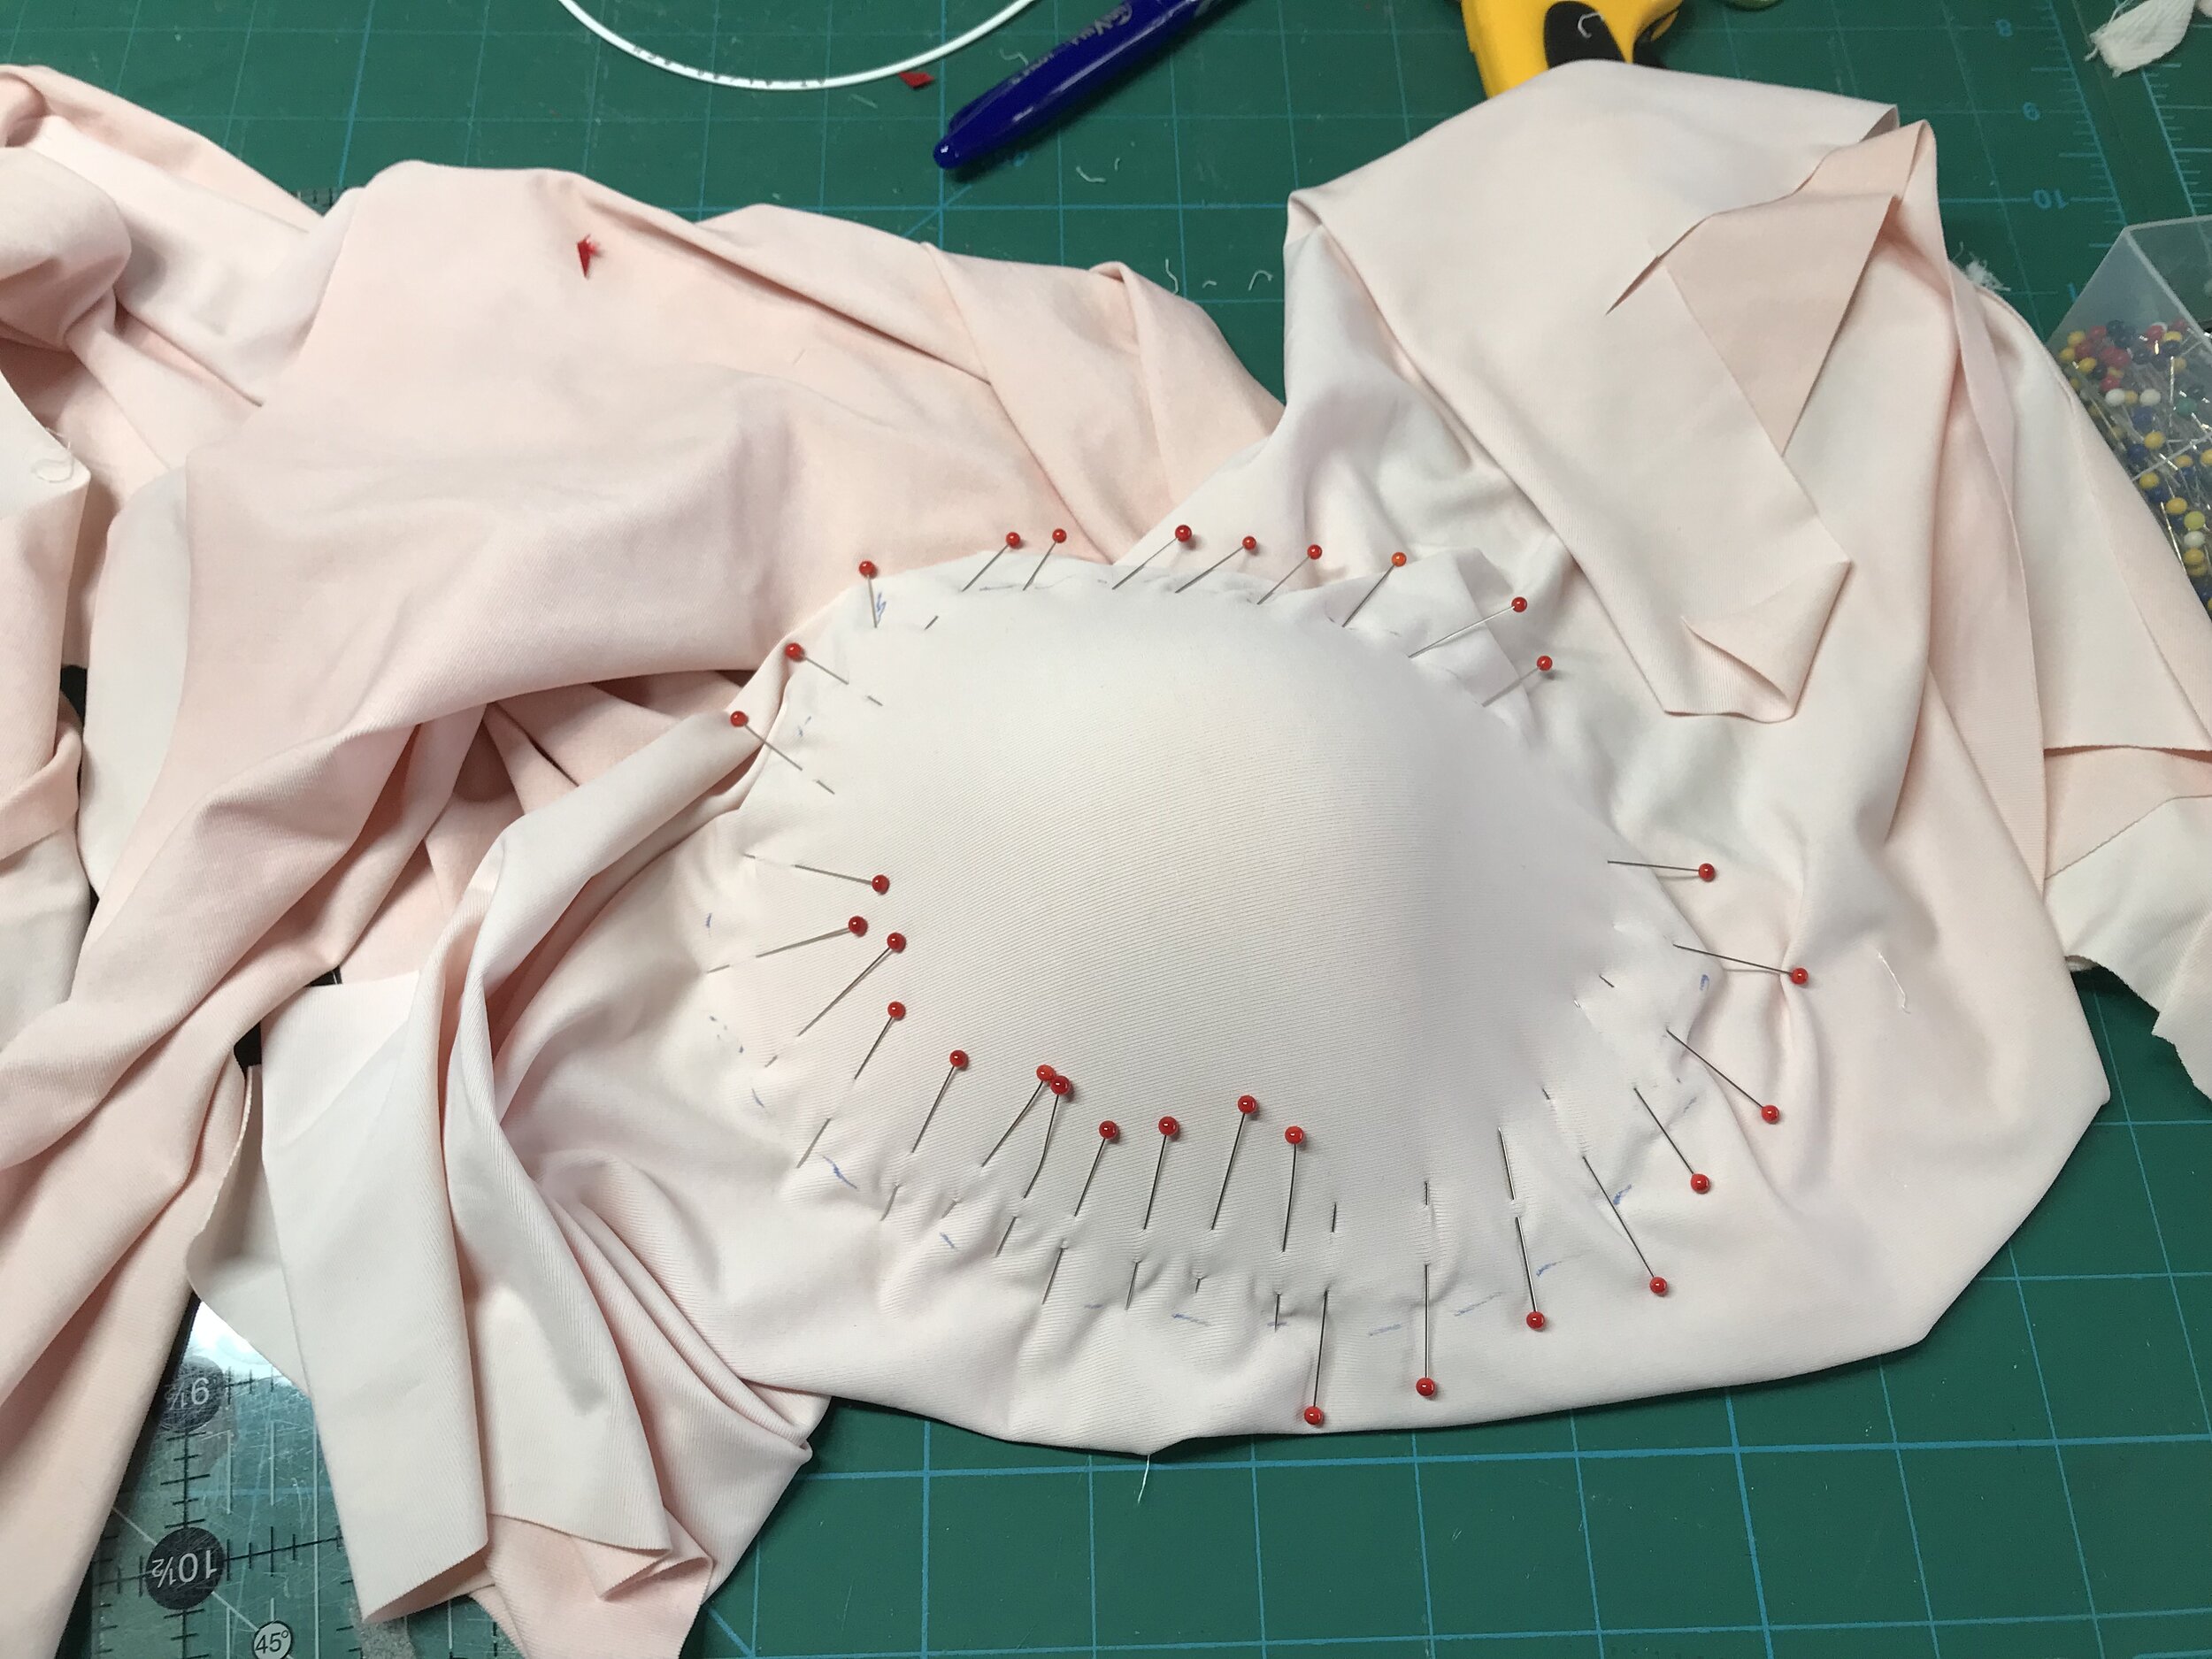
To recreate the look you need some really stretch fabric like the microlycra I was using from Bra Builders. The first step is to add some stable fabric to the bottom of the cup for the seam allowance as the foam itself cannot be folded. Then you have to stretch the fabric over the cup without causing it to collapse. It takes a bit of time but you have to keep going around stretching until you get all the wrinkles out. The pattern then has you cut around and then attach to the back of the cup and roll around to the front and then start the process all over again. Sometimes this can create a bit of bulk at the neck edge. So I first stitched in place all around the cup with the foam side up except for the top edge. For the top edge I used 3/8” double sided tape on the foam side and pushed the fabric over the top and onto the tape. Then I cut the loose fabric back to the tape.

As the wires are shorter than those used in the pattern I had to shorten the bridge and construct in a slightly different way to use the scallop edge of the lace. First, I fused the lace to a piece of sheer lining then I cut out another piece of sheer lining and turned up the bottom seam allowance. I attached the two pieces right sides together at the top edge and then flipped the front over and sewed across the bottom edge catching the turned up seam allowance.

5D657CF1-F25F-4374-B74E-5B9745A48C8F.JPEG

As my wires were also shorter at the side I had to adjust the height of the side frame before combining with the back band using the Orange Lingerie Berkeley band as a guide. Rather than use picot elastic which can be bulky on the foam I used fold over elastic to finish the upper edge. I really like the slightly wider and stronger elastic from Emerald Erin and remembered I had bought some in the new the blush pink colour which was was a great match. To complete the smooth appearance I attached the strap direct onto the foam cup and created an adjustable strap by attaching a small piece of strap elastic to the height of the band for the ring attachment.

So that is my matching bra sets done! What to do next?

Pattern Drafting, Sketches and New Year's Resolutions

It’s been a while since I last posted but I’ve had a manic few weeks of doing so many new things so I thought it was time to take a break and journal all the makes. My New Year’s Resolutions were to take time to practice sketching designs, further develop skills to take designs to patterns and explore different approaches to drafting. So here is what I have achieved so far.

F46E1F51-F5BD-4133-91FA-7ABAC5FDB41B.PNG

The year got off to a good start as Porcelynne had a week long Draft Along which was live drafting using the method in Jennifer’s book Bare Essentials. This was drafting from measurements to create a fitting pattern that could then be turned into a sloper to create any design. Alternatively you can use your fitted Eve cup, or any other well fitting pattern, to create the sloper, which I had already done, but was interested to see how the two would compare.

What I took away from the week was a better understanding of how to manipulate patterns I already had and this set is my first attempt to take an idea through to a finished make.

Although this method is a mathematical approach to determining measurements for bra drafting, for most of us, the first draft is a starting point. My initial draft had a similar shape to my Eve but needed some work to get a good fit. I had my Tailormade TMCollaBRAtory January kit to use and an idea for the design so I thought I could make a sloper from my perfect fitting Emerald Erin Black Beauty. The first step was to integrate the strap part of the power bar into the upper cup.

I wanted to create a diagonal seam through the apex which would create a super powerbar side with a curved lace upper cup. To help decide where to place the seam I used a technique I had seen in Beverly Johnson’s Bra-makers Manual where you make up a cup in foam and draw the style lines and cut up. Using the Bare Essentials method I then had to put the curves back on. I made up a test cup to check the fit both in terms of cup size and that it fit into the frame. So I was ready to use the beautiful lingerie satin kit.

Before I decided where to use the lace on the bra I cut out the lace back for the Ohhhlulu Claudia which is a great pattern where you can use the non stretch fabric of your bra on the small front panel. I often size up with the Claudia depending on the stretch of my lace and whether the front panel has any stretch at all.

D6C8E87B-E076-475B-9C6B-5BA8CA656870.PNG

The next set came about because I had run out of regular wires and thought why not try drafting for the short/demi/plunge wires I did have and use the kit for my February TMCollaBRAtory. I sketched a few ideas for front closing, partial bands with strappy backs but then realised I needed to get the basics right first.

The band draft was straight forward but I was struggling with the cups so I decided to look through the many patterns I have and see if I could use them. The idea was a lace cup with a separate foam lower cup with a push up effect.

I first came up with using the Madalynne X Simplicity 8436 which is a partial band for stretch lace which I had made a while ago. So I adjusted the cups to fit my full band draft. Then I needed a foam lower cup piece. The answer was the Porcelynne Ariel cup which is a three piece cup for a lovely round shape. So I made up the full cup in foam and inserted into the band with the lace over and as before drew on the style I wanted. This took off most of the upper cup so I adjusted the middle piece to incorporate the bits of the upper cup I needed.

I made up the other cup from my new pattern pieces, lined the lace cup, attached elastic to the neckline and finished the rest of the bra. From this I narrowed the bridge, created a gothic arch and narrowed the band as far as I could so it would appear to be a partial band. For that push up look I also tried making some cookies from Beverly Johnson’s class but the fit was so good I don’t think they are needed.

With all the pattern pieces adjusted I moved onto the beautiful lace kit for my February TMCollaBRAtory project. As I used the lace for the back band as well as the full lace cups I only had a small piece left to make a set. I instantly thought of the EvielaLuve Chloe thong which I had adapted for a comfier fit! I checked how much of the pattern piece I could cover before I cut out the front piece in mesh. I placed the lace over the mesh so that the scallop would sit below the fold over elastic and cut around. This left a tiny piece to partial cover the back. The fit and look of this set is sensational and I have plans to make it again very soon.

03357DC1-0B3B-428F-B92C-D4A94D6826BD.JPEG

Moving on to my latest make which could be a blog post on its own but I think I will include it here. It wasn’t what I planned to make next but this mustard and black kit from Diane’s Bratastic Fabrics had such great Art Deco vibes that I decided to run with it.

I had already bought some Sashiko inspired embroidery designs from Designs by Juju that I wanted to try out on lingerie satin so the idea was to try a find a design that would work with the lace. A posting on FB reminded me of the Orange Lingerie Lansdowne which I intended to revisit to get a good fit but more importantly the large lower cup would be perfect.

I started by altering the pattern to fit which meant taking a wedge out of the underarm and altering the back band. Then I stitched out a few of the designs to see which worked best with the lace. With the design chosen I had to decide how to place the pattern piece to look best with the lace and check it would fit in the 8” x 8” hoop. I was struggling to decide so I printed out the design and cut out the pattern piece. I used a low loft fusible fleece for stabiliser as this would compact well for sewing and would be like a padded cup for what is described as a “cleavage enhancing, plunging underwire bra”. I was able to get a cup and side from each square. To ensure none of the stitches unravelled I traced off the pattern pieces and then stitched inside before I cut out.

To cover the stabiliser I lined with the fabric which enabled me to enclose all the seams and still be comfortable. I did have to switch to a bigger needle and use a walking foot but I did get through all the layers and it looks good on the inside as well. For the set I made another Ohhhlulu Claudia but I didn’t have much lace so I opted for a lace overlay on the front panel and used mesh on the fold for the back. This encloses the back seam and gives a smooth profile under clothing.

Now I have the fit right this is another stunning bra and immensely pleased with how it turned out. Through out the makes I have also been working on underwear drafting but I will share this in a separate blog.

Bra-A-Week Challenge - Anyone else keeping up?

I am a big fan of Emerald Erin and her Bra-A-Week challenge has been a great source of inspiration to take my makes to a new level. This ties in nicely with being part of this years #tmcollaBRAtory which I have talked about in previous posts. So I thought I would post a round up of some particularly pleasing recent makes.

First off is my most recent make which uses Erin’s idea for creating stripes by sewing down pleated tulle. I had just received a huge order from Tailor Made which included some beautiful autumnal colours. What I hadn’t realised until it arrived was that the olive tulle was a perfect match with the leaf lace. Then I needed a pattern that would showcase both the lace and the striped tulle.

711D5A33-D2BF-4E54-9243-93DD6C5F6F77.PNG

I couldn’t decide between the Orange Lingerie Marlborough or the Emerald Erin Black Beauty, both of which I have made numerous times as they both fit perfectly. In the end I decided to use the Marlborough as the power bar is part of the cup and I wouldn’t loose the sheerness of the one layer. Also the lace has quite a deep scallop and the upper cup of the Marlborough fitted perfectly.

Creating the stripes was a lengthy process as I wanted to be precise with the pleat. First I had to decide which way to pleat the tulle. This had to be lengthwise as I only had 1/2 yard but full width. Using a chalk marker I drew lines at 1” intervals and then folded from line to line, pinning and then basting. Then I had to choose what thread colour to use. As I didn’t have a green close enough I decided to use the beige contrast so I would need to be super neat! Using knife pleats meant that one side of the fold would be on top and the other side on the reverse. The reverse stitch of my machine is pretty good but I still decided to stitch from the right side. Luckily I have a great edge foot which I set at 1/16th and could sit against the edge of the fold.

The next decision was what to use as lining. Looking through my stash I found some sheer lining which matched the lace and I really liked the two tone effect under the olive tulle. To make sure I cut the pieces exactly mirrored I folded the pleats and pinned in place. Then I had to decide how to place the pattern pieces so I didn’t have any silly edges and it would look right in a seam allowance. I also chose to use the tulle for the frame rather than a lace band. I finished the bra as normal and moved on to matching underwear.

I had to scratch my head a little to decide how to bring both the tulle and lace into underwear. Both have some give in one direction so I wanted a pattern that could use this. Looking through my patterns I thought I would try an Ohhhlulu Grace and use the lace scallop lengthwise for the side panels. I didn’t have enough tulle to pleat the back and only partially for the front but was enough to look fine.

4778FF32-DD4A-4629-9B60-7202EFBFBB93.JPEG

I used two layers of the lace for each side panel using the full width. I used chalk to mark the seam allowance on the tulle and a red Frixon pen for the lace. I placed the lace over the tulle lining up the seams allowances. Then I stitched around the scallop and through the seam allowance and cut back to the stitching. Finally I used fold over elastic for the waist with soft lingerie elastic for the leg.

Although I had made a size bigger than normal to make up for the lack of stretch they are a little snug so I decided to make the Orange Lingerie Montgomery using the lace and some matching super soft and stretchy mesh as an alternate.

BD74727B-F63A-472B-A1B7-5351131DFDCD.PNG

I was so pleased with the result. It’s hard to go wrong with such fabulous supplies and patterns I know fit well which brings me smoothly on to my October make for #TMCollaBRAtory. I had a gorgeous embroidered tulle lace bra kit and wanted to bring out the beautiful colours. The kit came with black tulle but it was little dark to bring out the delicate blue and purple flowers so out came the stash and I decided on what was called mauve on the EvielaLuve website. Then the usual dilemma of what pattern to use to showcase the gorgeous lace. Again a search through my patterns brought me to the Orange Lingerie Boylston. it has a deep upper cup and wide straps.

My first step was to take off the seam allowance of the upper cup and straighten the line. I then used tulle on the fold for the upper cup edge and then placed the lace over the tulle angling down from the top outer edge to the centre front seam allowance. For the lower cup pieces I basted a layer of tulle to each piece and treated as one. Then I used another layer of tulle for a lining so I could enclose the upper cup. The lace can’t be mirrored so it is a case of finding a balance for bridge and side frame. Again I basted one layer of tulle to each piece and then lined with tulle so I could enclose the seams and the front of the bra would have the same level of sheerness.

IMG_4833.jpg

I wasn’t sure how I would make the straps but as this was a kit for a bra I thought i would cut out the front panel for a Montgomery brief and see what I was left with. I started with the straps in the tulle. There wasn’t enough lace to cover completely so I cut into two pieces and placed at an angle ensuring the low point of the scallop would hit the 3/8” line where the elastic would be sewn. For a flat and neat finish I slipped the strap in between the tulle and lace of the upper cup.

Both sets I could just sit and look at. Although I seem to enjoy deciding as I go along there is often a trigger that sends me in a particular direction!

Strapless Sensations - PUG Diamond and Orange Lingerie Esplanade

As soon as I saw the PUG Diamond Bustier I knew I had to make one. Over the years I have tried a variety of RTW strapless bras and never found one that was either comfortable or a flattering fit so I was keen to try making my own. After success with this I thought it was time to try the Esplanade - the only Orange Lingerie pattern I haven’t made. So here are my two beauties.

Read More

Madalynne Simplicity X Kits 8229 and 8228 - So Beautiful

In between other projects I have been working my way through the Madalynne Simplicity pattern bundle waiting for the right fabric to come along. I was just so excited when Madalynne launched the latest batch of kits which included this beautiful white lace for the 8229 bra with a matching underwear kit for the 8228. Normally I would get a set out of a bra kit but with the underwear kit I was able to make three very different styles to match the bra.

Read More

Straps, Lace and Foam - Part One

After a major effort to get all my Christmas cards done I thought I deserved a little more lingerie sewing before I delved in to making the long awaited duffle coat. So I played around with a couple of patterns I hadn’t done before. First up I will introduce the Ohhh Lulu Jasmine bra with the lace back accompanied by the Ultimate Lace Panties.

Read More

Summer Lingerie Part 2 - Ohhh Lulu Grace and Romy Purple Perfection

So for the third make I wanted to use the lace I had in my stash to a make a pretty feminine set. The Esme is a very flattering fit and started my obsession with Evie la Luve patterns. It came in a deal with the Bella and is the first lingerie pattern I bought after taking the Beverly Johnson Craftsy classes. I am capable of drafting my own patterns but I do enjoy testing what is out there. I wanted to team up with a softer lace bralette so I went back to the Rosie which I have only made for my sister and thought would try for myself.

Read More

Delivery from Emerald Erin

Since I first started making lingerie I have struggled to source supplies here in the UK. There are a small number of suppliers who I use but they don't always have the range I need to complete a particular project. Until now I have sourced mostly from B-Wear in Sweden, who are the European distributor for Bra Makers Supply in Canada. Scouring the internet for patterns and ideas for swimwear I recently came across the Emerald Erin blog and Etsy shop and bought swimwear fabric, lining and elastic as well a grey bamboo knit and black/blush bra kit. All this was in a custom order from Canada. The items arrived promptly, were beautifully wrapped and looked gorgeous. This is what I made!

Read More