A perfect Marlborough Bra to finish the year - Sketching and Shirring Elastic!

Being part of Tailormade’s #TMCollaBRAtory and Emerald Erin’s Bra-a-week Challenge has made me really push myself in terms of design and technique so I wanted something really special for my December project to finish the year off in style. Given the issues with the post, at Christmas, I was lucky my delivery arrived in time.

8ED7D0A8-B68A-4FCD-9CF8-36A481A76D2D.jpg

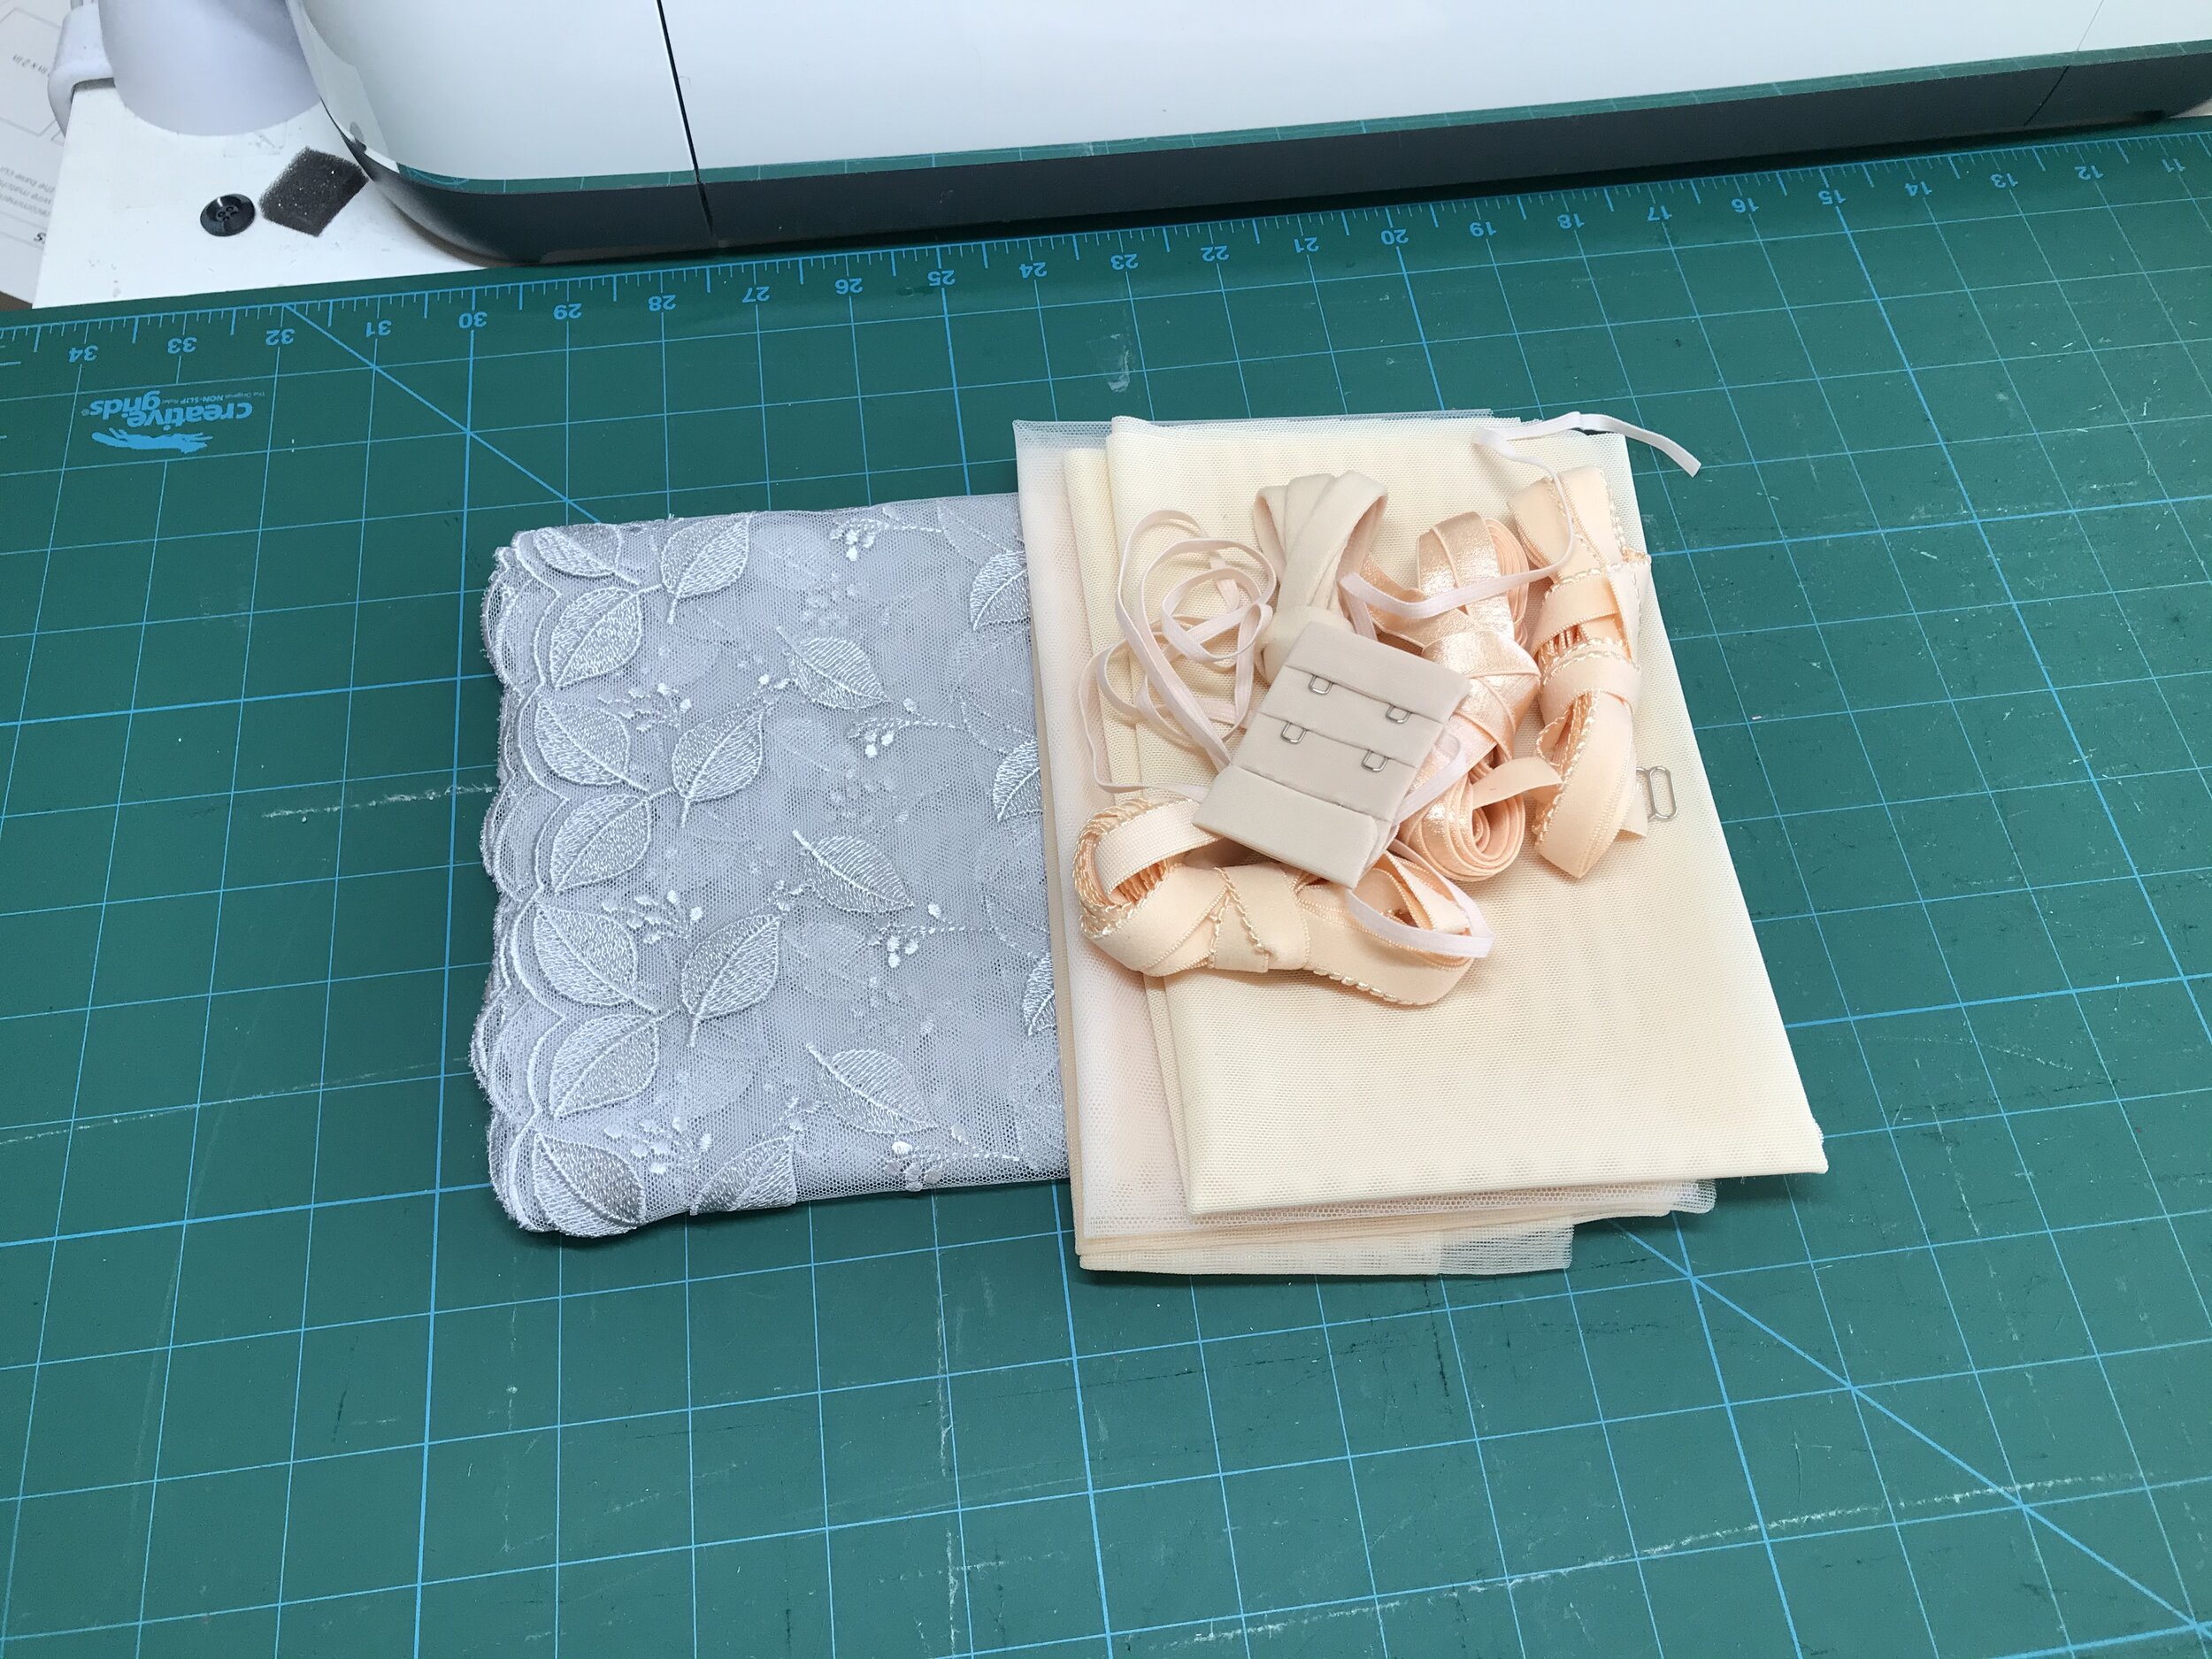
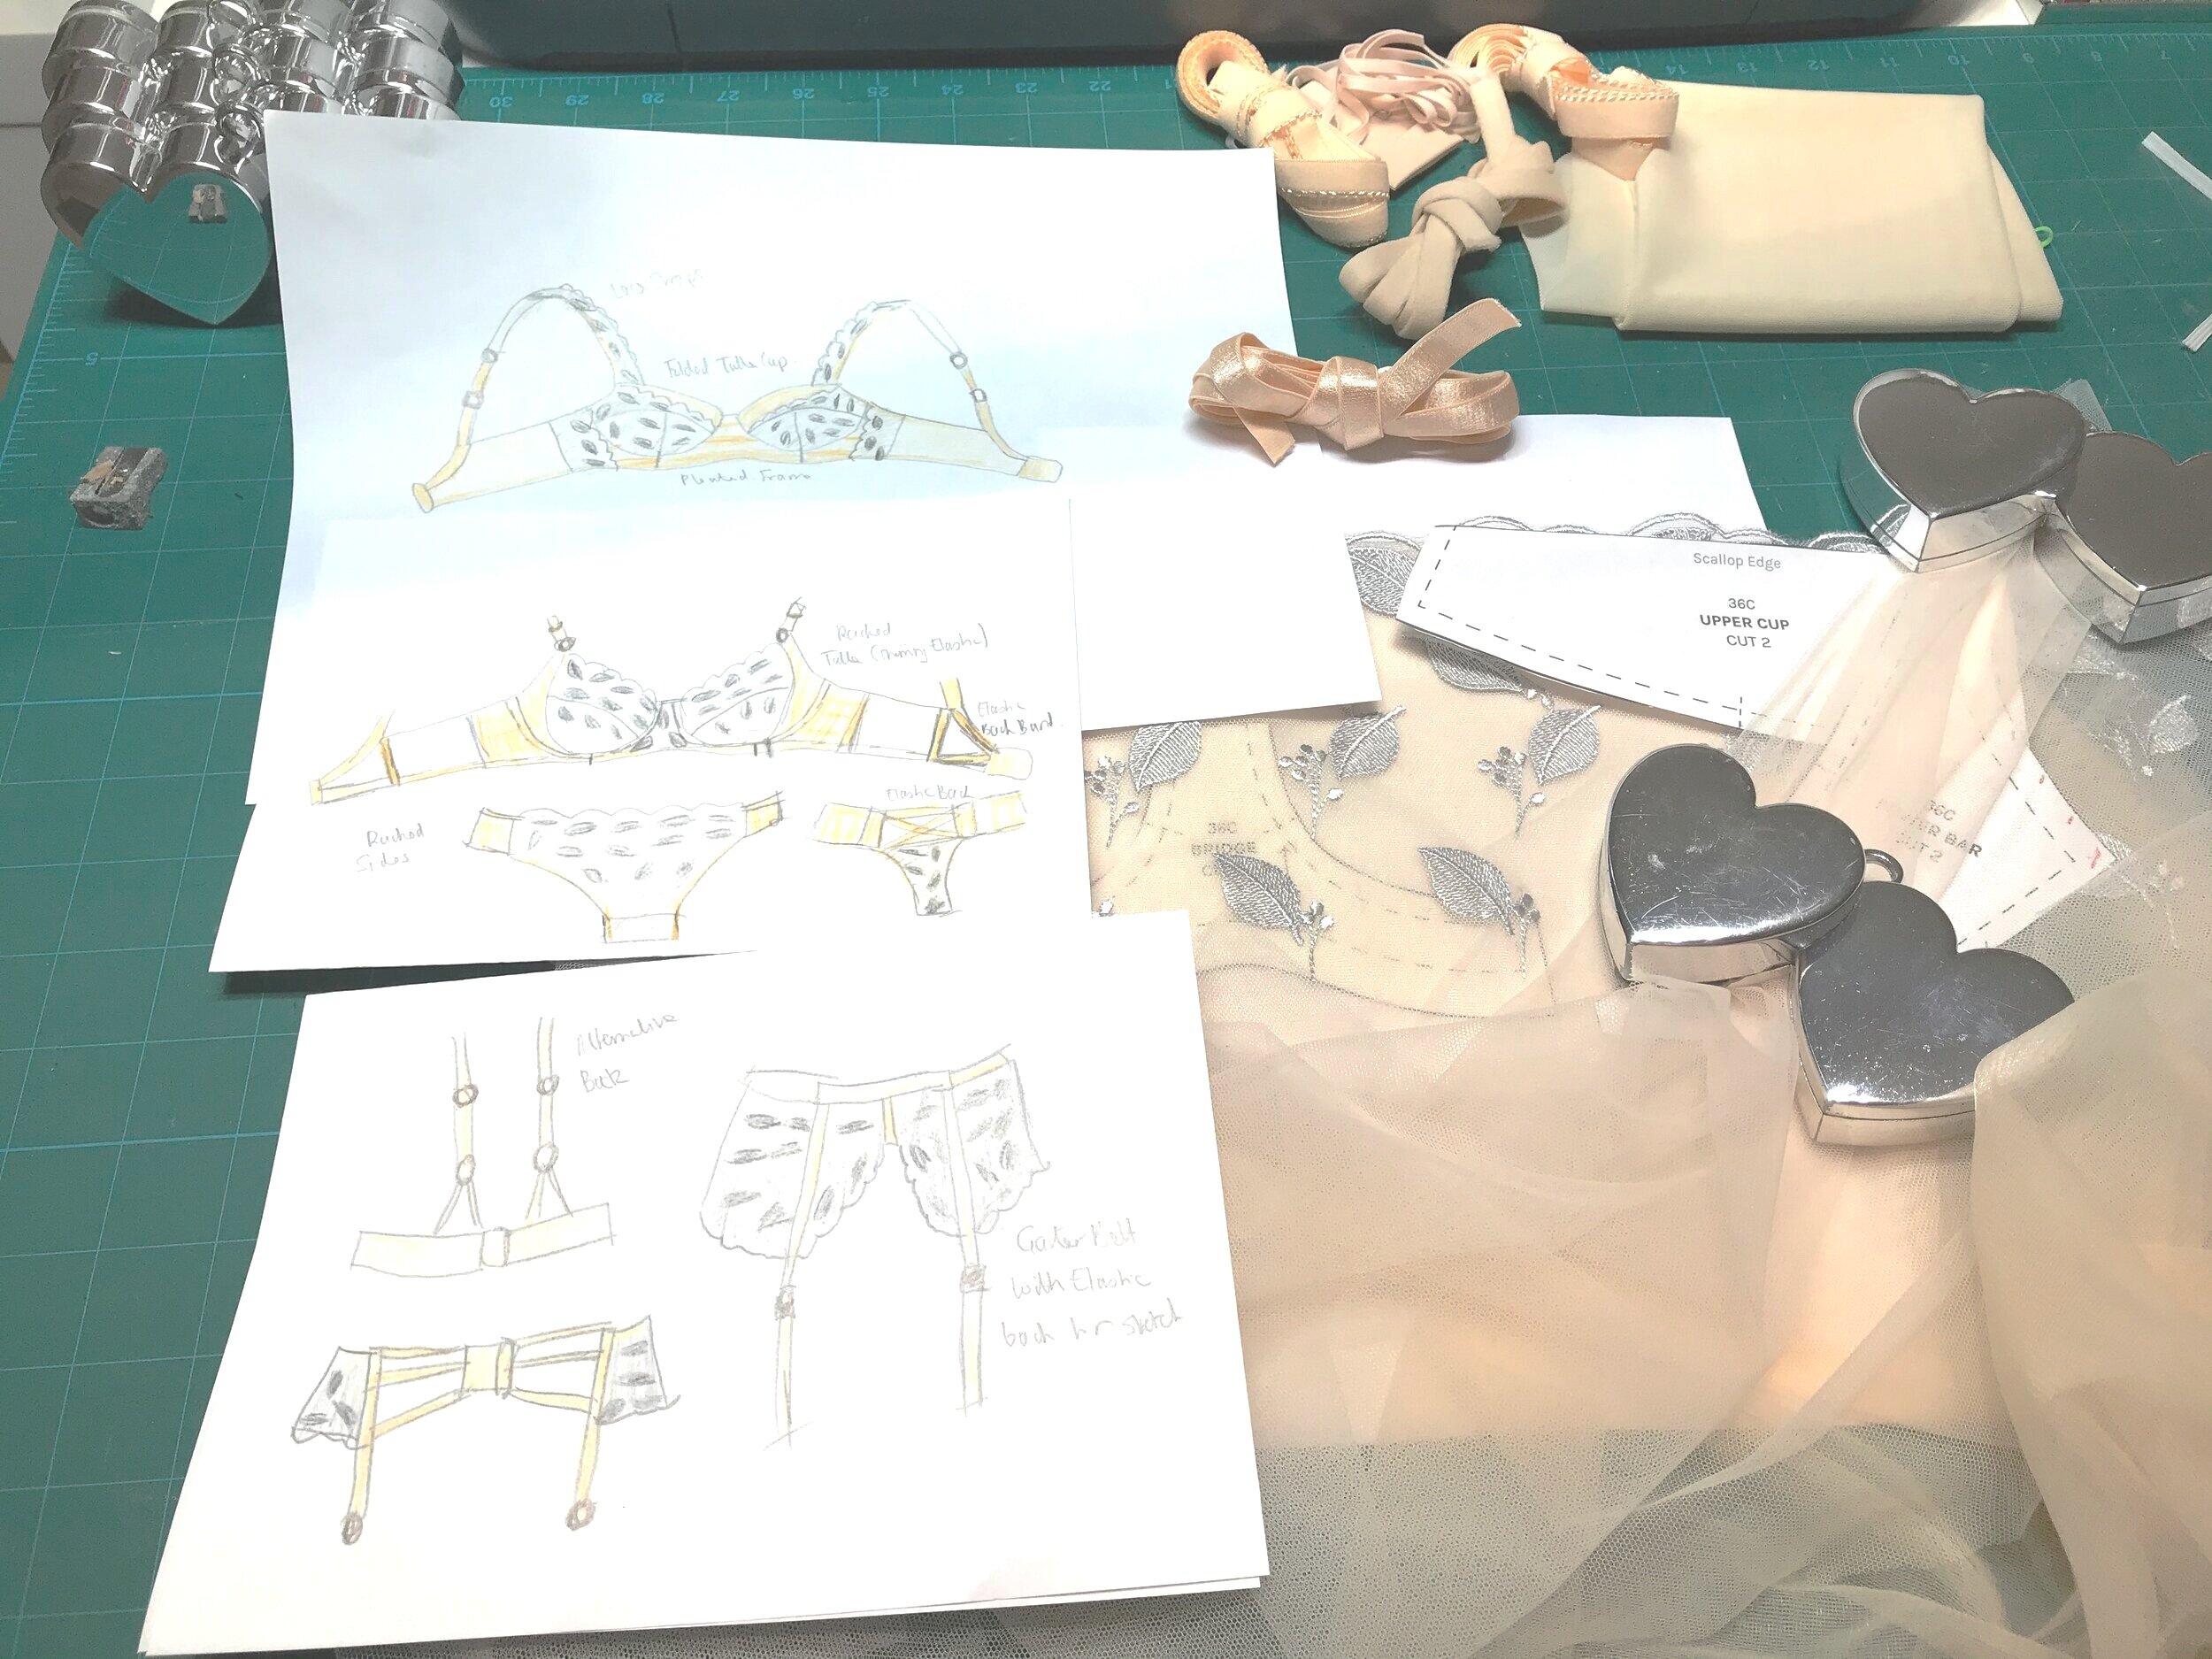
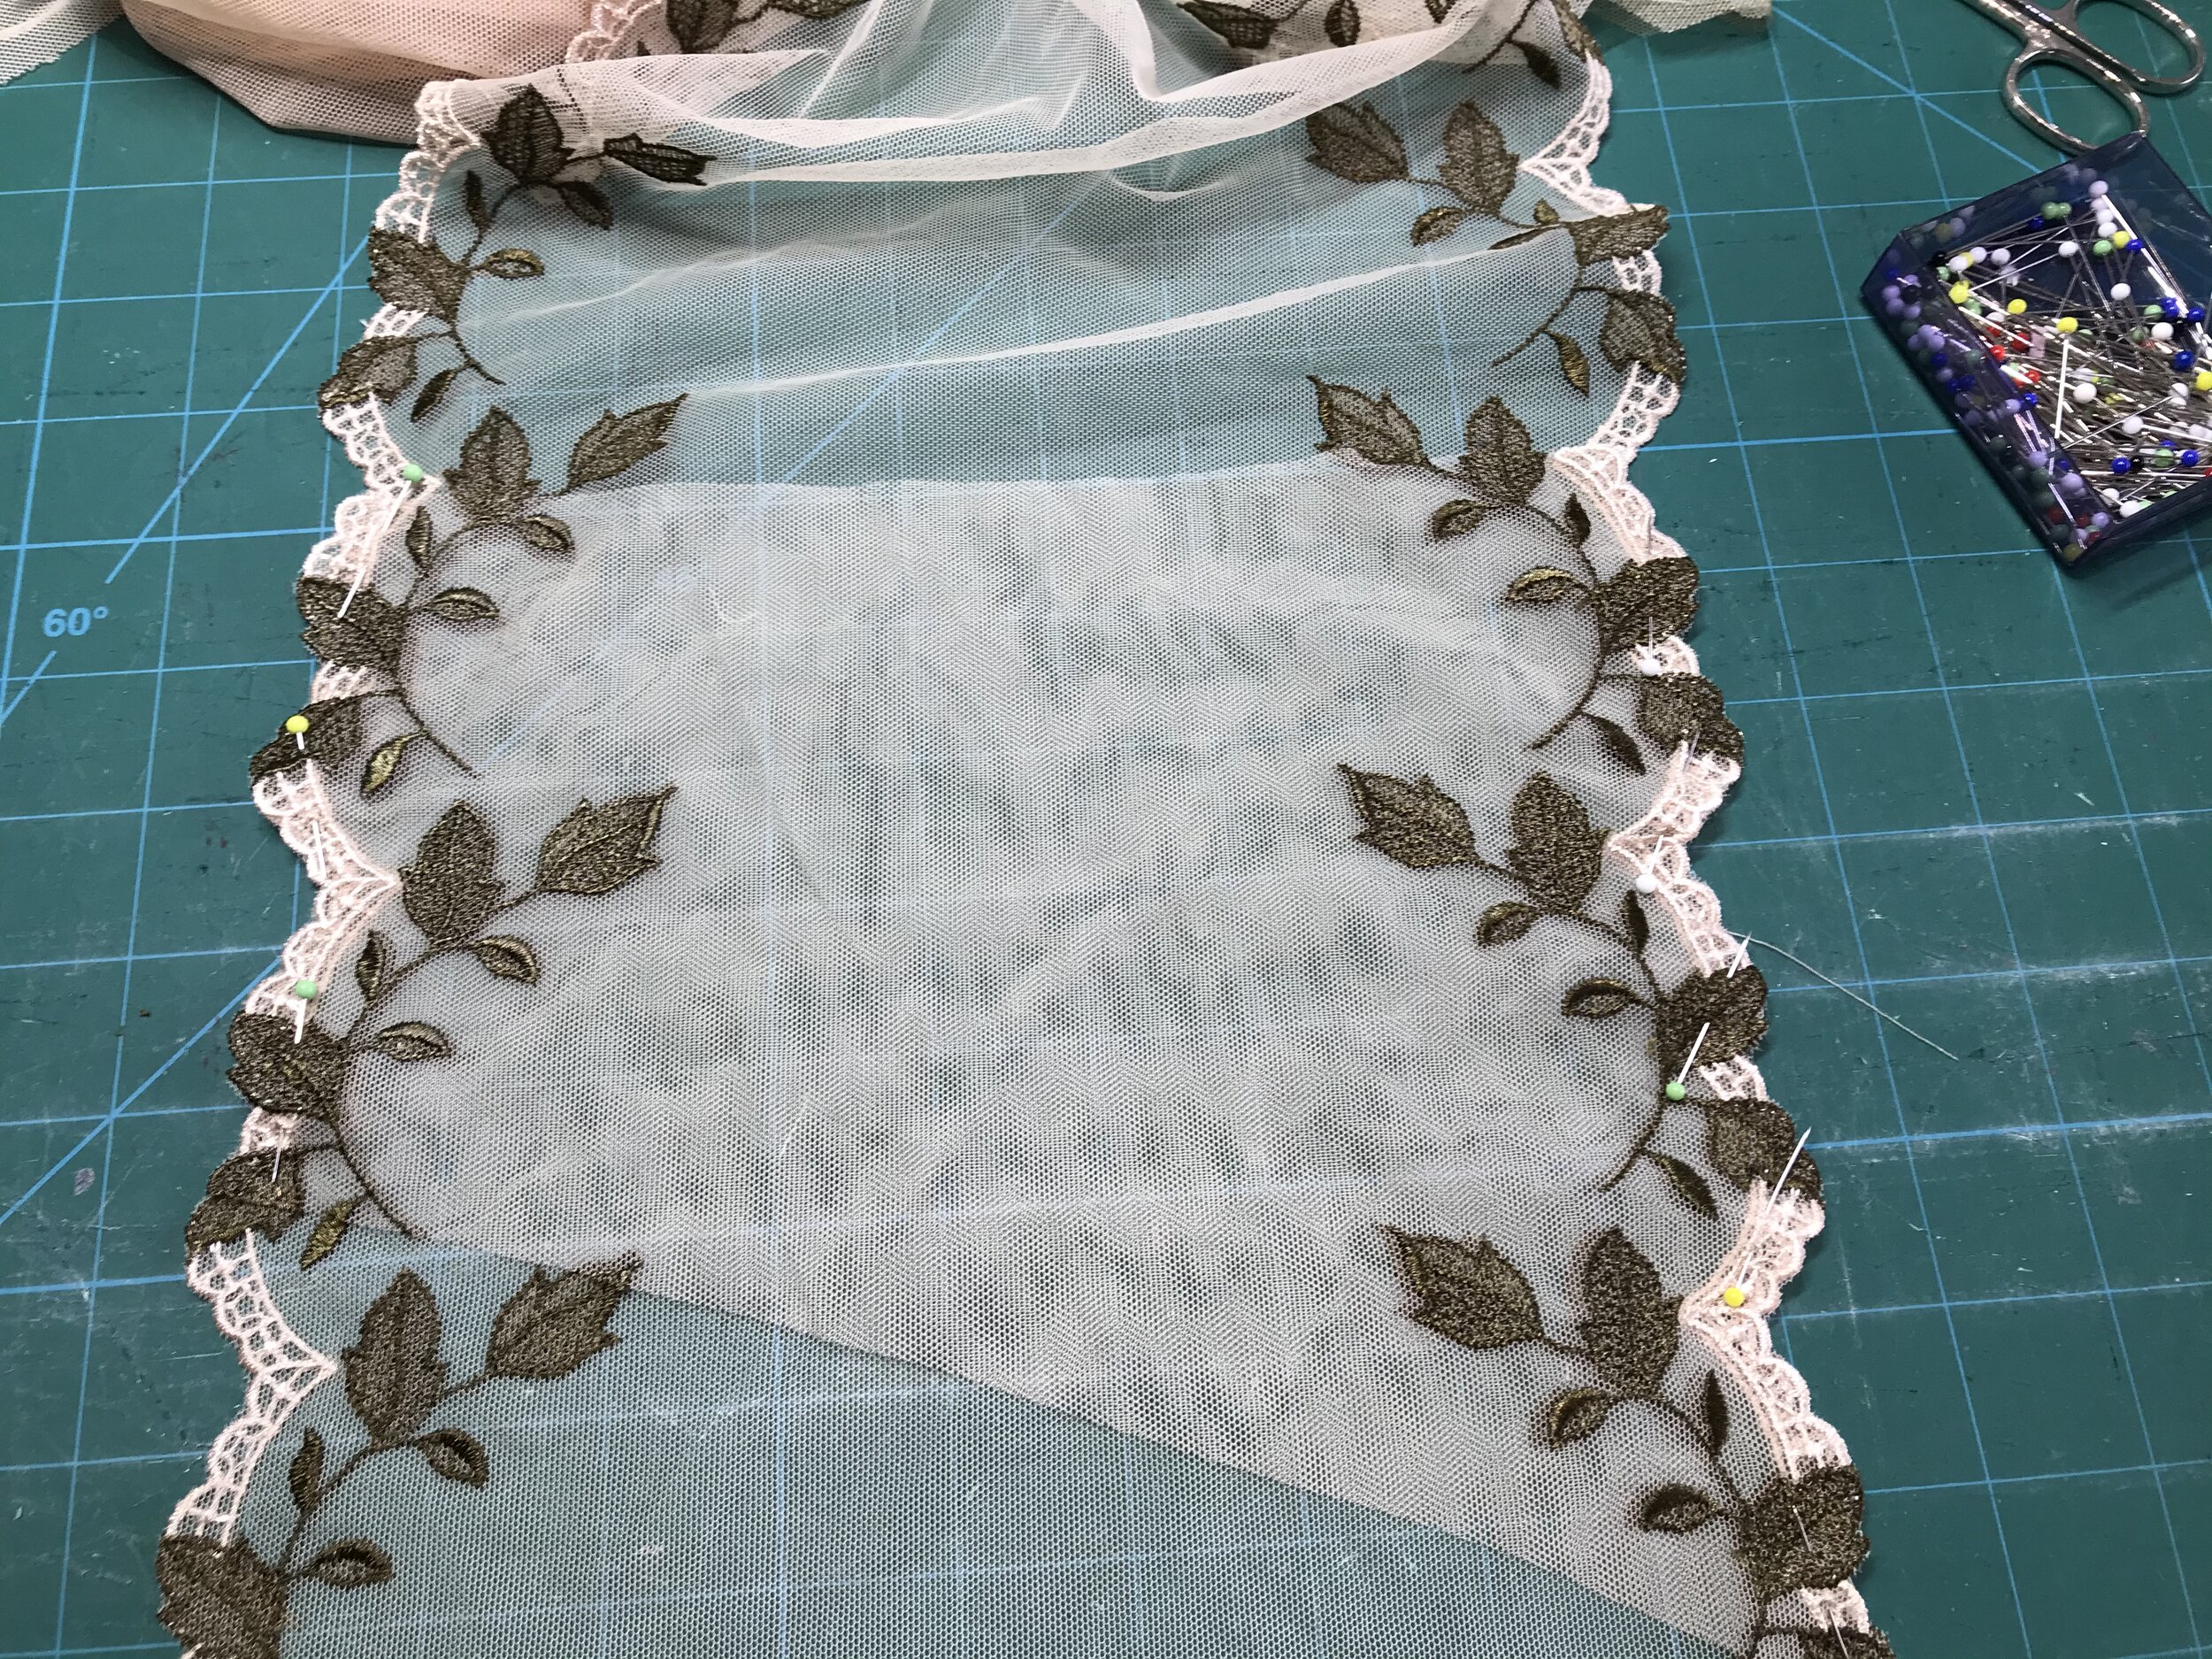
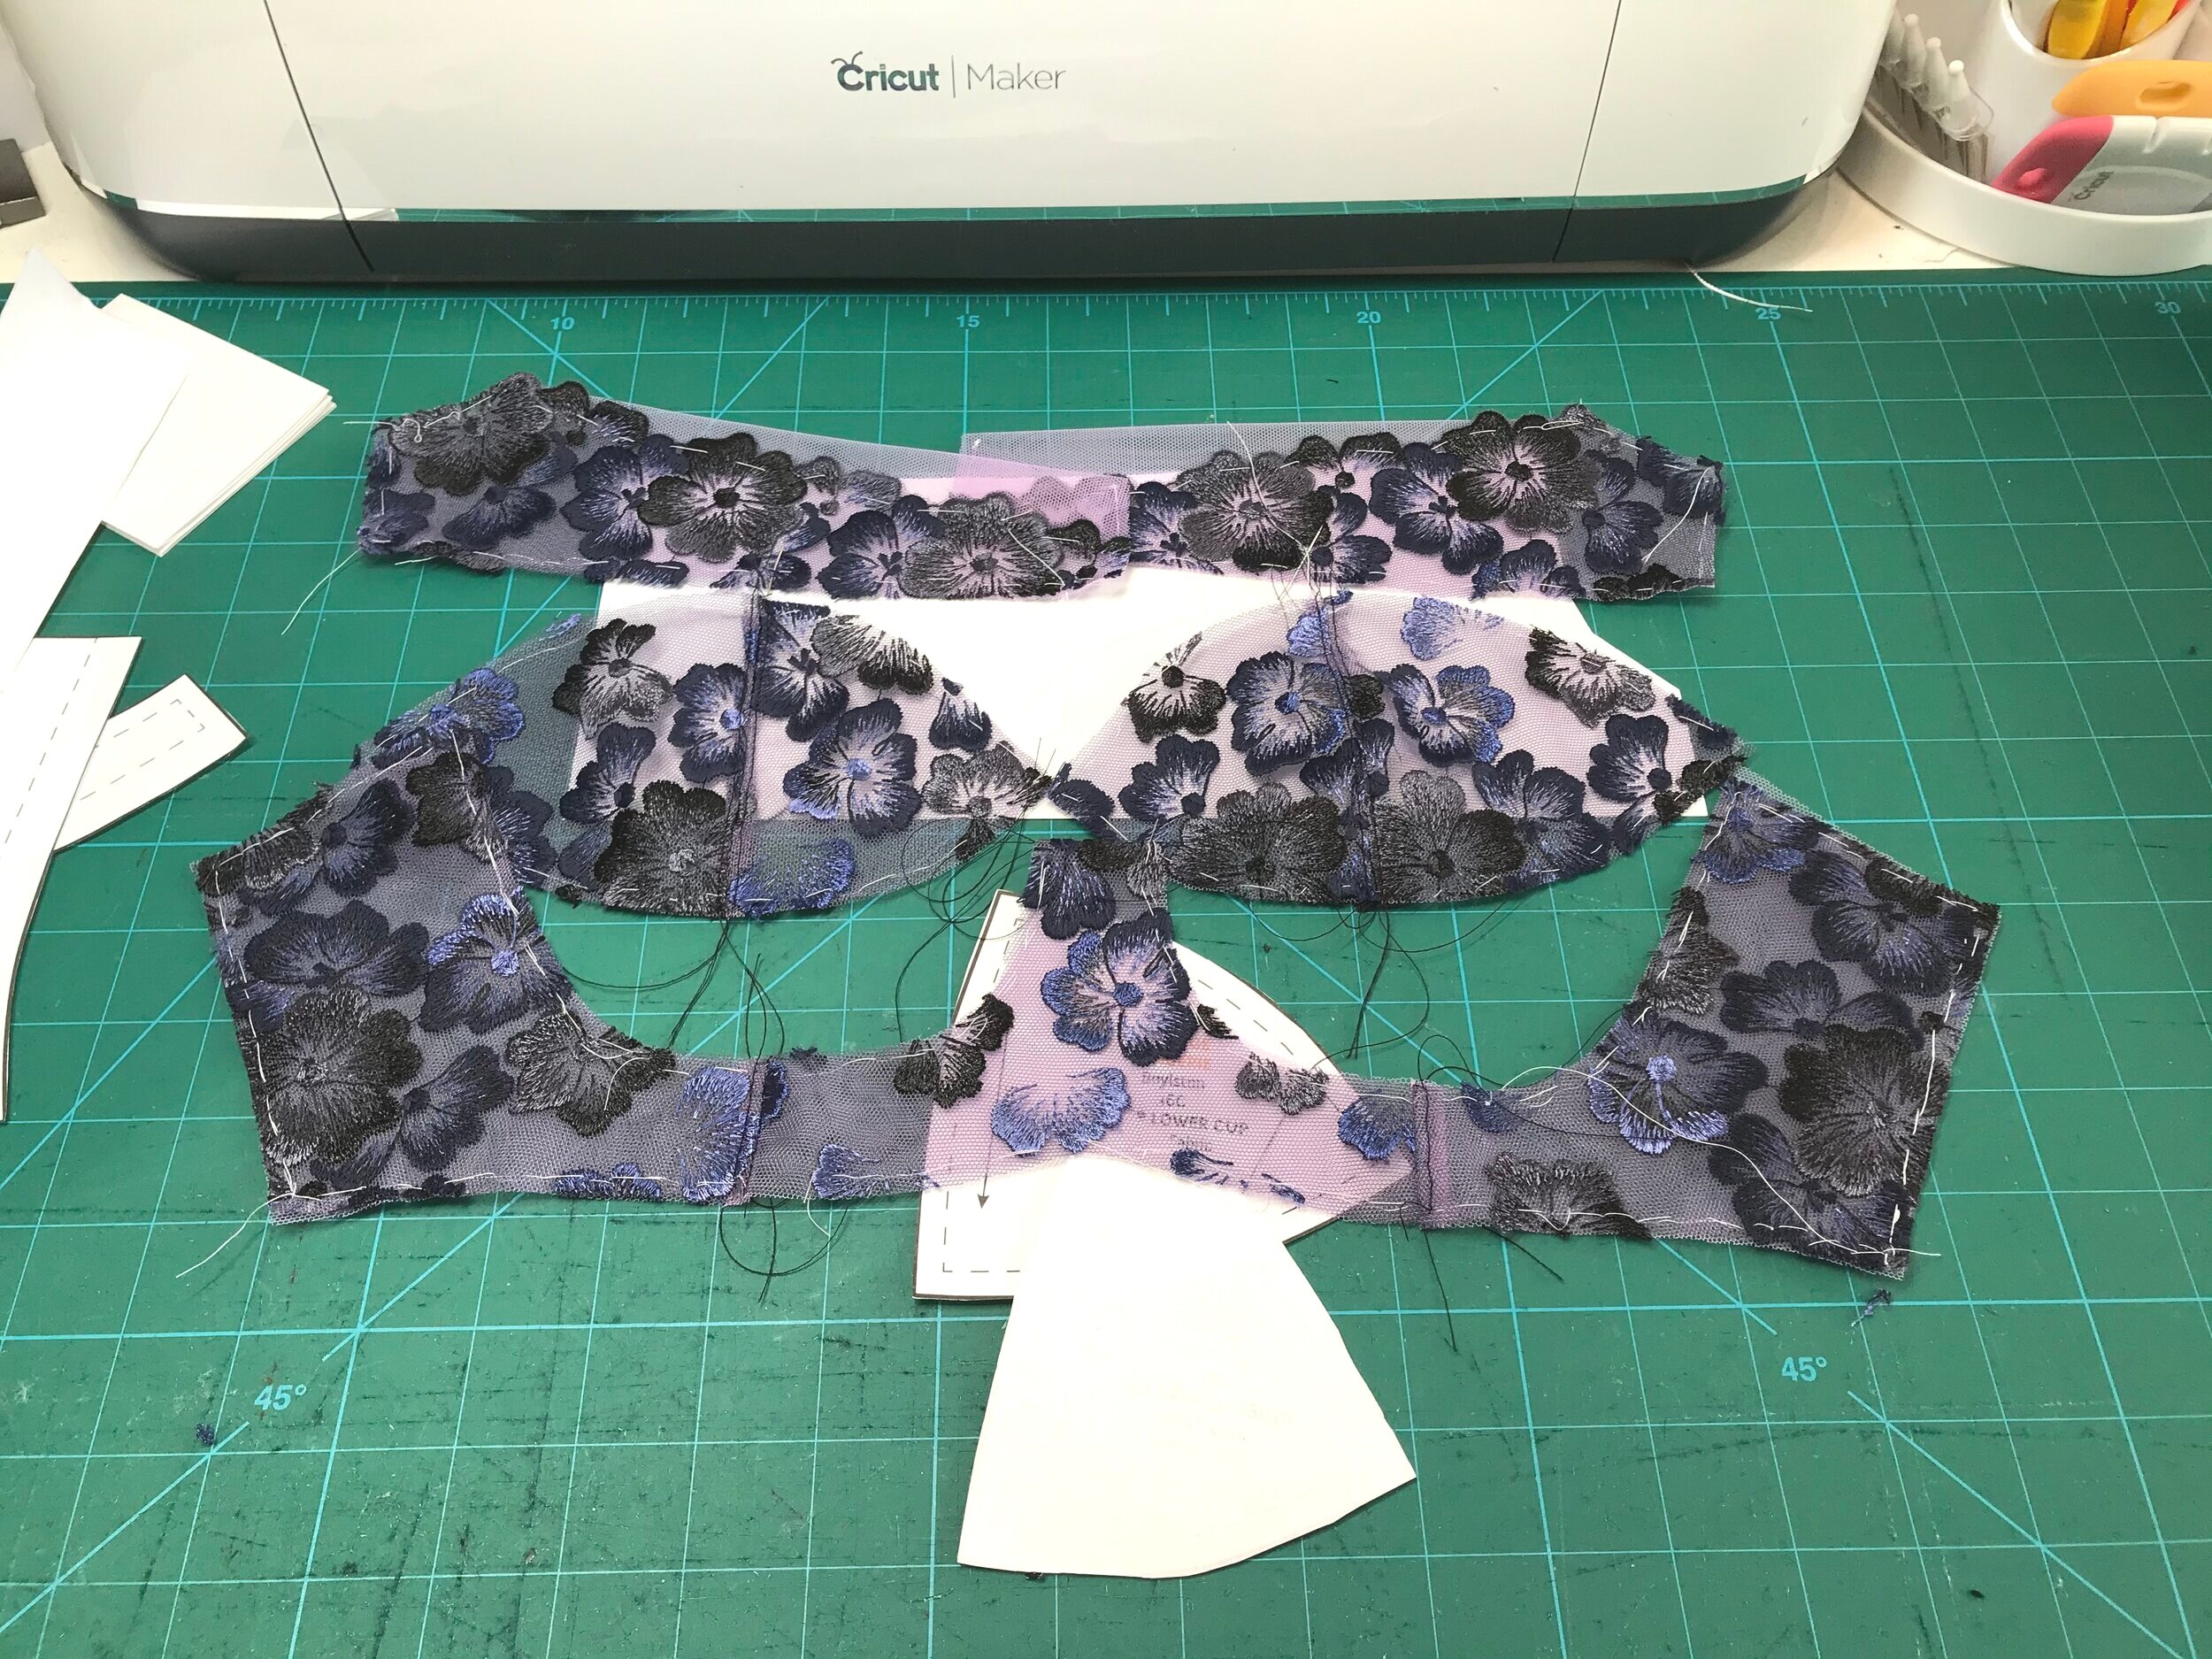
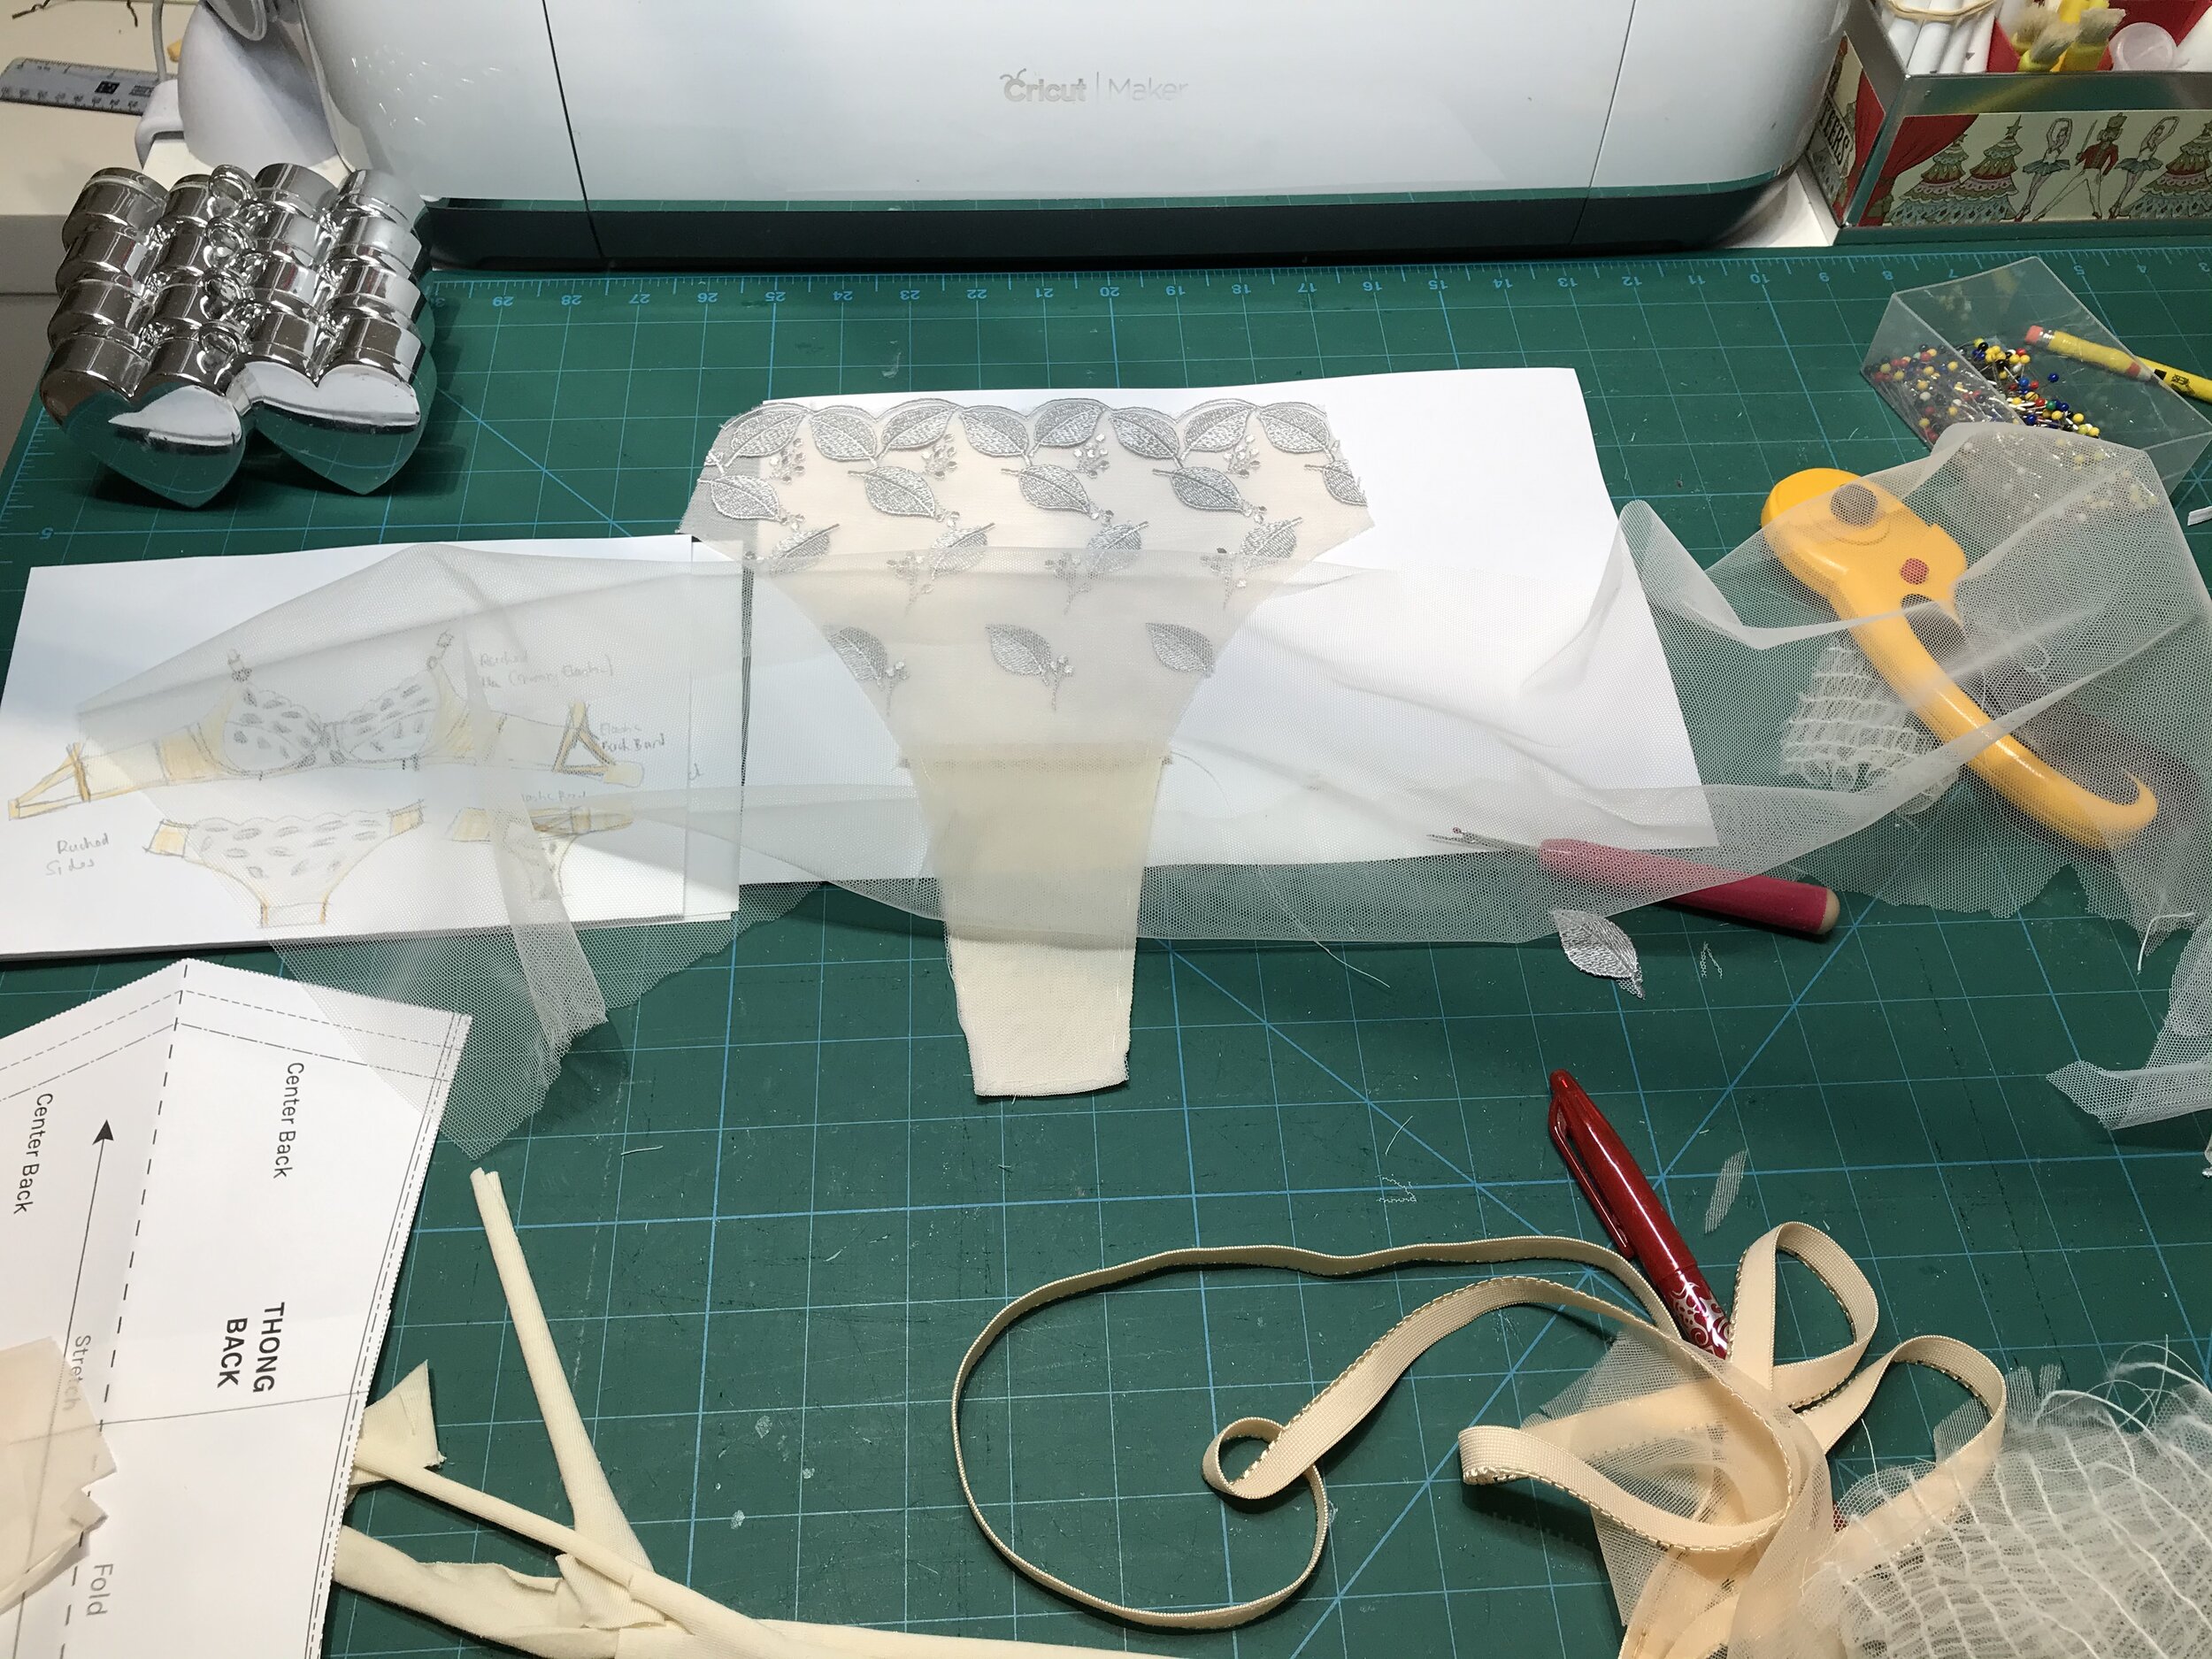
The kit was a non stretch embroidered tulle lace with peach elastic, powernet, tulle and sheer lining. My first thought was a vertical seam cup like the Orange Lingerie Devonshire but I wanted to bring more of the peach into the cup. After playing with the fabric for a while I decided it was time to try sketching my ideas. Hubby provided his very best colouring pencils and I already had some metallic pencils for the silver. The drawings are only really scribbles but it really did help with the design process.

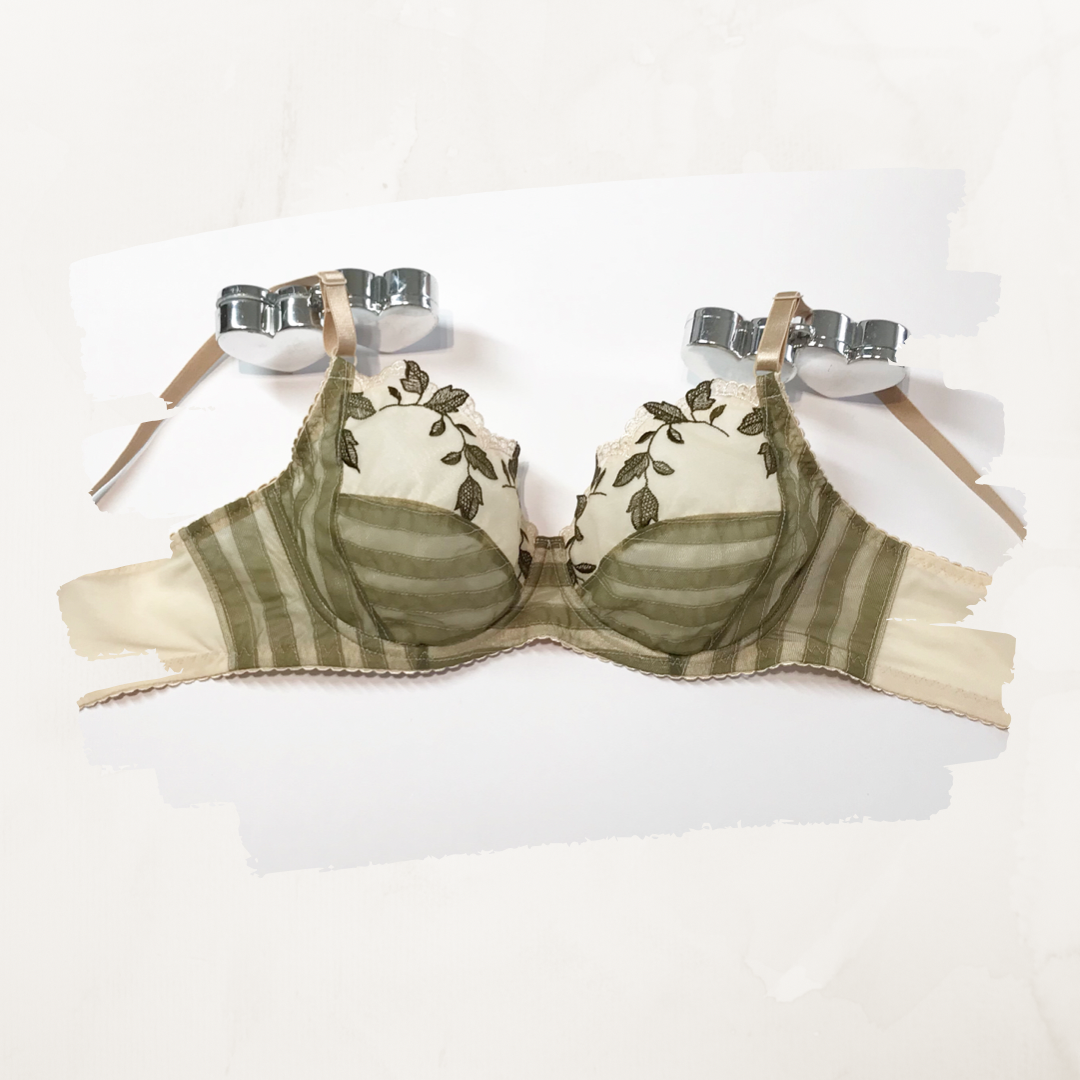
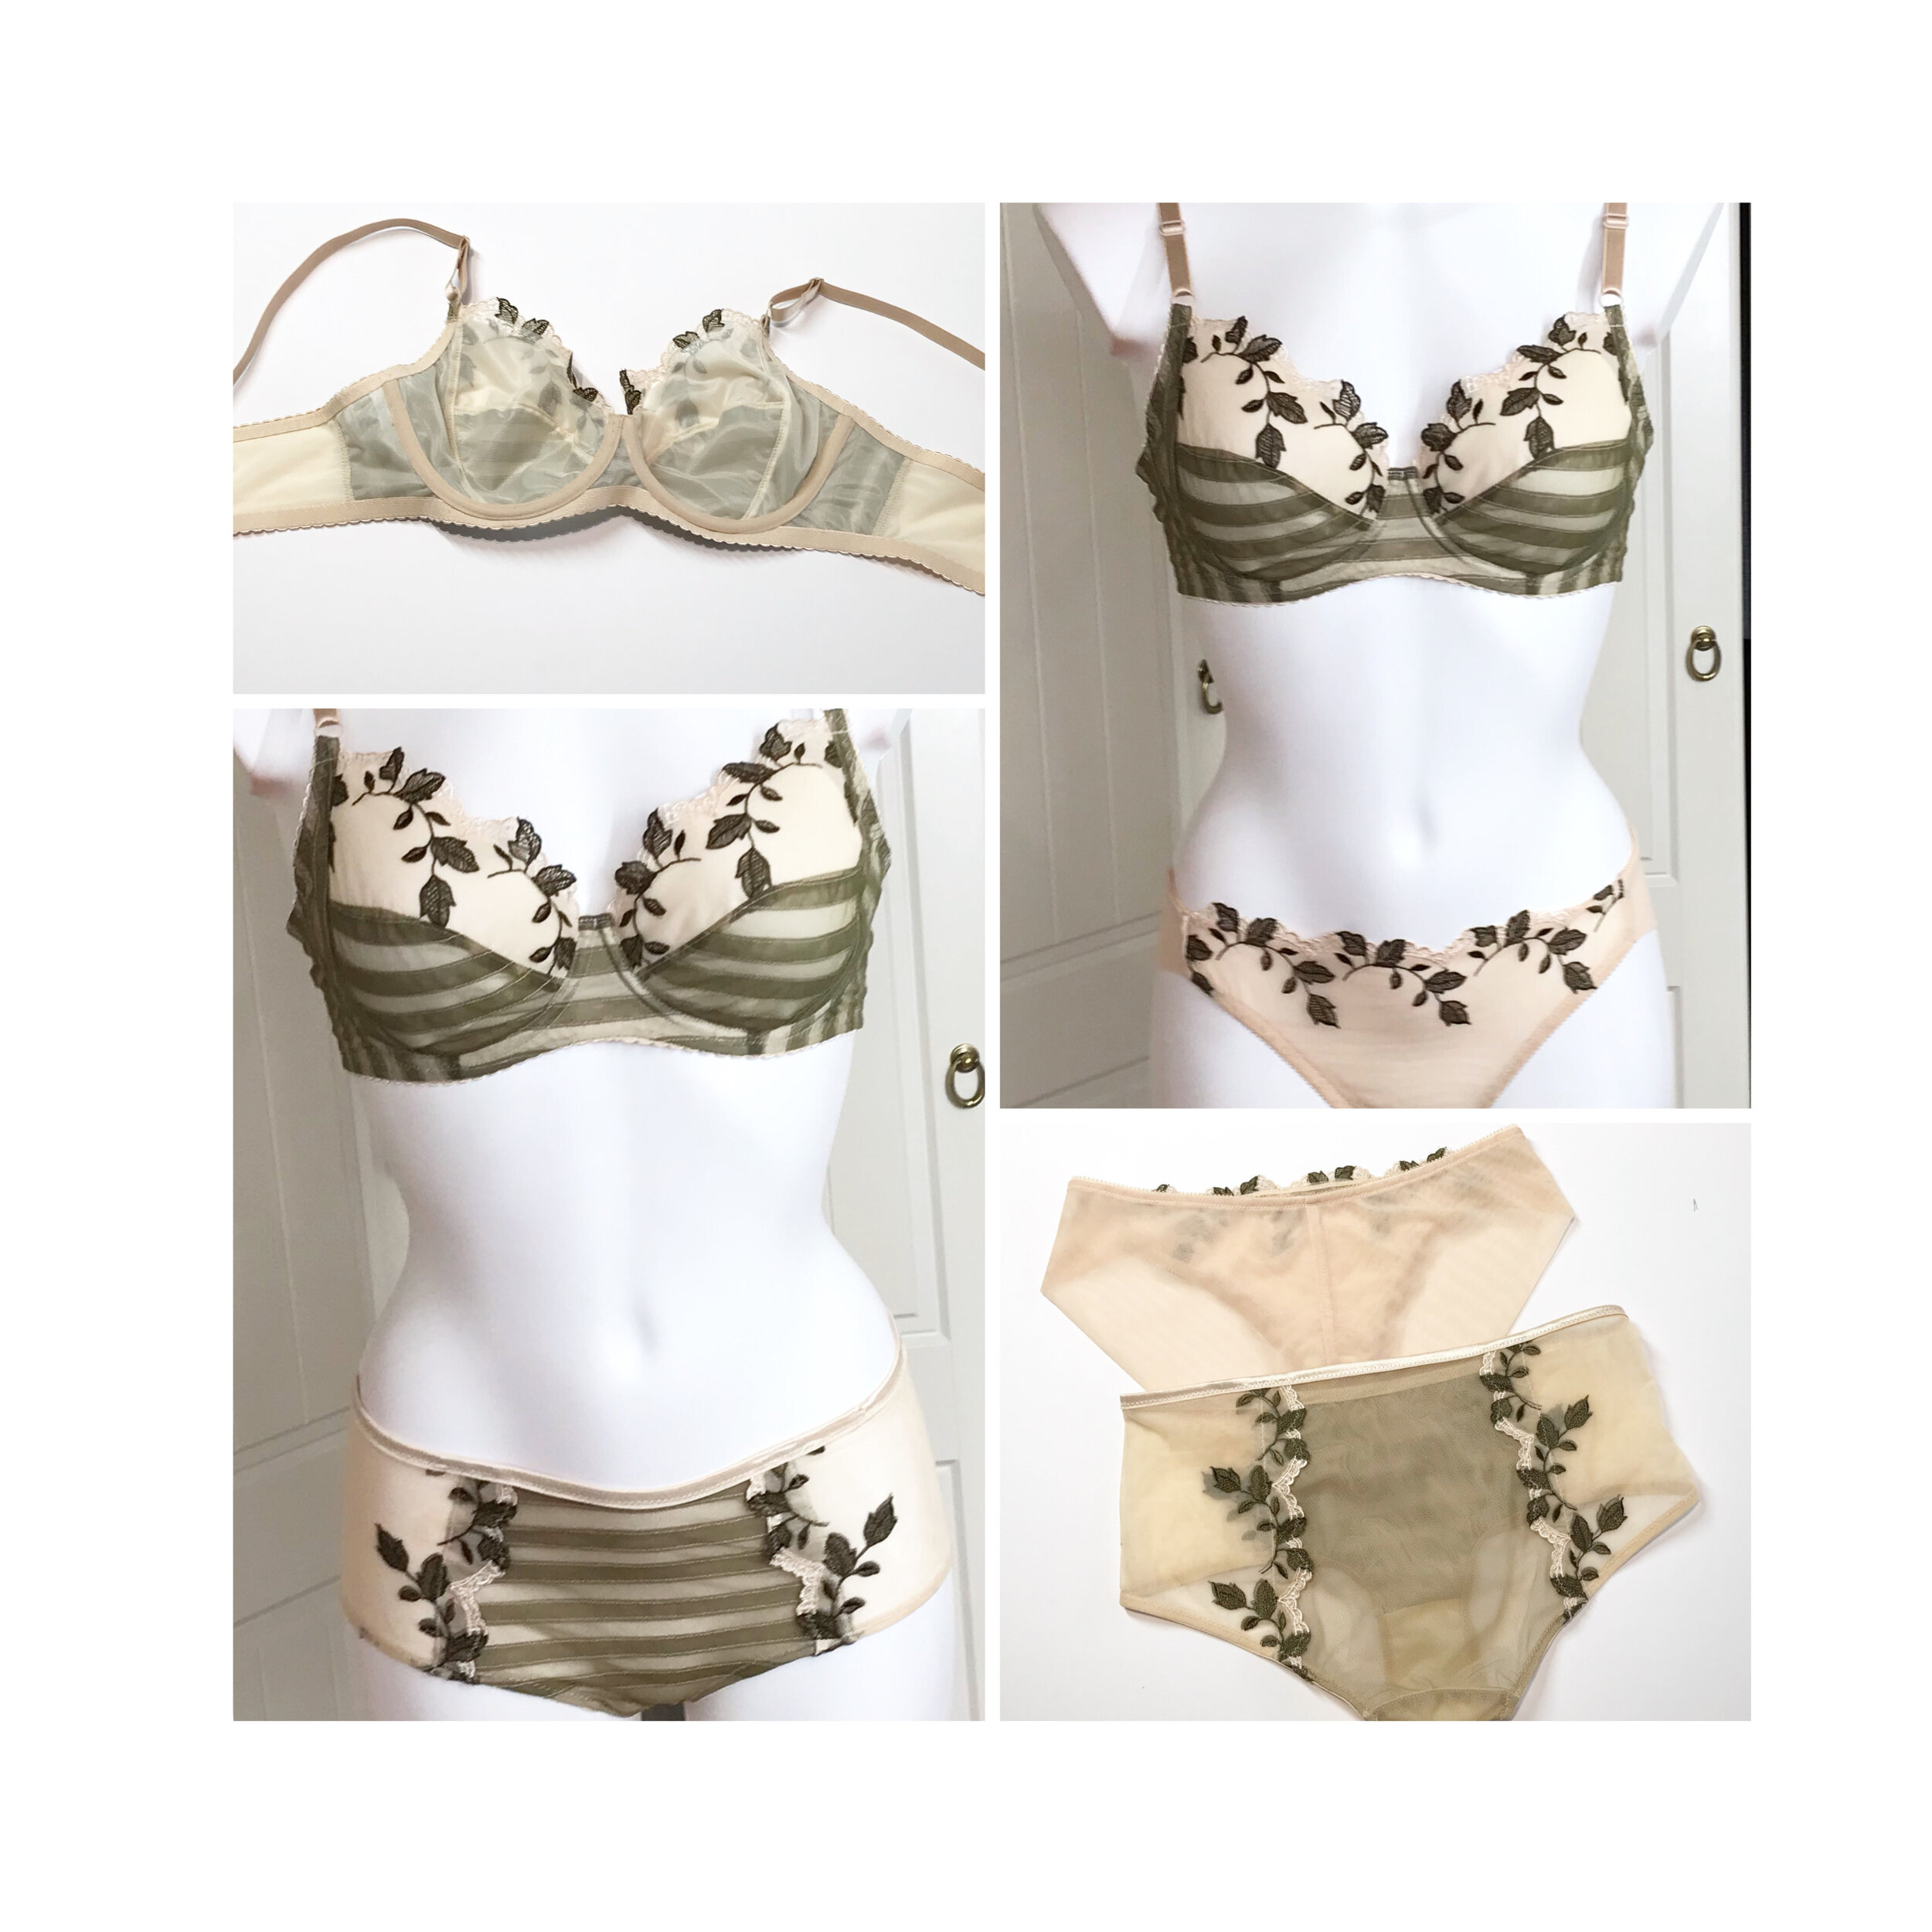
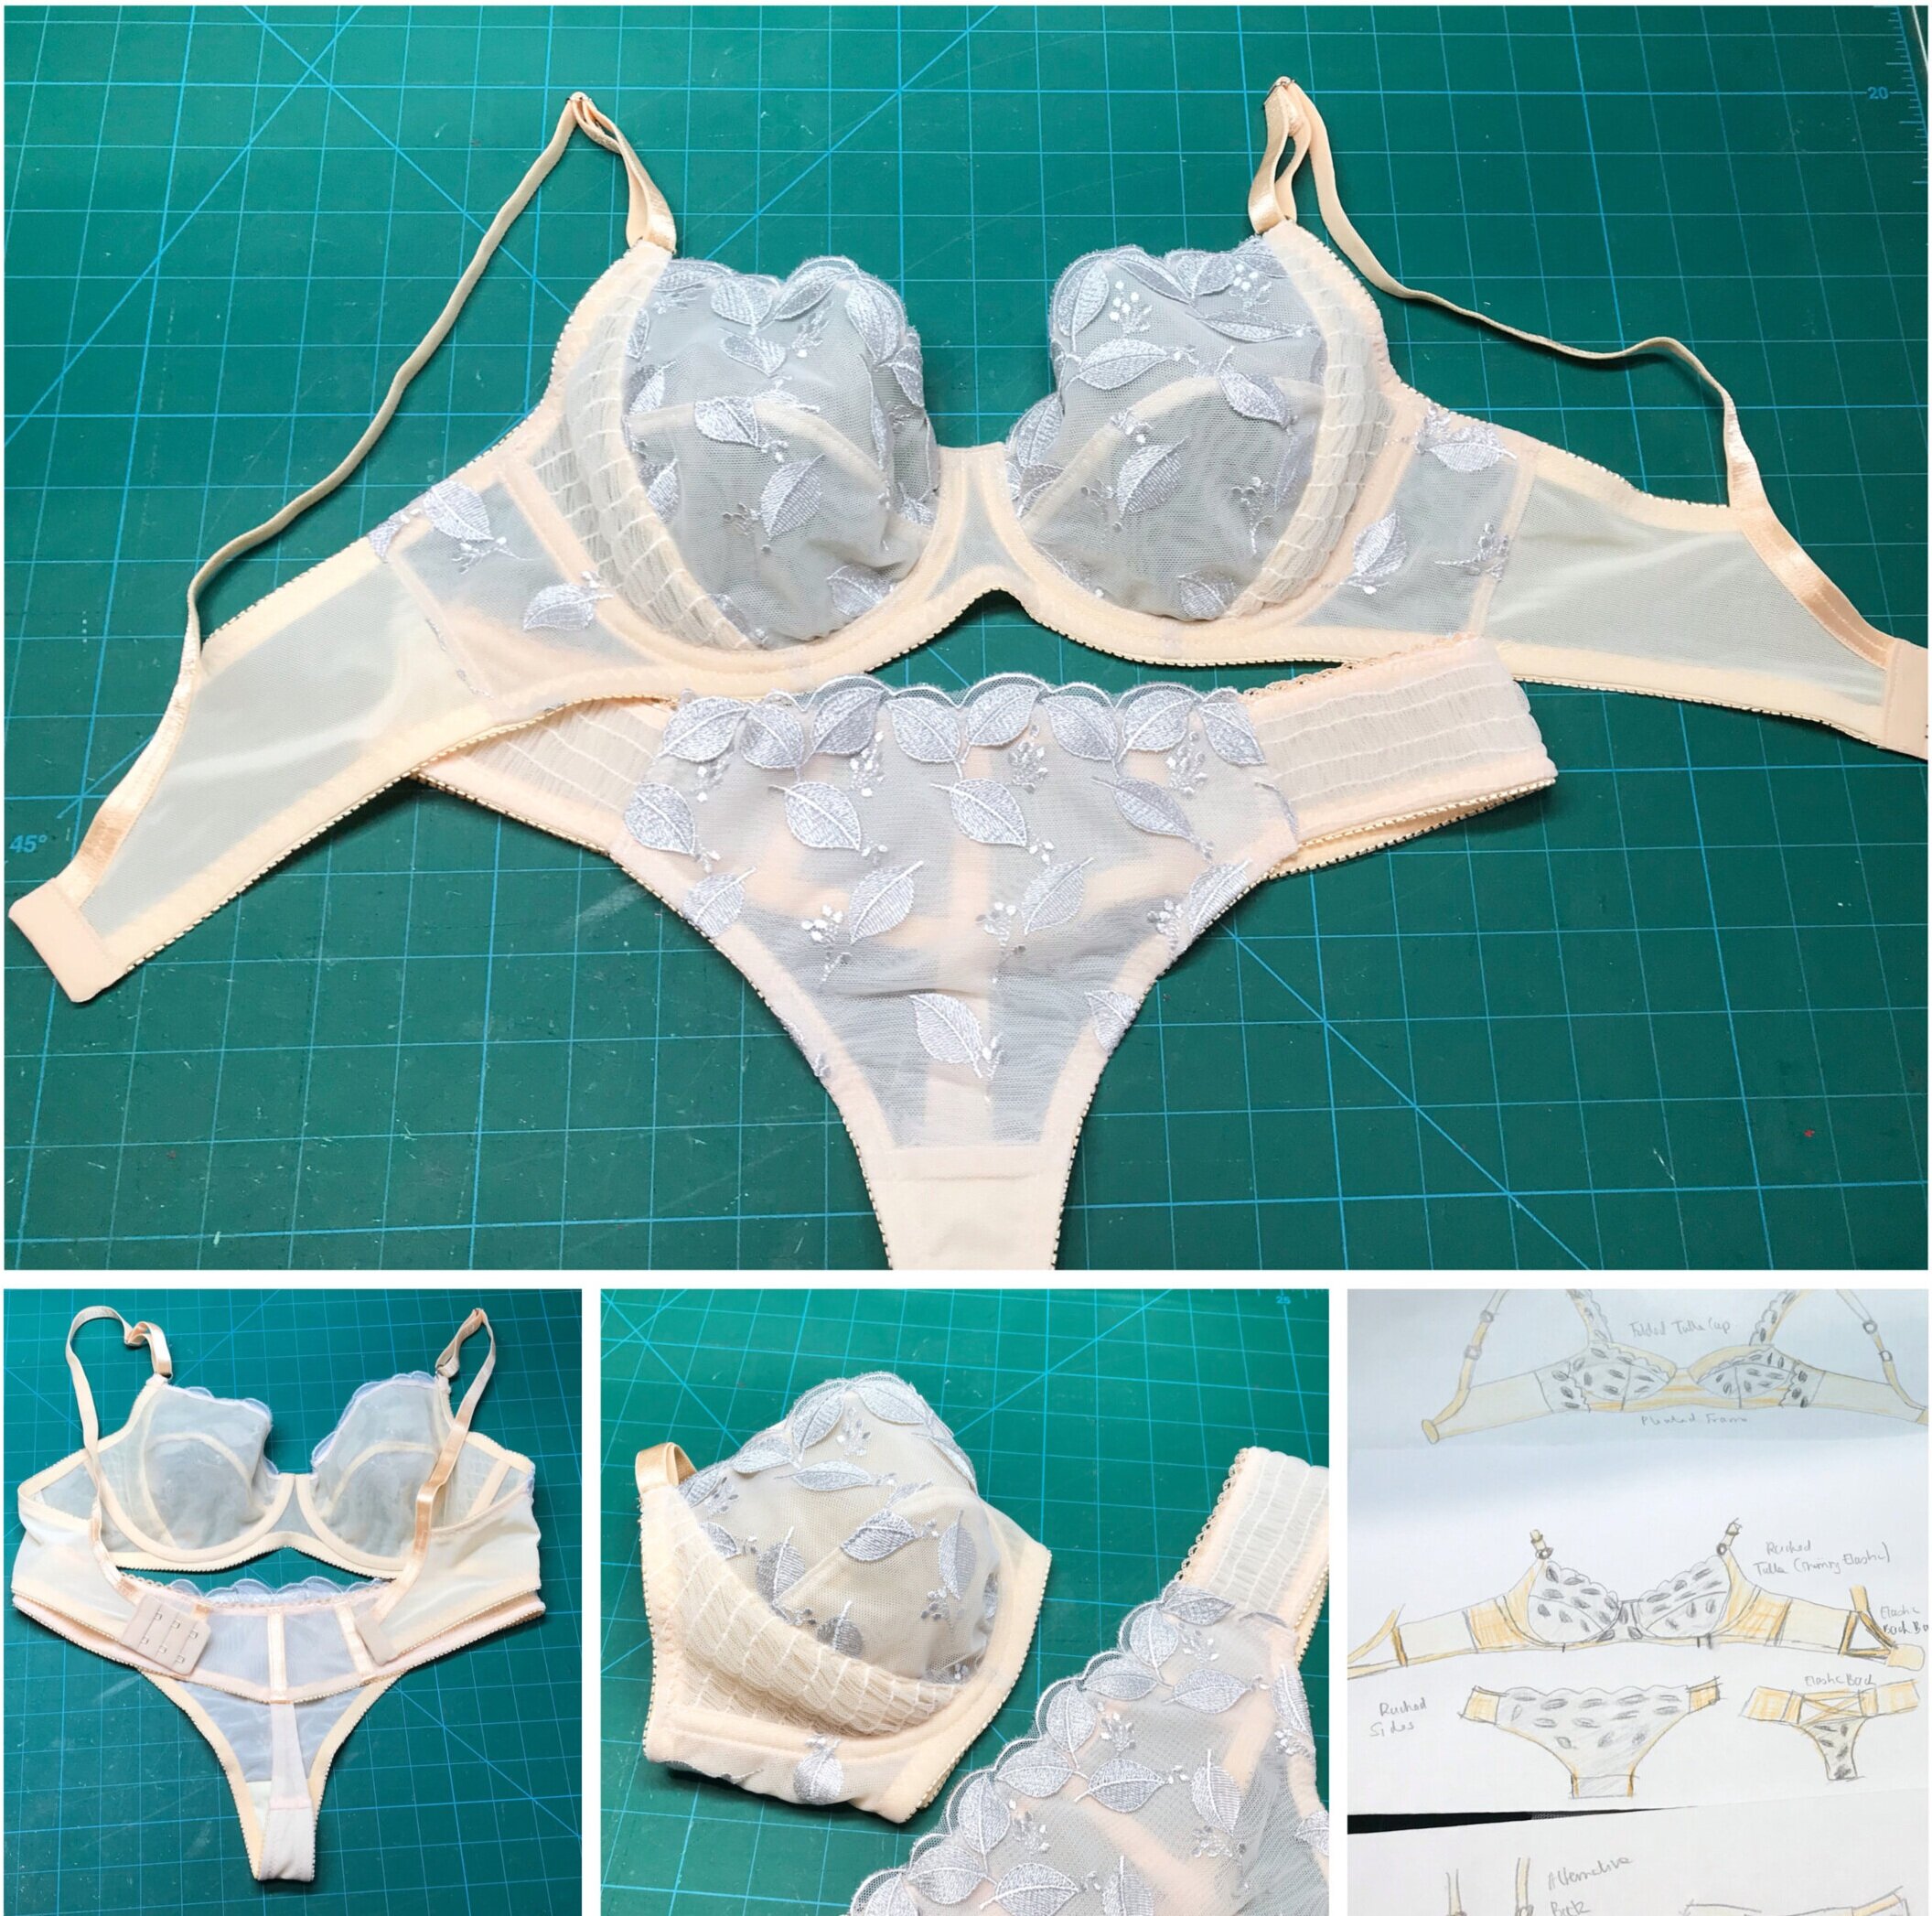
The outcome was to make an Orange Lingerie Marlborough bra with the inner cup in the lace lined with the peach and the powerbar in tulle gathered using shirring elastic. The underwear was designed to have a lace front panel with the sides being made from the gathered tulle which would stretch. I also sketched out some alternative strap ideas and a garter belt.

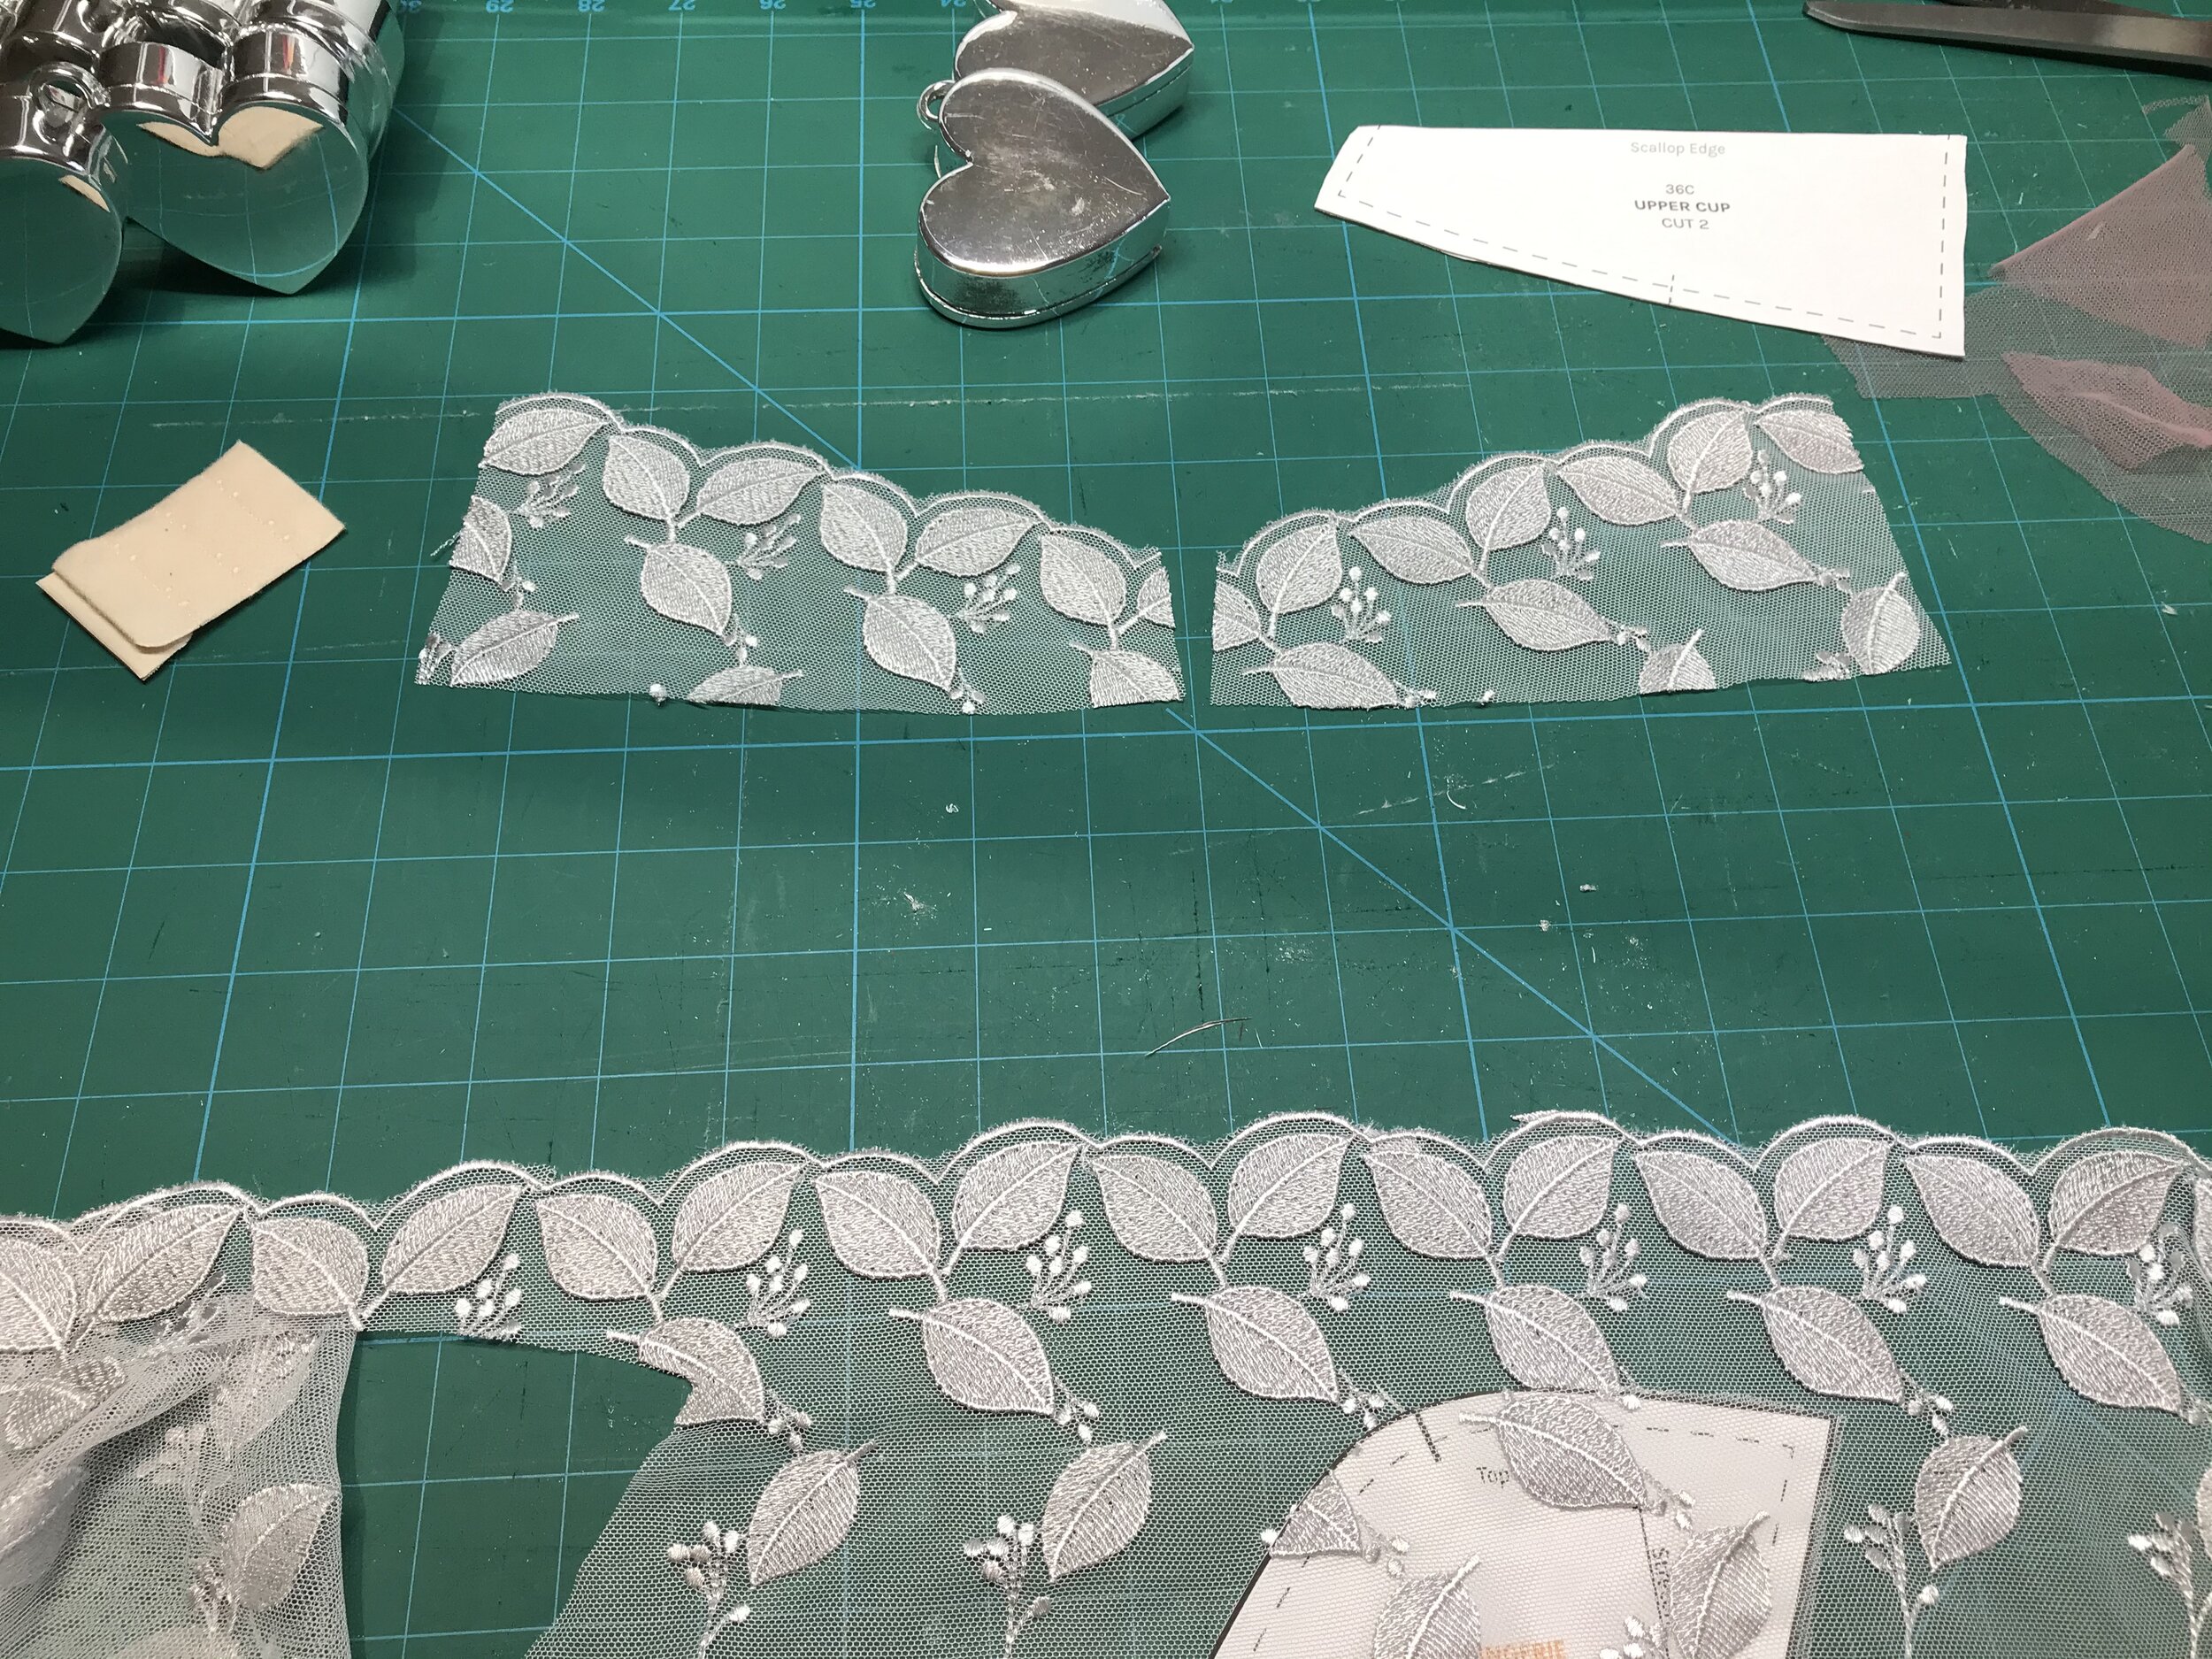
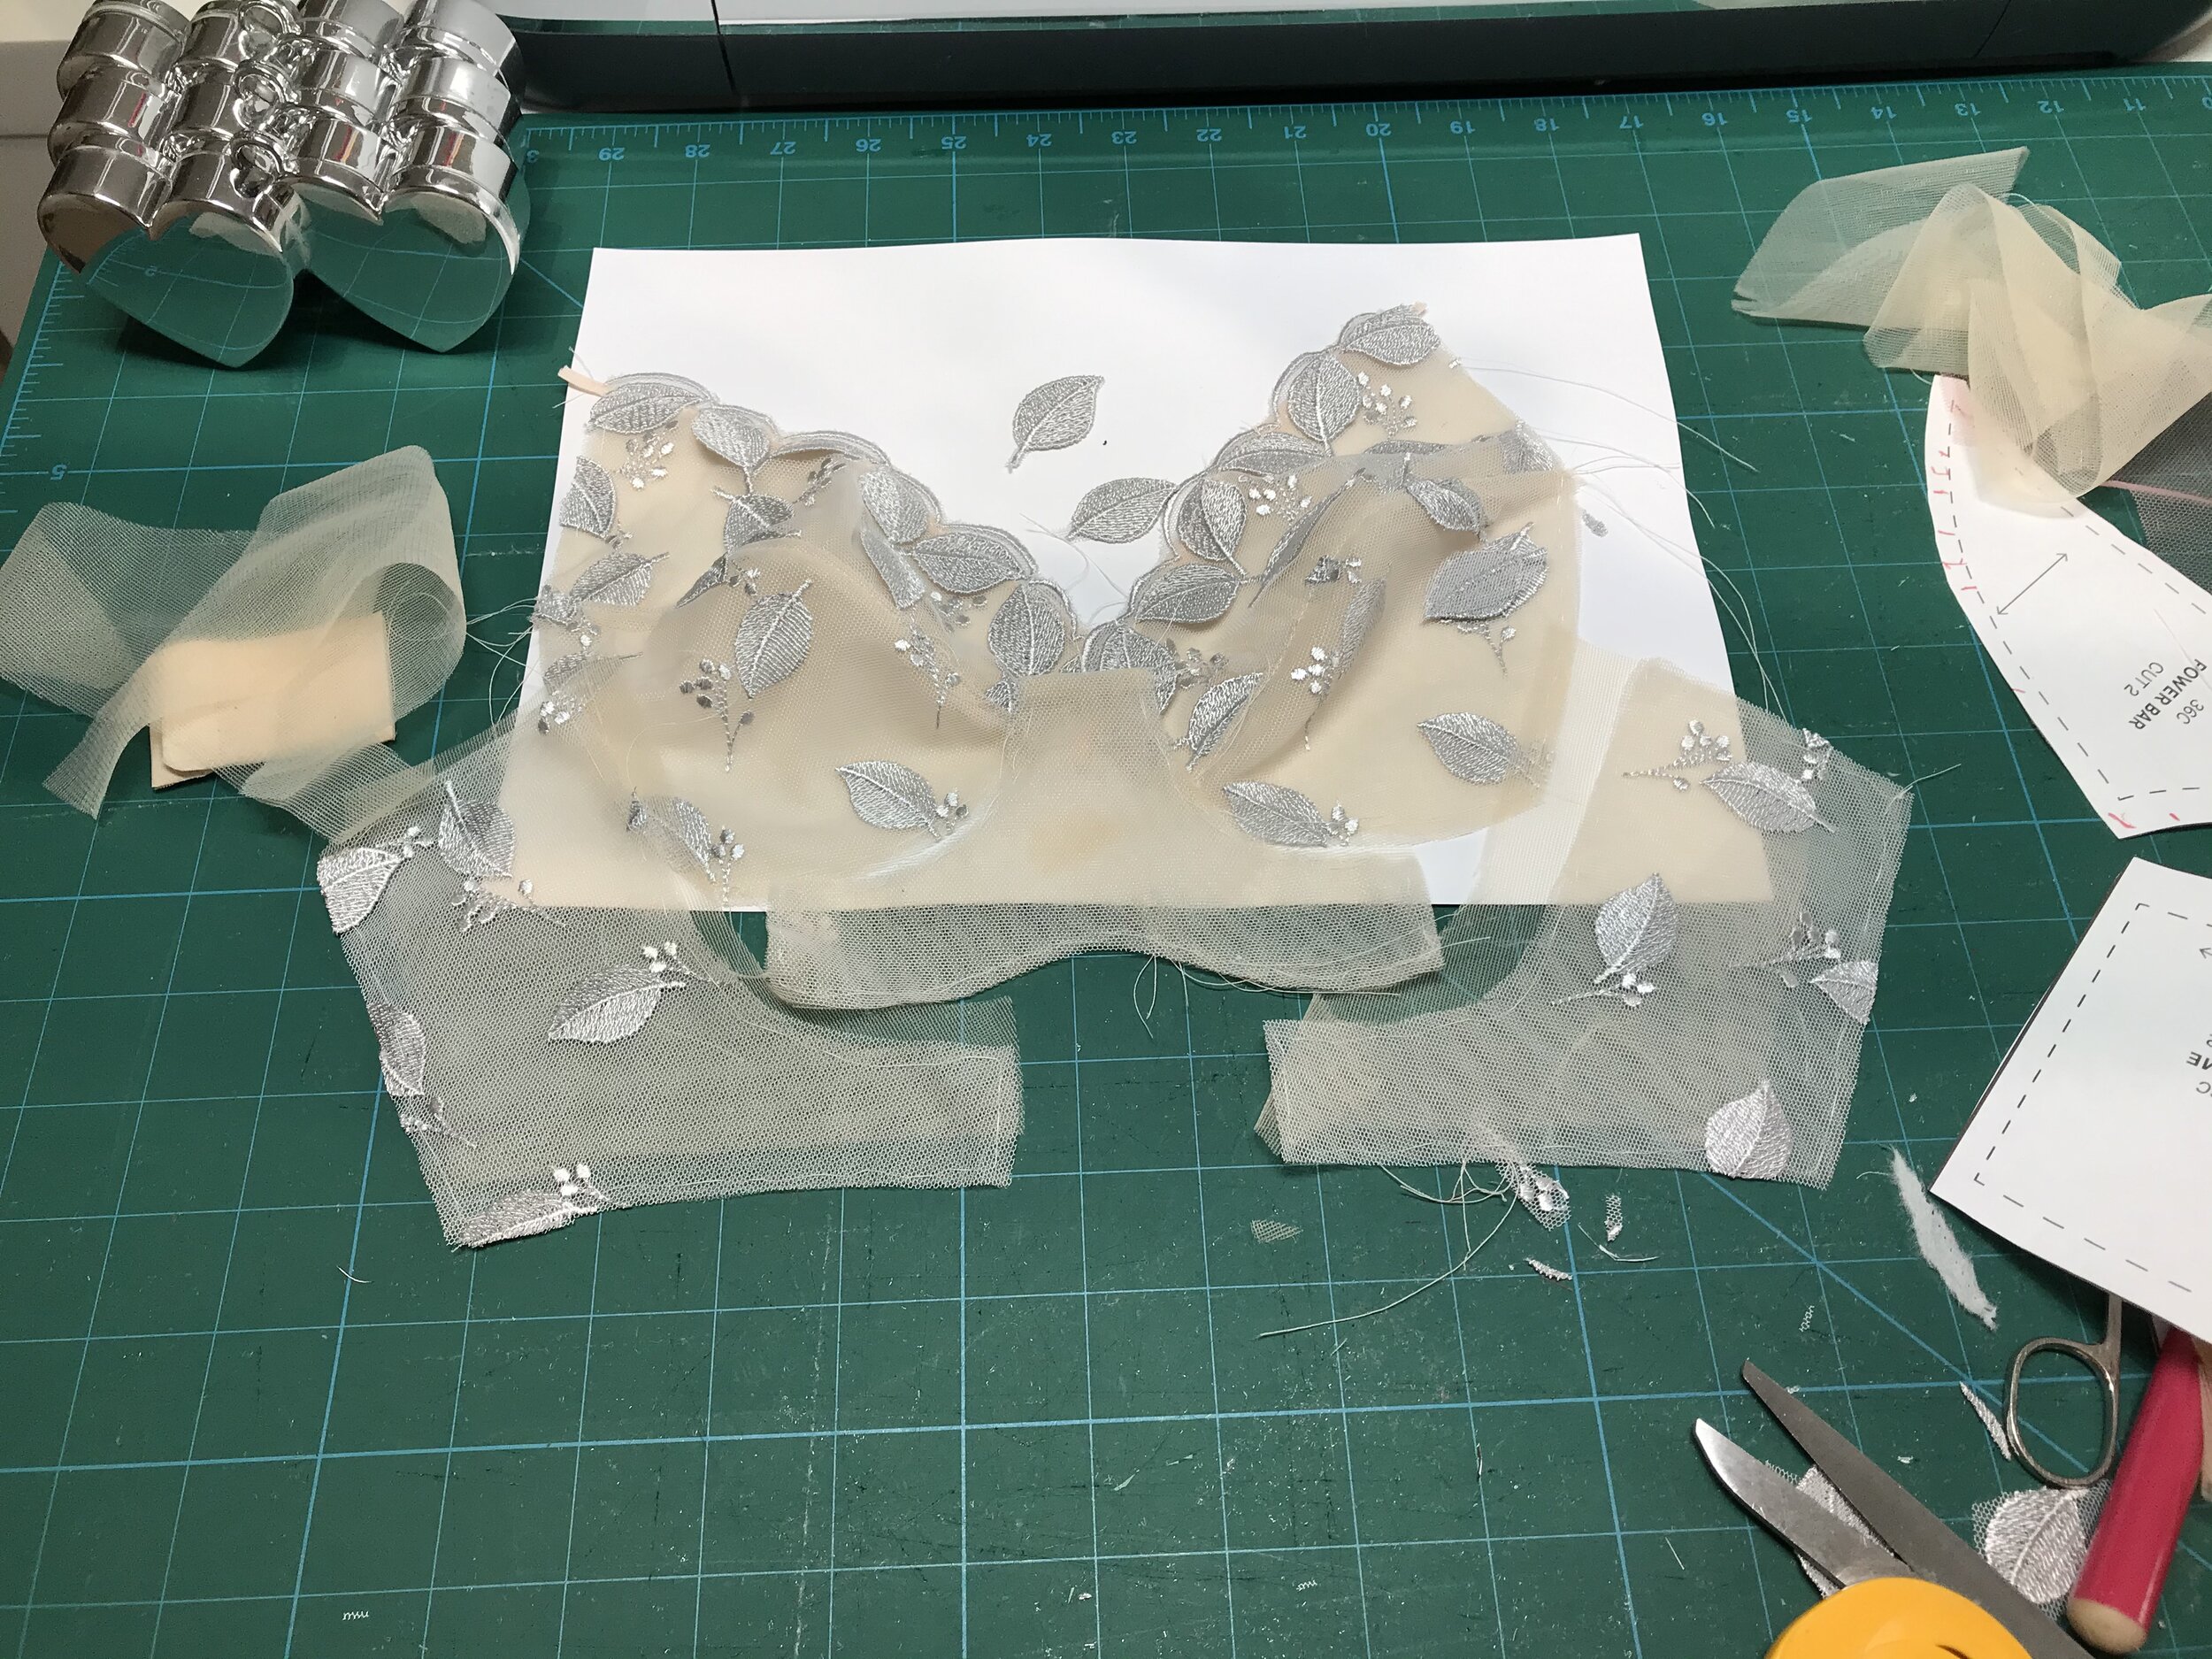
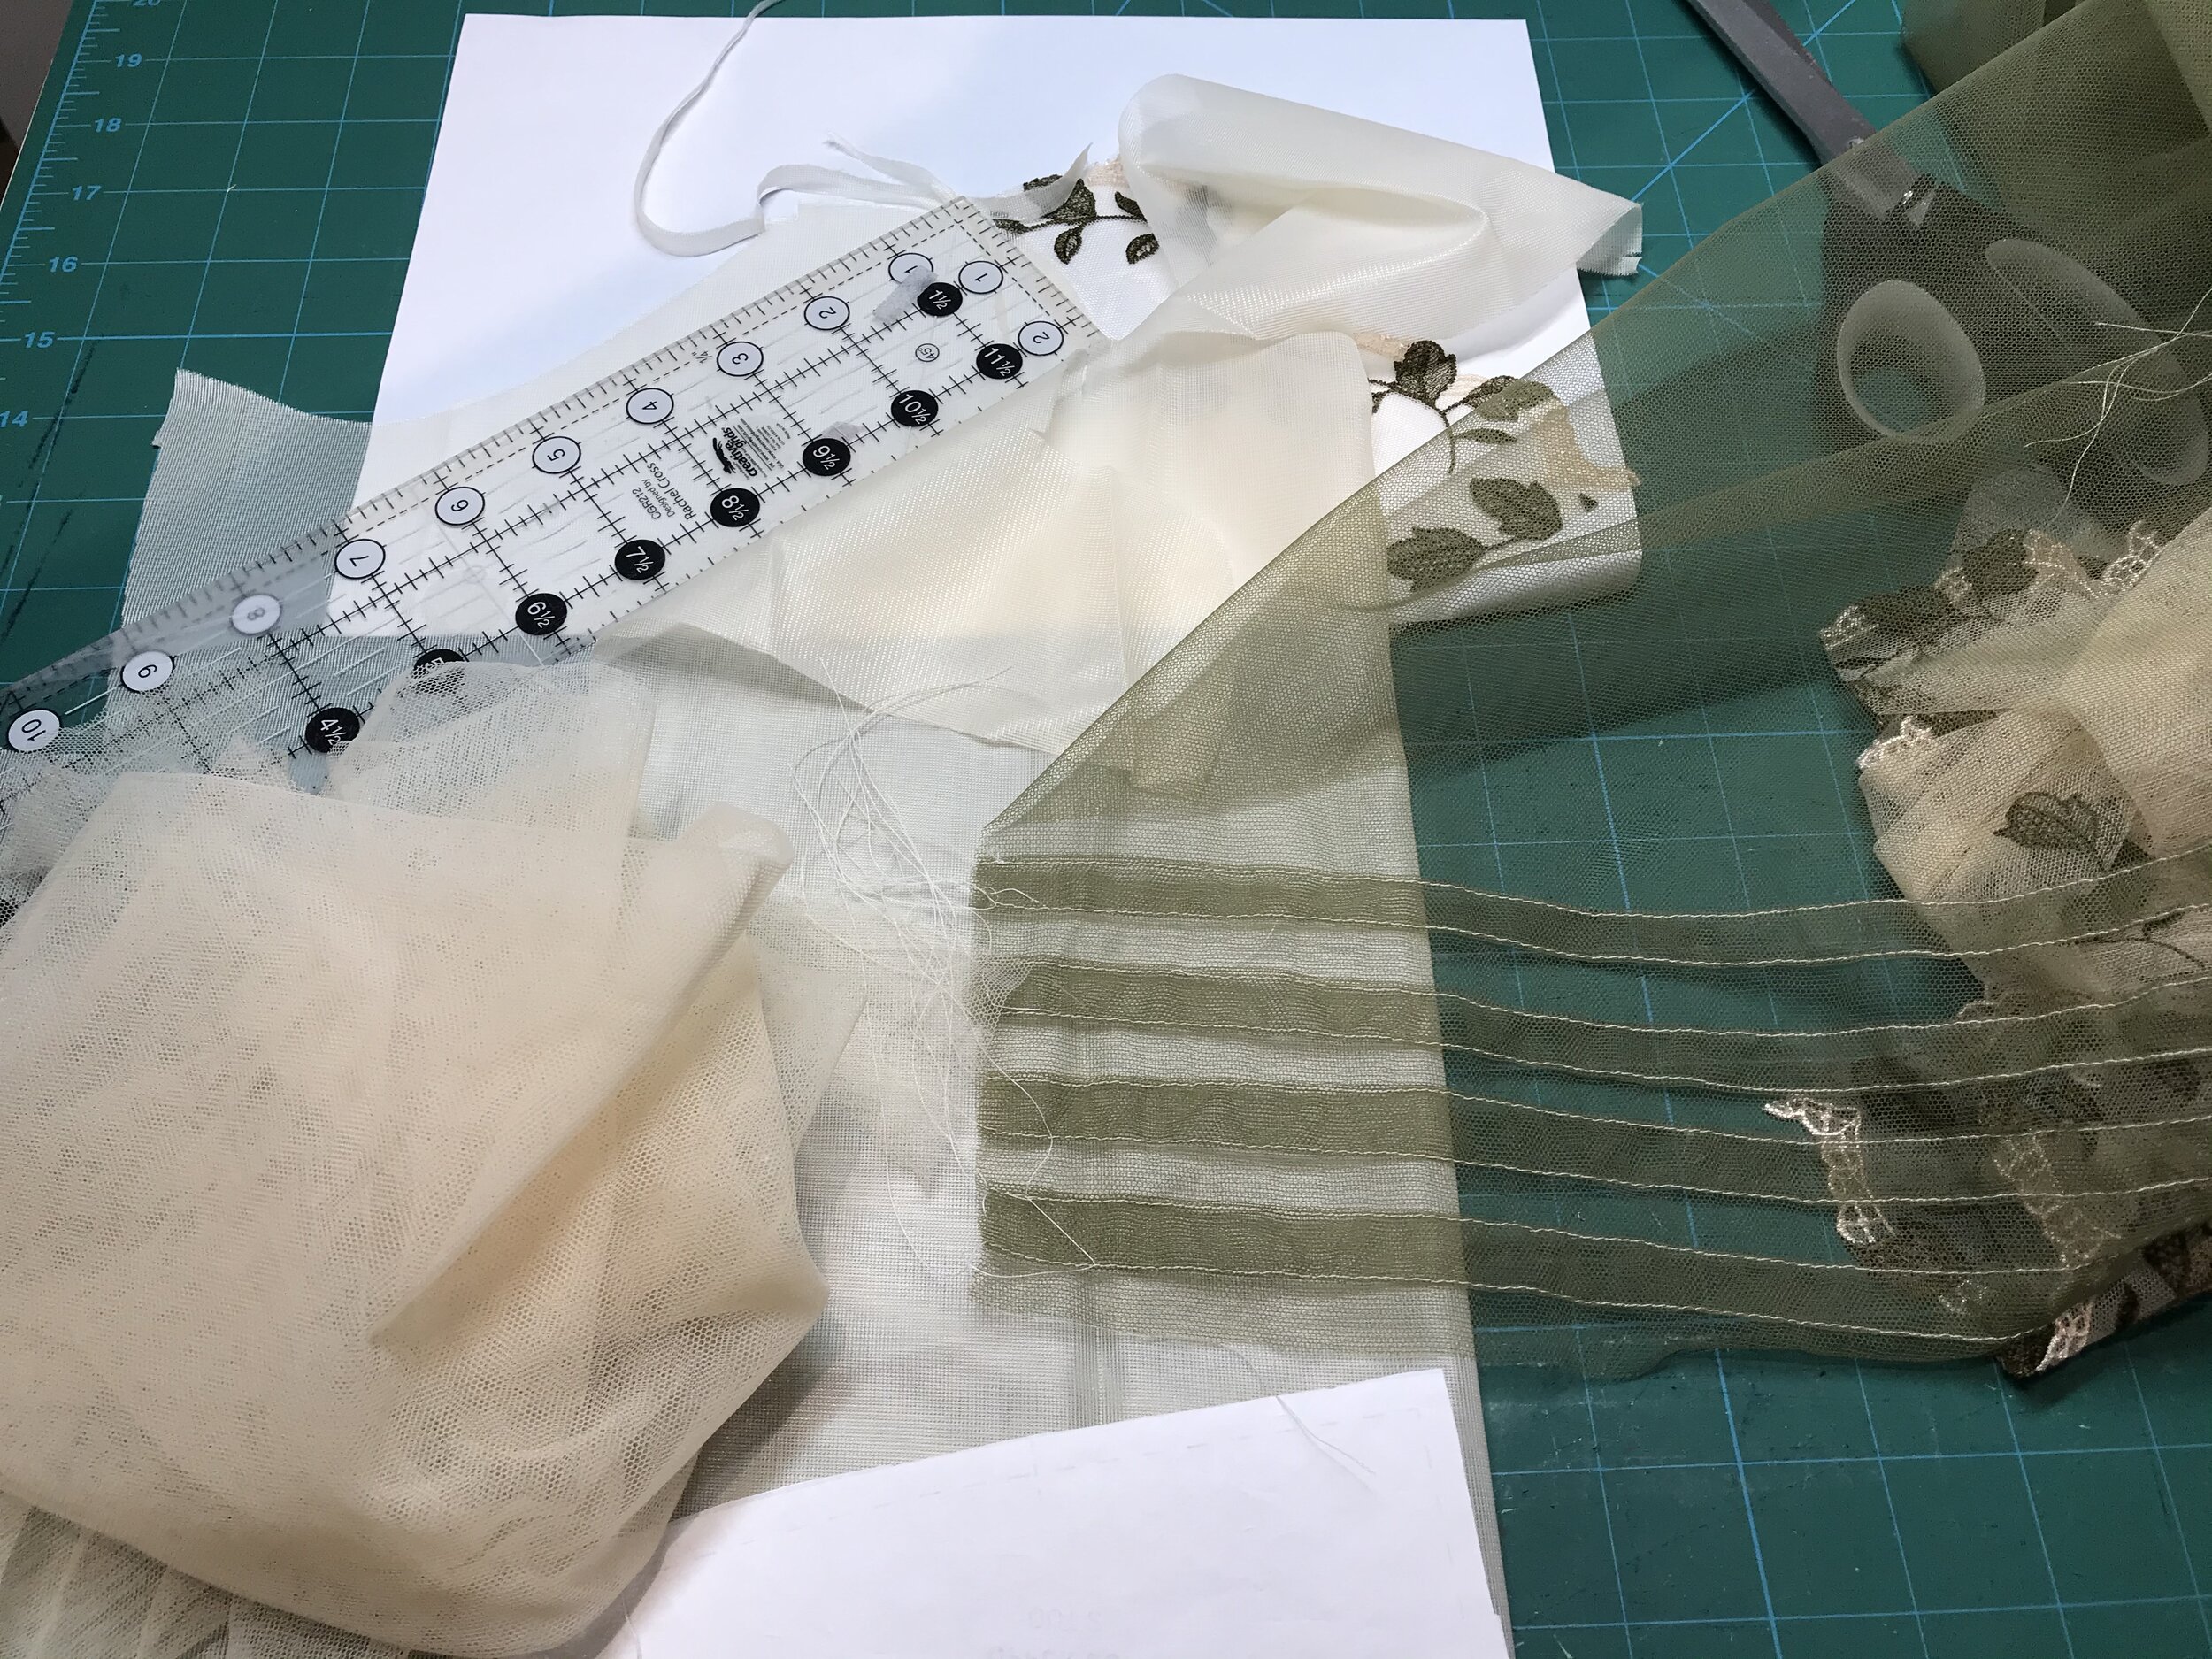
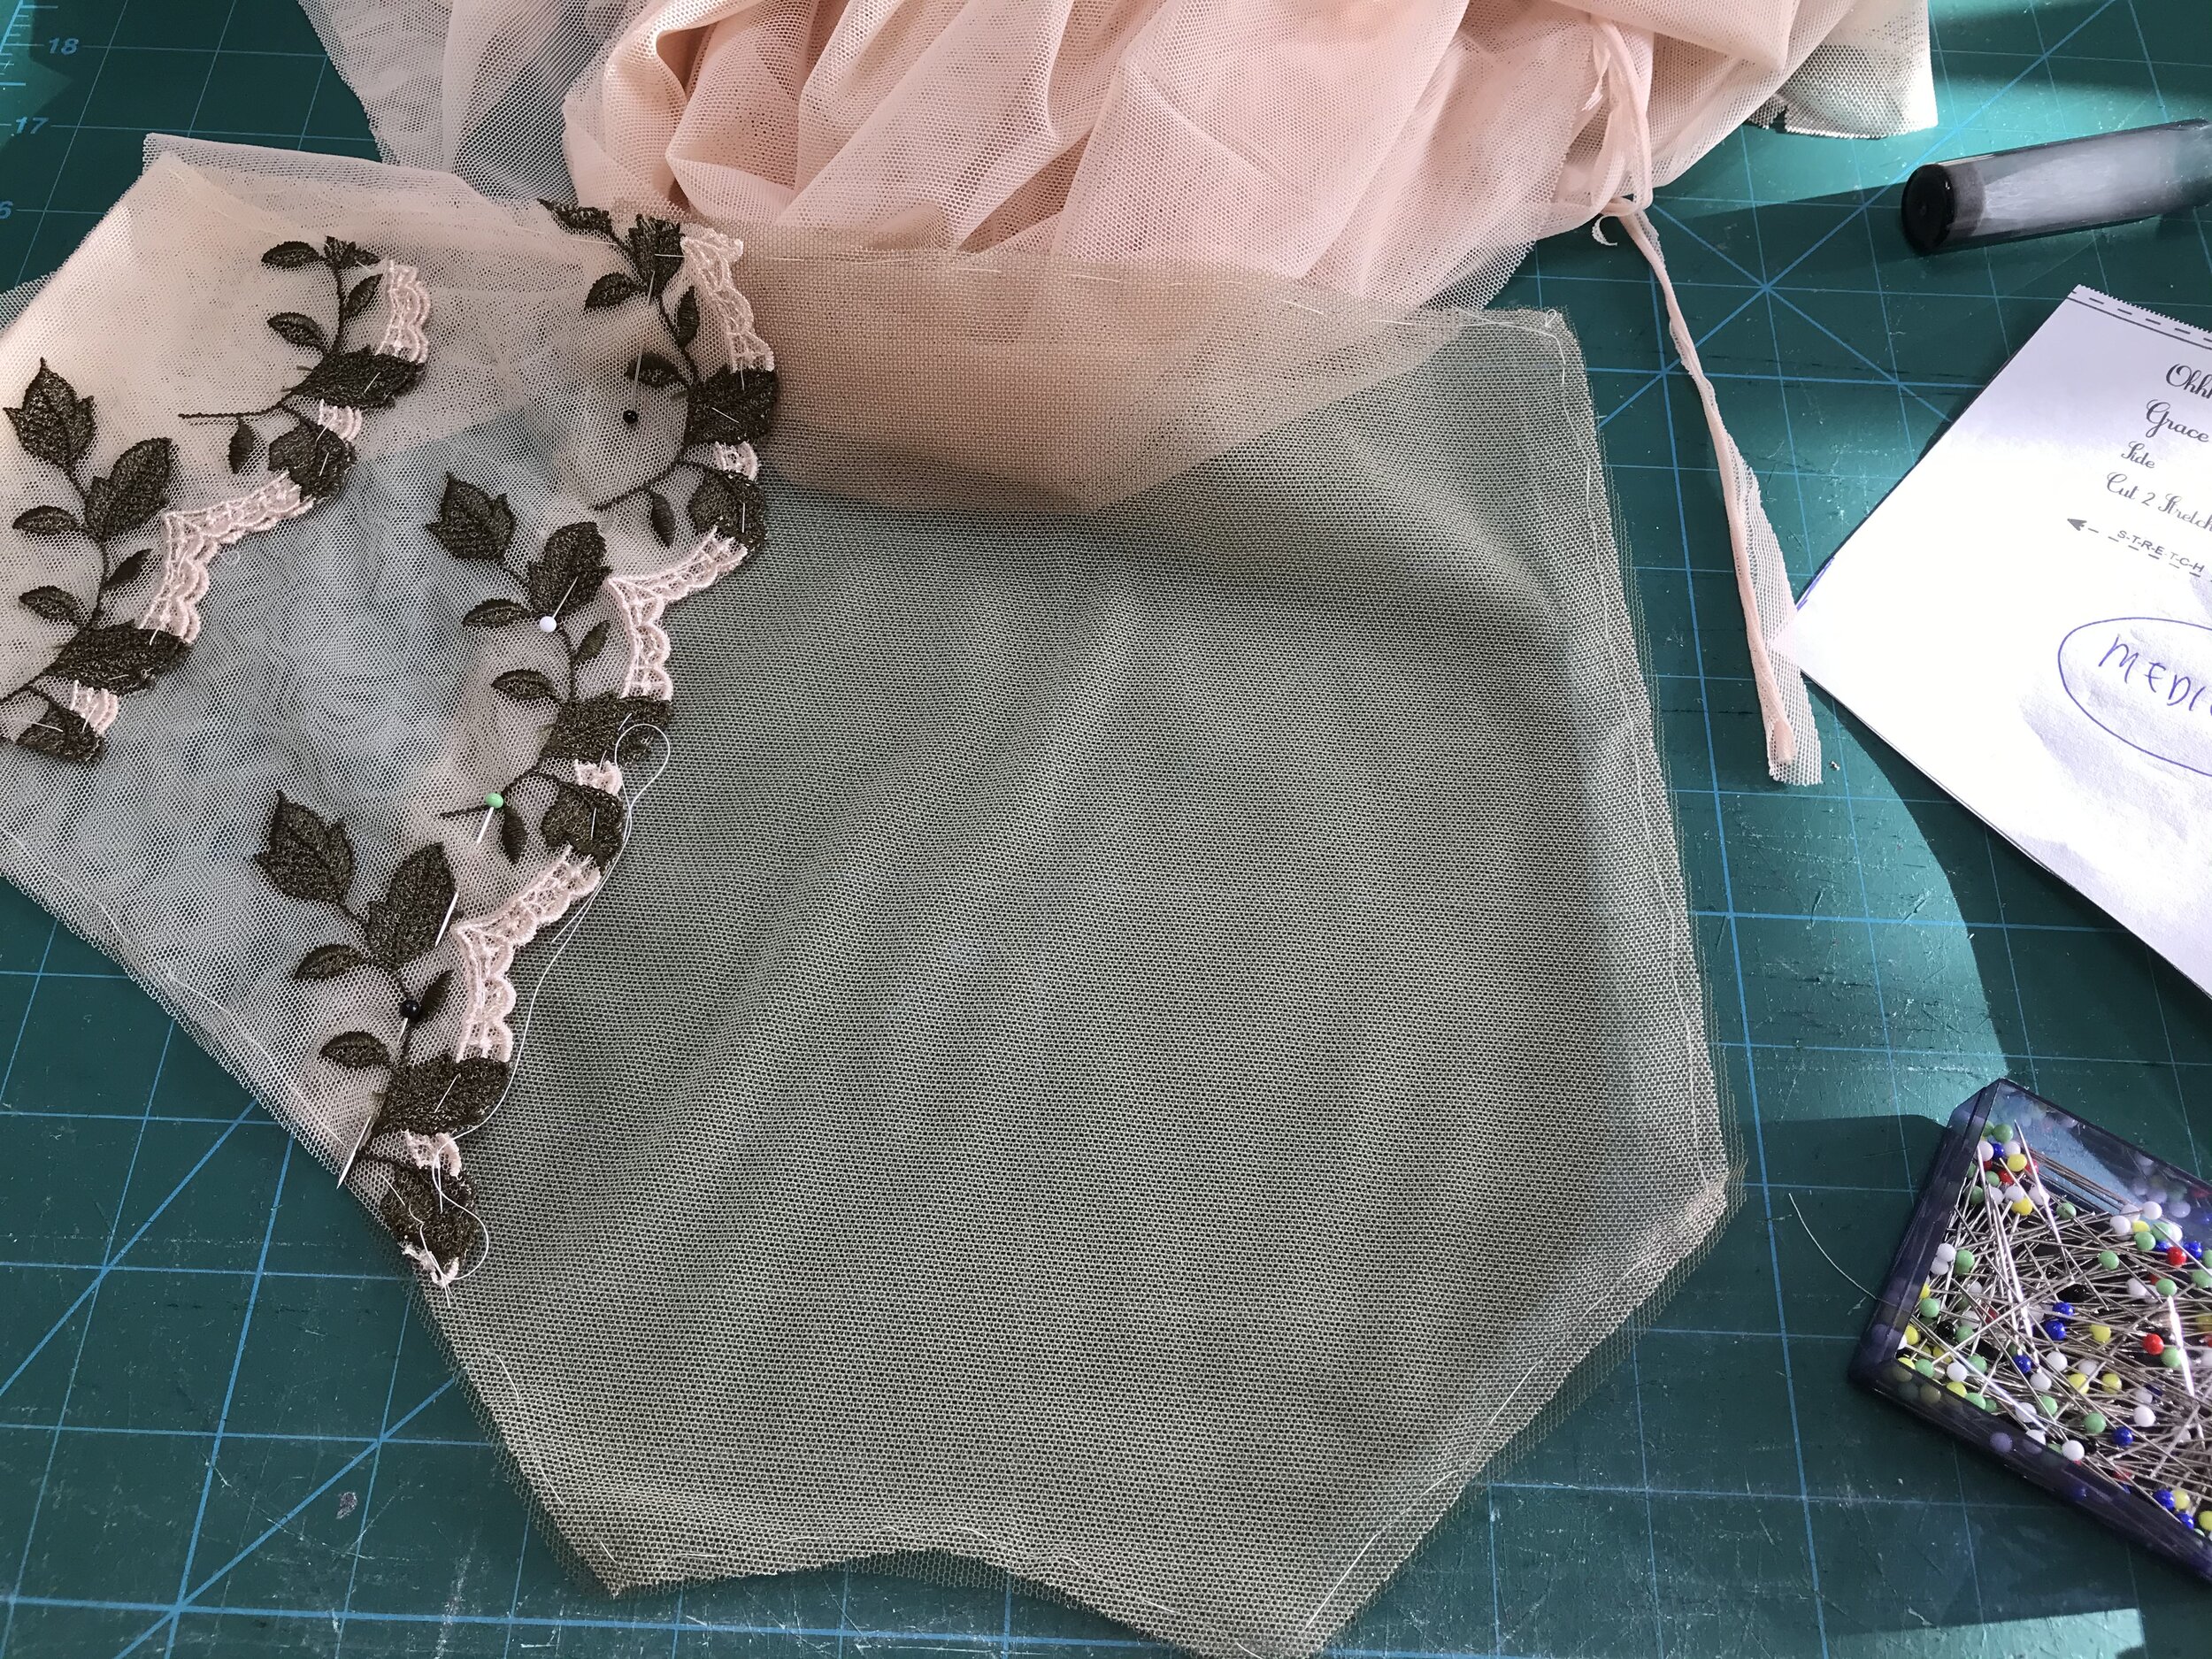
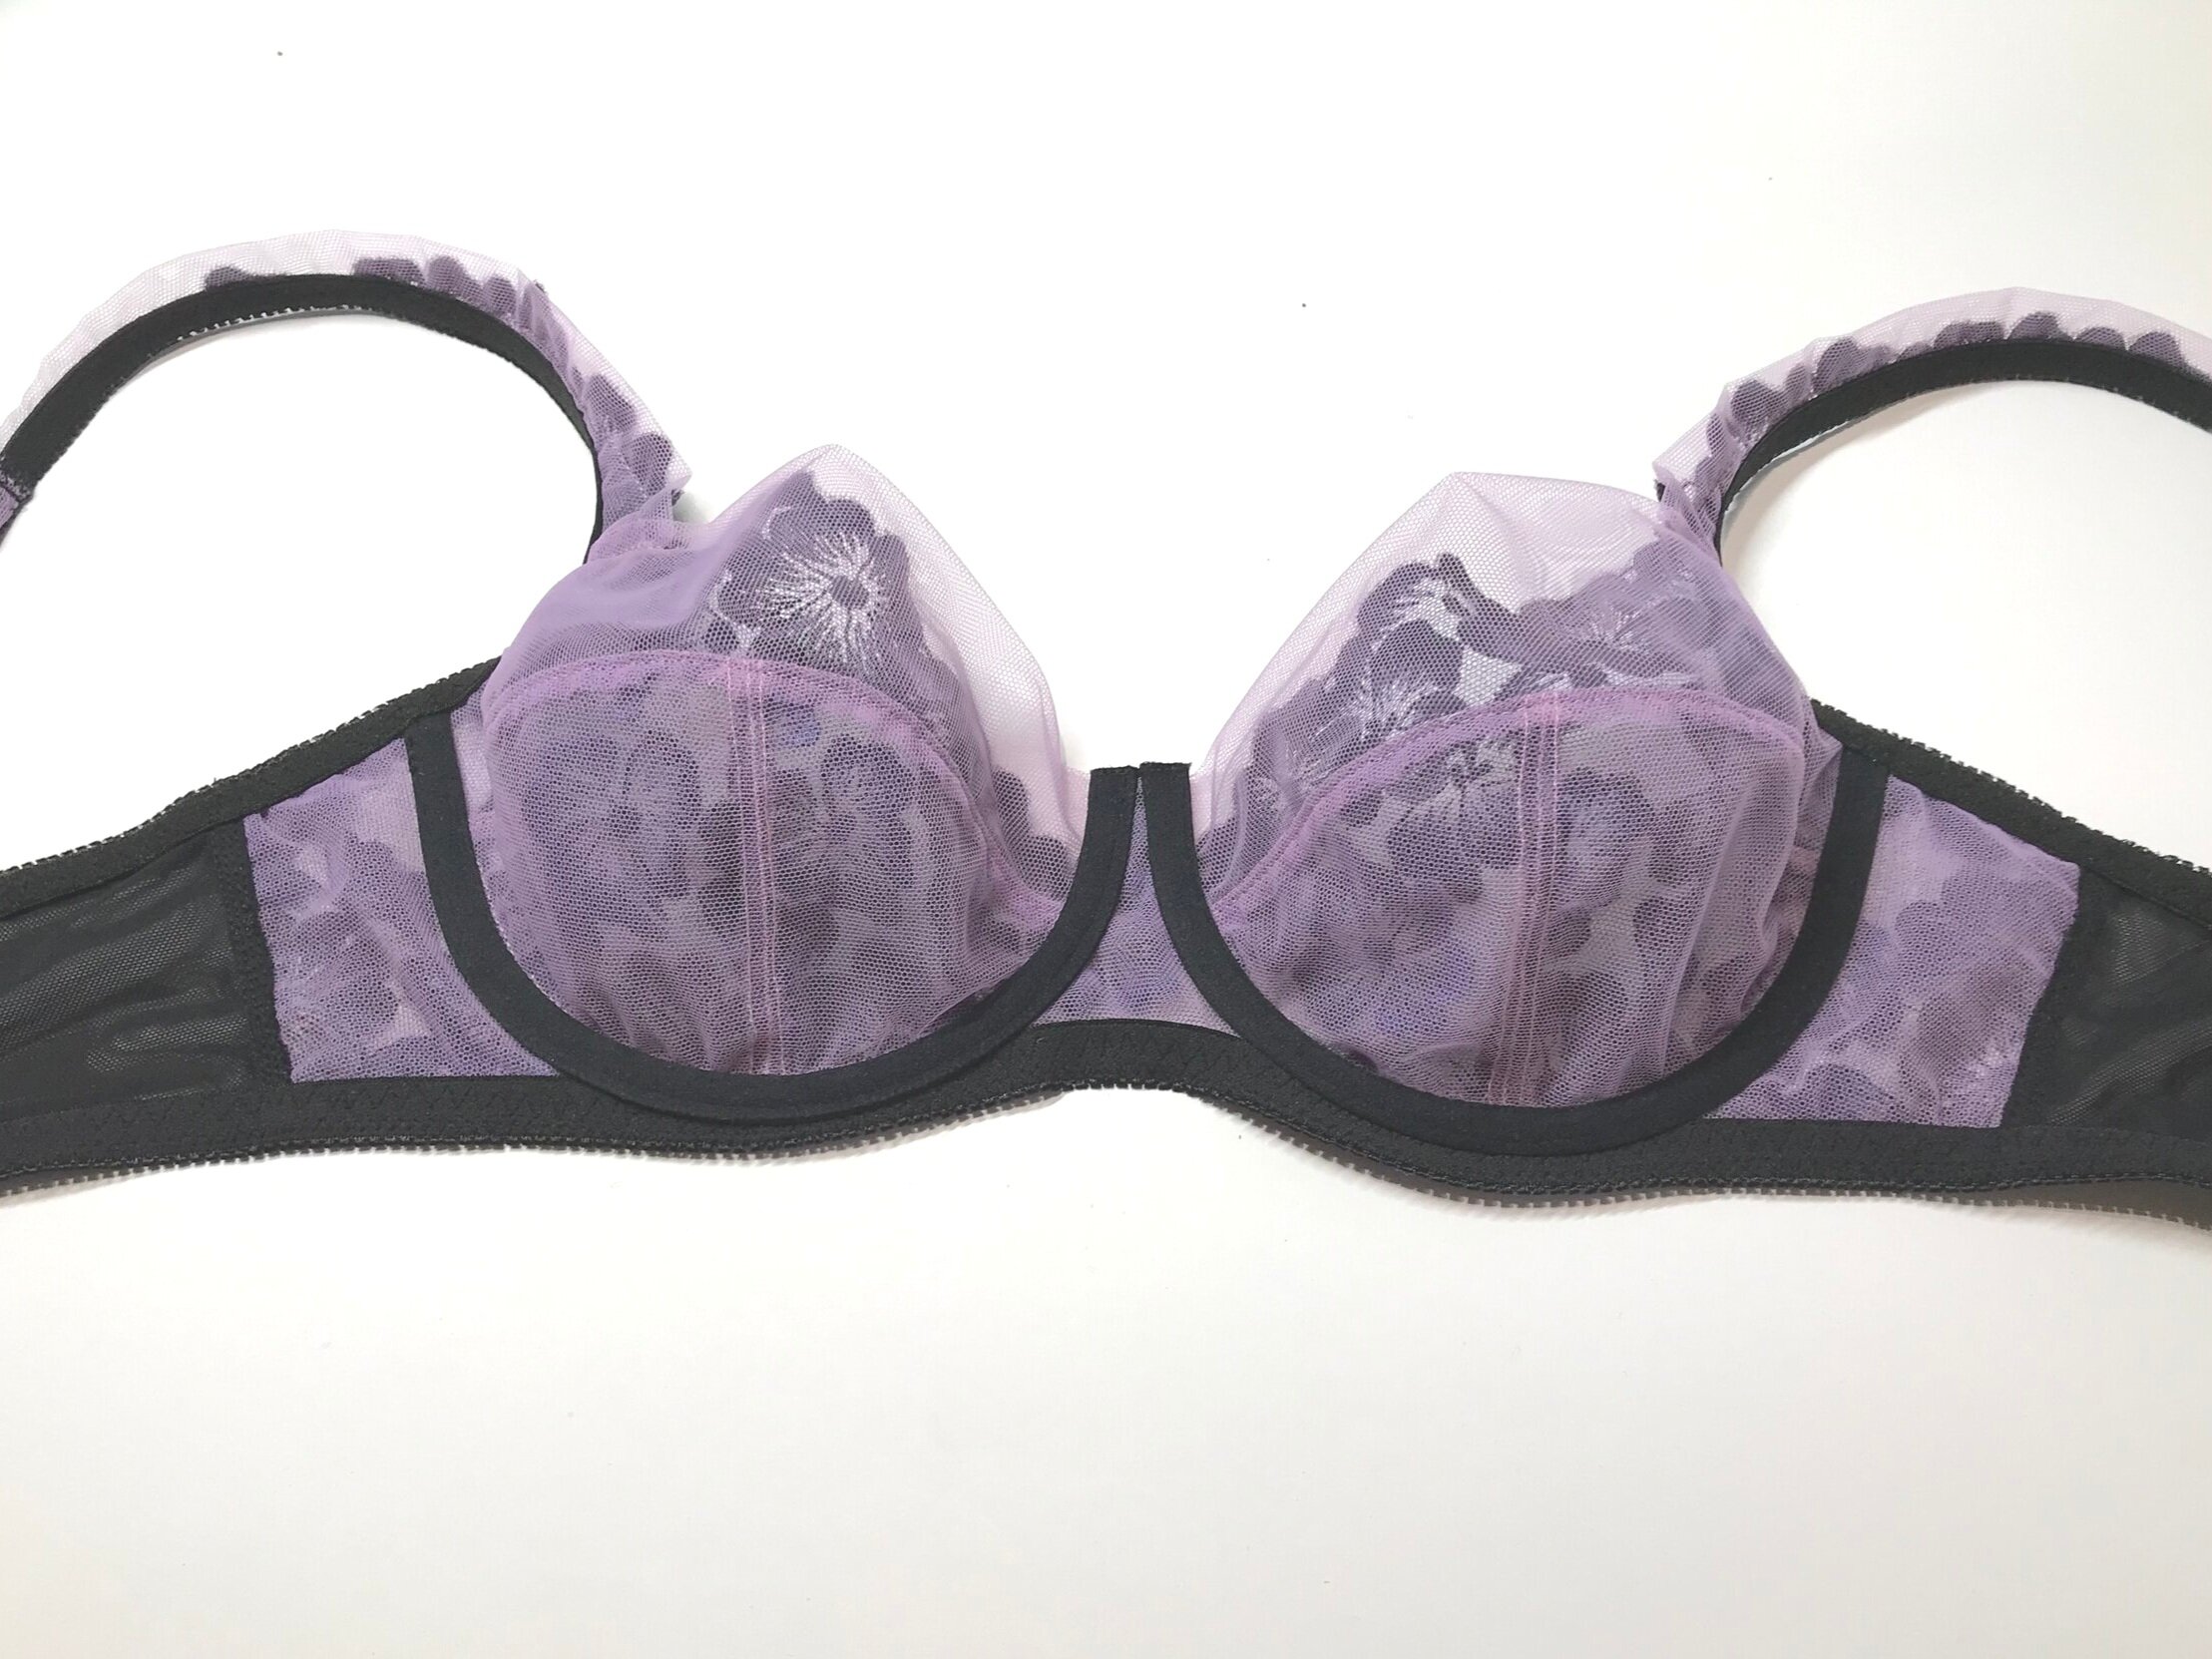
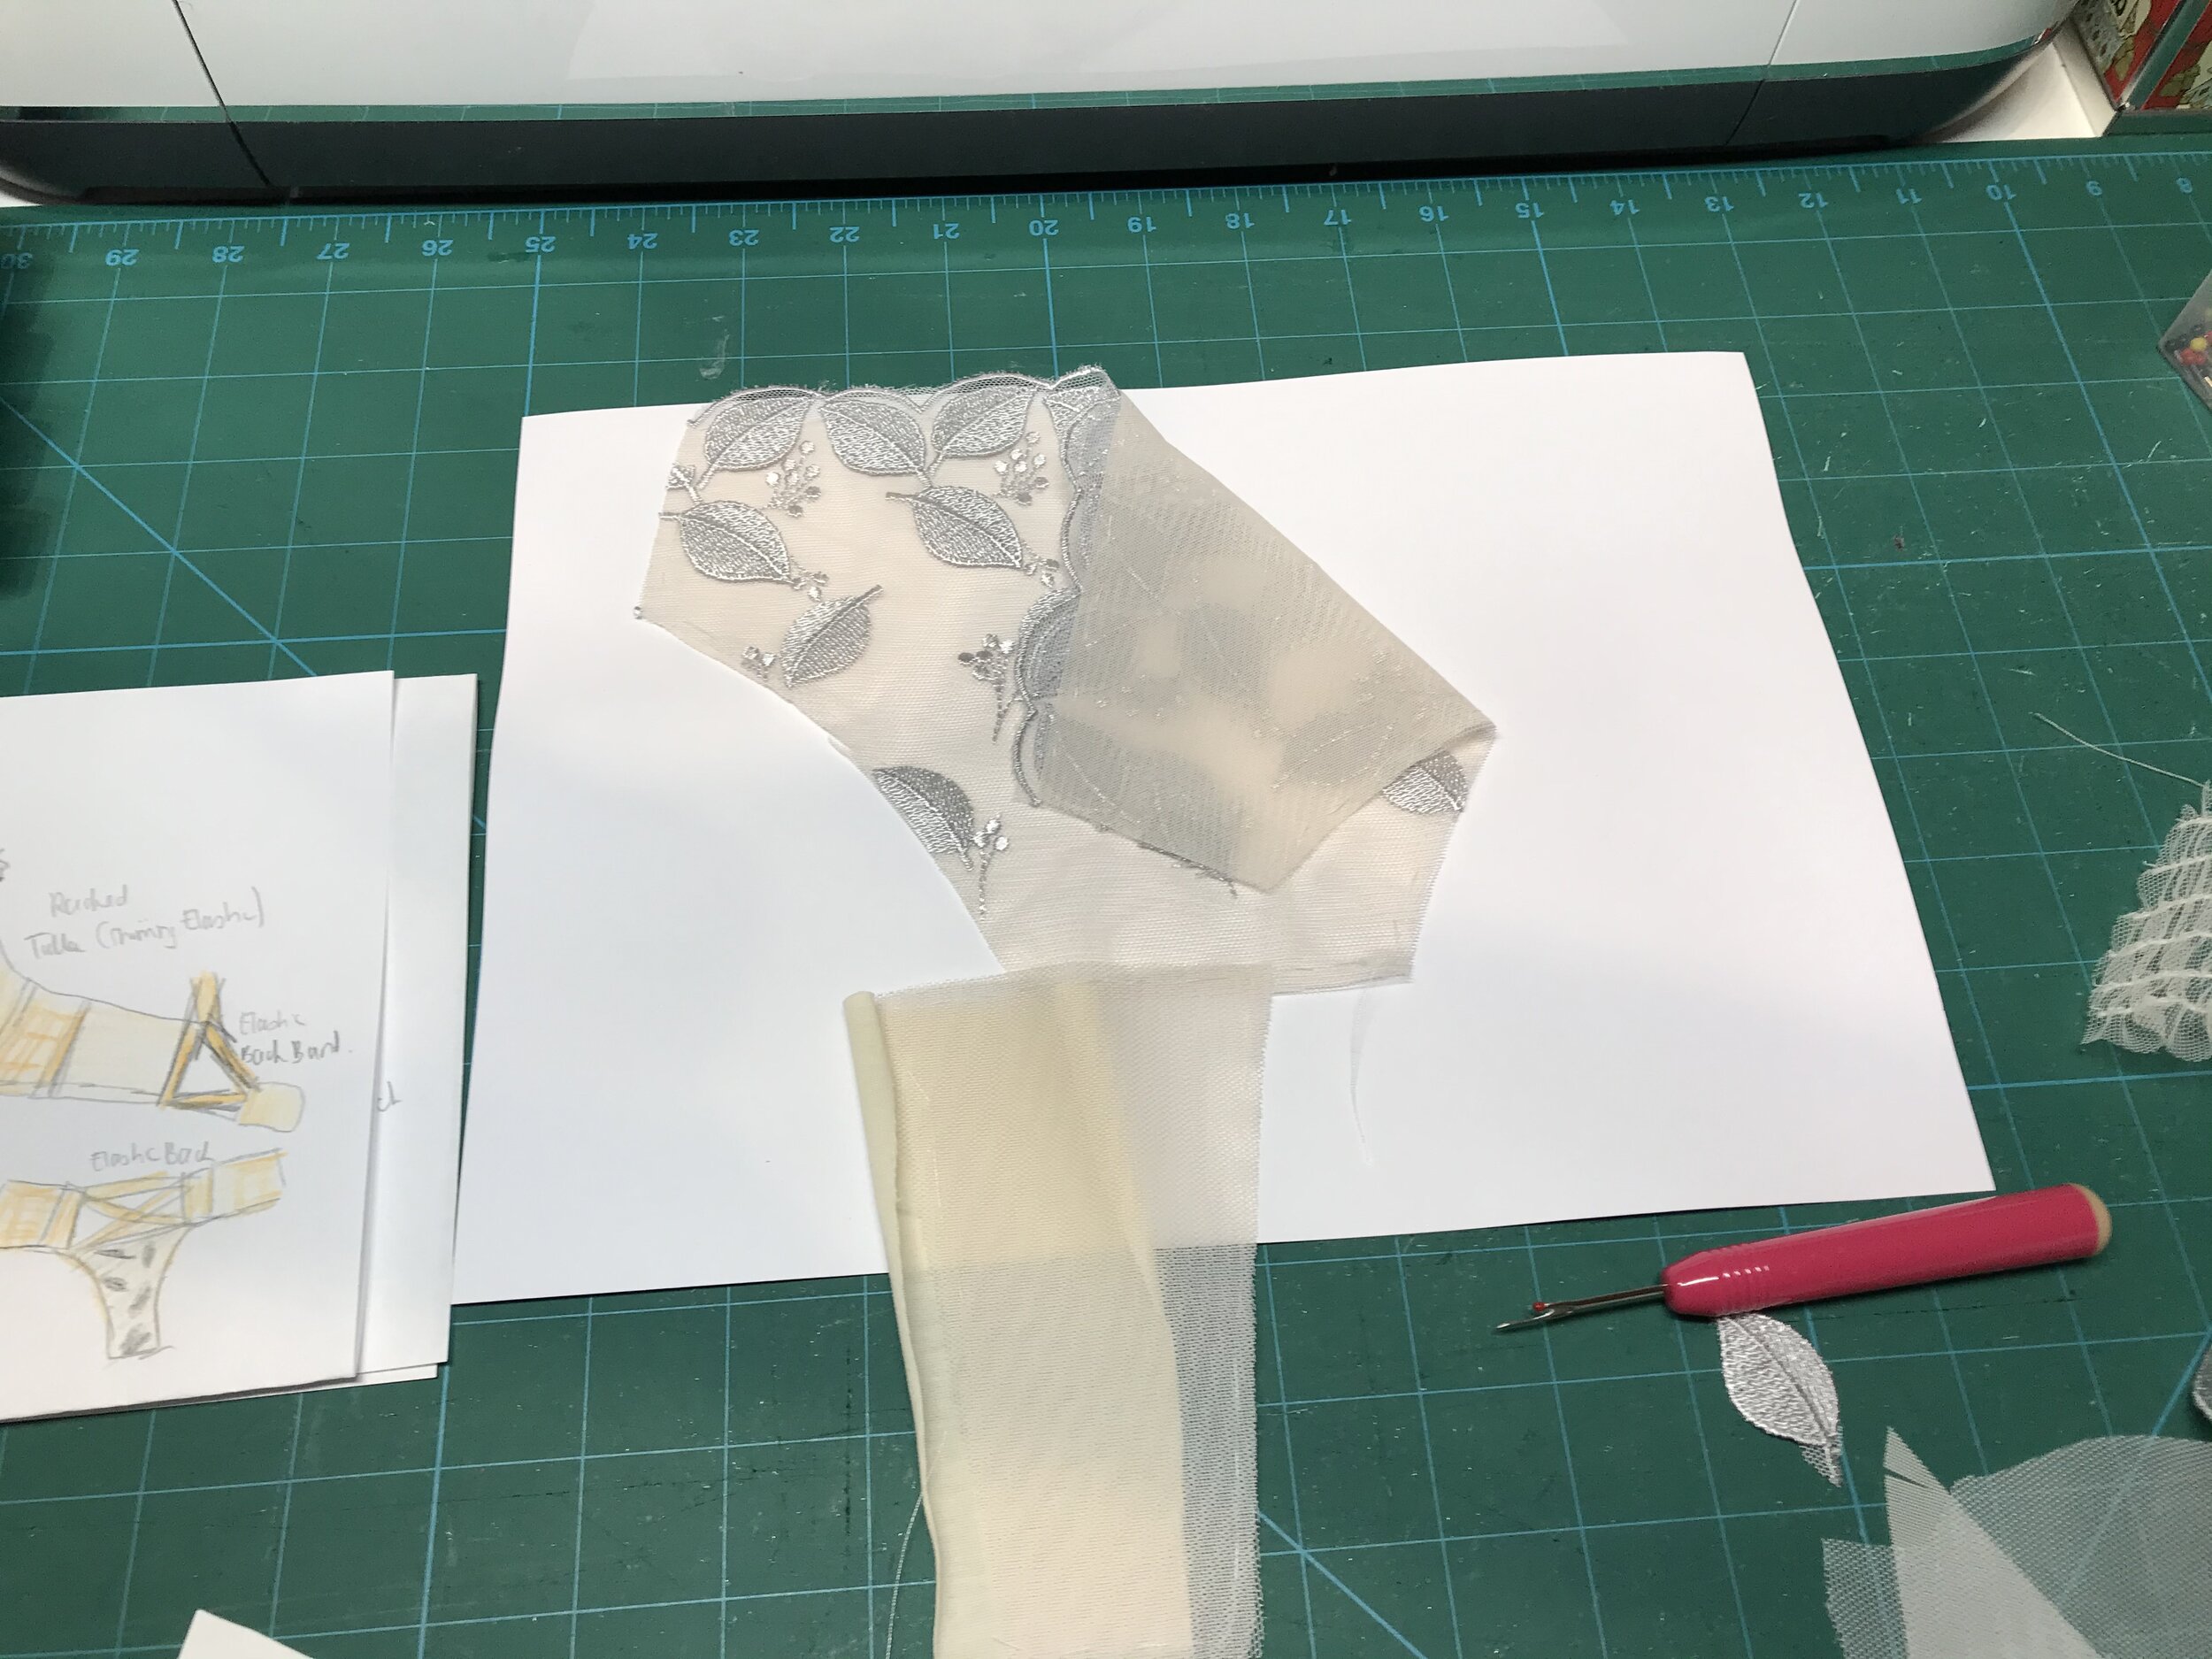
The first issue was that the lace only had one scallop edge and could not be mirrored. Normally I would start the second cup with the same pattern as the other side but for this pattern the leaves would be in a different sequence and the way I have placed it is more aesthetically pleasing to me. I lined the upper cups with a piece of sheer lining on the fold and even though this gave a neat edge I still finished with narrow elastic. To get the peach colour to show through the lace I basted a layer of sheer lining to the other pieces and also used a separate layer as lining which allowed me to enclose all the seams.

C8B39FD4-6160-4619-A2F2-6017B00E9243.JPEG

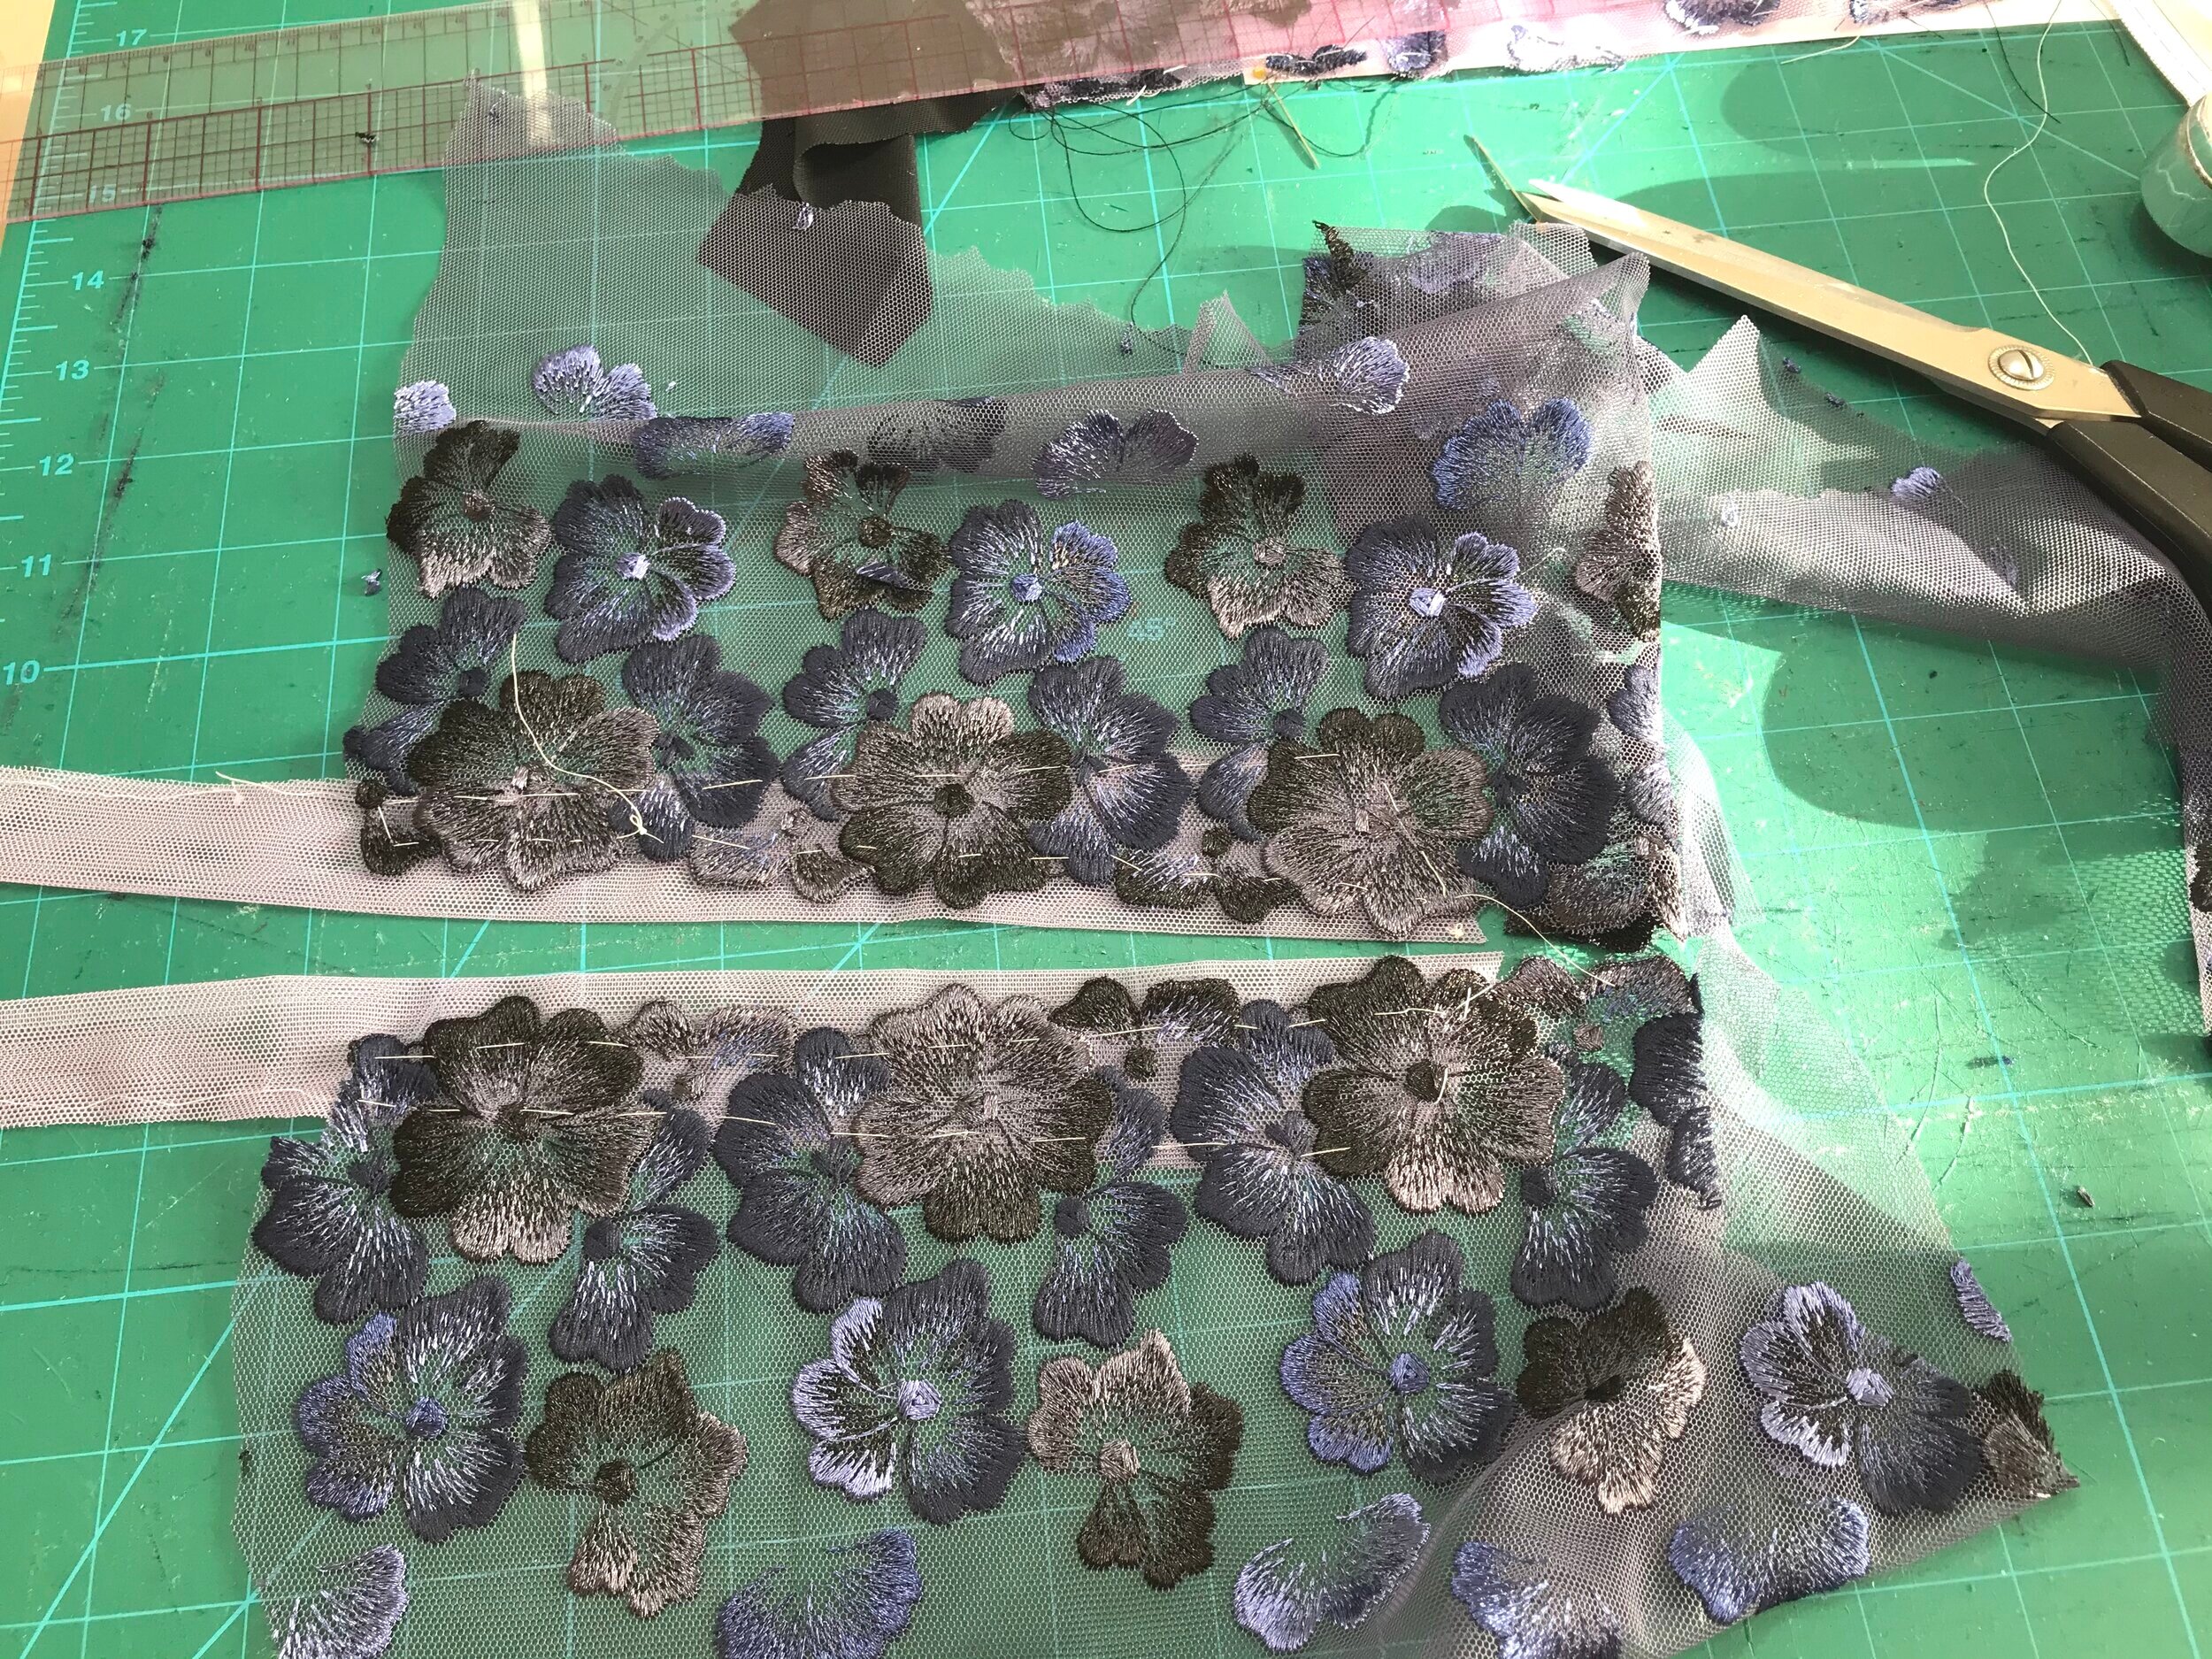
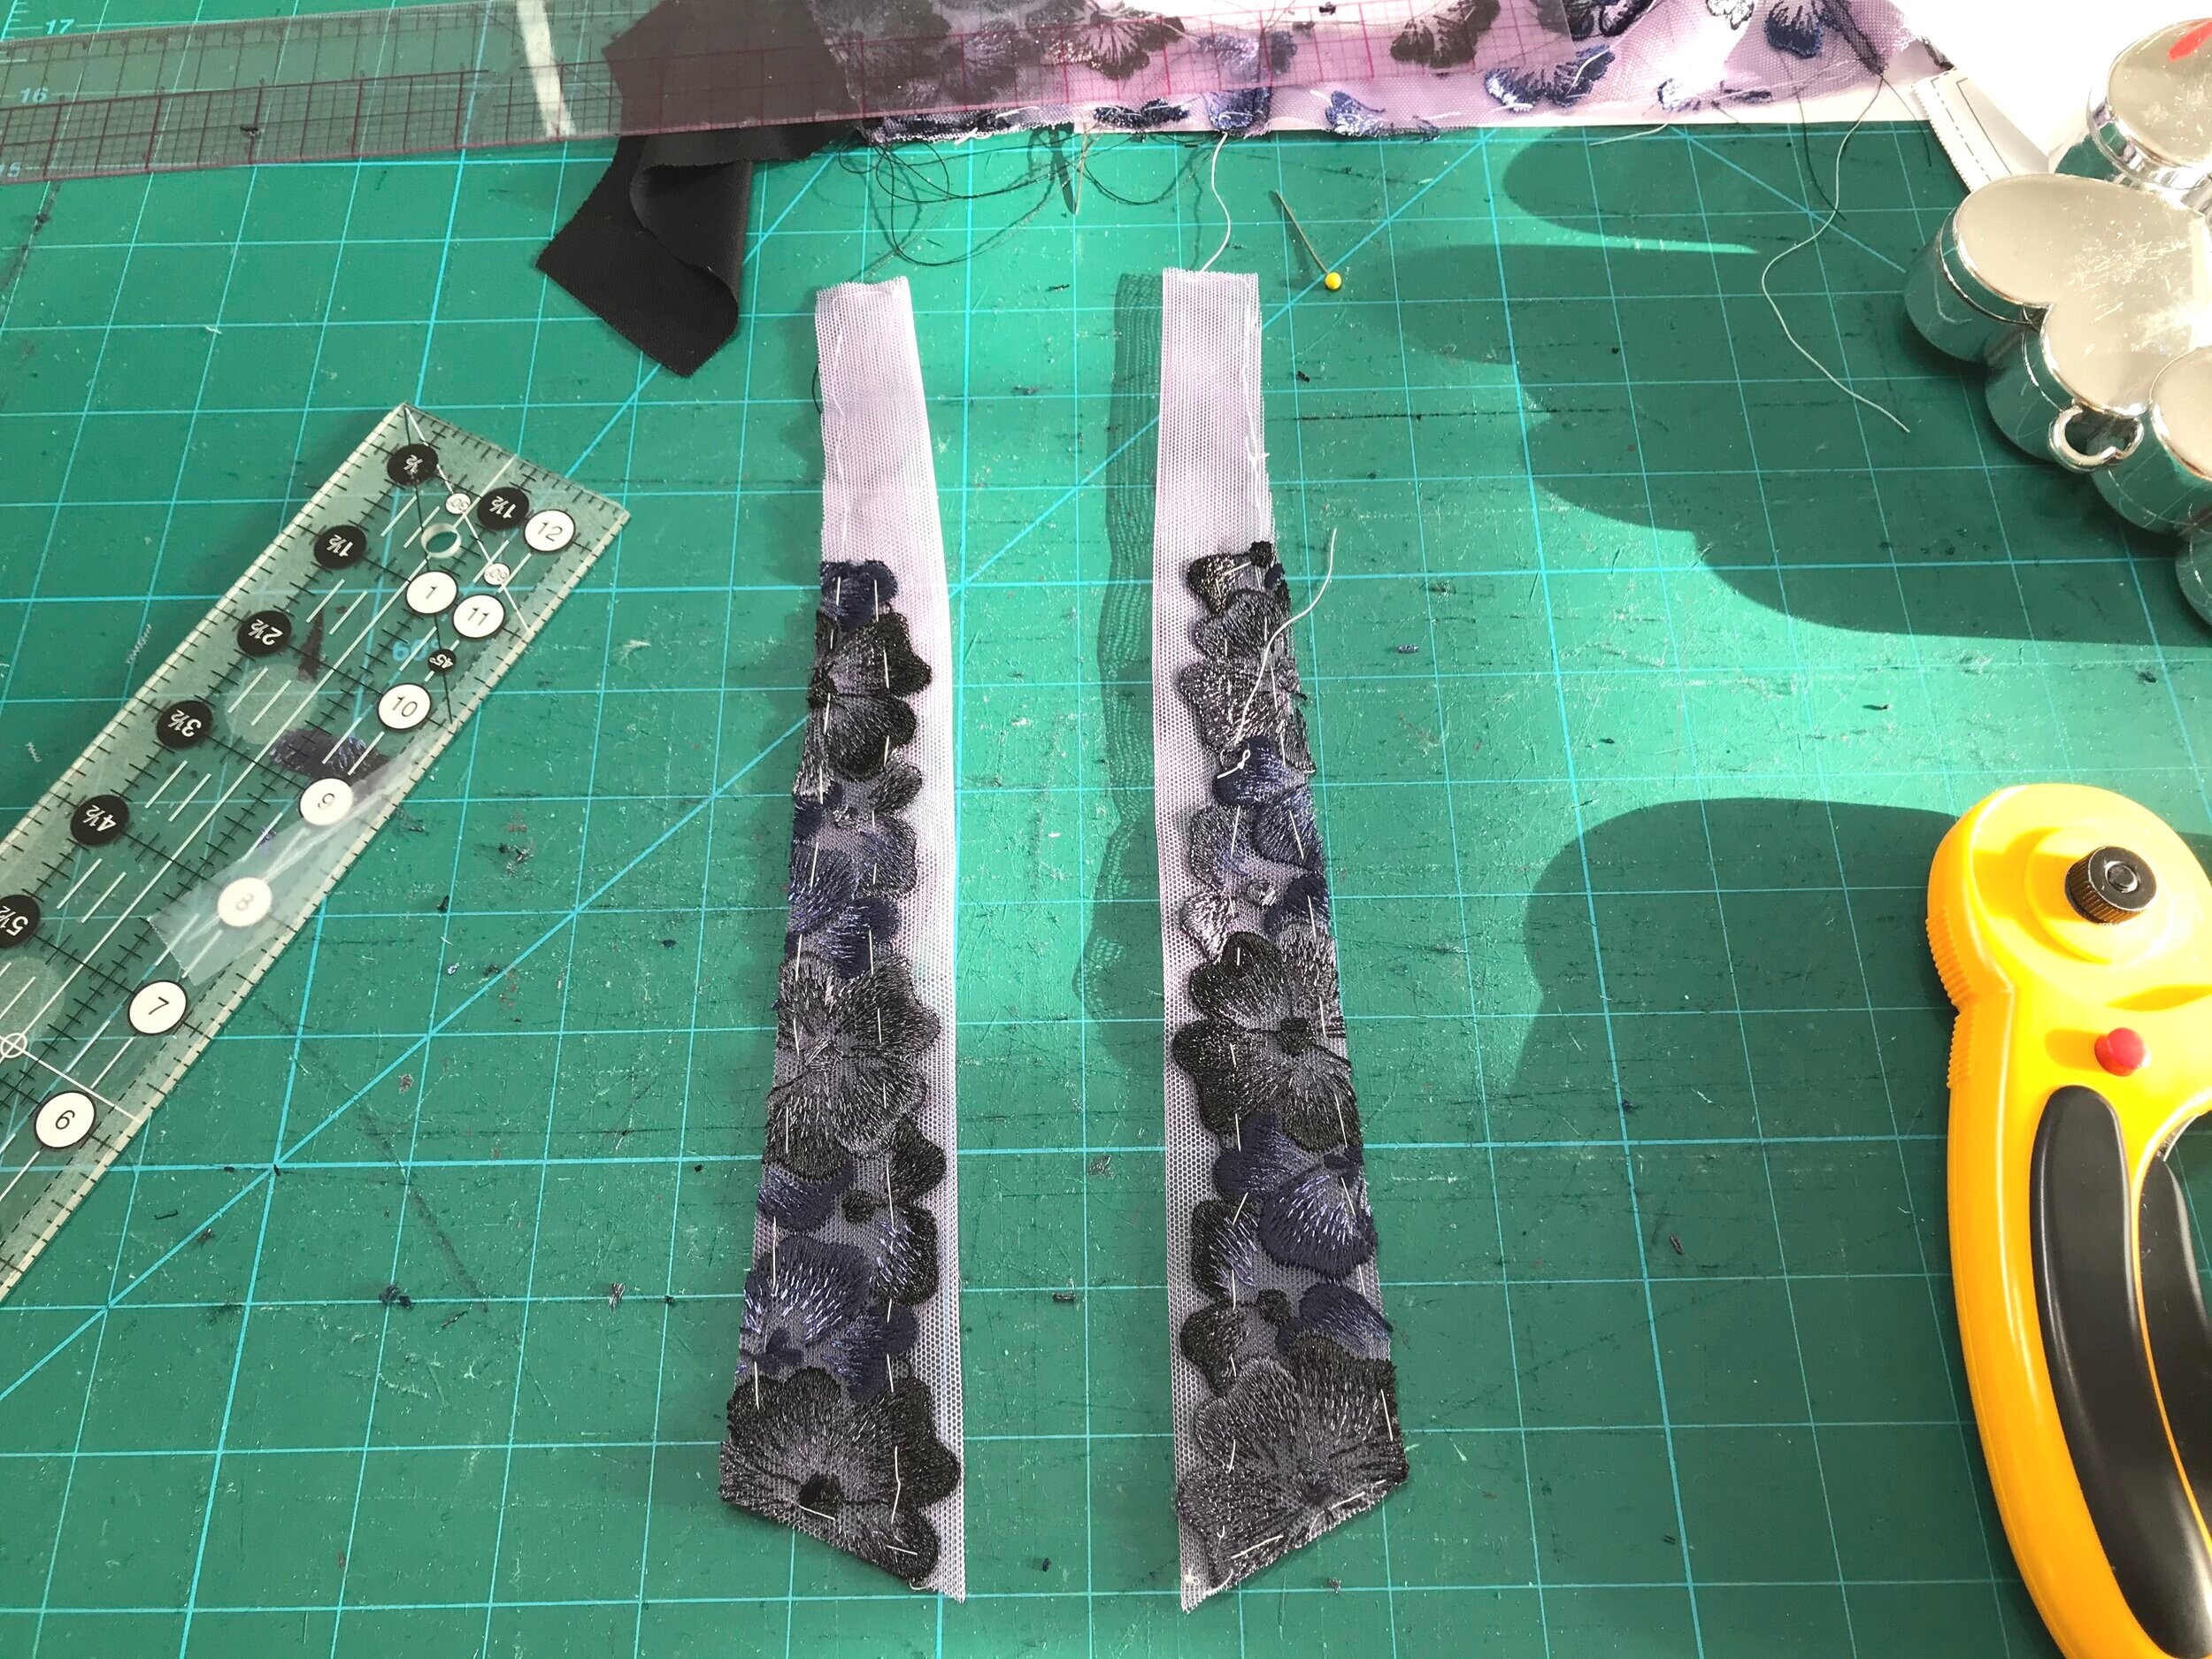
In the sketches I had envisaged using the lace for the bridge but the gathered tulle for the side frame. Once I had started gathering I realised I wouldn’t have enough tulle for this. The leaves on the scallop edge are only attached along the vein unlike lower down the lace and are quite bulky. To make the bridge I used just the bottom section which has no leaves and the attached leaves from the middle section for the side frame.

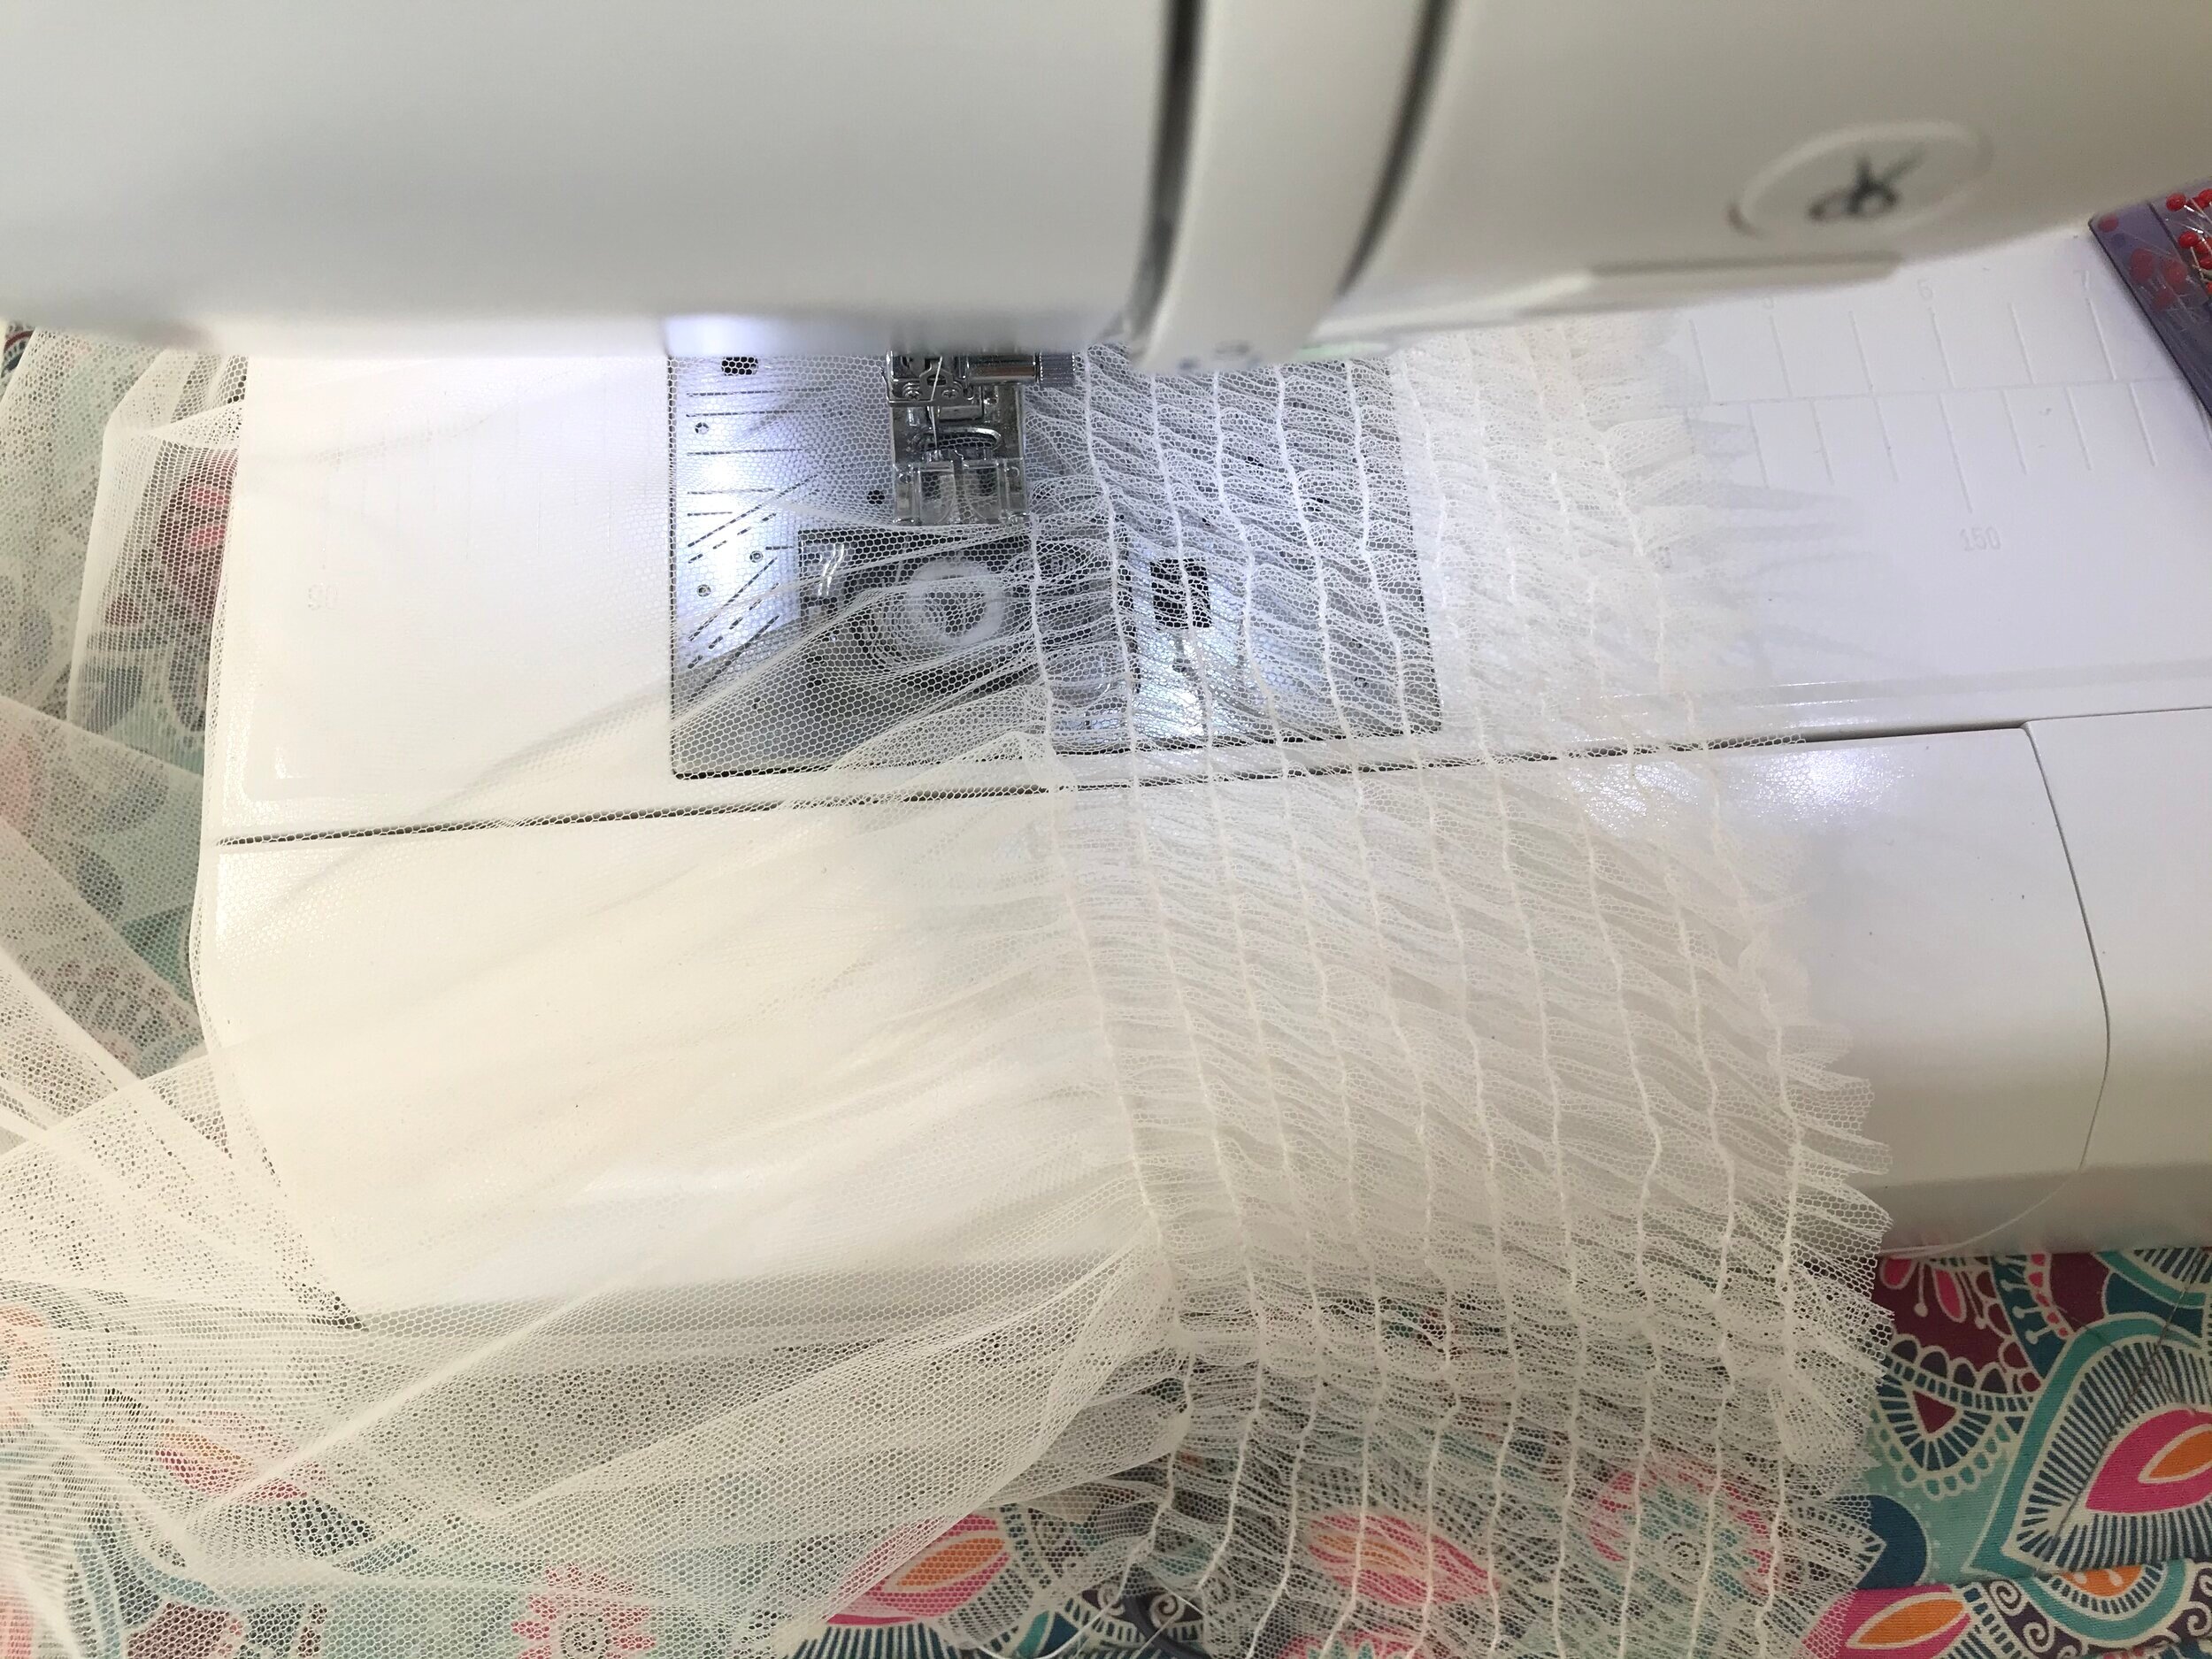
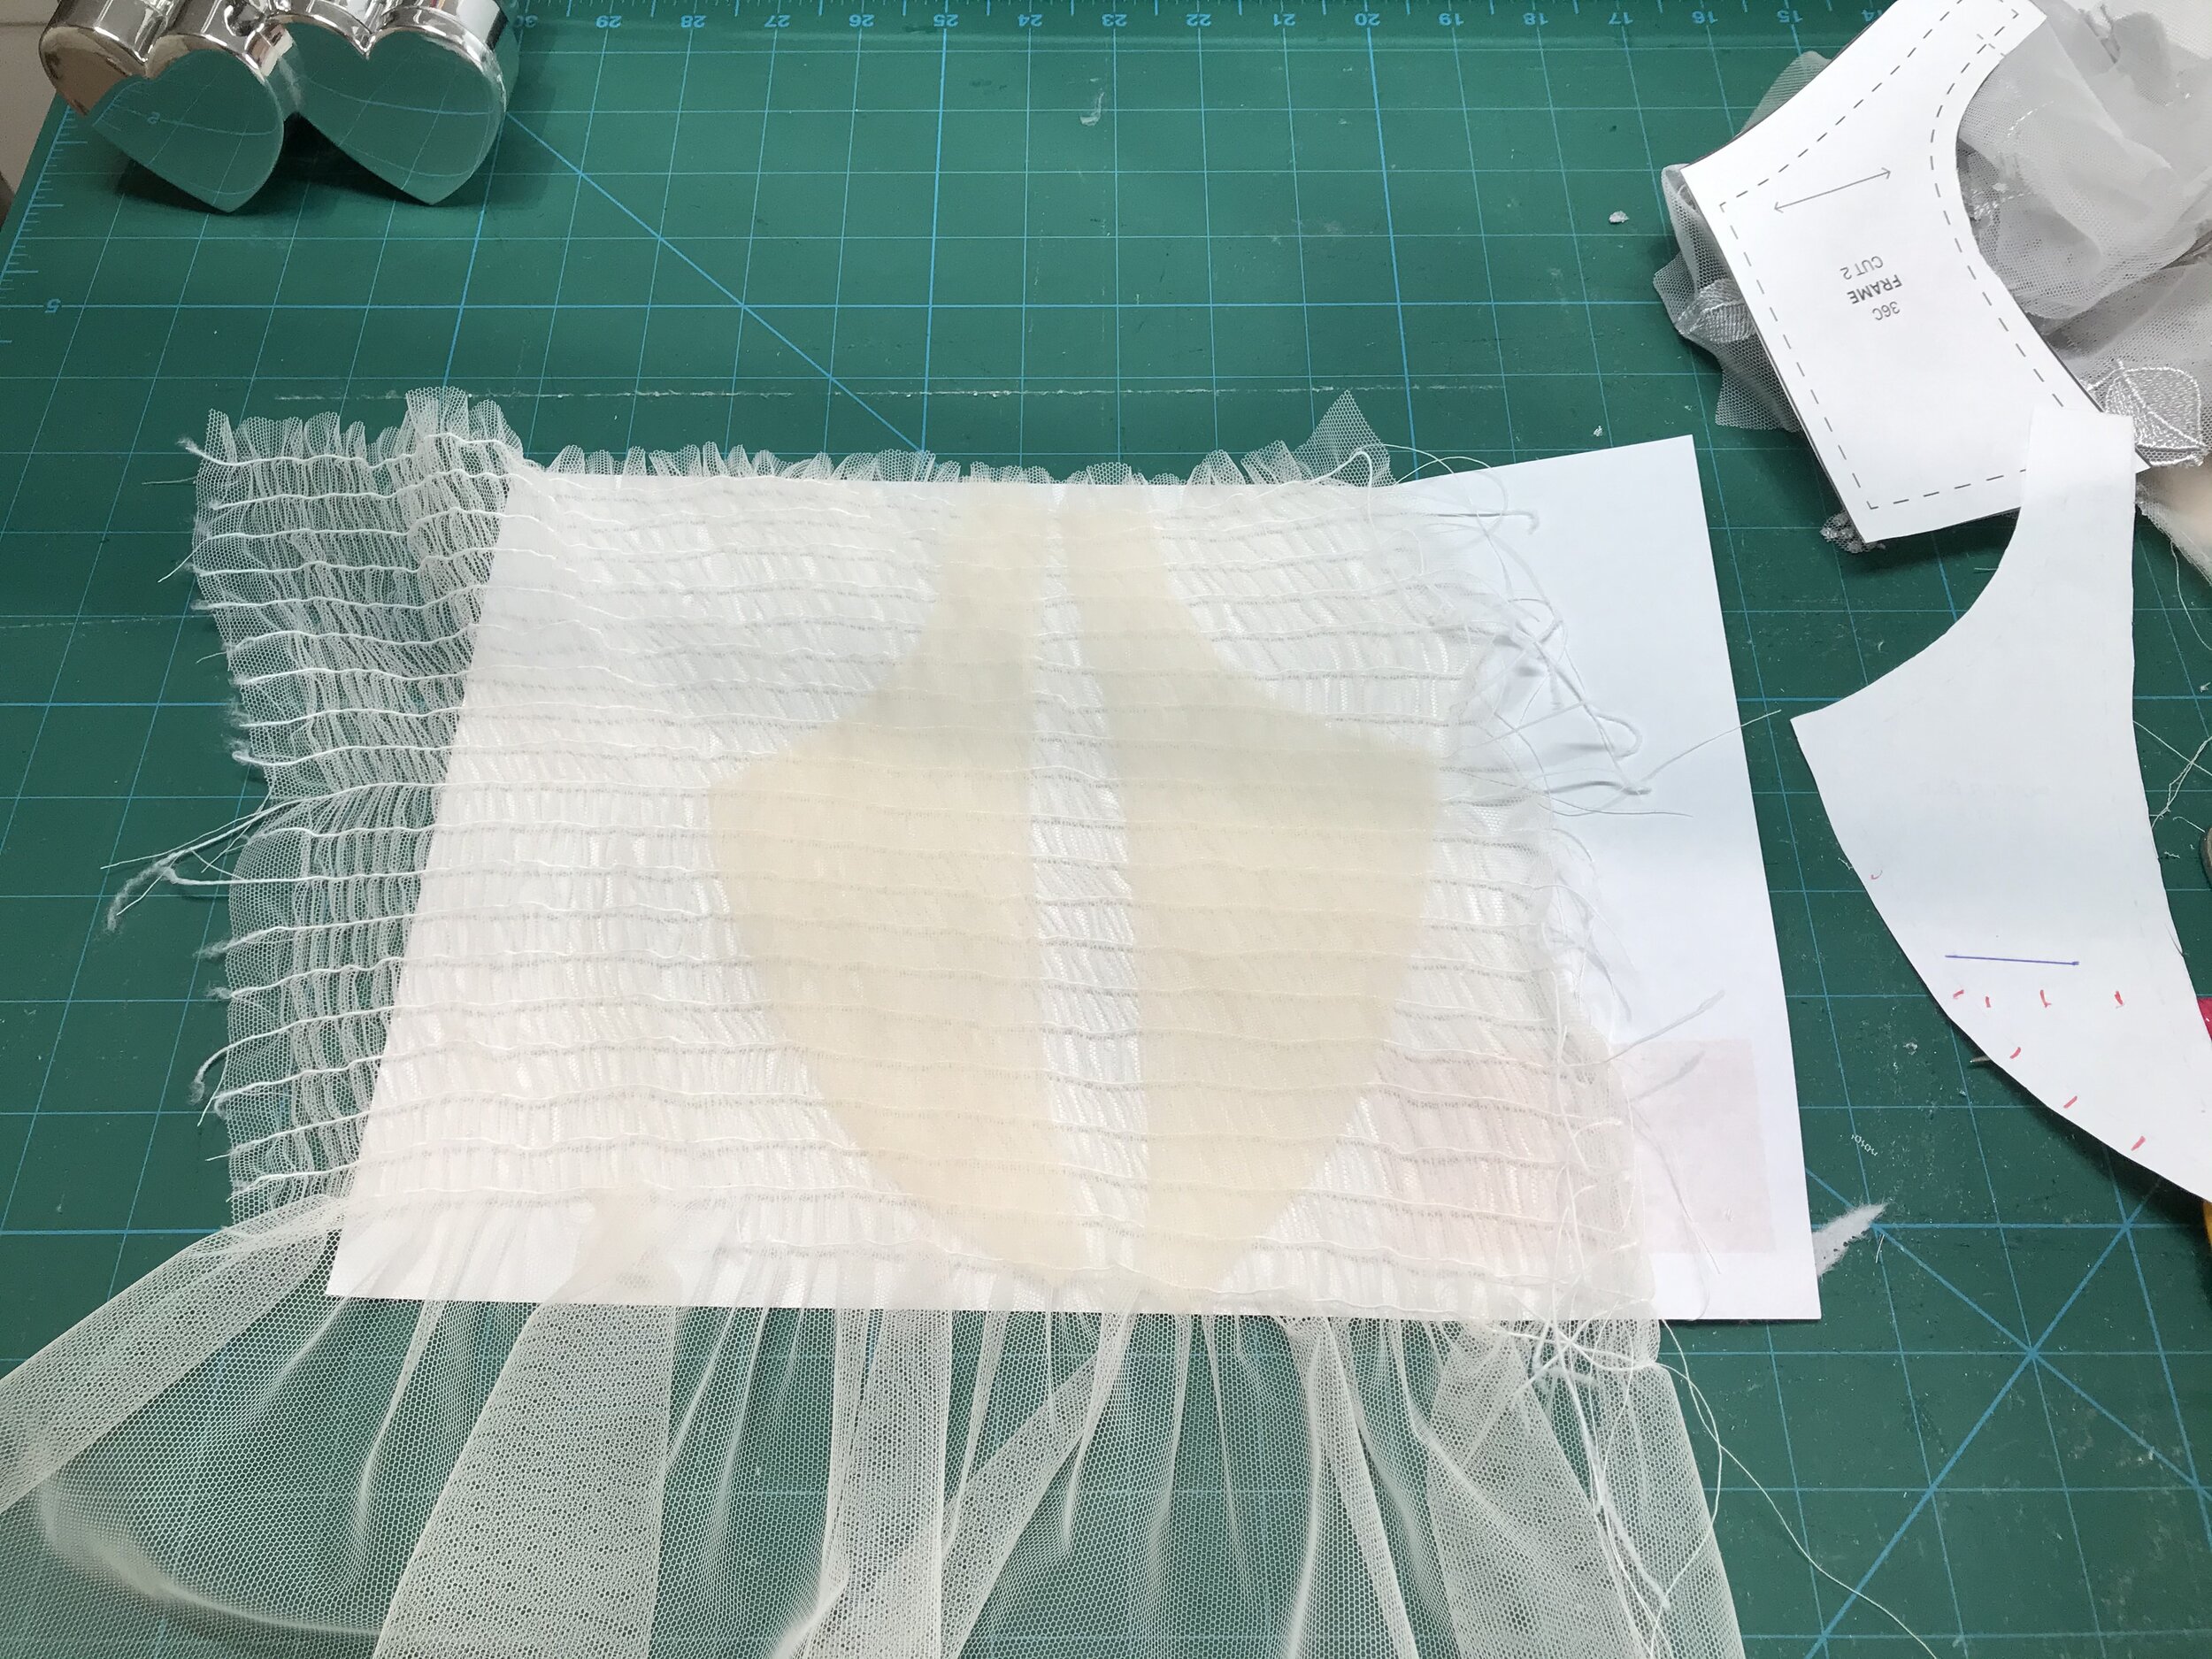
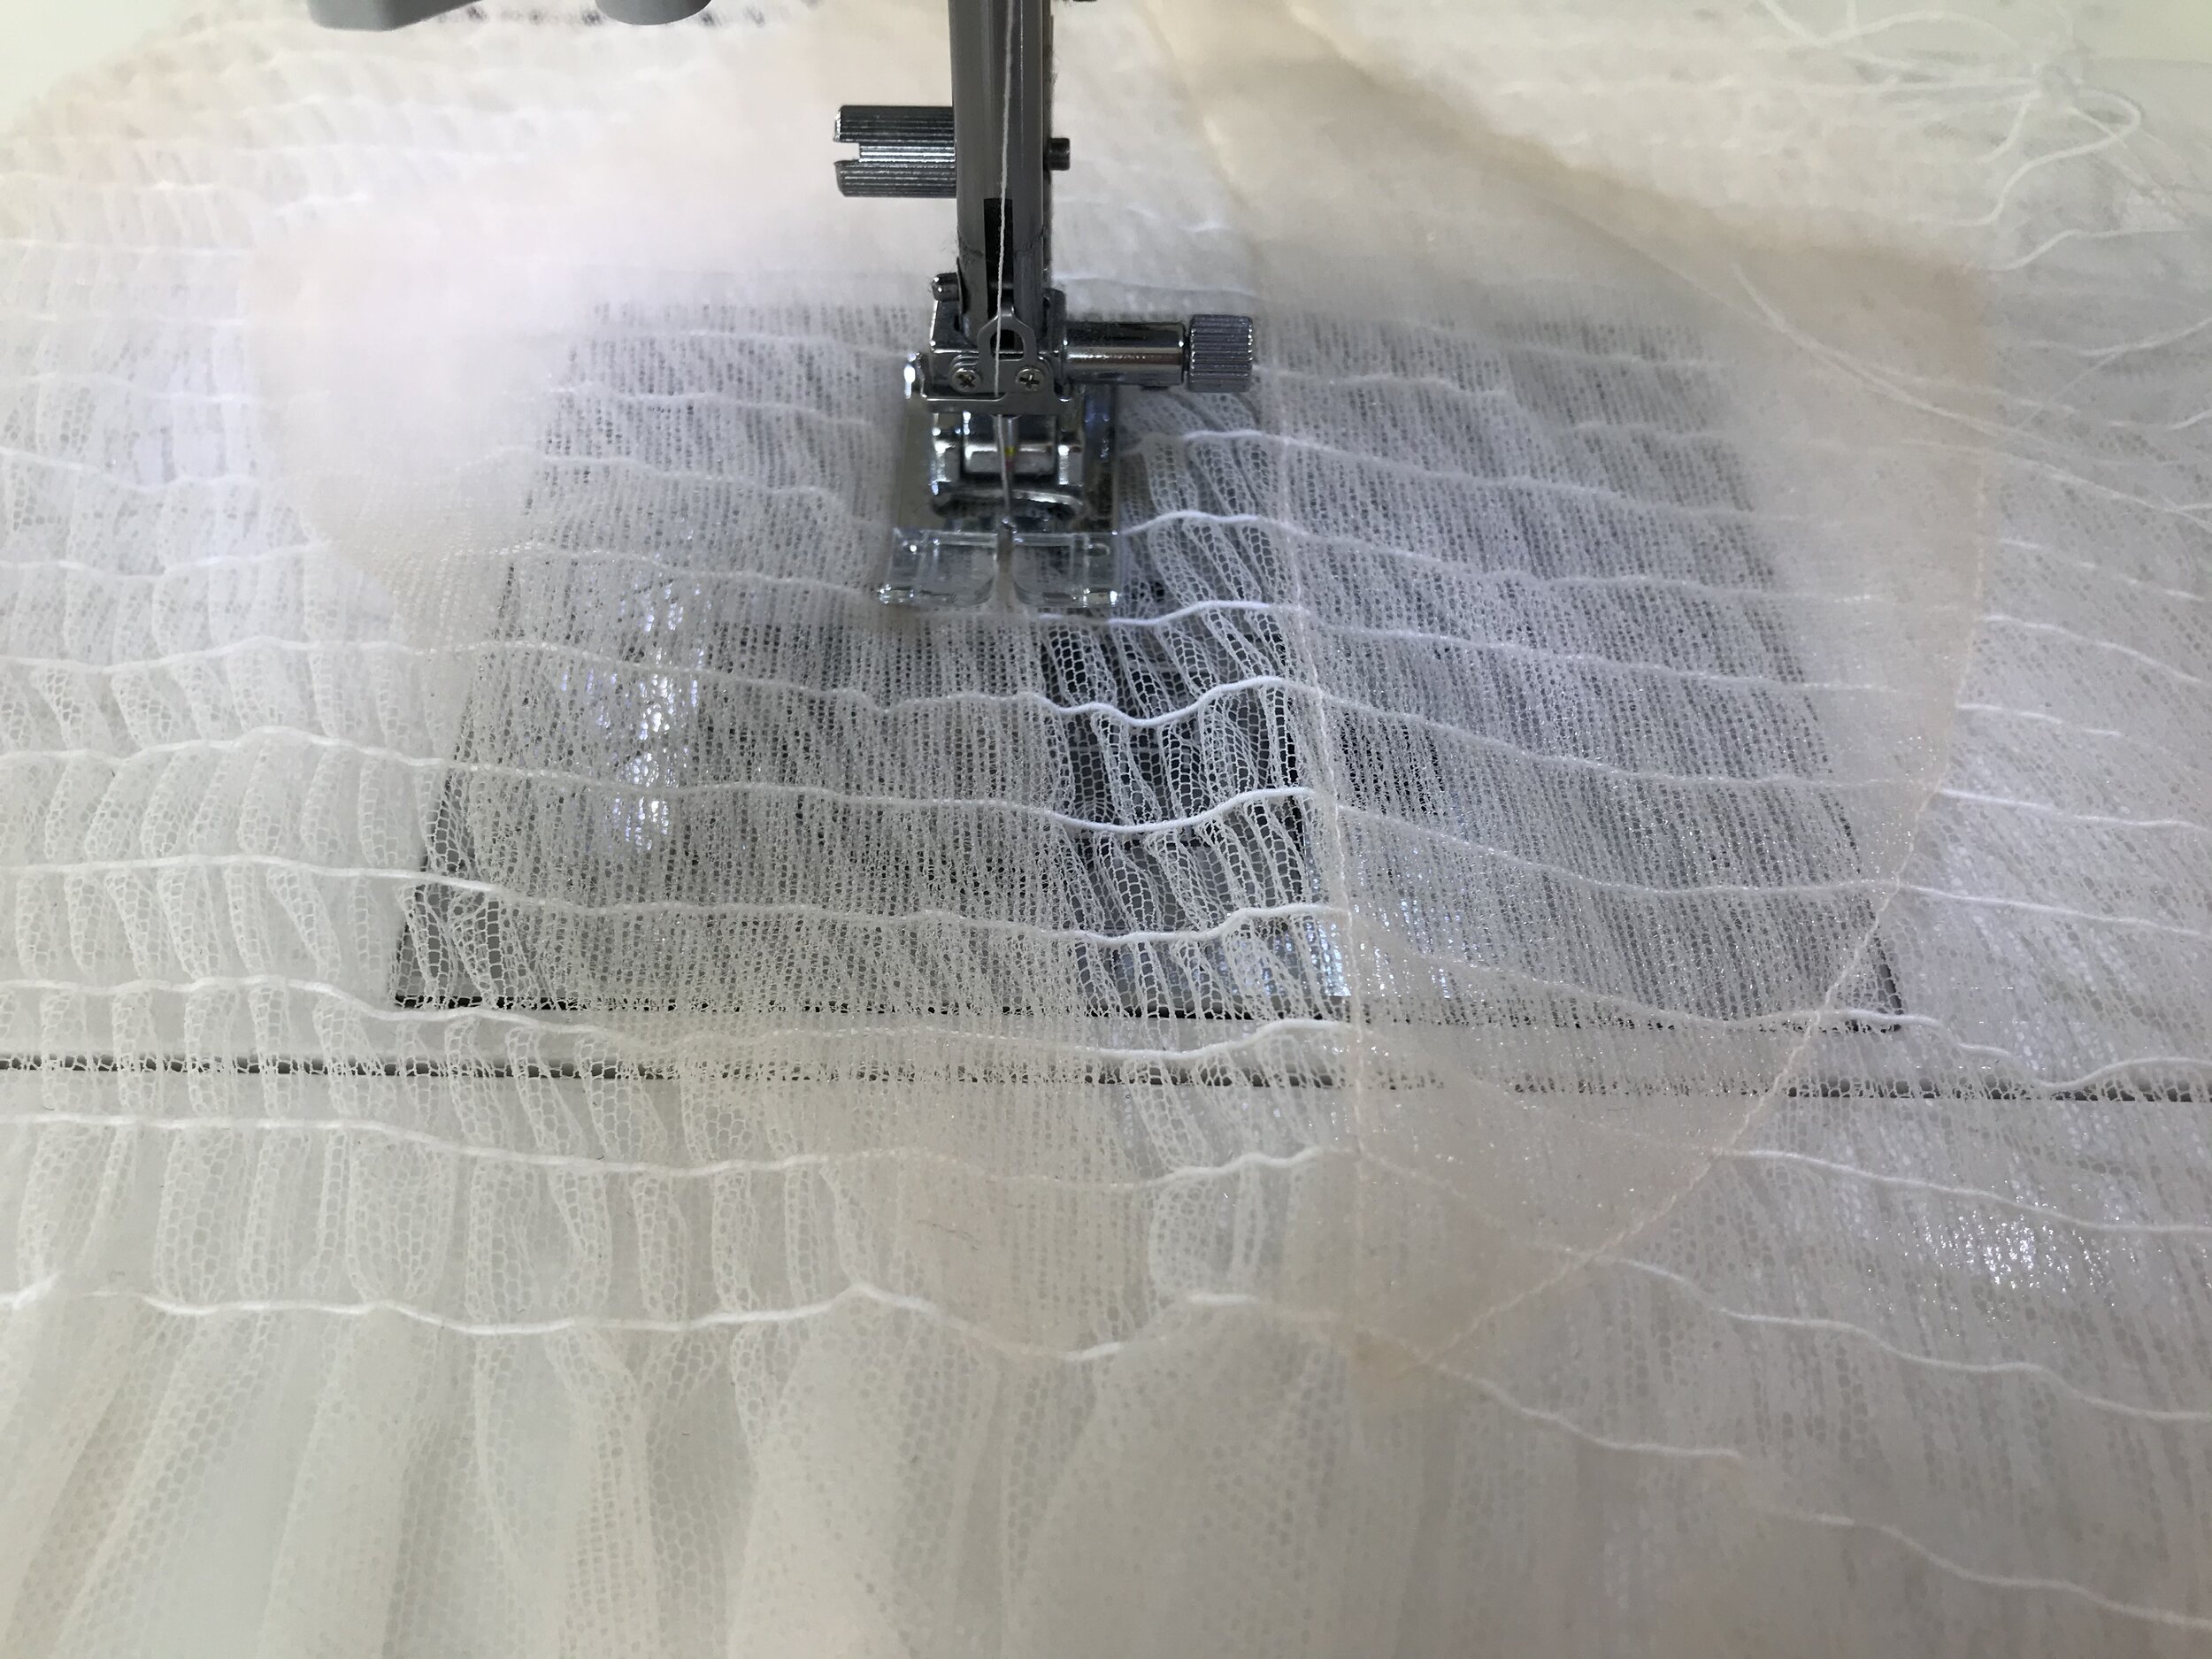
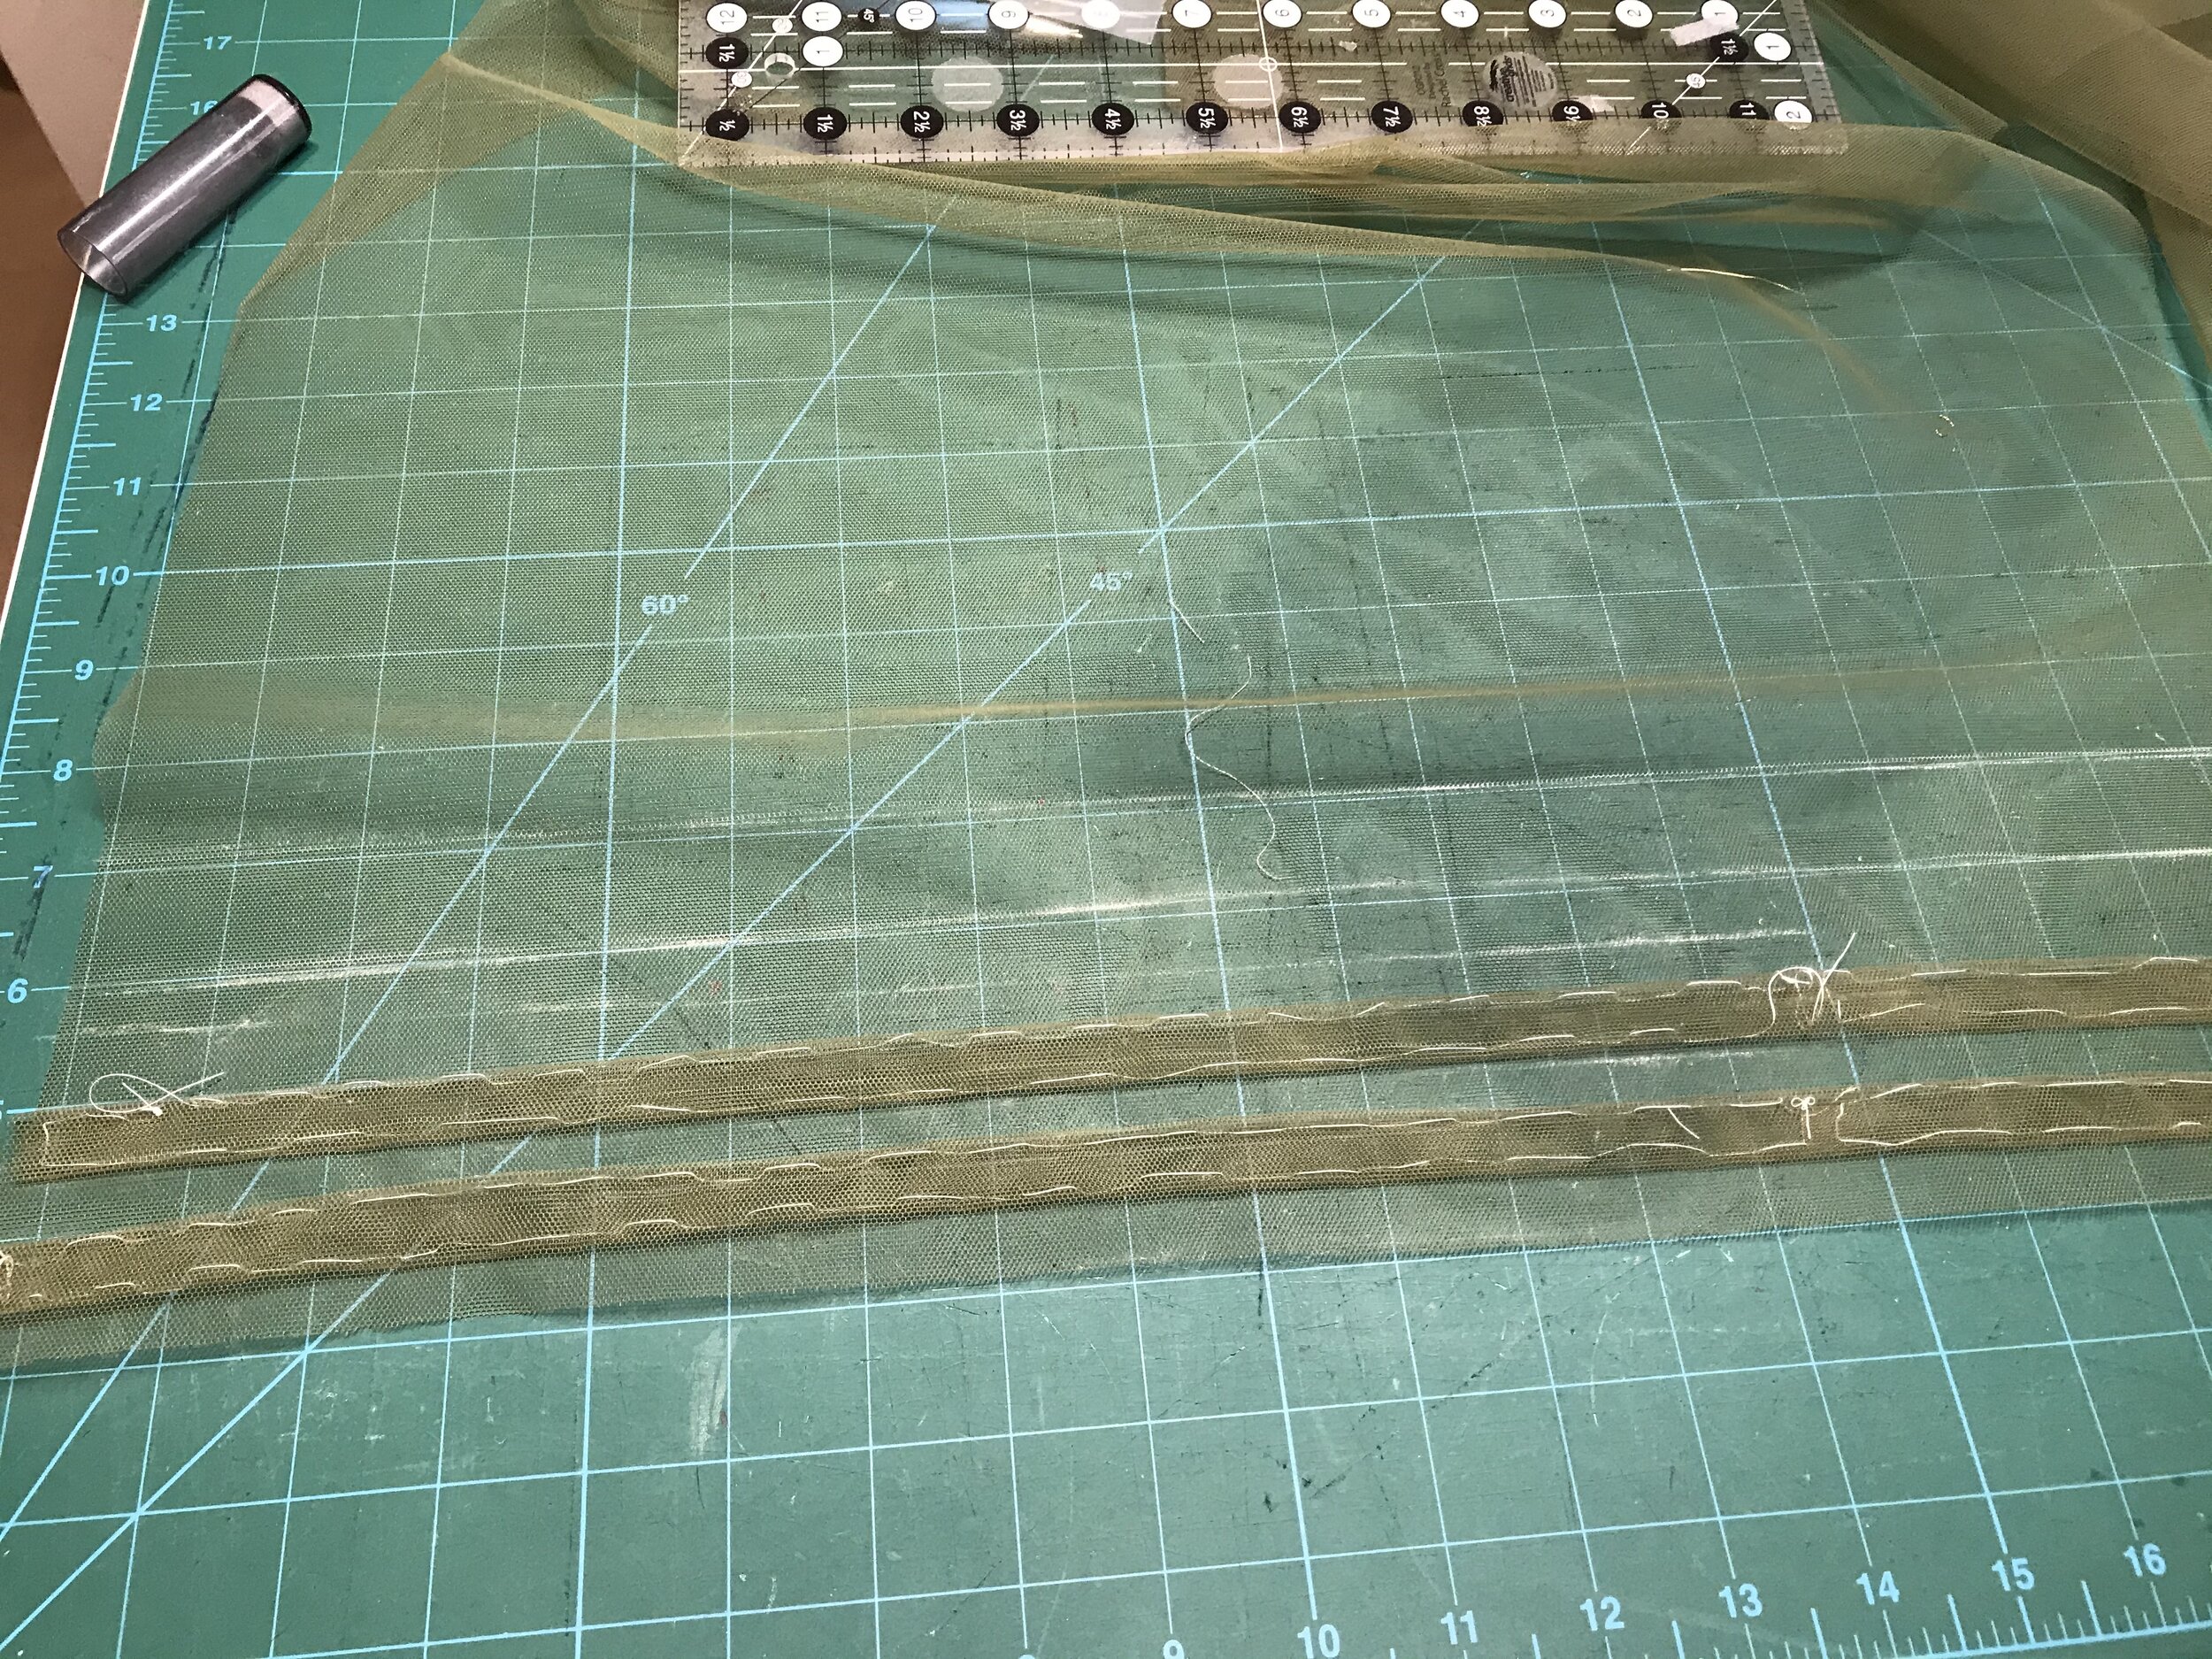
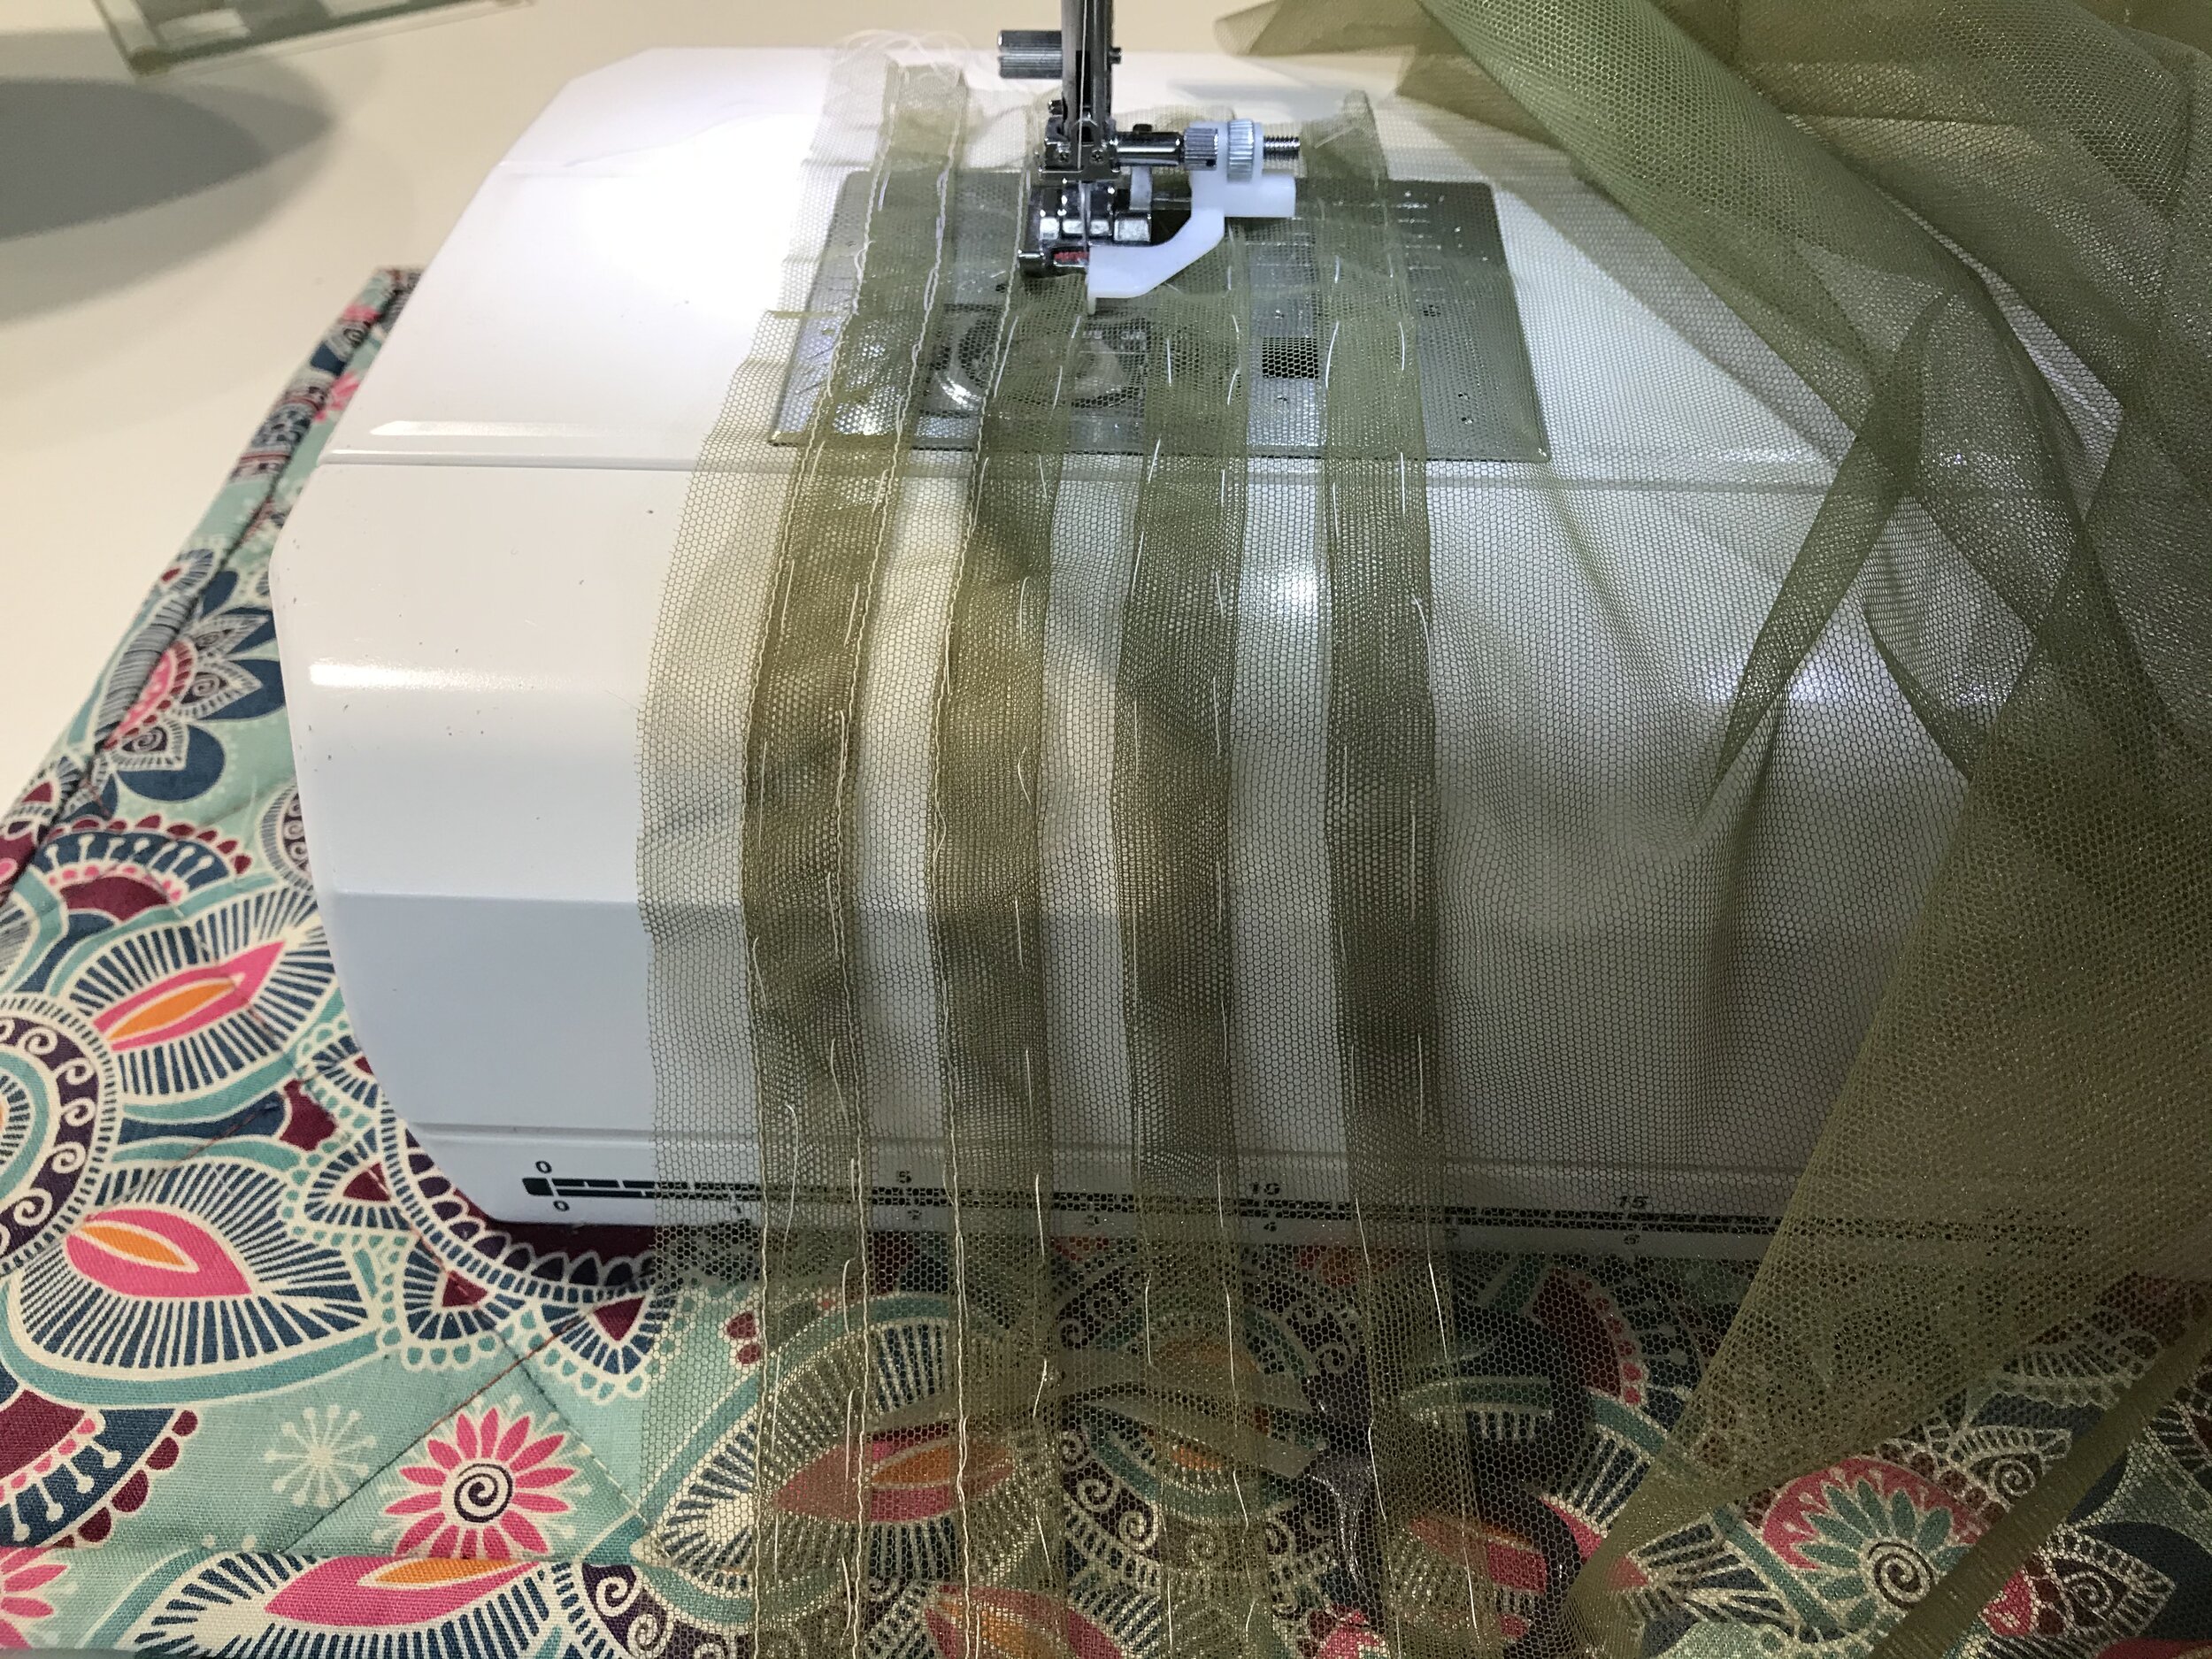
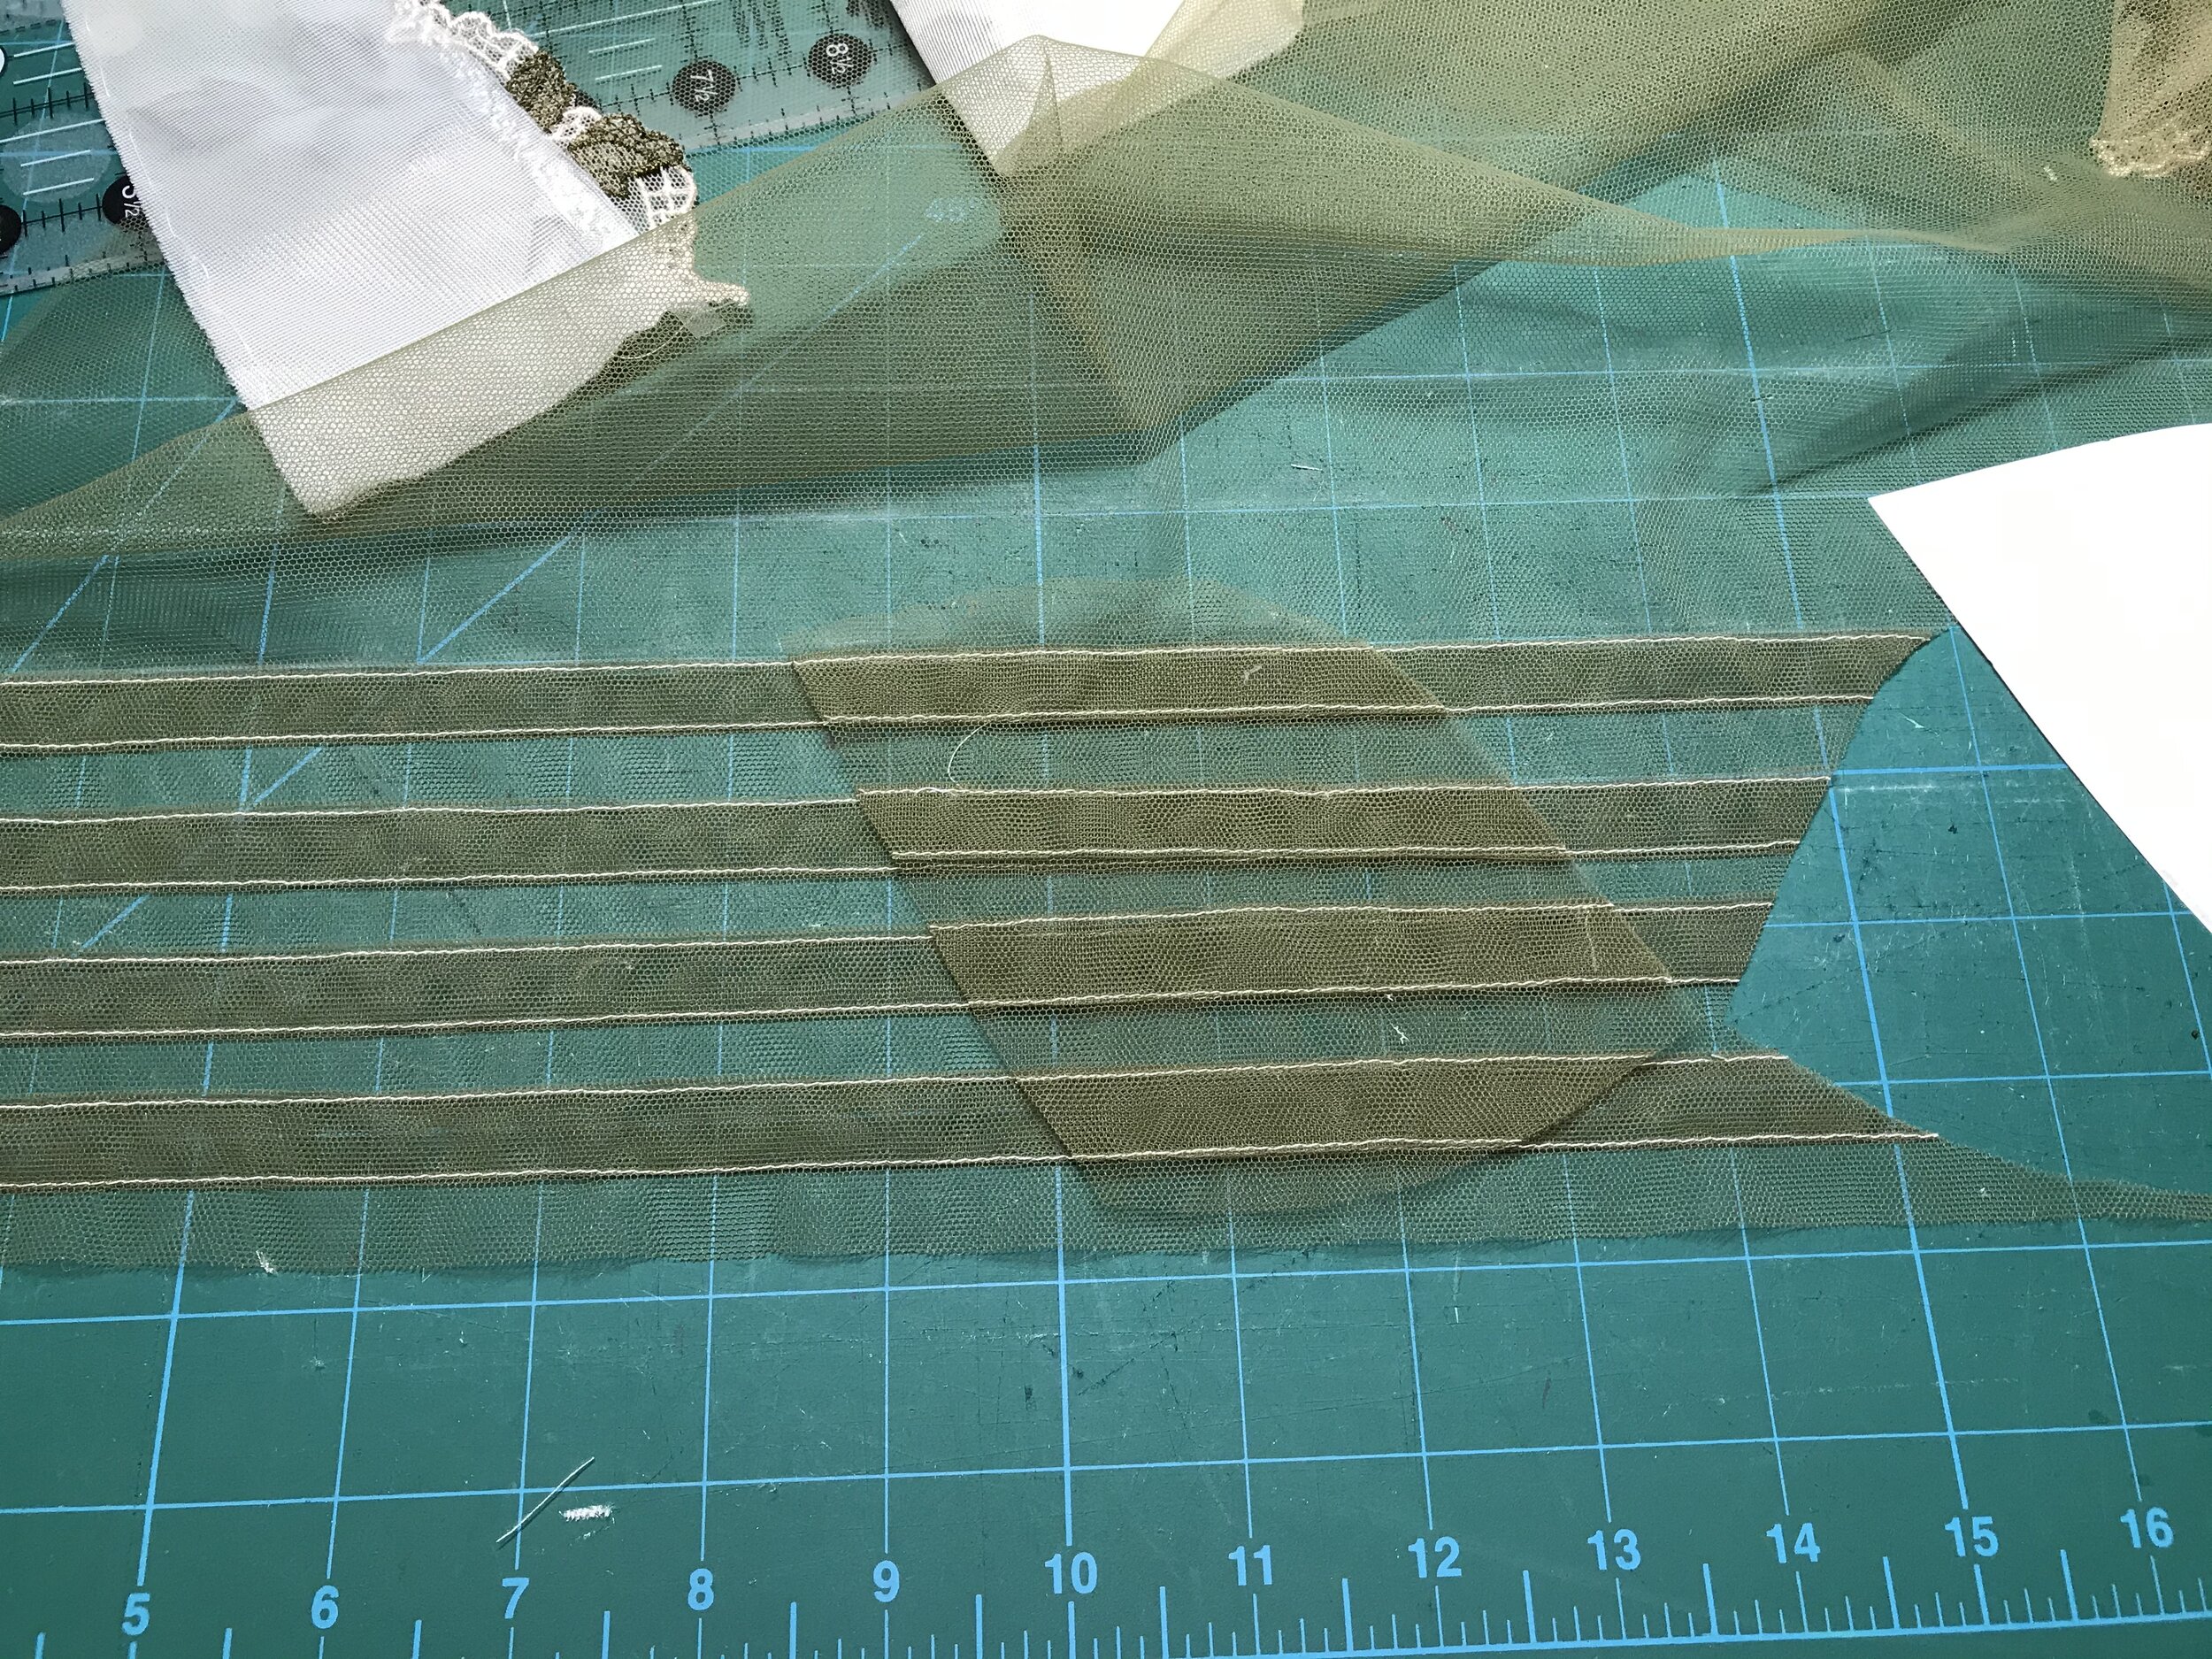
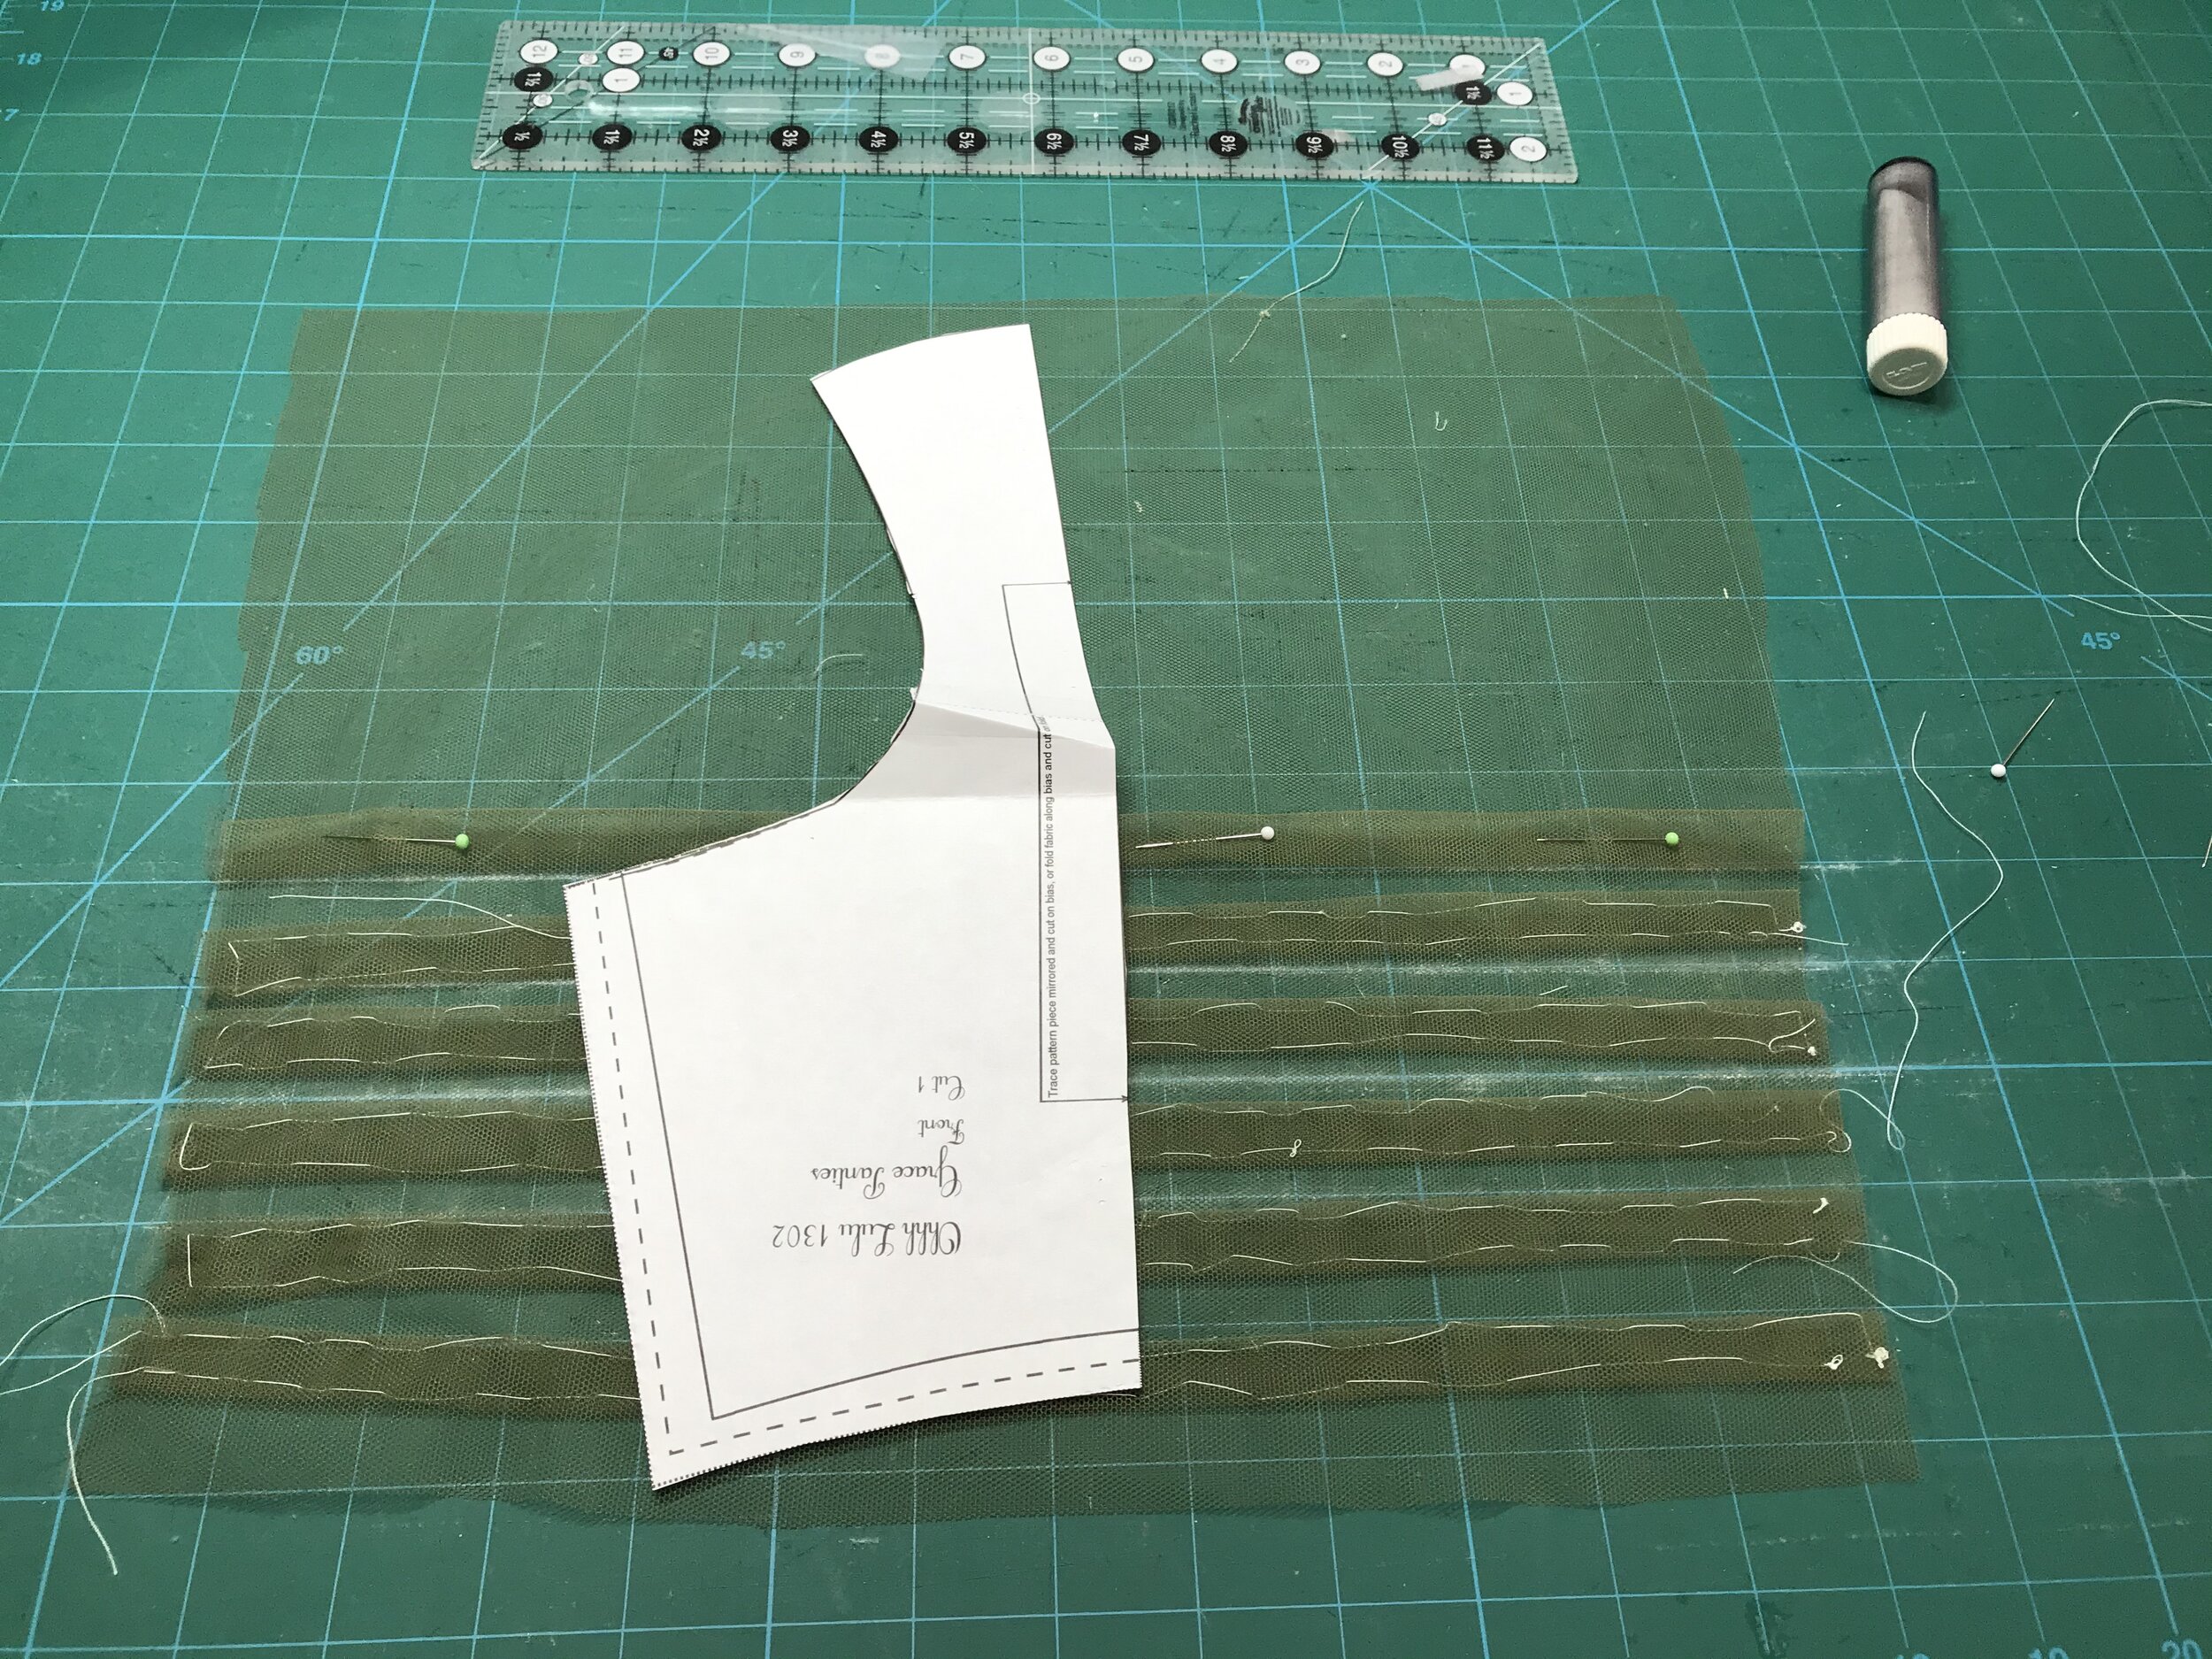
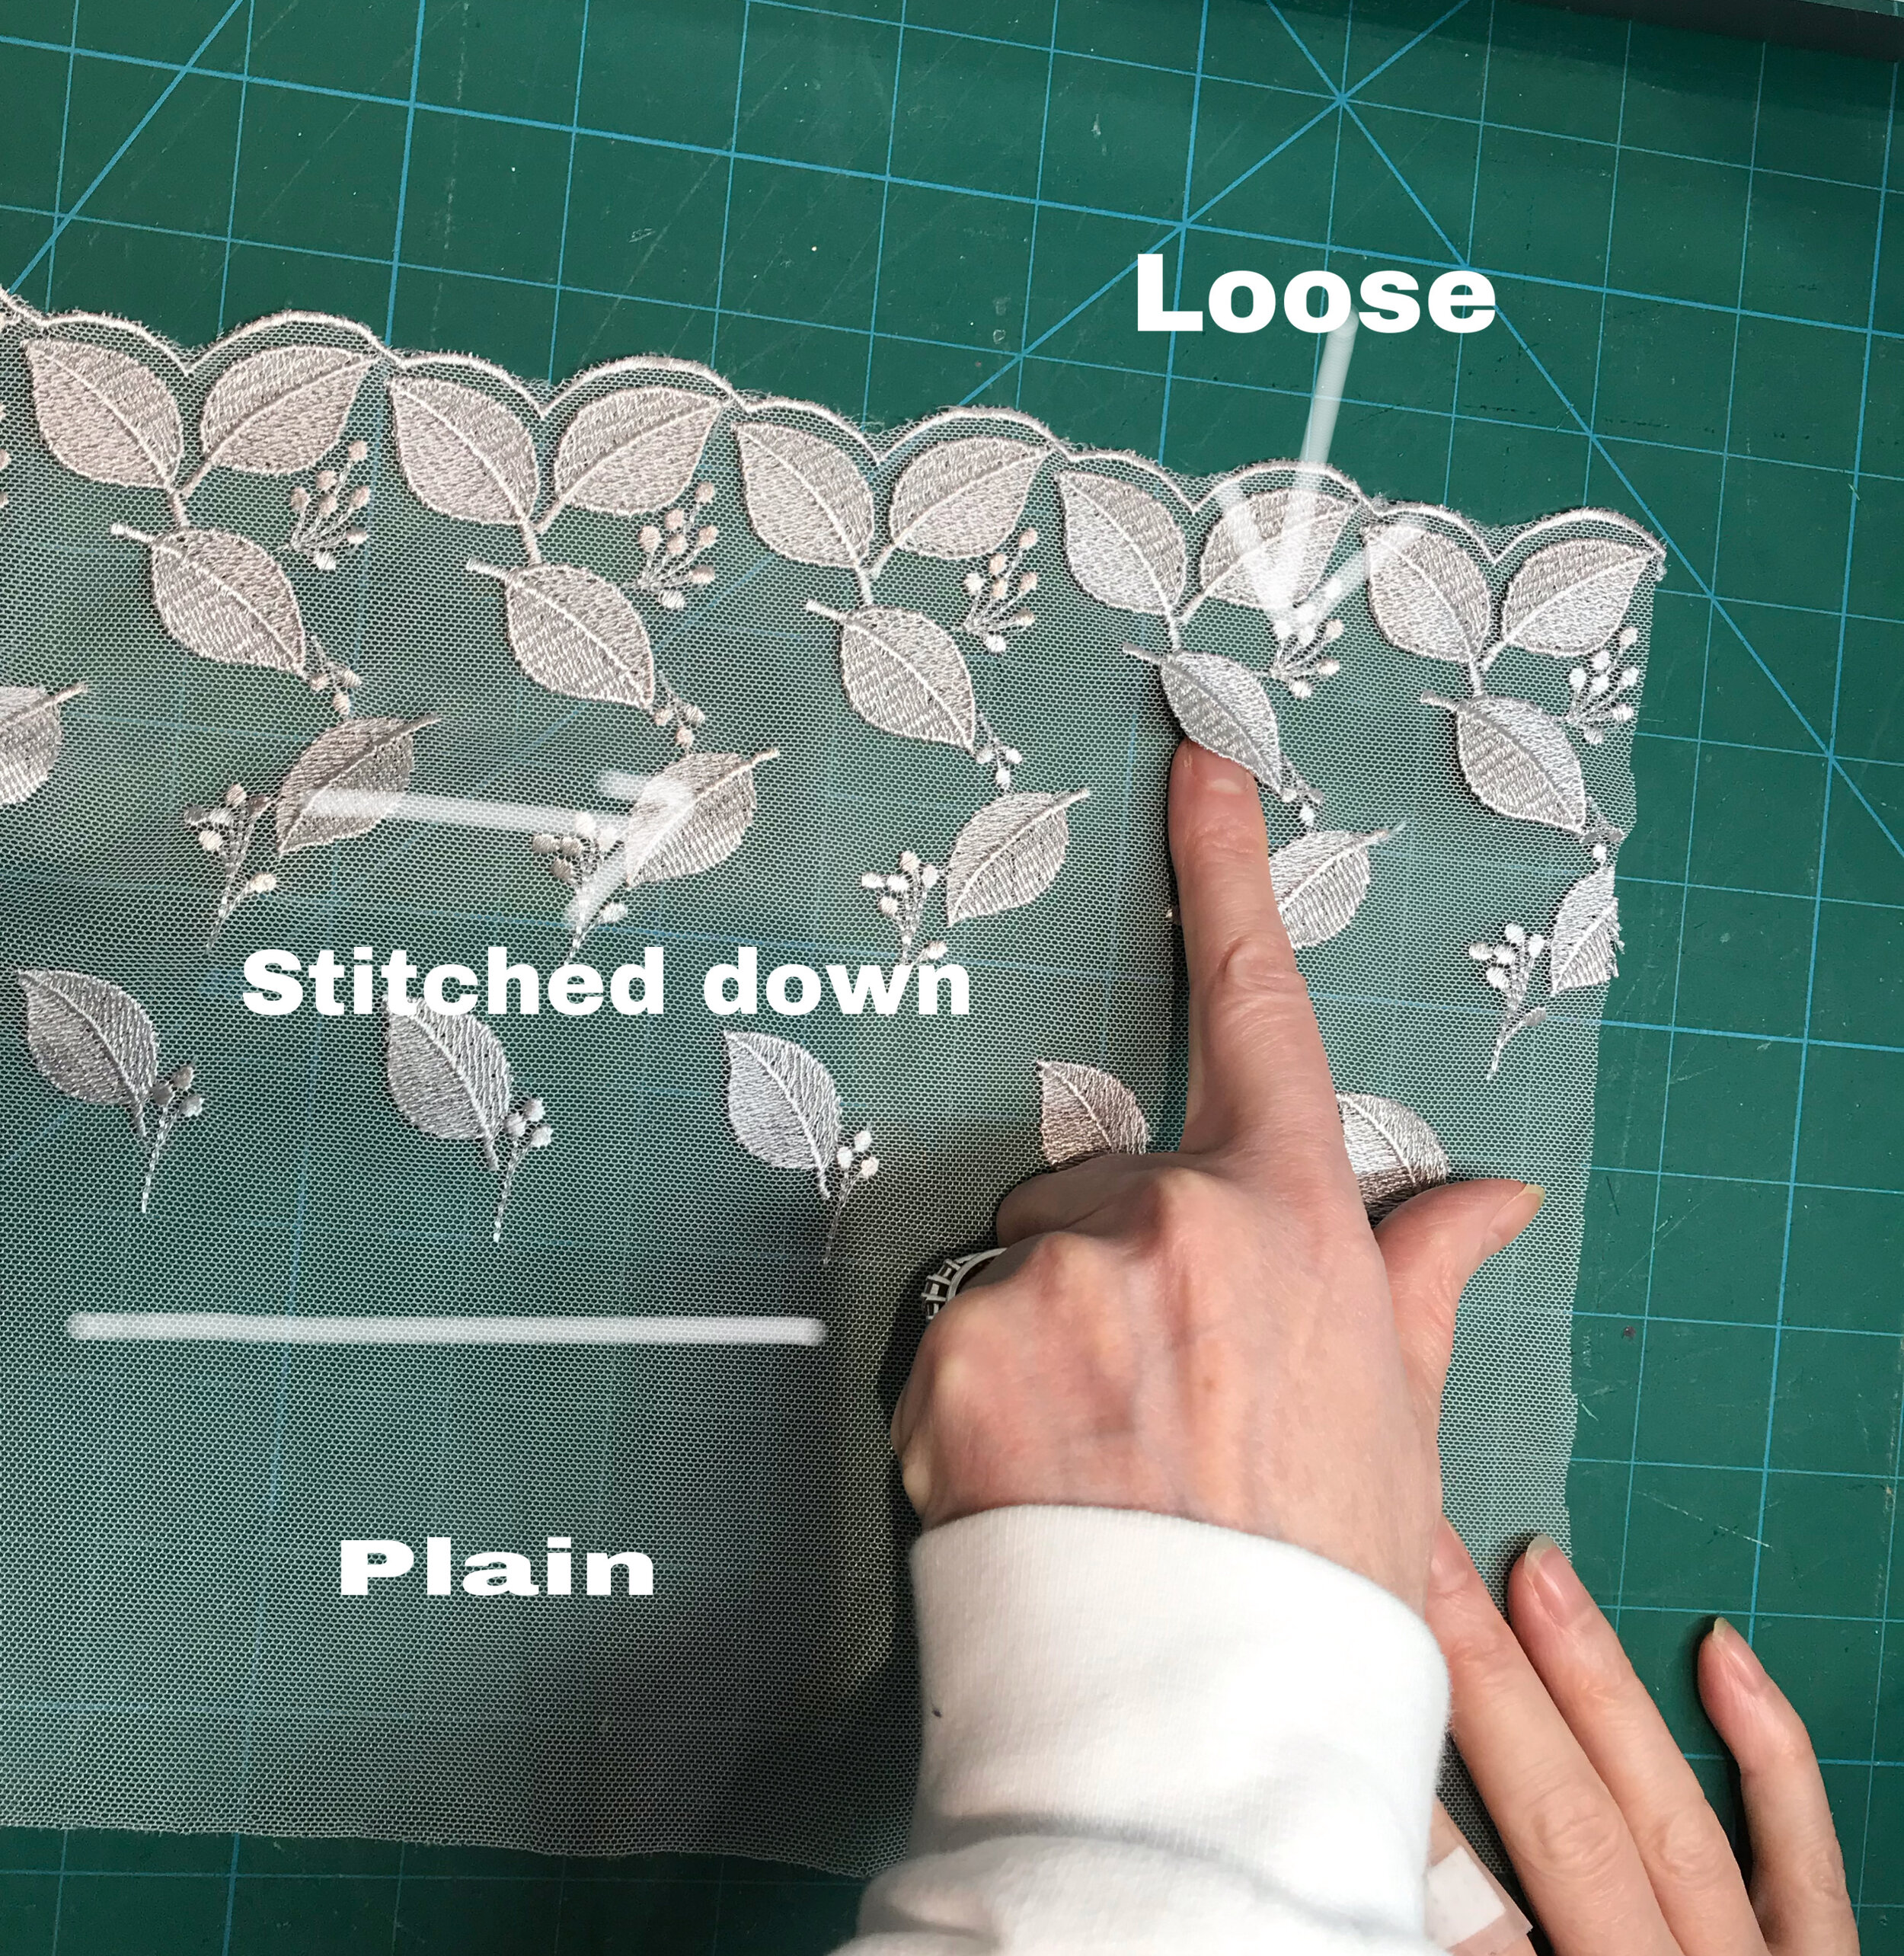
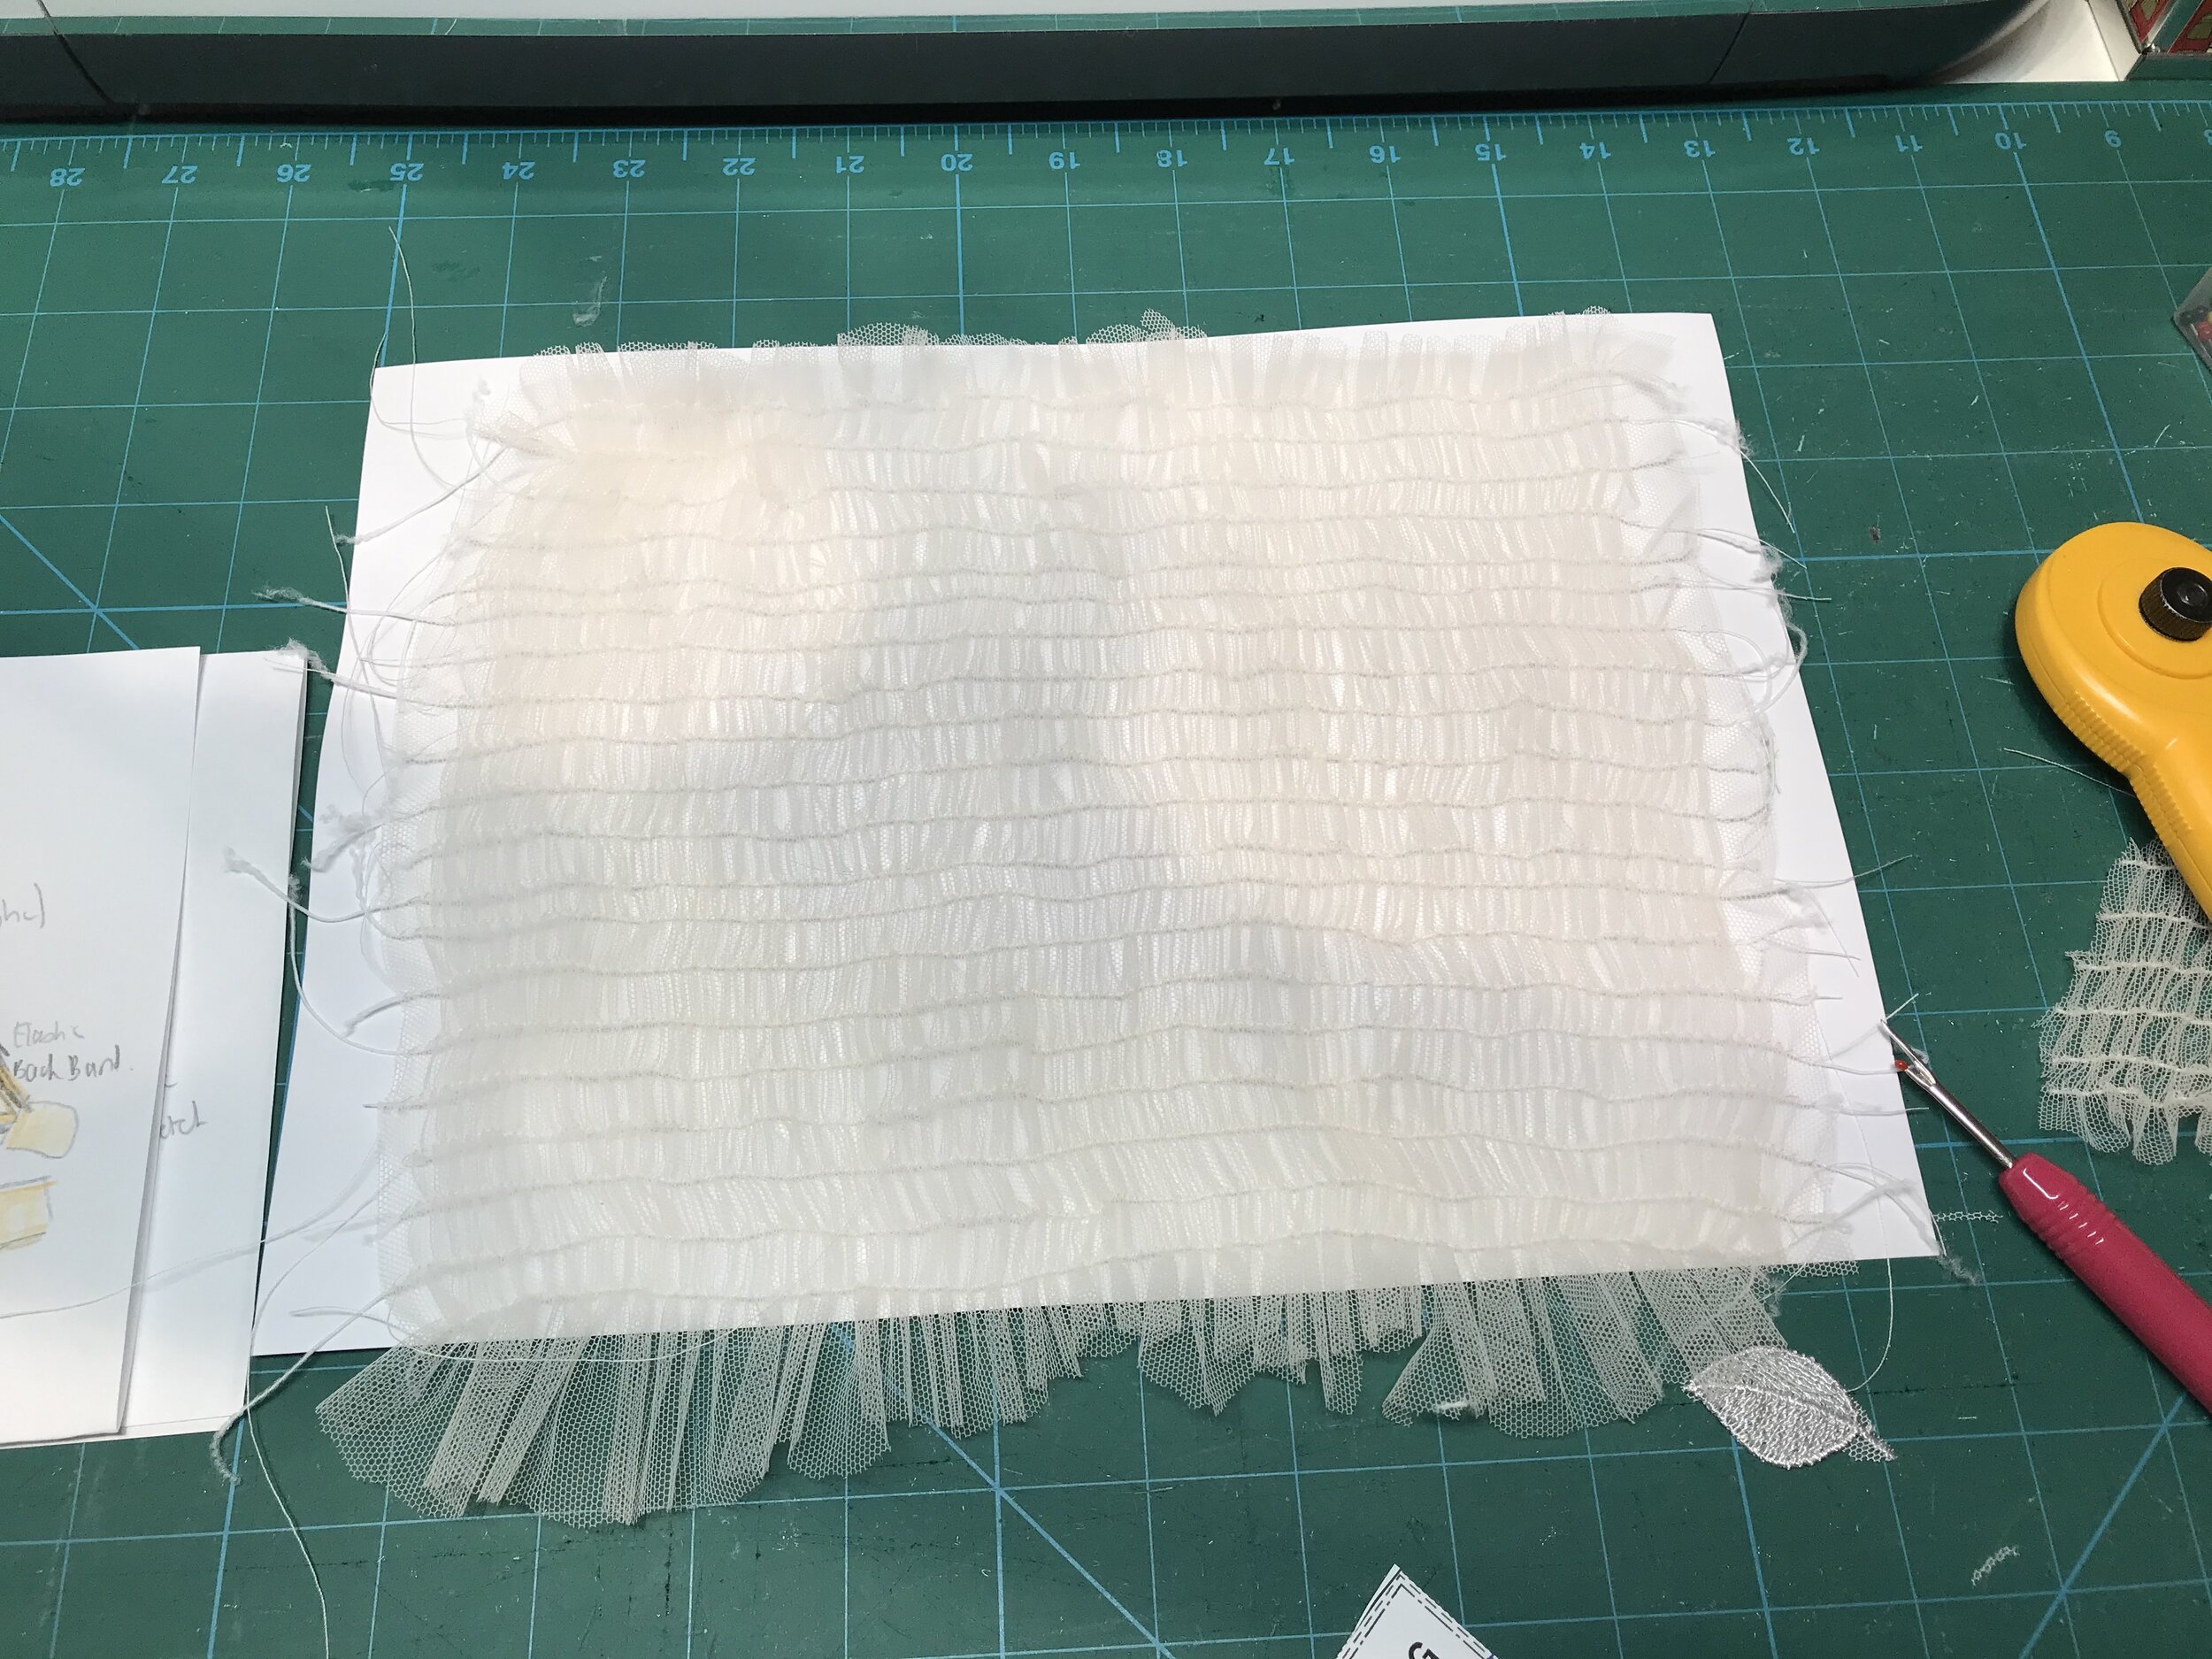
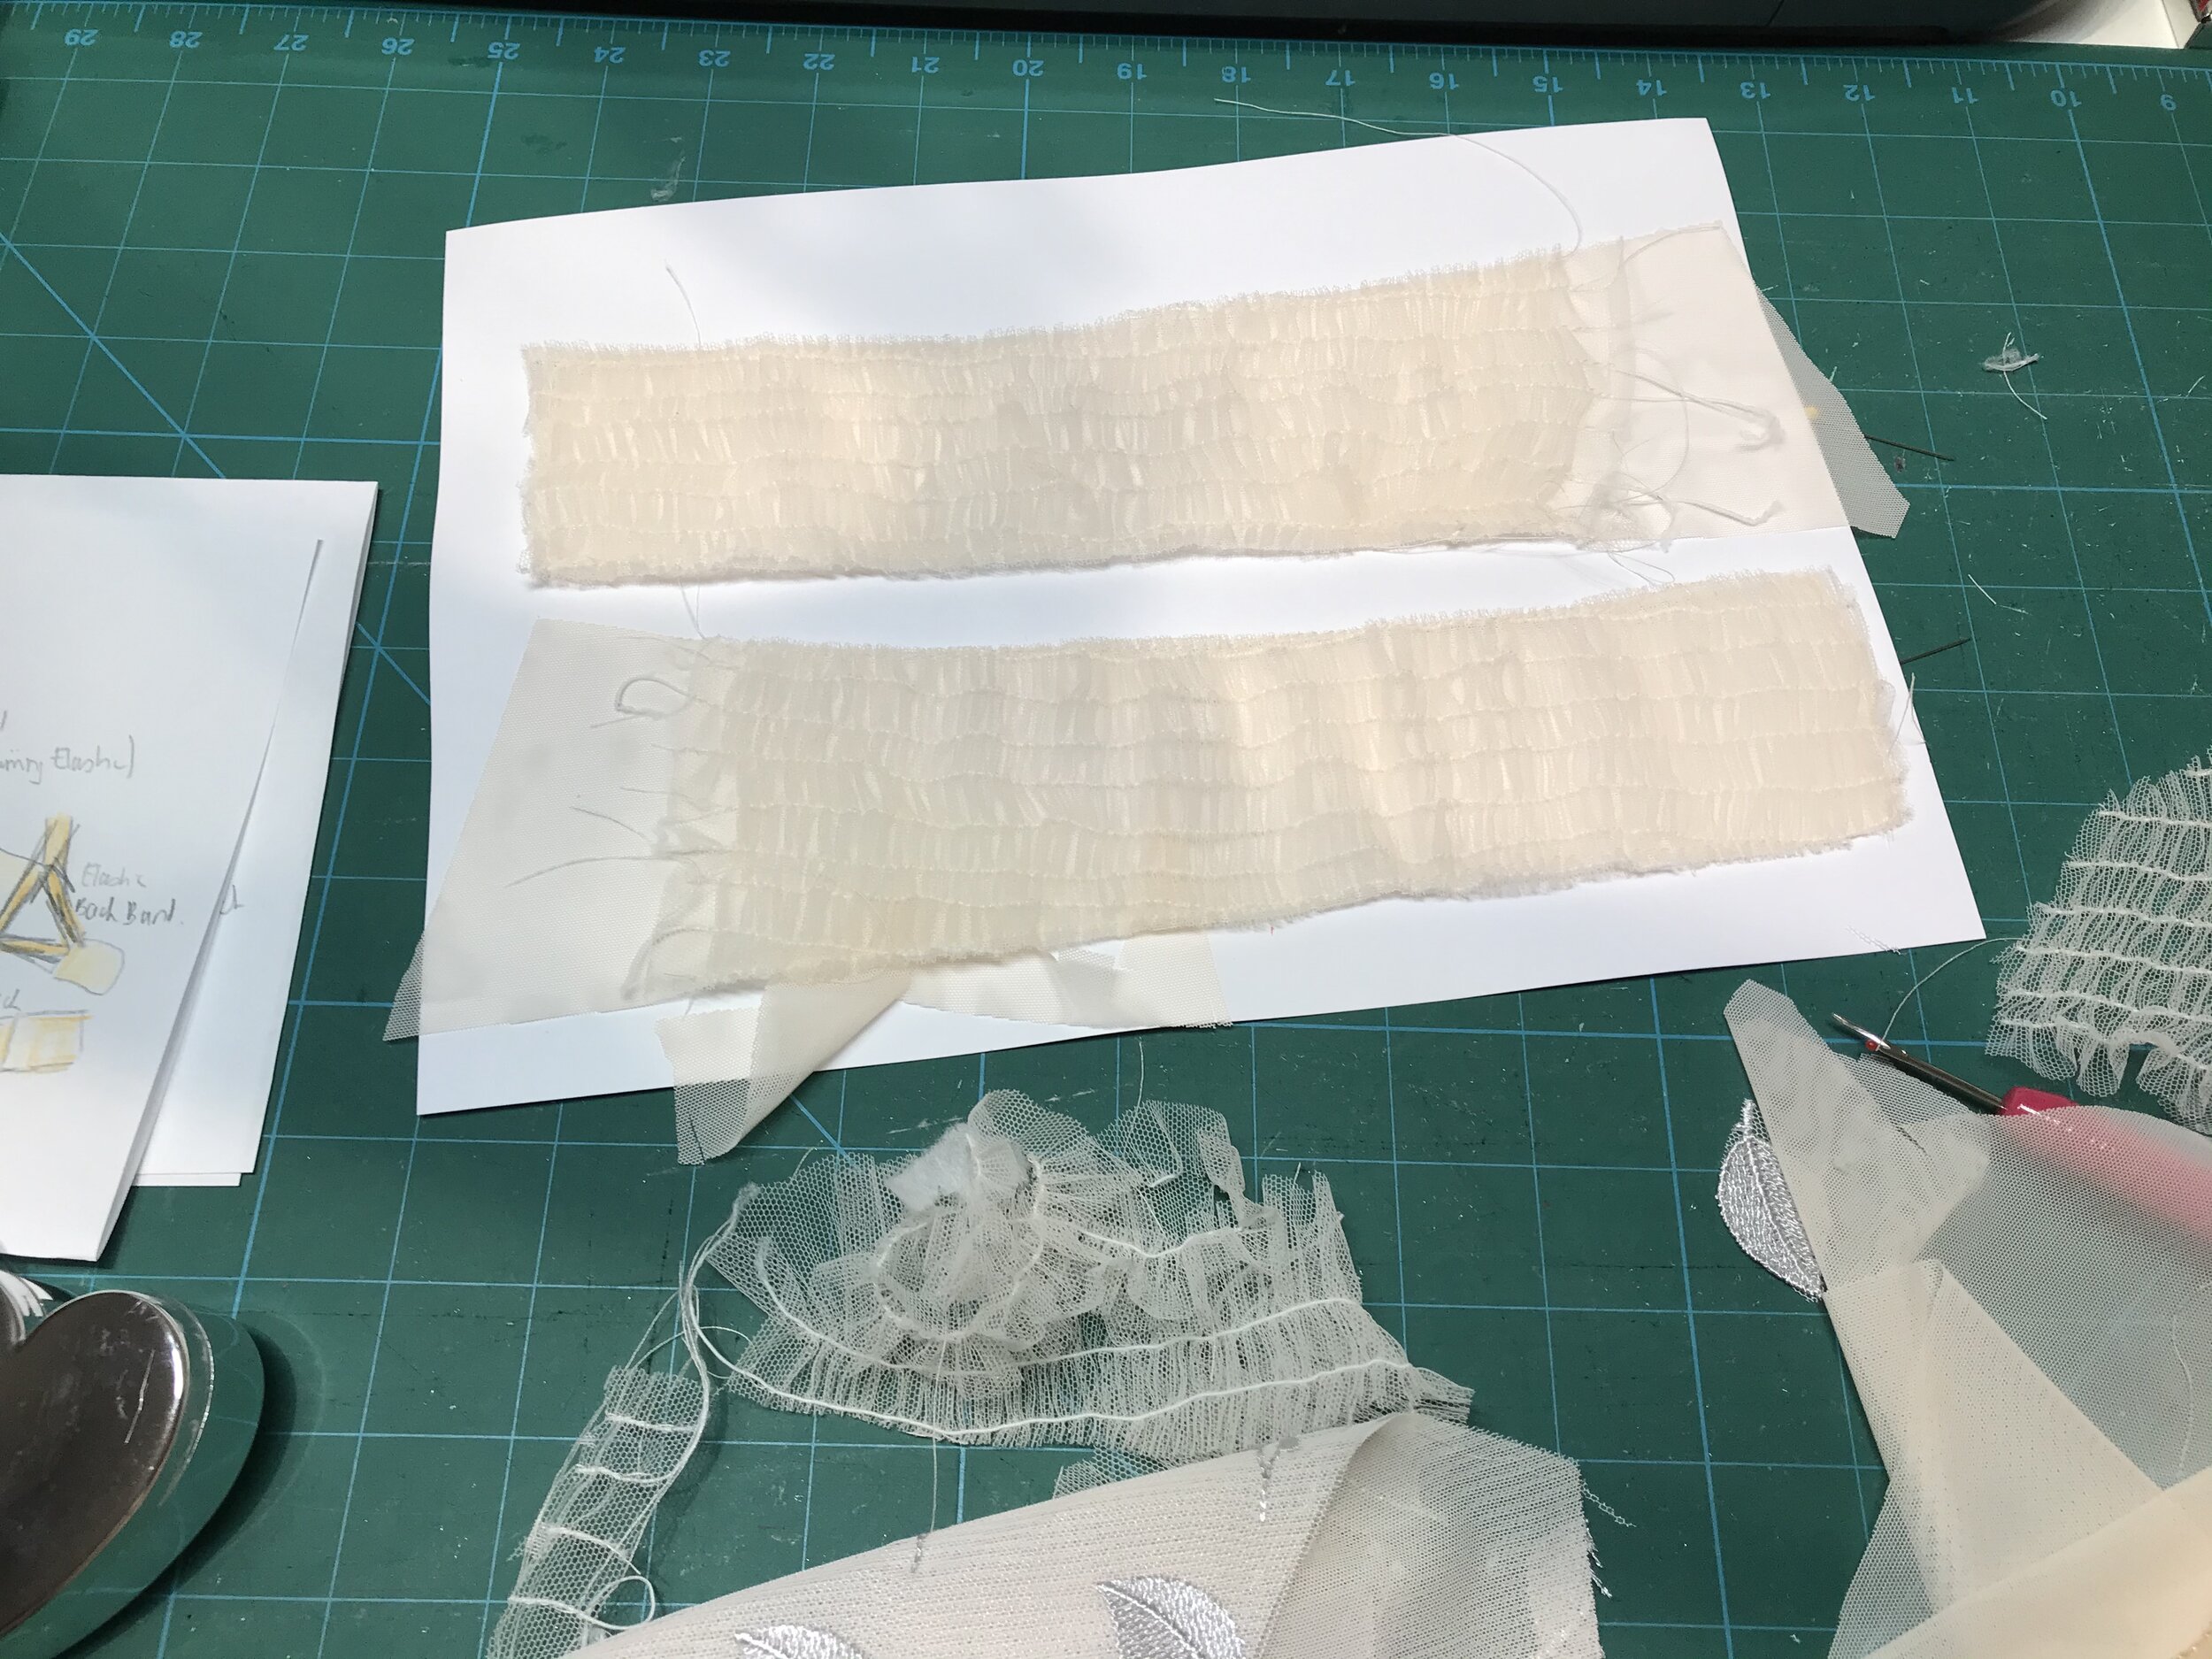
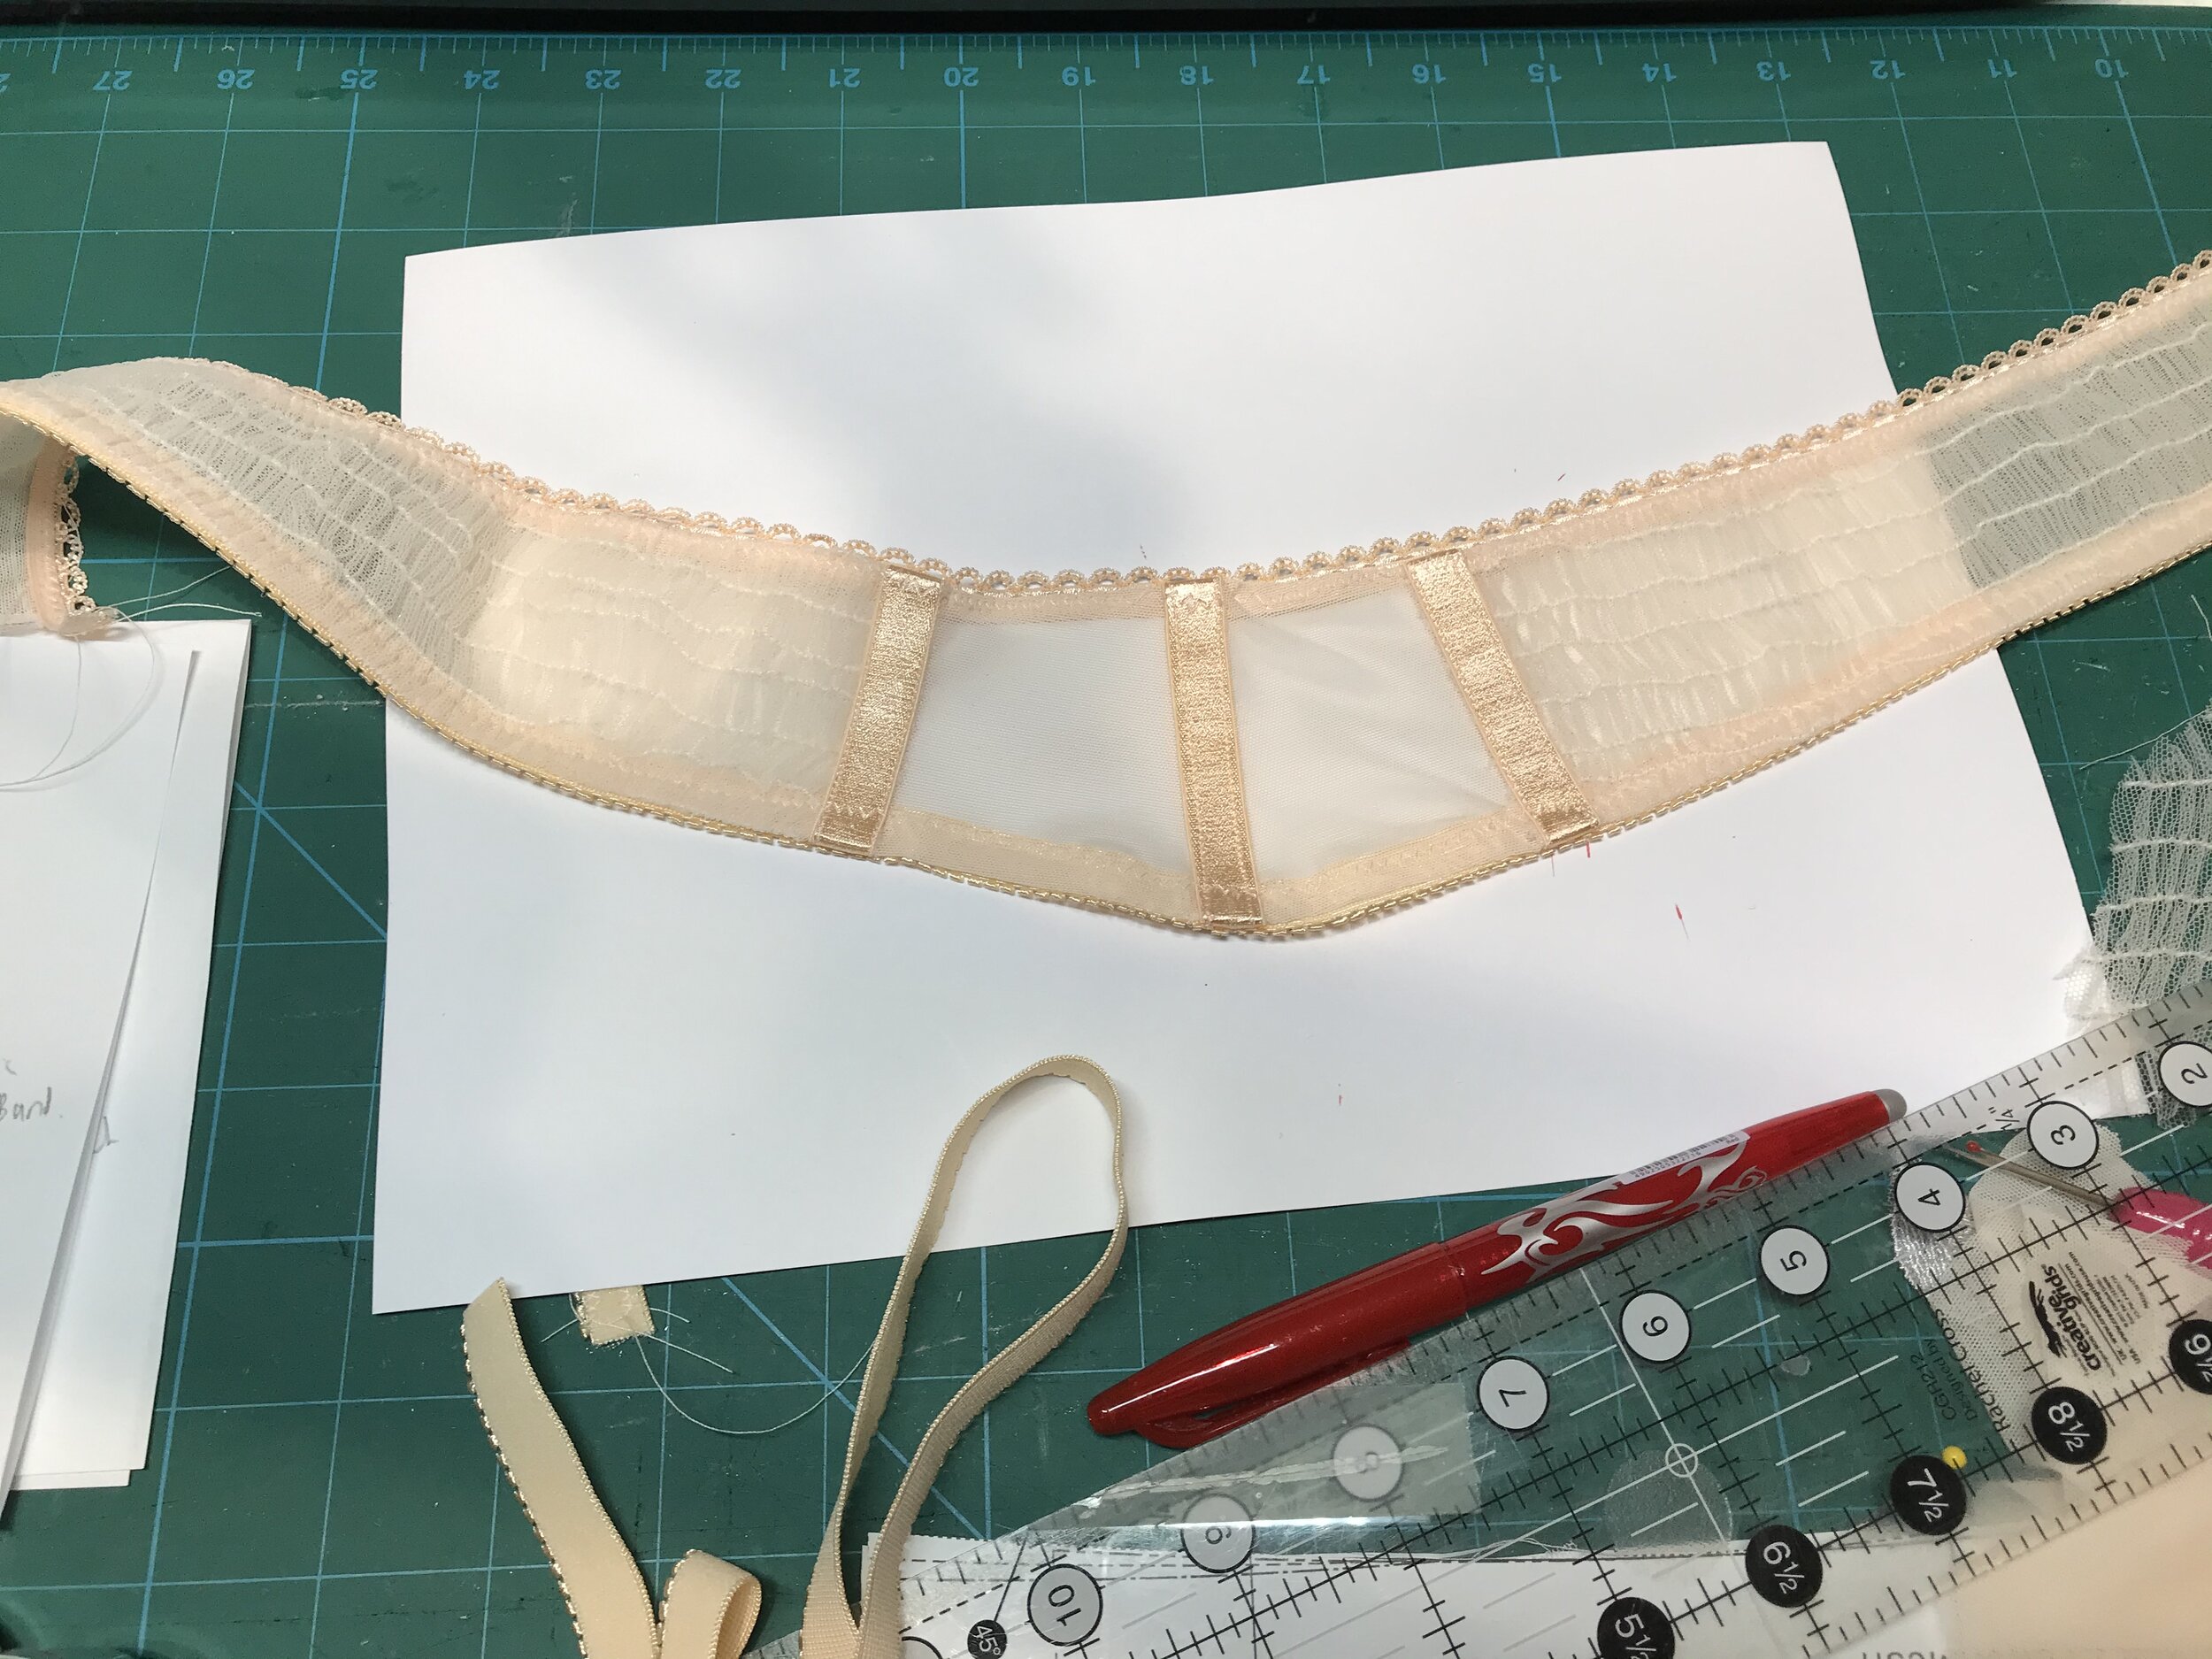
Previously I had only used shirring elastic to gather a sleeve into a cuff so this was going to be a real experiment. I hand wound the elastic on to the bobbin and used a stitch length of 4 based on the research I had done. Tulle is difficult to mark so I moved my needle so that I could sew at 1/2” intervals at the foot edge and stitched enough rows to be able to cut out the powerbars before steaming to relax the elastic. I used temporary adhesive spray to tack the sheer lining pieces I had cut to the wrong side. Next I stitched all around the very edge before cutting out. Finally I used another layer of sheer lining to enclose the seam with the inner cup. In my sketch I had used strapping to create a more open back but in practice I finished as normal in order that I would have enough strapping left for the underwear.

IMG_5349.jpg

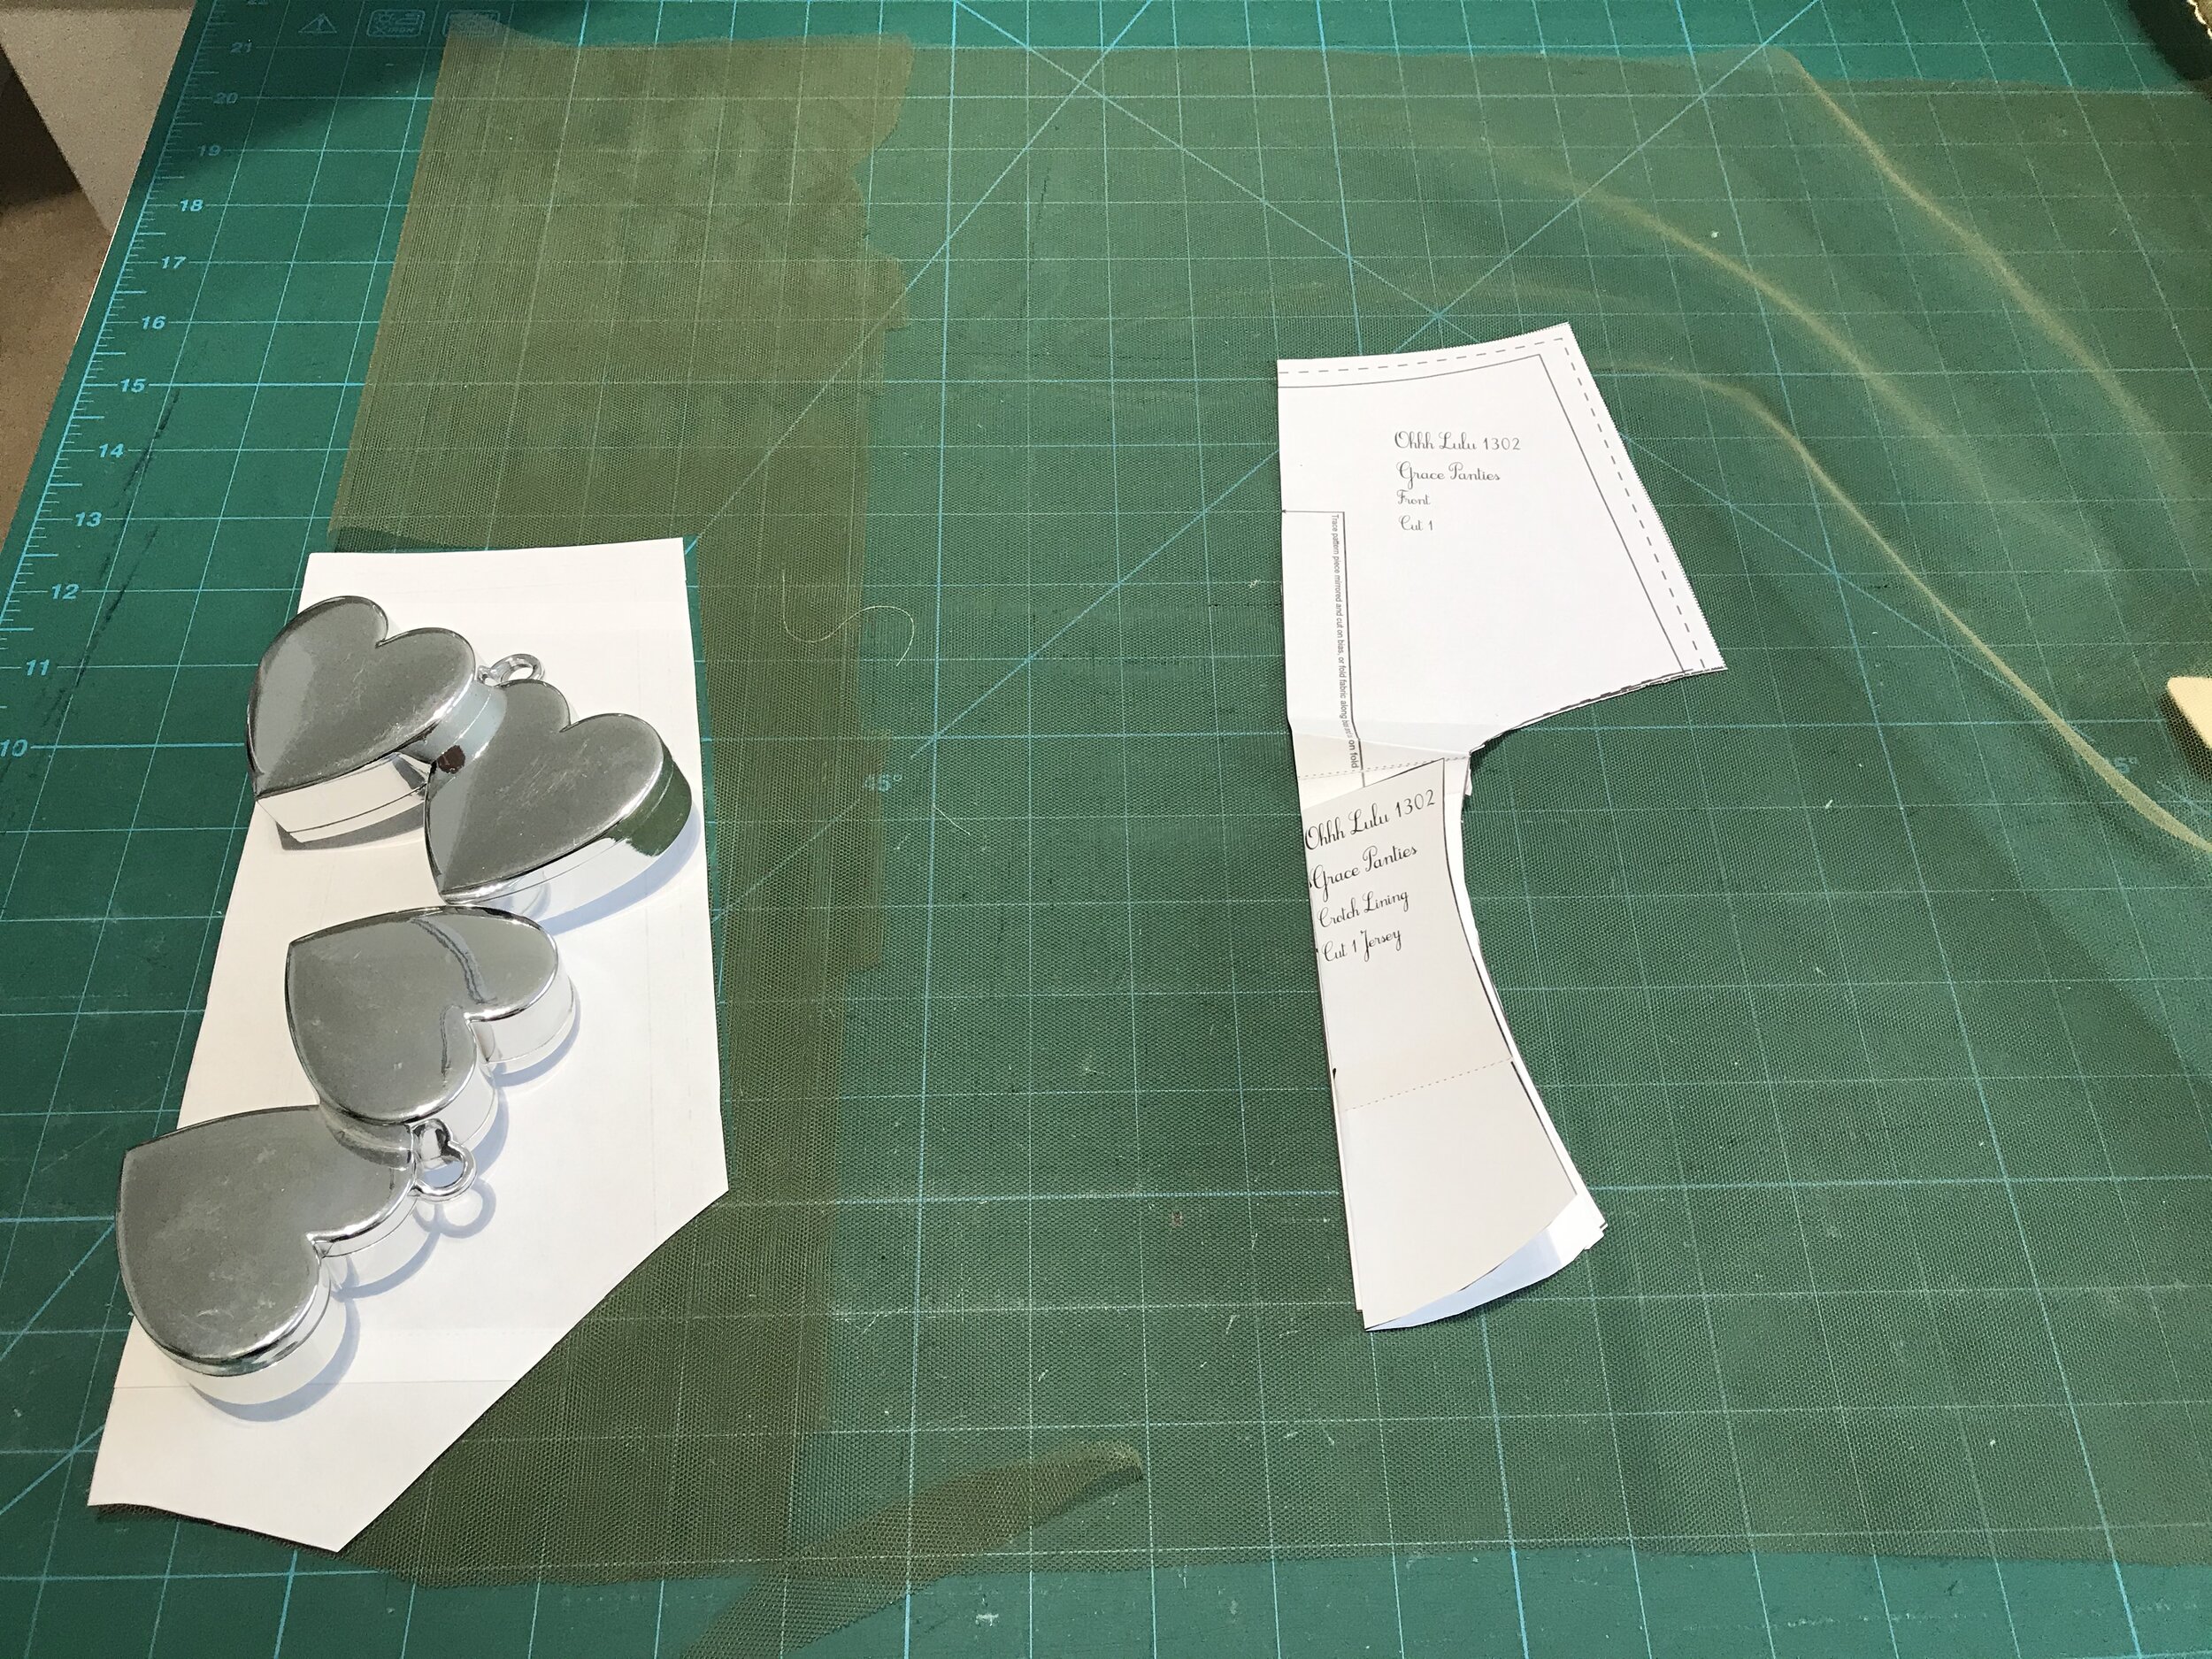
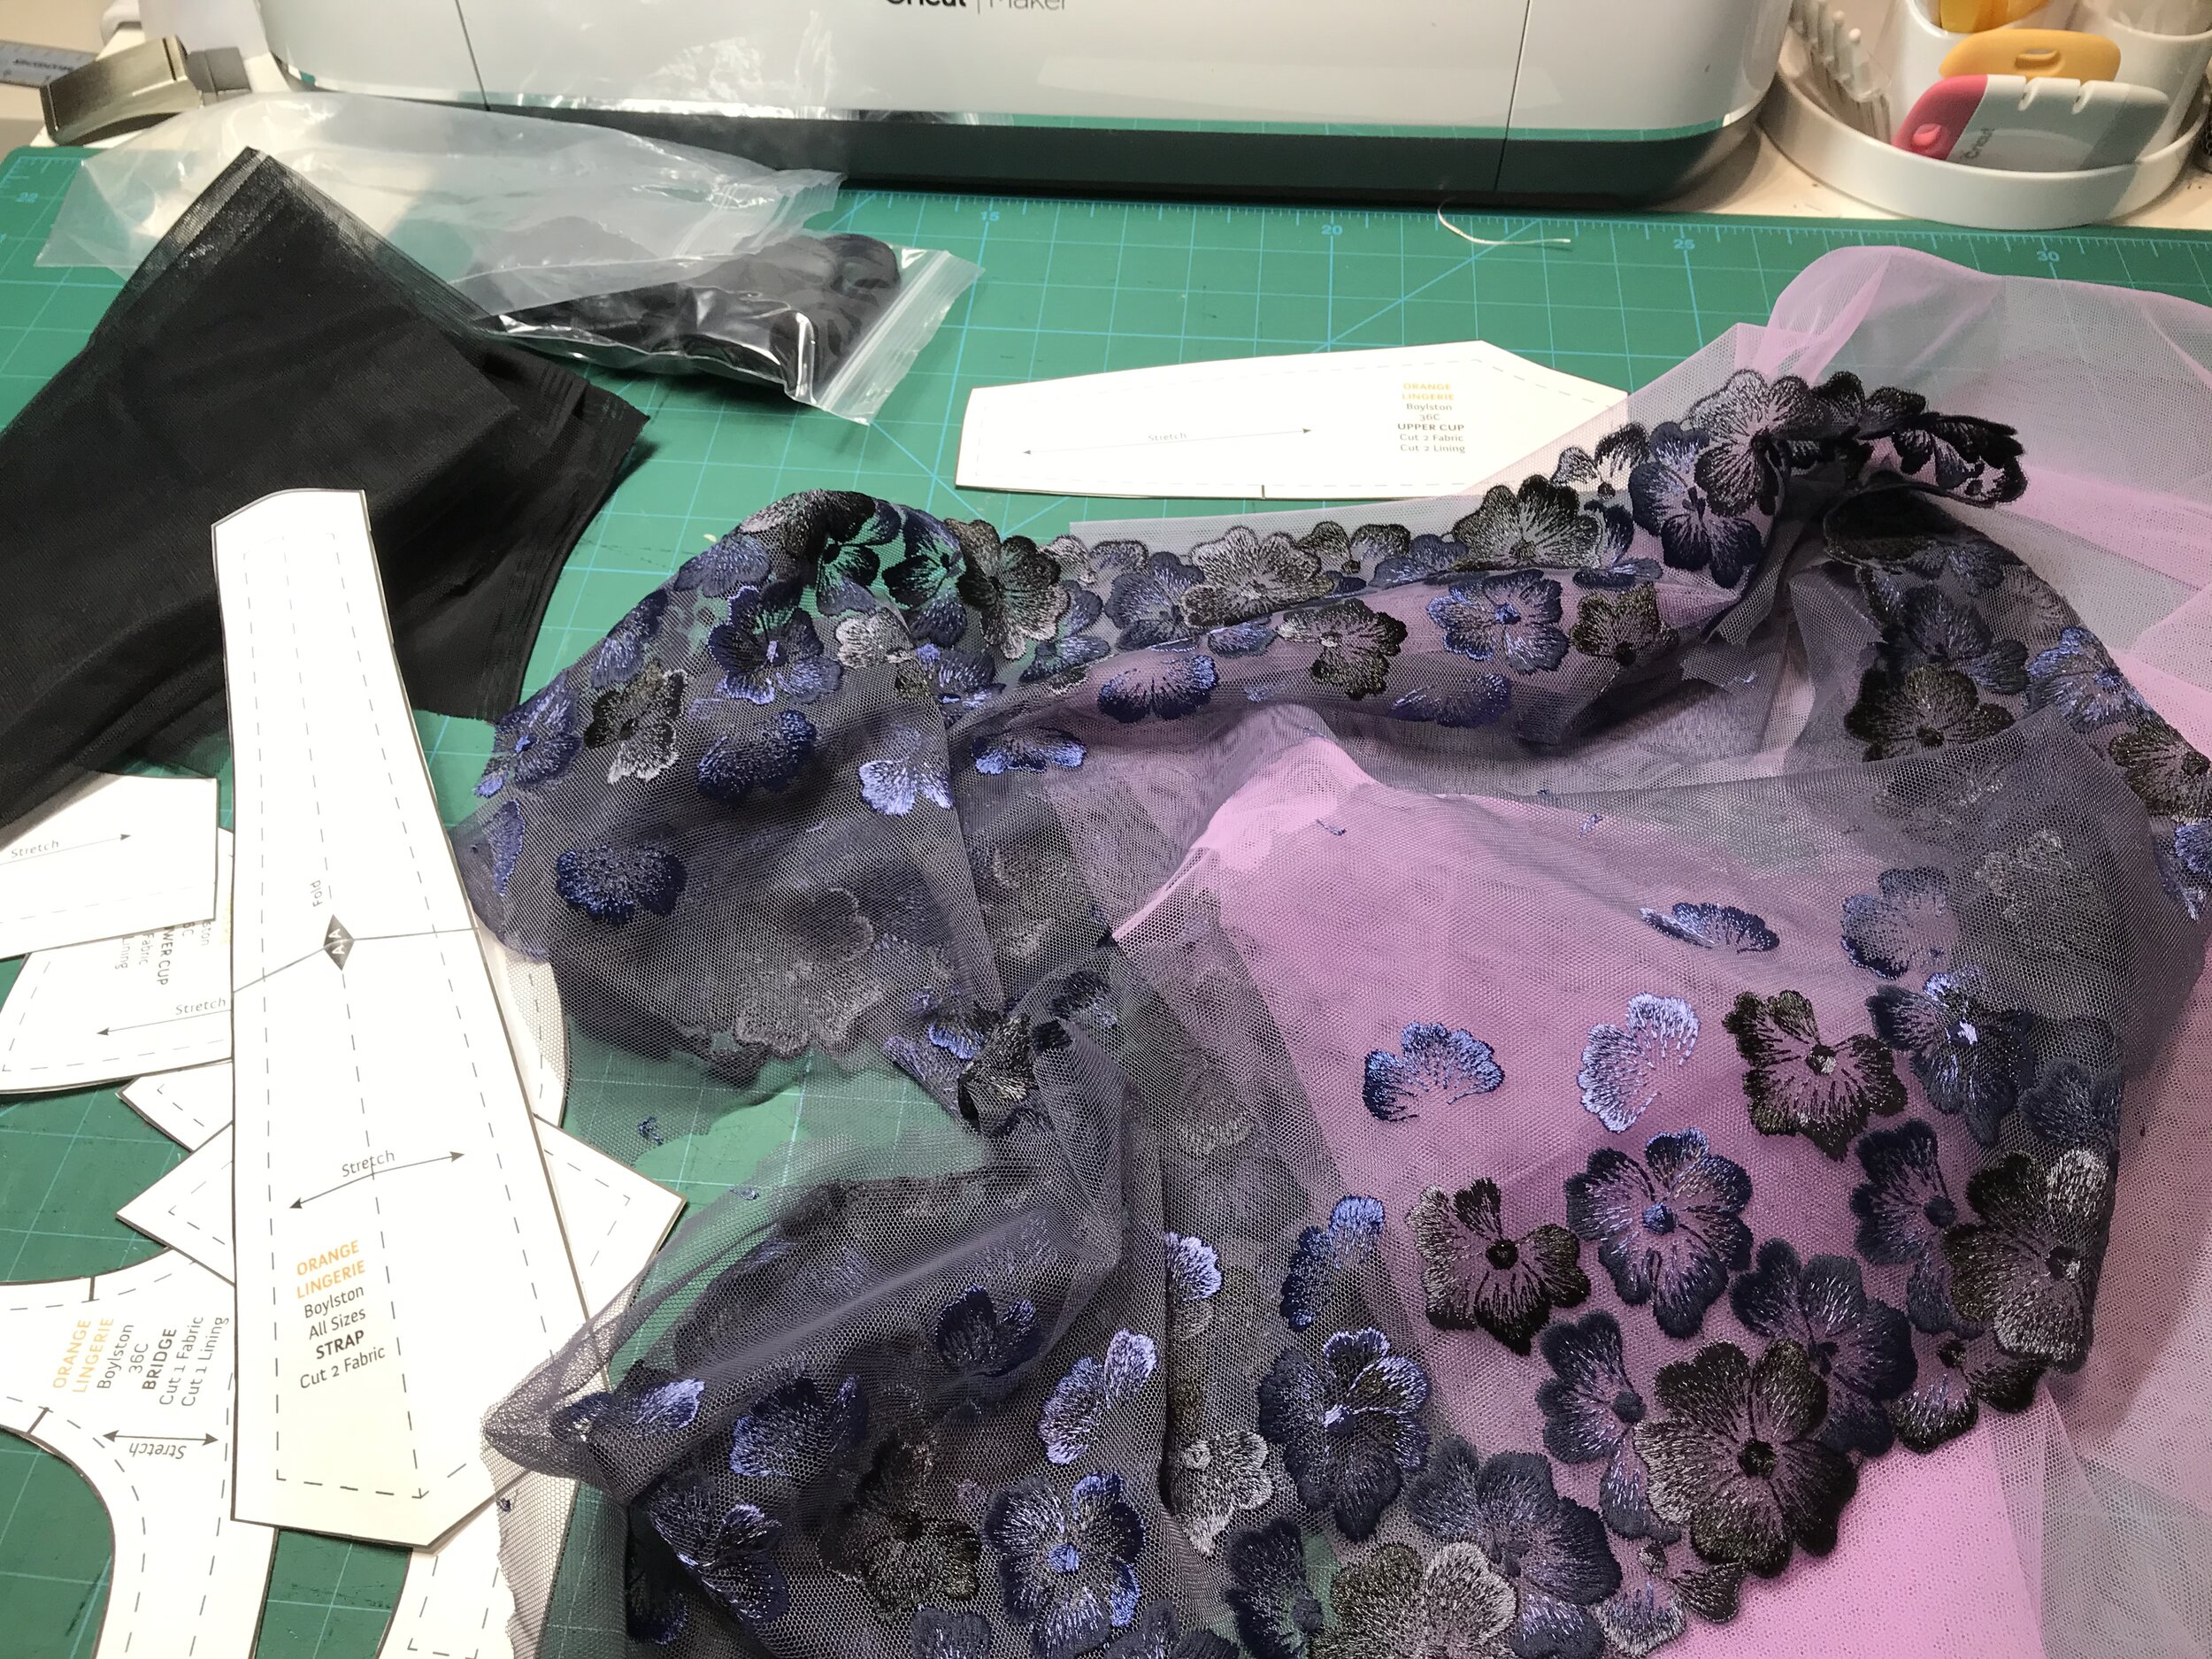
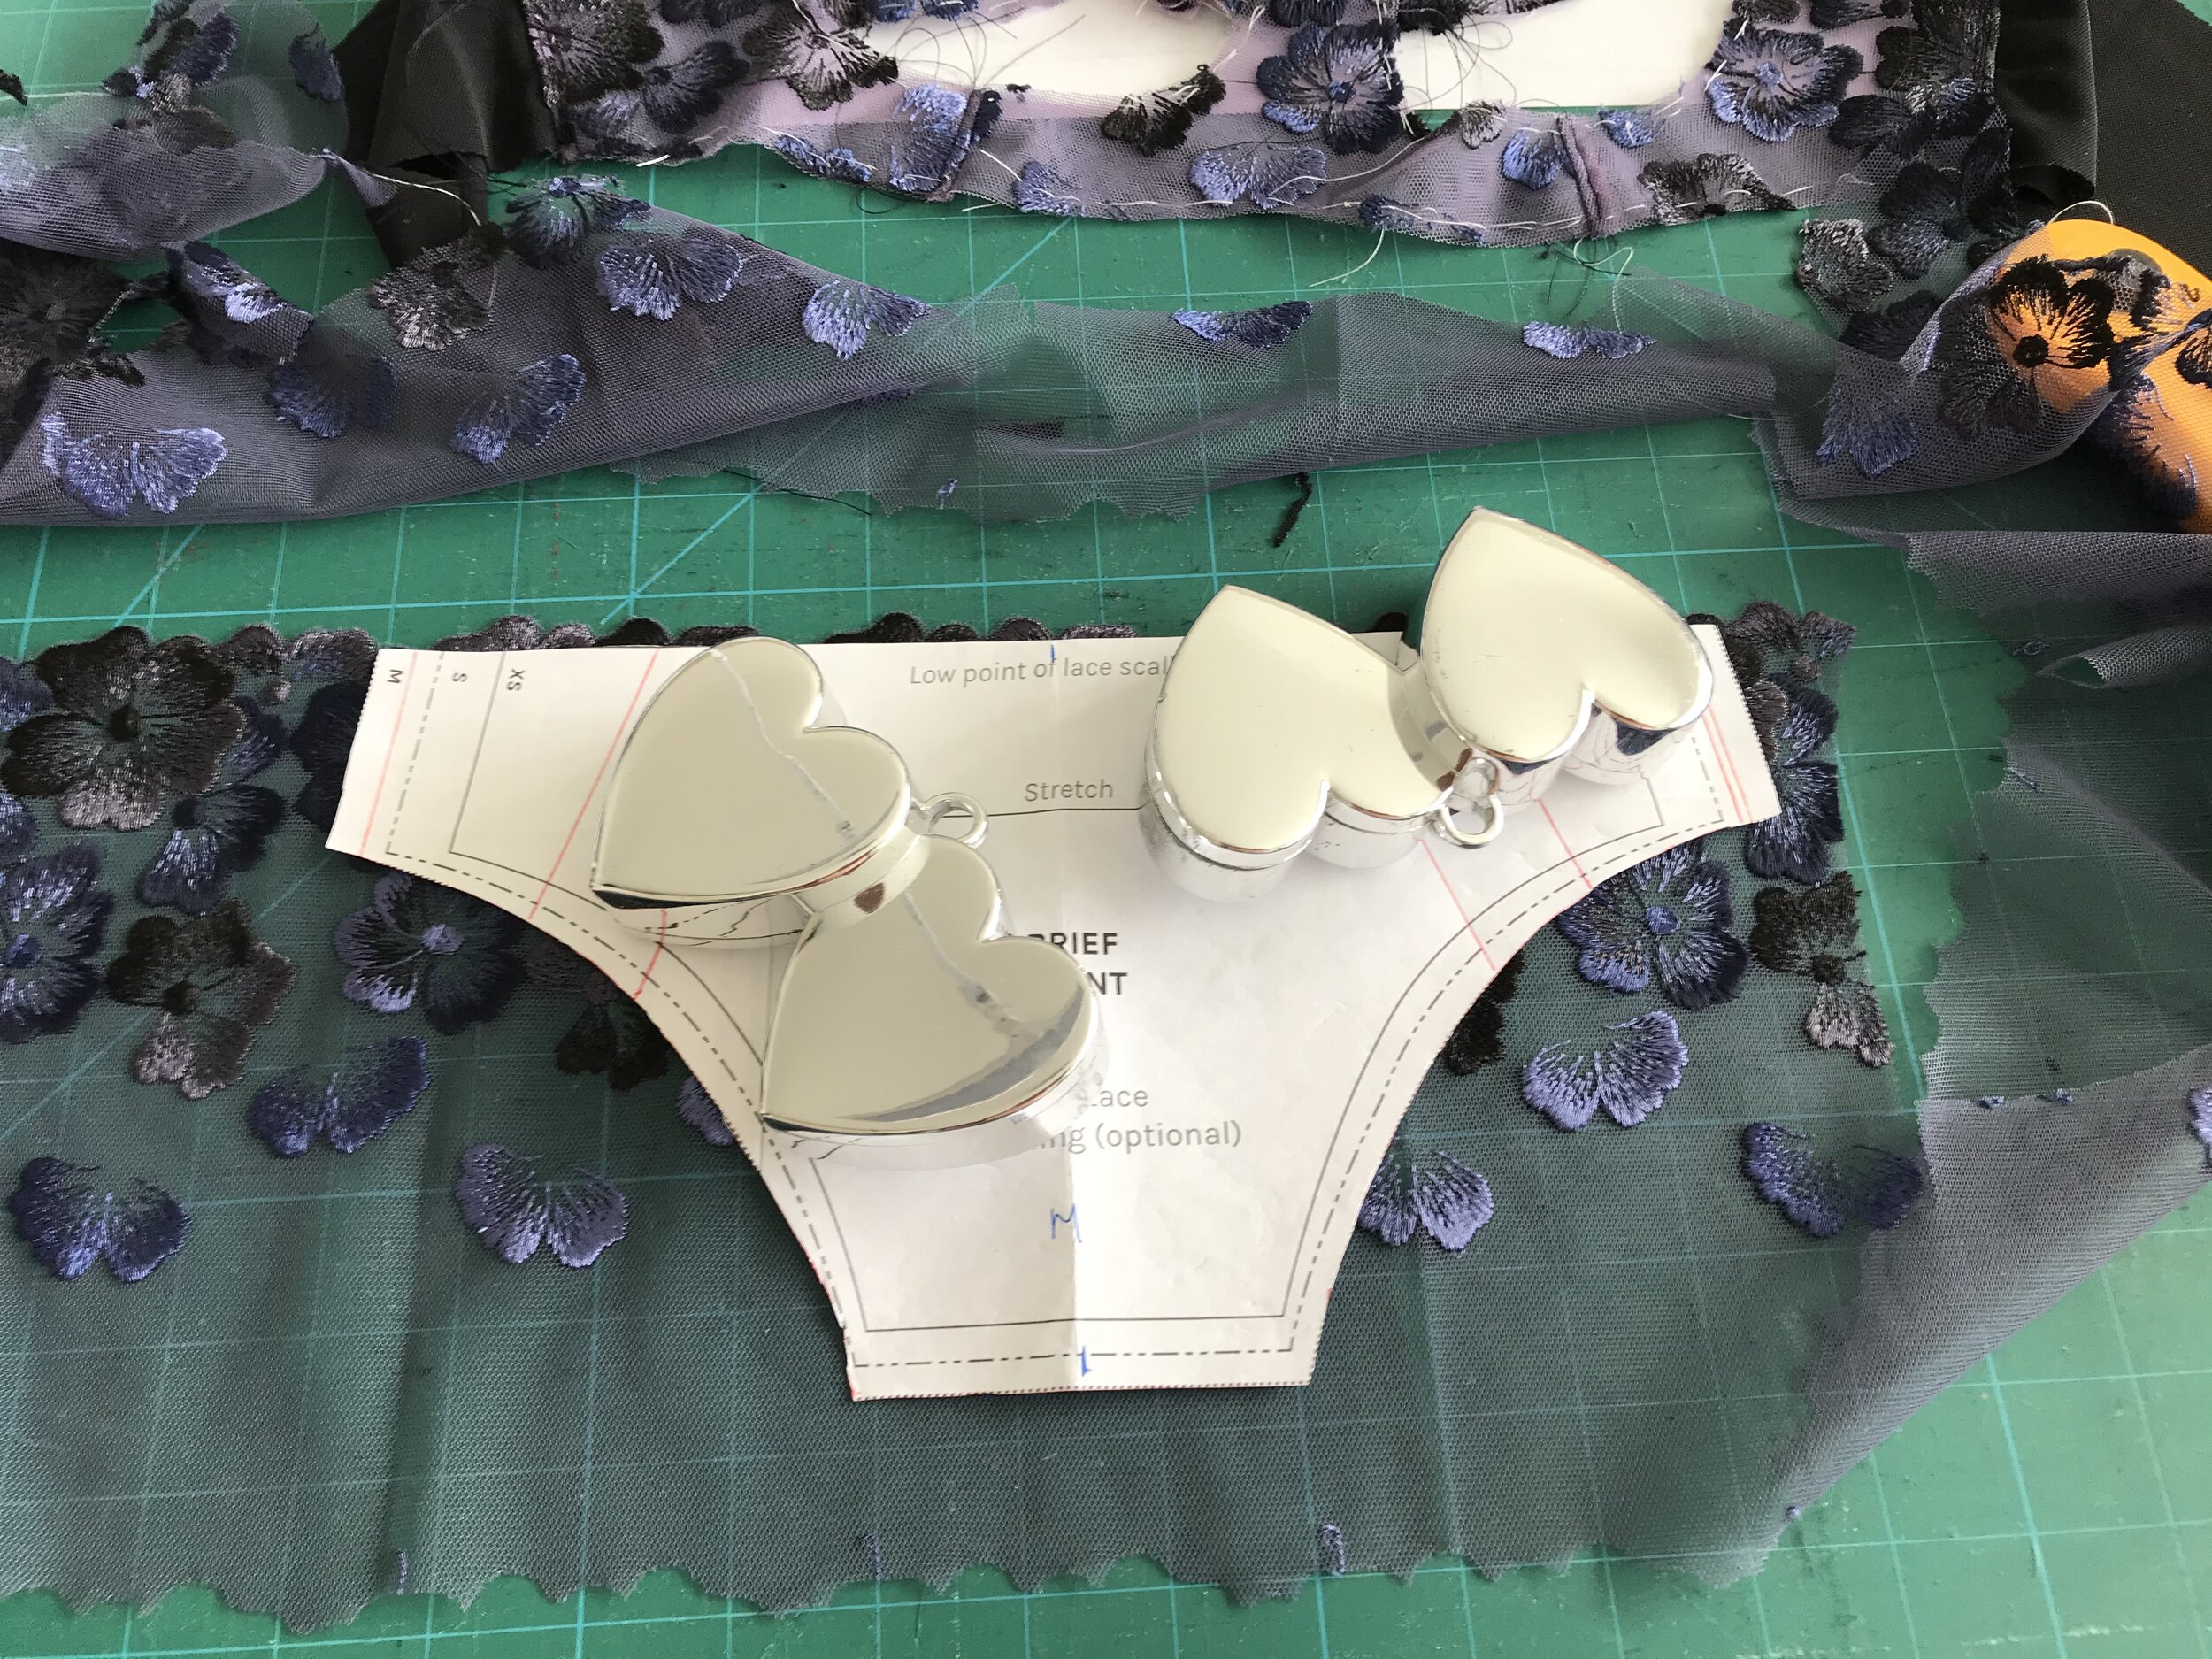
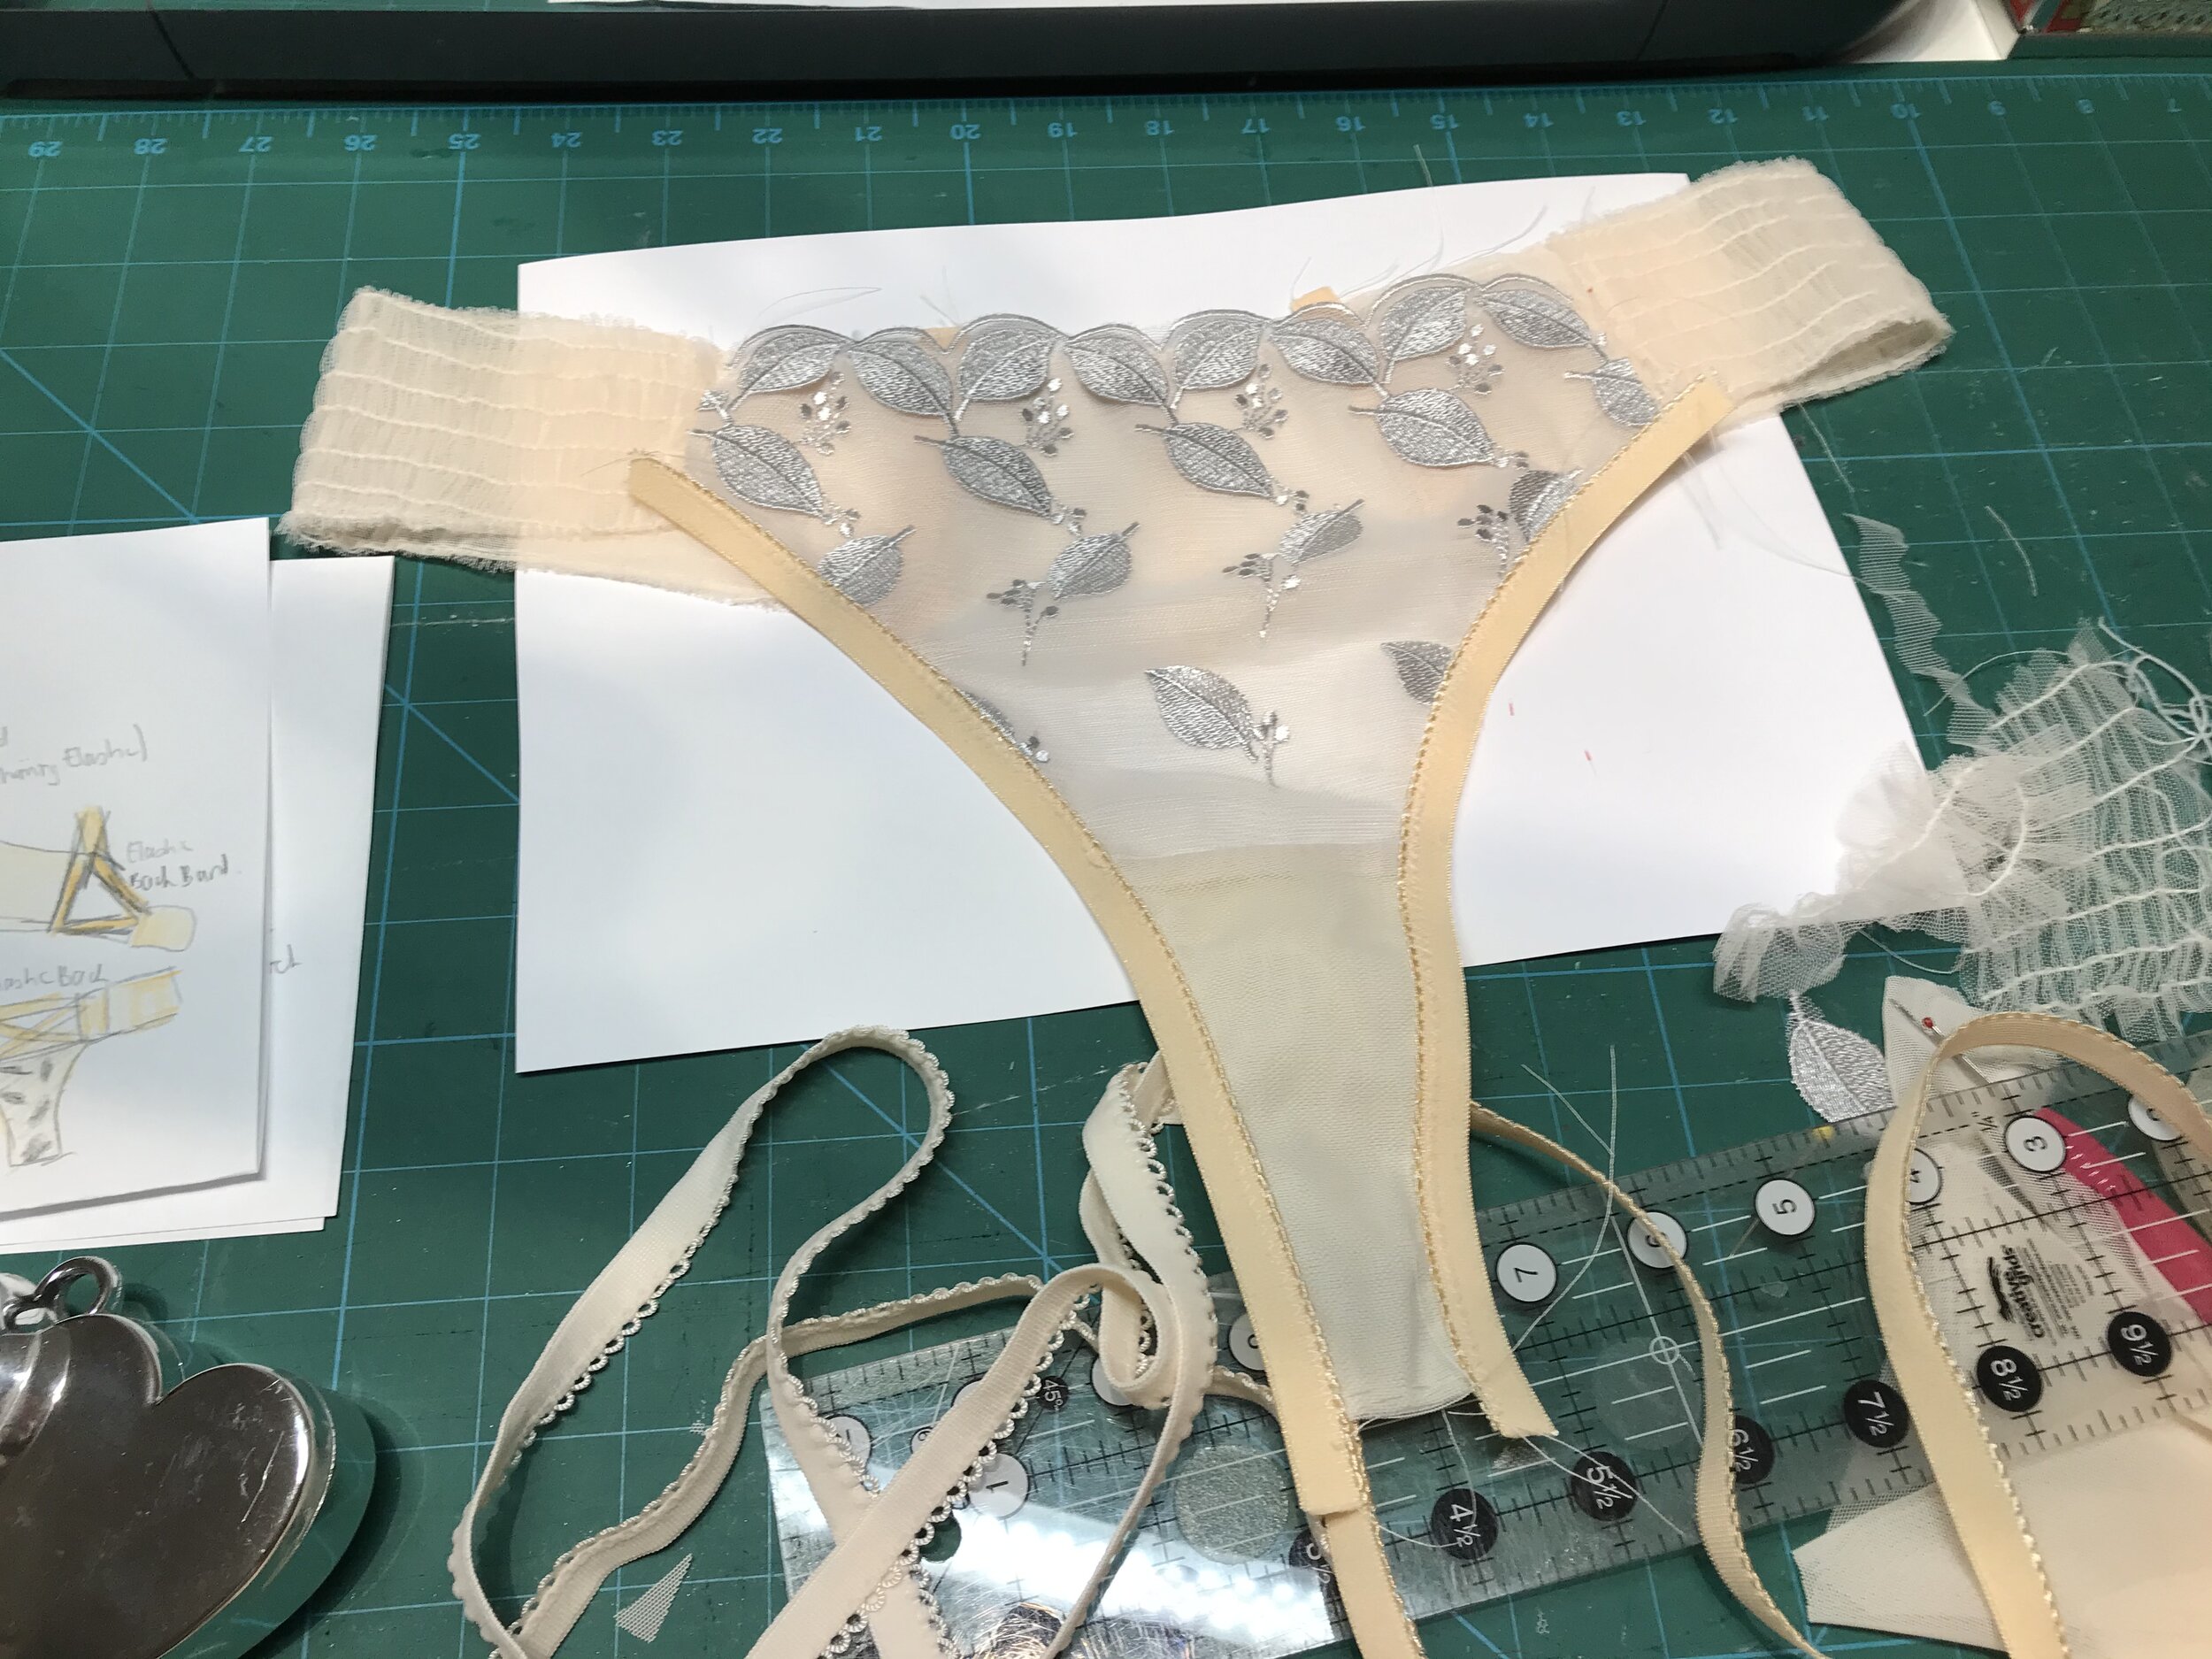
With the bra done I moved on to the thong I had sketched. I started with the Orange Lingerie Kingston pattern pieces. This uses stretch mesh on the fold for the leg edge so I thought I would use the folded pattern piece with the width of the elastic added at the fold line.

I cut out the front from the lace and lined with peach stretch mesh before attaching clear elastic to the waist. For the gusset I used just a plain piece of lace so as not to have any bulky embroidery before again lining with the mesh to get the peach colour as well as the cotton jersey lining.

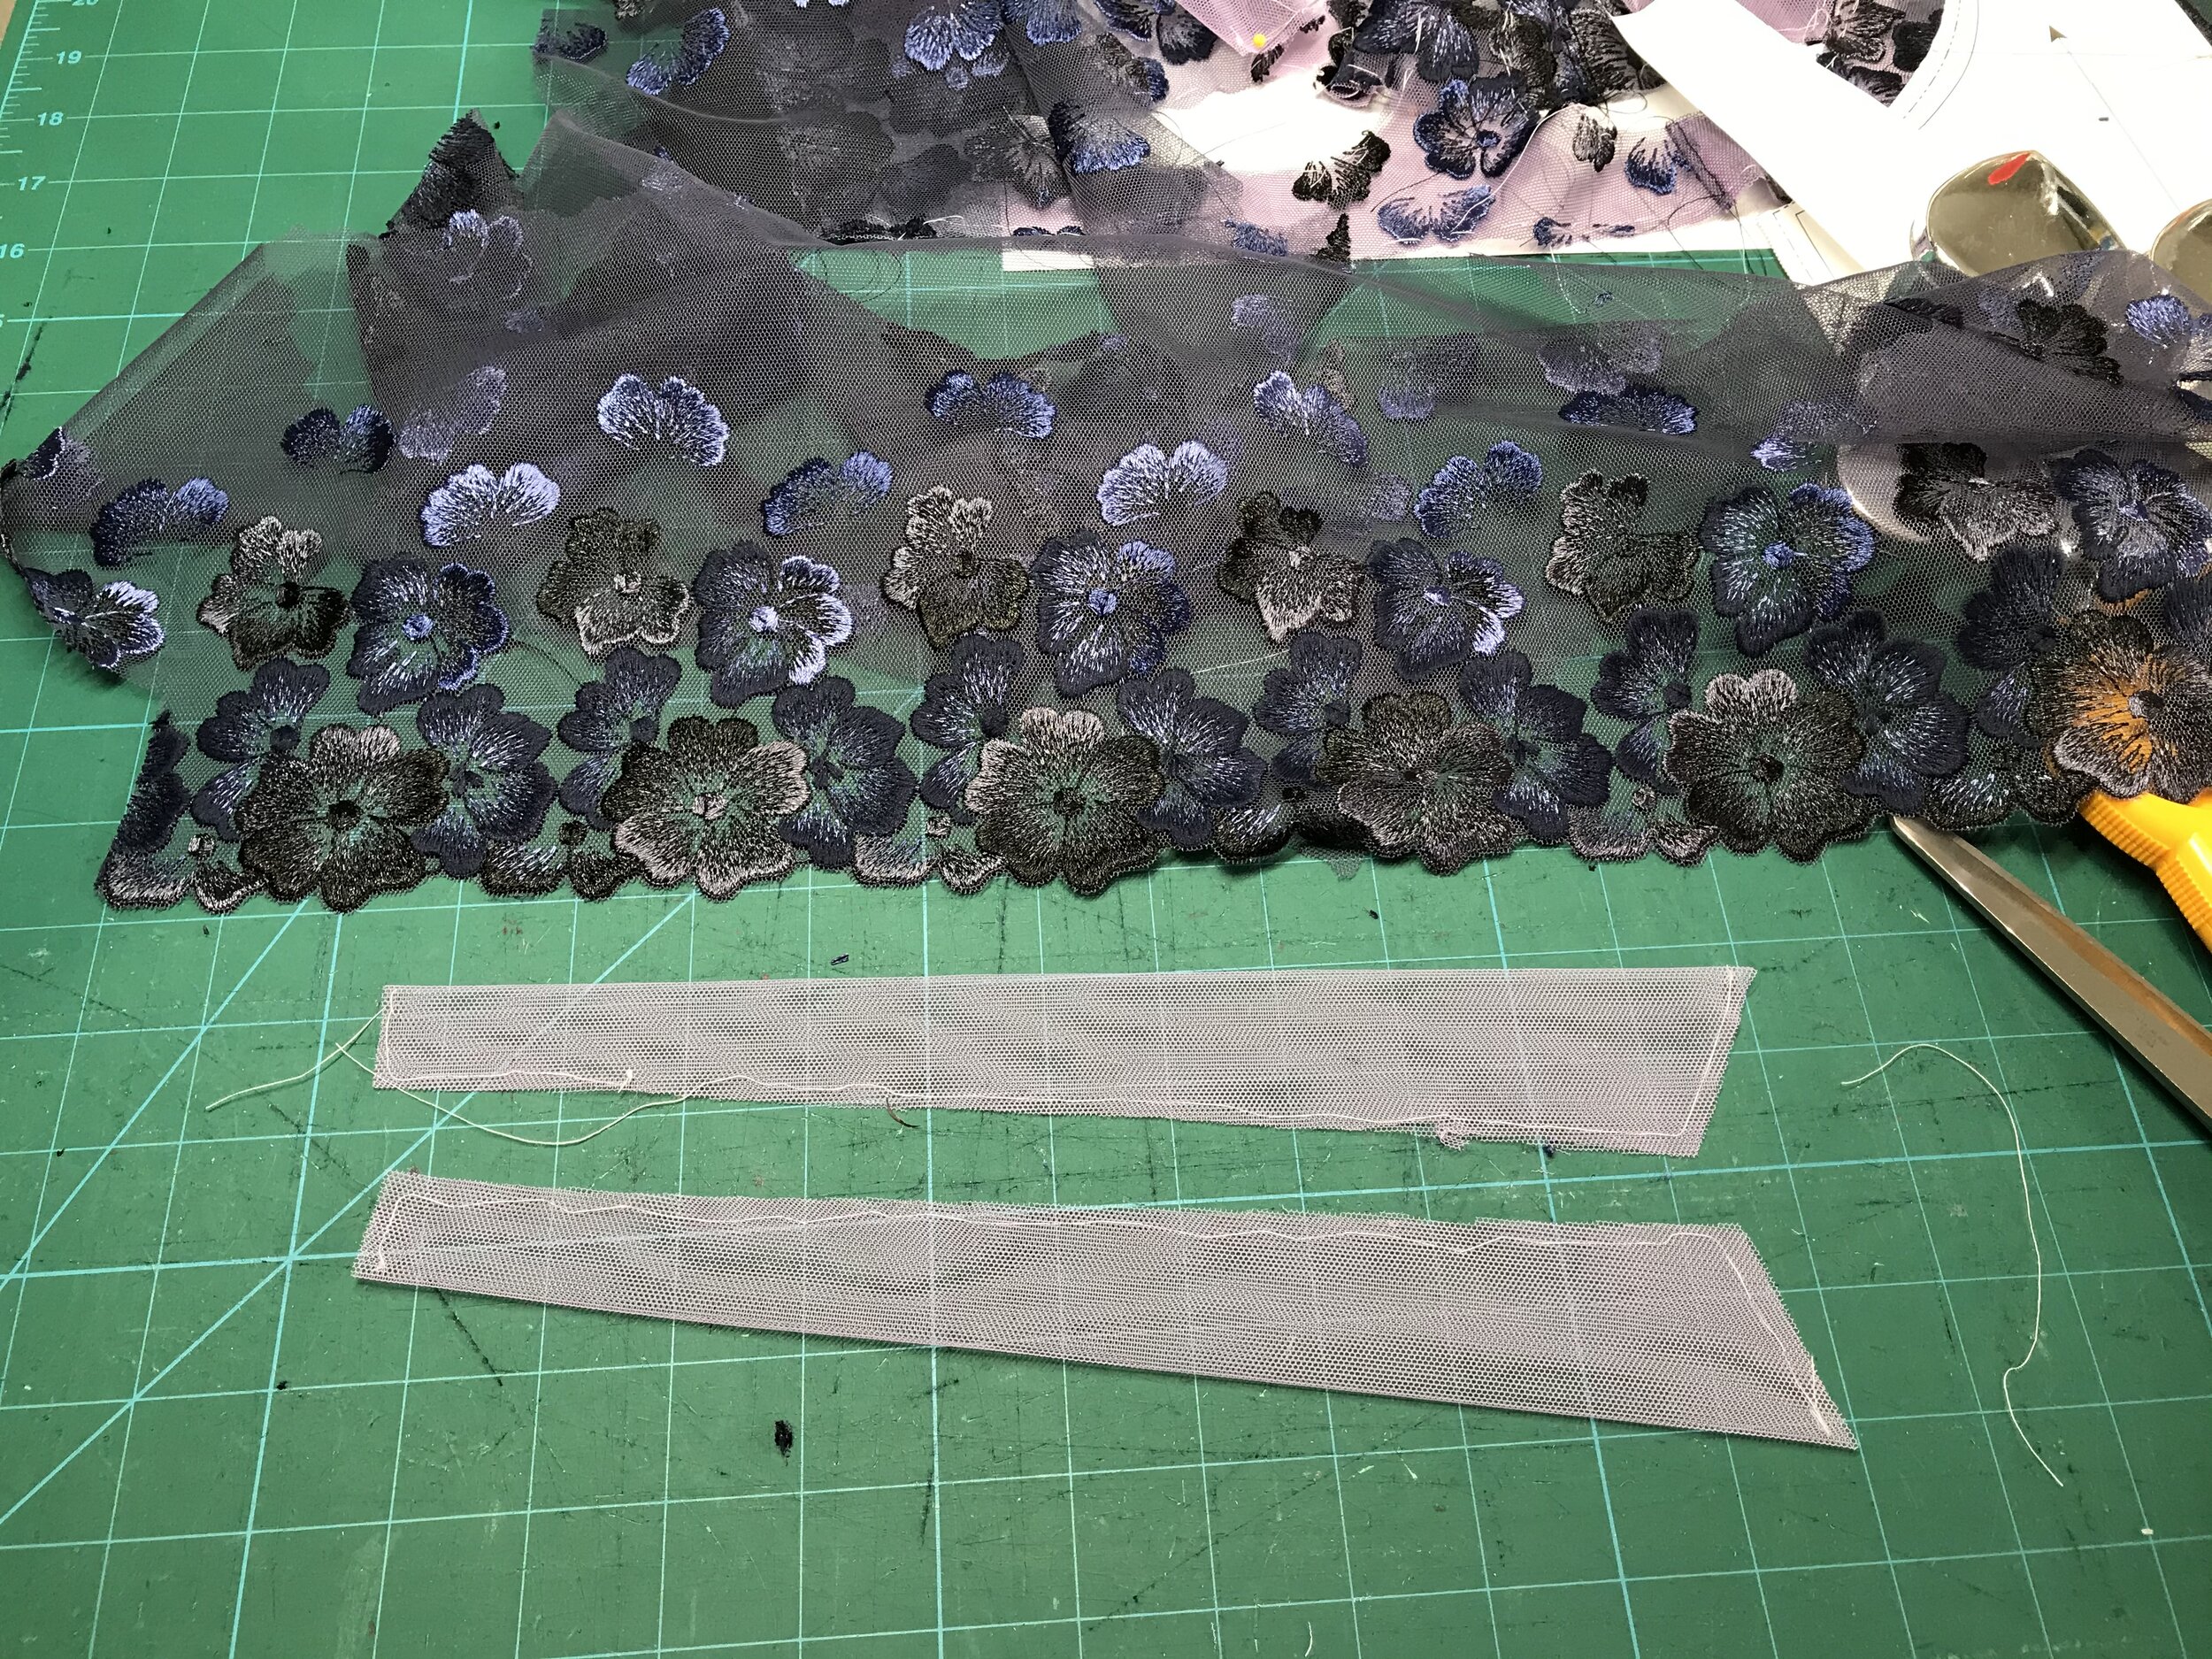
At that point I decided to gather the remaining tulle to see what size piece I would be left to work with.

I cut out the sides in stretch mesh and checked against the gathered tulle. It wasn’t wide enough to cover the whole piece so I came up with the idea of attaching what I had to the stretch mesh starting at the front and then applying strap elastic on top where it ended before cutting back to the strapping so there was no unsightly or bulky finish on the inside. The two pieces were different sizes so I measured the shortest and marked lines to place the strapping.

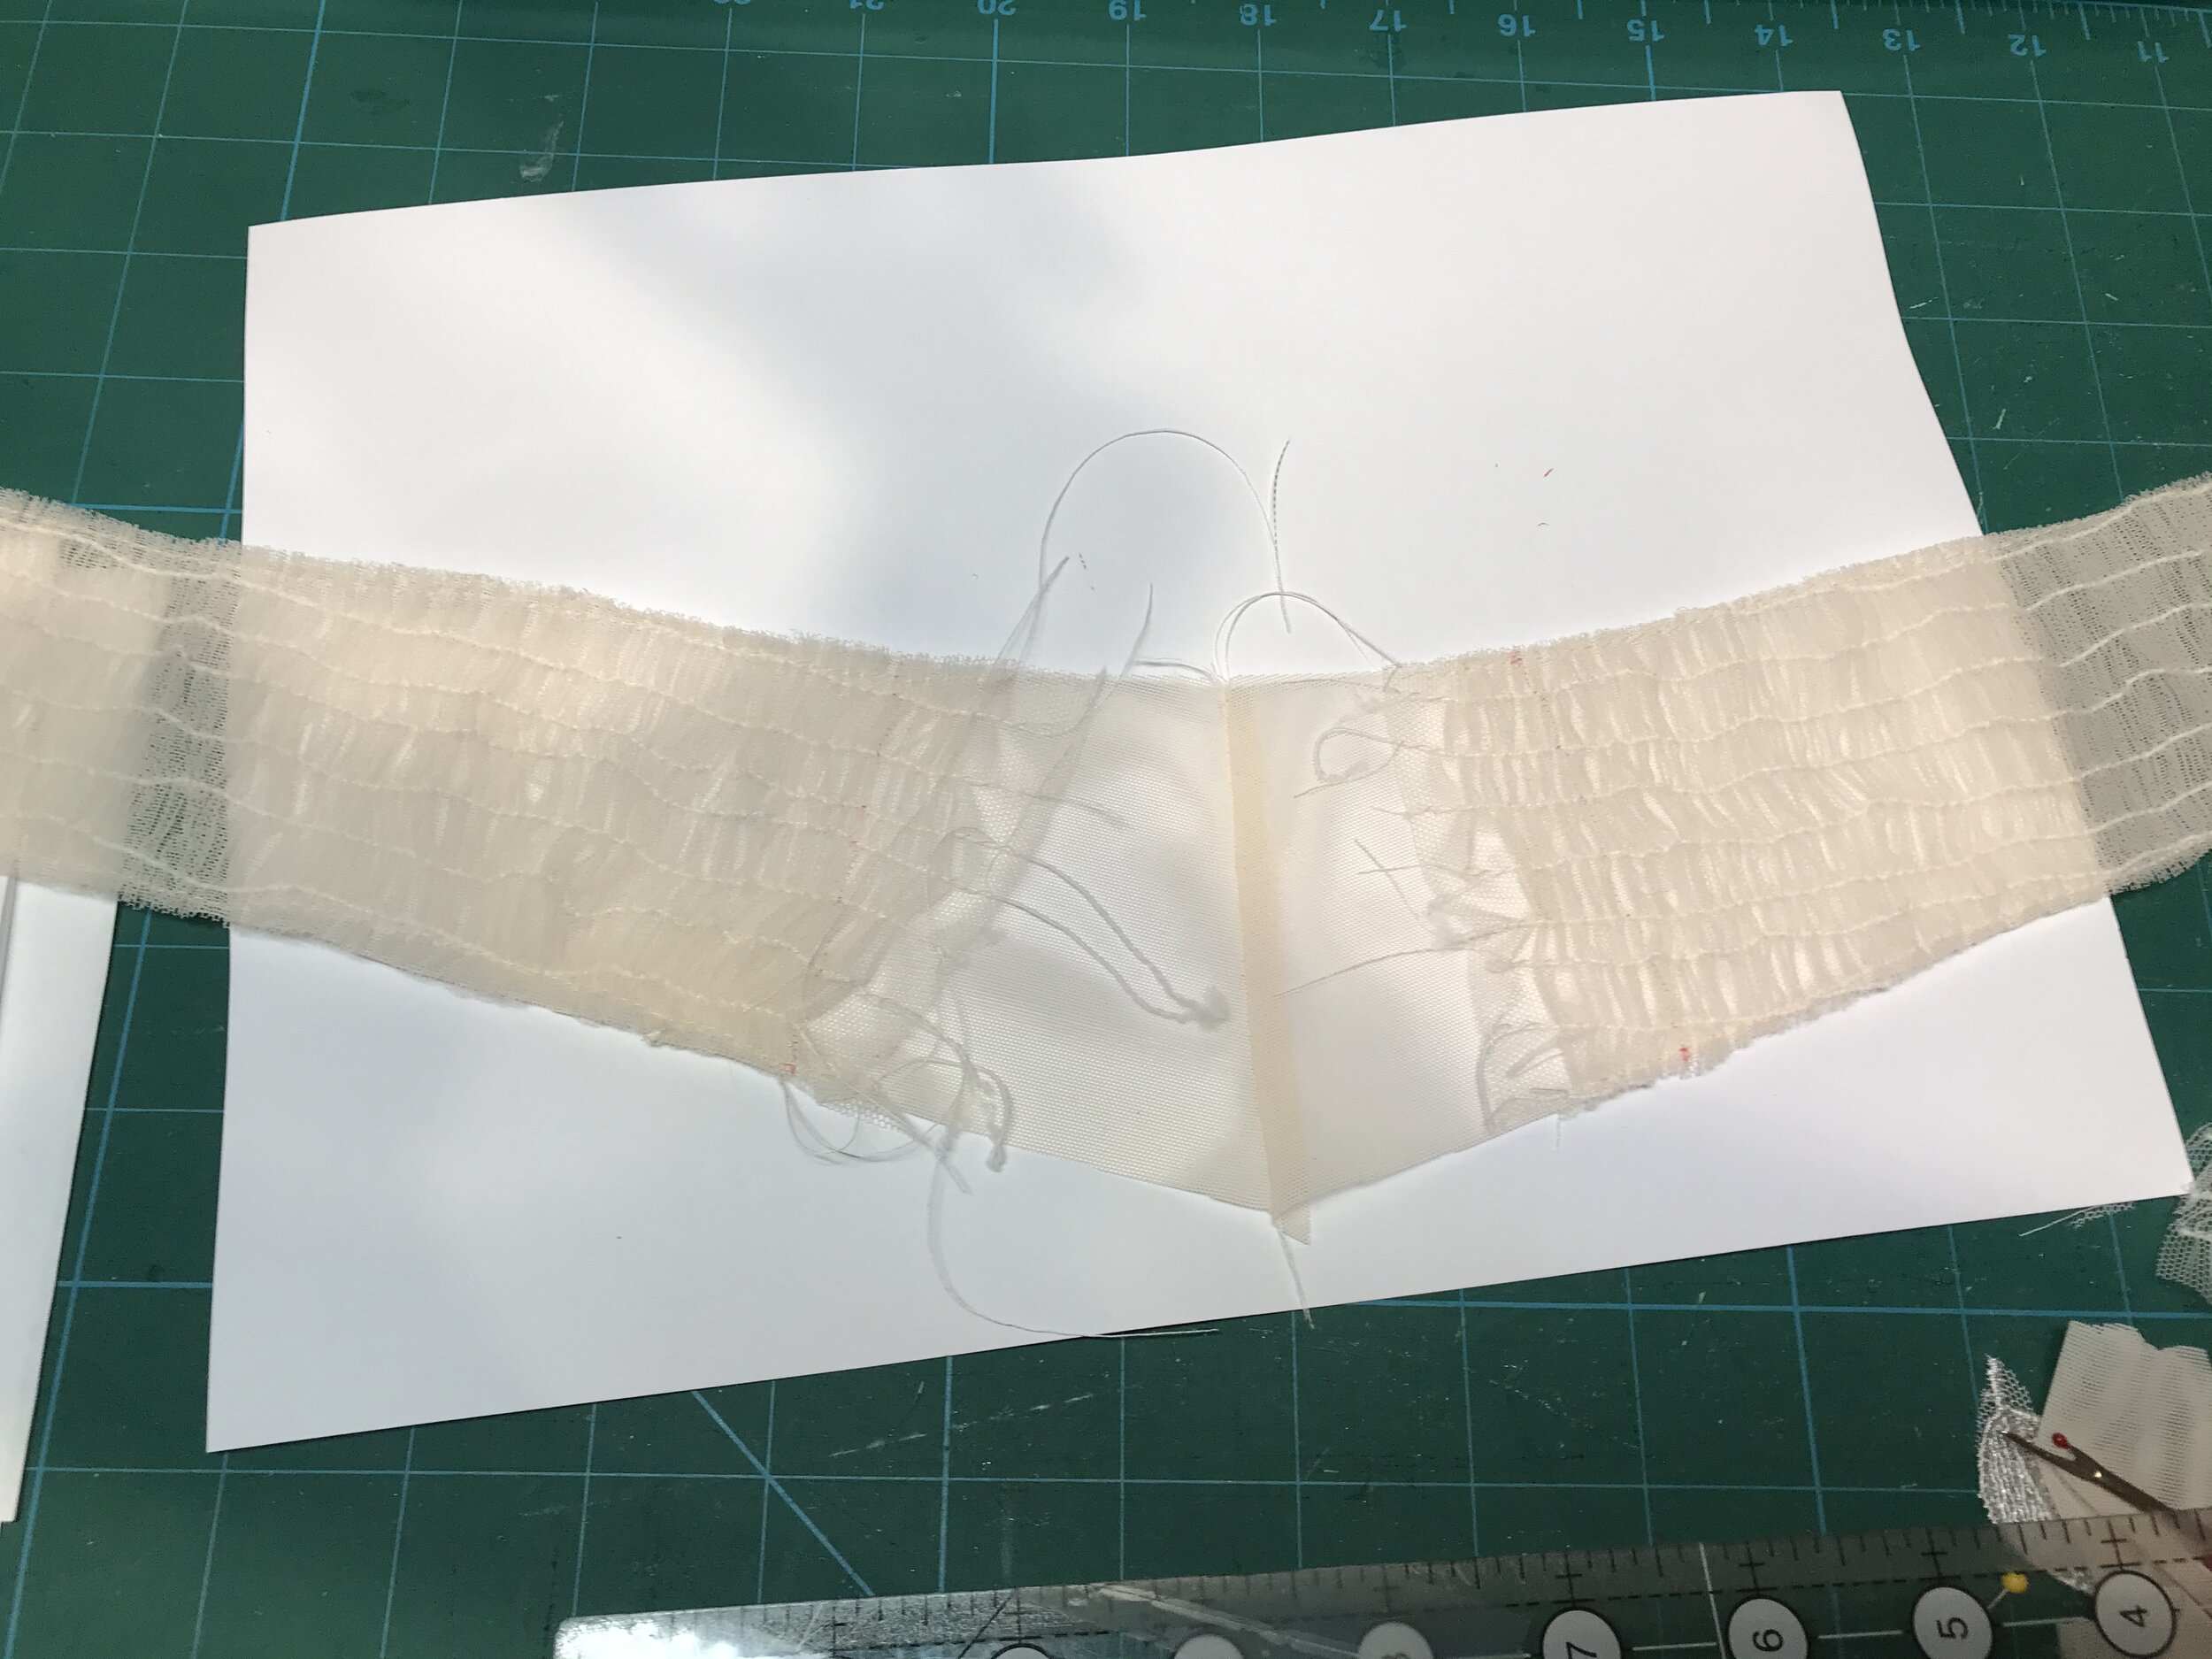
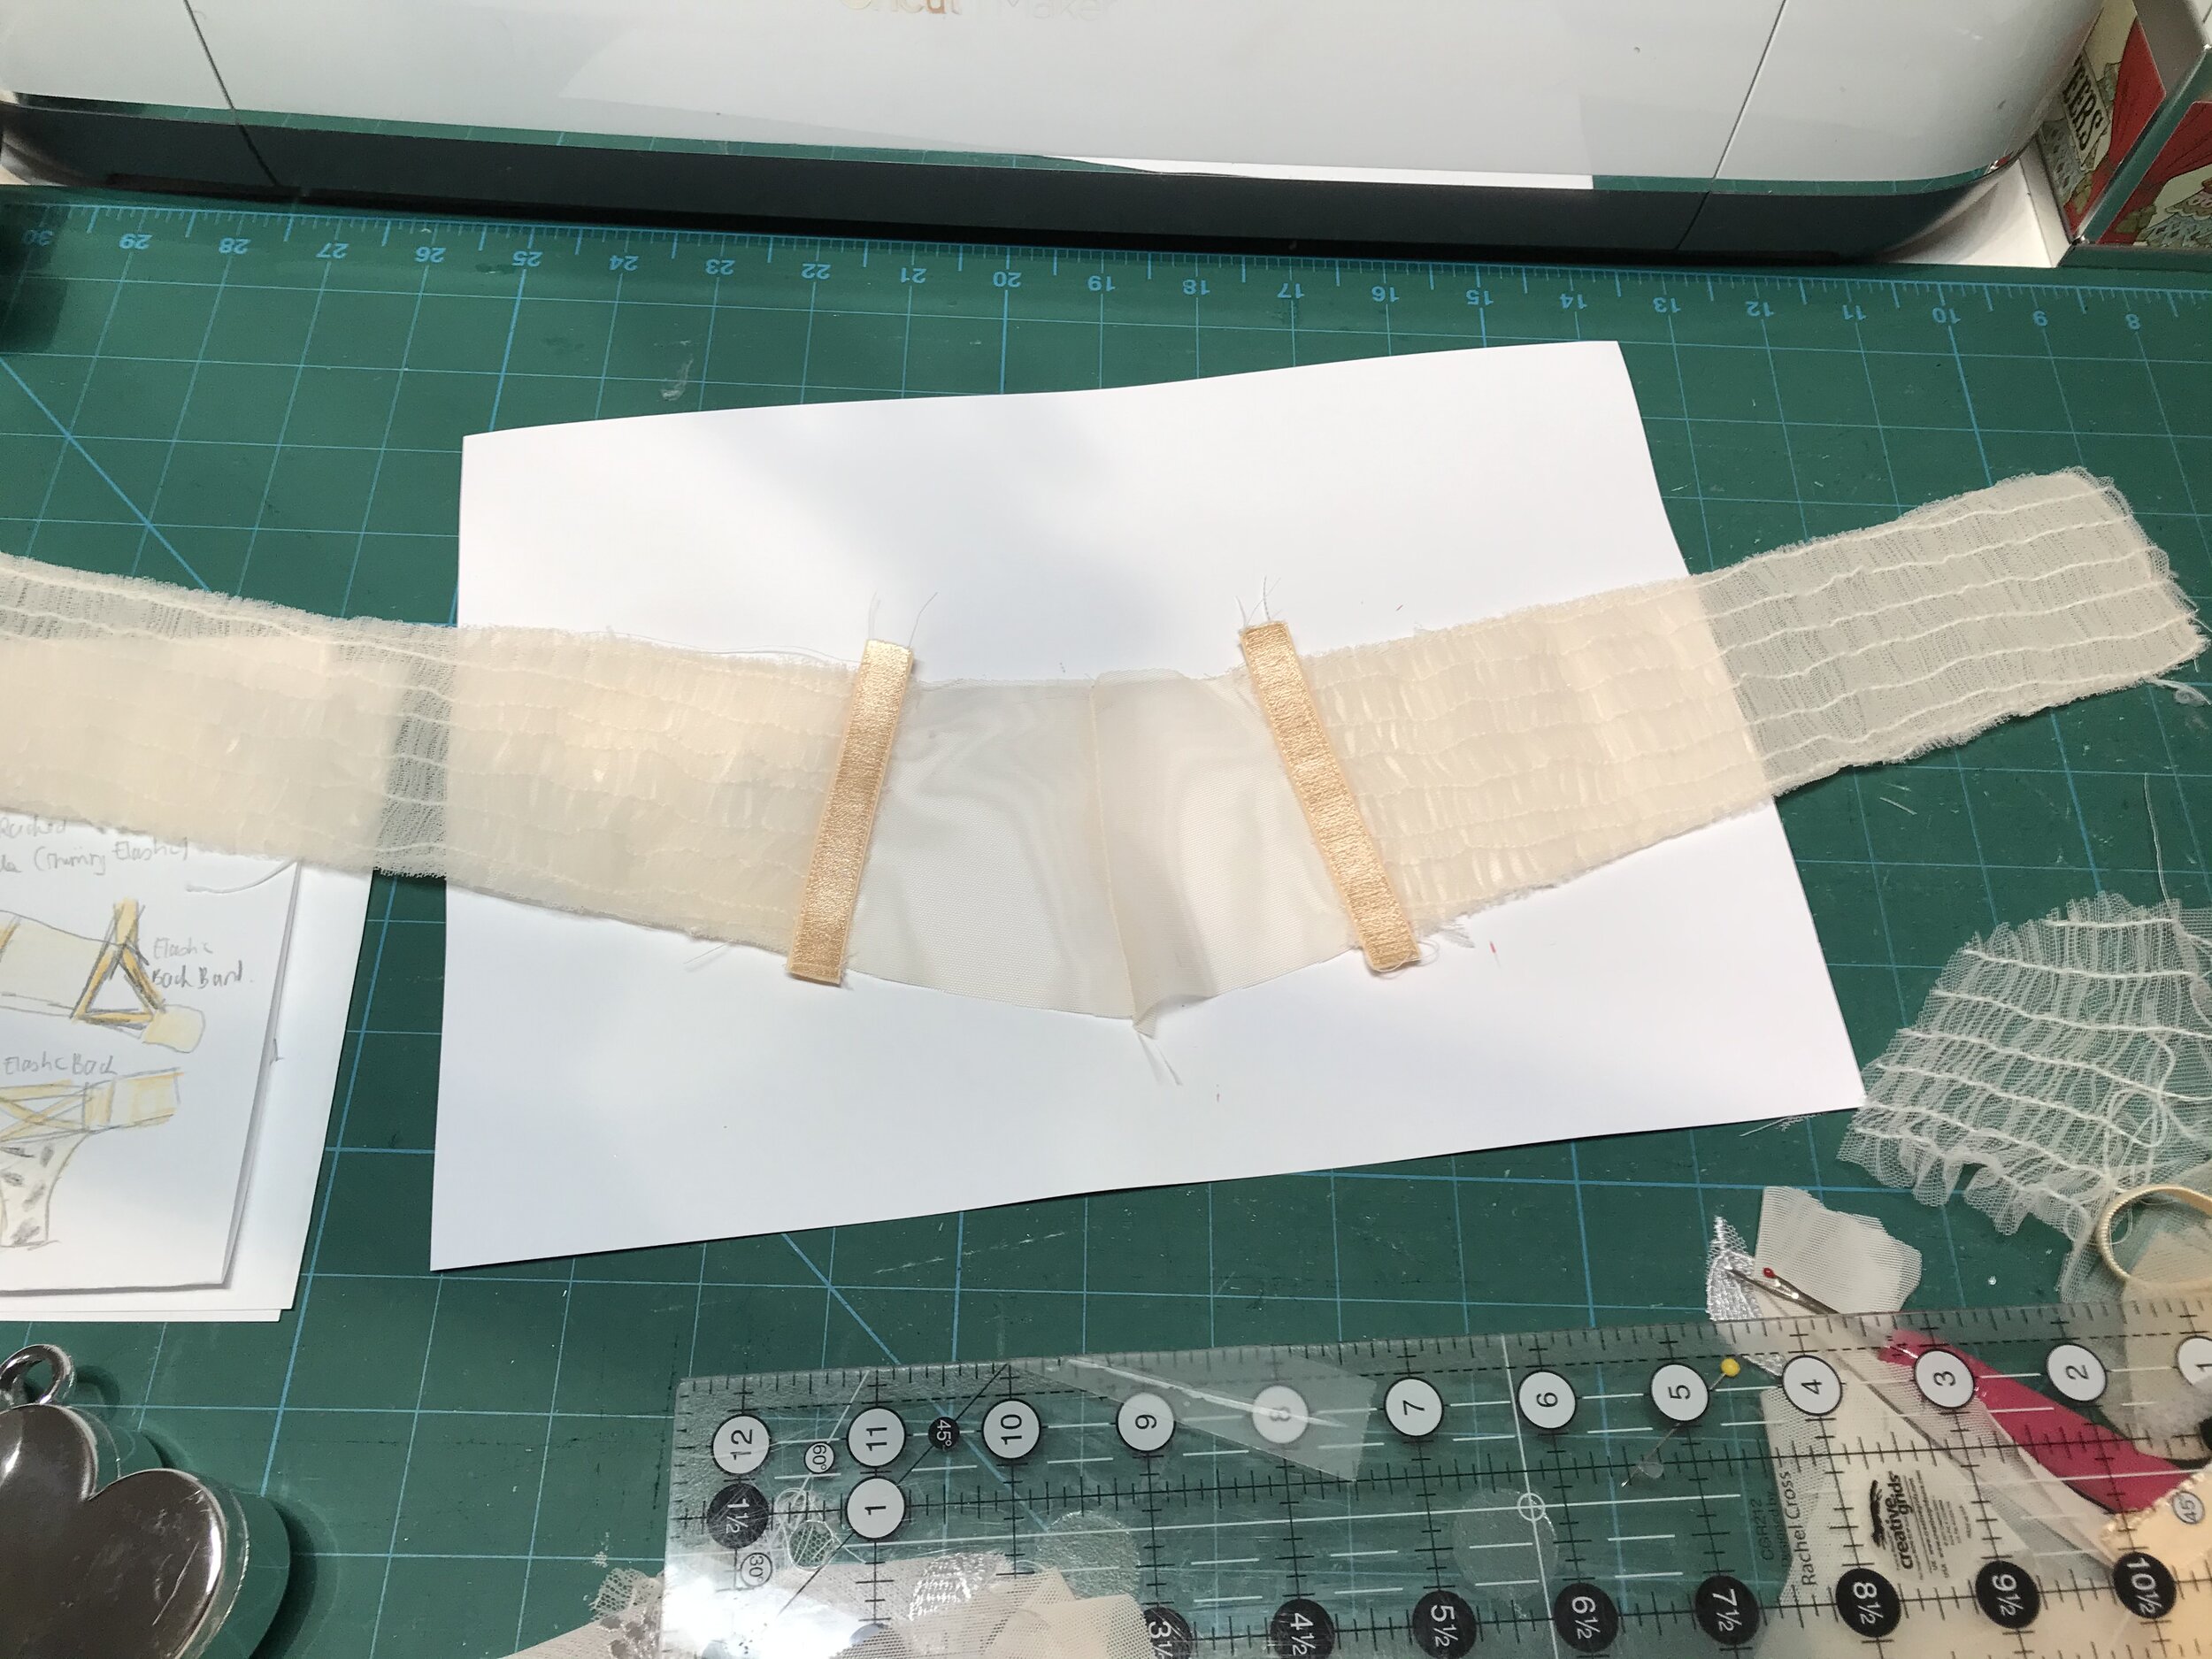
Next I covered the open back seam with another piece of strap elastic and trimmed back to the stitching. The plan was to use the lace for the back extension but I decided it didn’t have enough stretch so I used the stretch mesh.

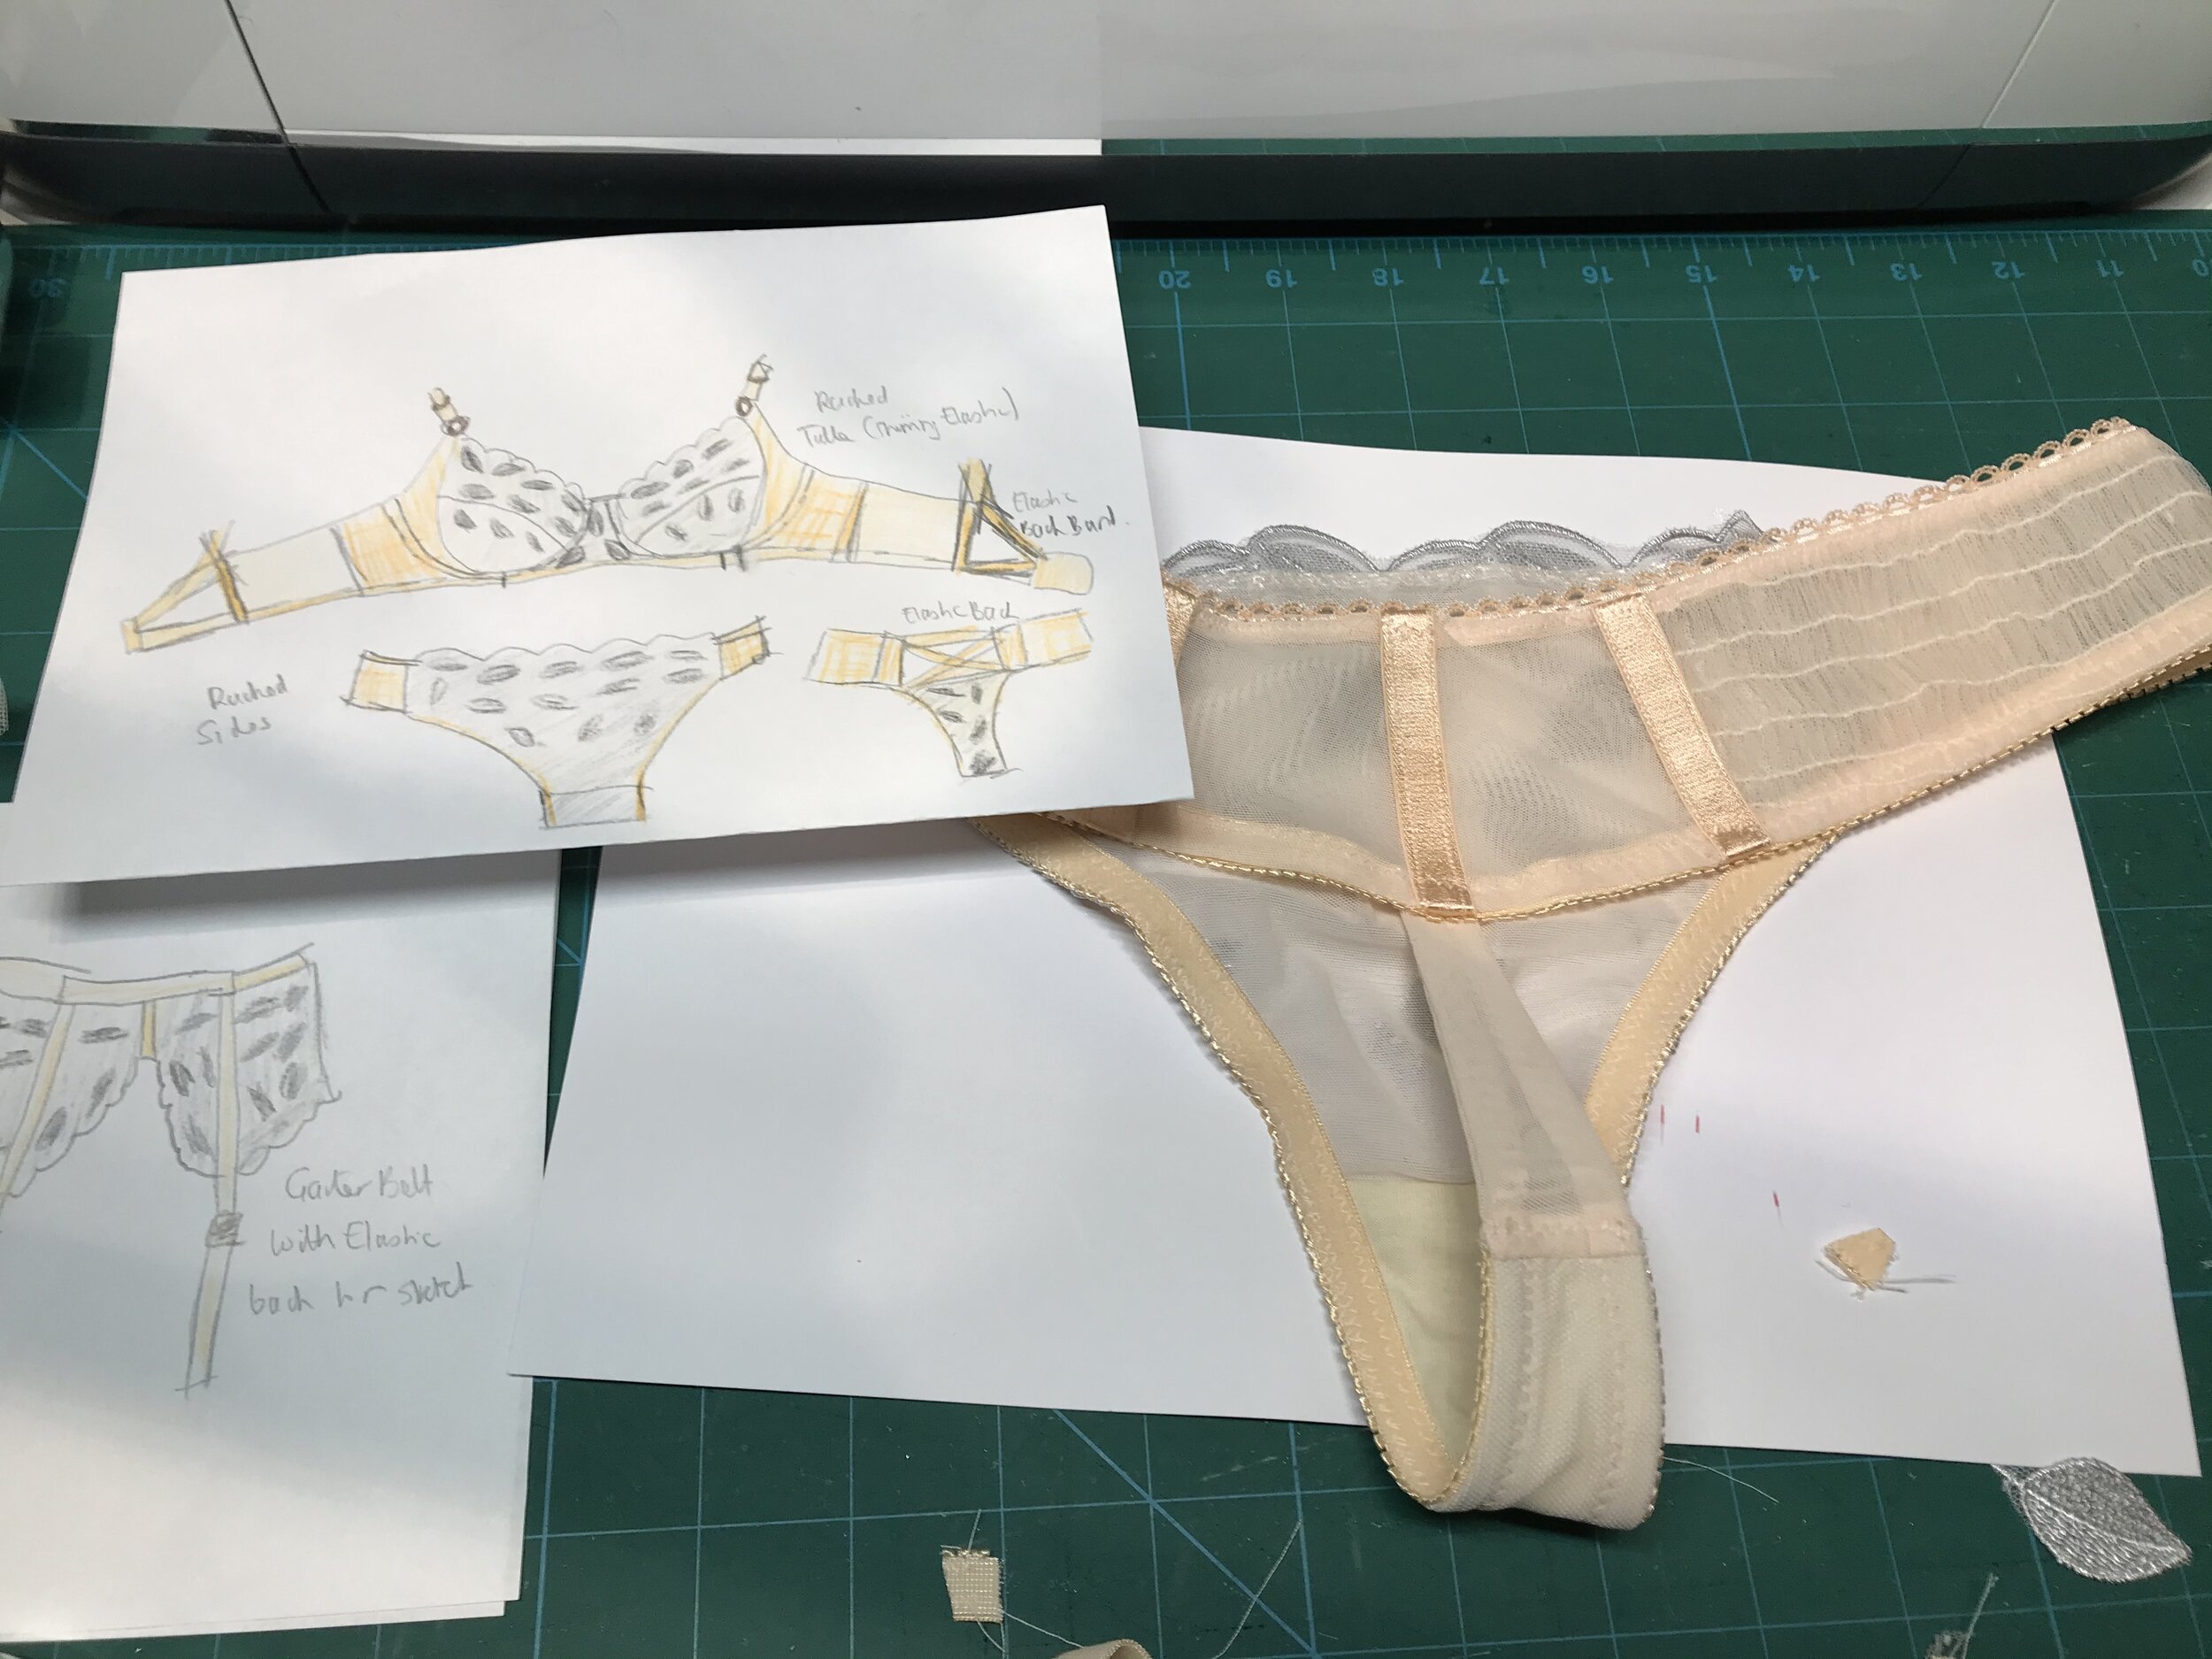
I did want to make a garter but I only had rose gold fasteners so I will leave that for another time. To be honest the set was perfect as it was and I need a rest!

Bra-A-Week Challenge - Anyone else keeping up?

I am a big fan of Emerald Erin and her Bra-A-Week challenge has been a great source of inspiration to take my makes to a new level. This ties in nicely with being part of this years #tmcollaBRAtory which I have talked about in previous posts. So I thought I would post a round up of some particularly pleasing recent makes.

First off is my most recent make which uses Erin’s idea for creating stripes by sewing down pleated tulle. I had just received a huge order from Tailor Made which included some beautiful autumnal colours. What I hadn’t realised until it arrived was that the olive tulle was a perfect match with the leaf lace. Then I needed a pattern that would showcase both the lace and the striped tulle.

711D5A33-D2BF-4E54-9243-93DD6C5F6F77.PNG

I couldn’t decide between the Orange Lingerie Marlborough or the Emerald Erin Black Beauty, both of which I have made numerous times as they both fit perfectly. In the end I decided to use the Marlborough as the power bar is part of the cup and I wouldn’t loose the sheerness of the one layer. Also the lace has quite a deep scallop and the upper cup of the Marlborough fitted perfectly.

Creating the stripes was a lengthy process as I wanted to be precise with the pleat. First I had to decide which way to pleat the tulle. This had to be lengthwise as I only had 1/2 yard but full width. Using a chalk marker I drew lines at 1” intervals and then folded from line to line, pinning and then basting. Then I had to choose what thread colour to use. As I didn’t have a green close enough I decided to use the beige contrast so I would need to be super neat! Using knife pleats meant that one side of the fold would be on top and the other side on the reverse. The reverse stitch of my machine is pretty good but I still decided to stitch from the right side. Luckily I have a great edge foot which I set at 1/16th and could sit against the edge of the fold.

The next decision was what to use as lining. Looking through my stash I found some sheer lining which matched the lace and I really liked the two tone effect under the olive tulle. To make sure I cut the pieces exactly mirrored I folded the pleats and pinned in place. Then I had to decide how to place the pattern pieces so I didn’t have any silly edges and it would look right in a seam allowance. I also chose to use the tulle for the frame rather than a lace band. I finished the bra as normal and moved on to matching underwear.

I had to scratch my head a little to decide how to bring both the tulle and lace into underwear. Both have some give in one direction so I wanted a pattern that could use this. Looking through my patterns I thought I would try an Ohhhlulu Grace and use the lace scallop lengthwise for the side panels. I didn’t have enough tulle to pleat the back and only partially for the front but was enough to look fine.

4778FF32-DD4A-4629-9B60-7202EFBFBB93.JPEG

I used two layers of the lace for each side panel using the full width. I used chalk to mark the seam allowance on the tulle and a red Frixon pen for the lace. I placed the lace over the tulle lining up the seams allowances. Then I stitched around the scallop and through the seam allowance and cut back to the stitching. Finally I used fold over elastic for the waist with soft lingerie elastic for the leg.

Although I had made a size bigger than normal to make up for the lack of stretch they are a little snug so I decided to make the Orange Lingerie Montgomery using the lace and some matching super soft and stretchy mesh as an alternate.

BD74727B-F63A-472B-A1B7-5351131DFDCD.PNG

I was so pleased with the result. It’s hard to go wrong with such fabulous supplies and patterns I know fit well which brings me smoothly on to my October make for #TMCollaBRAtory. I had a gorgeous embroidered tulle lace bra kit and wanted to bring out the beautiful colours. The kit came with black tulle but it was little dark to bring out the delicate blue and purple flowers so out came the stash and I decided on what was called mauve on the EvielaLuve website. Then the usual dilemma of what pattern to use to showcase the gorgeous lace. Again a search through my patterns brought me to the Orange Lingerie Boylston. it has a deep upper cup and wide straps.

My first step was to take off the seam allowance of the upper cup and straighten the line. I then used tulle on the fold for the upper cup edge and then placed the lace over the tulle angling down from the top outer edge to the centre front seam allowance. For the lower cup pieces I basted a layer of tulle to each piece and treated as one. Then I used another layer of tulle for a lining so I could enclose the upper cup. The lace can’t be mirrored so it is a case of finding a balance for bridge and side frame. Again I basted one layer of tulle to each piece and then lined with tulle so I could enclose the seams and the front of the bra would have the same level of sheerness.

IMG_4833.jpg

I wasn’t sure how I would make the straps but as this was a kit for a bra I thought i would cut out the front panel for a Montgomery brief and see what I was left with. I started with the straps in the tulle. There wasn’t enough lace to cover completely so I cut into two pieces and placed at an angle ensuring the low point of the scallop would hit the 3/8” line where the elastic would be sewn. For a flat and neat finish I slipped the strap in between the tulle and lace of the upper cup.

Both sets I could just sit and look at. Although I seem to enjoy deciding as I go along there is often a trigger that sends me in a particular direction!