Pattern Drafting, Sketches and New Year's Resolutions
It’s been a while since I last posted but I’ve had a manic few weeks of doing so many new things so I thought it was time to take a break and journal all the makes. My New Year’s Resolutions were to take time to practice sketching designs, further develop skills to take designs to patterns and explore different approaches to drafting. So here is what I have achieved so far.
The year got off to a good start as Porcelynne had a week long Draft Along which was live drafting using the method in Jennifer’s book Bare Essentials. This was drafting from measurements to create a fitting pattern that could then be turned into a sloper to create any design. Alternatively you can use your fitted Eve cup, or any other well fitting pattern, to create the sloper, which I had already done, but was interested to see how the two would compare.
What I took away from the week was a better understanding of how to manipulate patterns I already had and this set is my first attempt to take an idea through to a finished make.
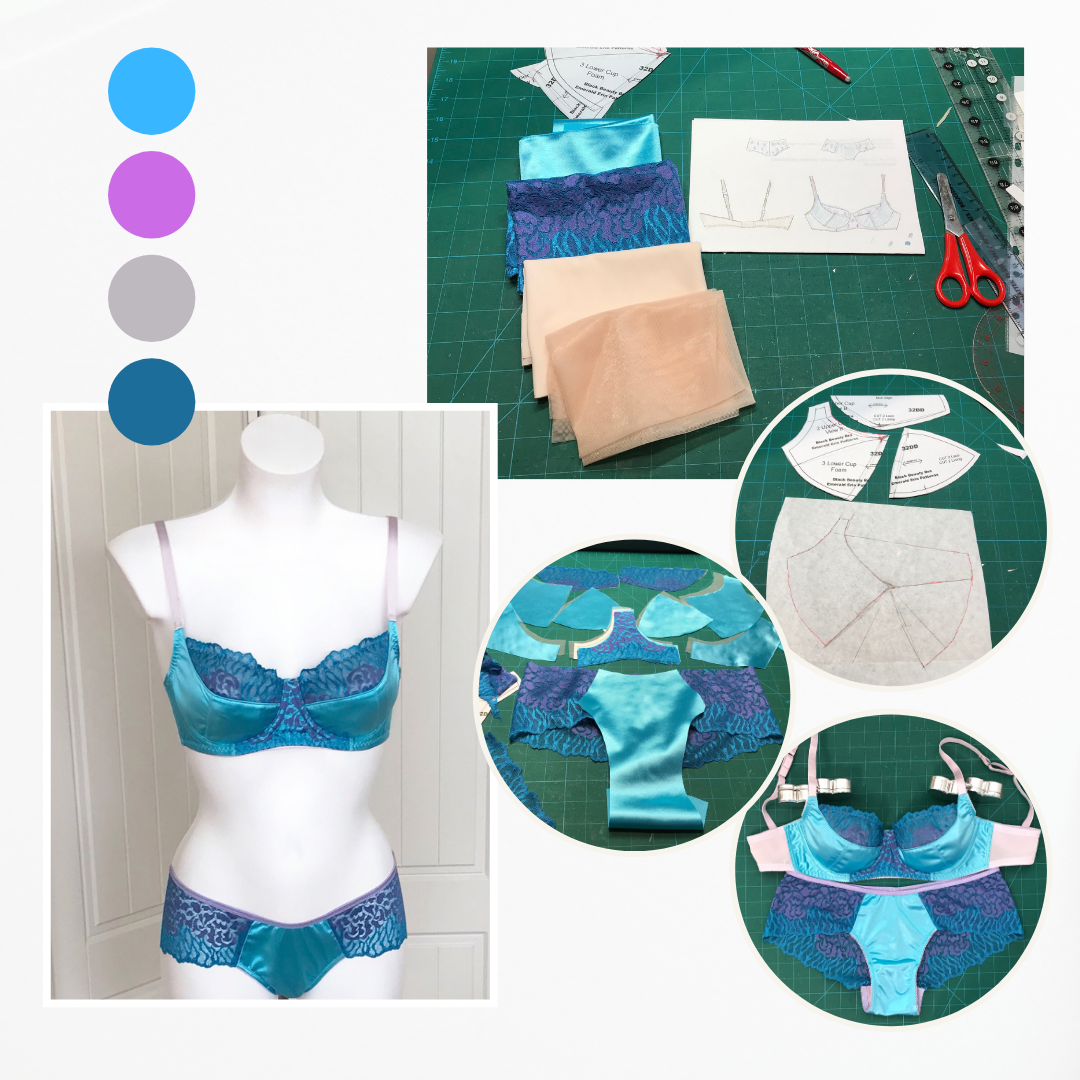
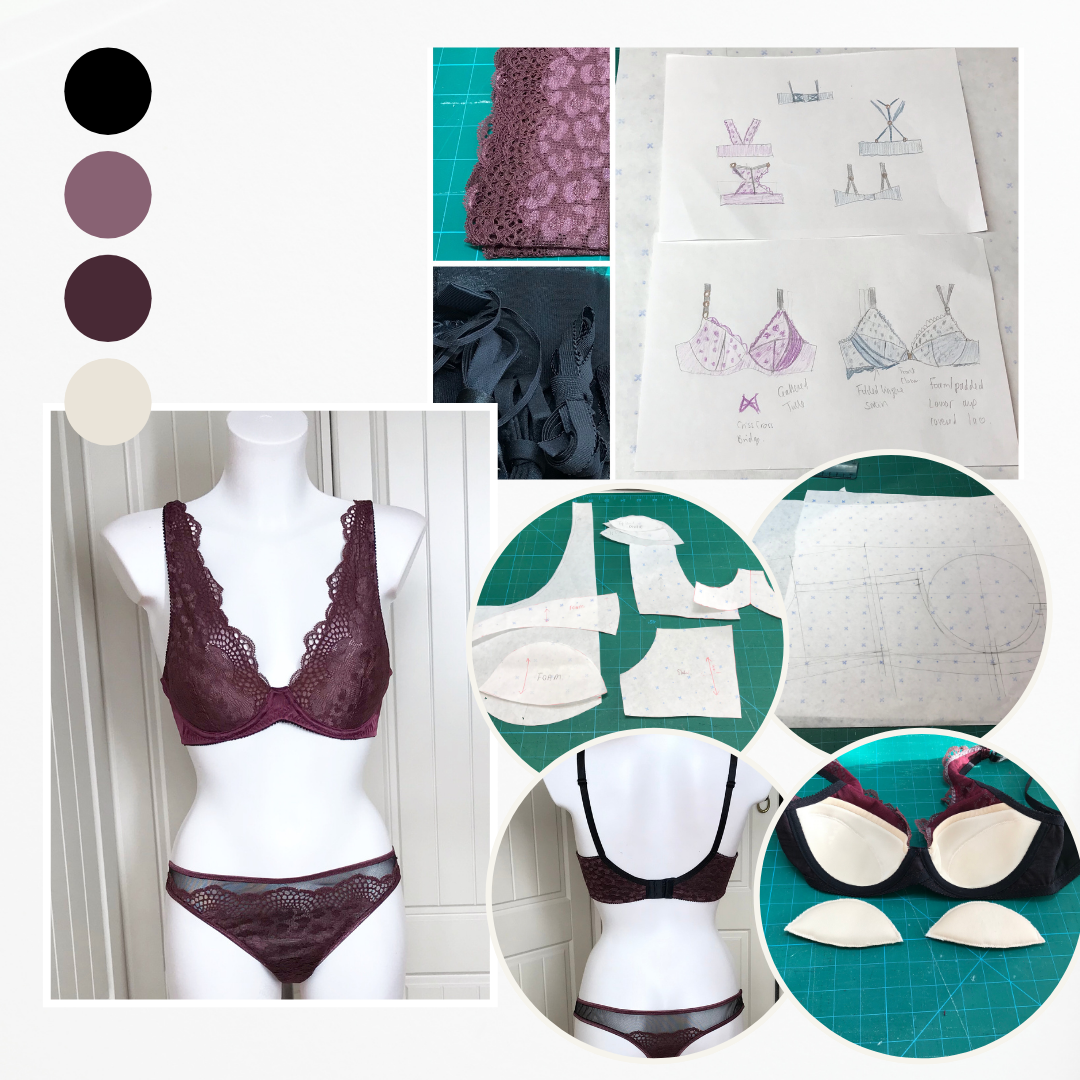
Although this method is a mathematical approach to determining measurements for bra drafting, for most of us, the first draft is a starting point. My initial draft had a similar shape to my Eve but needed some work to get a good fit. I had my Tailormade TMCollaBRAtory January kit to use and an idea for the design so I thought I could make a sloper from my perfect fitting Emerald Erin Black Beauty. The first step was to integrate the strap part of the power bar into the upper cup.
I wanted to create a diagonal seam through the apex which would create a super powerbar side with a curved lace upper cup. To help decide where to place the seam I used a technique I had seen in Beverly Johnson’s Bra-makers Manual where you make up a cup in foam and draw the style lines and cut up. Using the Bare Essentials method I then had to put the curves back on. I made up a test cup to check the fit both in terms of cup size and that it fit into the frame. So I was ready to use the beautiful lingerie satin kit.
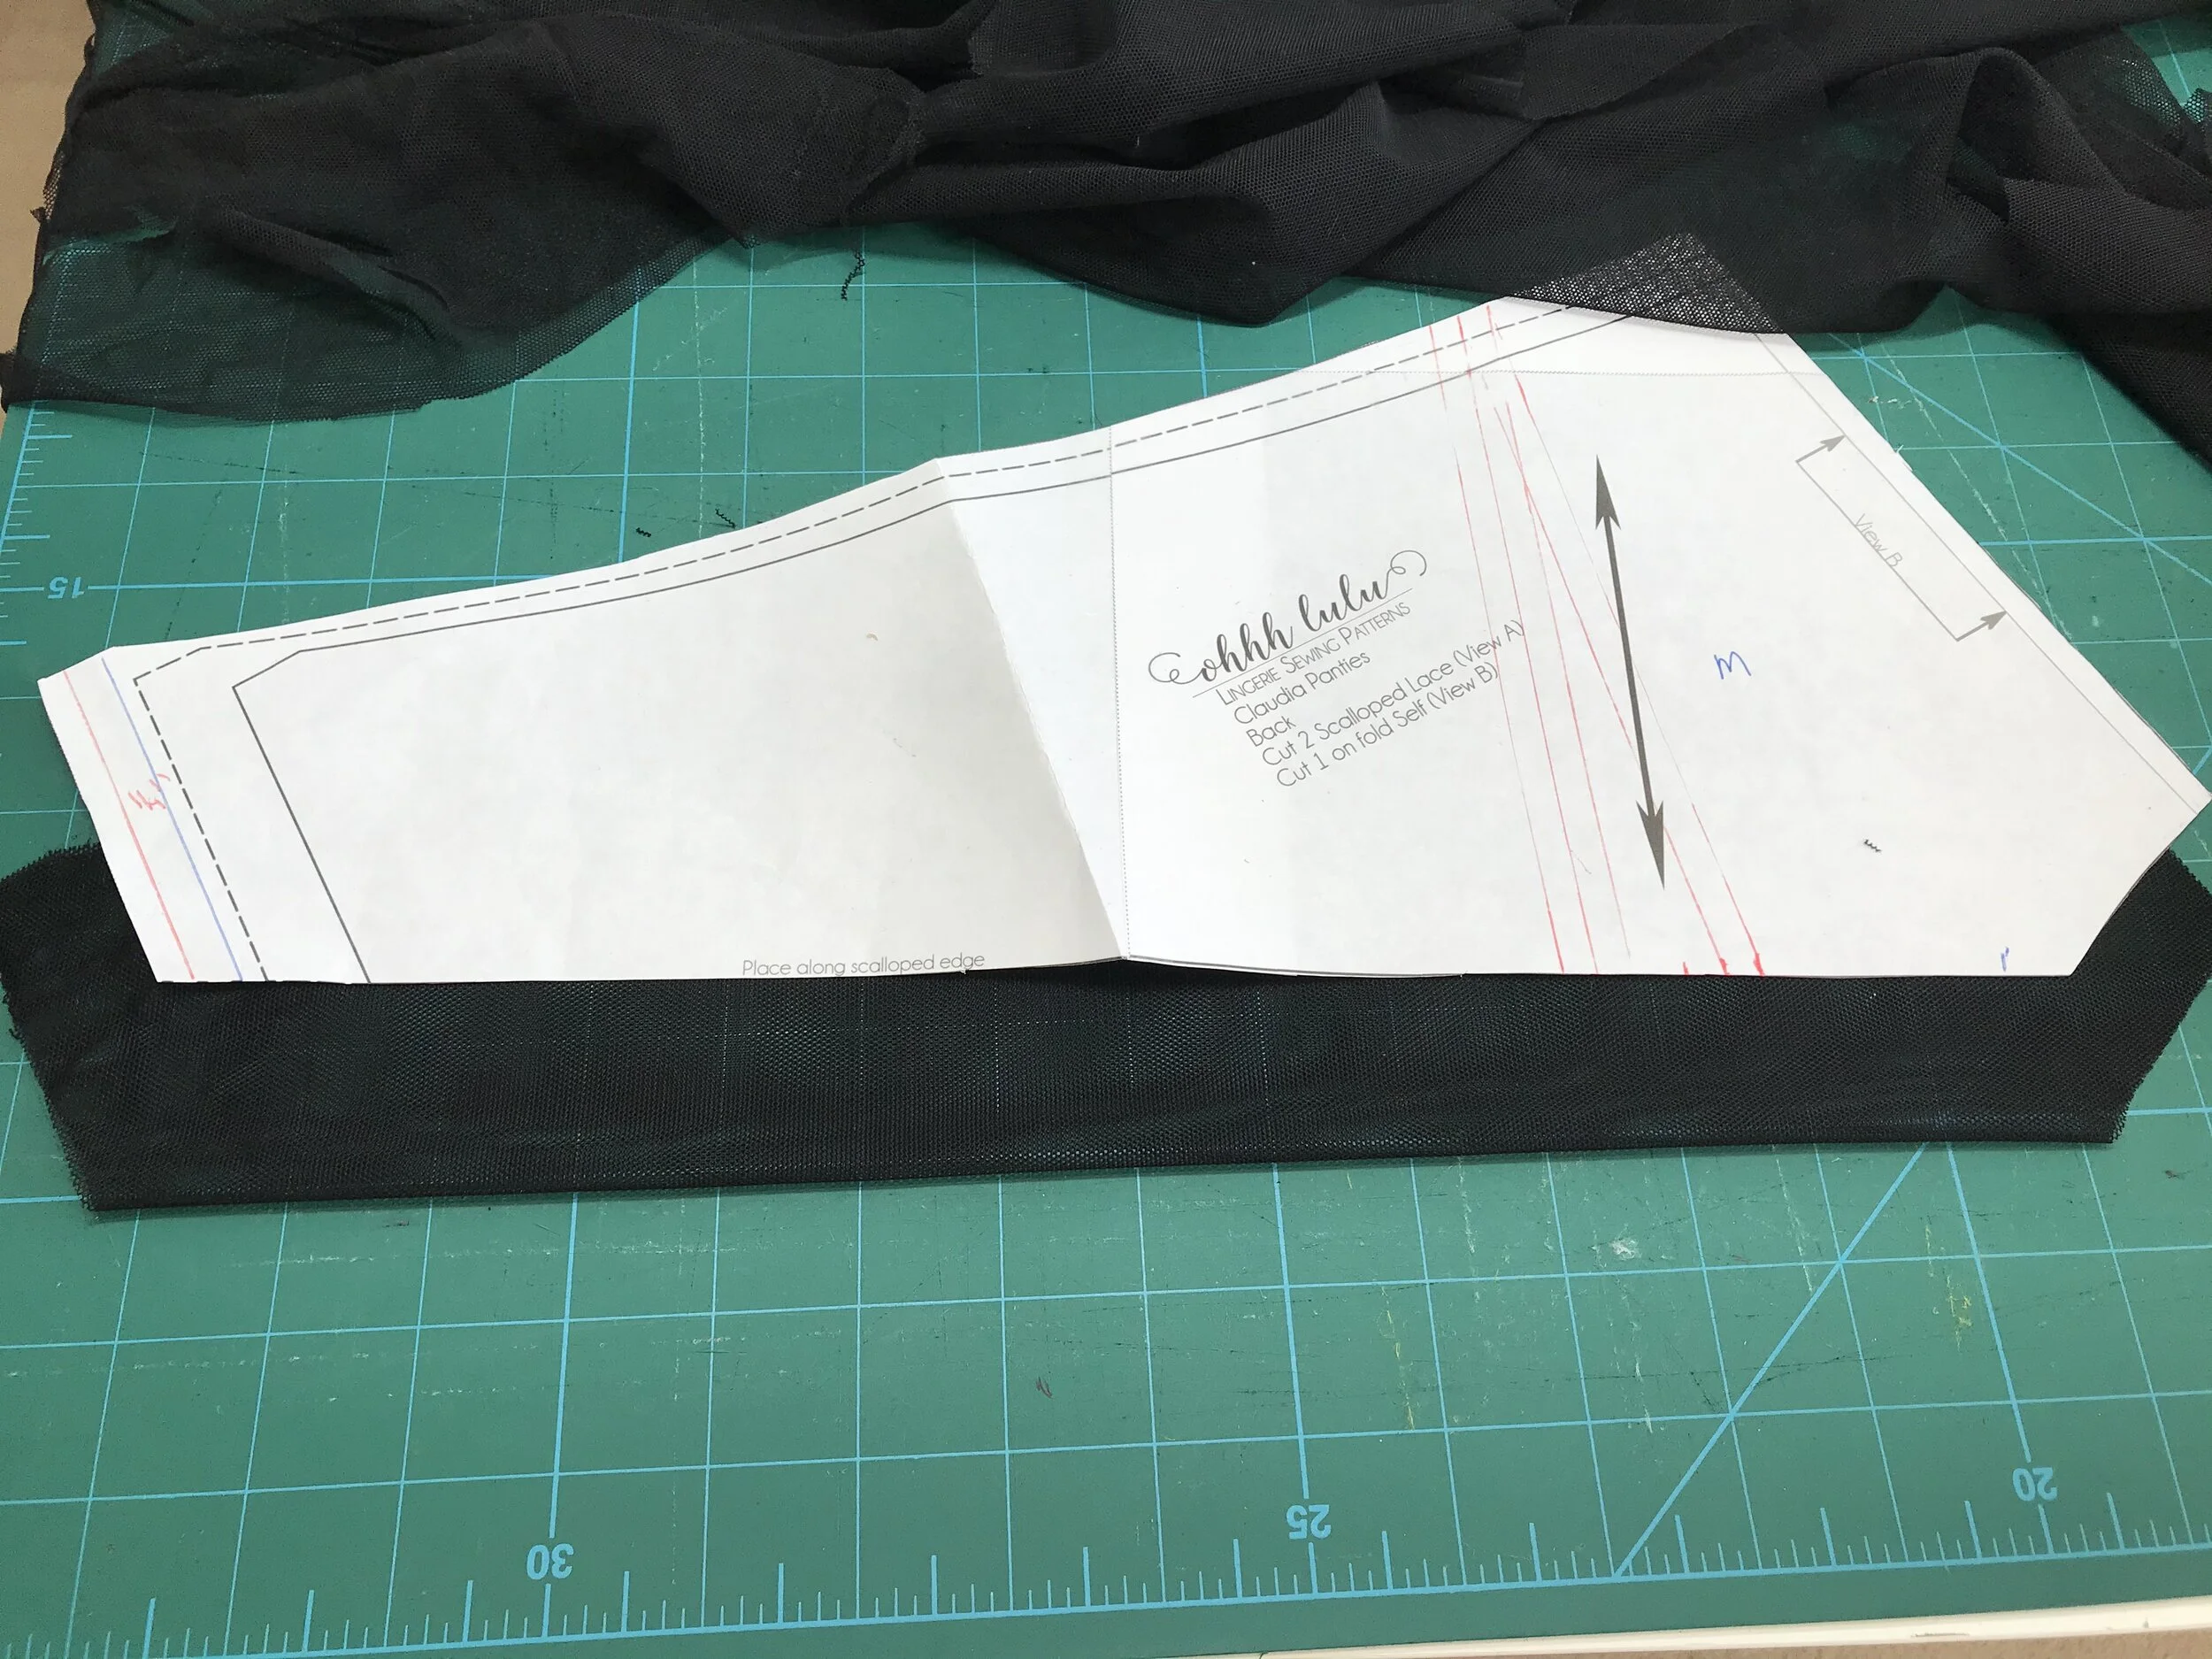
Before I decided where to use the lace on the bra I cut out the lace back for the Ohhhlulu Claudia which is a great pattern where you can use the non stretch fabric of your bra on the small front panel. I often size up with the Claudia depending on the stretch of my lace and whether the front panel has any stretch at all.
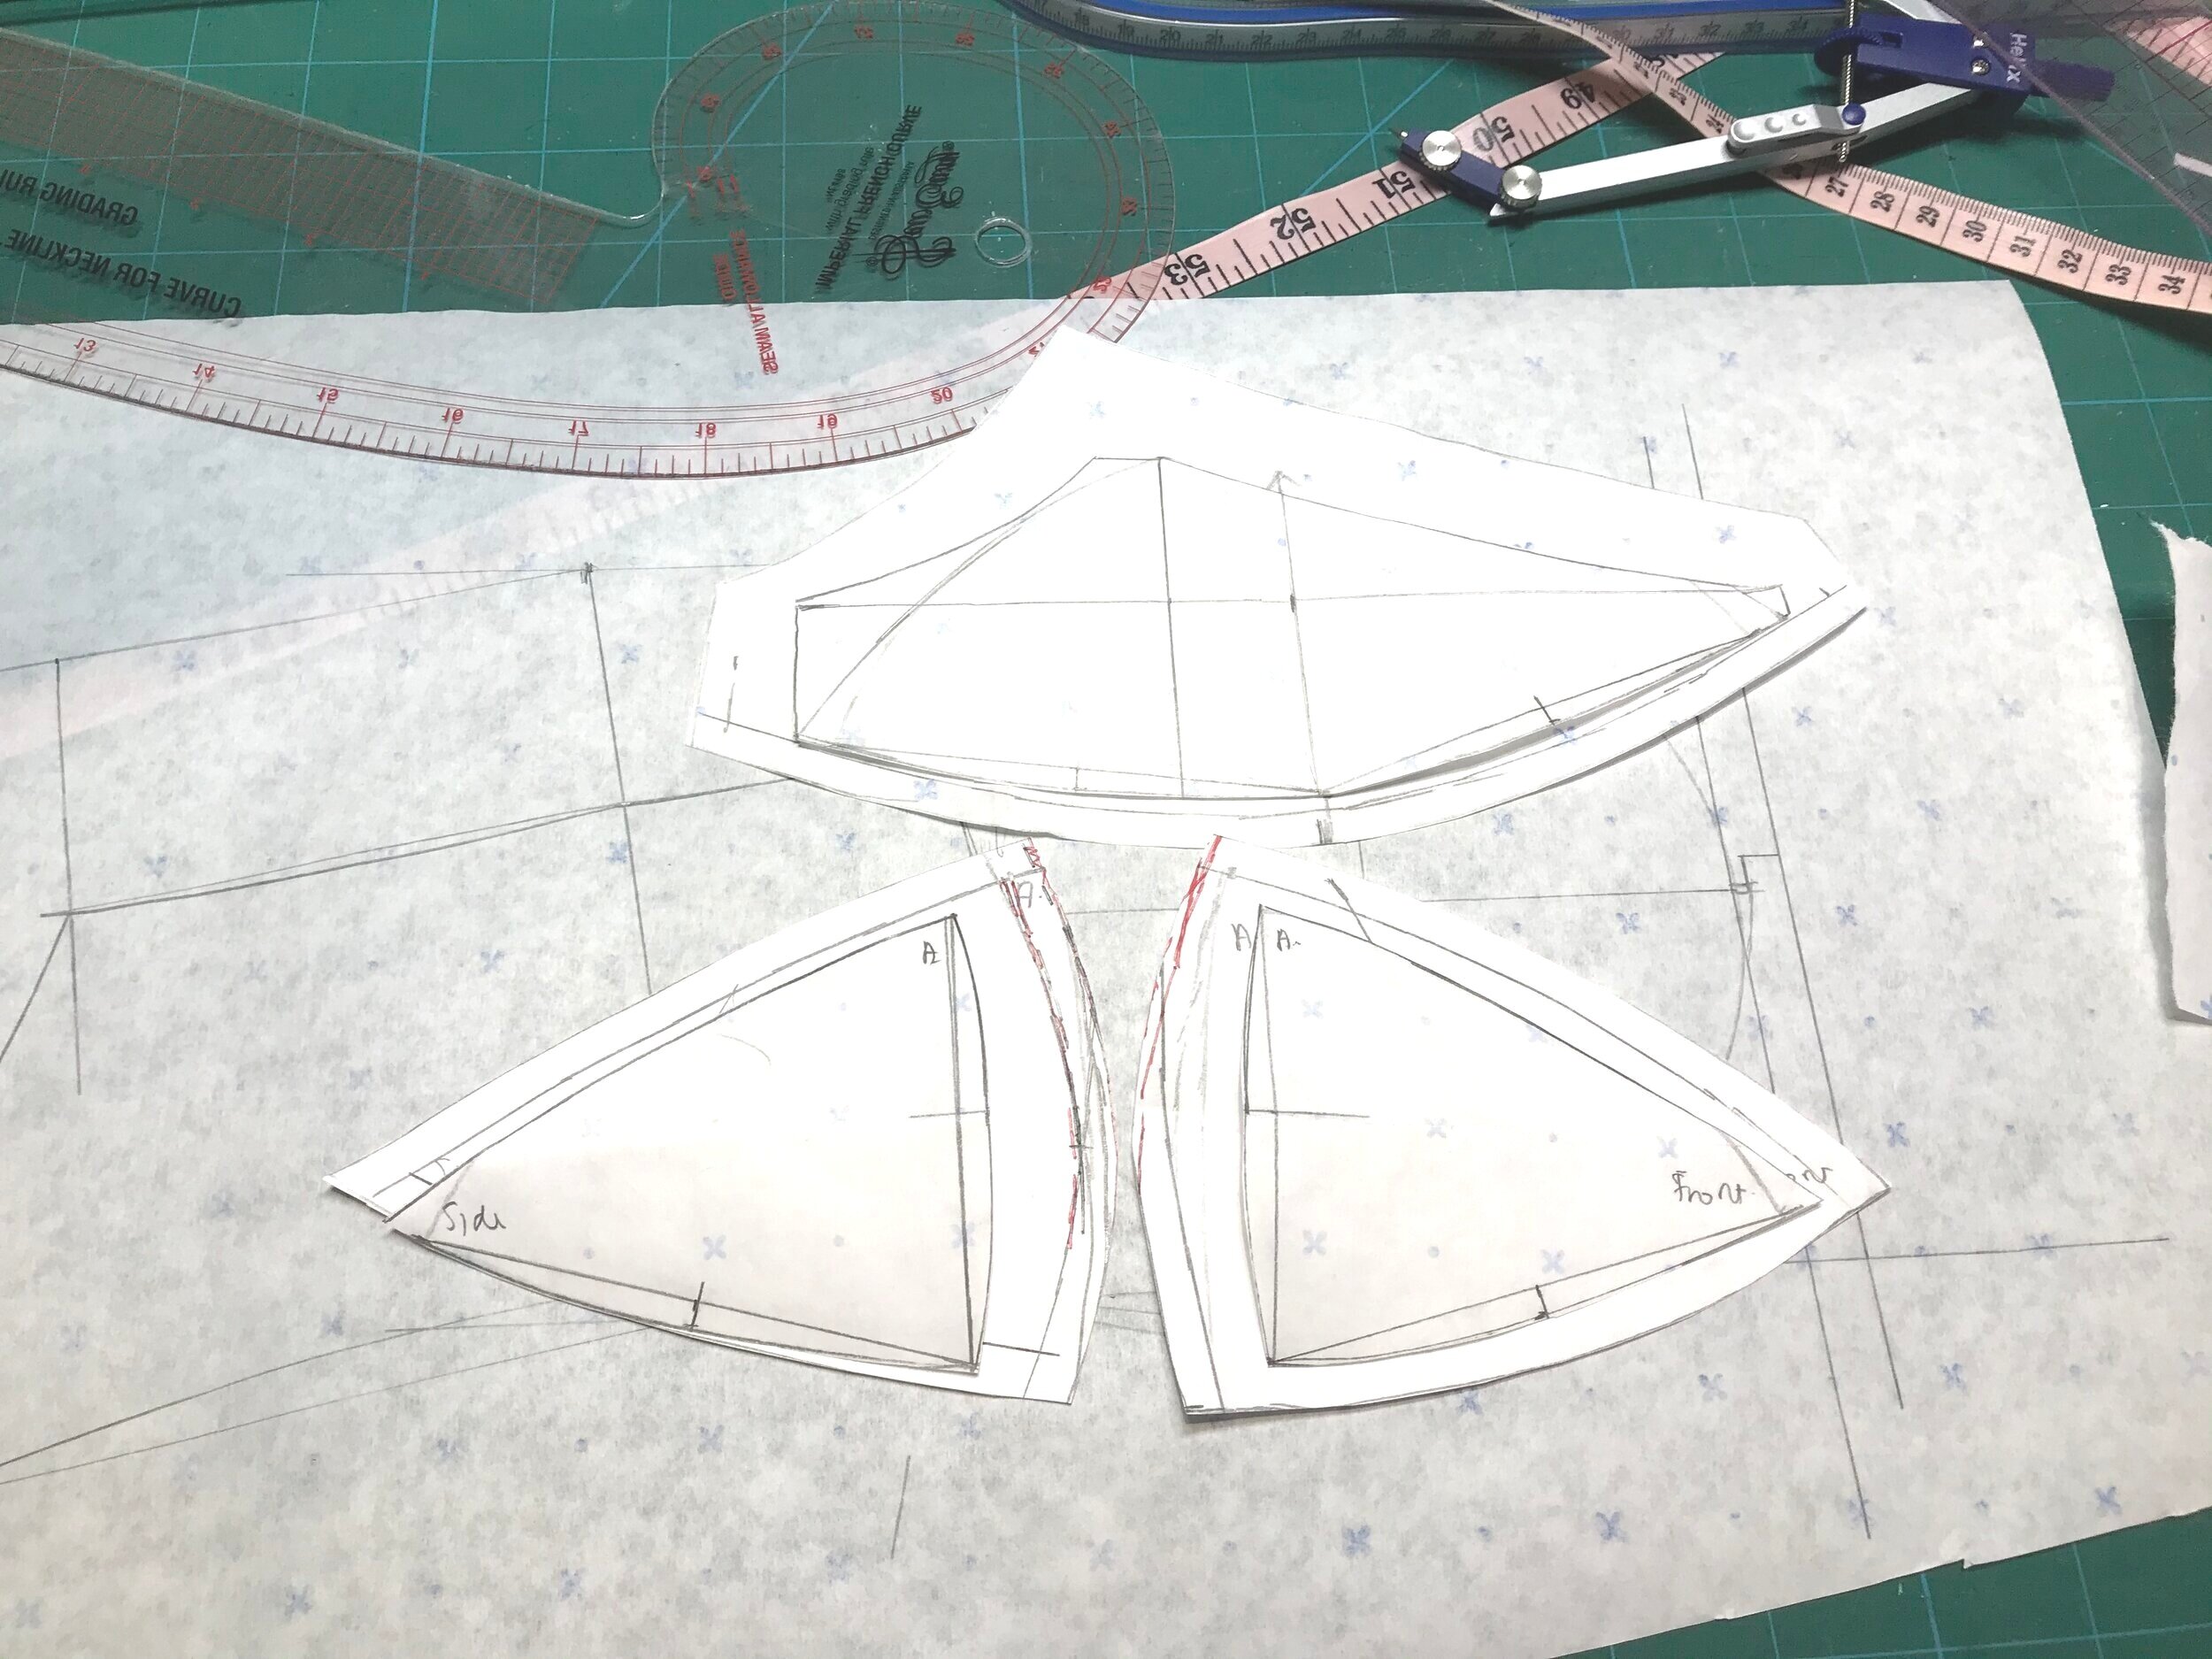
The next set came about because I had run out of regular wires and thought why not try drafting for the short/demi/plunge wires I did have and use the kit for my February TMCollaBRAtory. I sketched a few ideas for front closing, partial bands with strappy backs but then realised I needed to get the basics right first.
The band draft was straight forward but I was struggling with the cups so I decided to look through the many patterns I have and see if I could use them. The idea was a lace cup with a separate foam lower cup with a push up effect.
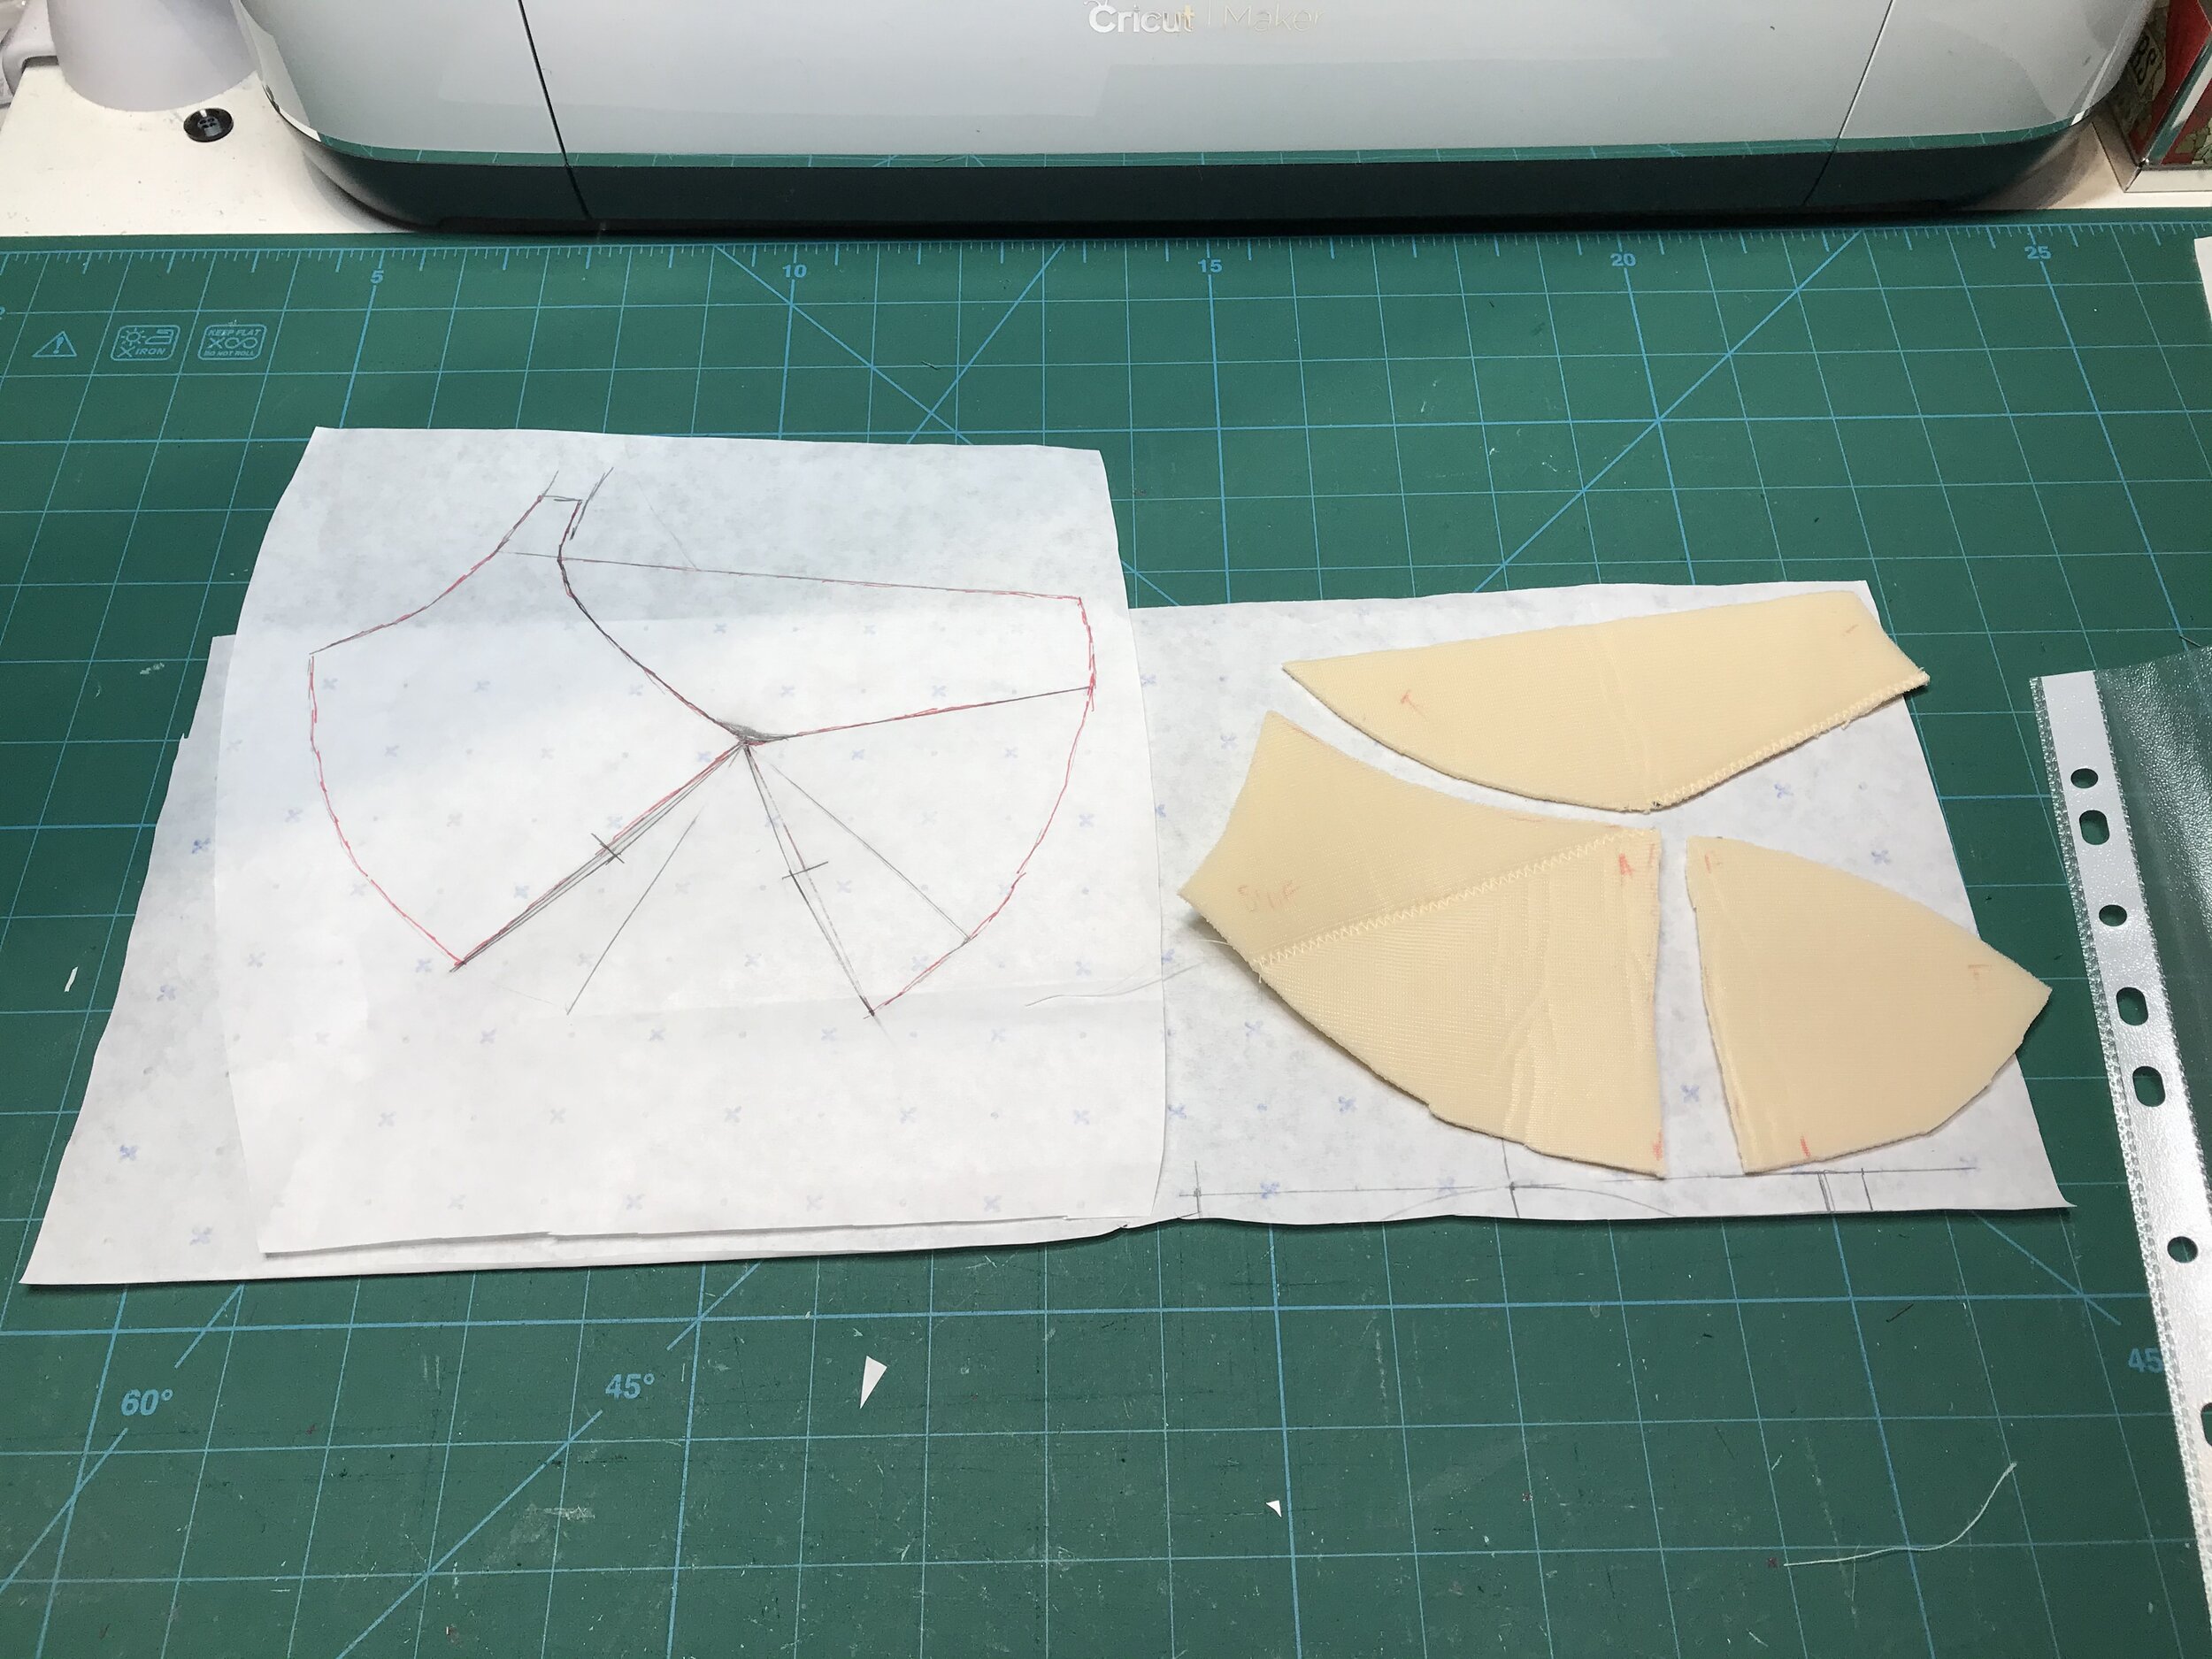
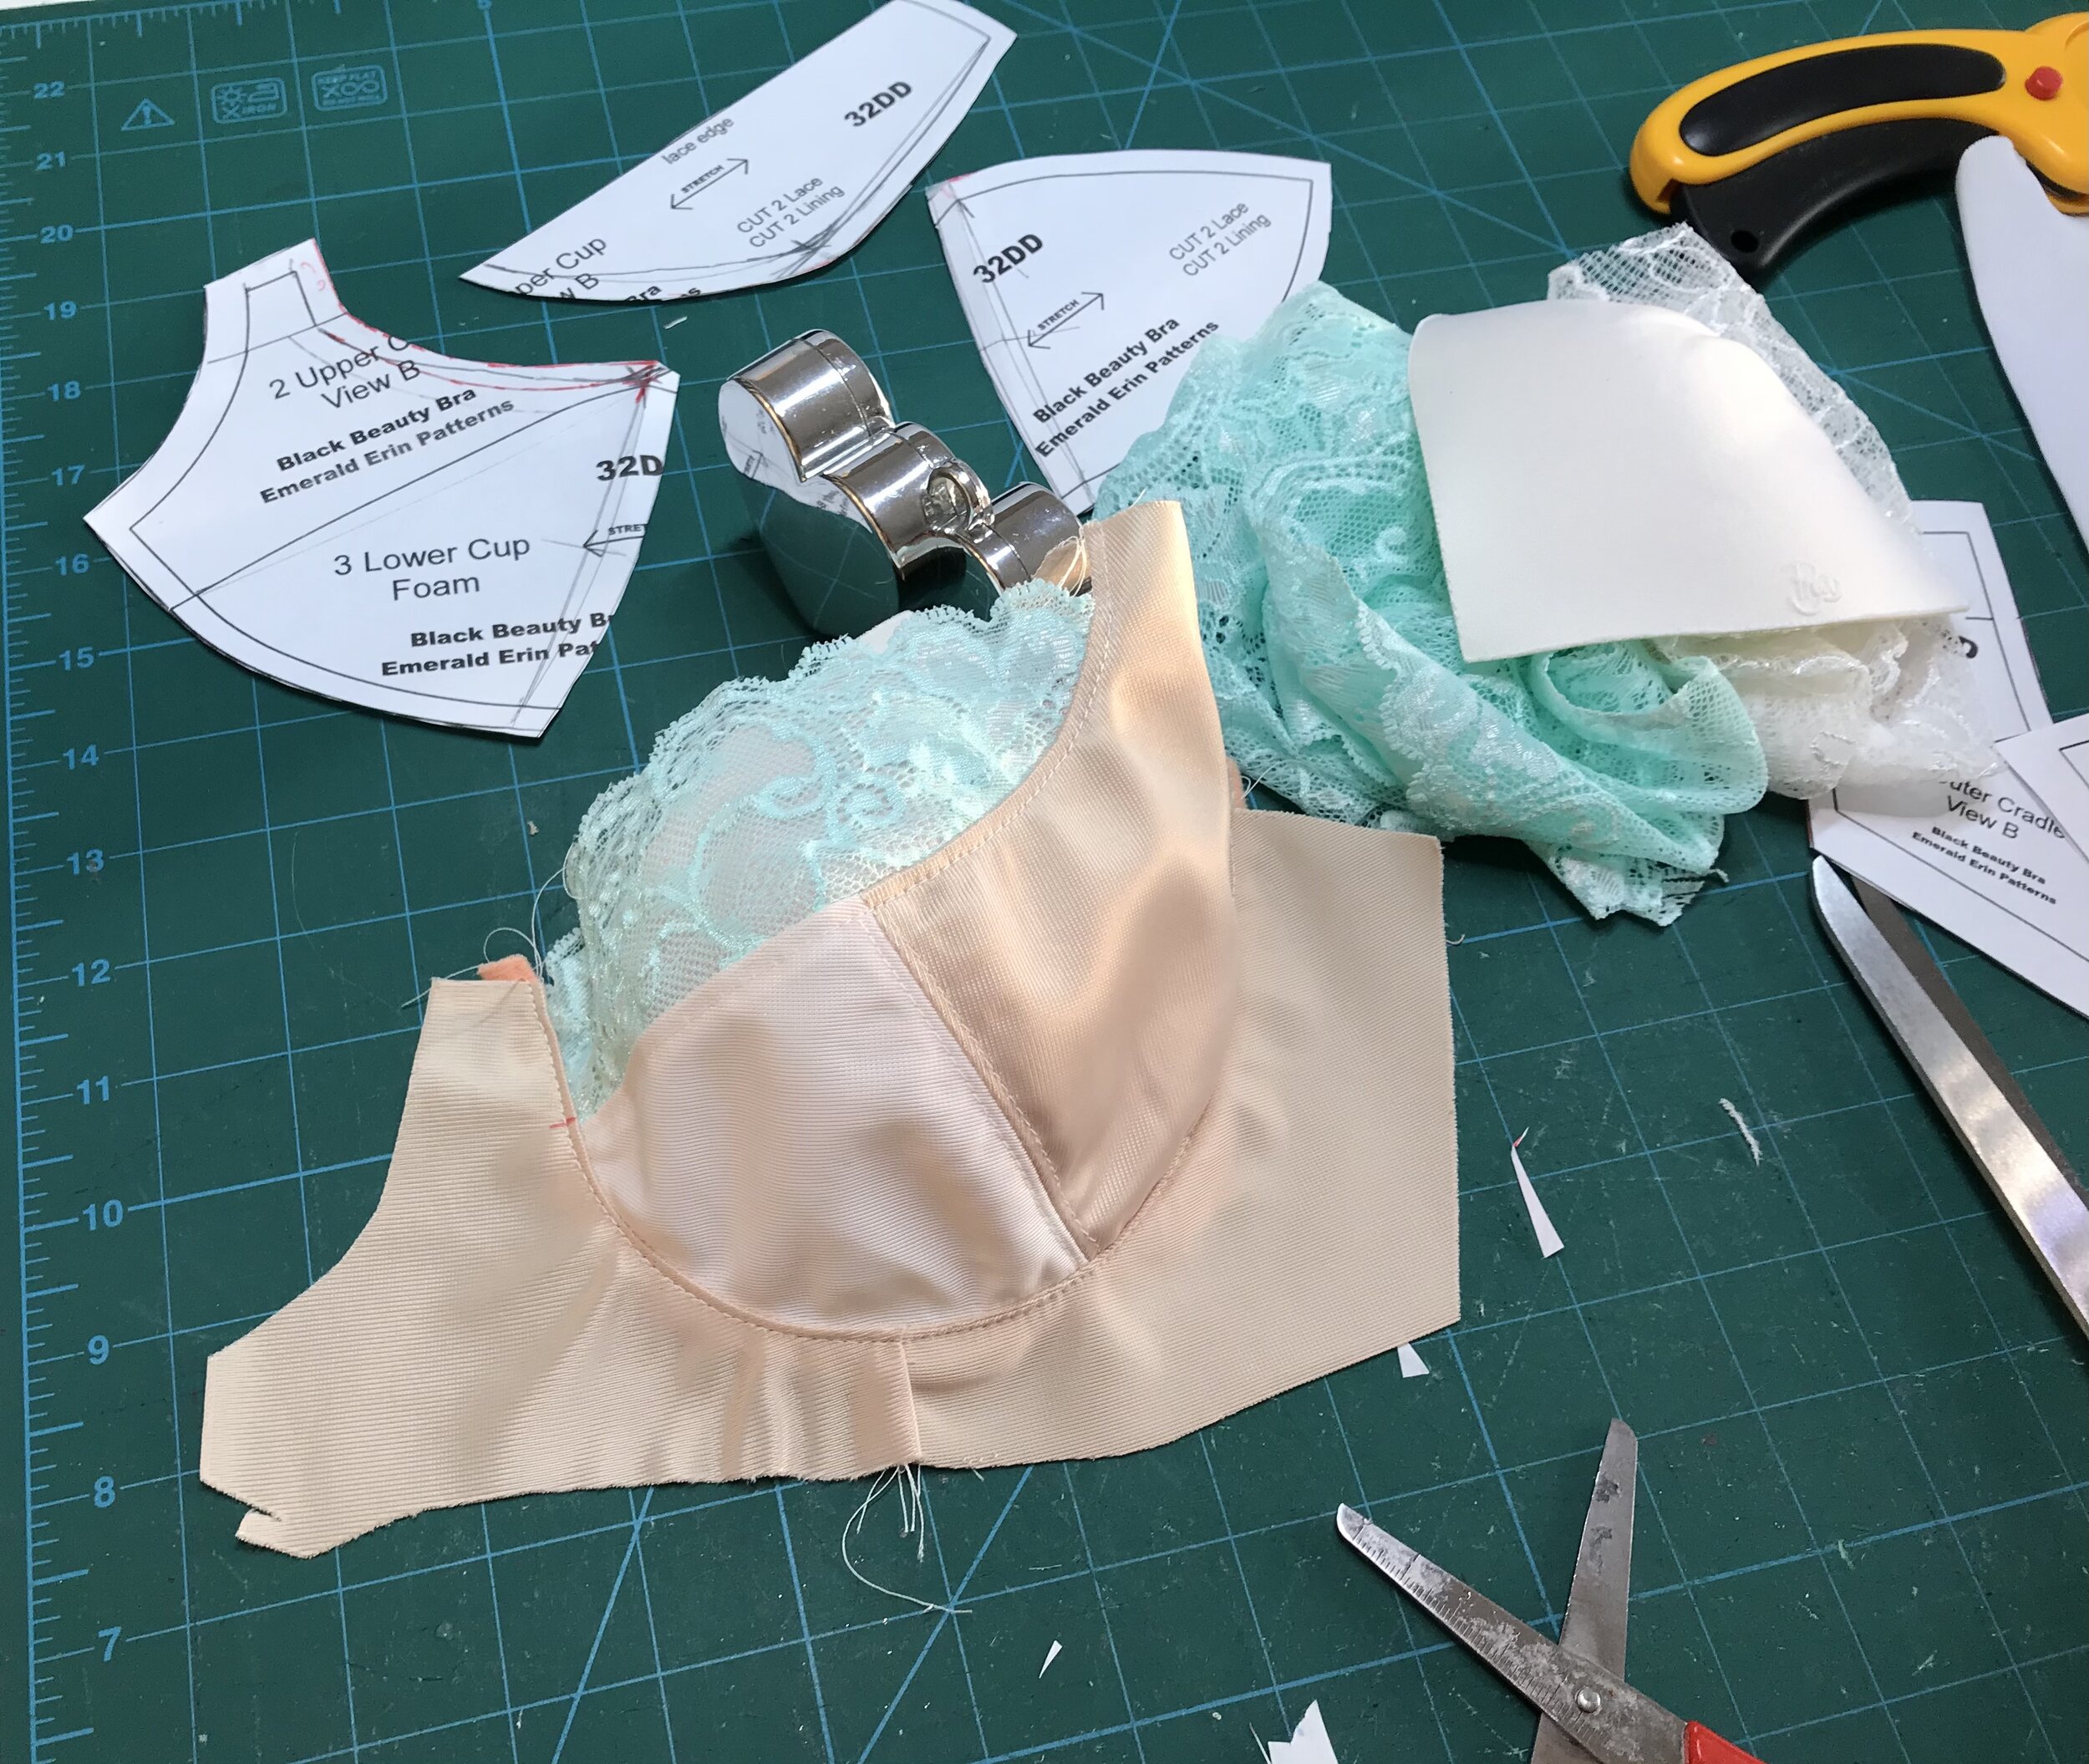
I first came up with using the Madalynne X Simplicity 8436 which is a partial band for stretch lace which I had made a while ago. So I adjusted the cups to fit my full band draft. Then I needed a foam lower cup piece. The answer was the Porcelynne Ariel cup which is a three piece cup for a lovely round shape. So I made up the full cup in foam and inserted into the band with the lace over and as before drew on the style I wanted. This took off most of the upper cup so I adjusted the middle piece to incorporate the bits of the upper cup I needed.
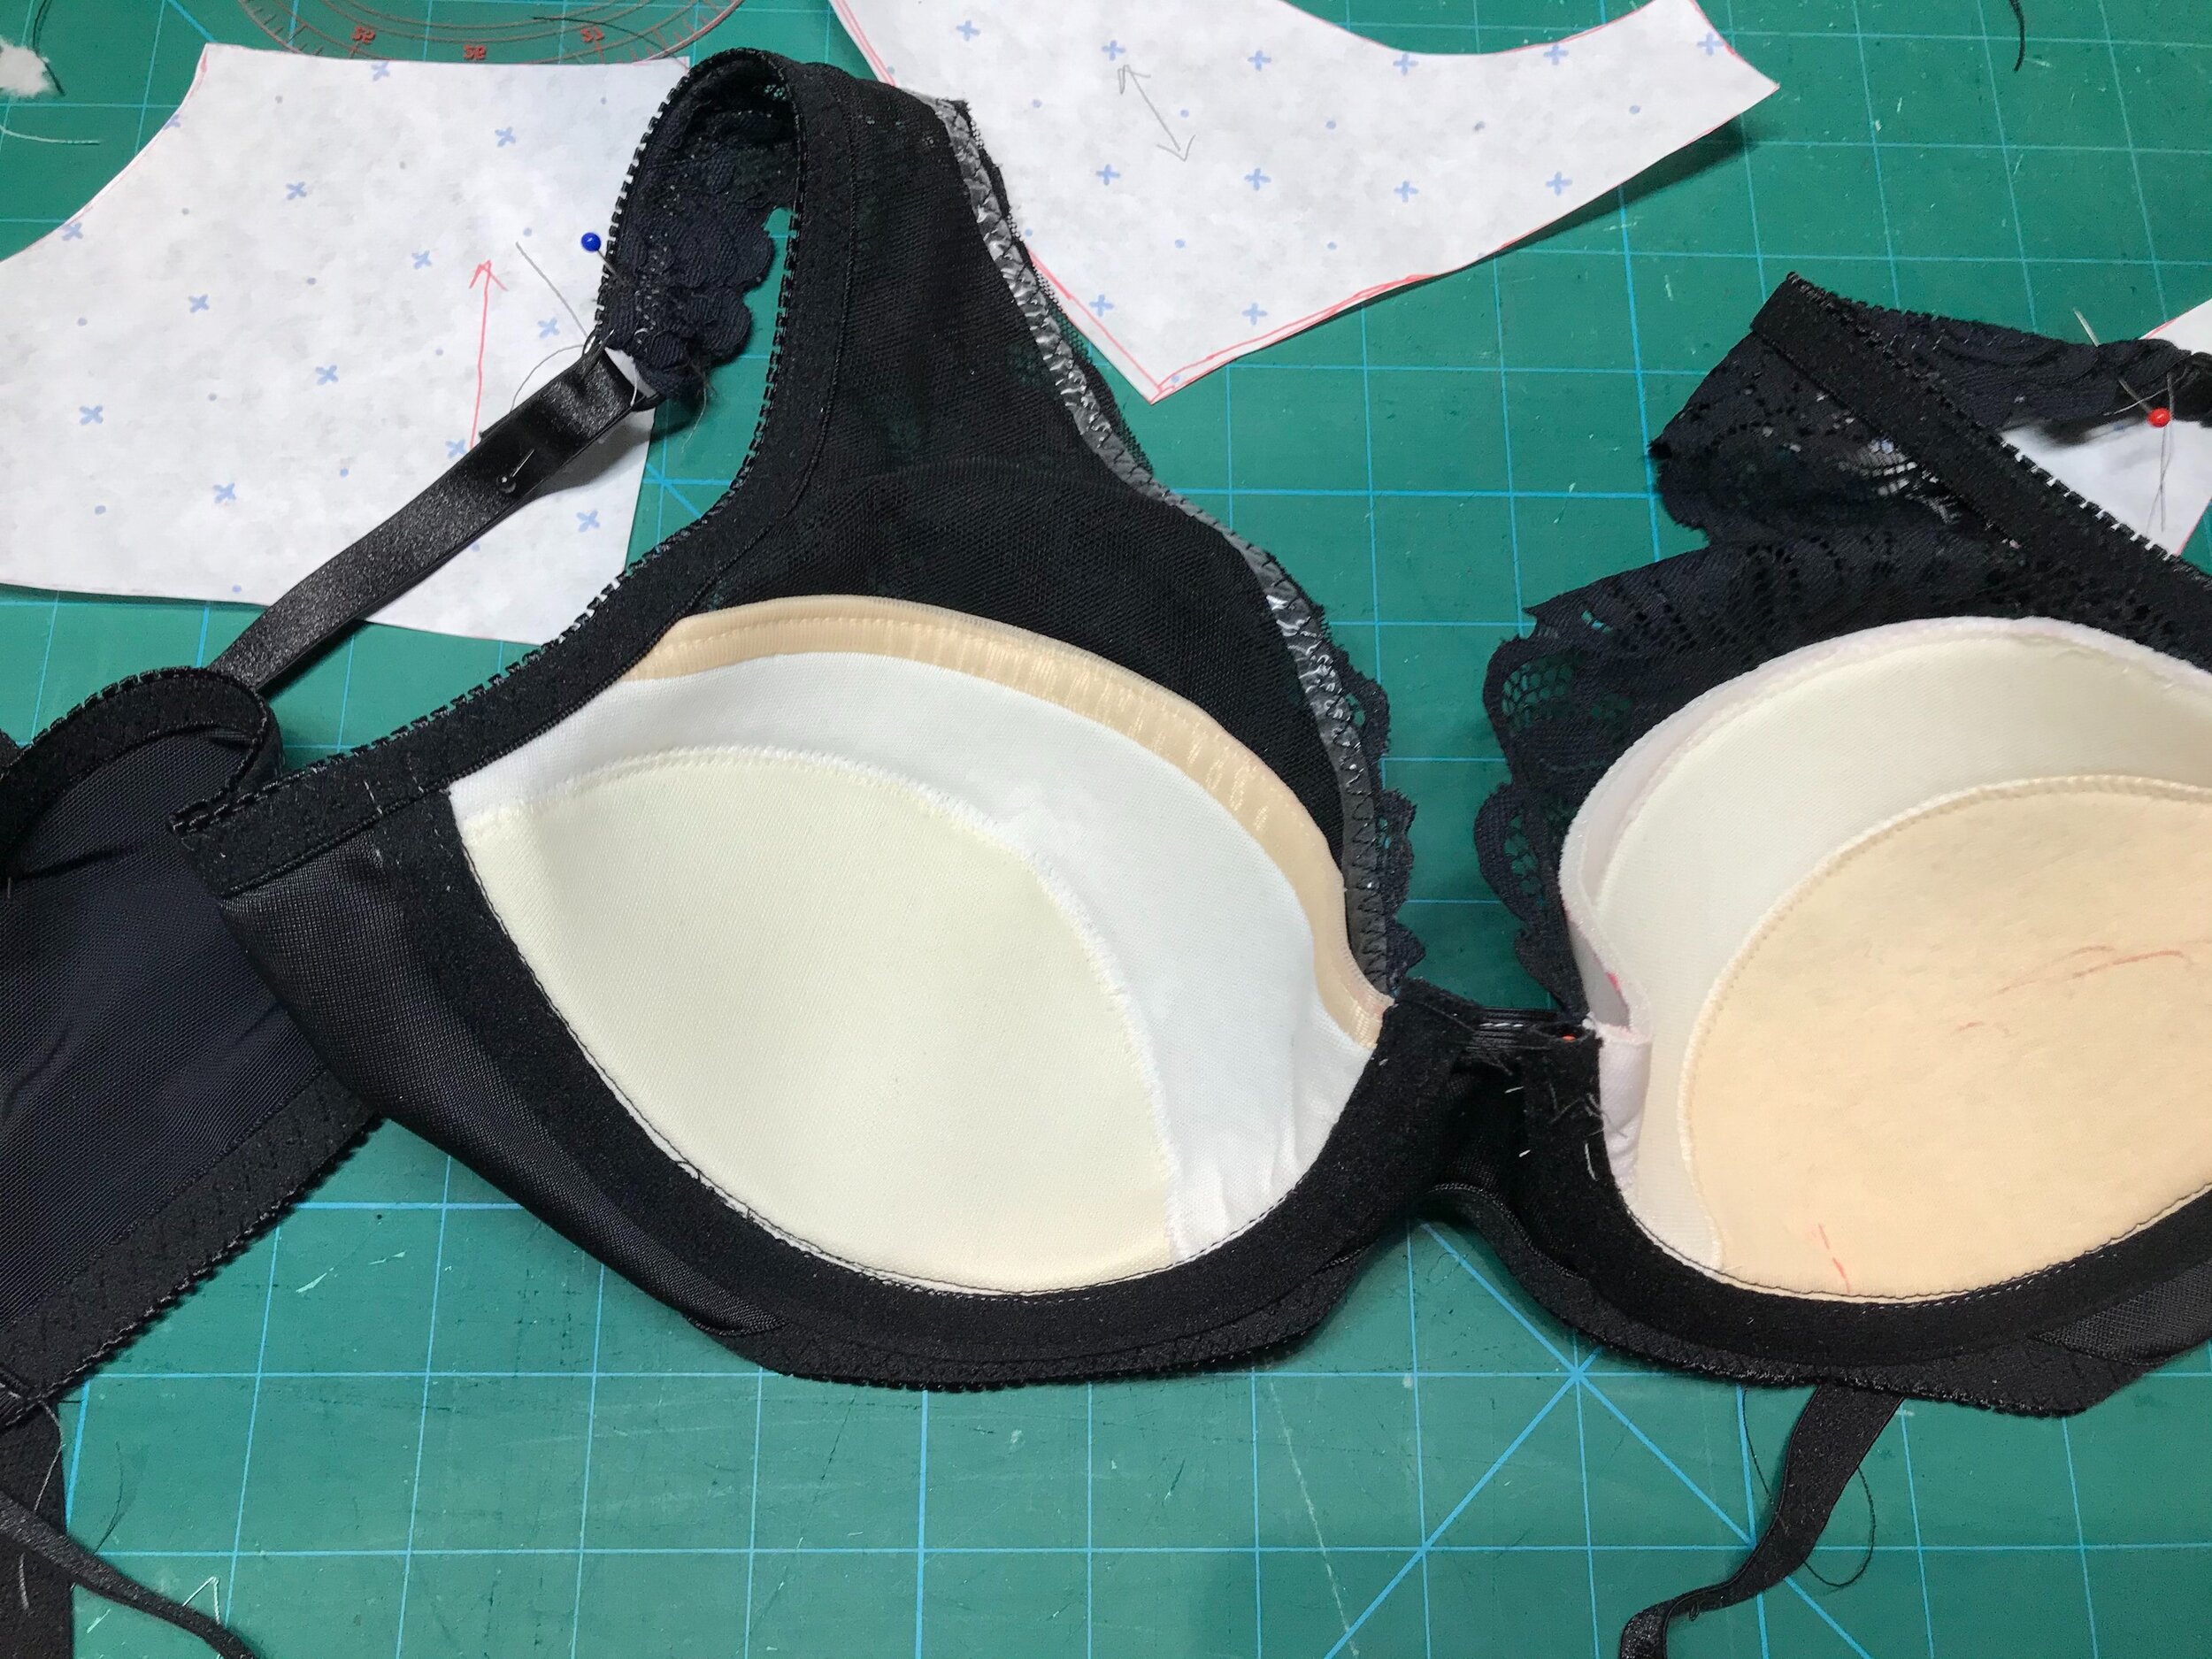
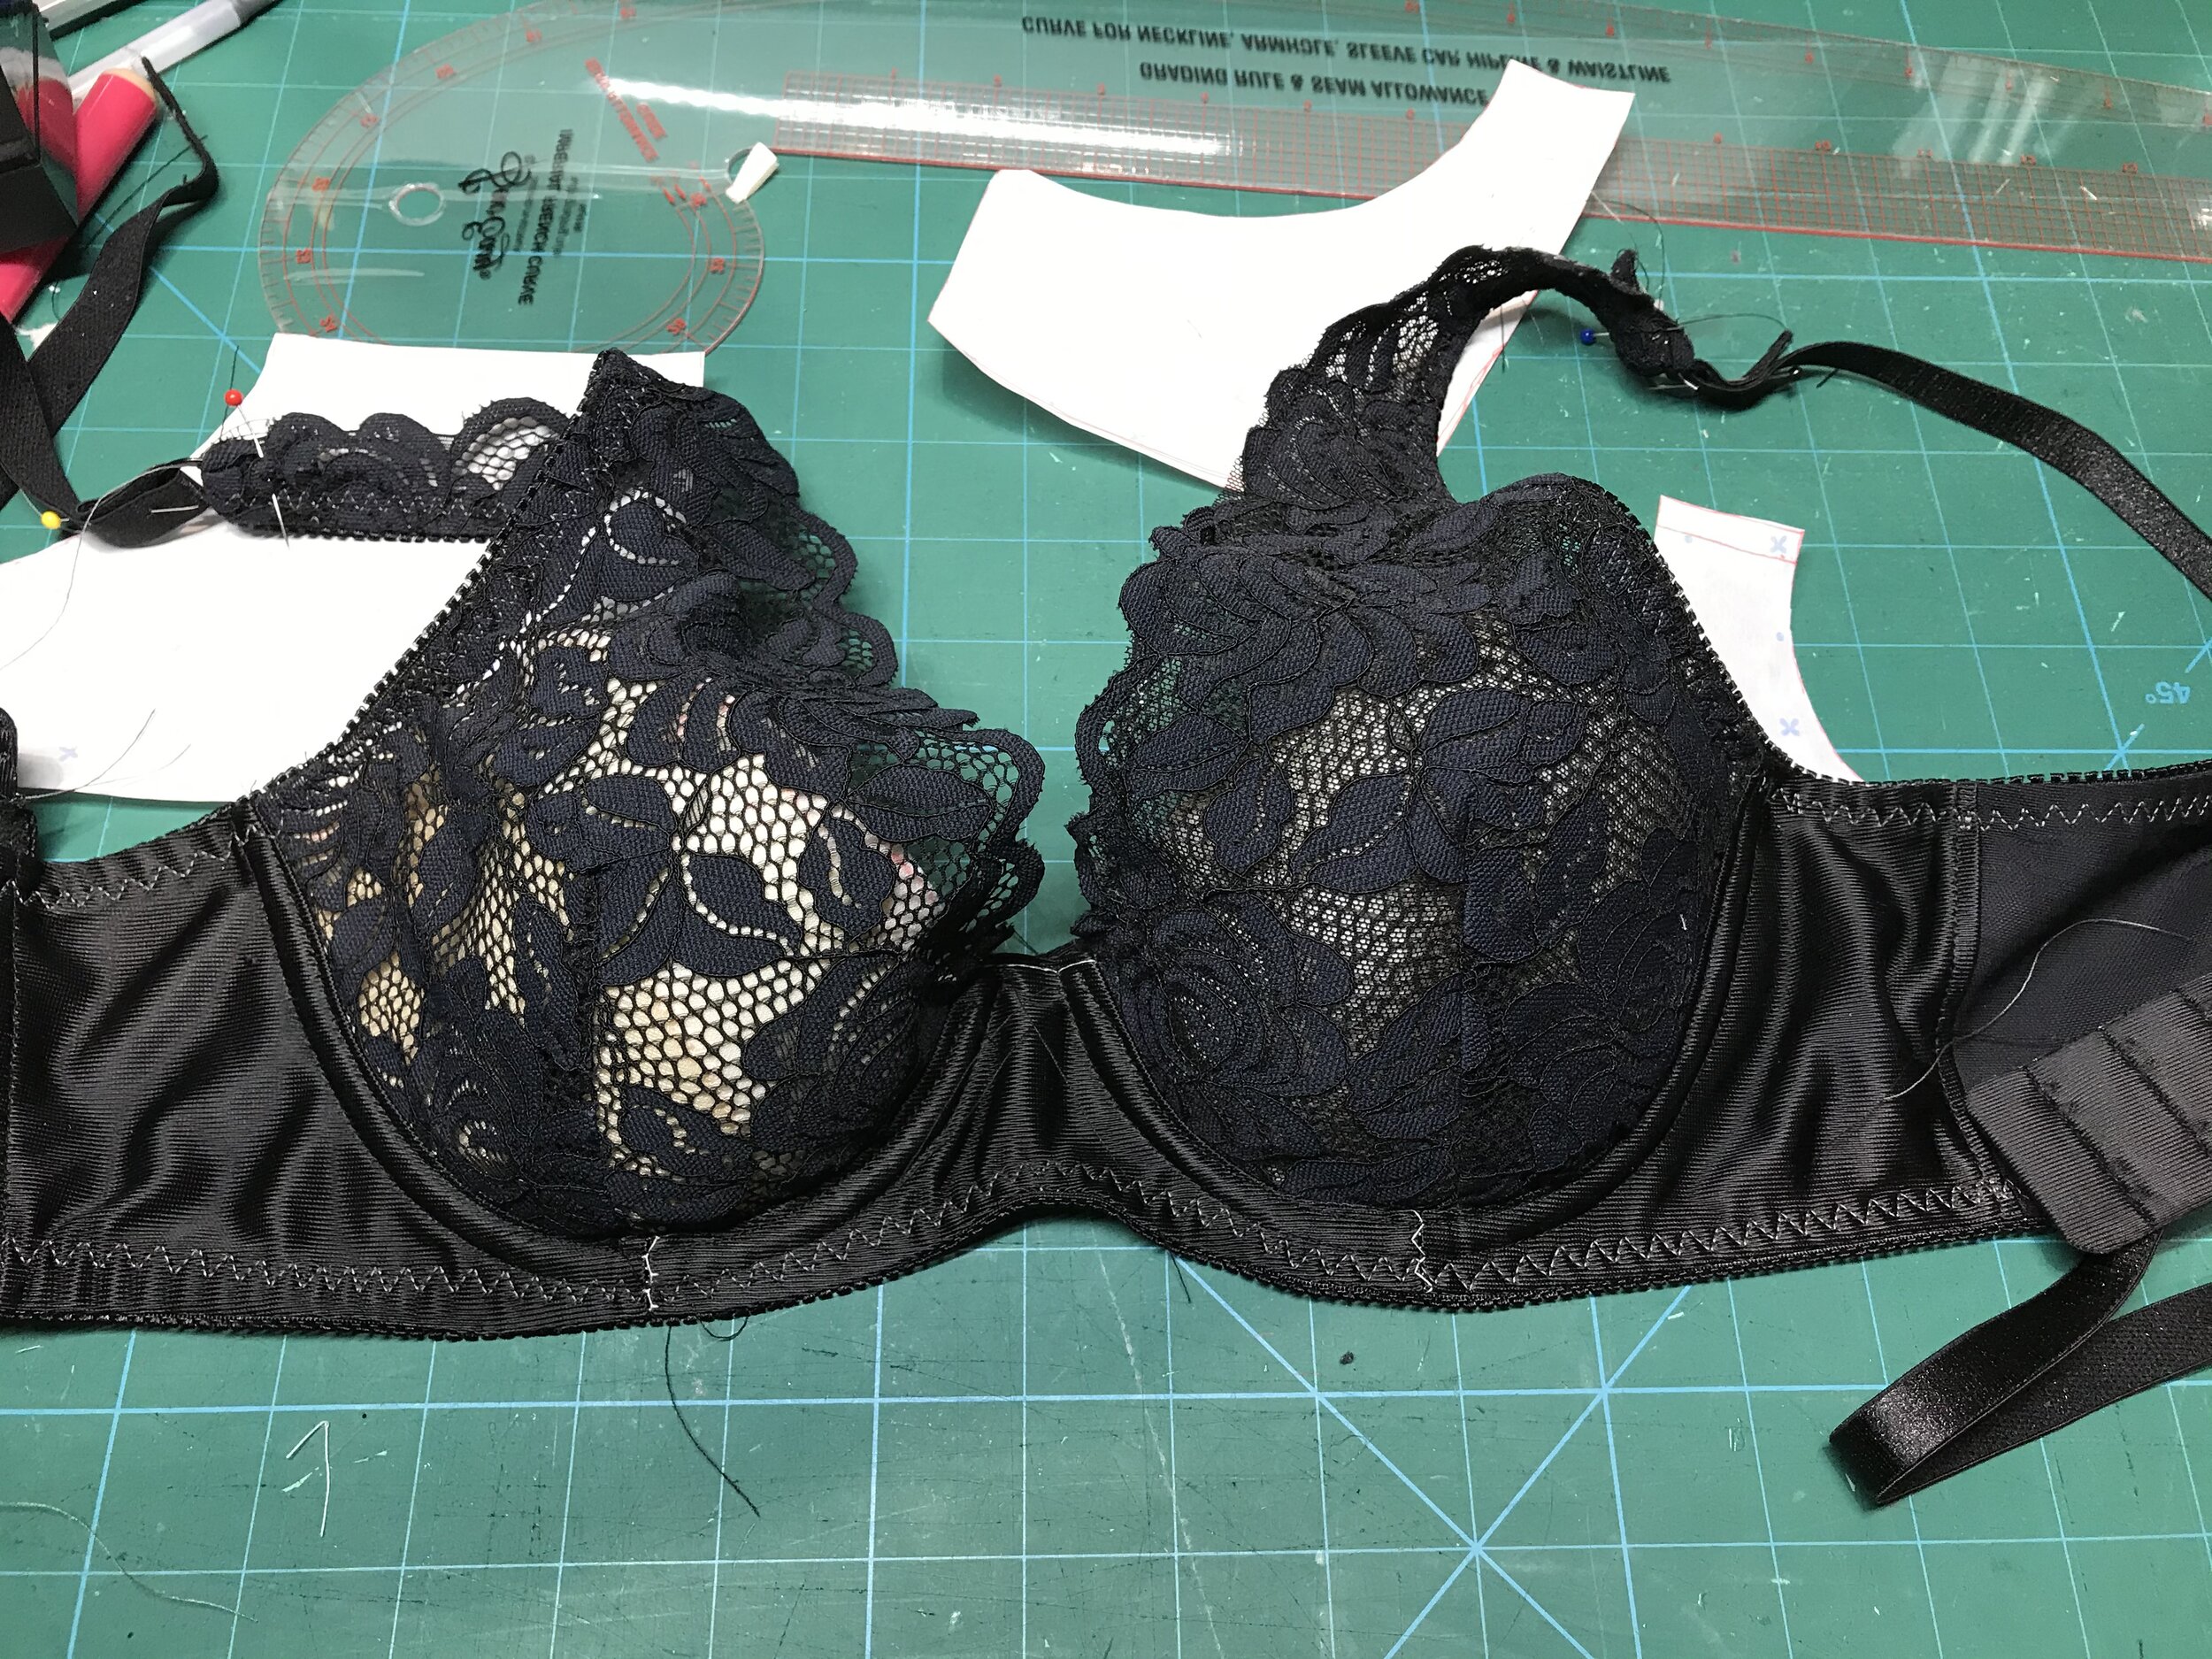

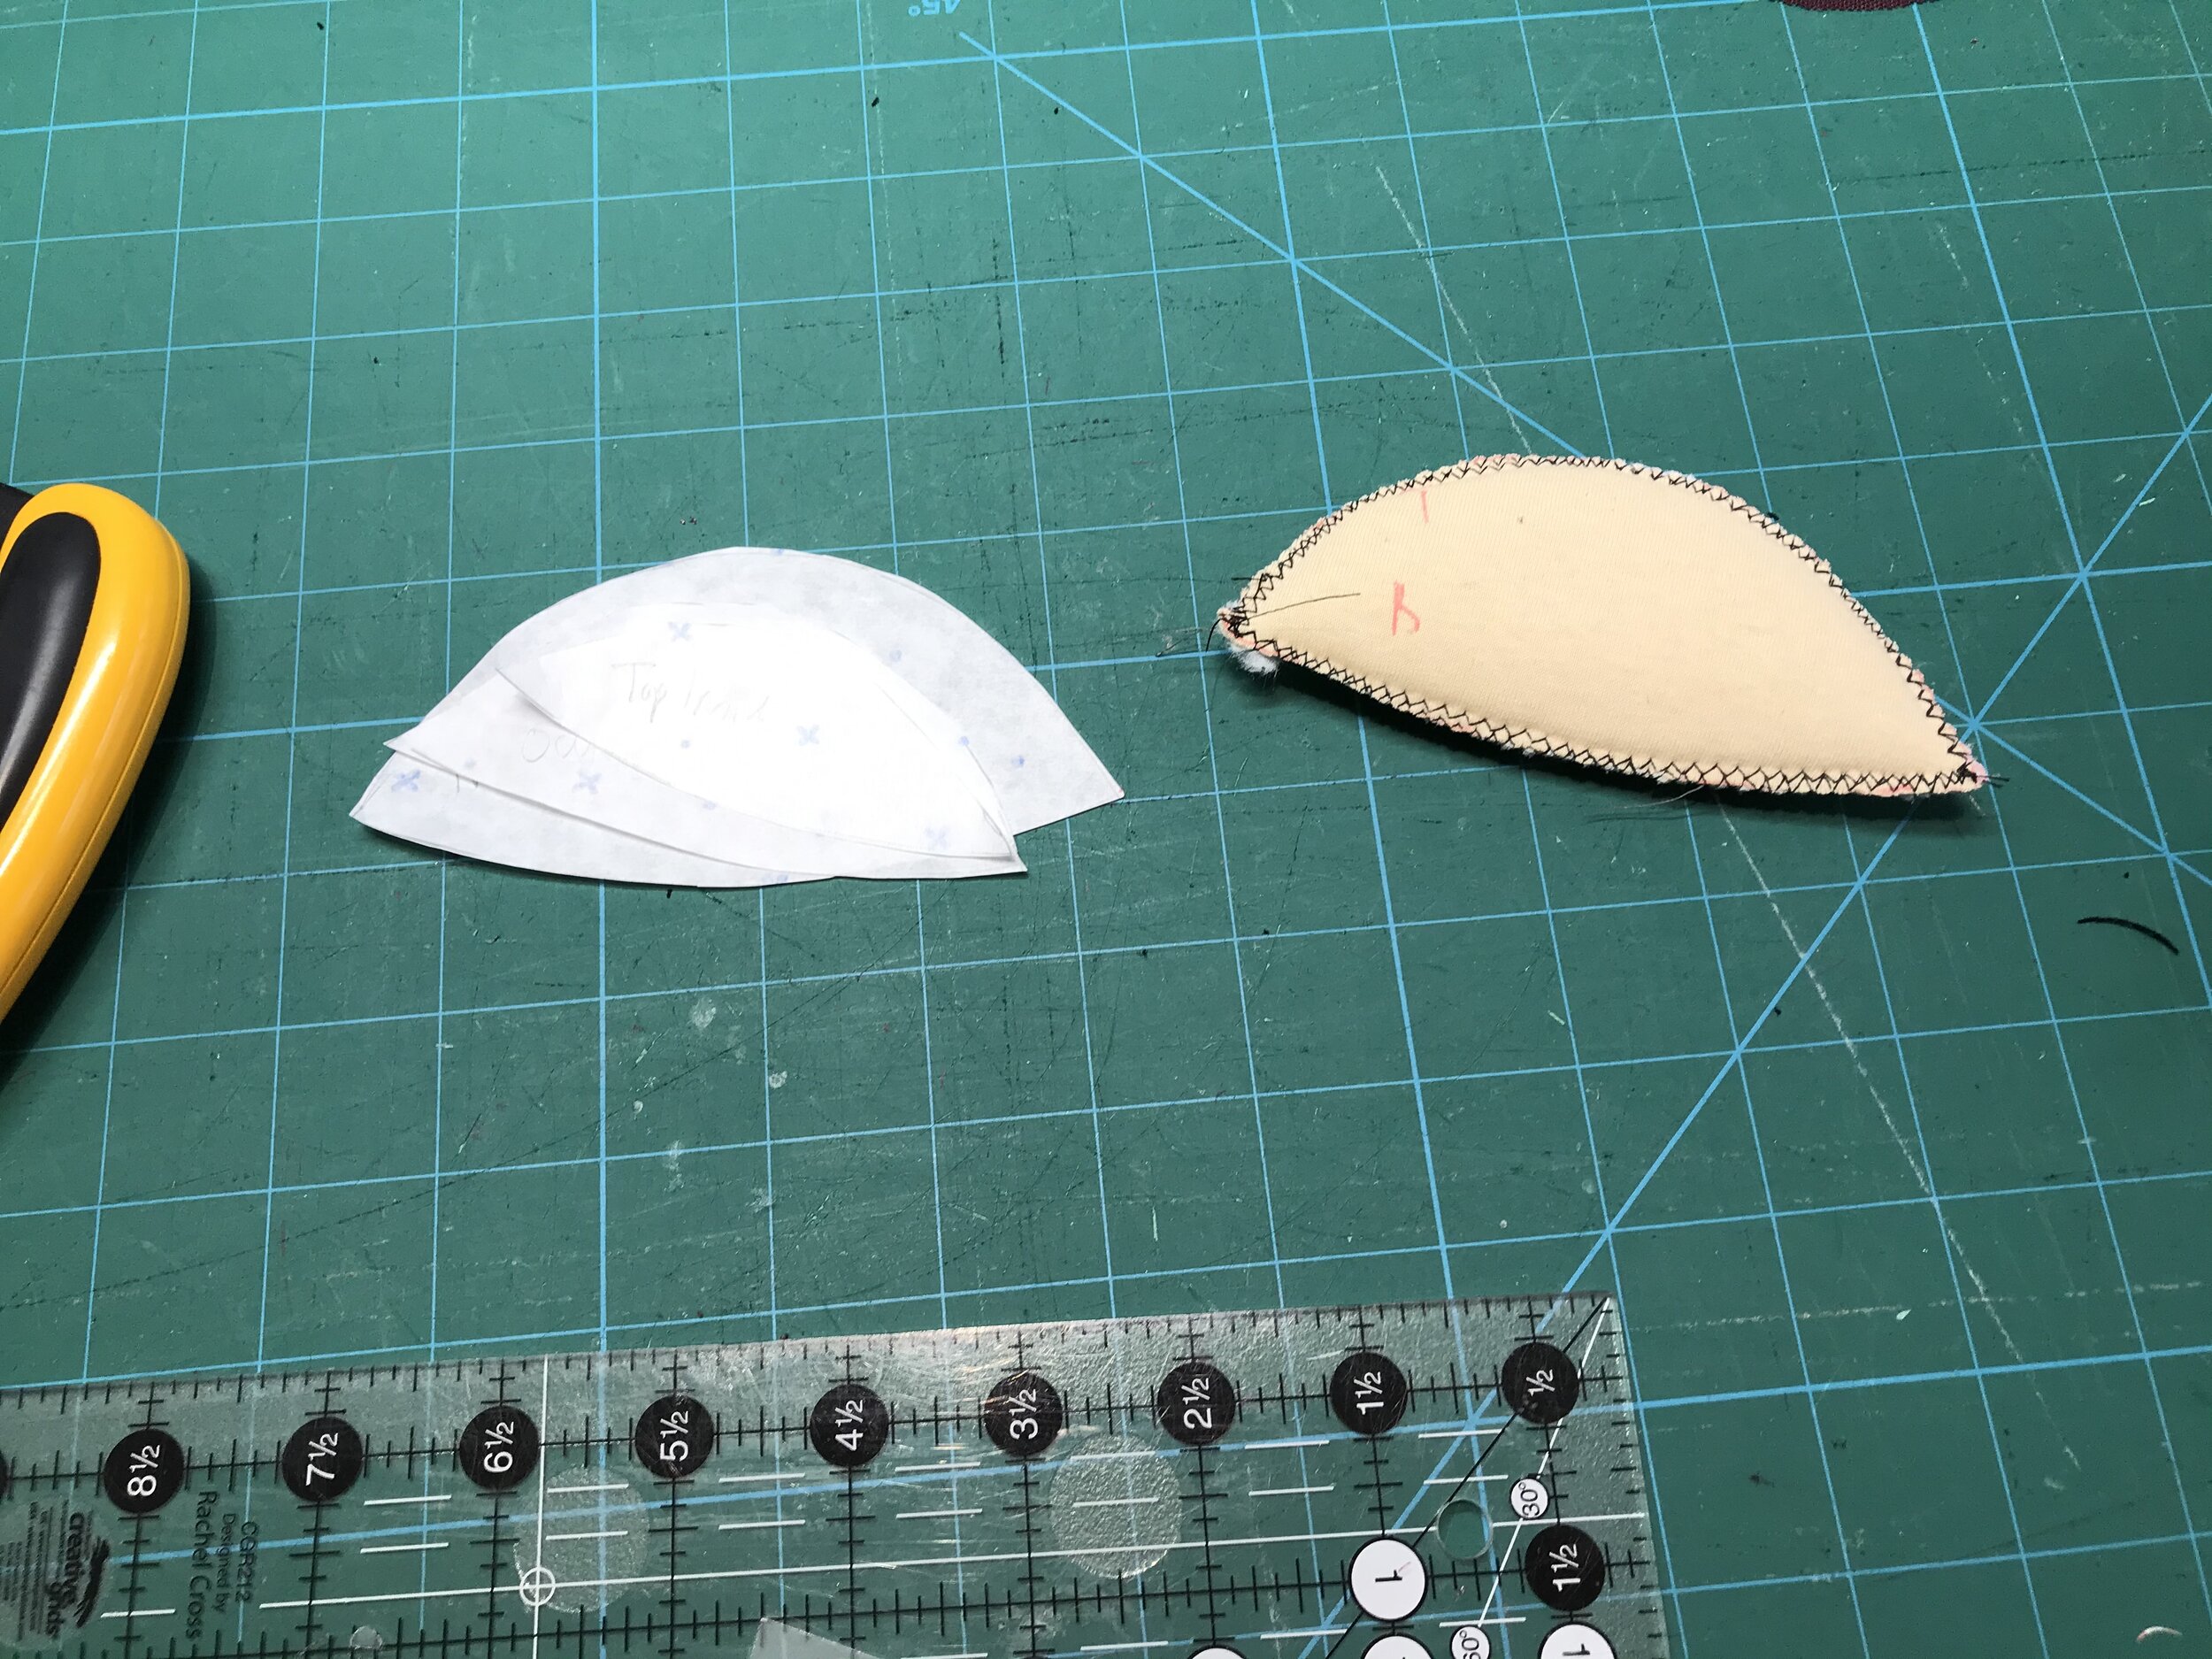
I made up the other cup from my new pattern pieces, lined the lace cup, attached elastic to the neckline and finished the rest of the bra. From this I narrowed the bridge, created a gothic arch and narrowed the band as far as I could so it would appear to be a partial band. For that push up look I also tried making some cookies from Beverly Johnson’s class but the fit was so good I don’t think they are needed.

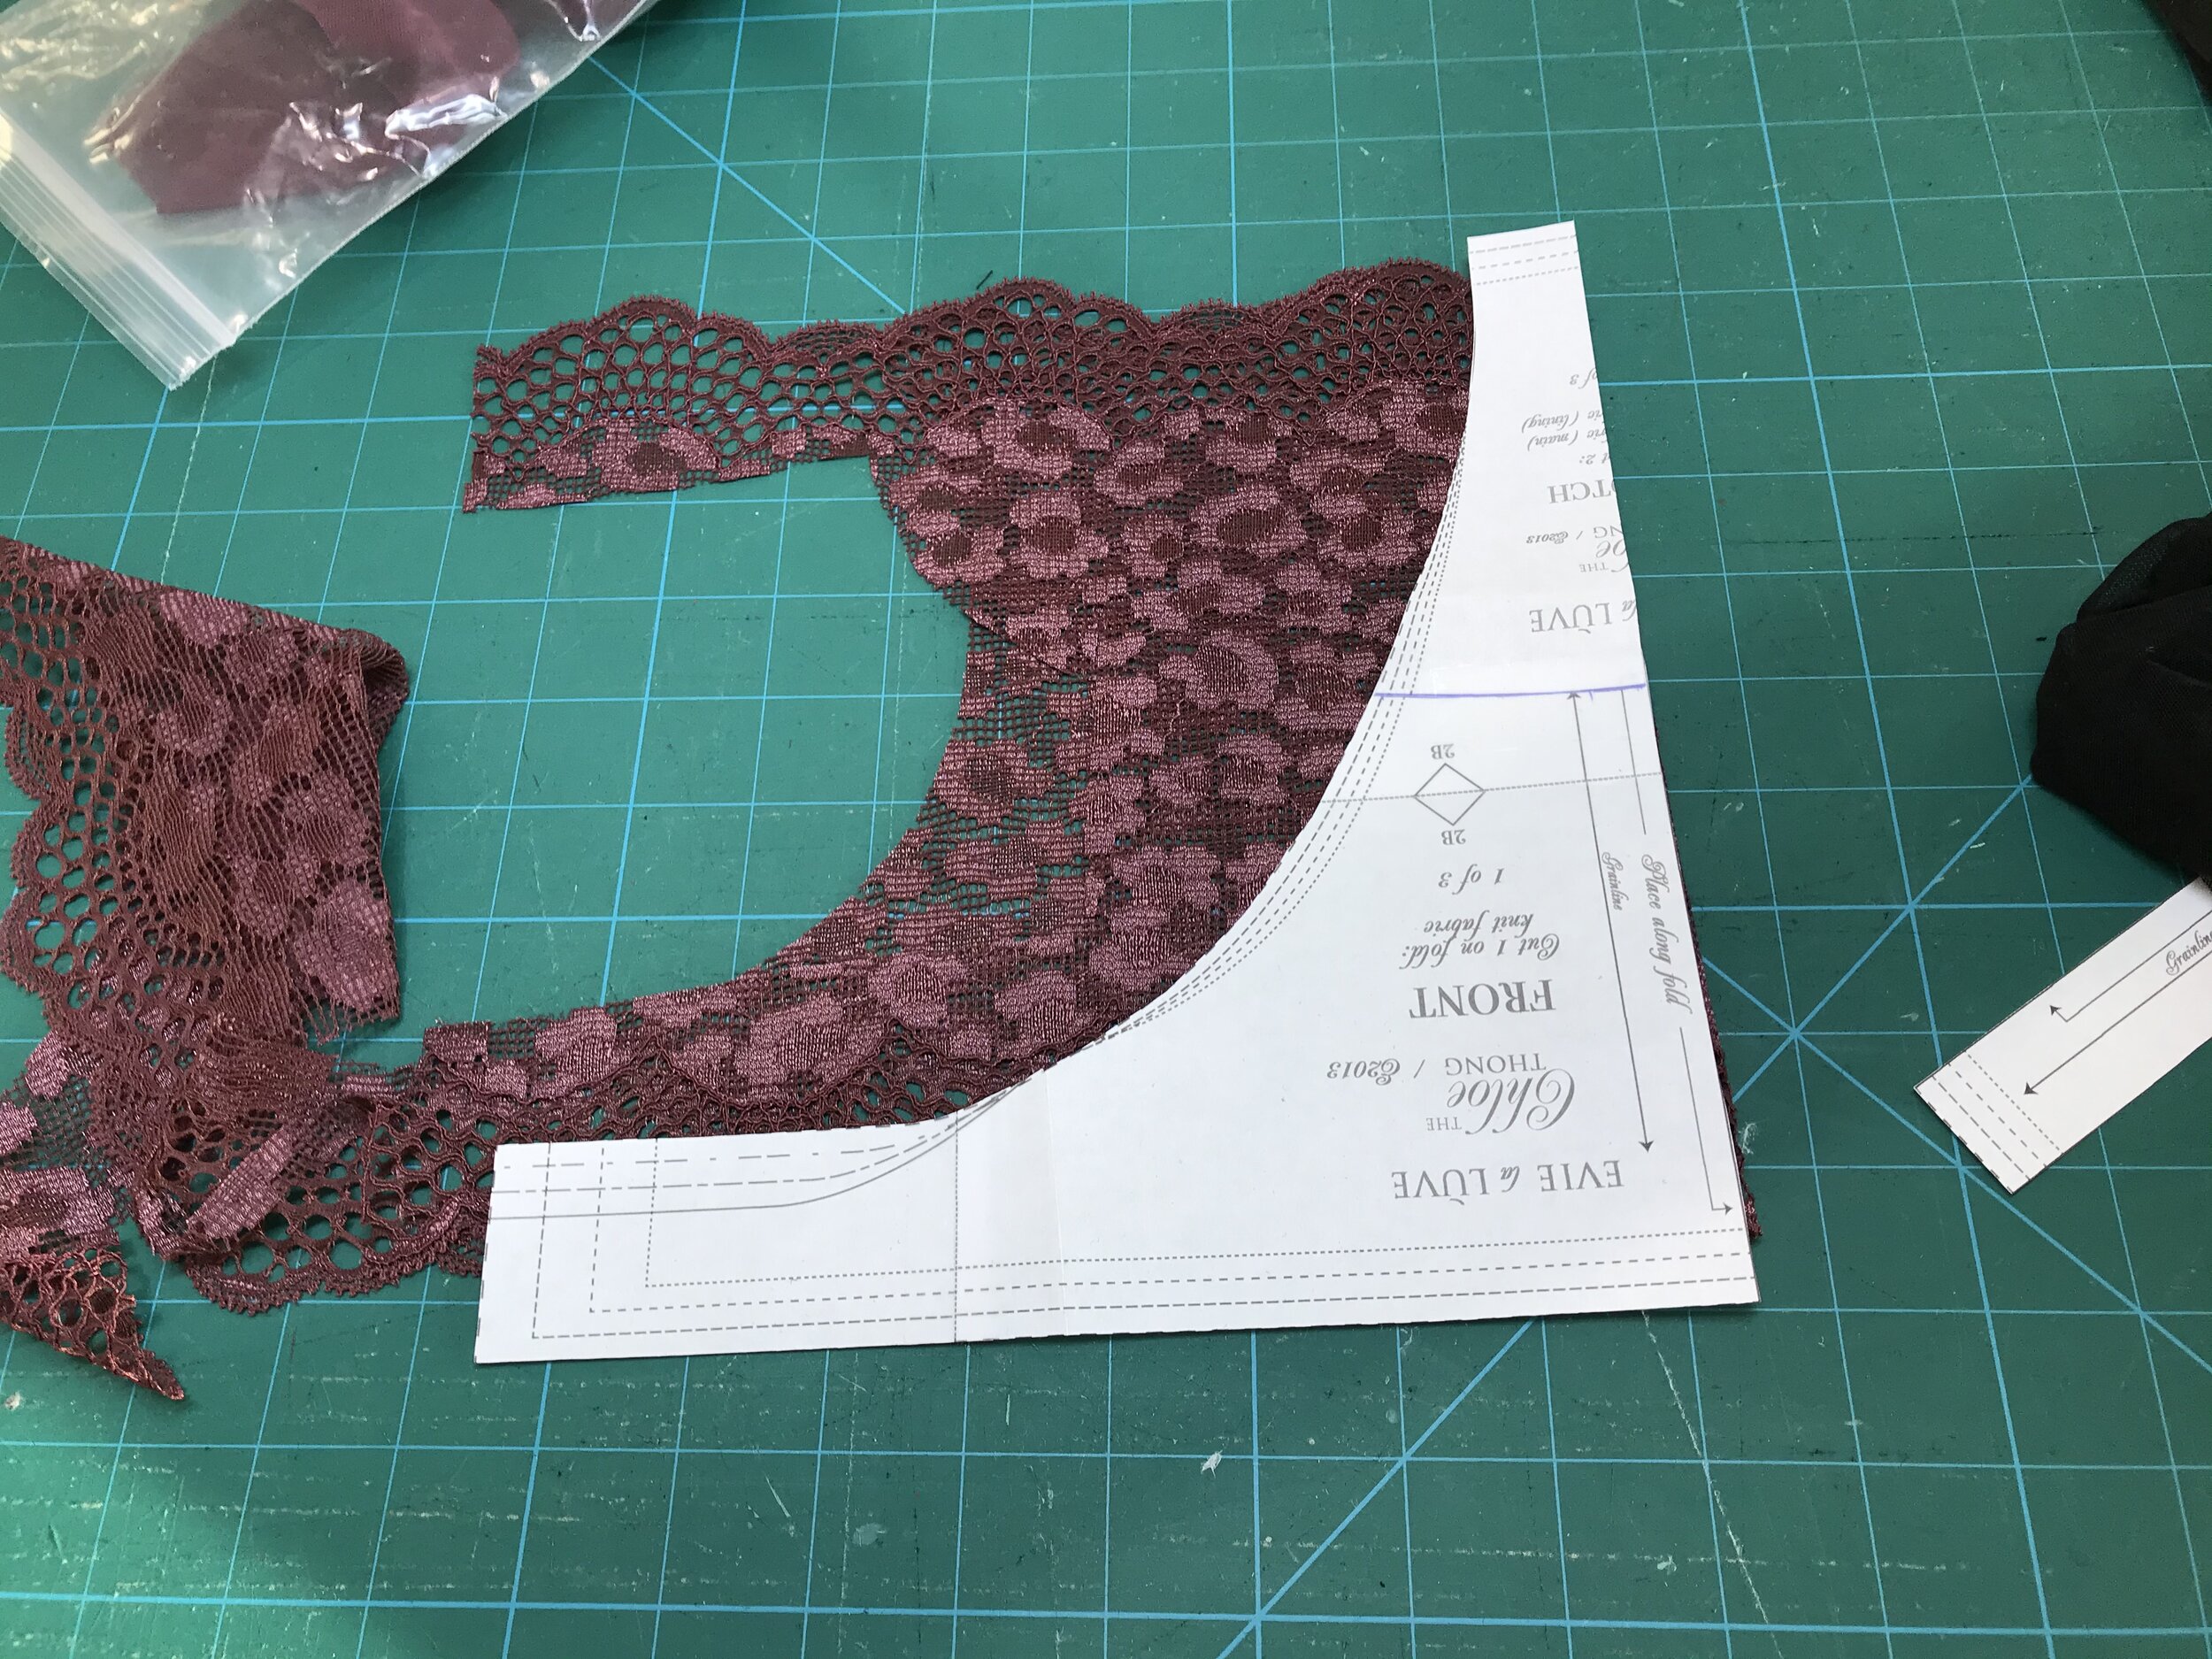
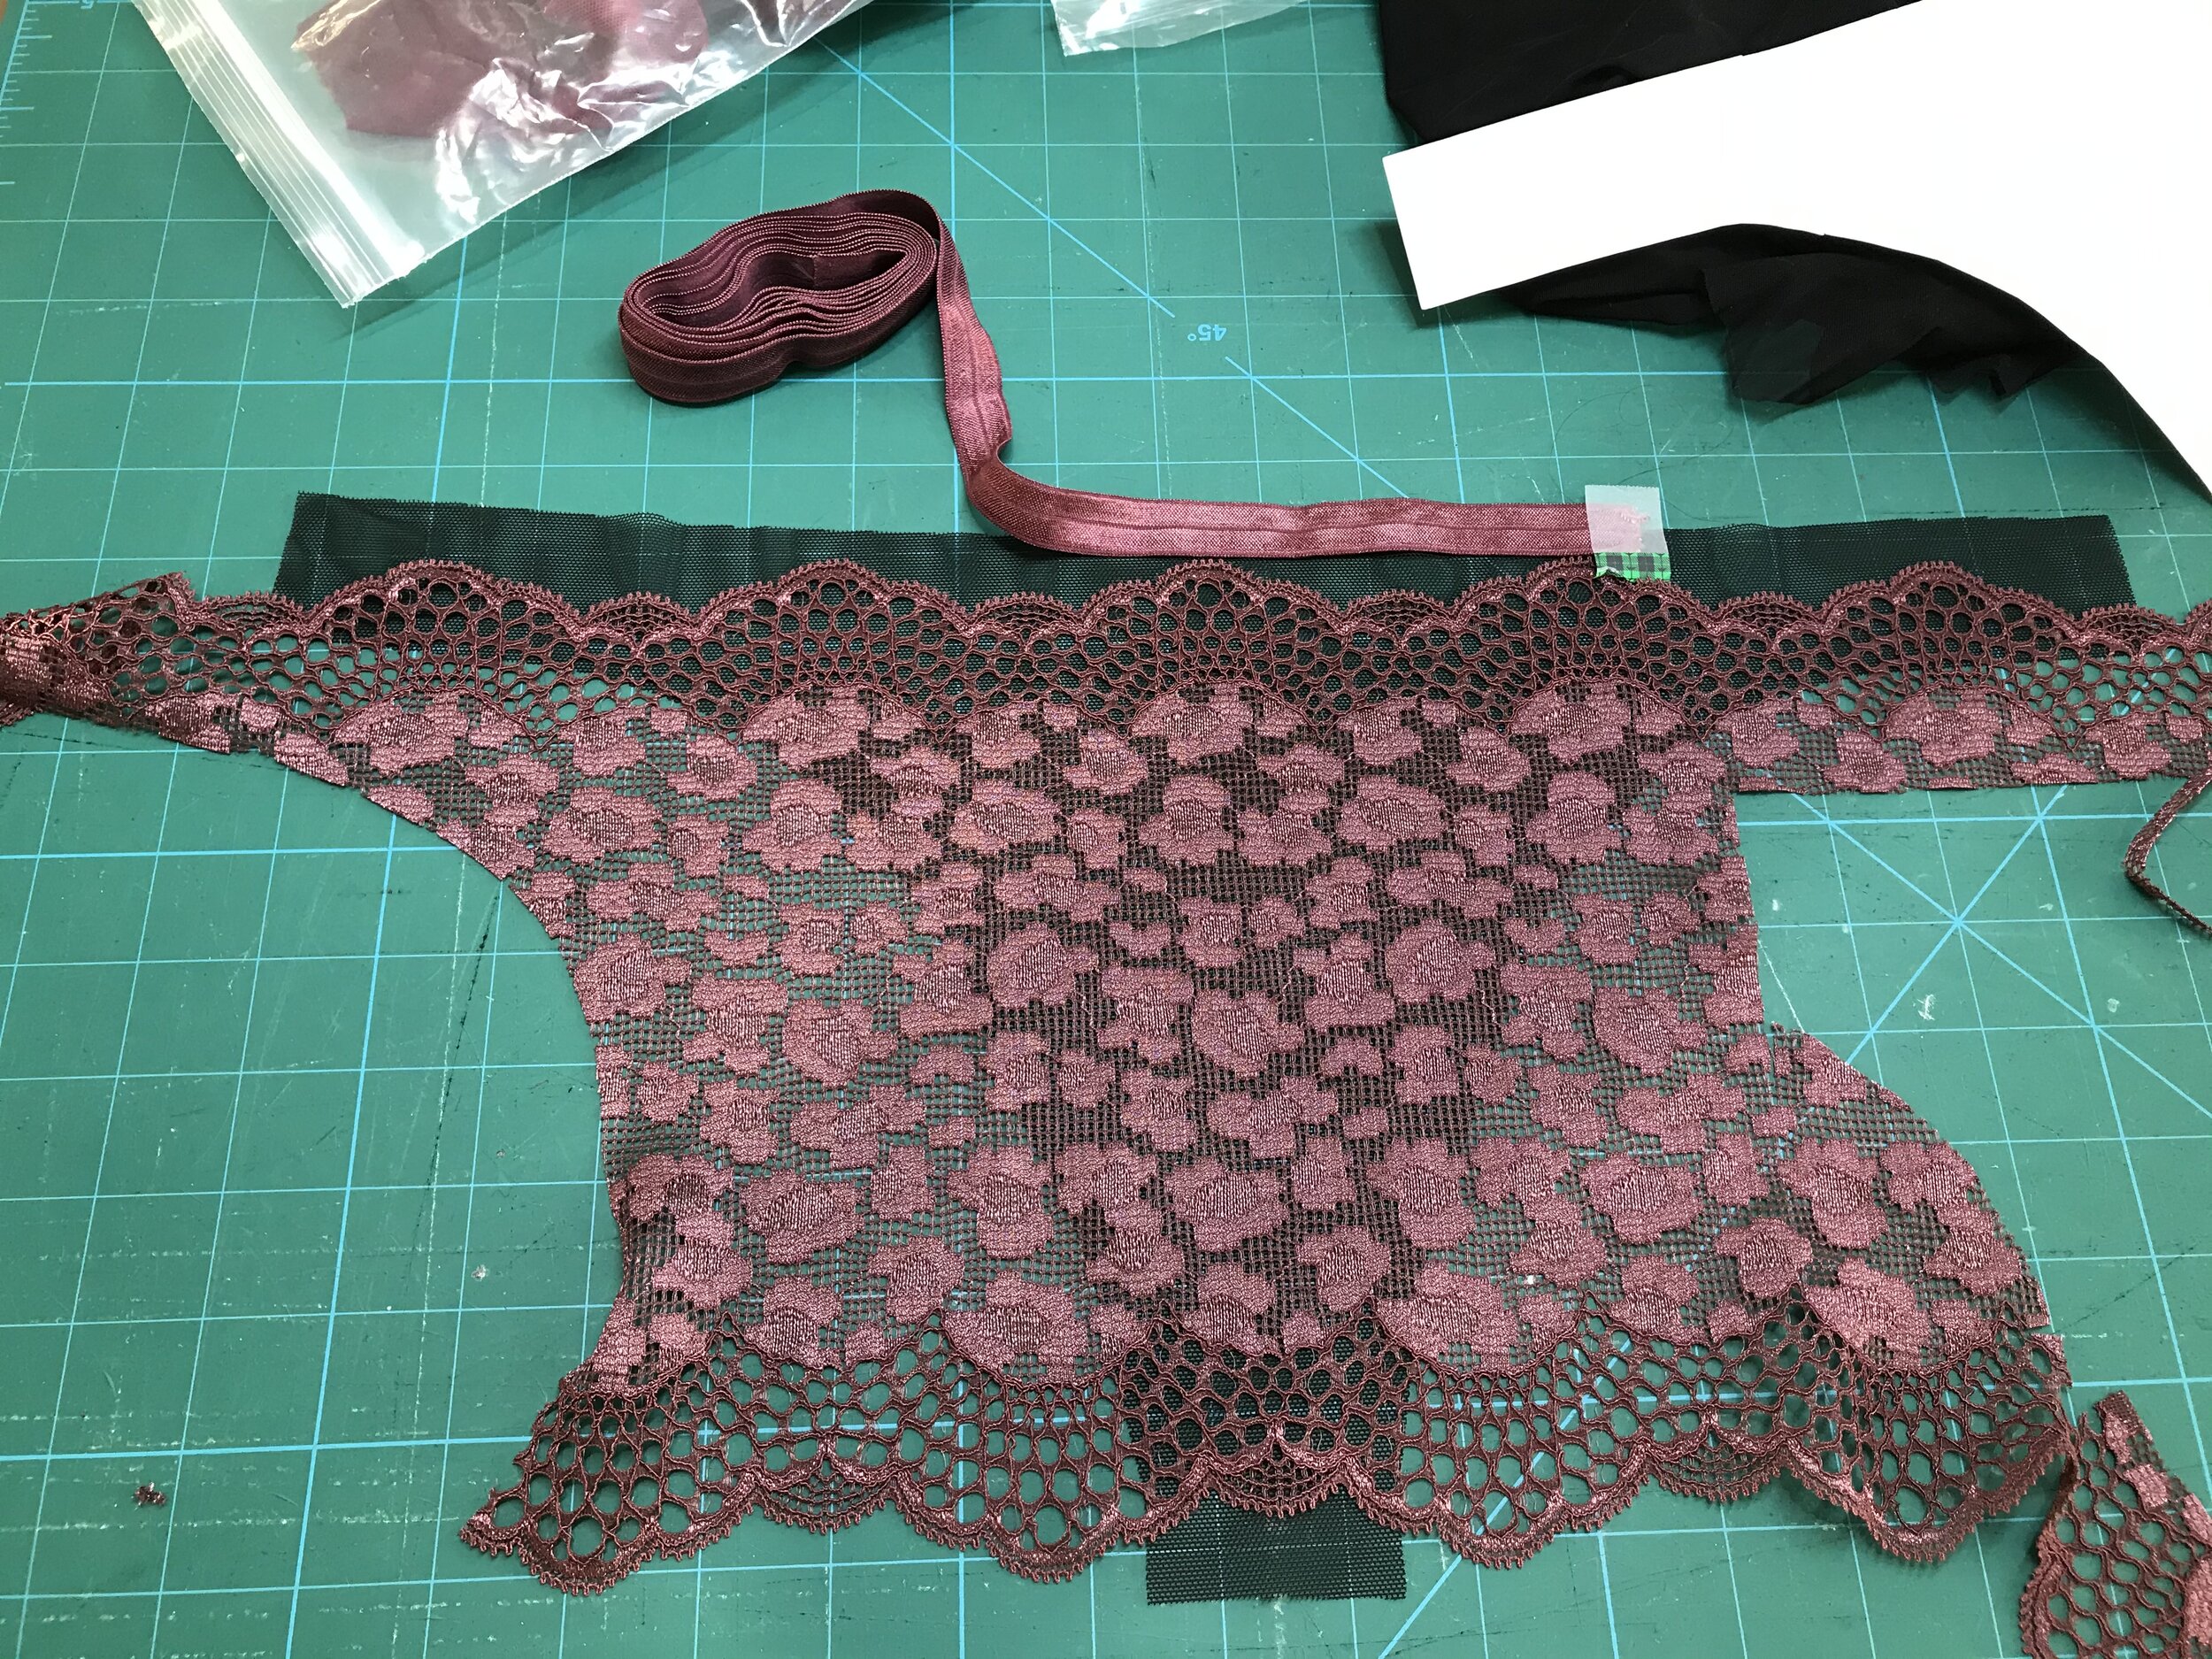
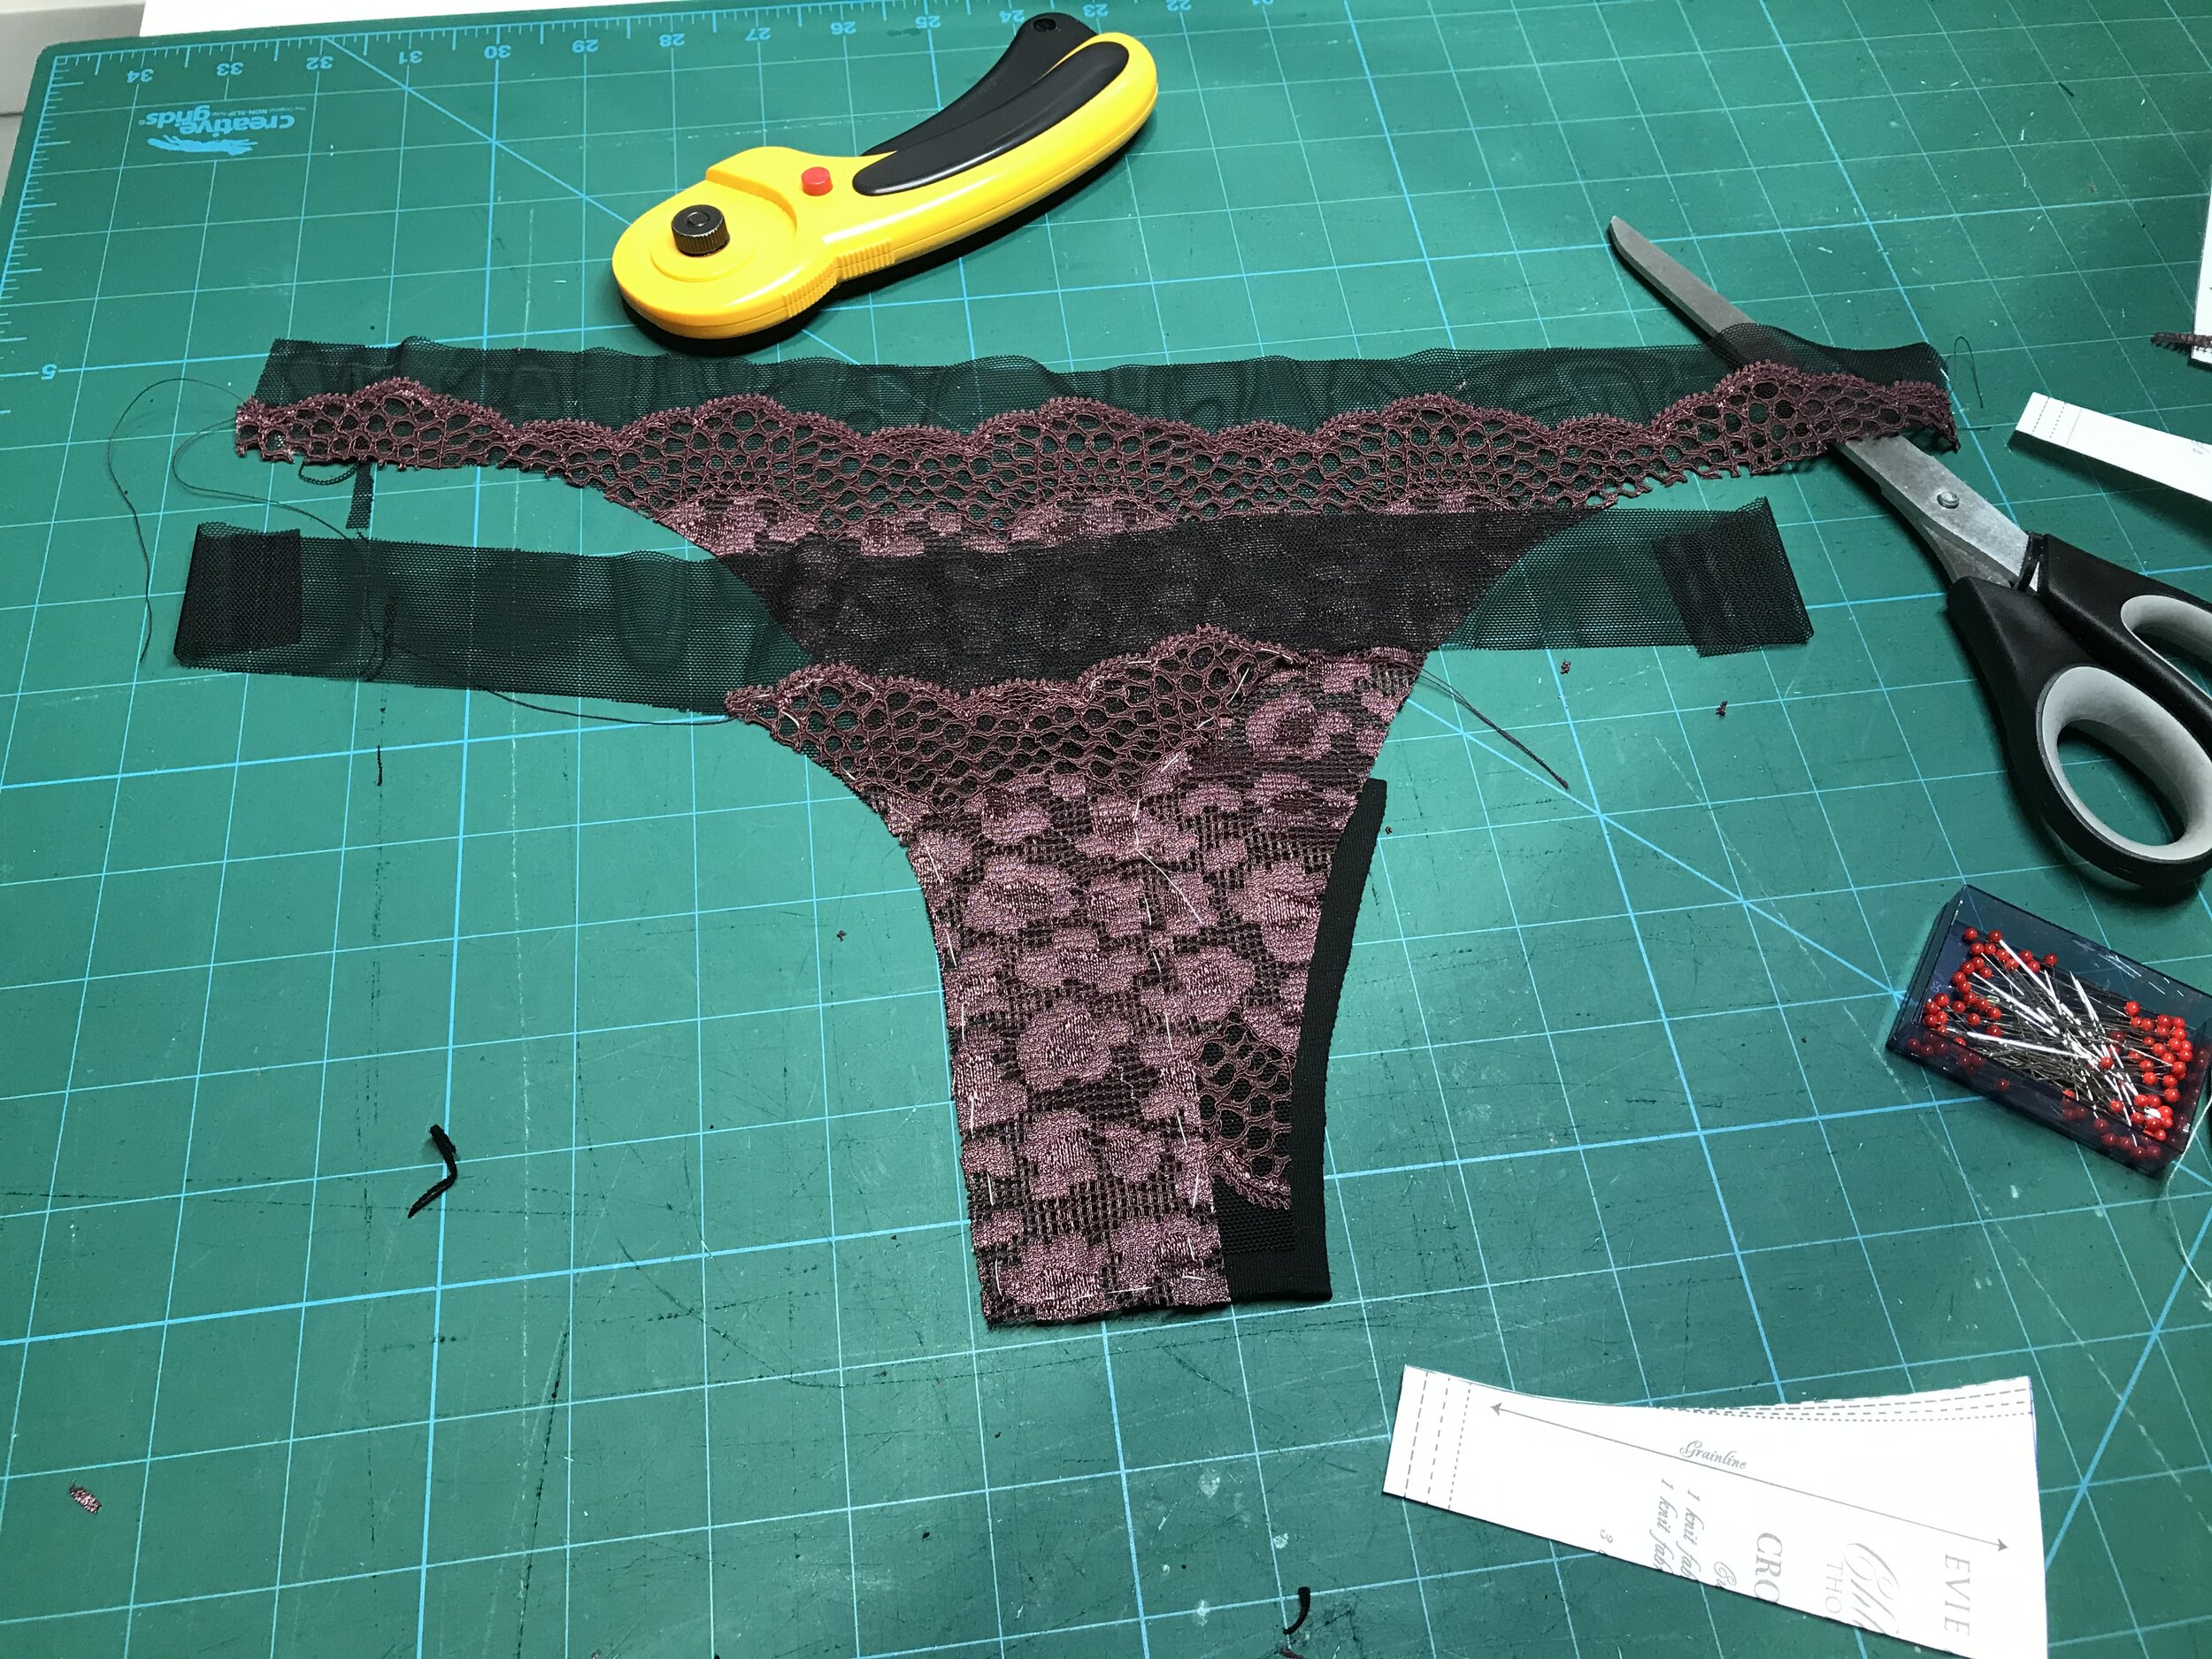
With all the pattern pieces adjusted I moved onto the beautiful lace kit for my February TMCollaBRAtory project. As I used the lace for the back band as well as the full lace cups I only had a small piece left to make a set. I instantly thought of the EvielaLuve Chloe thong which I had adapted for a comfier fit! I checked how much of the pattern piece I could cover before I cut out the front piece in mesh. I placed the lace over the mesh so that the scallop would sit below the fold over elastic and cut around. This left a tiny piece to partial cover the back. The fit and look of this set is sensational and I have plans to make it again very soon.
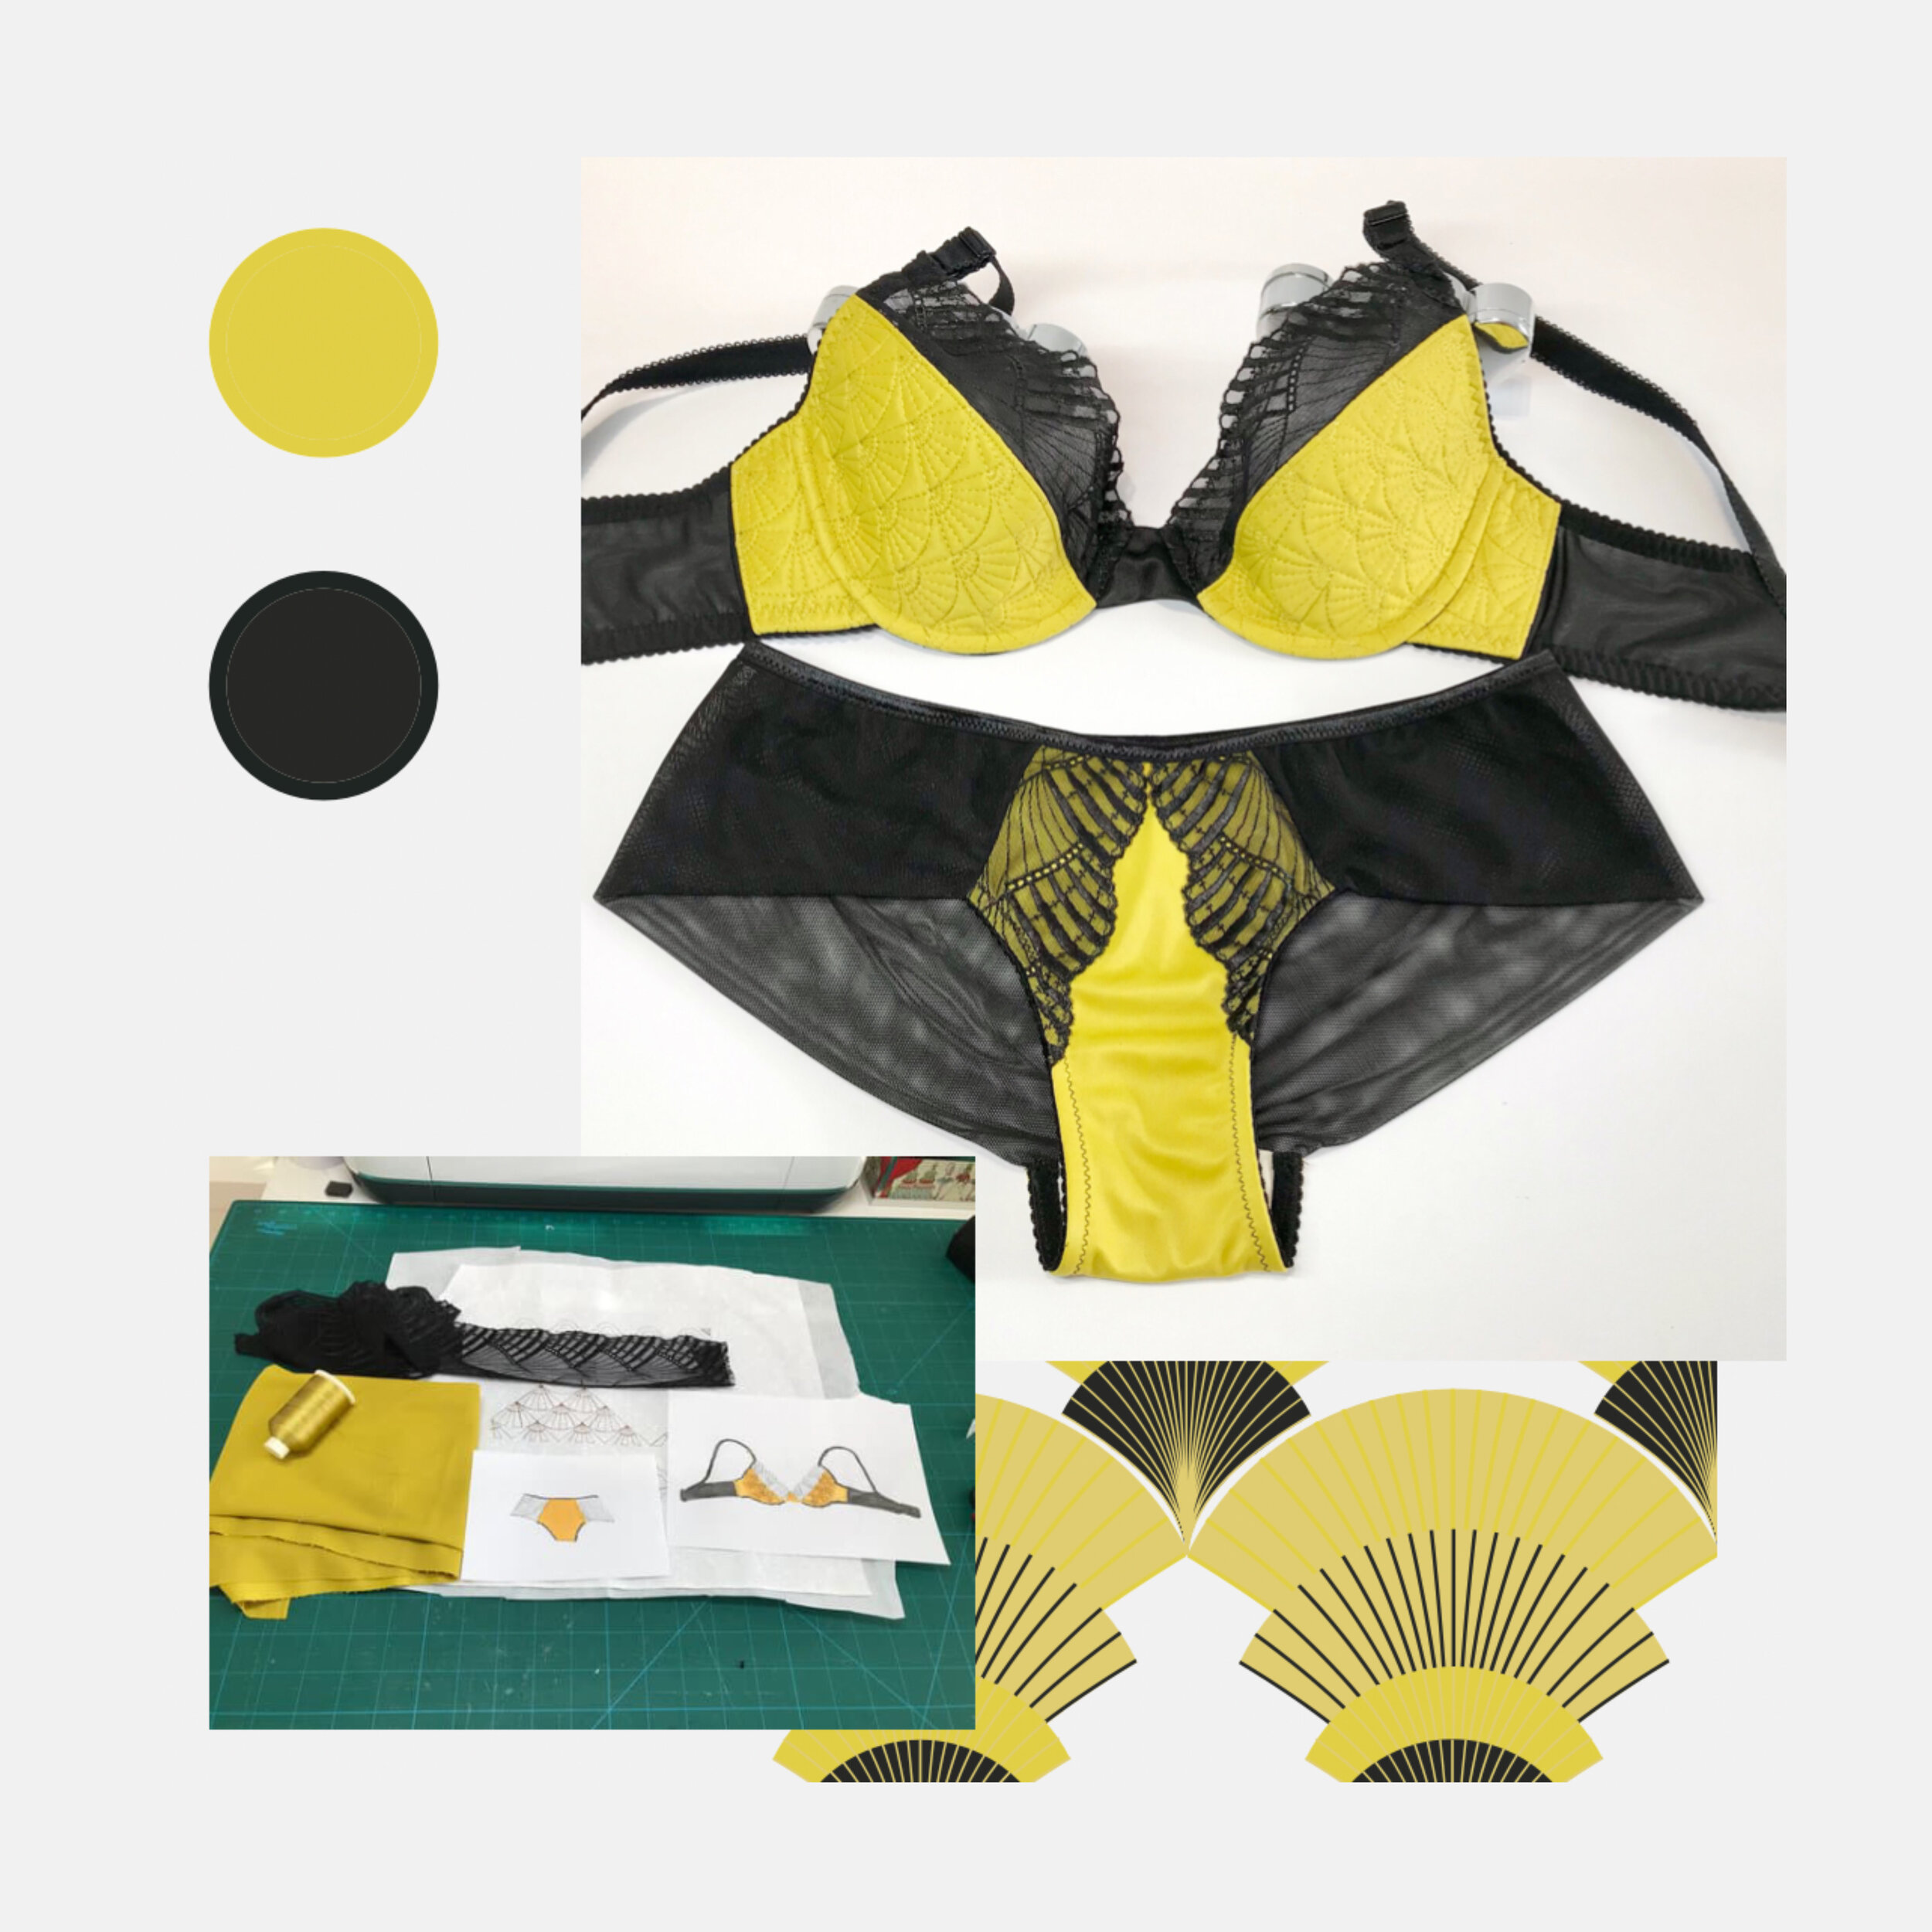
Moving on to my latest make which could be a blog post on its own but I think I will include it here. It wasn’t what I planned to make next but this mustard and black kit from Diane’s Bratastic Fabrics had such great Art Deco vibes that I decided to run with it.
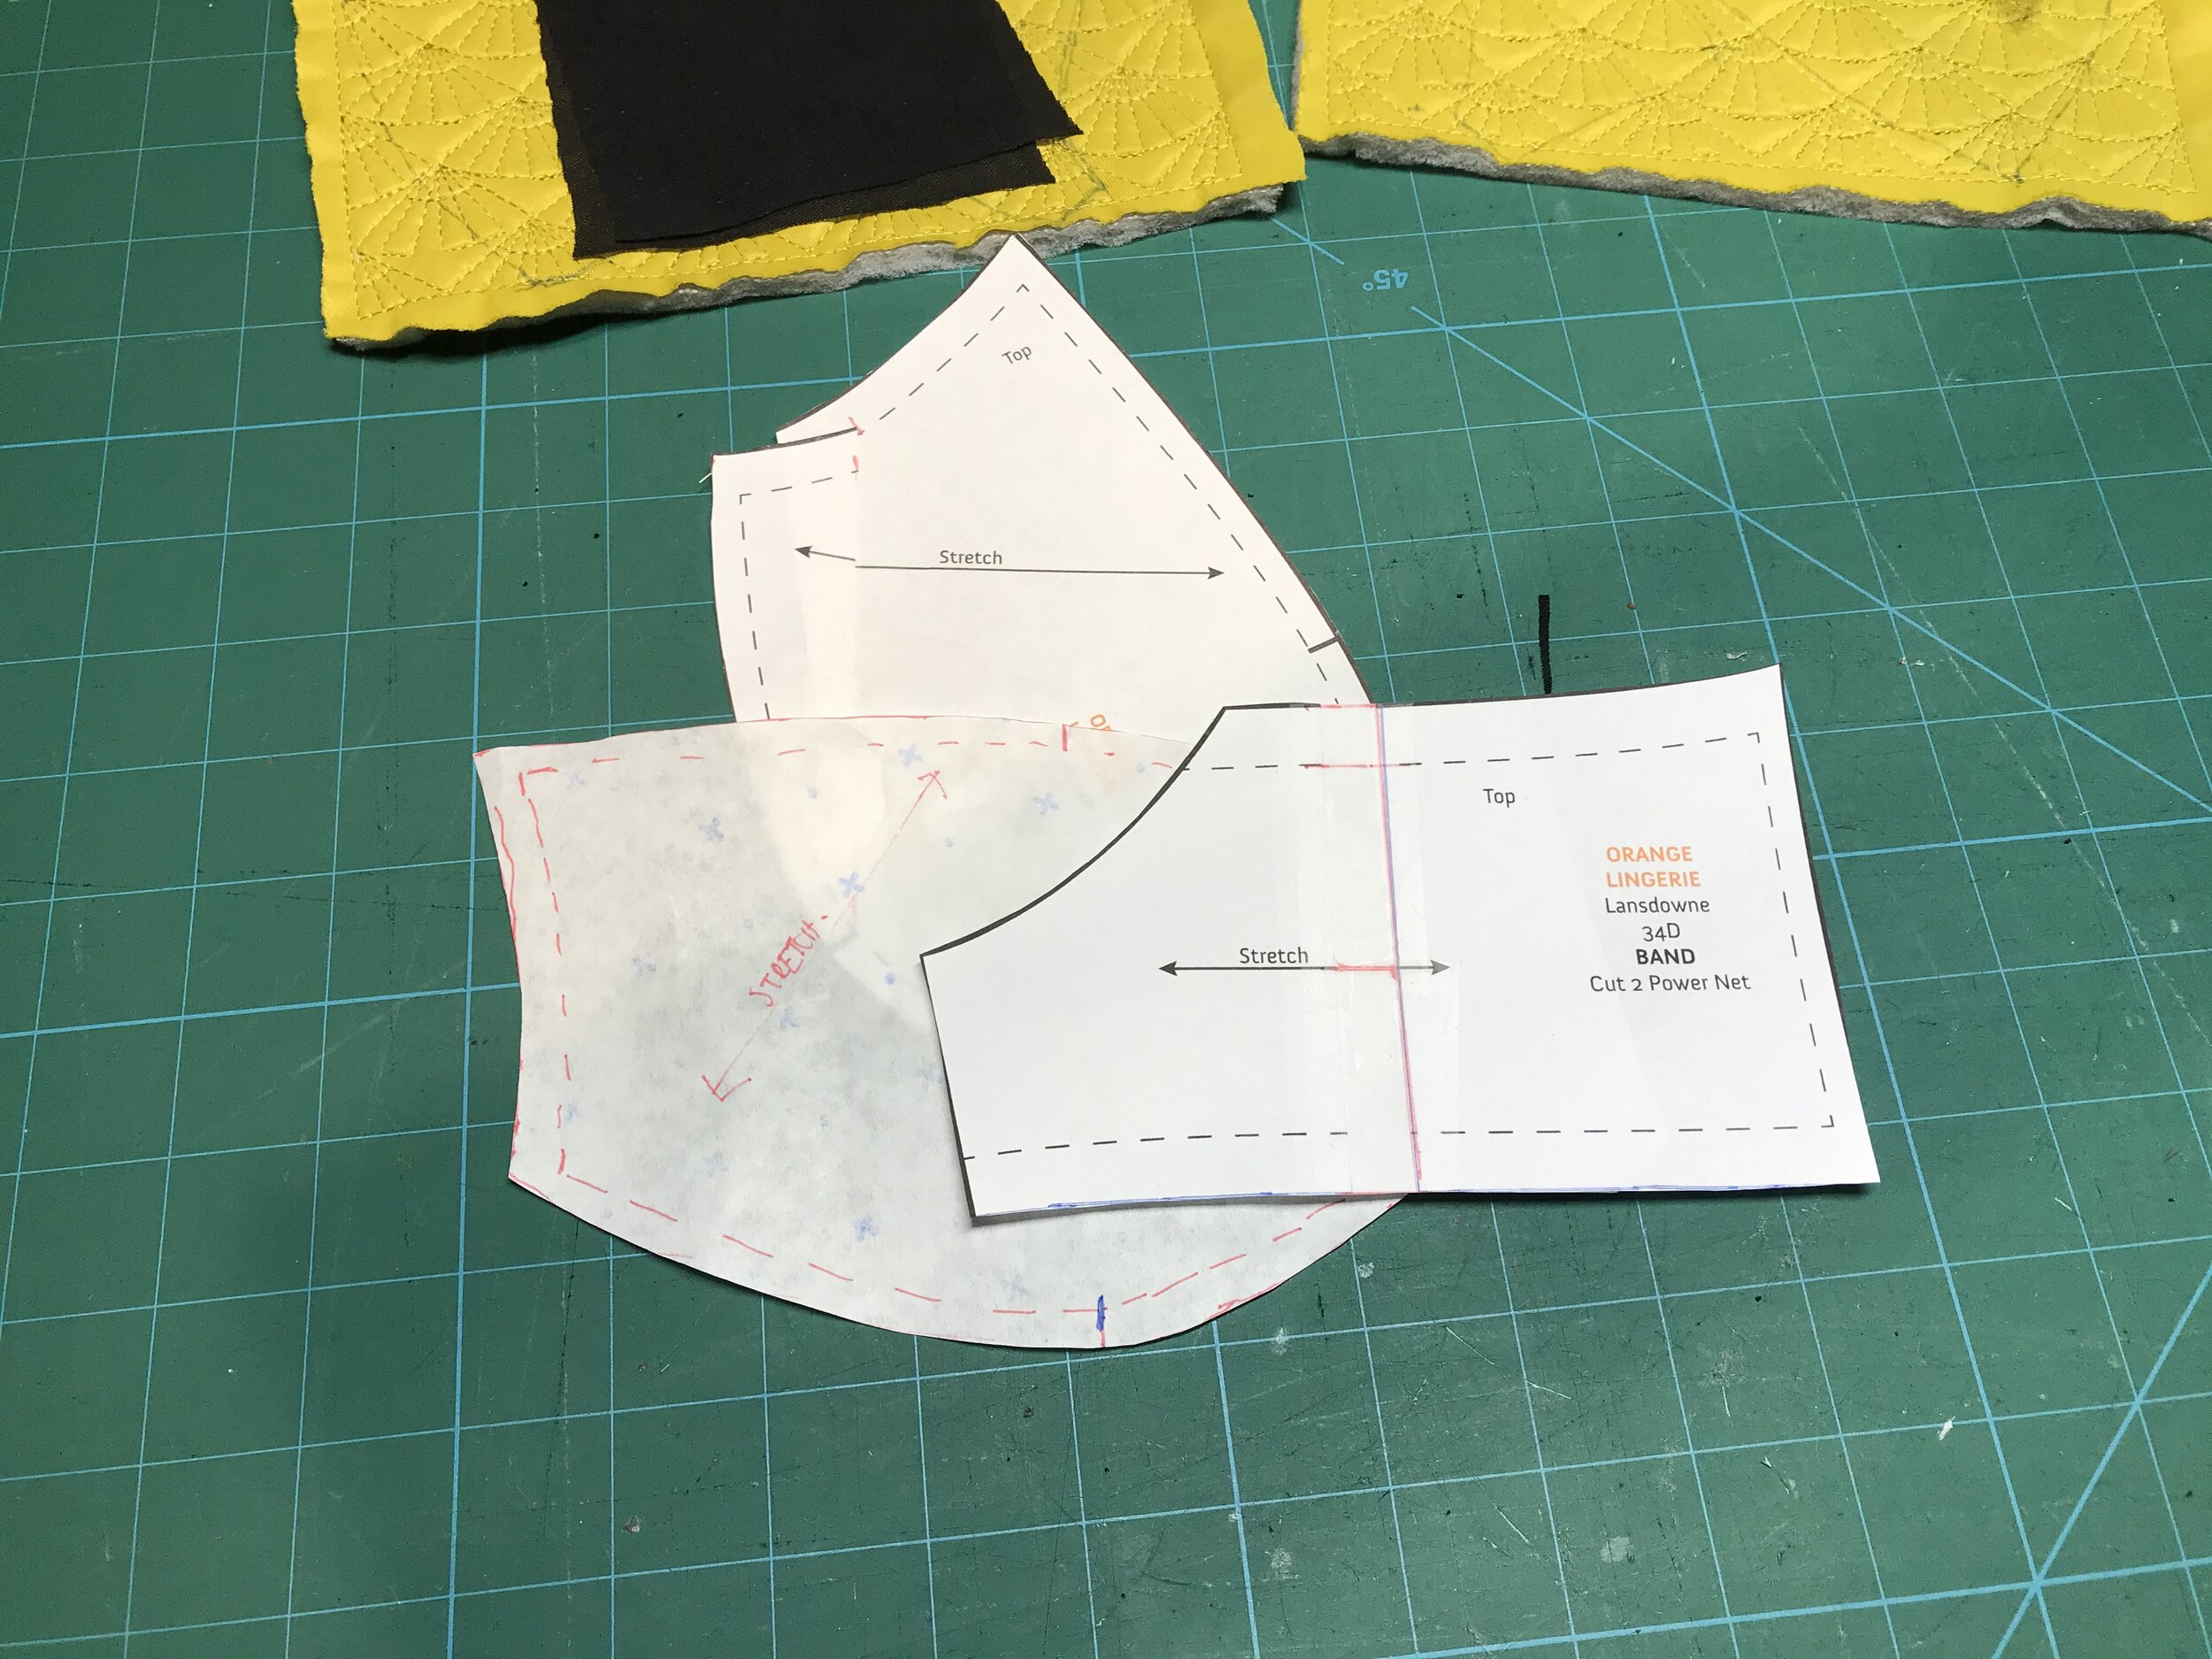
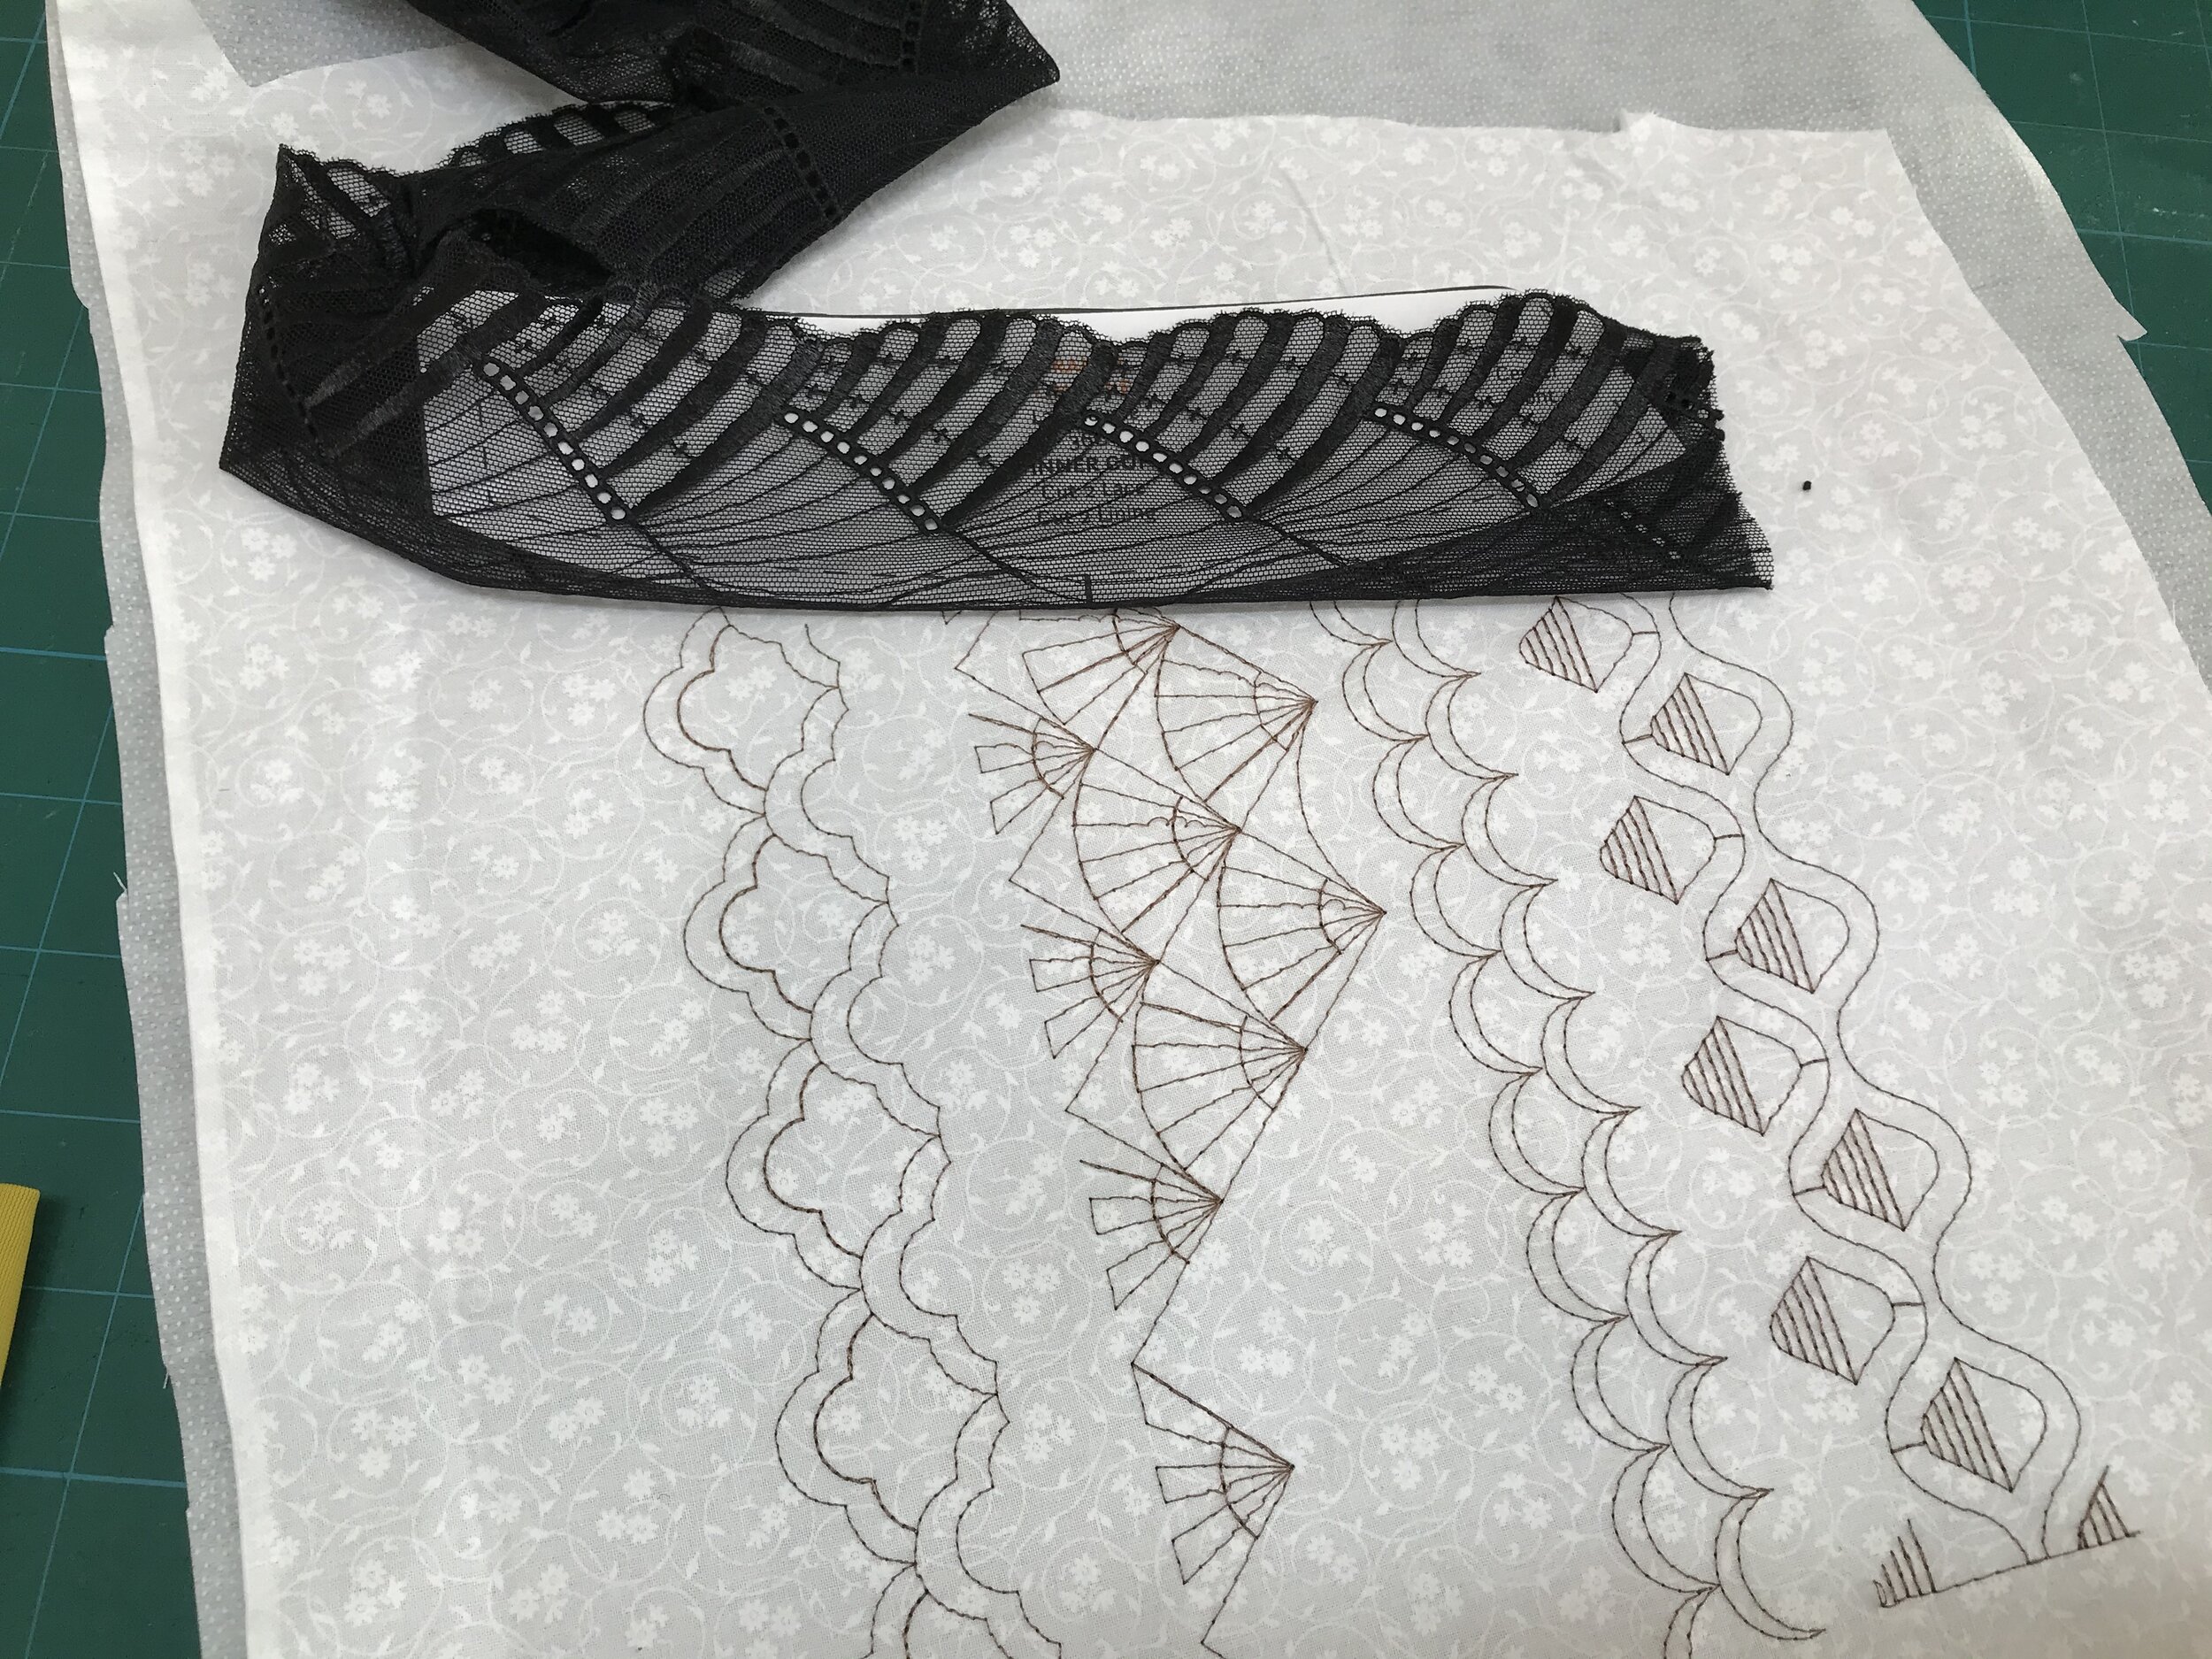
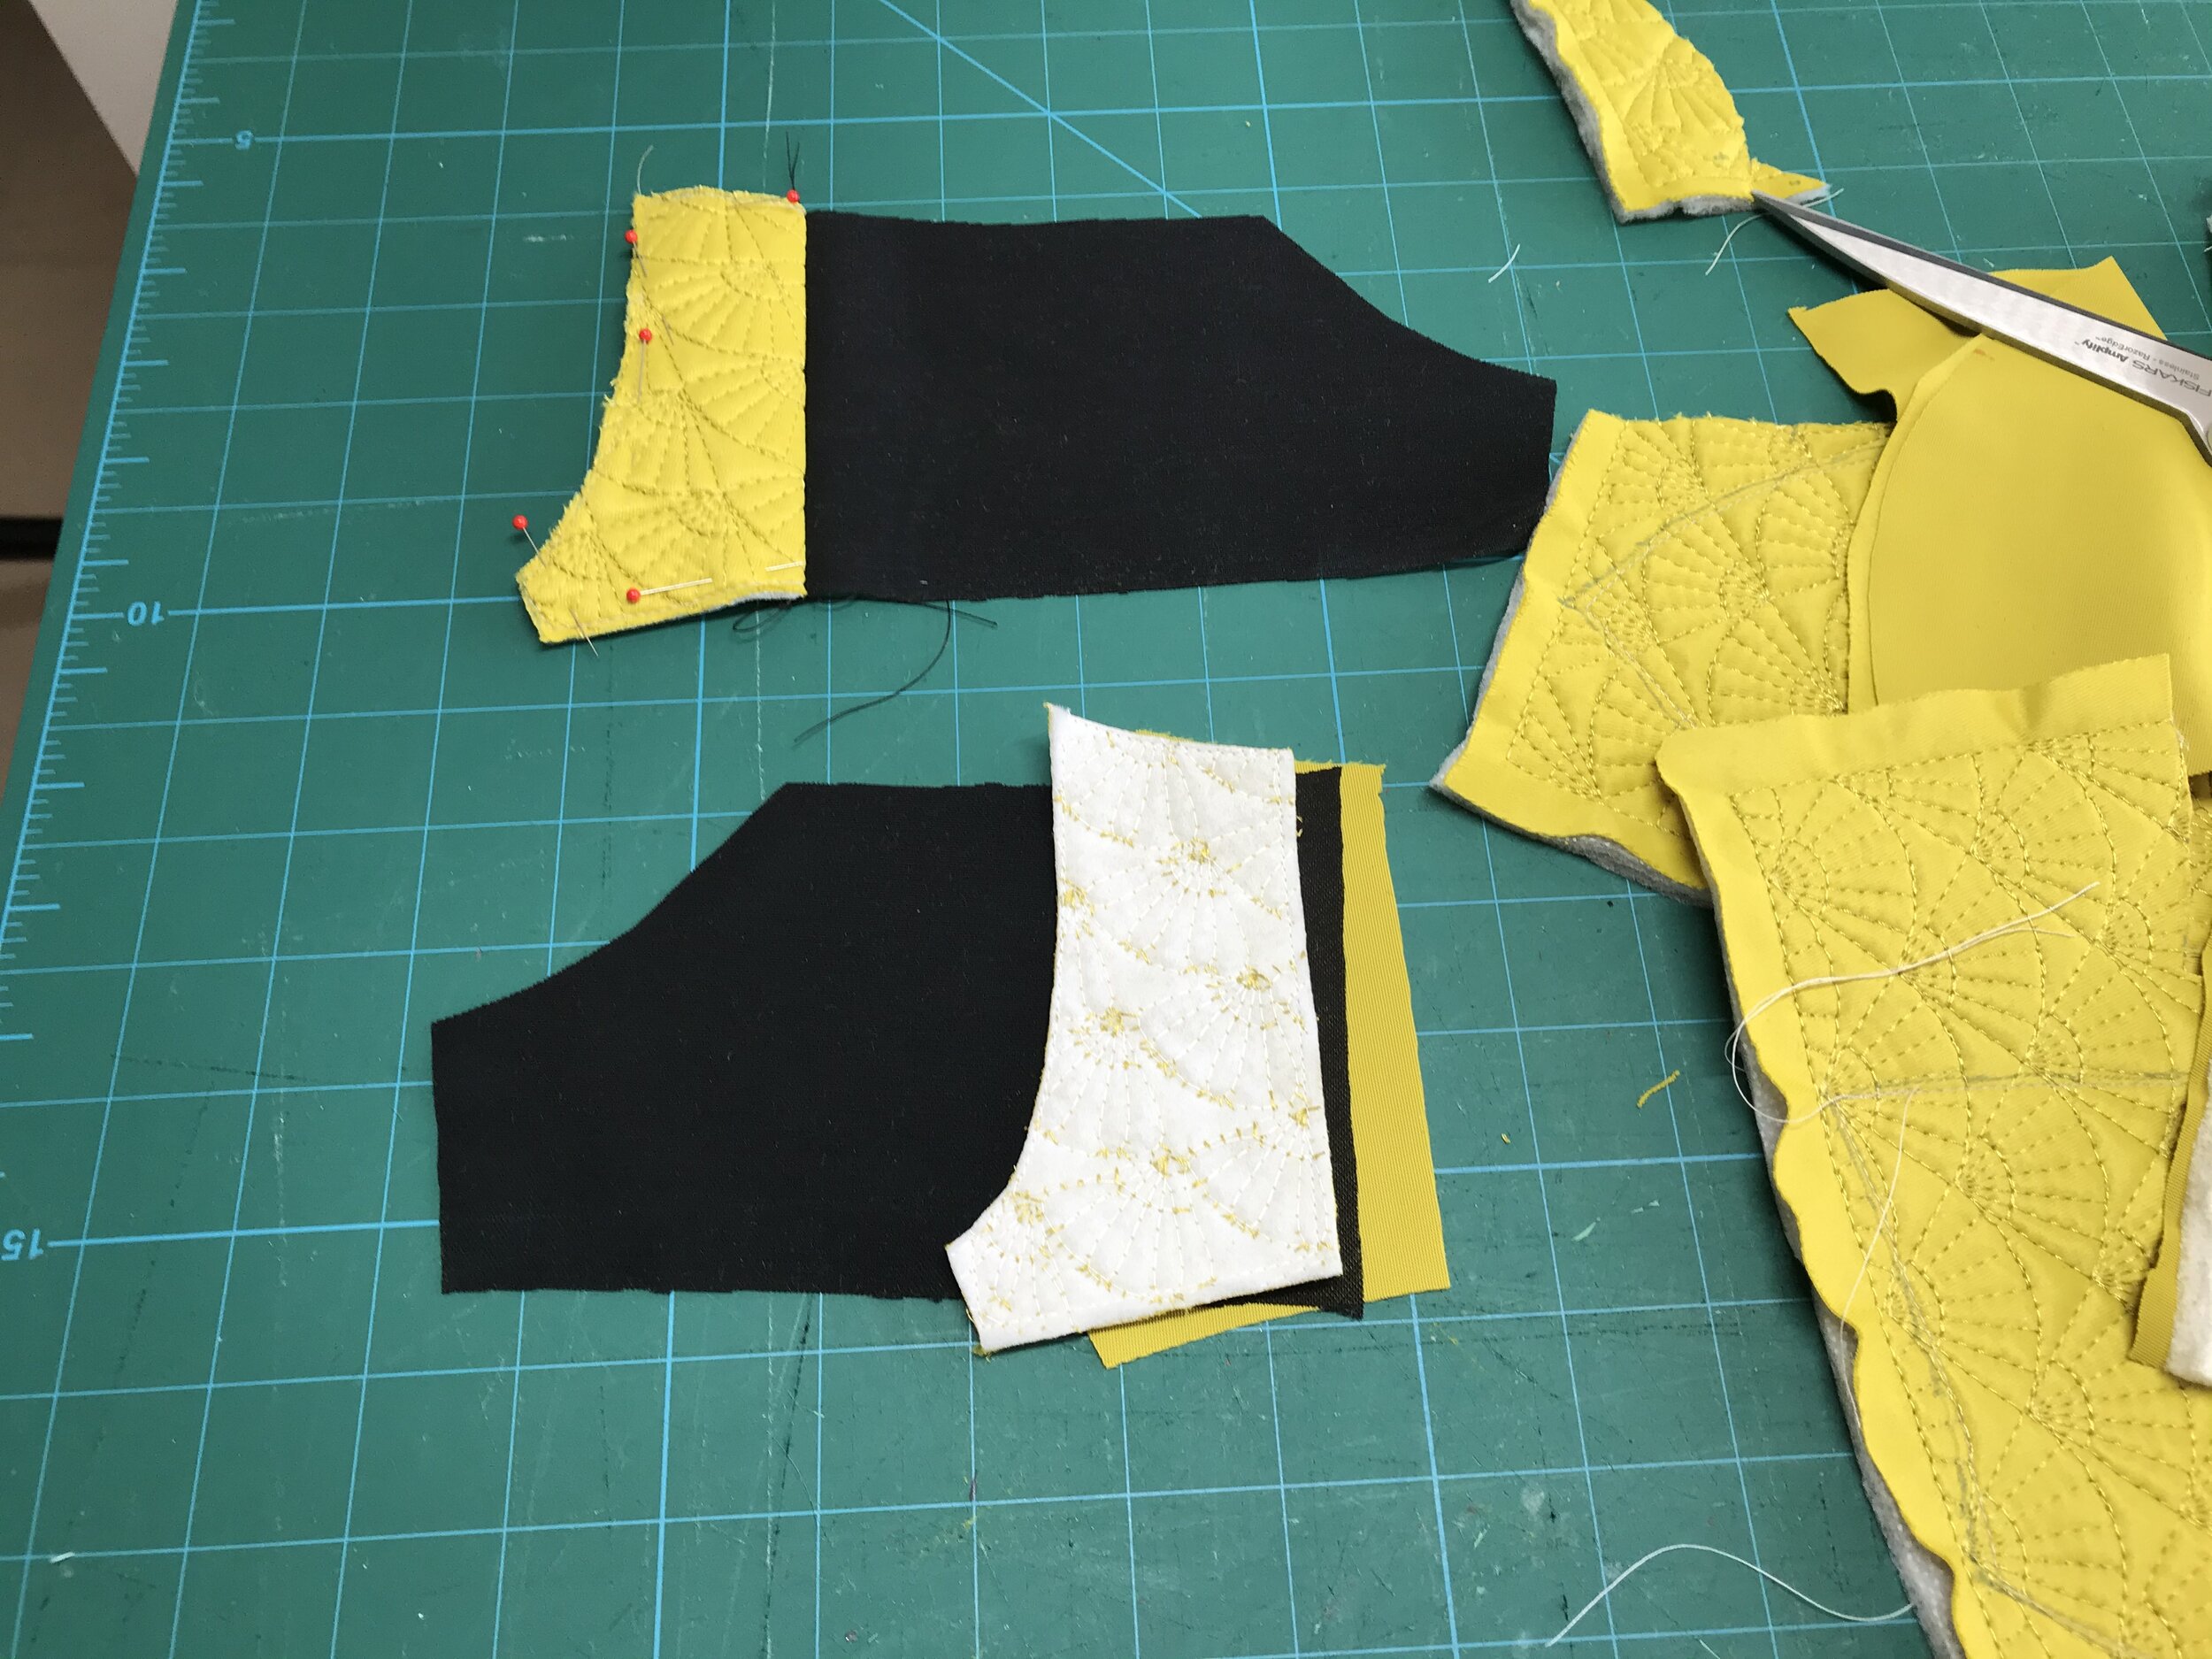
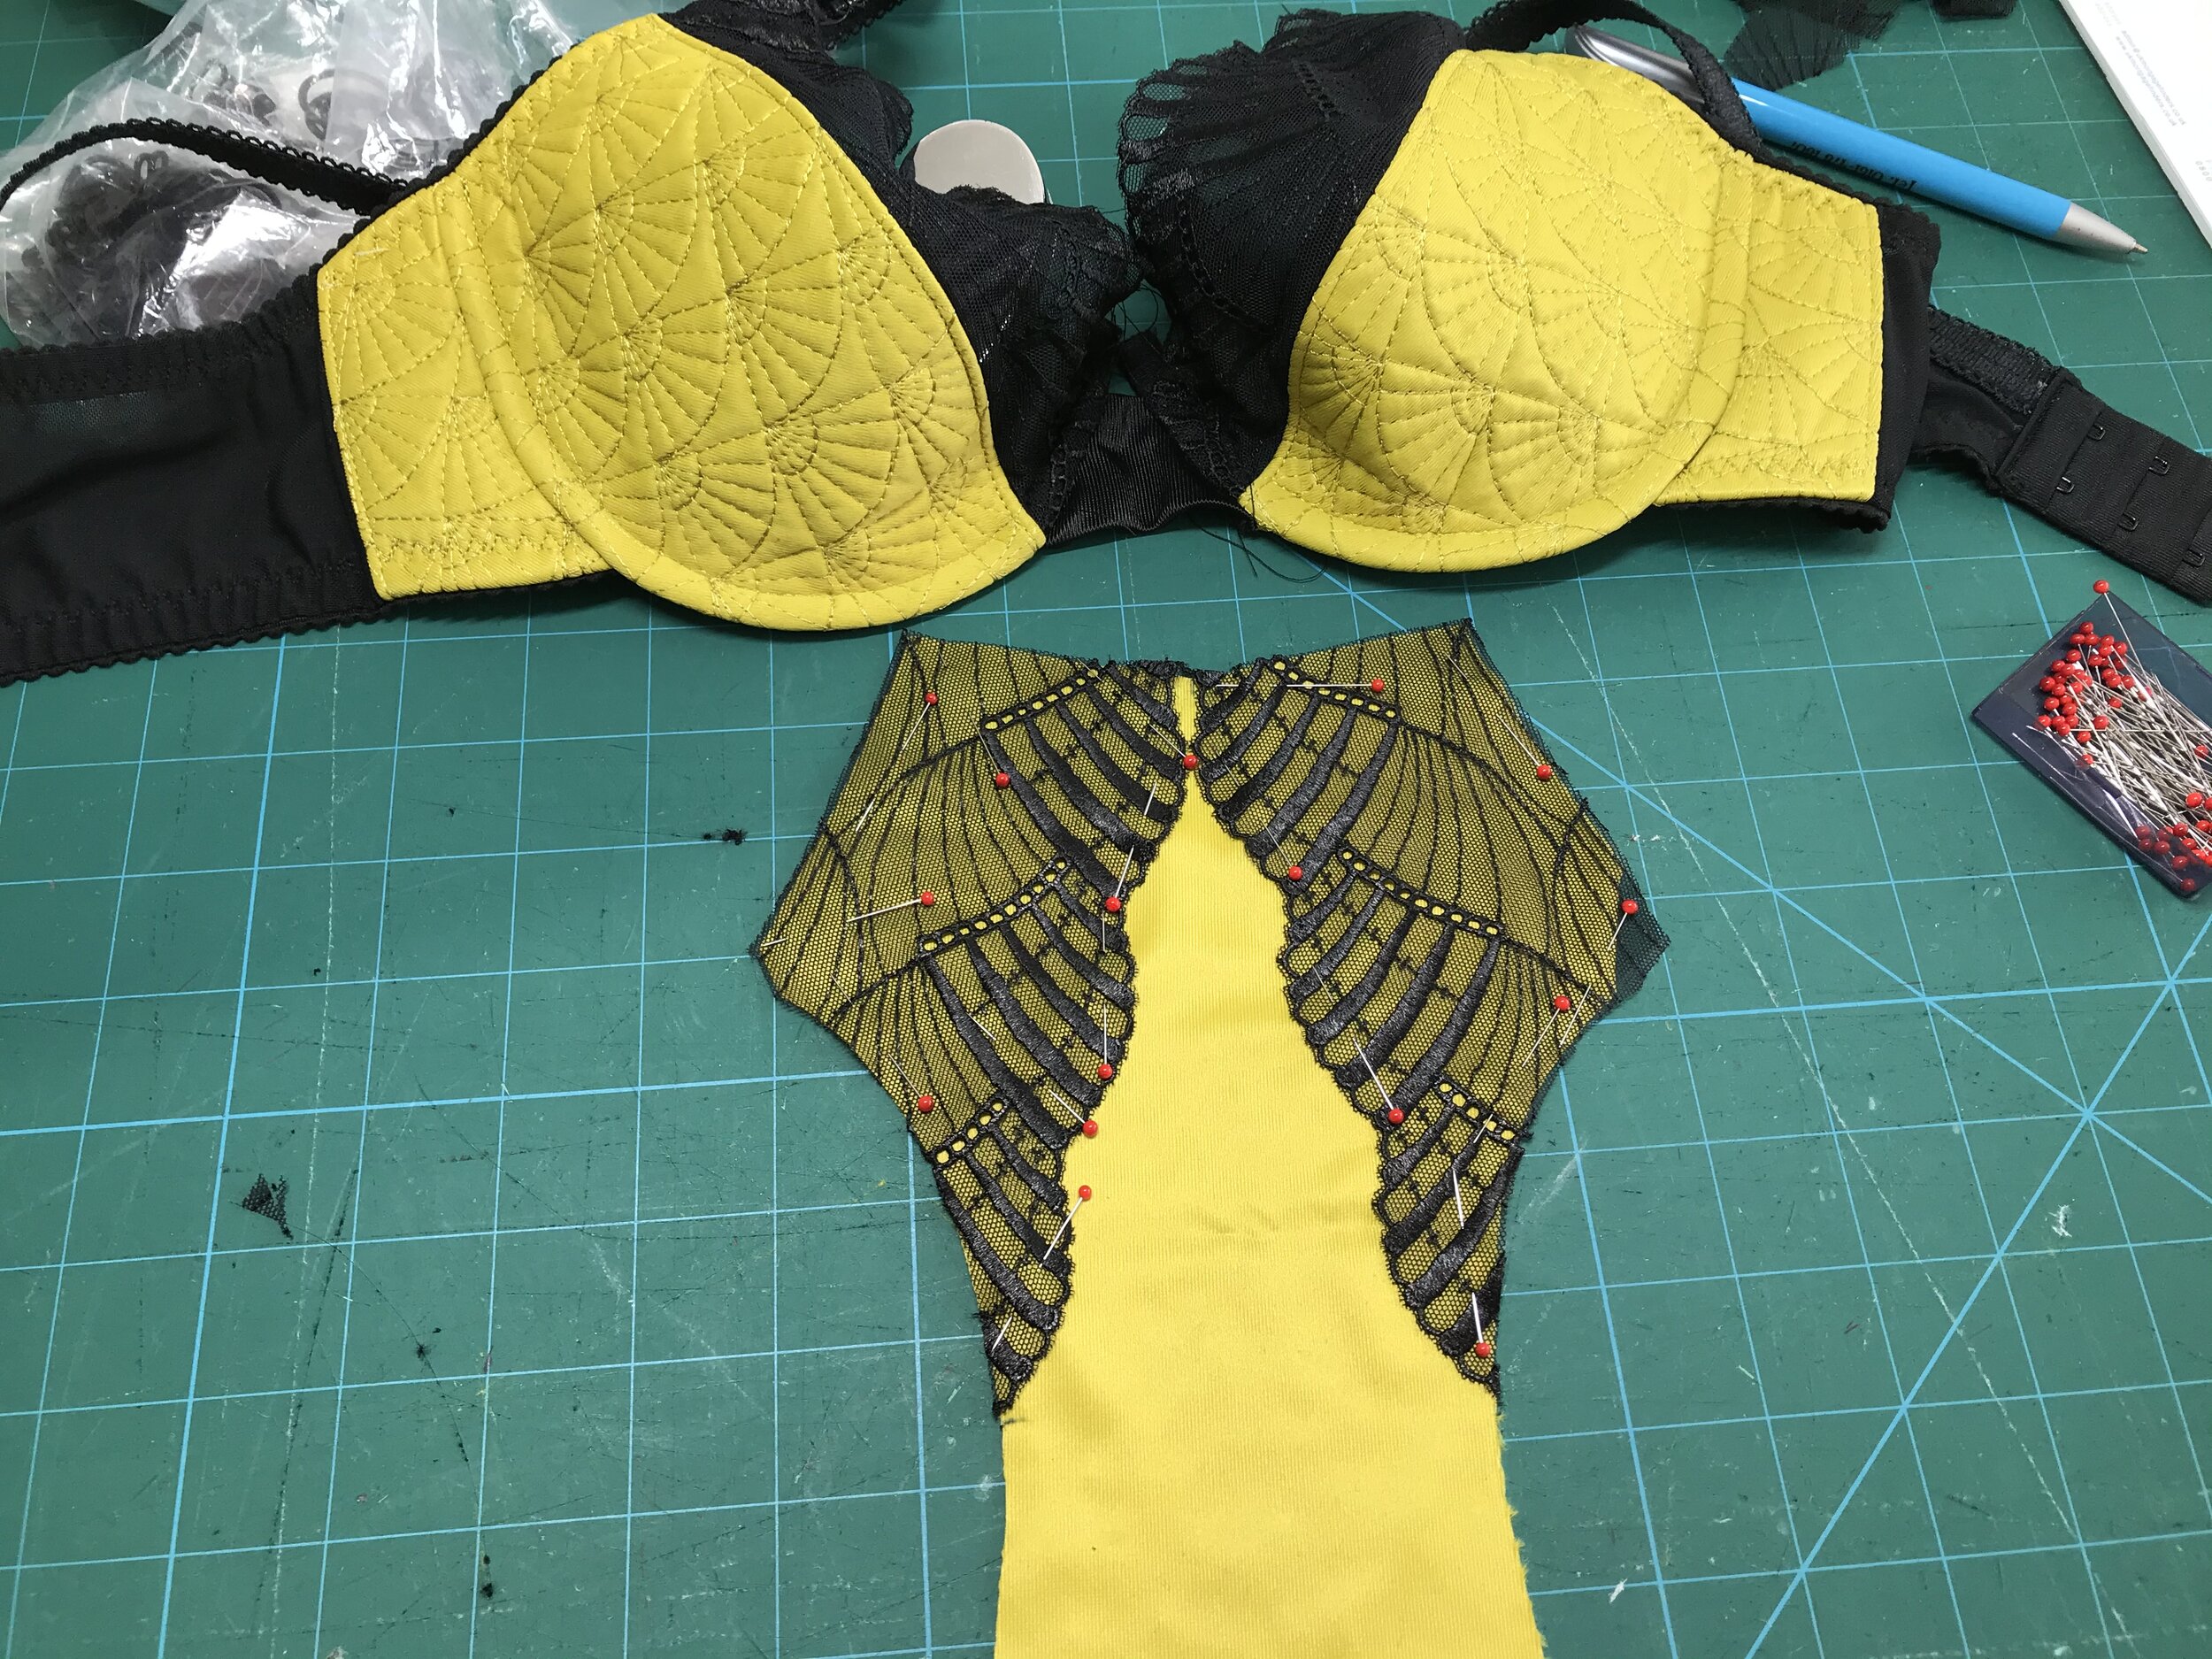
I had already bought some Sashiko inspired embroidery designs from Designs by Juju that I wanted to try out on lingerie satin so the idea was to try a find a design that would work with the lace. A posting on FB reminded me of the Orange Lingerie Lansdowne which I intended to revisit to get a good fit but more importantly the large lower cup would be perfect.
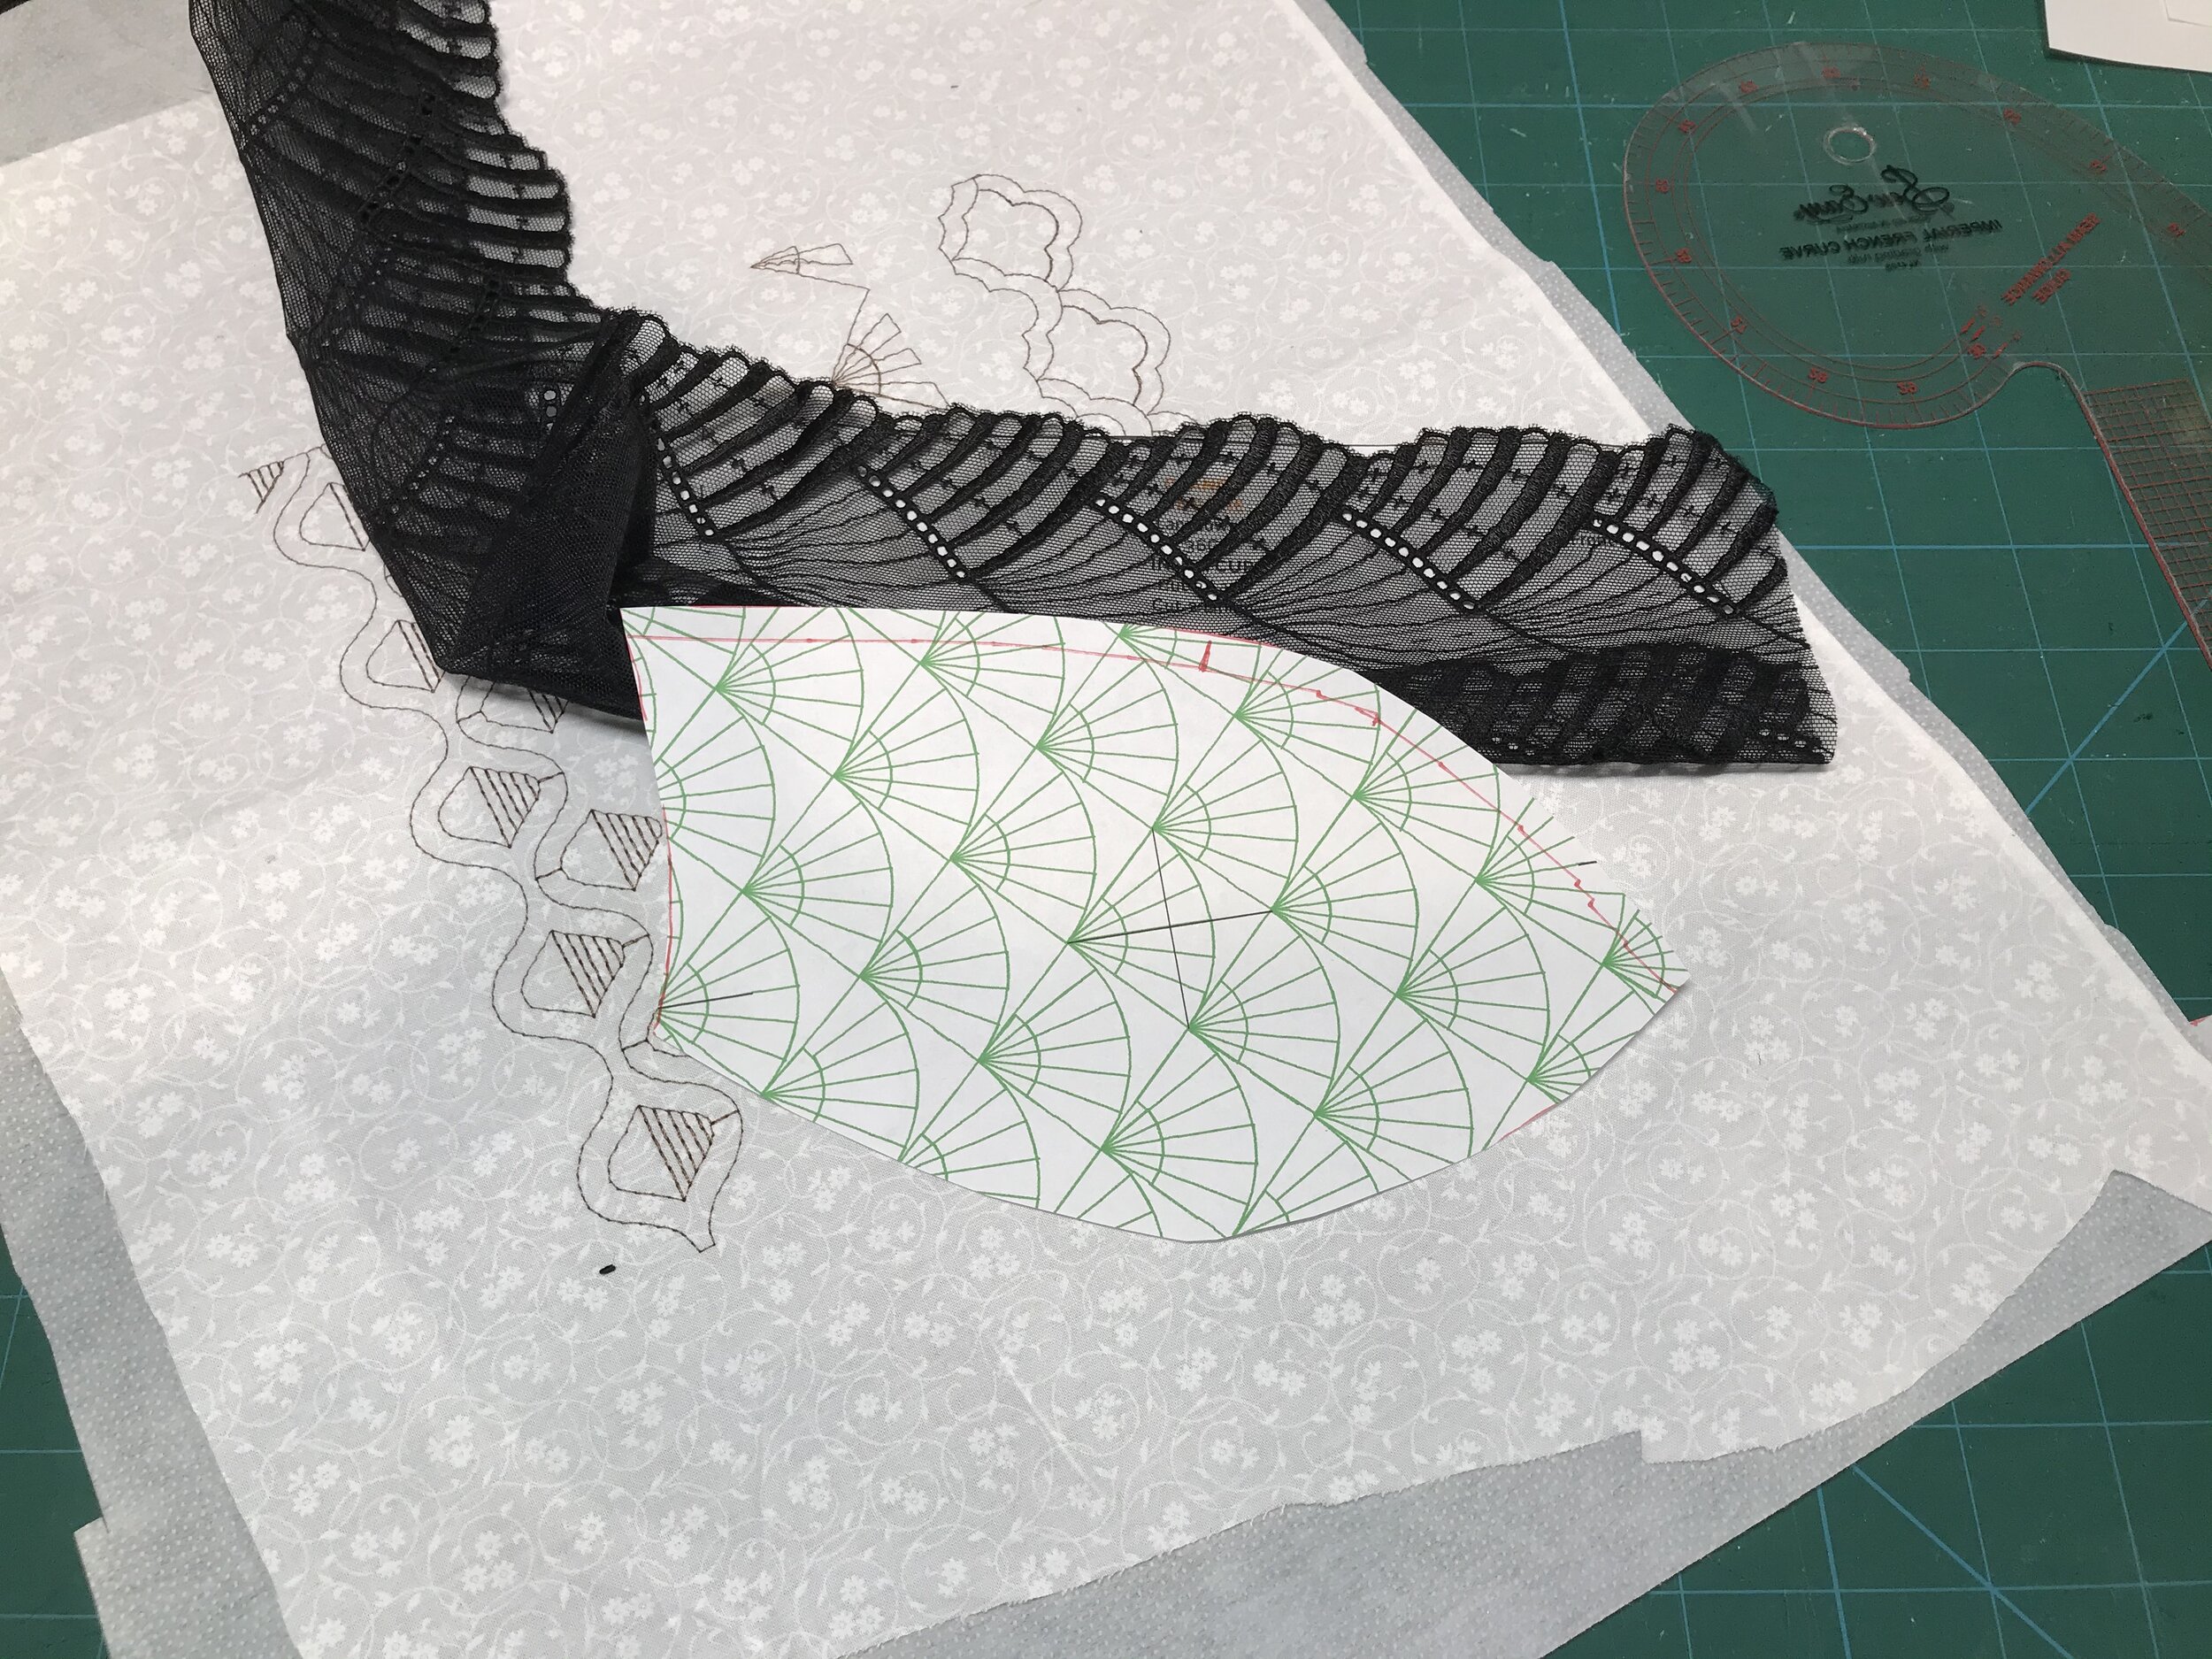
I started by altering the pattern to fit which meant taking a wedge out of the underarm and altering the back band. Then I stitched out a few of the designs to see which worked best with the lace. With the design chosen I had to decide how to place the pattern piece to look best with the lace and check it would fit in the 8” x 8” hoop. I was struggling to decide so I printed out the design and cut out the pattern piece. I used a low loft fusible fleece for stabiliser as this would compact well for sewing and would be like a padded cup for what is described as a “cleavage enhancing, plunging underwire bra”. I was able to get a cup and side from each square. To ensure none of the stitches unravelled I traced off the pattern pieces and then stitched inside before I cut out.
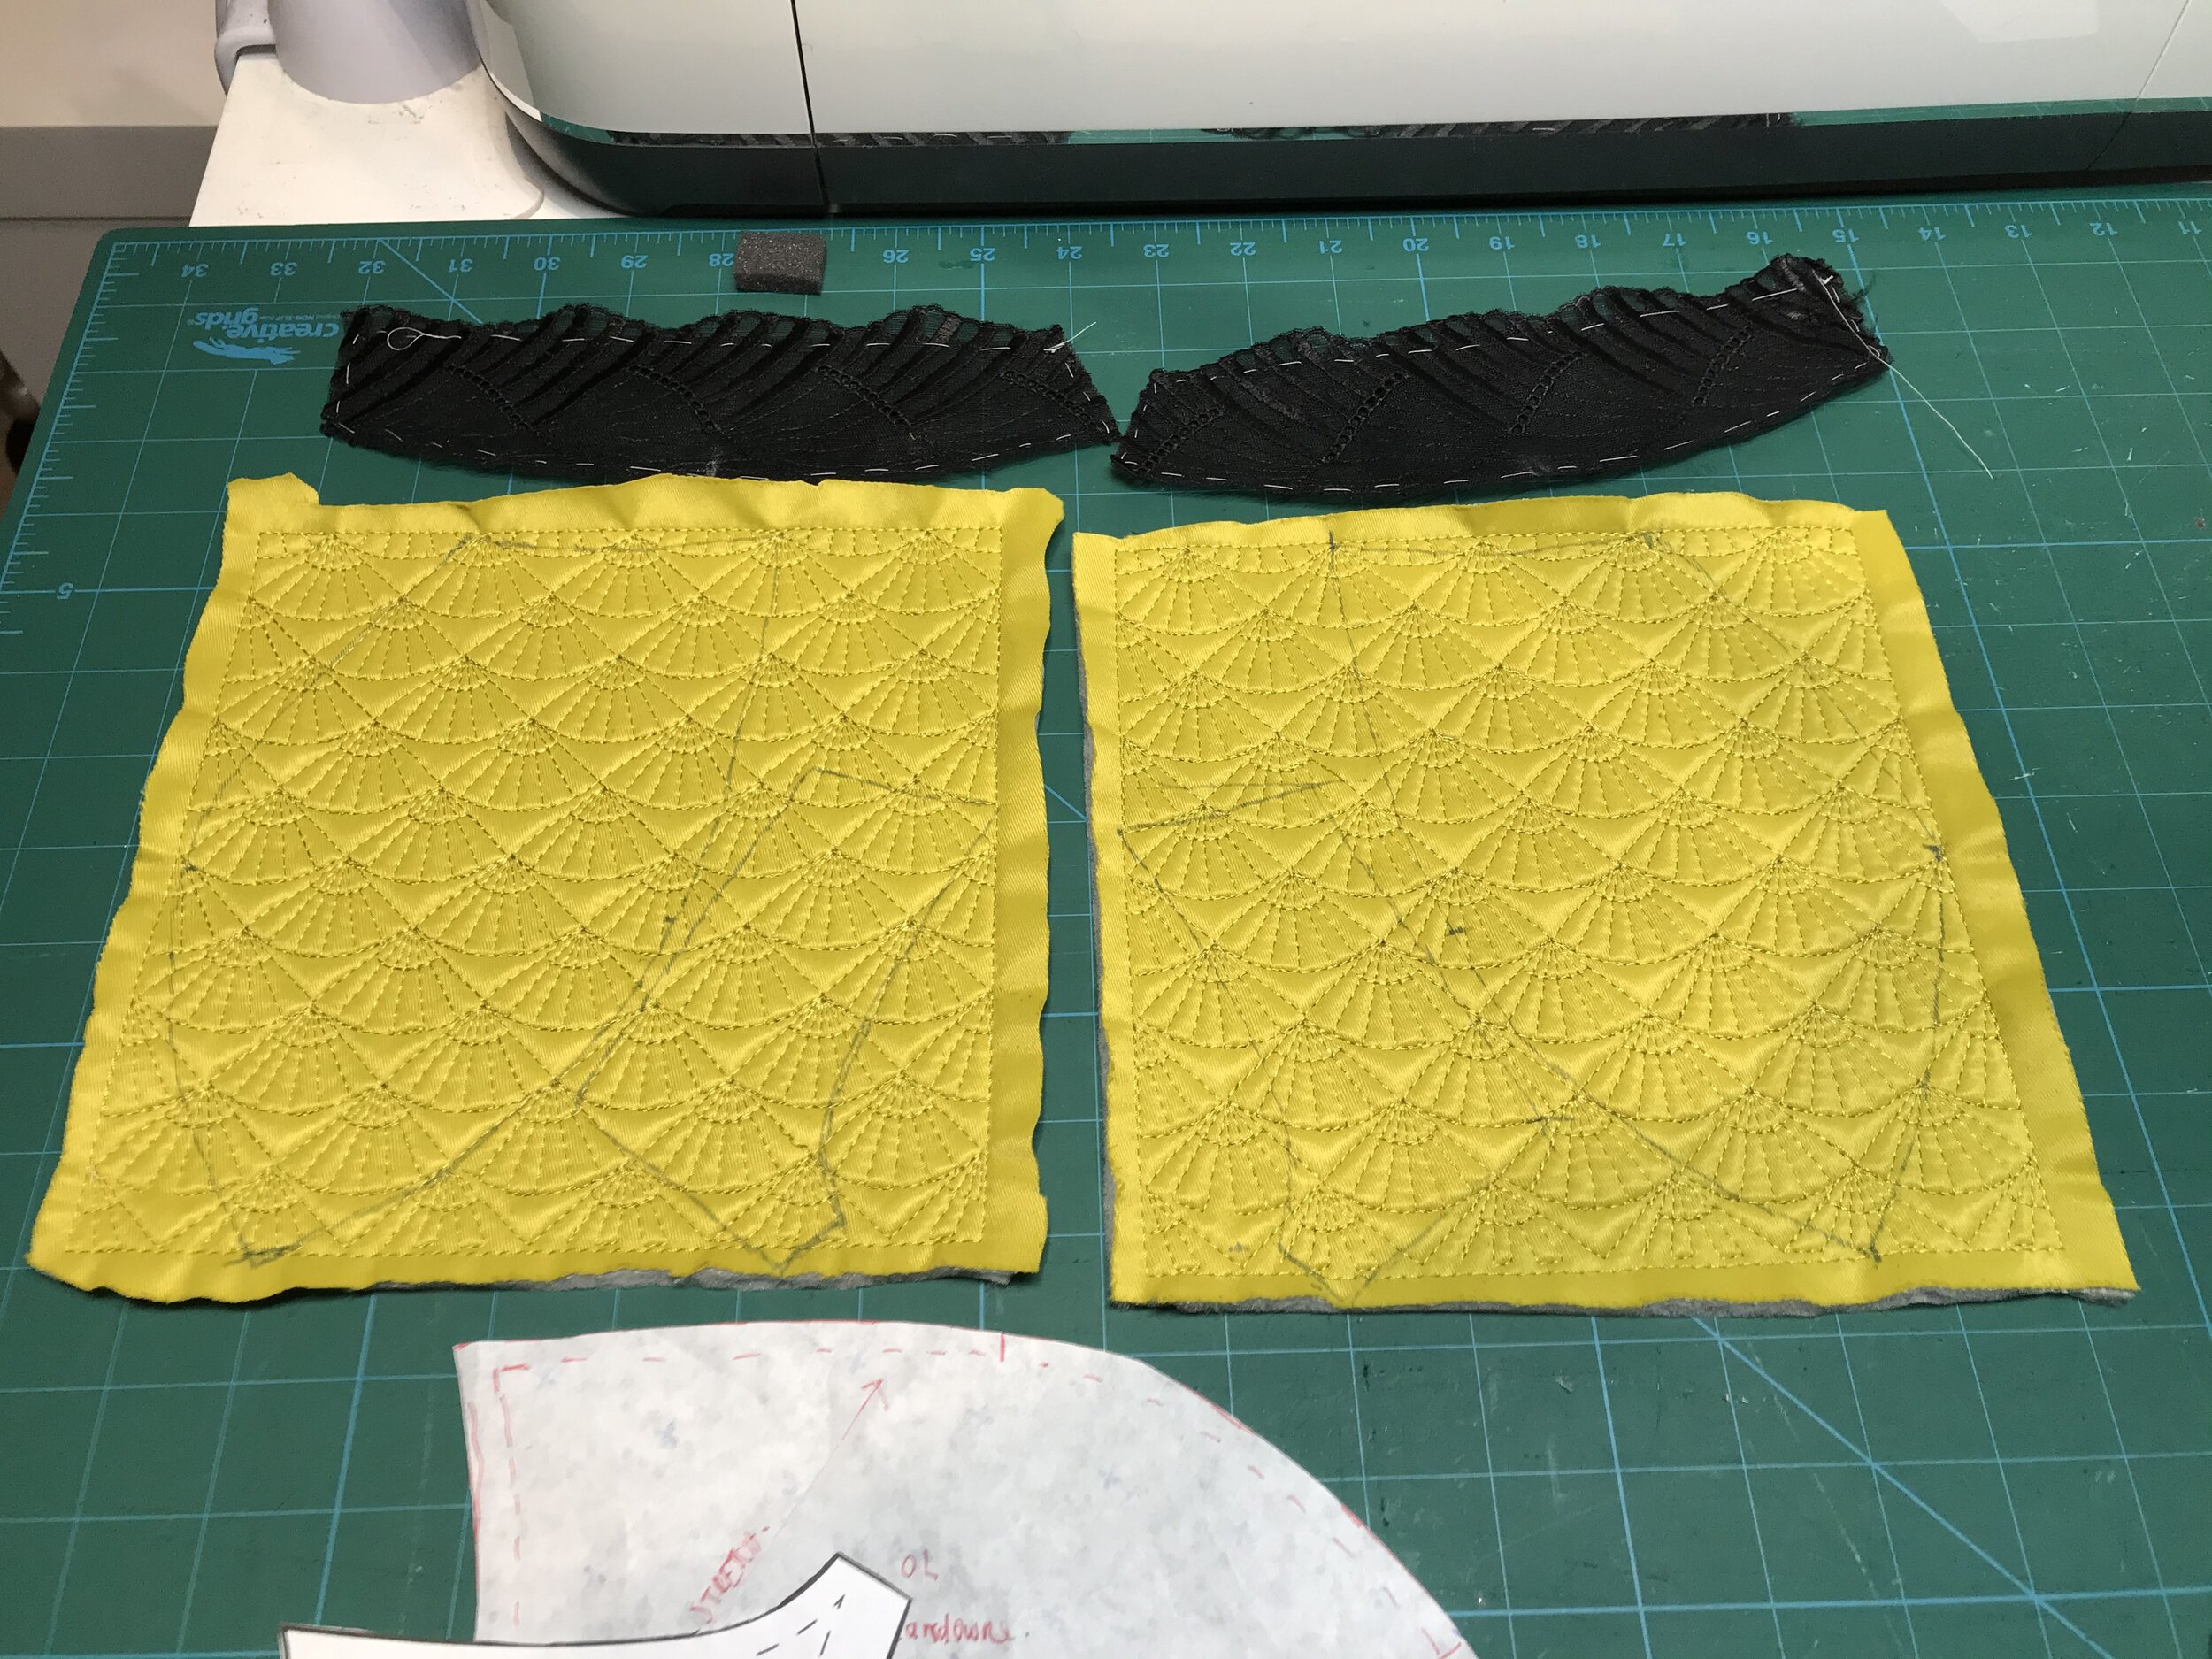
To cover the stabiliser I lined with the fabric which enabled me to enclose all the seams and still be comfortable. I did have to switch to a bigger needle and use a walking foot but I did get through all the layers and it looks good on the inside as well. For the set I made another Ohhhlulu Claudia but I didn’t have much lace so I opted for a lace overlay on the front panel and used mesh on the fold for the back. This encloses the back seam and gives a smooth profile under clothing.
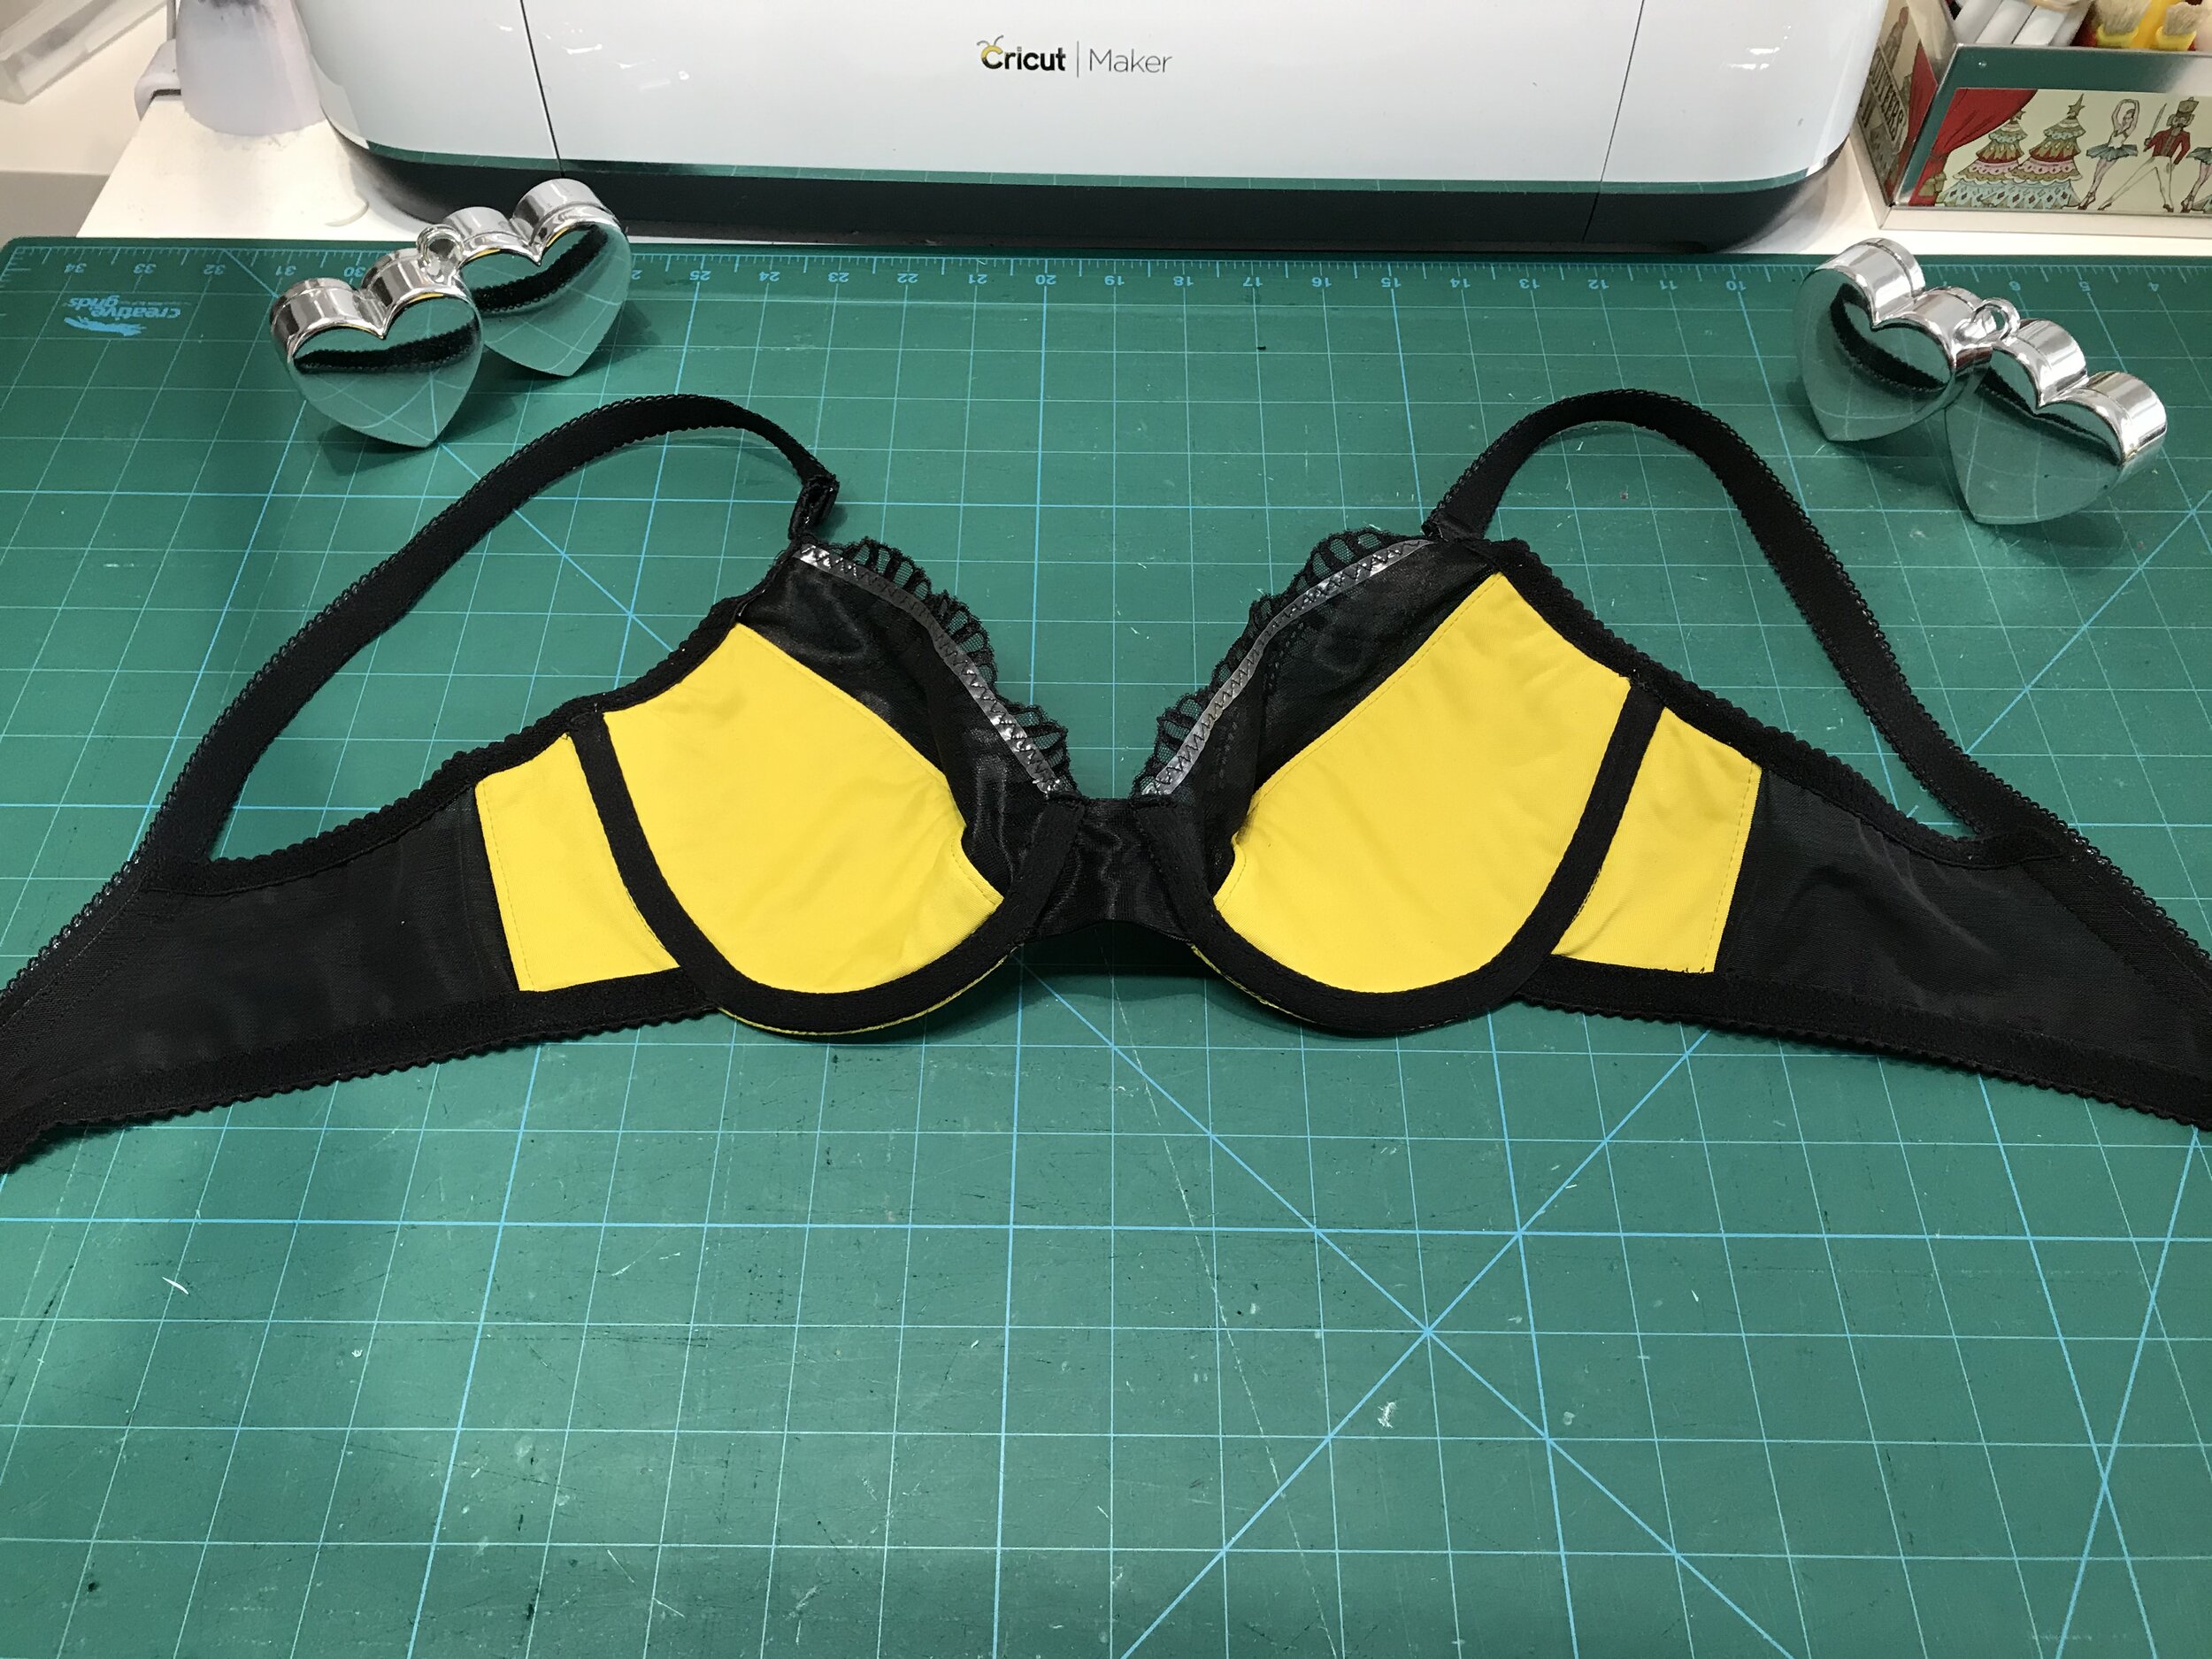
Now I have the fit right this is another stunning bra and immensely pleased with how it turned out. Through out the makes I have also been working on underwear drafting but I will share this in a separate blog.