Madalynne X Simplicity 8711 - Another Stunner
A wet weekend so I finally got chance to make the Madalynne X Simplicity 8711. I just had to have this pattern as soon as it came out which meant shipping from the US. There are some fabulous kits on the website but I had previously bought all the beautiful fabrics during a free shipping weekend so had plenty to choose from.


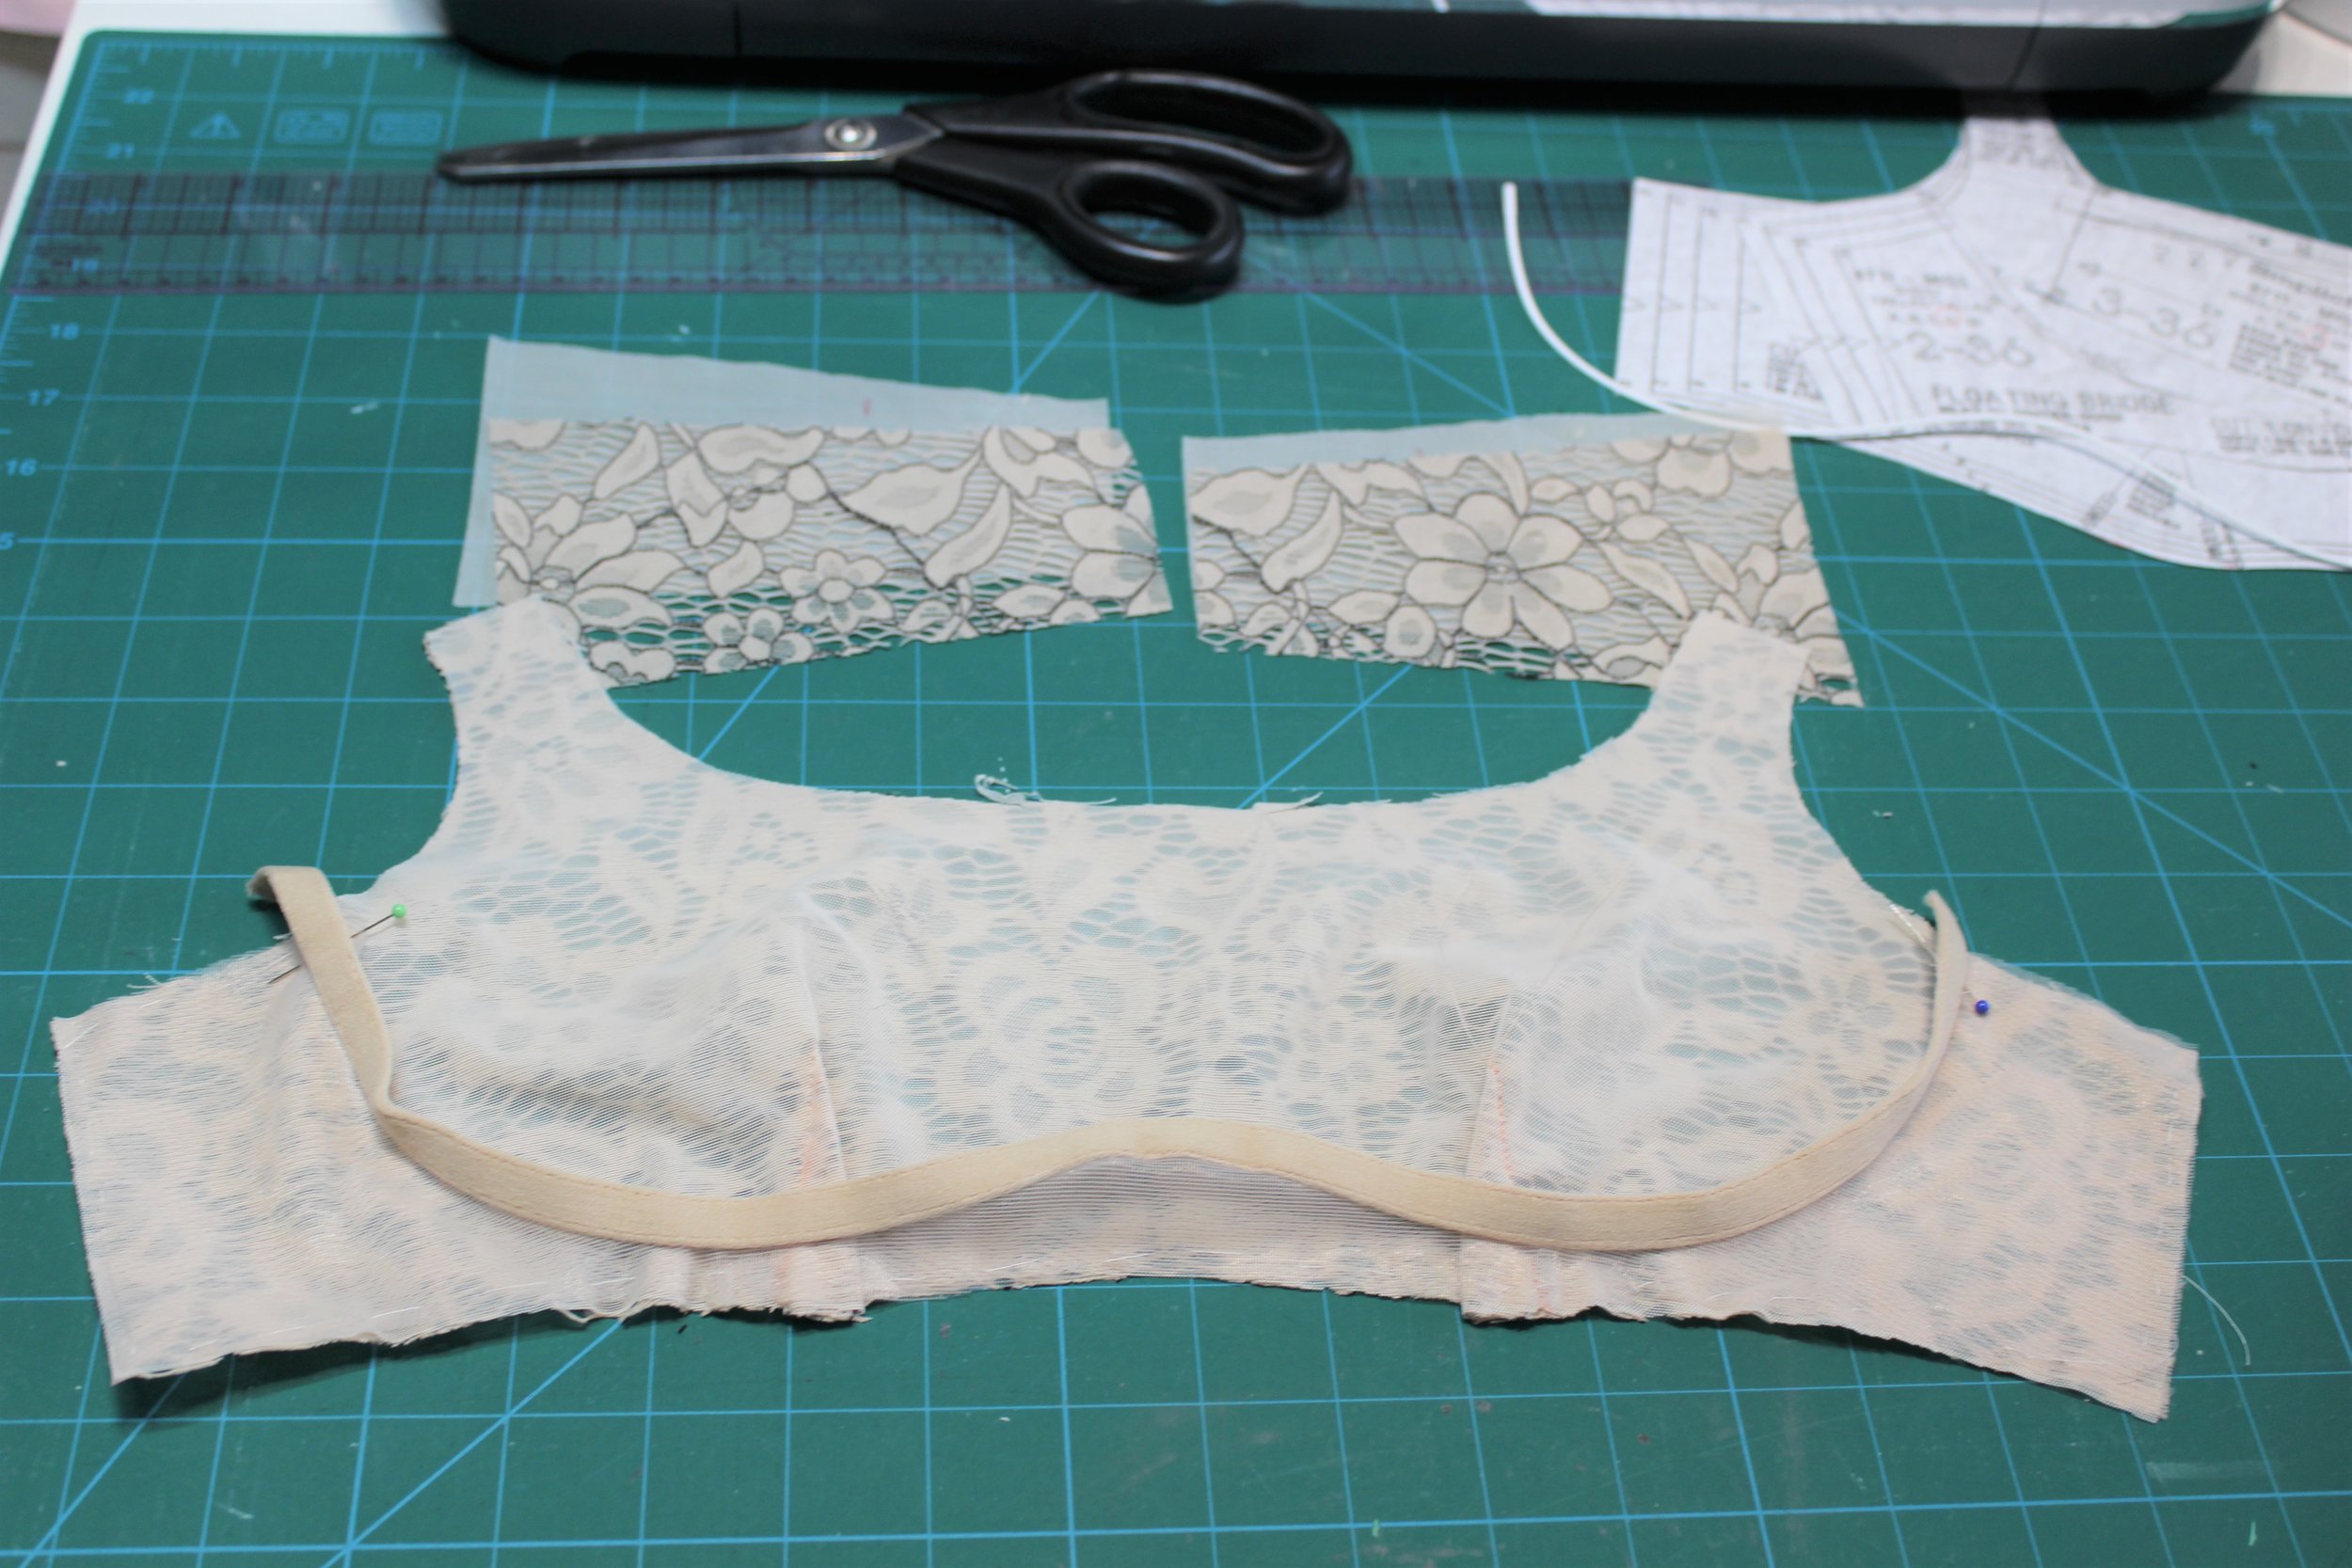
The description is of an underwire bralette with an interior frame, called a floating bridge, that holds a continuous monowire for support. Floating bridge, monowire!

So the big decision was what size monowire to buy. There is so much help on the website (including a guide you can download) I found easier to digest than the printed pattern. The guidance was to buy the size up and down from your calculations. Having made other Madalynne patterns I went with my usual size and the size up. And, just as suggested, I needed the larger size.

Wire sorted I then had to decide which of three gorgeous fabrics to use. I have both the pink and blue metallic from the website but in the end I had to use the lace as I only had the right size fastener in the black. Too many choices for the lining! All the various shades of nude/peach worked but I decided on the peach powernet which being a light powernet has quite a silky soft feeling. For better support I used a matching sheer lining for the floating bridge.
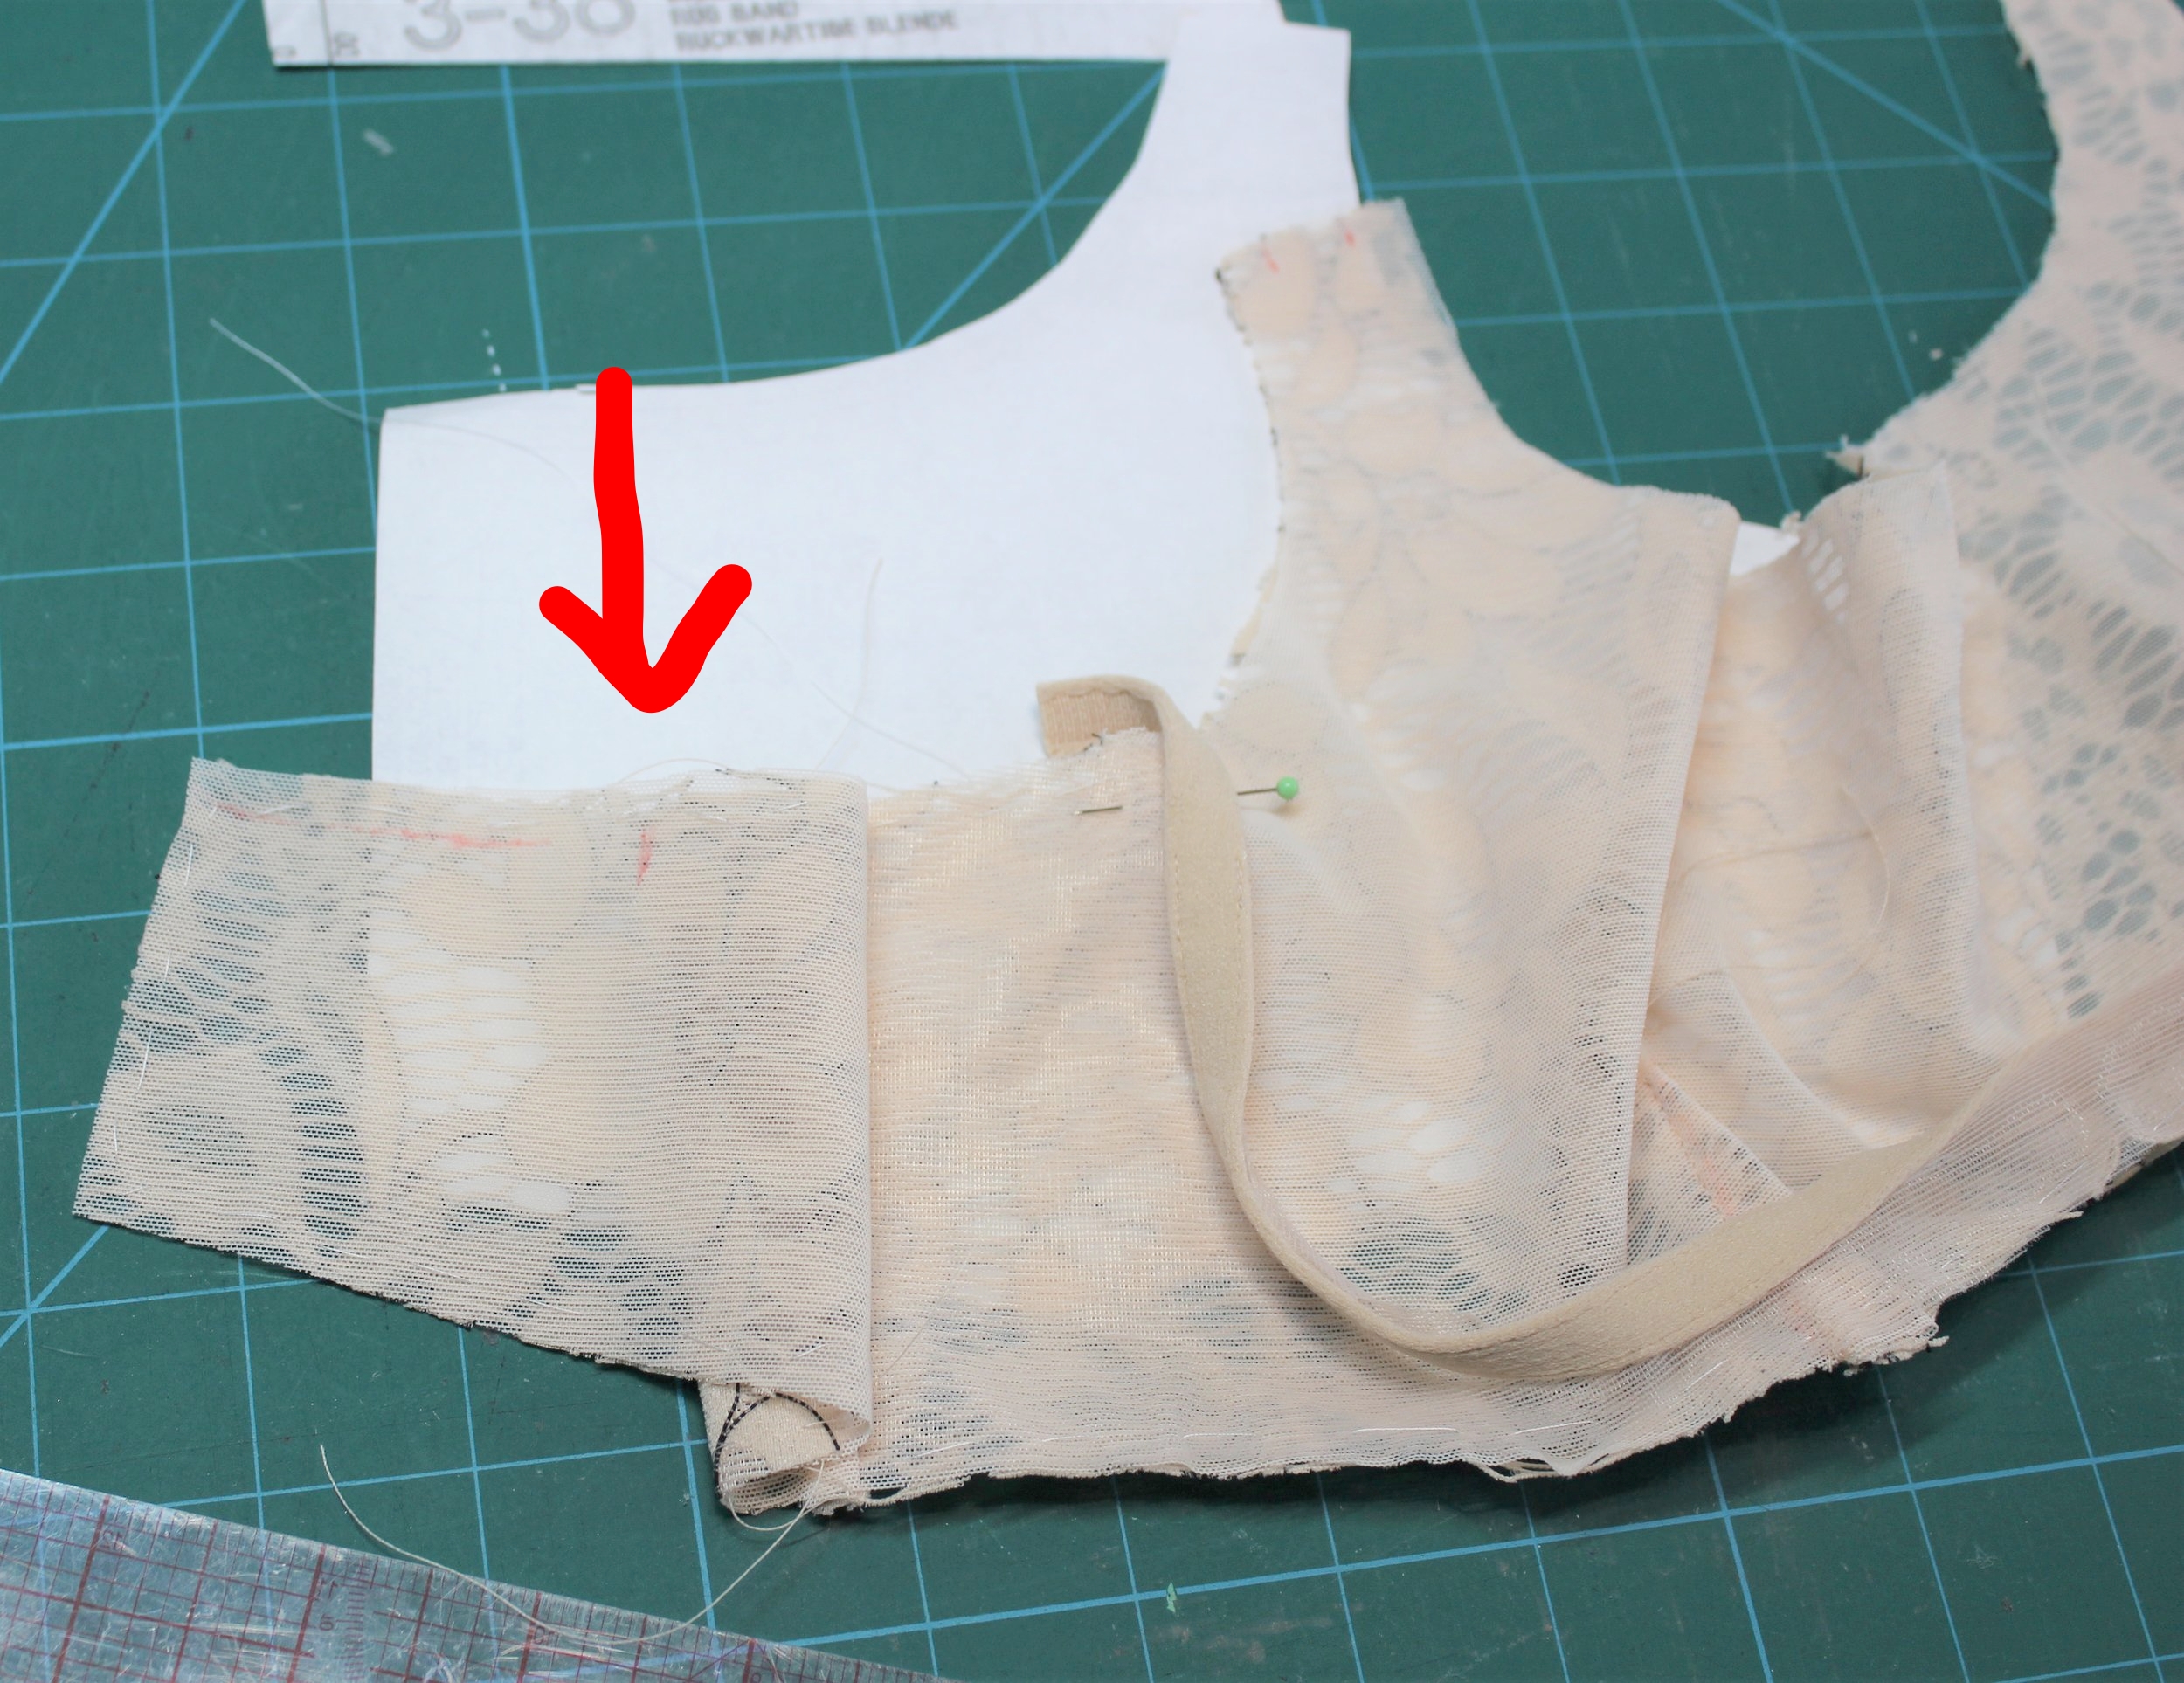
Each band size has its own pattern pieces. So I photocopied my size and then cut out the cup size from these pieces. Alas, this was to be my downfall as I photocopied two band sizes as I wasn’t quite sure which one to use. After making my decision I failed to tidy up and some pattern pieces fell on the floor. Next day I didn’t check I had all the right sizes. Luckily it was just the floating bridge I cut in the wrong size so not too much wasted. I also failed to read the instructions and cut lace for the floating bridge not even thinking through the construction. Again not a lot of waste.
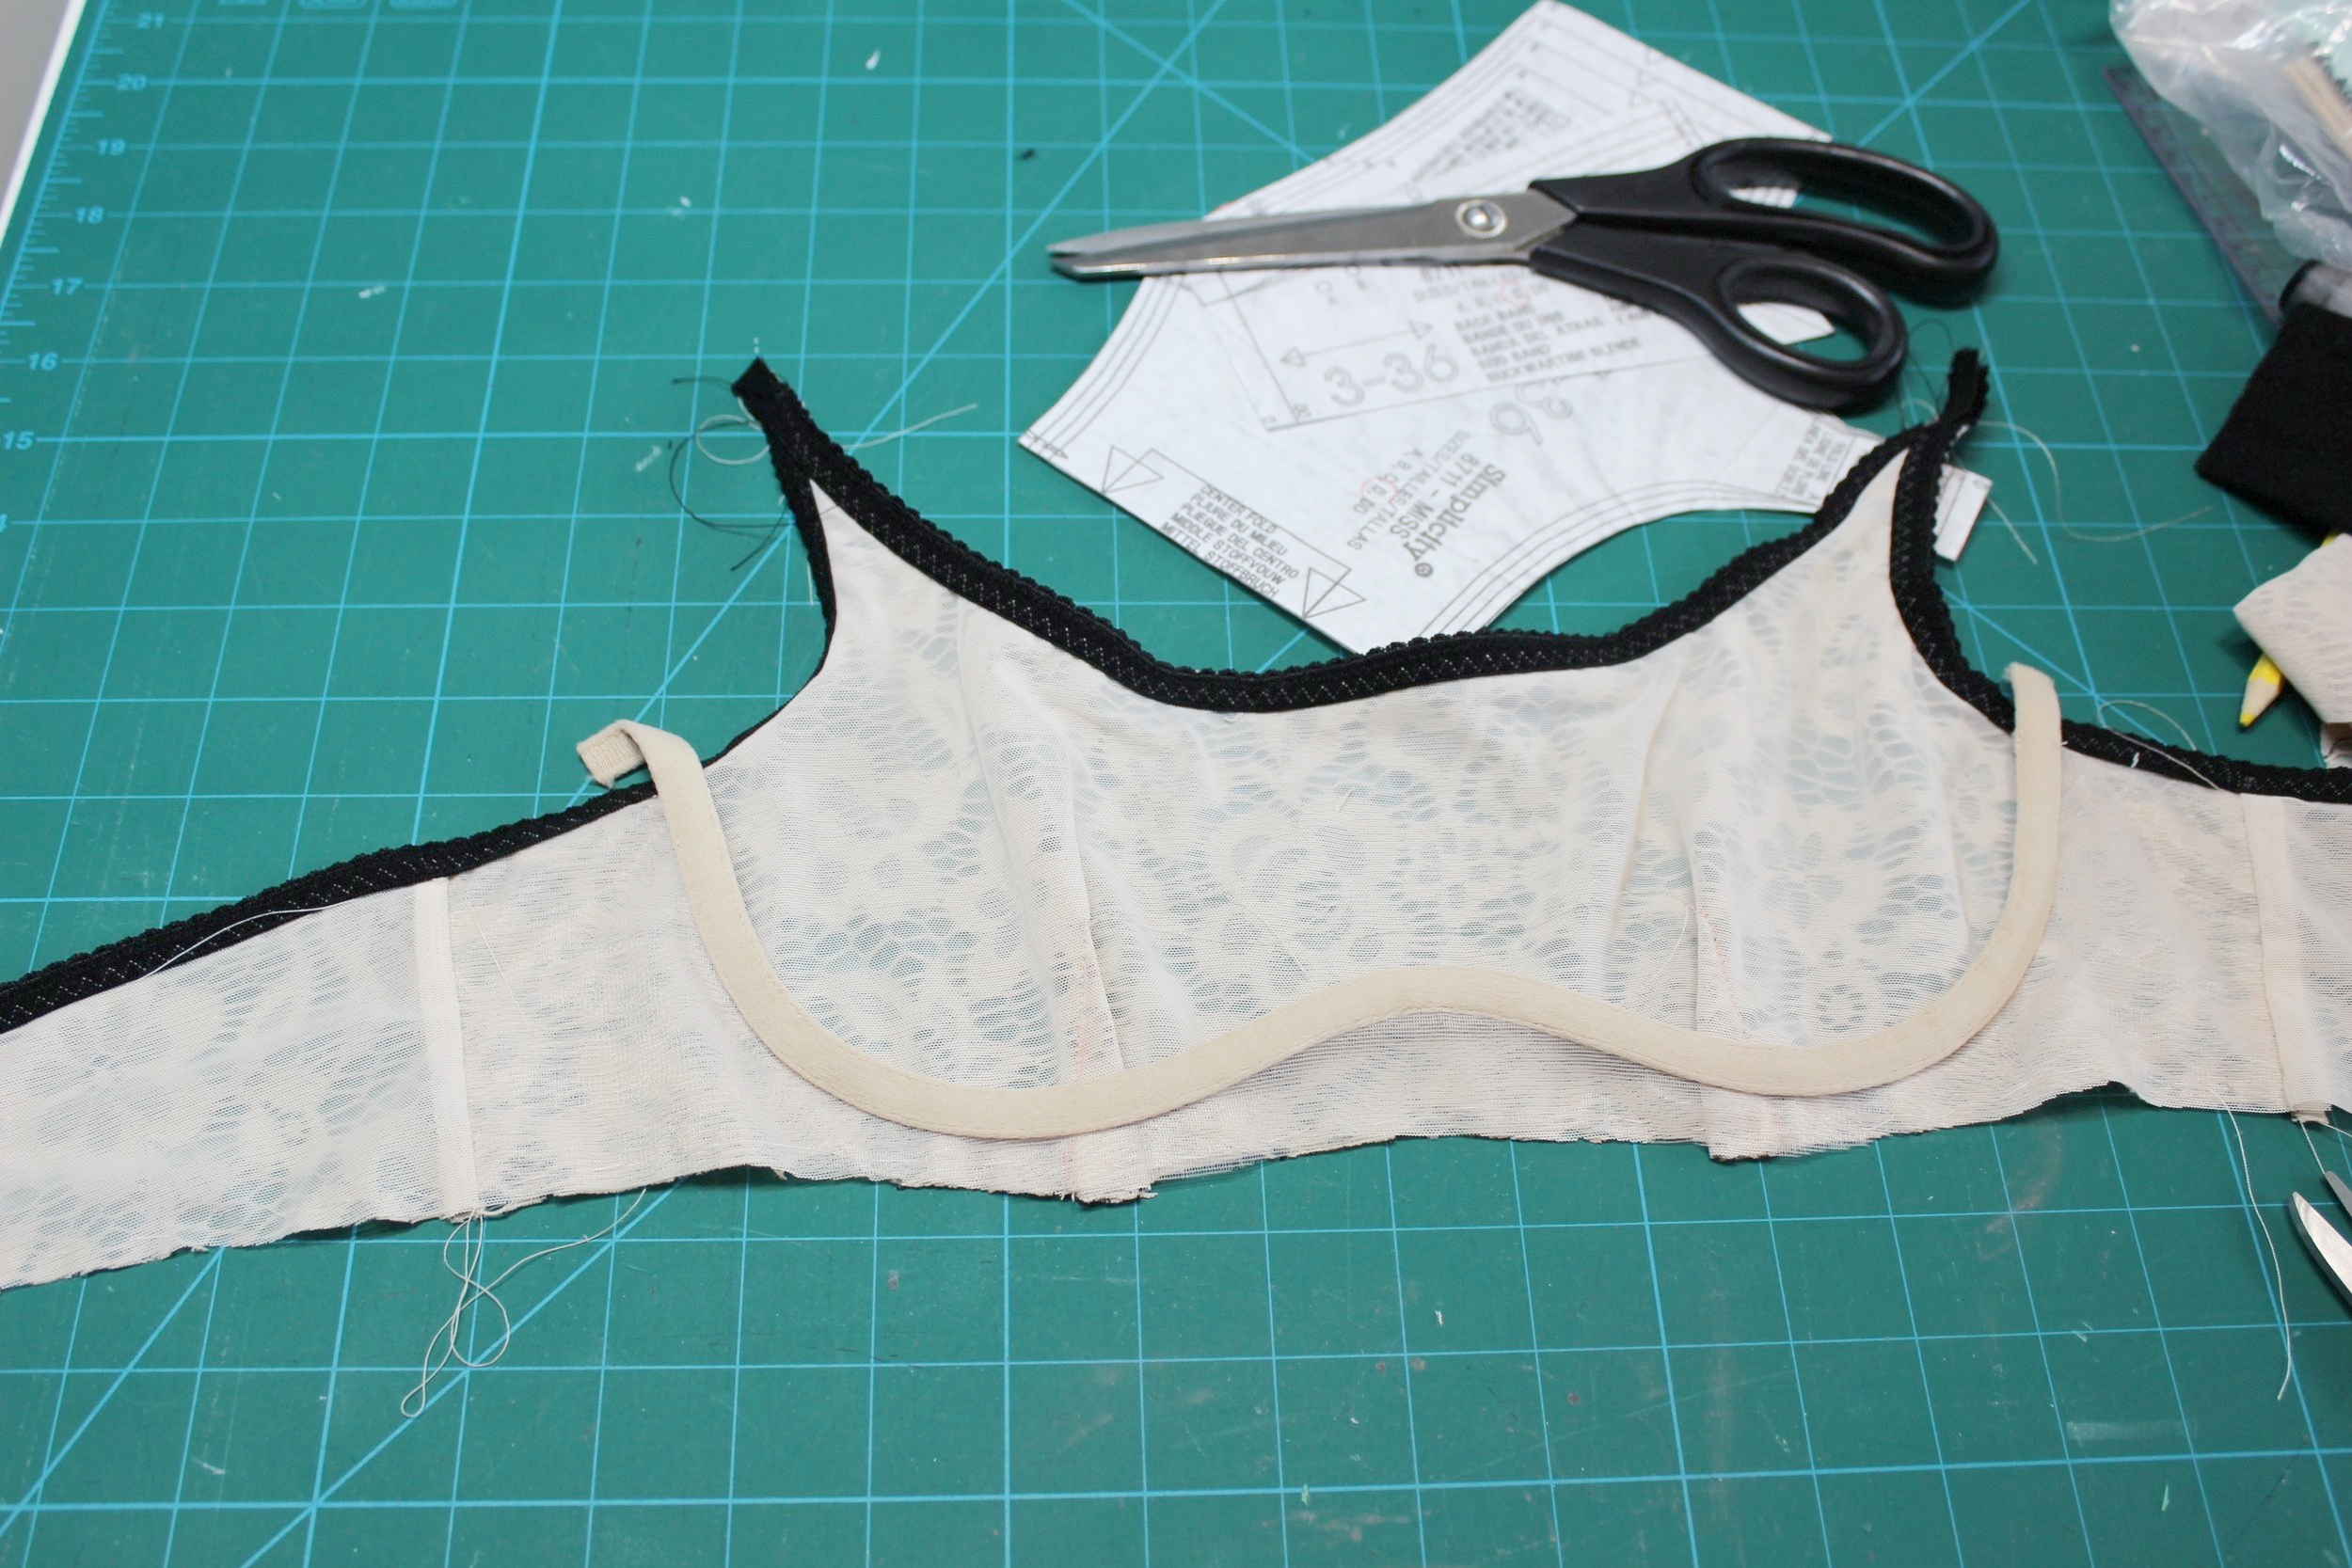
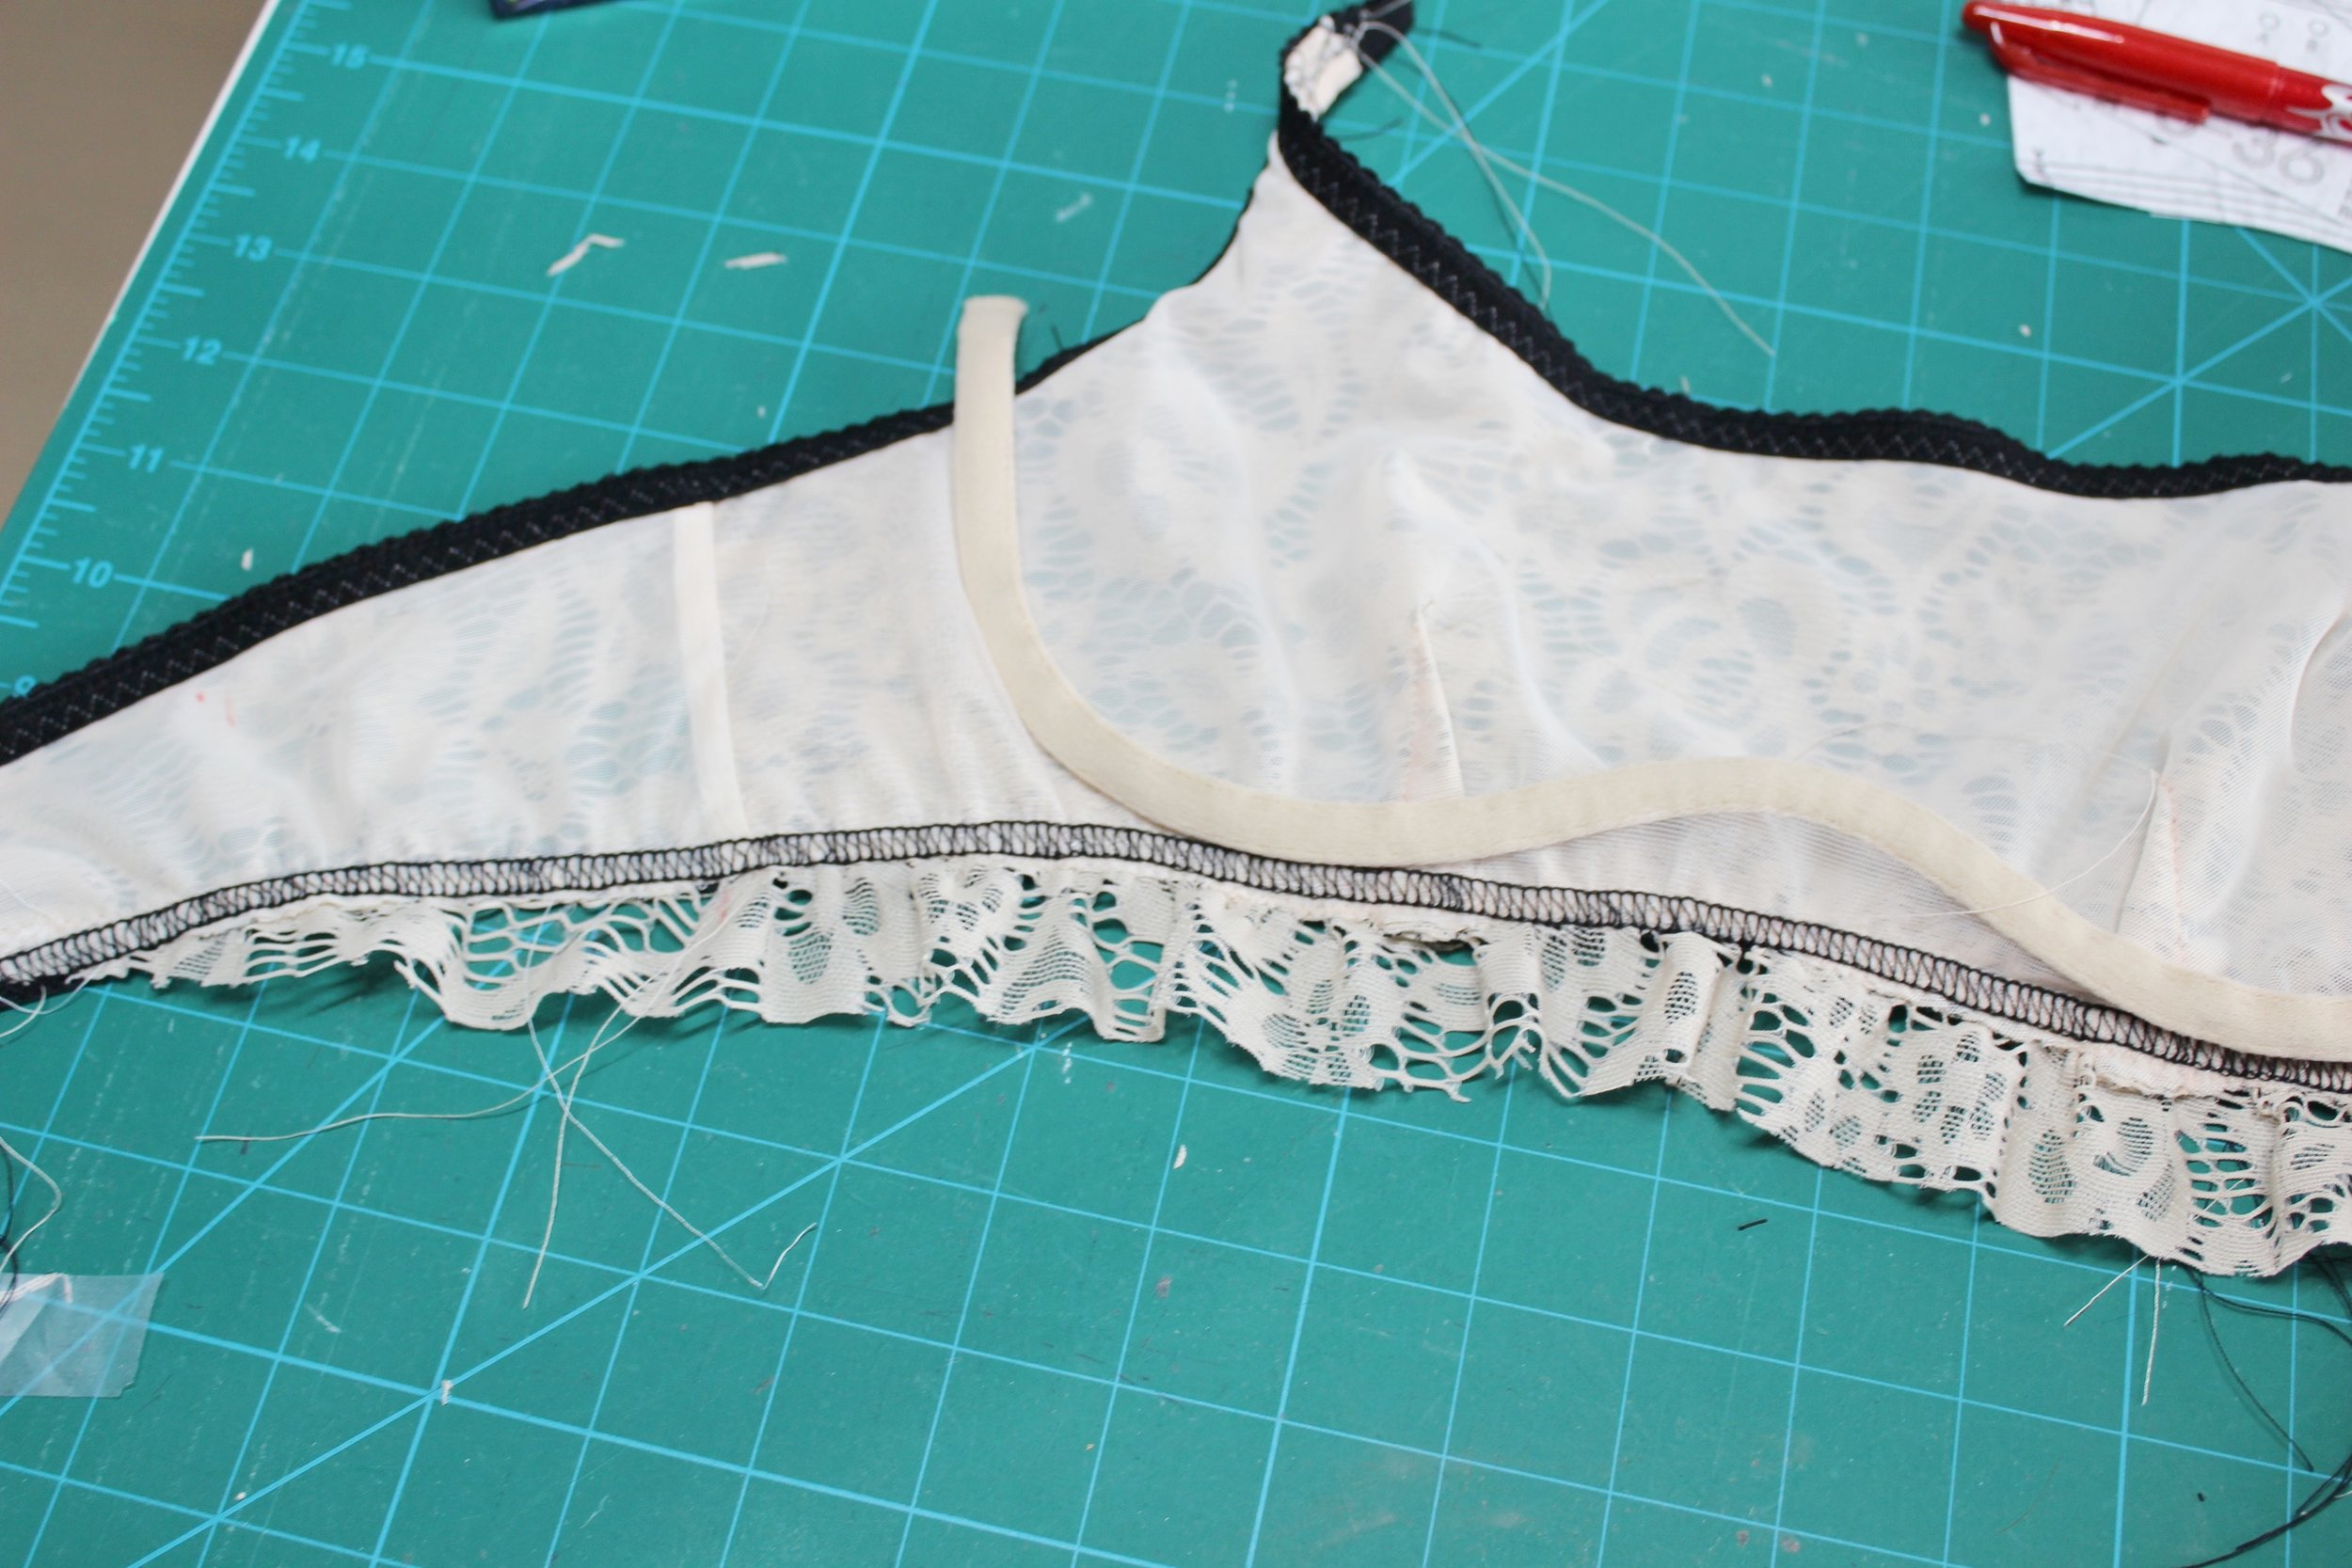
I followed the instructions on the sew along and the only variation was that I enclosed the front between the band fabric and lining. The instructions have you cover the seam with plush channeling. The lace has quite open spaces so it was hard to baste the band fabric and lining. It would have probably been better to use temporary spray adhesive. The fabric was also hard to mark. The seam allowances are all 1/4” so when you attach 3/8” plush elastic to the neck and underarm you have to hover the elastic 1/8”off the edge. So that I had this perfect I marked the 1/4” seam. Next time I will adjust the pattern piece for this. I also enlongated my mark for the straps on the back as once you fold the elastic over you loose the mark.
Then my usual dilemma of what colour thread to use when the elastic is a contrast to the fabric. I did the first pass in black thread. So although not the right way to do it I did the second pass with the fabric on top with the beige thread on top with black bobbin thread. You can just make out the top thread on the reverse. After seeing a recent Madalynne post on Instagram I applied the band elastic using my coverstitch machine. This looks pretty from the front and covers the overlap on the reverse. Just the straps and fastener to do. For once the fastener was a perfect fit and no adjustment to the back band necessary.
Bralette done and then on to the underwear. The pattern includes a really cute 3 ruffle low rise but I didn’t think the lace suited this. I hadn’t seen anyone else make matching underwear with this fabric. So I summoned all my creative powers and came out of my comfort zone to do something completely different. Probably should not have experimented with the lovely lace but the result was amazing.

I thought I would try and match the bralette with elastic on the right side creating its own ruffle. The lace doesn’t have a scalloped edge so I was going to attempt to use a rolled hem on the overlocker. As the pieces were too big to photocopy I traced off my size on dot and cross paper. I would normally spray baste the lace and lining before cutting as one piece but rather than waste too much fabric I cut out individually and then used the temporary spray adhesive.
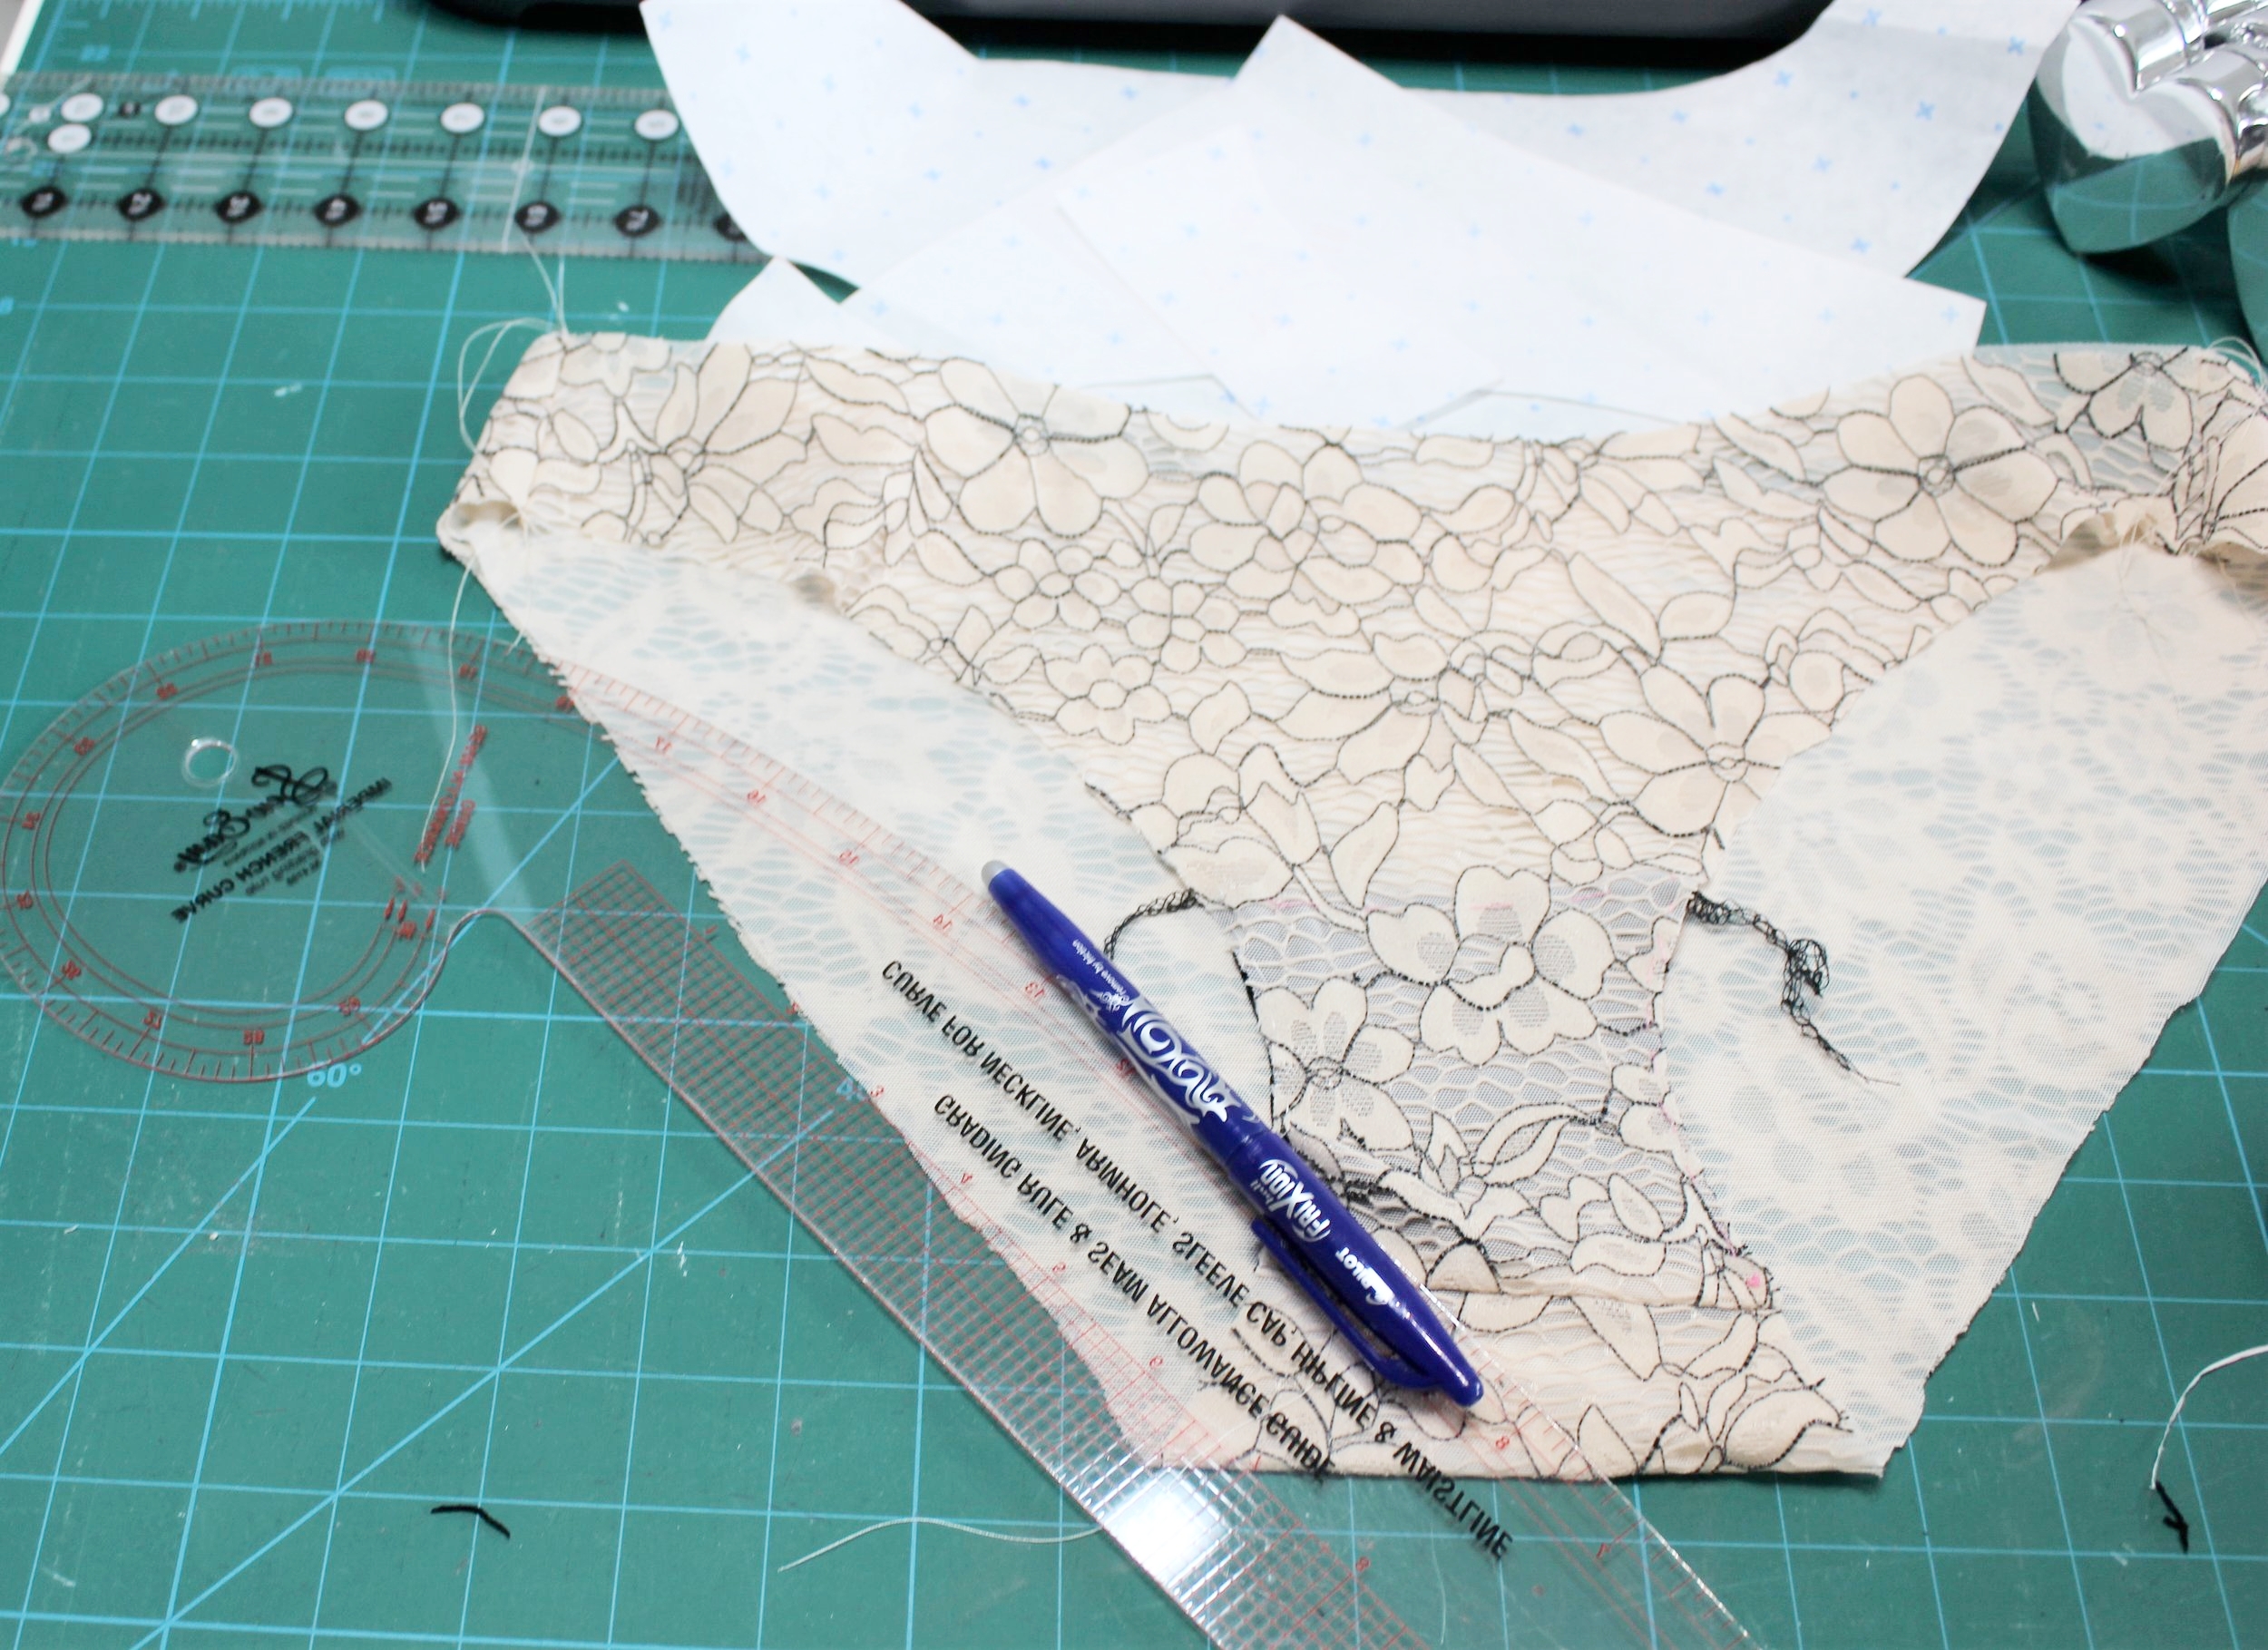
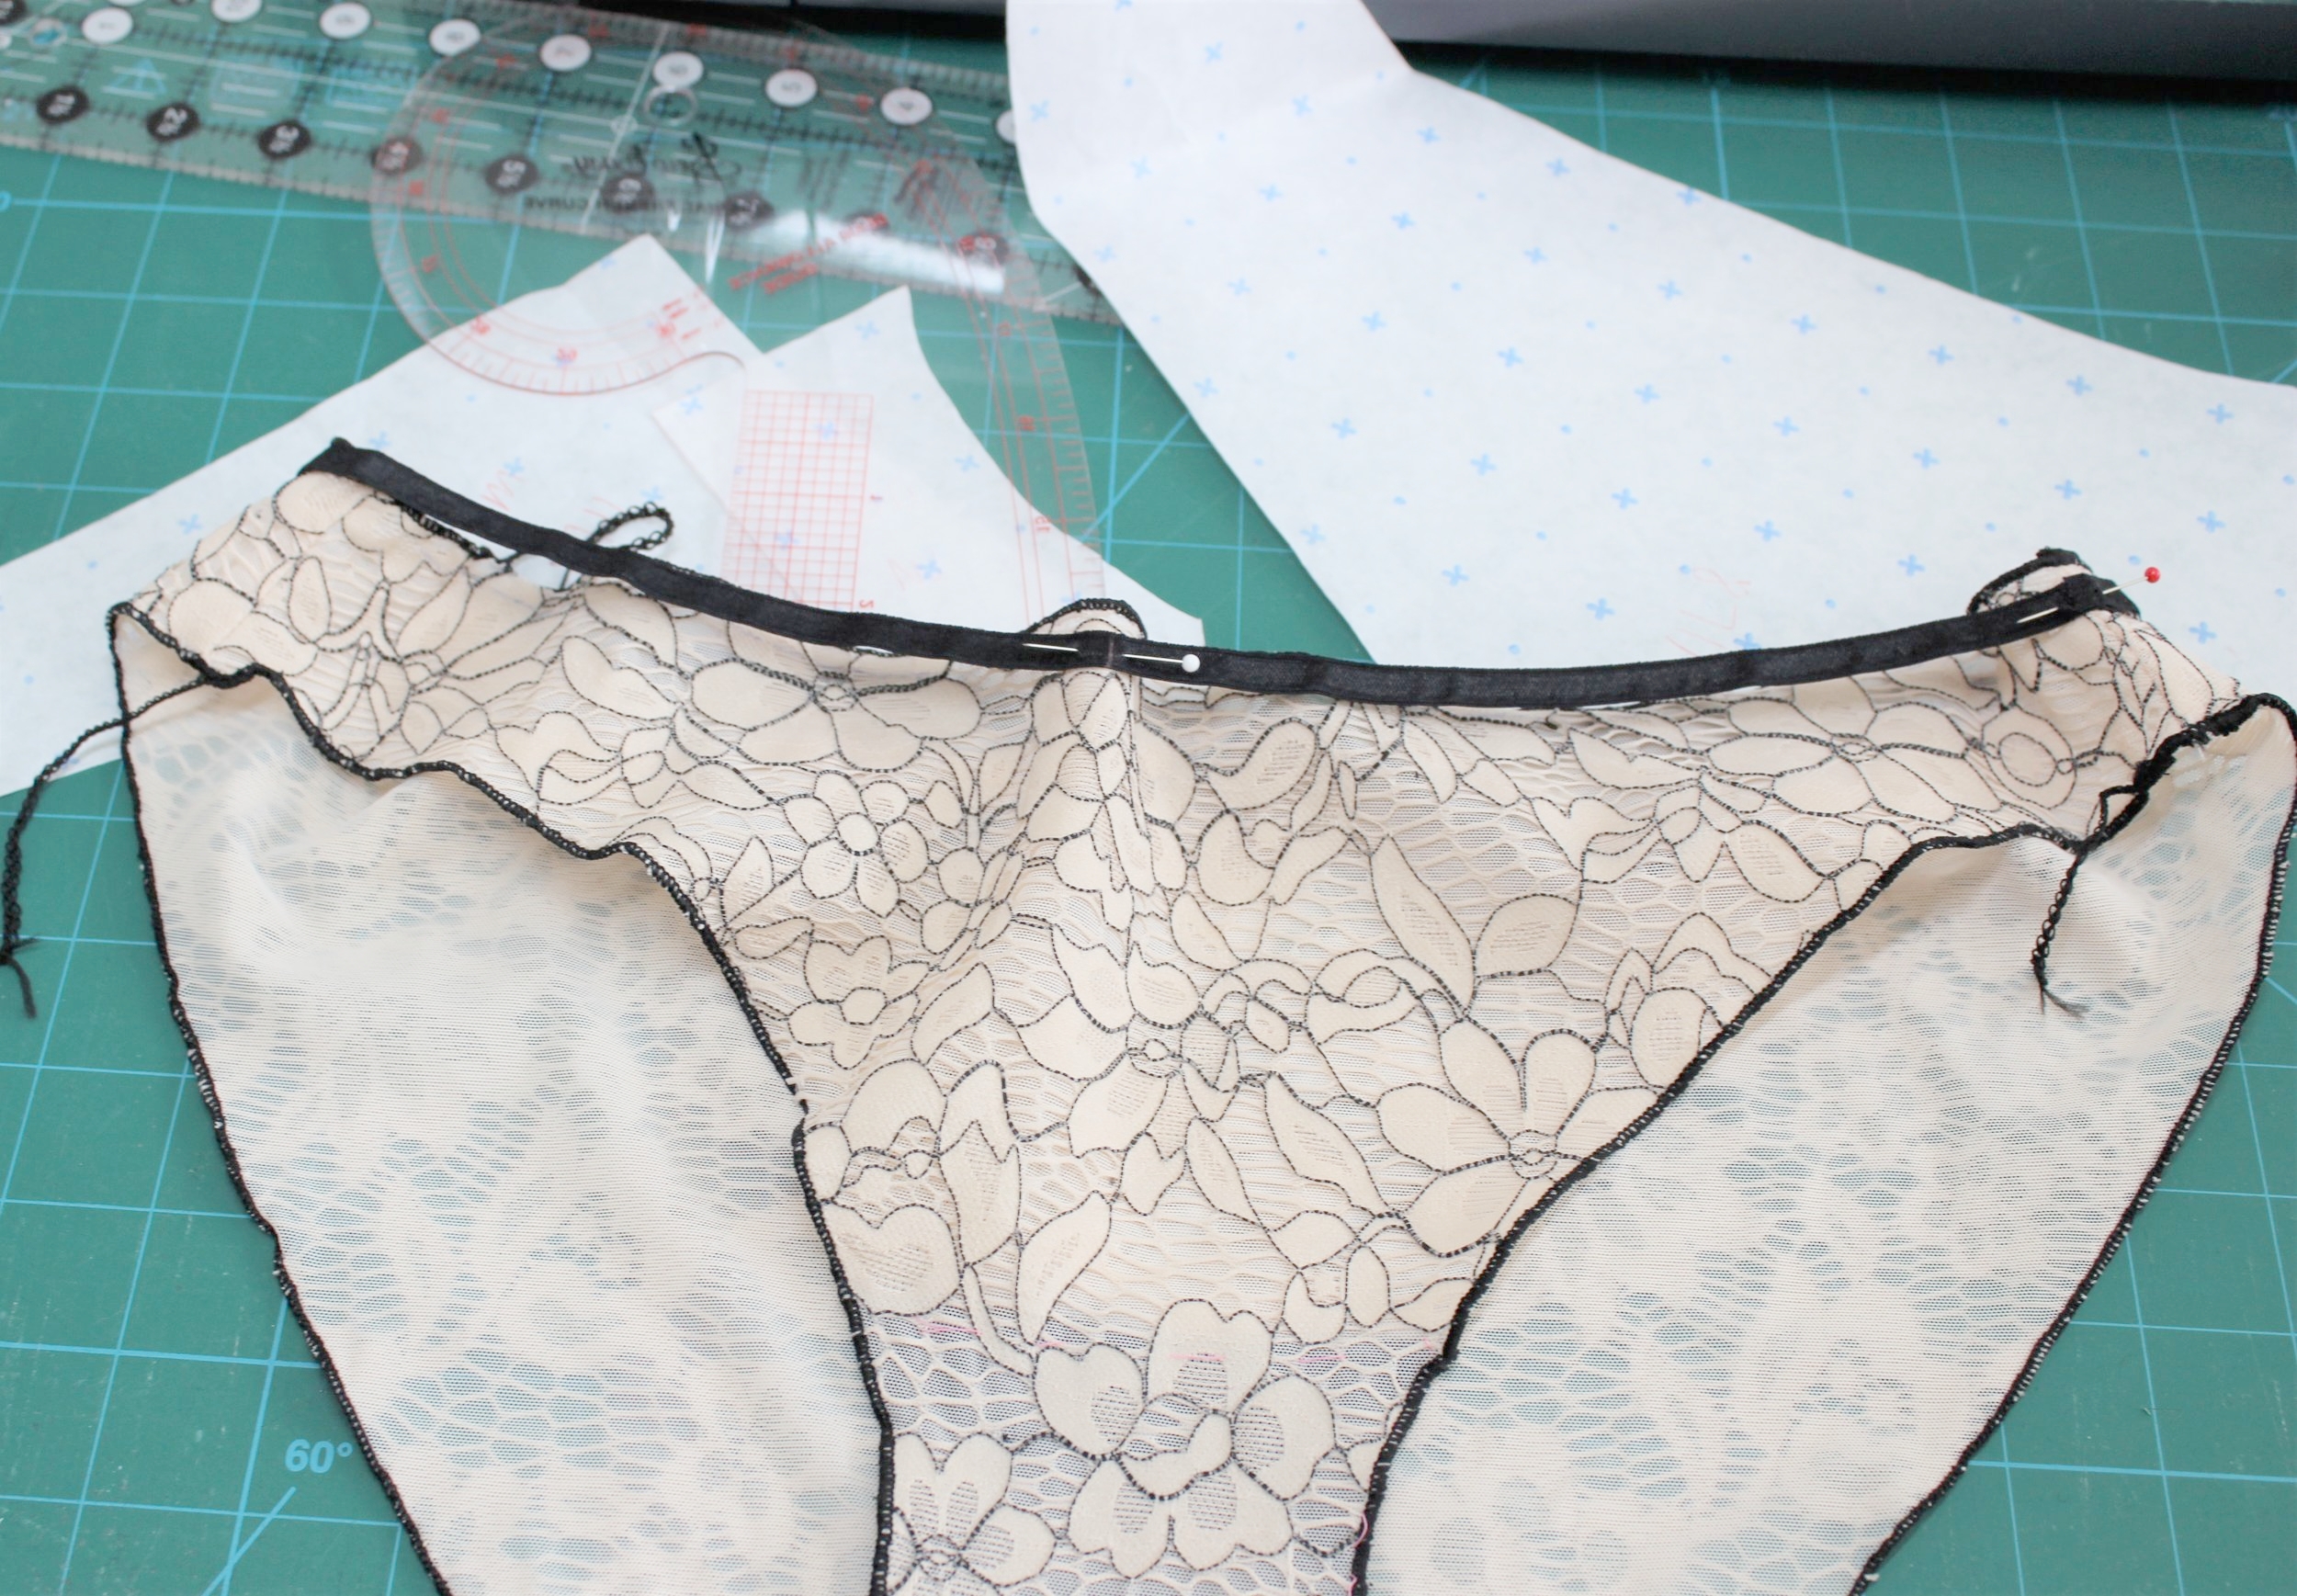
Then had to make another decision. What colour fabric to use for the gusset. I didn’t have the right beige/peach so used black. It doesn’t photograph well but looks better on. I attached front and back, enclosing the back of the gusset and sewed the side seams so I could check the fit. The pattern uses 1/4” seam allowance so thought would need to cut at least this off all round. After trying on I decided to leave the seam allowance on the waist and took off 1/4 off most of the leg using my curved ruler to both mark and then redraw a smooth line. I marked on one side and then pinned together to cut in one go so both sides matched. Then I still needed to take a further 1/4” from just before and just after the gusset. Once happy with the shape I could move on and finish.

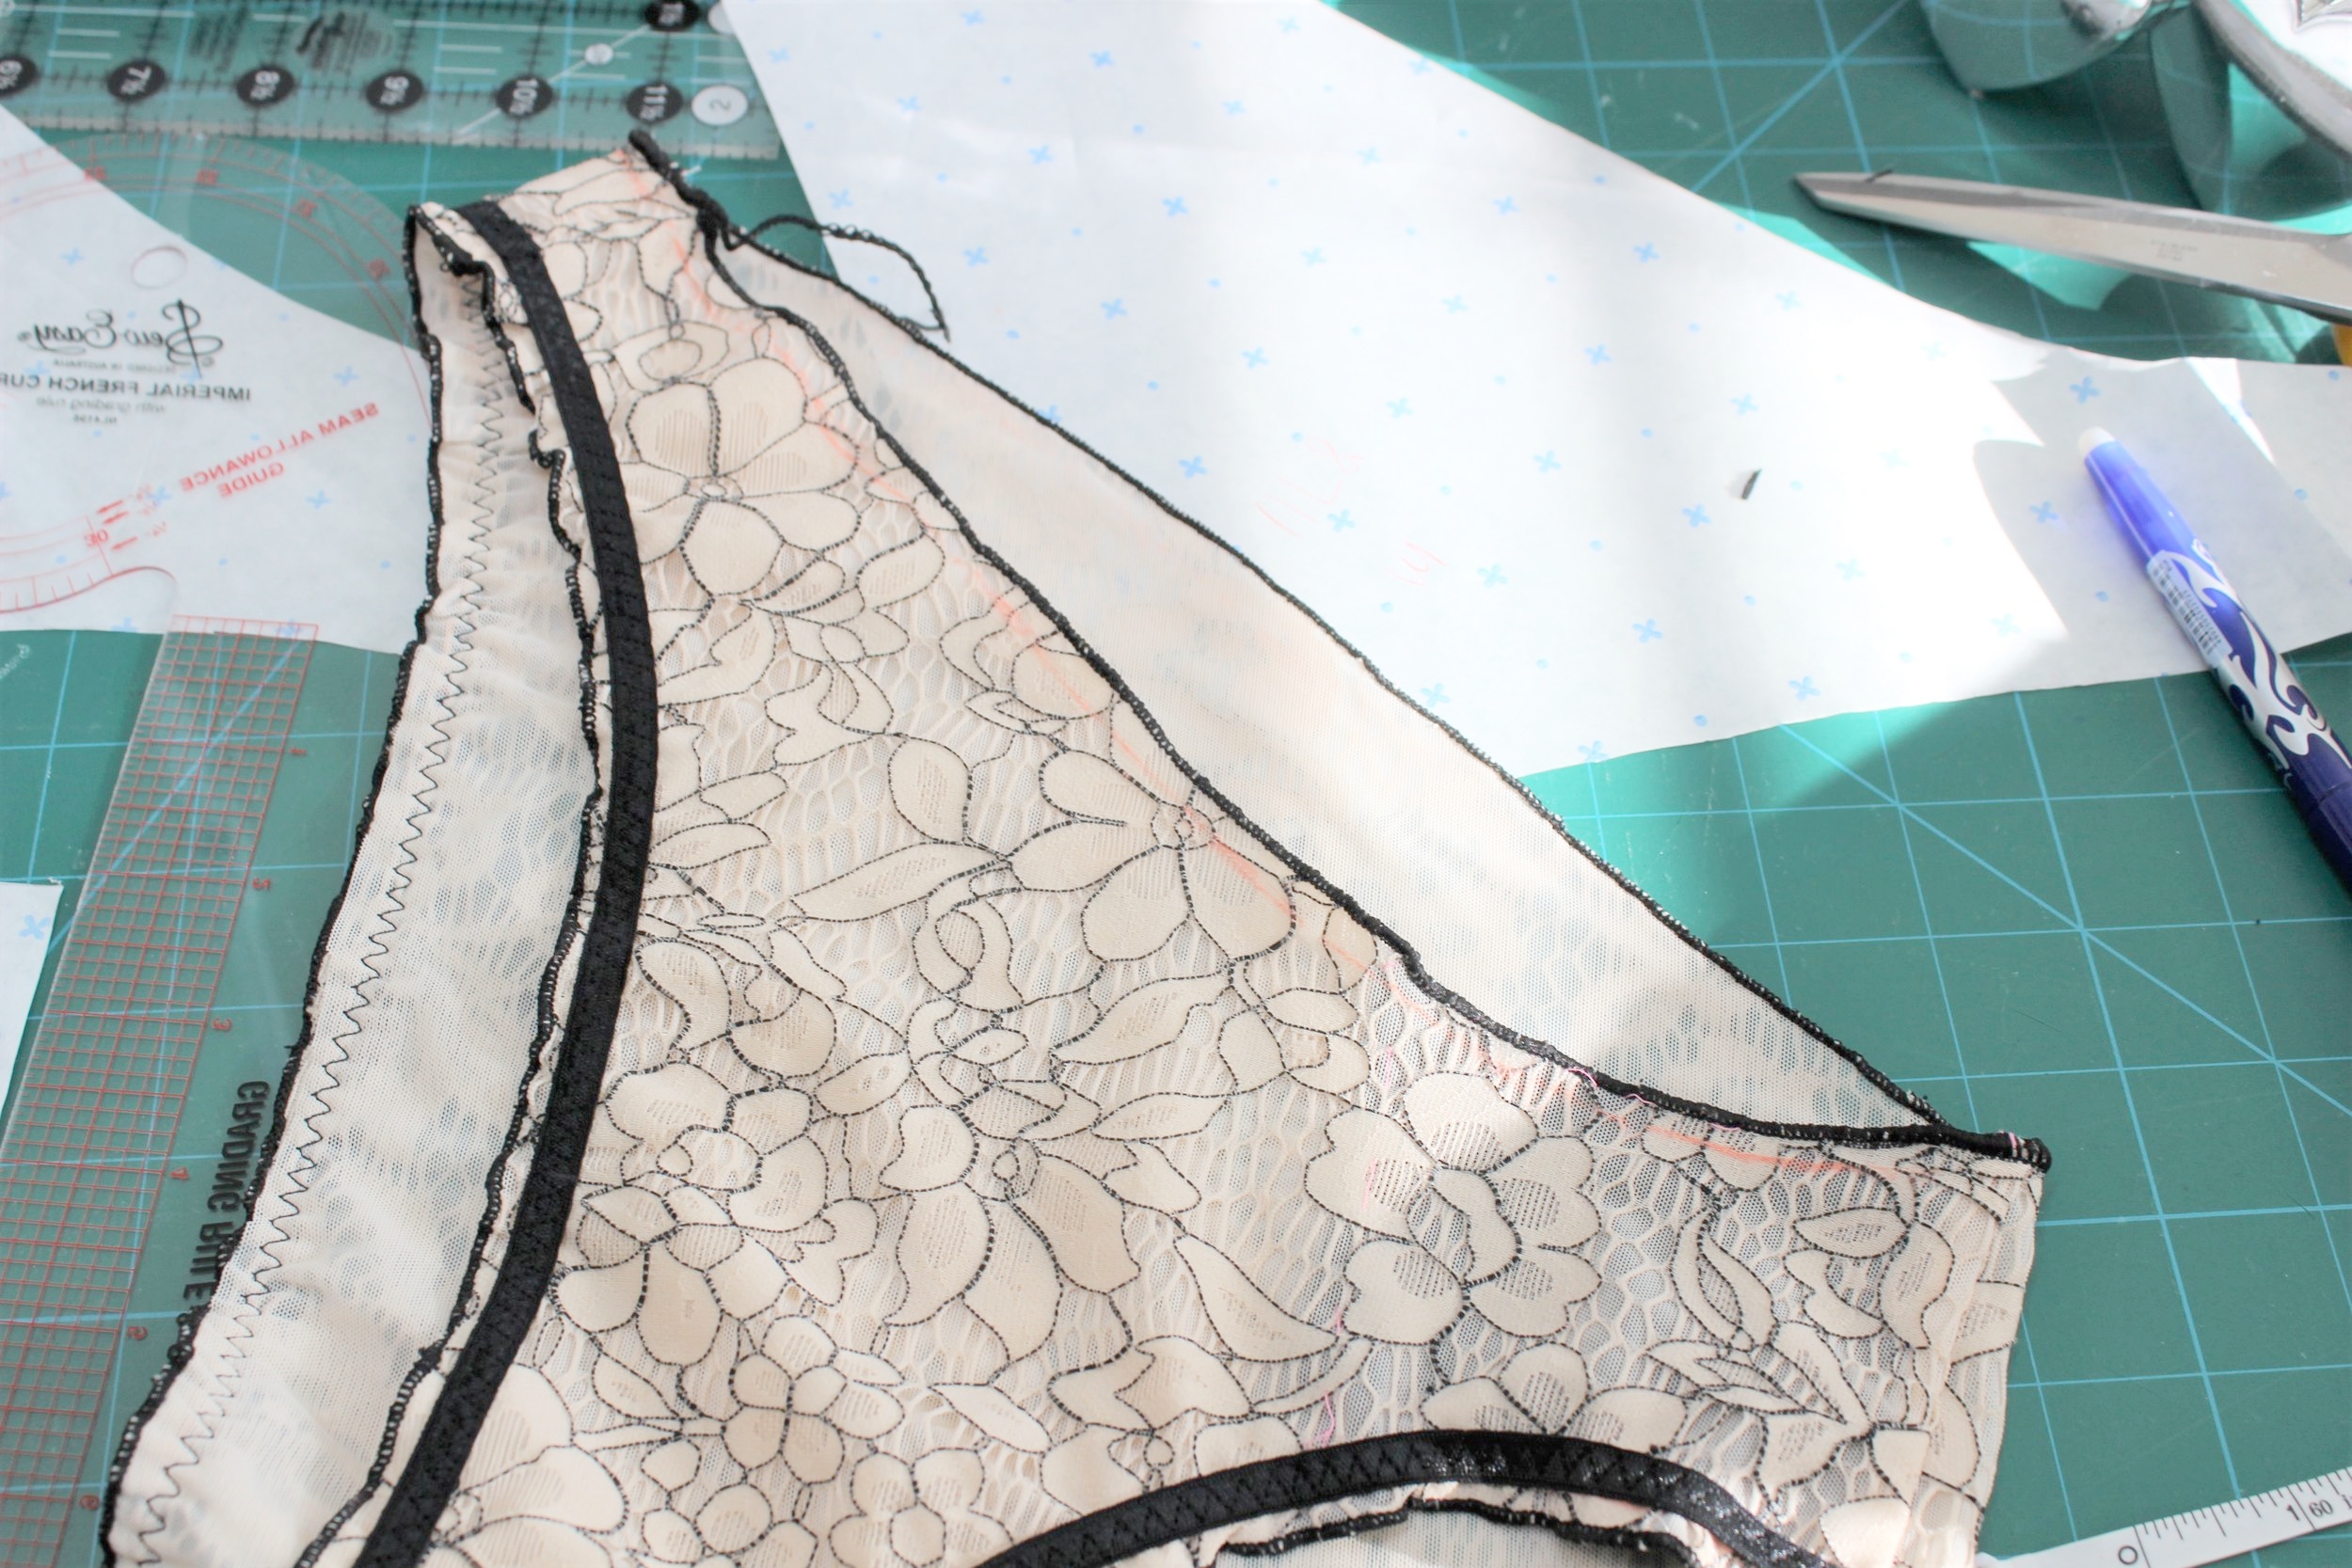
So to the rolled hem. Finished a couple of rolled hems recently so wasn’t too fazed by changing the settings on the overlocker. I did a test and decided to try woolly nylon in the loopers for better coverage. This gave a much better result. This did stretch the edge slightly but after a quick steam looked fine. I did sew in the round which makes finishing off awkward but I think this looks better than finishing by joining one of the side seams.
I was amazed to find some narrow black elastic in my stash. It had a shiny side like strap elastic but not very strong which I though would be perfect for underwear as well as match the band on the bralette. I used the elastic guide that came with the pattern. I measured the waist and leg openings and deducted 20% of this for a snug fit and checked against the elastic guide. This was pretty spot on so was happy to use the guide.
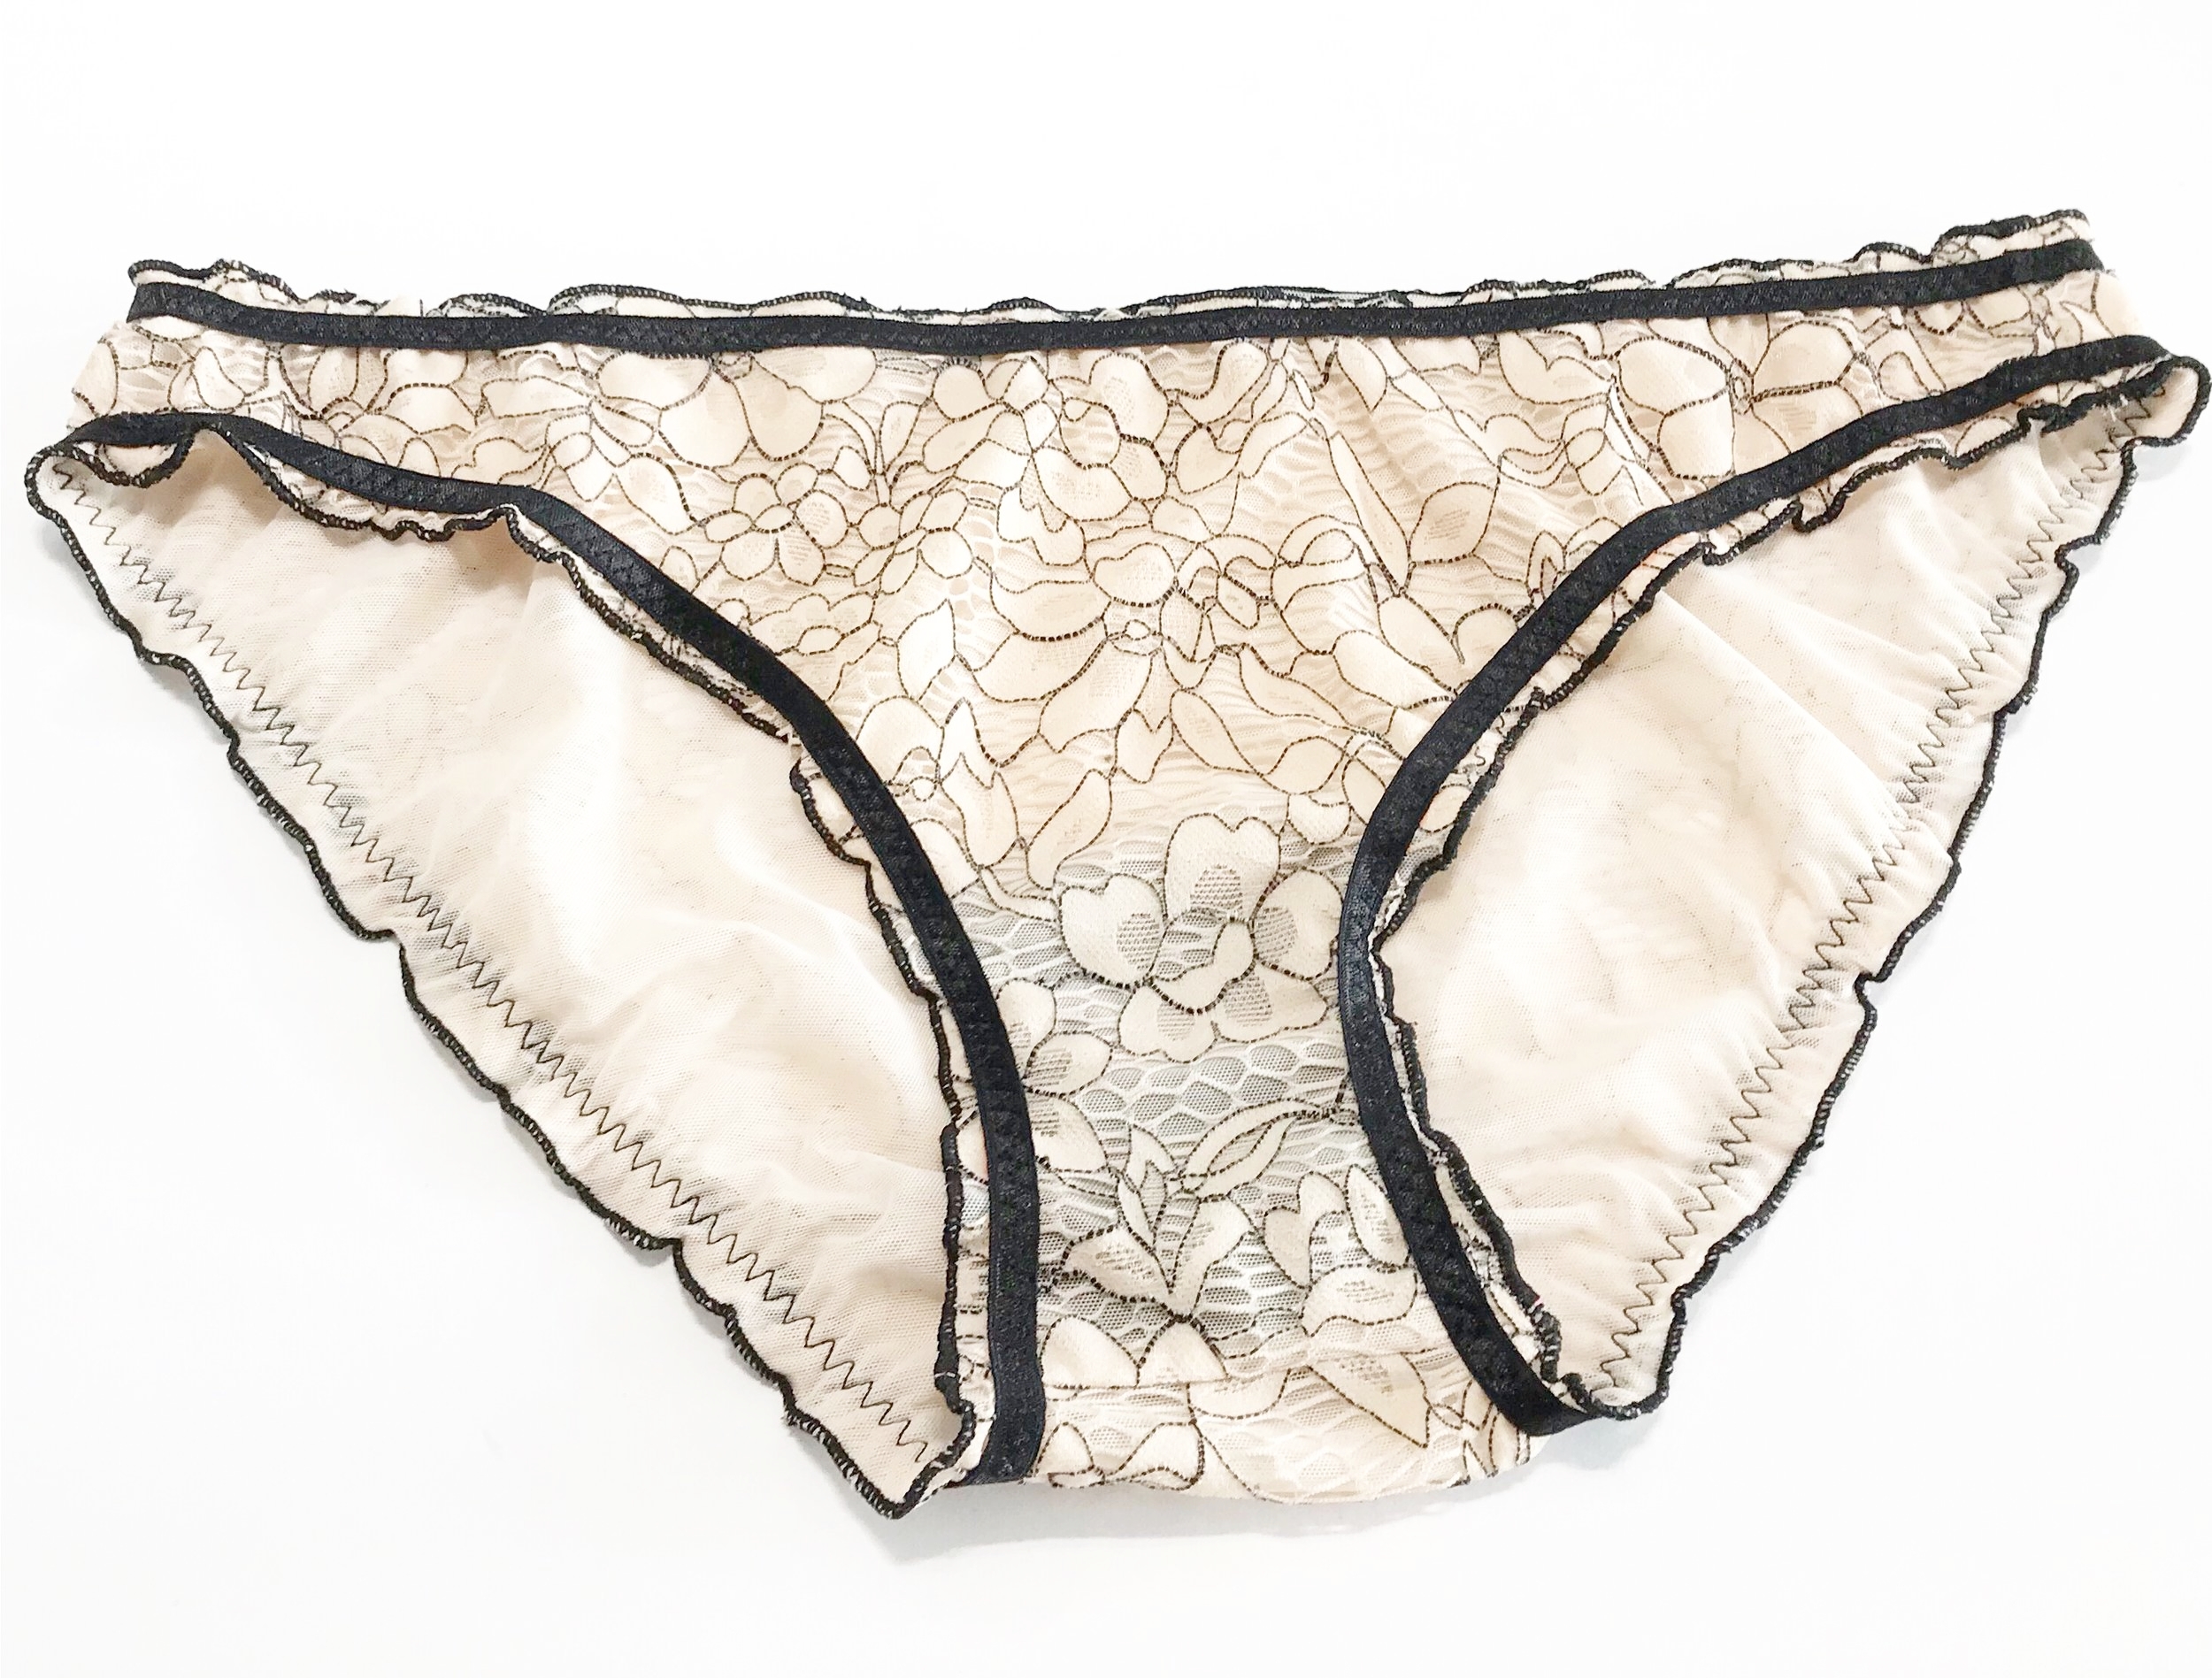
I overlapped the elastic by 1/4” and secured using a straight stitch. I then marked 1/4” along both waist and leg opening as a guide for attaching the elastic. I matched at the quarter points. Then I got a feel for how much I need to stretch the elastic before apply with a narrow 3 step zigzag. A quick steam and looking amazing.
I am just thrilled with this set. What amazing support even with the lightweight powernet and looks absolutely gorgeous with my version of the underwear. Thanks to the great designers out there we can all make beautiful, comfortable, perfect fitting lingerie. On a mission to spread the word!
