The Berkeley
So here is the all lace Berkeley from Orange Lingerie. It was only meant to be a tester but it looks and fits amazing. Having only just finished my first Marlborough, another orange lingerie pattern, I didn't think I would get anything that fit as well. So I was over the moon with this.

I only joined Instagram a couple of days ago so I was really happy that a notification popped up to say that Tailor Made had released a number of kits. I was able to order the navy and white/raspberry. From the comments the navy ran out pretty quick.
Pattern downloaded I was ready to go. I always print off instructions as I find this much easier to work with and I always read through them before starting. Orange Lingerie patterns are fabulous. Every step is clearly described and illustrated even down to stitch length and width.
There are separate pattern pieces for each size, showing seam allowances and /or trim allowances. I find this very useful when deciding where to place lace and checking the width for the fastener.
Having made a few bras I am getting better at gauging the size. For me, I have found that I usually end up making a smaller band size with a larger cup than the instructions indicate, However, a lot does depend on the fabric you are using. I start by making a 3D paper version, trimming off the seam allowances and taping together with magic tape.
Happy with the size I printed off again for my pattern pieces. I found a small length of stretch lace that I could play with. For the rest of the fabric and notions needed I always have a stash of beige, white, red and black mostly from B Wear.
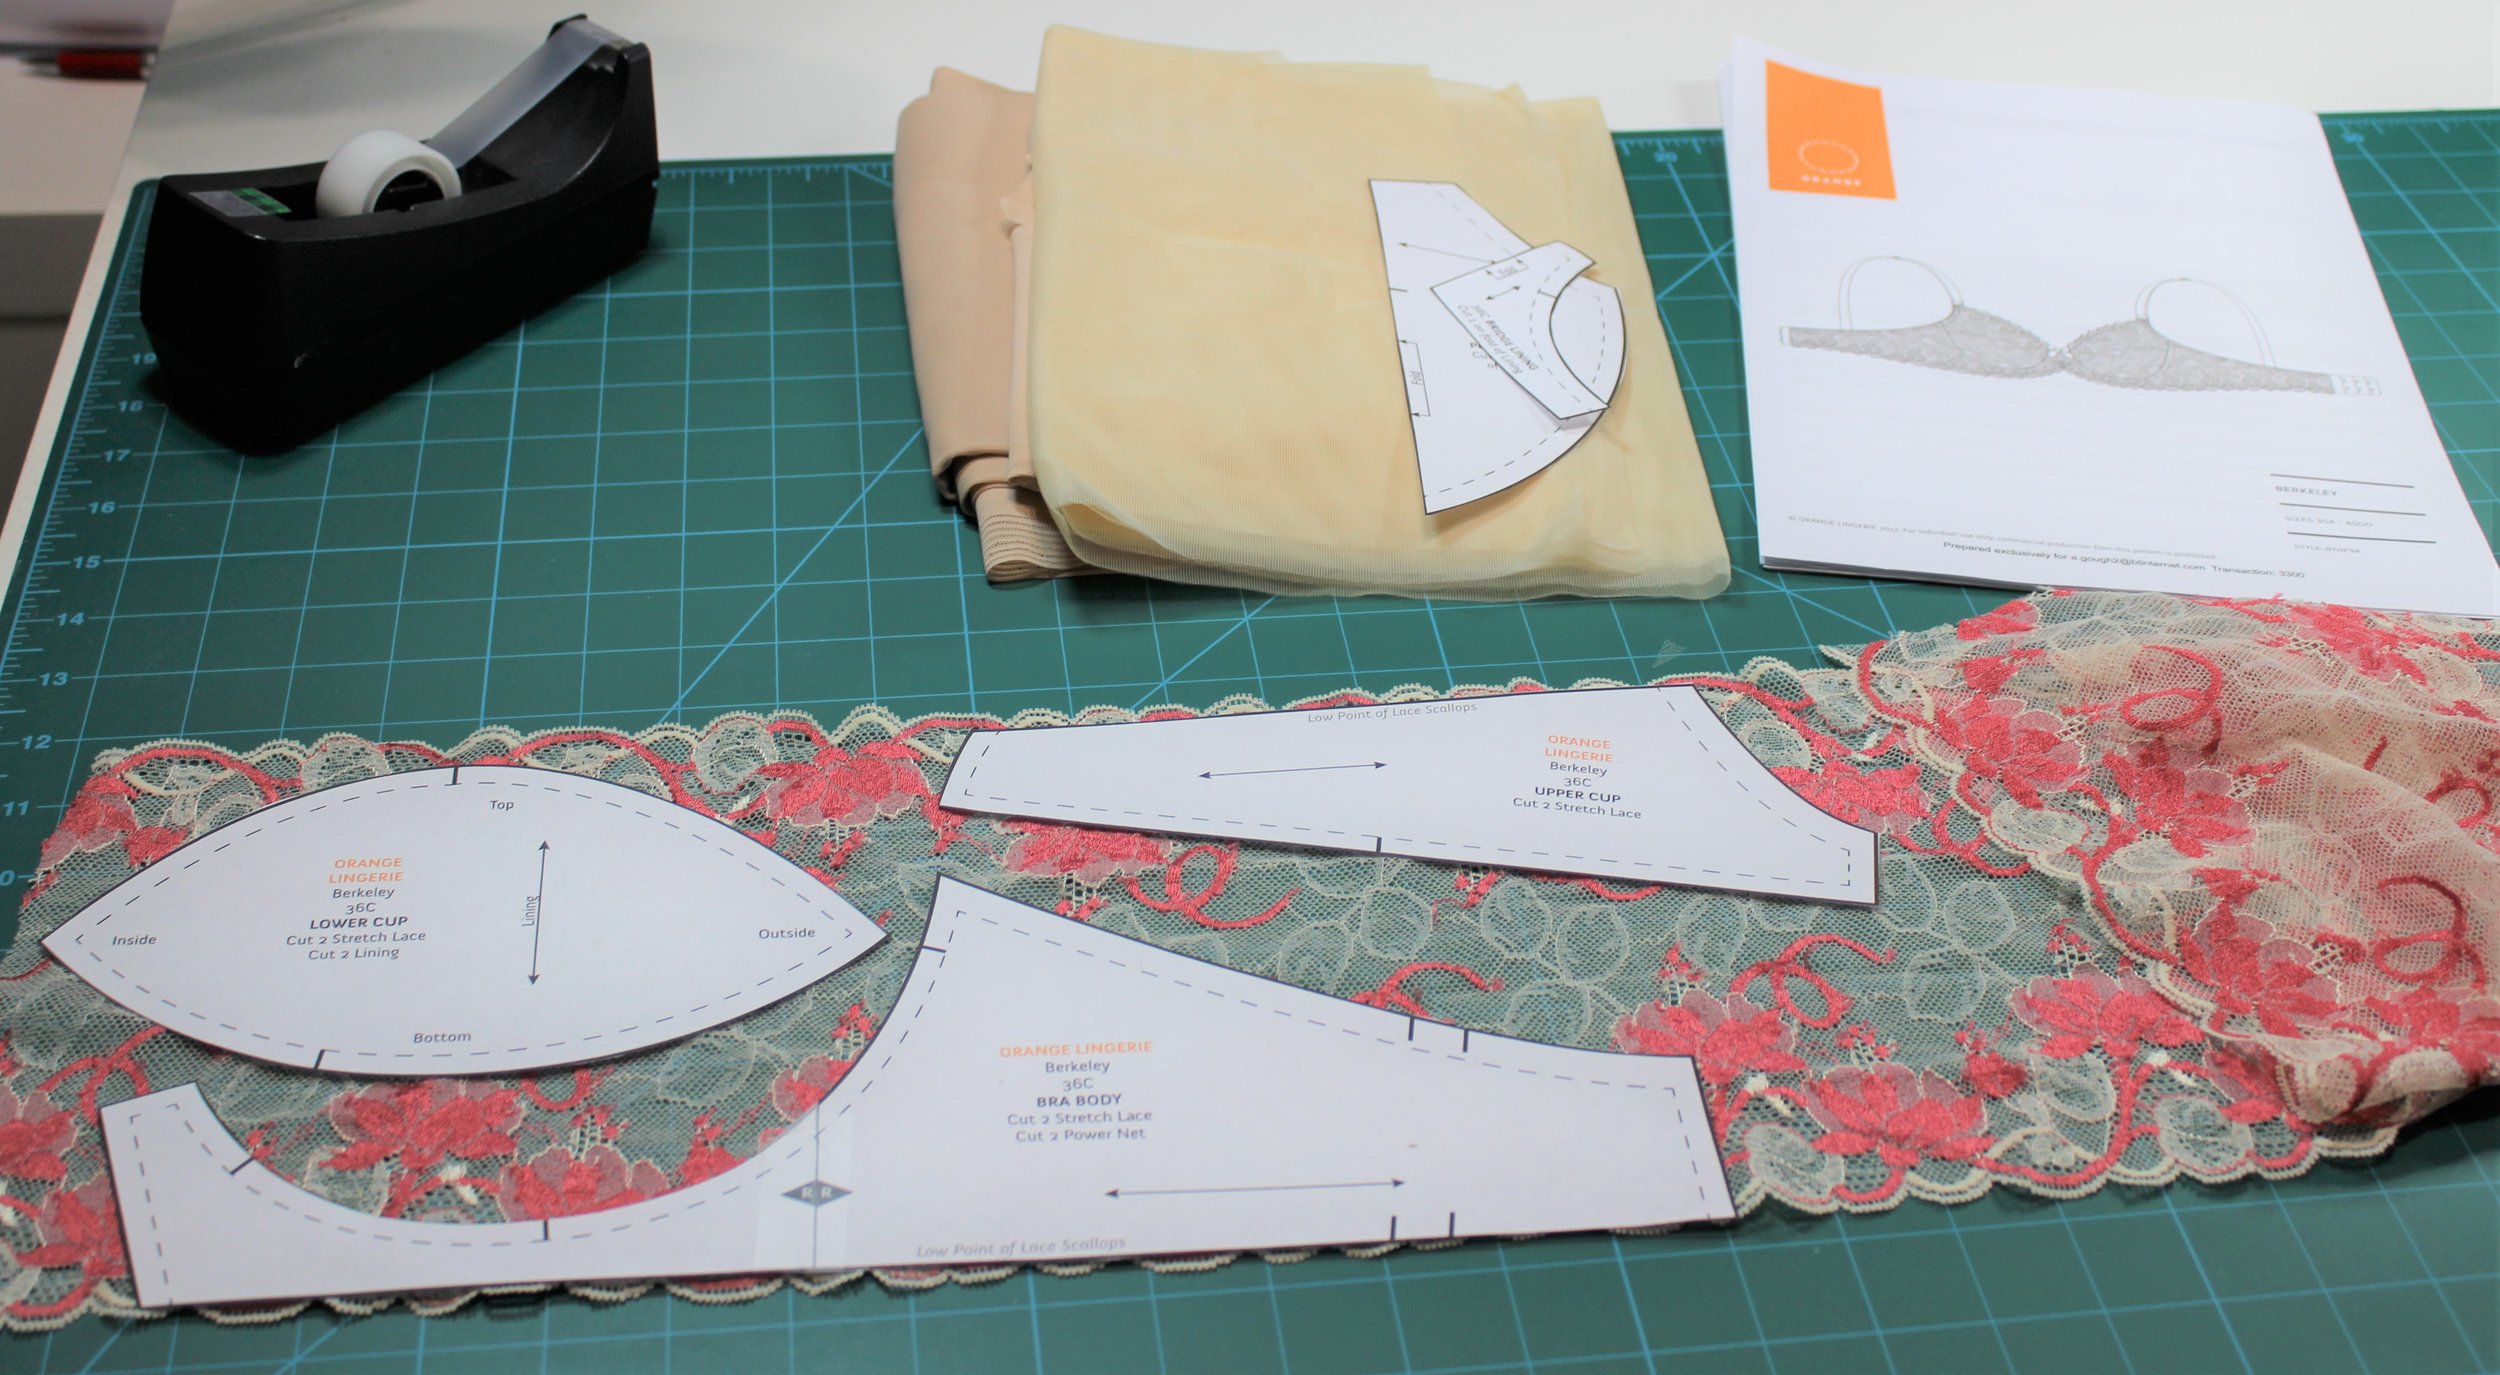
The instructions are really helpful for lace placement. This pattern shows seam allowances, otherwise I would mark them in, as you need to know where the lace pieces join for a scalloped edge. The easiest way I have found is to place one side, checking for pattern balance and then cut out. I then flip the pieces over placing right sides together on the remaining fabric where the pattern matches.

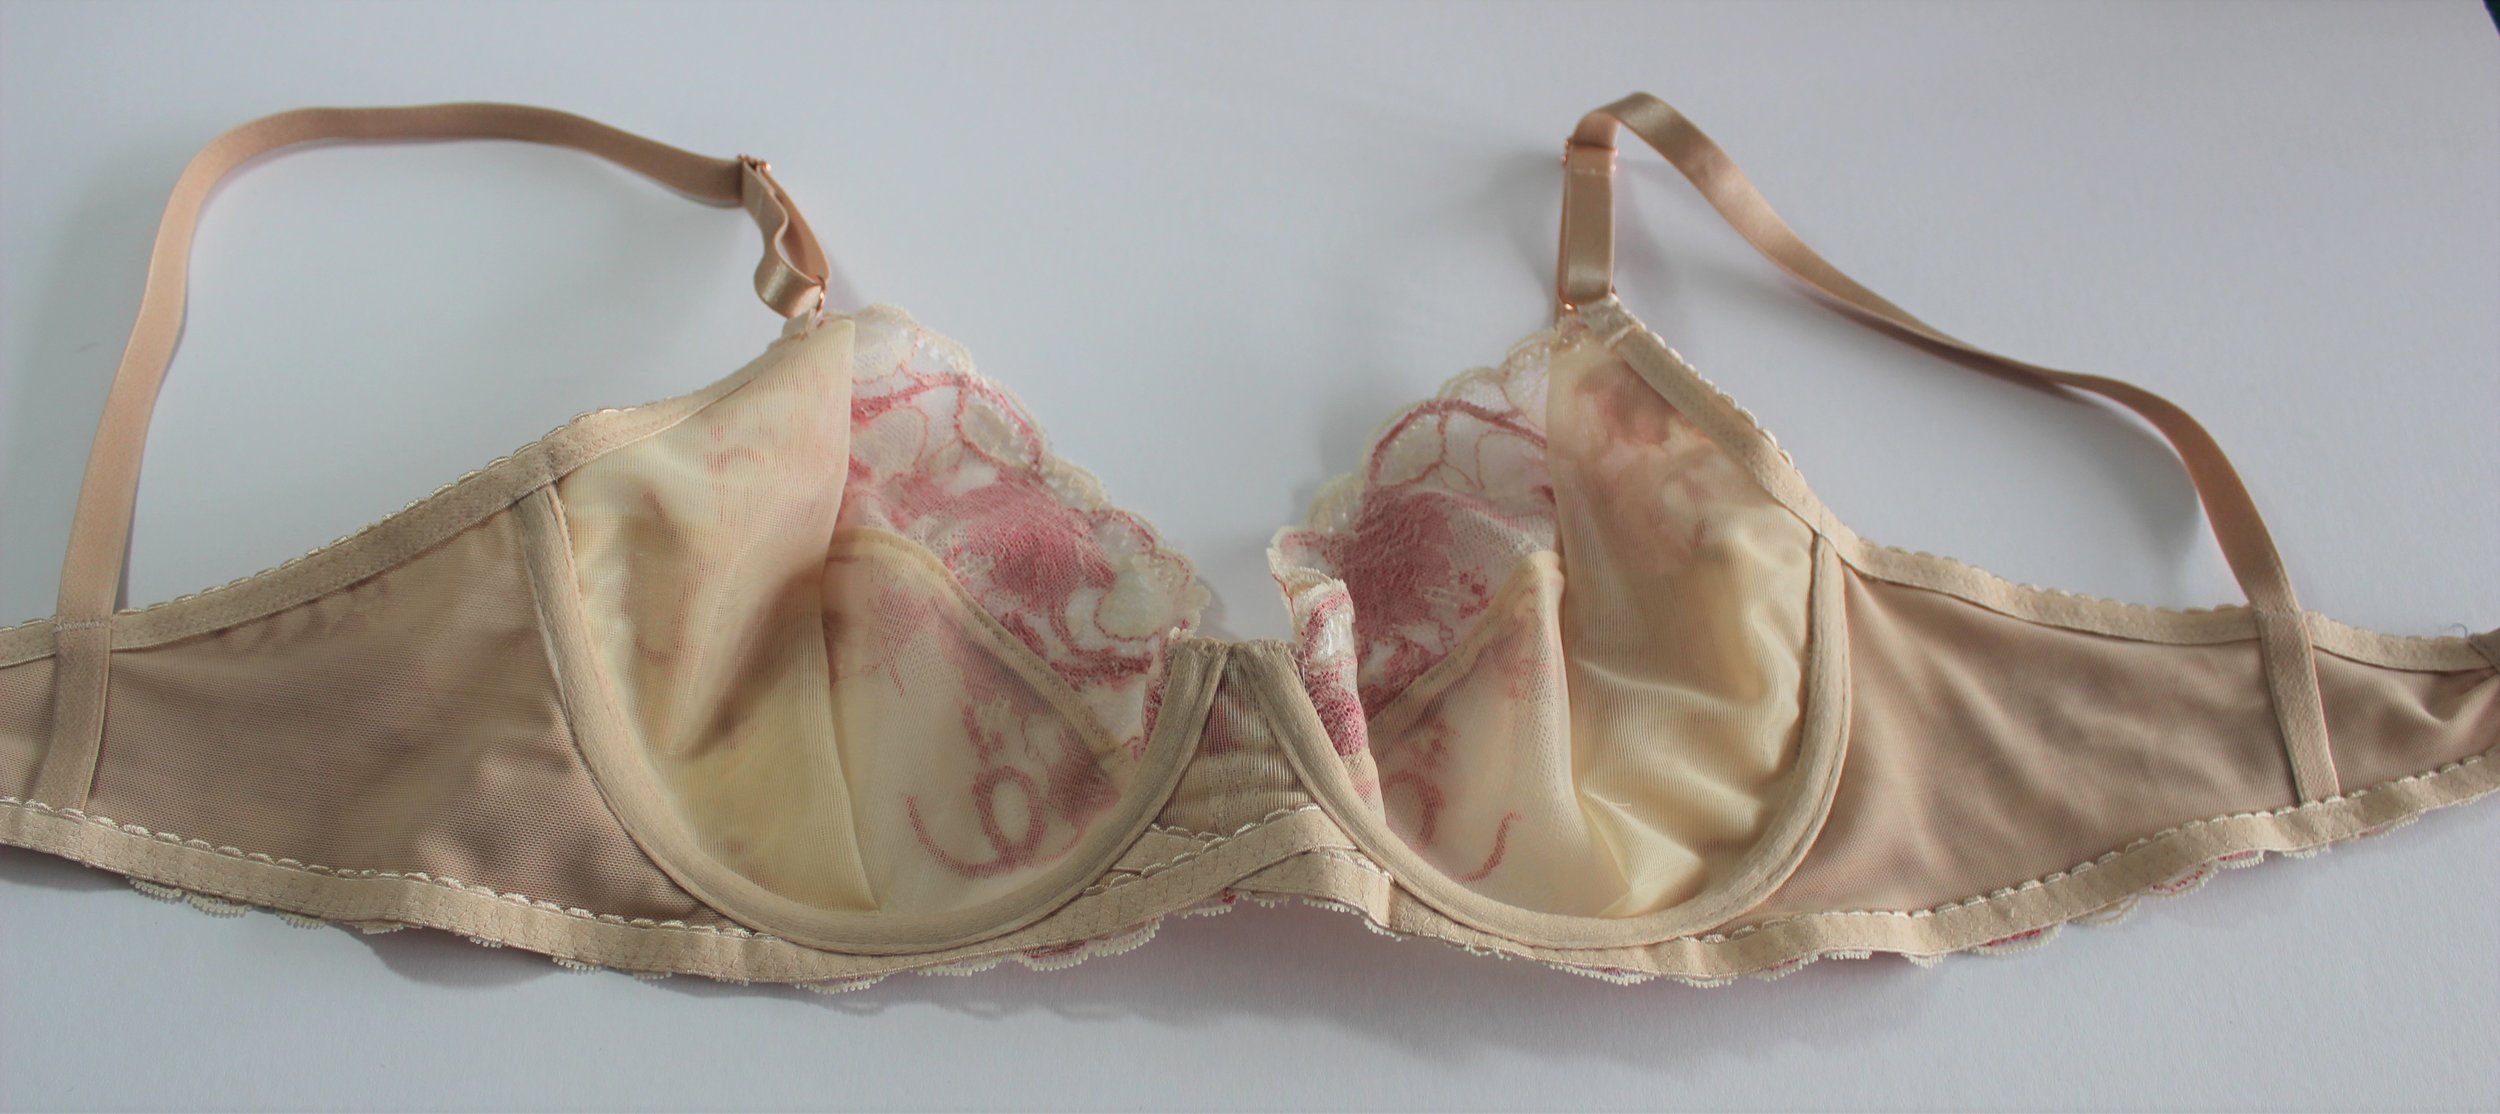
So all cut out with perfectly mirrored lace. I attached the linings to the lace with temporary spray. Not in the pattern, but I have also lined the upper cup with bra tulle for softness and added support making sure I had the stretch in the right direction.

At this point I have the put cups together and attached the clear elastic to the upper cup using a 3 step zigzag. Already looking beautiful.

I thought I would try a camera shot at the sewing machine. The notches lined up perfectly when attaching the cups to the cradle. I wouldn't normally use so many pins but with three notch marks and a new pattern i went a bit overboard!
The next step is to attach the underwire casing along the cup-to-body seam. For the casing I use a microtex size 10 needle and put on my walking foot .
Before attaching the underarm elastic I check that the back strap fits into the fastener as it may require a little tweaking of the back band.
I got so carried away with how well it was all going that I almost forgot to put the stabiliser on the upper ring attachment point to stop it stretching out the elastic in this area.

Next you make the straps. I thought the rose gold findings looked much better than the beige.
I didn't have any plain edge plush elastic for the body so I put the picot edge upwards so it didn't show below the lace. As you are using the lace edge you apply the elastic in one pass using a 3 step zigzag the width of the elastic. I am lucky as I my machine has up to a 9mm stitch width so I could use a 7mm stitch which fit perfectly and would stop the elastic rolling.
All seams are enclosed so the inside looks as professional as the outside.