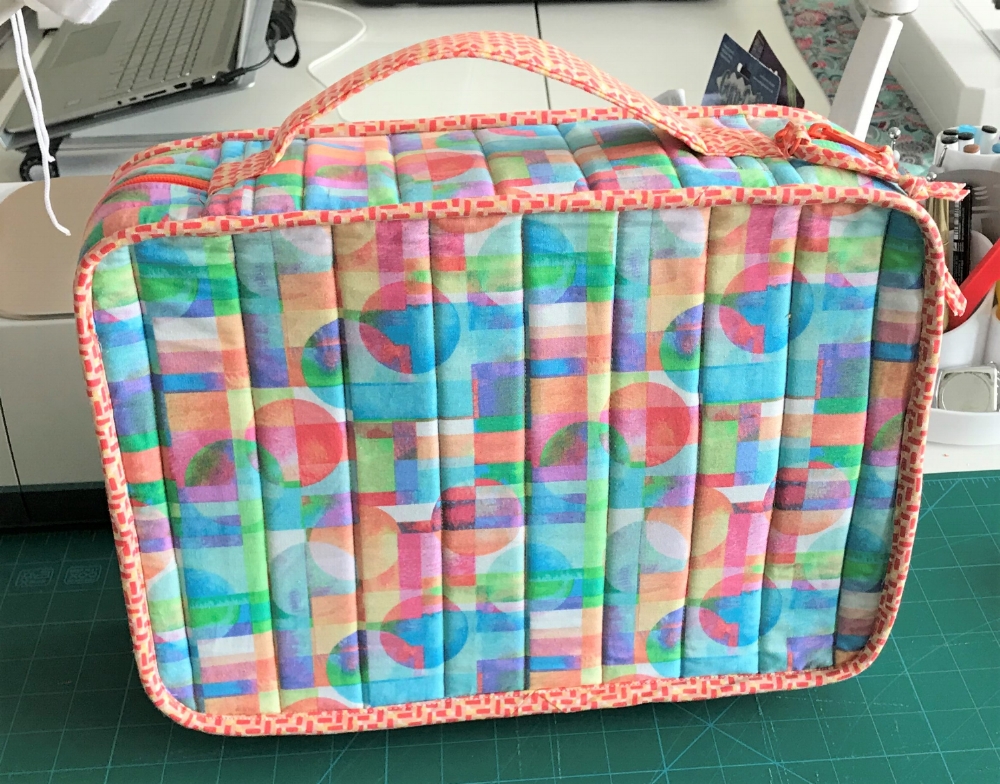
Everything in Its Place Bag
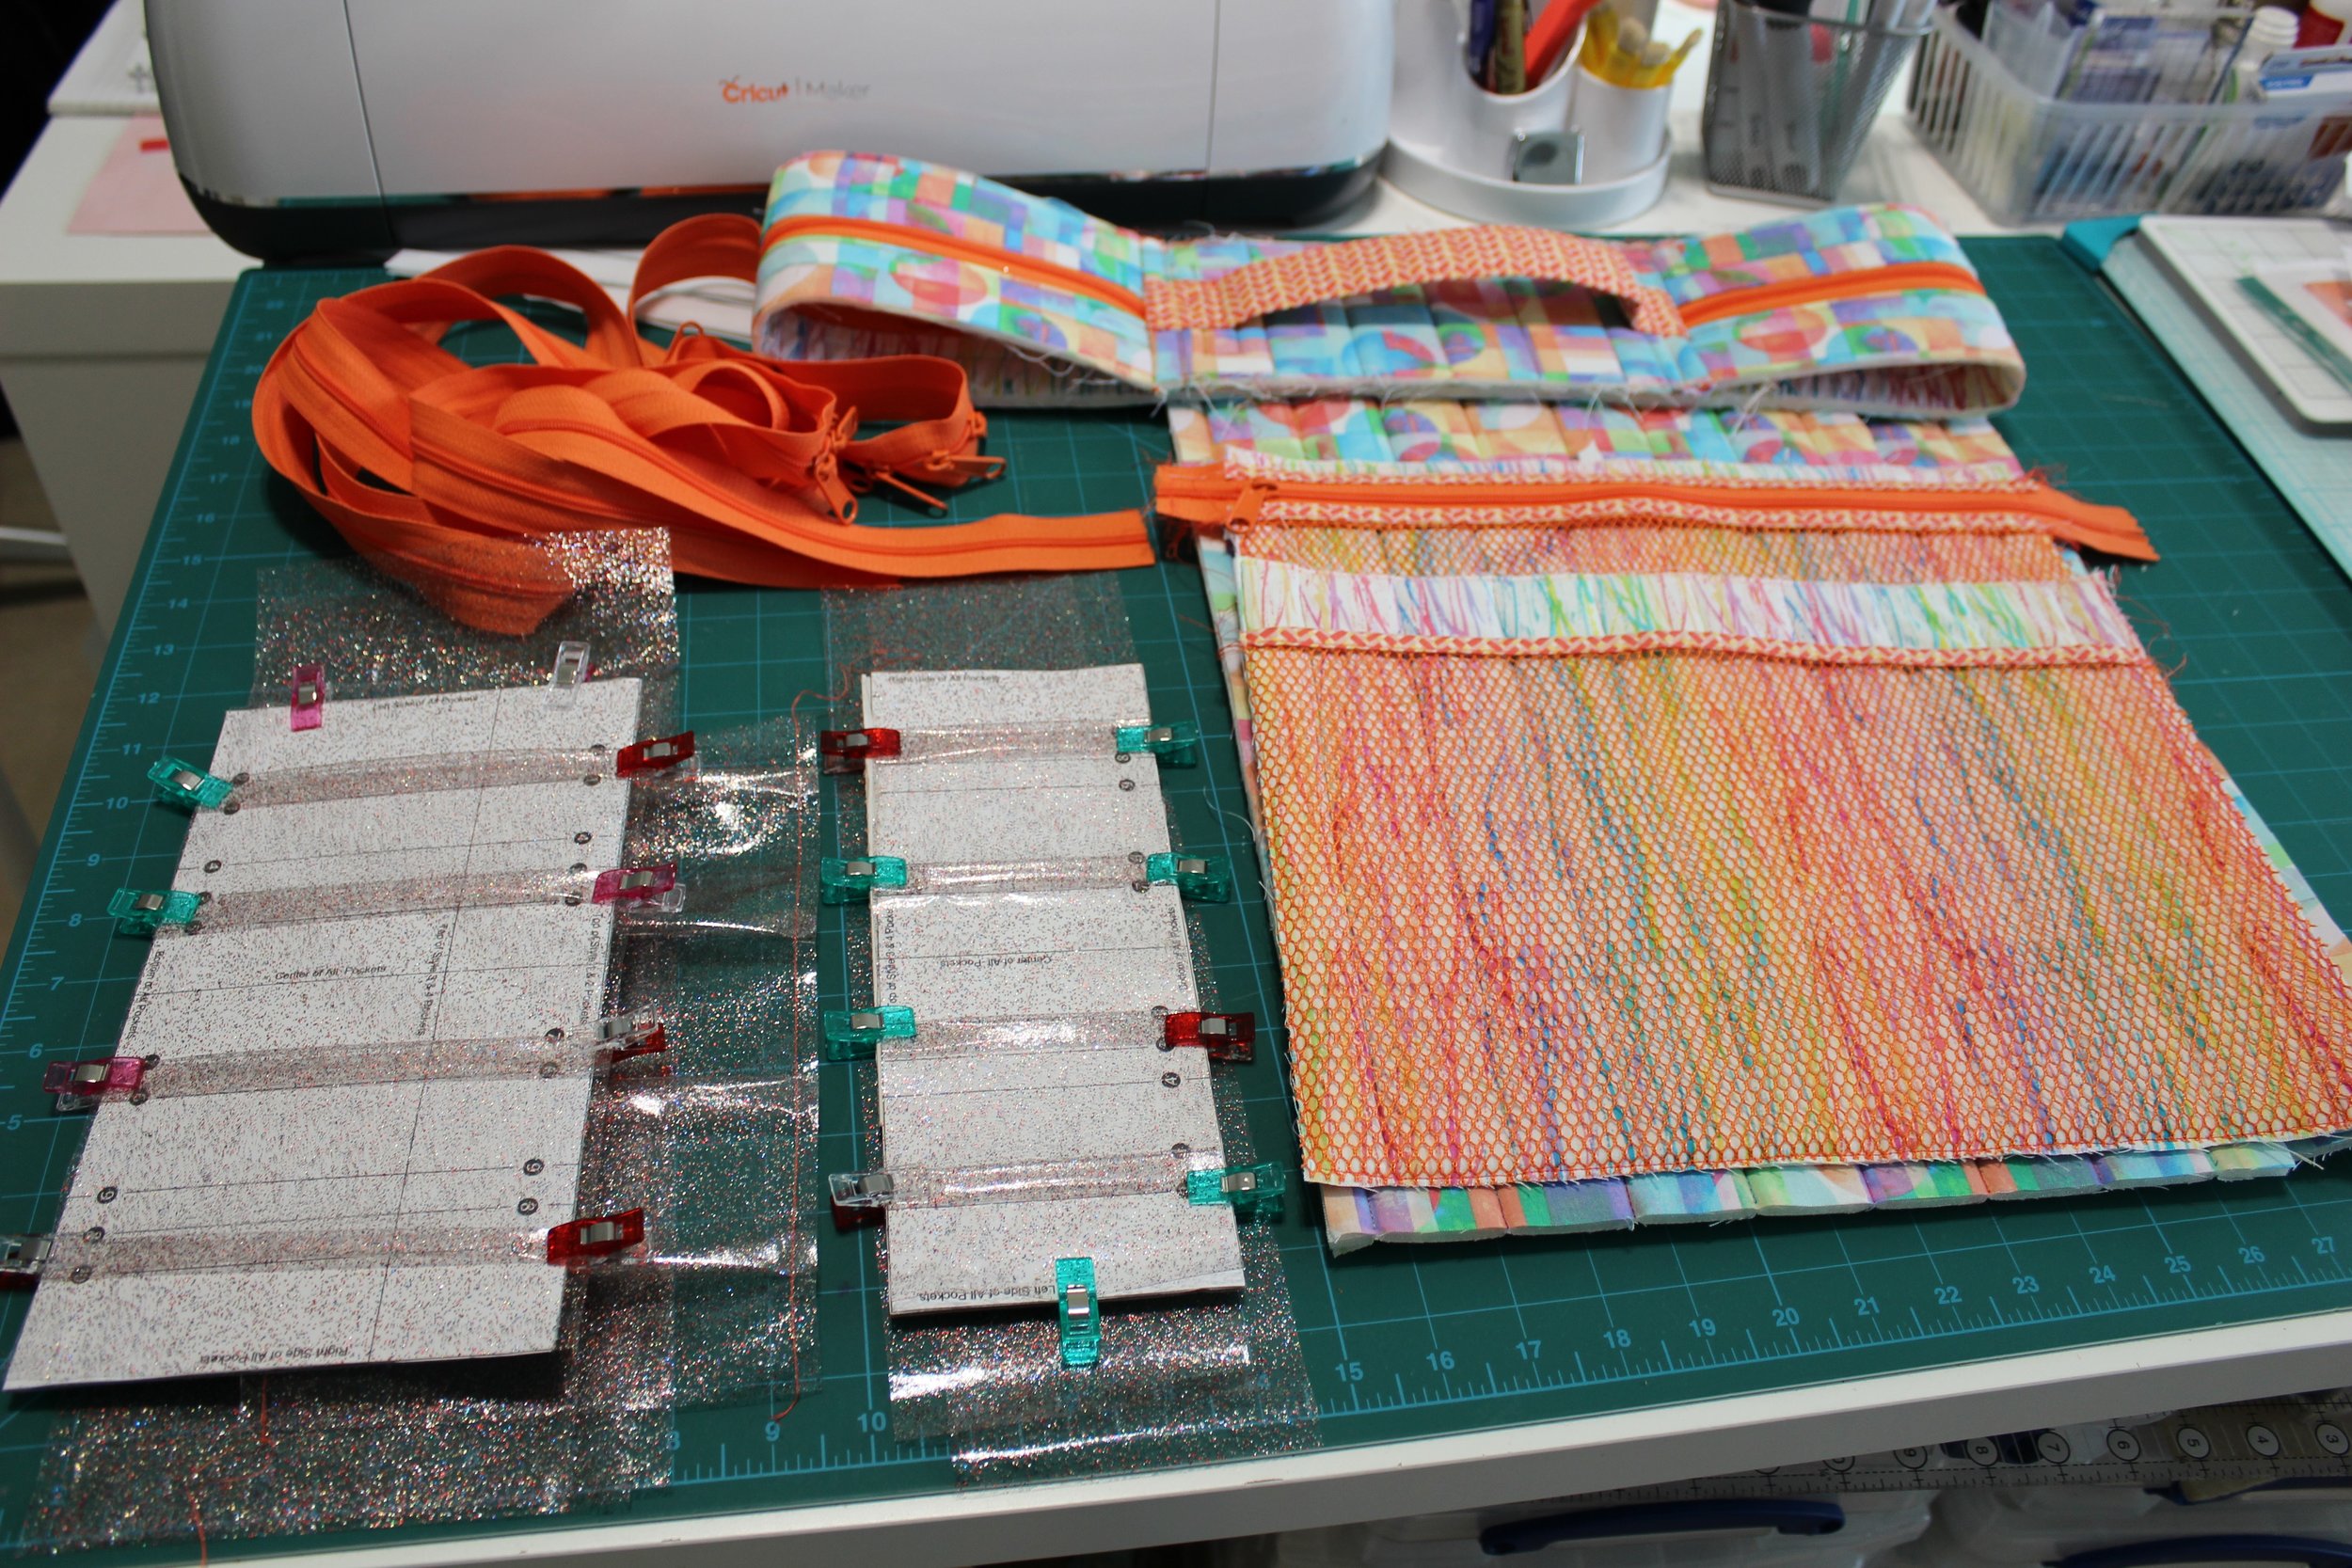
Just so I could use rainbow glitter vinyl! Lucy, the tutor for the Fluorite Quilt, had all her tools in a great organiser that had glitter vinyl. The vinyl had come from the Sewing Quarter and the pattern was by Annie Reineim but Lucy had made using a Craftsy Class. A couple of days later an offer came along and I bought the Craftsy Class. Had to wait a while for the vinyl to come in stock but worth the wait.
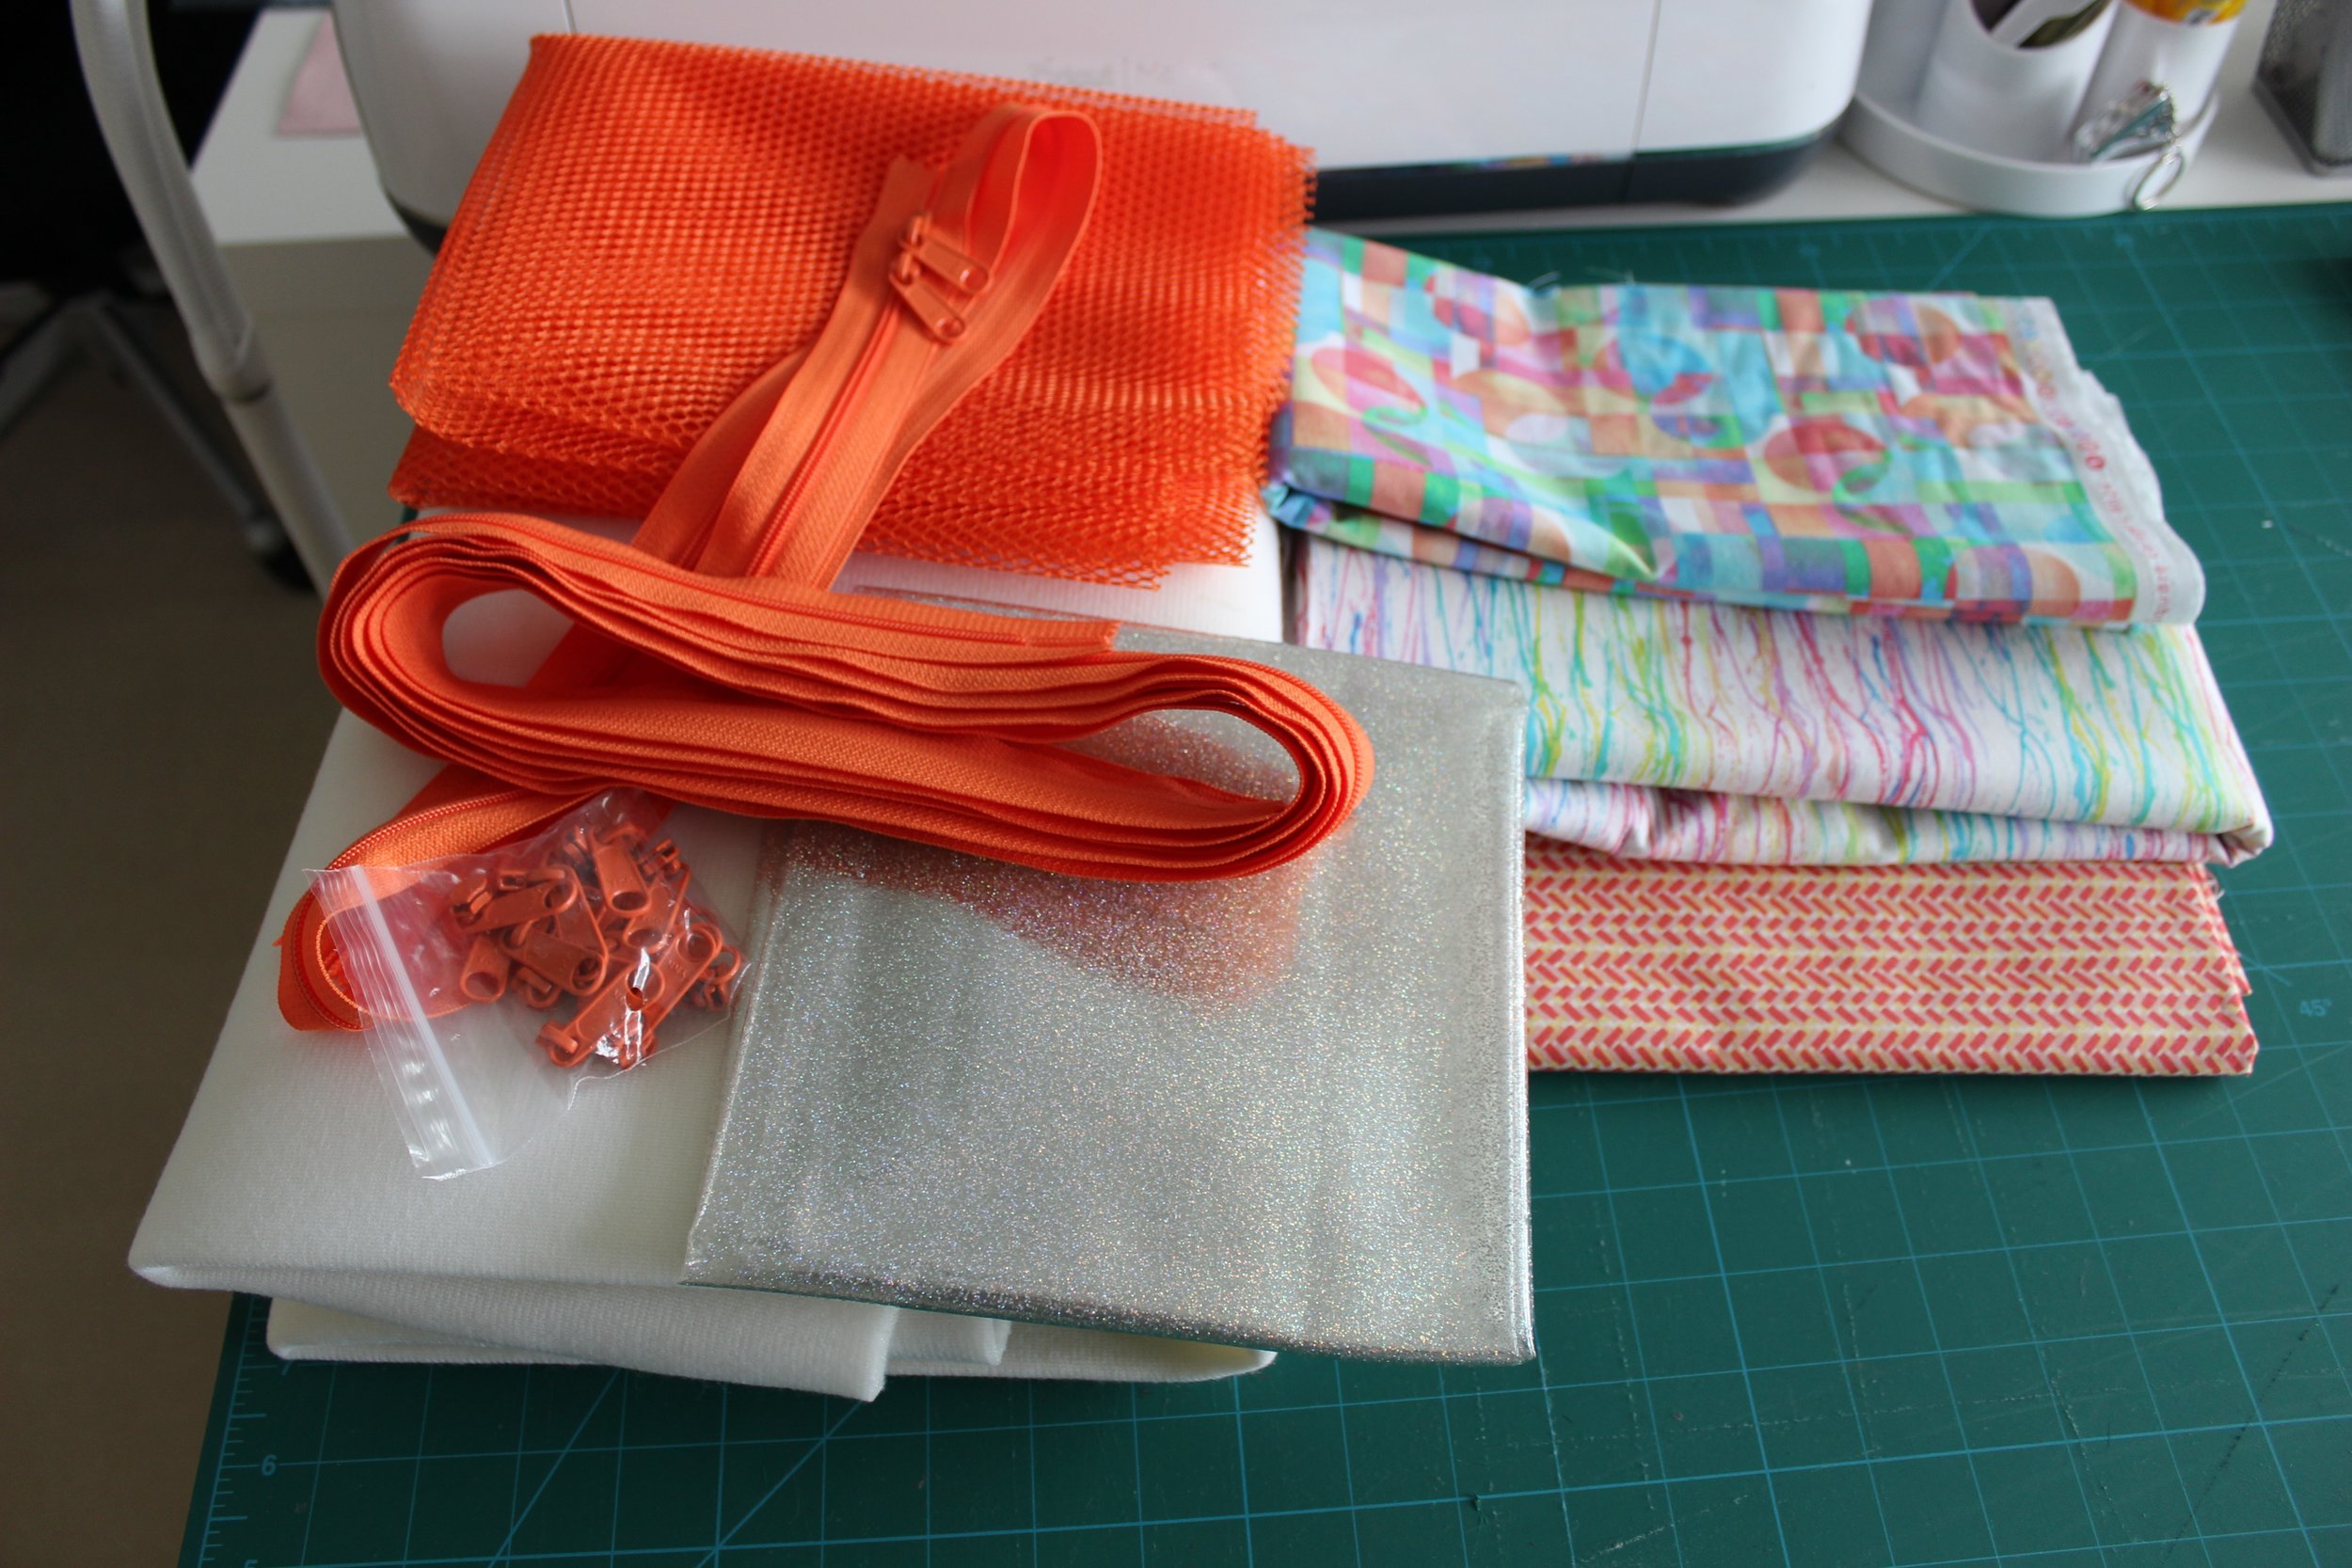
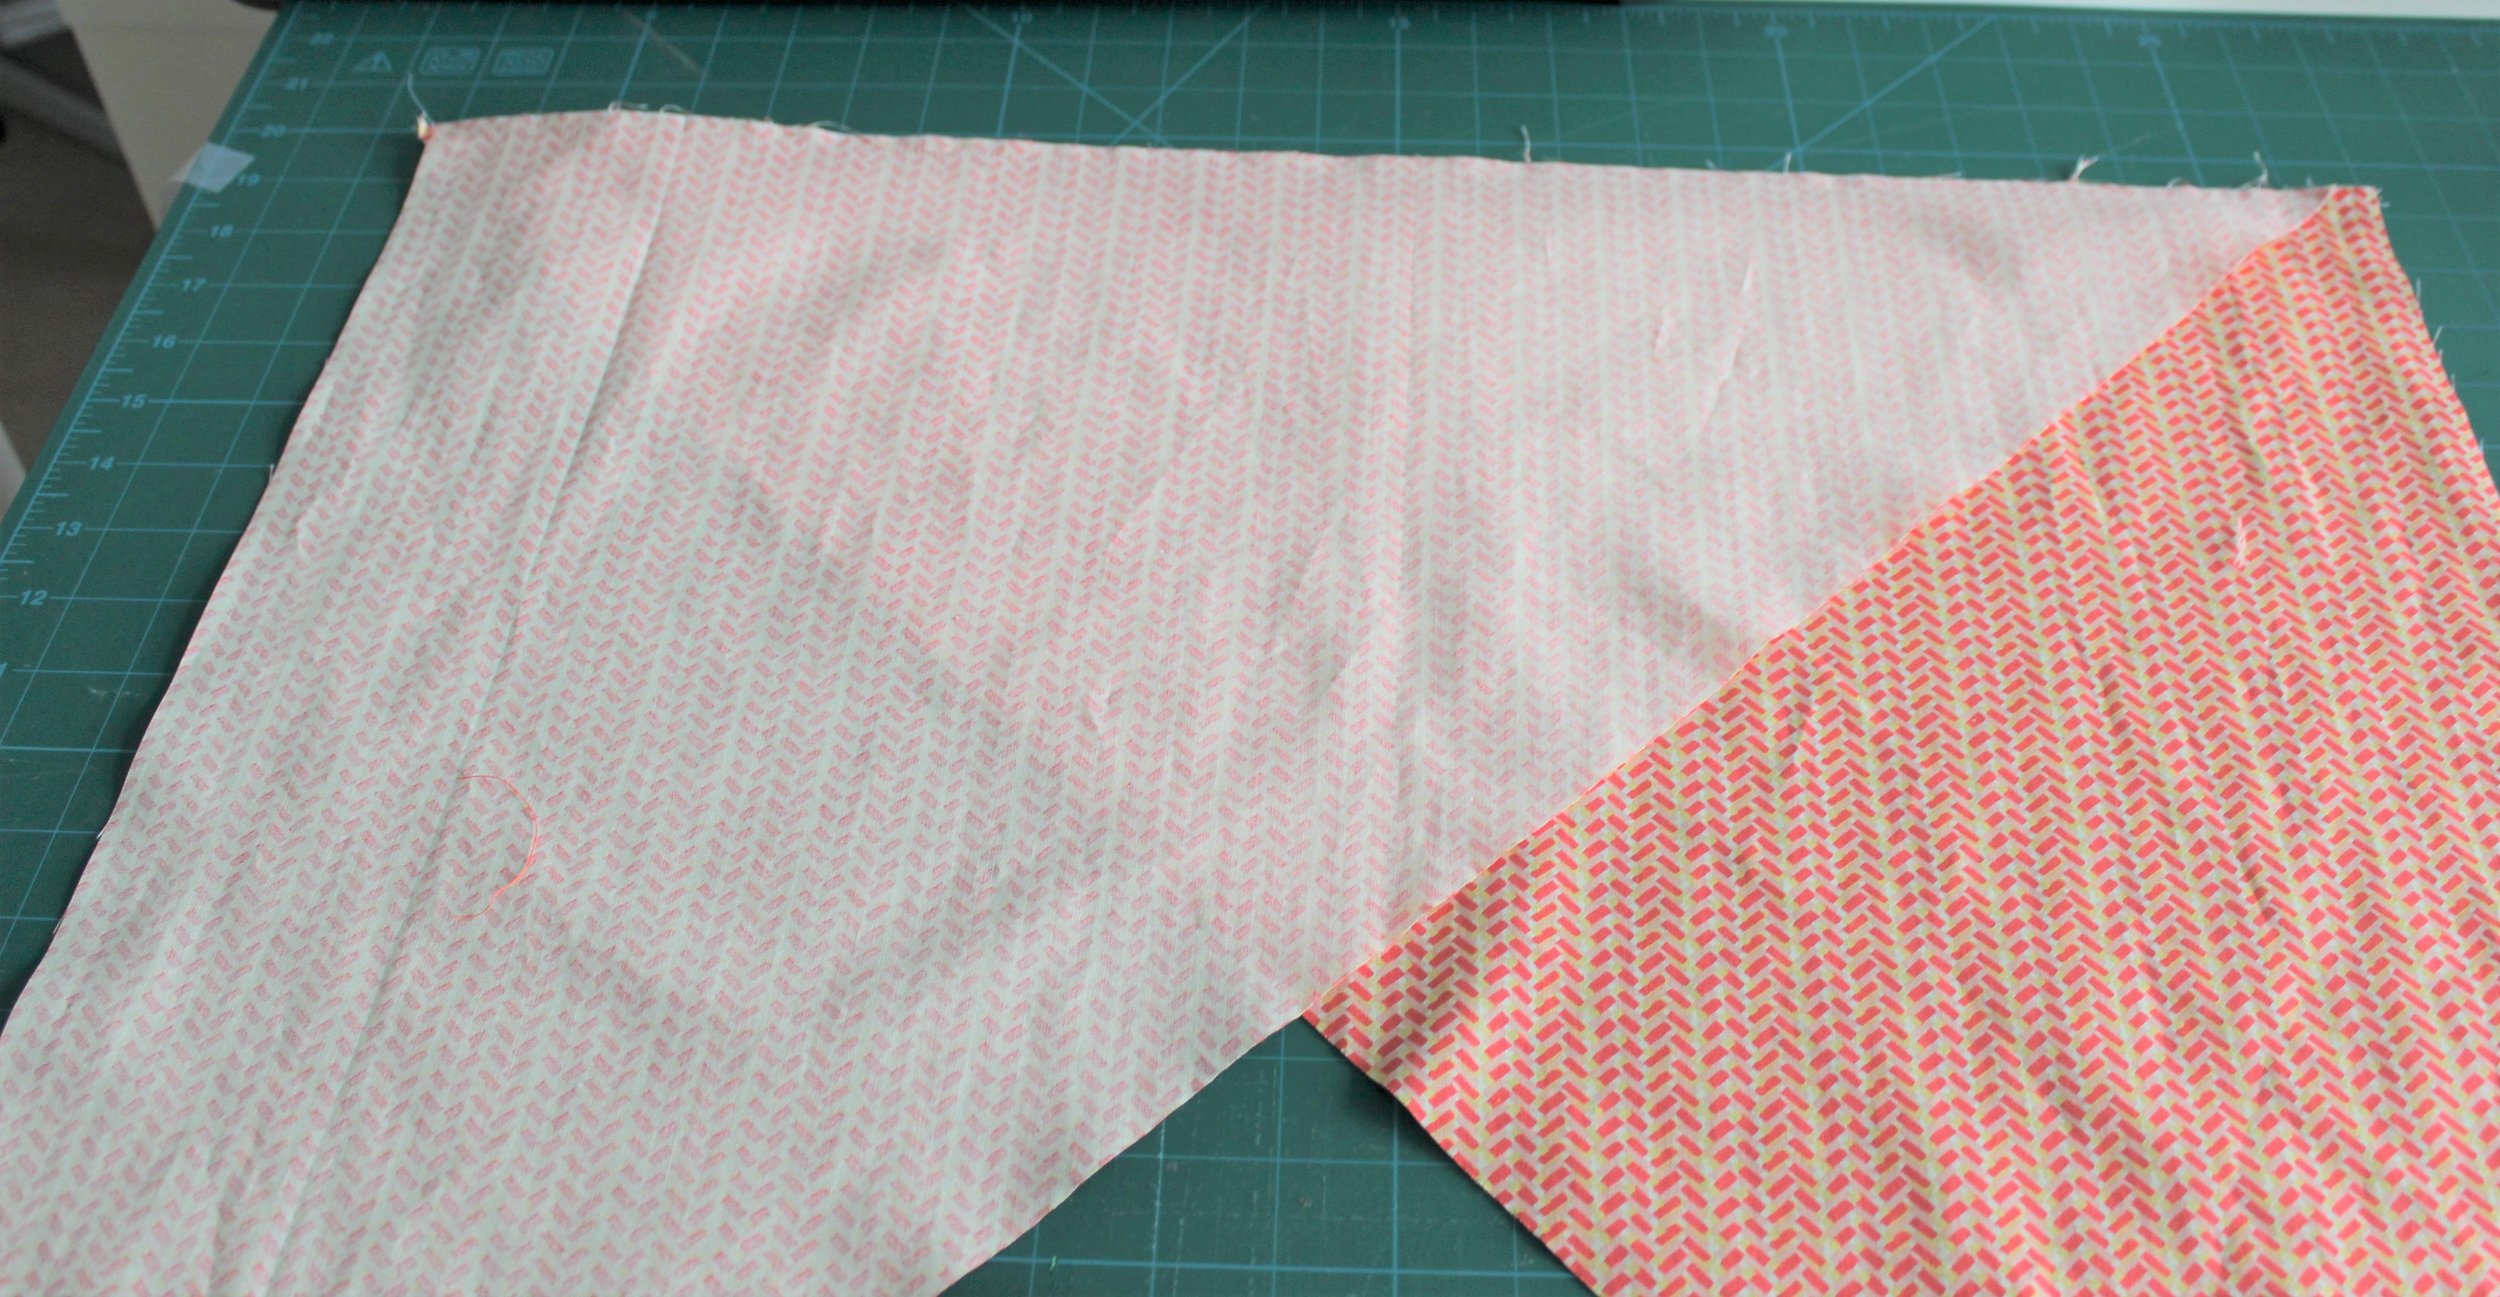
Quite a long and expensive list of requirements to get together. Got the fabric in the Patchfinders sale ( the annual 20% of everything). Then there was the Soft and Stable, mesh, long zippers, zippers by the yard, vinyl. Fortunately, Sew Hot stocks all the ByAnnie products. Thought it best to use the same brand and then I could get a feel for the structure. I do have a Bosal equilvalent also from Sew Hot.

The vinyl, from Sewing Quarter, came tightly packed flat which meant crease lines. So leaving it in the sunshine was my idea to soften the folds! It helped then I rolled it up for a while. I was a little apprehensive about the quality but pleasantly surprised given the price.
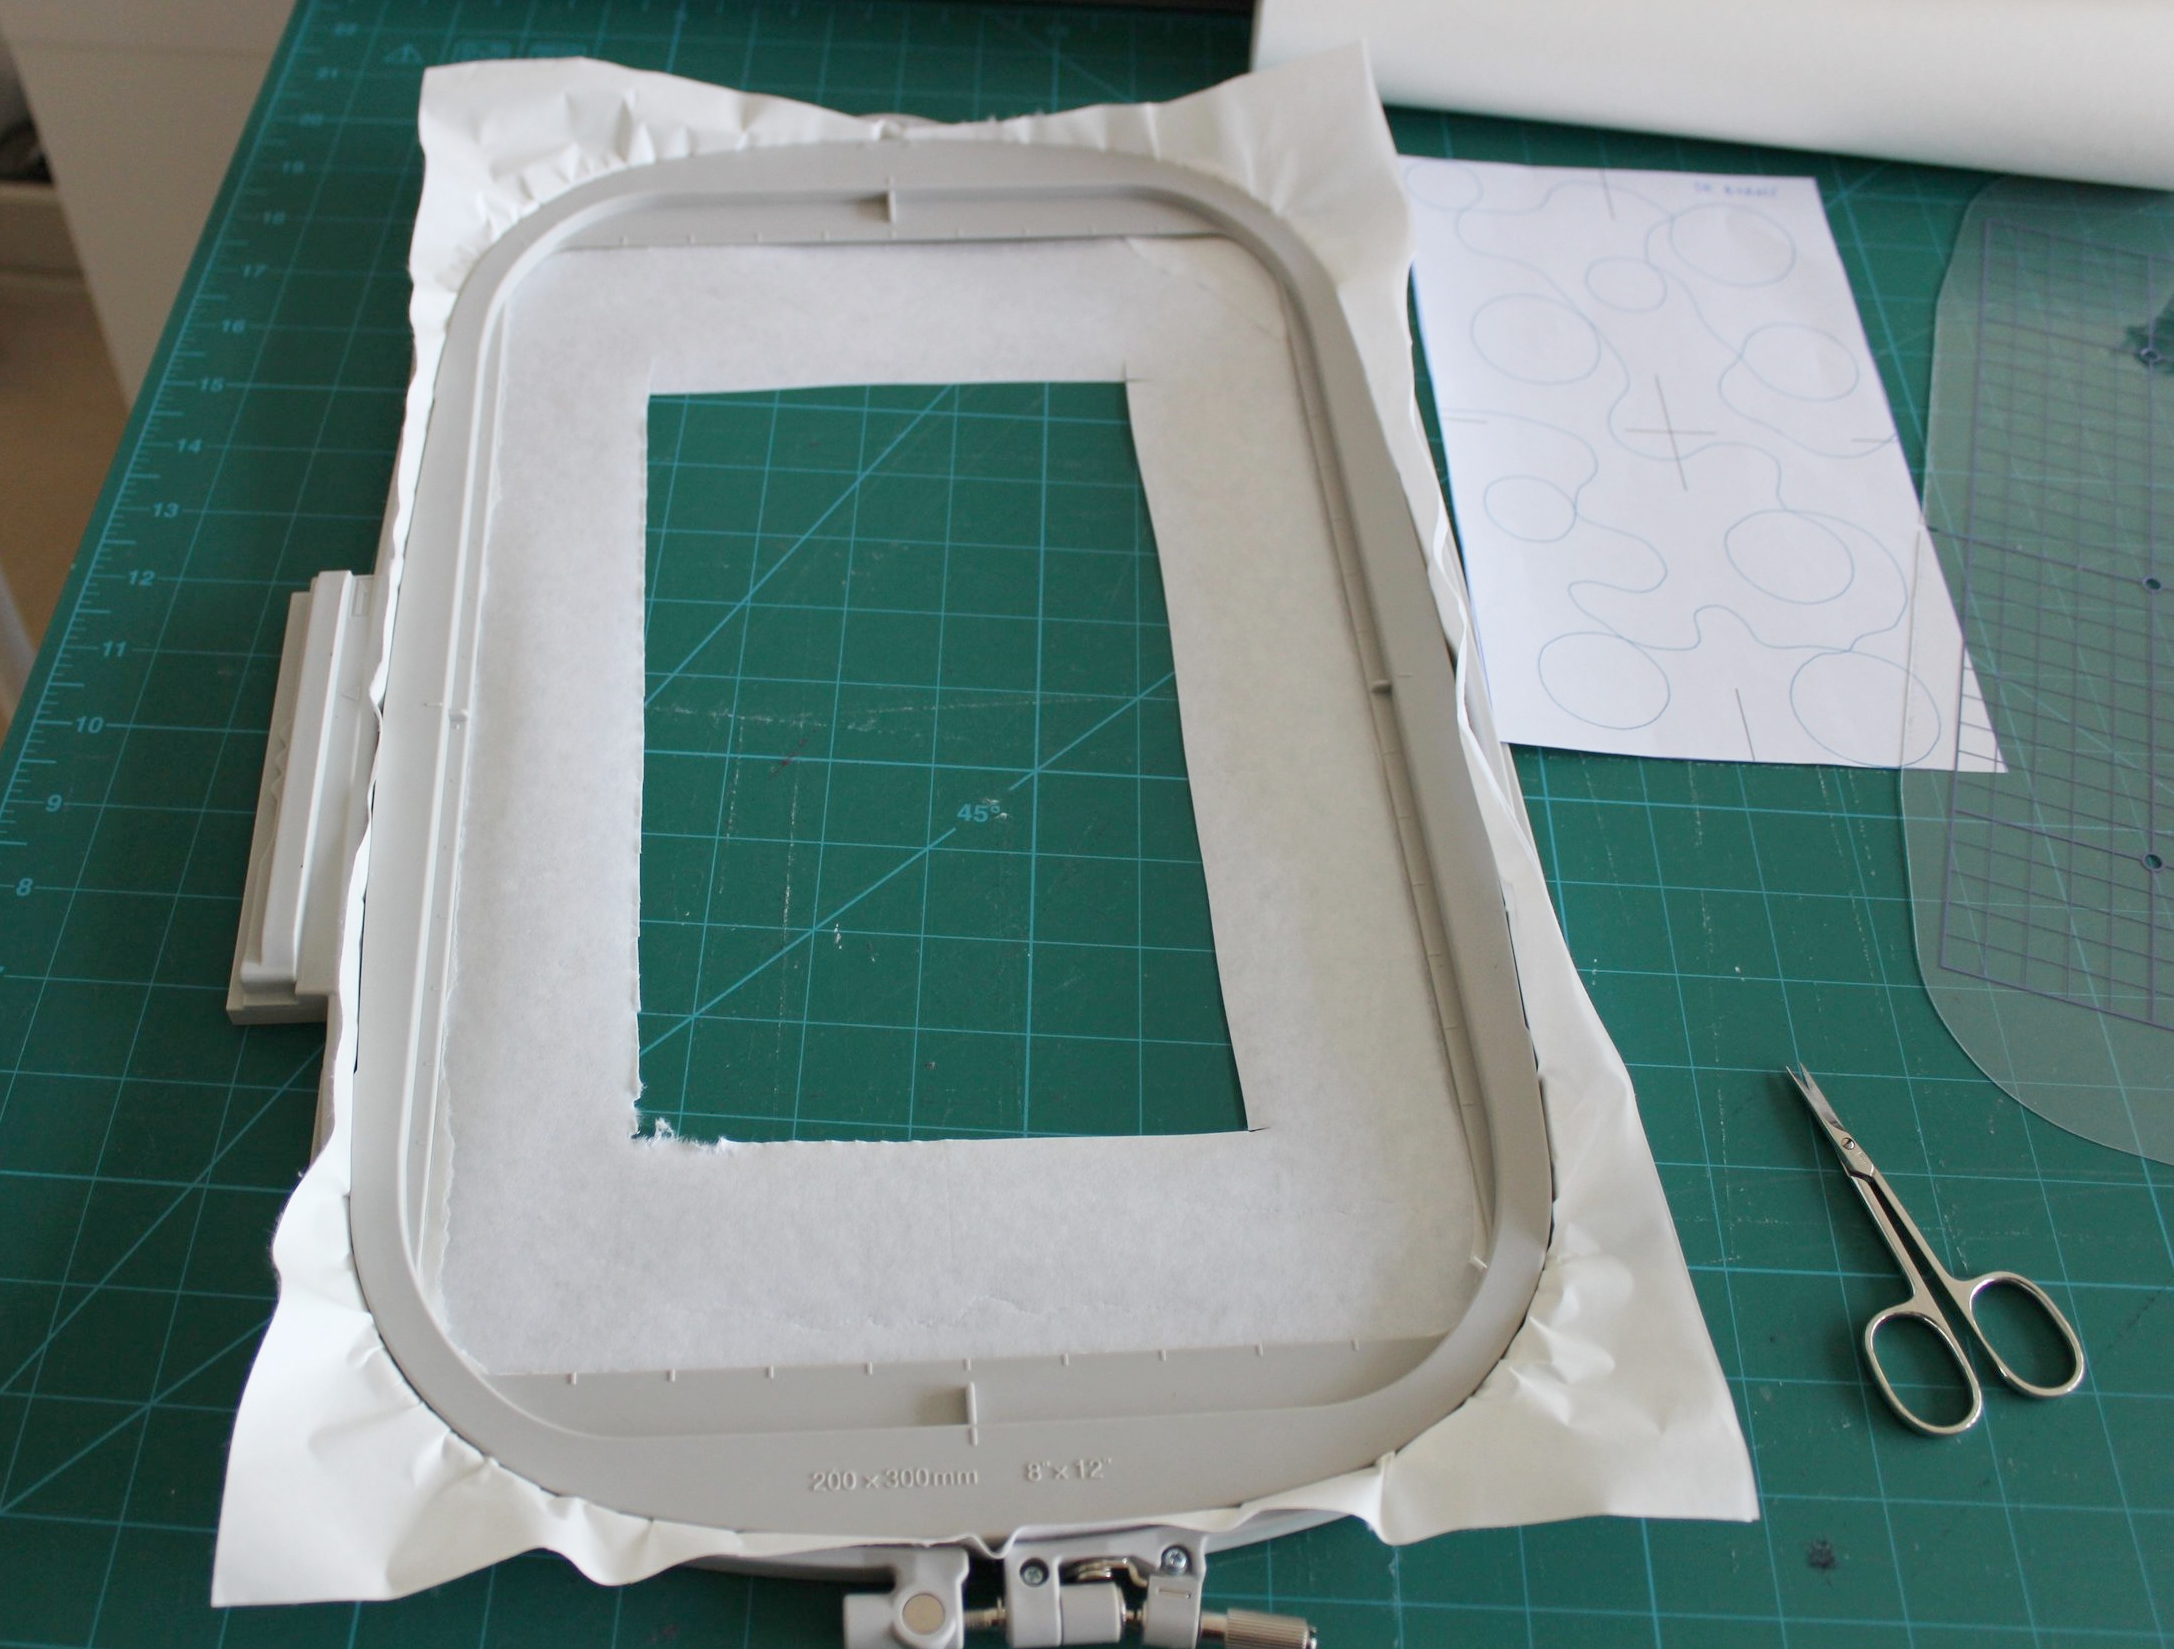
The idea was to quilt the fabric and then cut up. Having just finished quilting in the hoop I thought I would try again. I found another of Amelie Scott expansion pack with circles to match the fabric. A bit of a disaster. Just too much to get into the hoop. I tried using Floriani Perfect Stick but not having it. So thought I would test my freemotion quilting skills. A bit too rusty. Reverted back to straight lines with my walking foot!
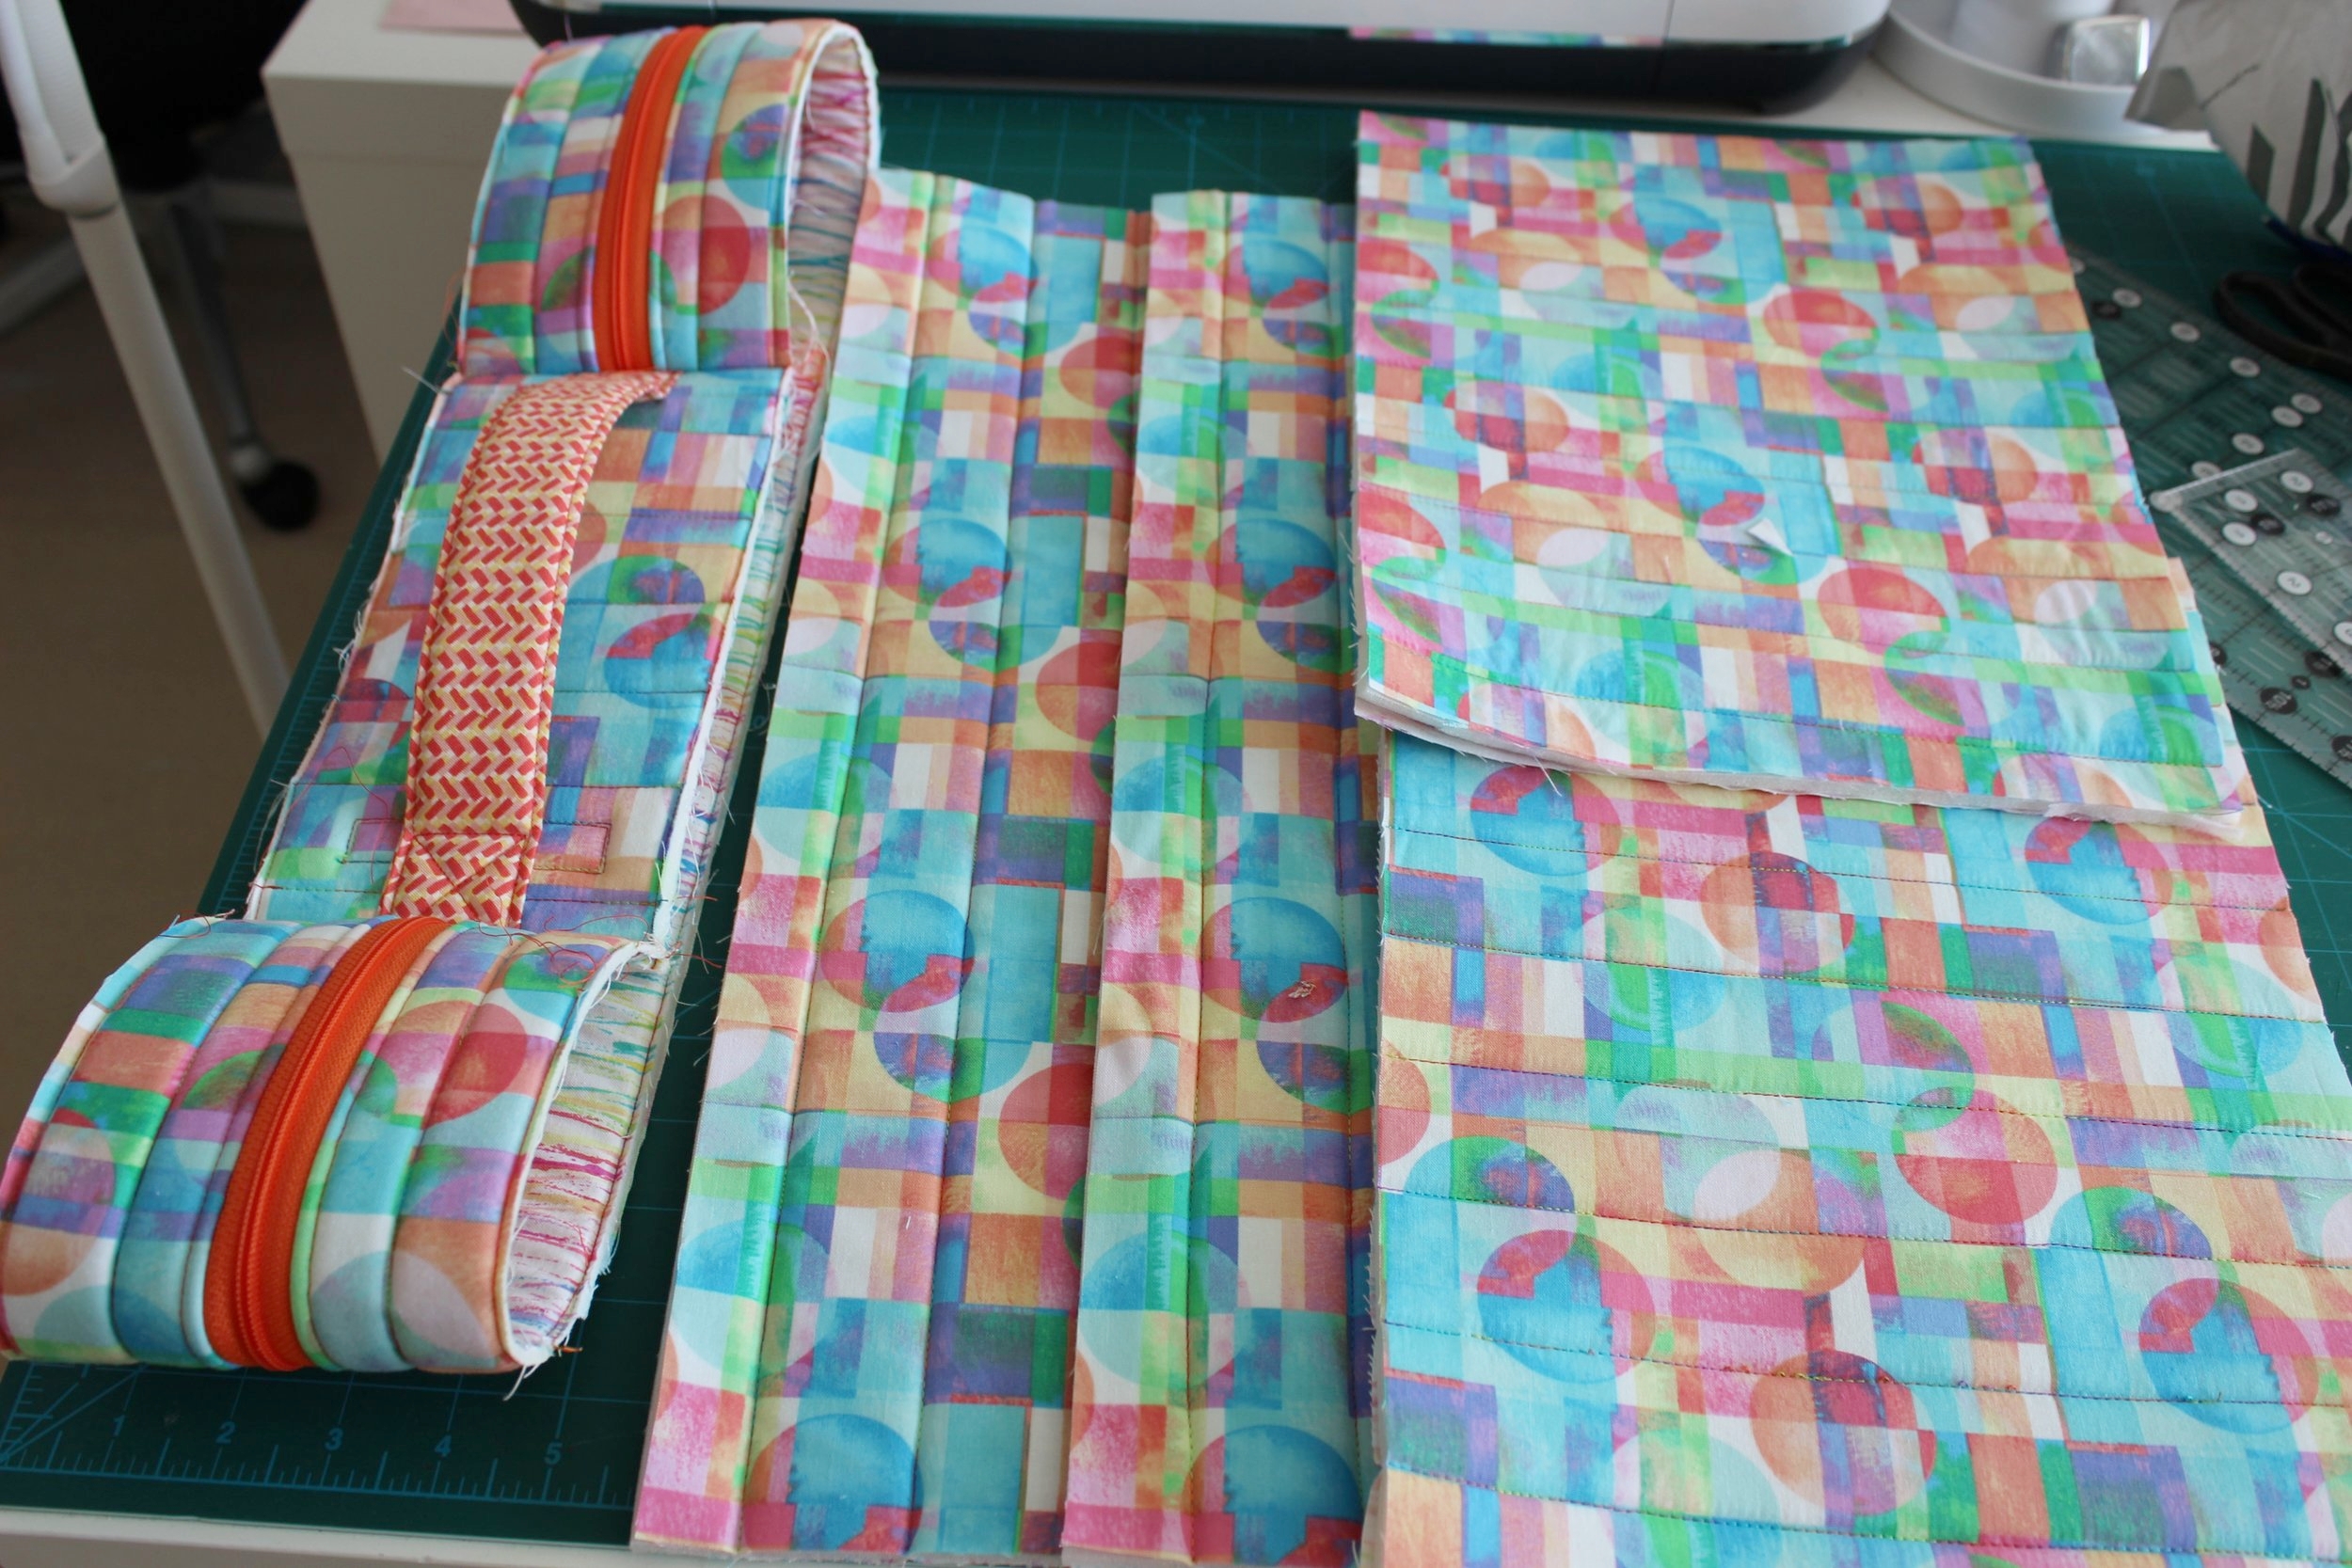
I made the gusset first. The zip went in well. There was a bit of bulk to get through when sewing the top to the sides and I have a heavy duty sewing machine with a walking foot!
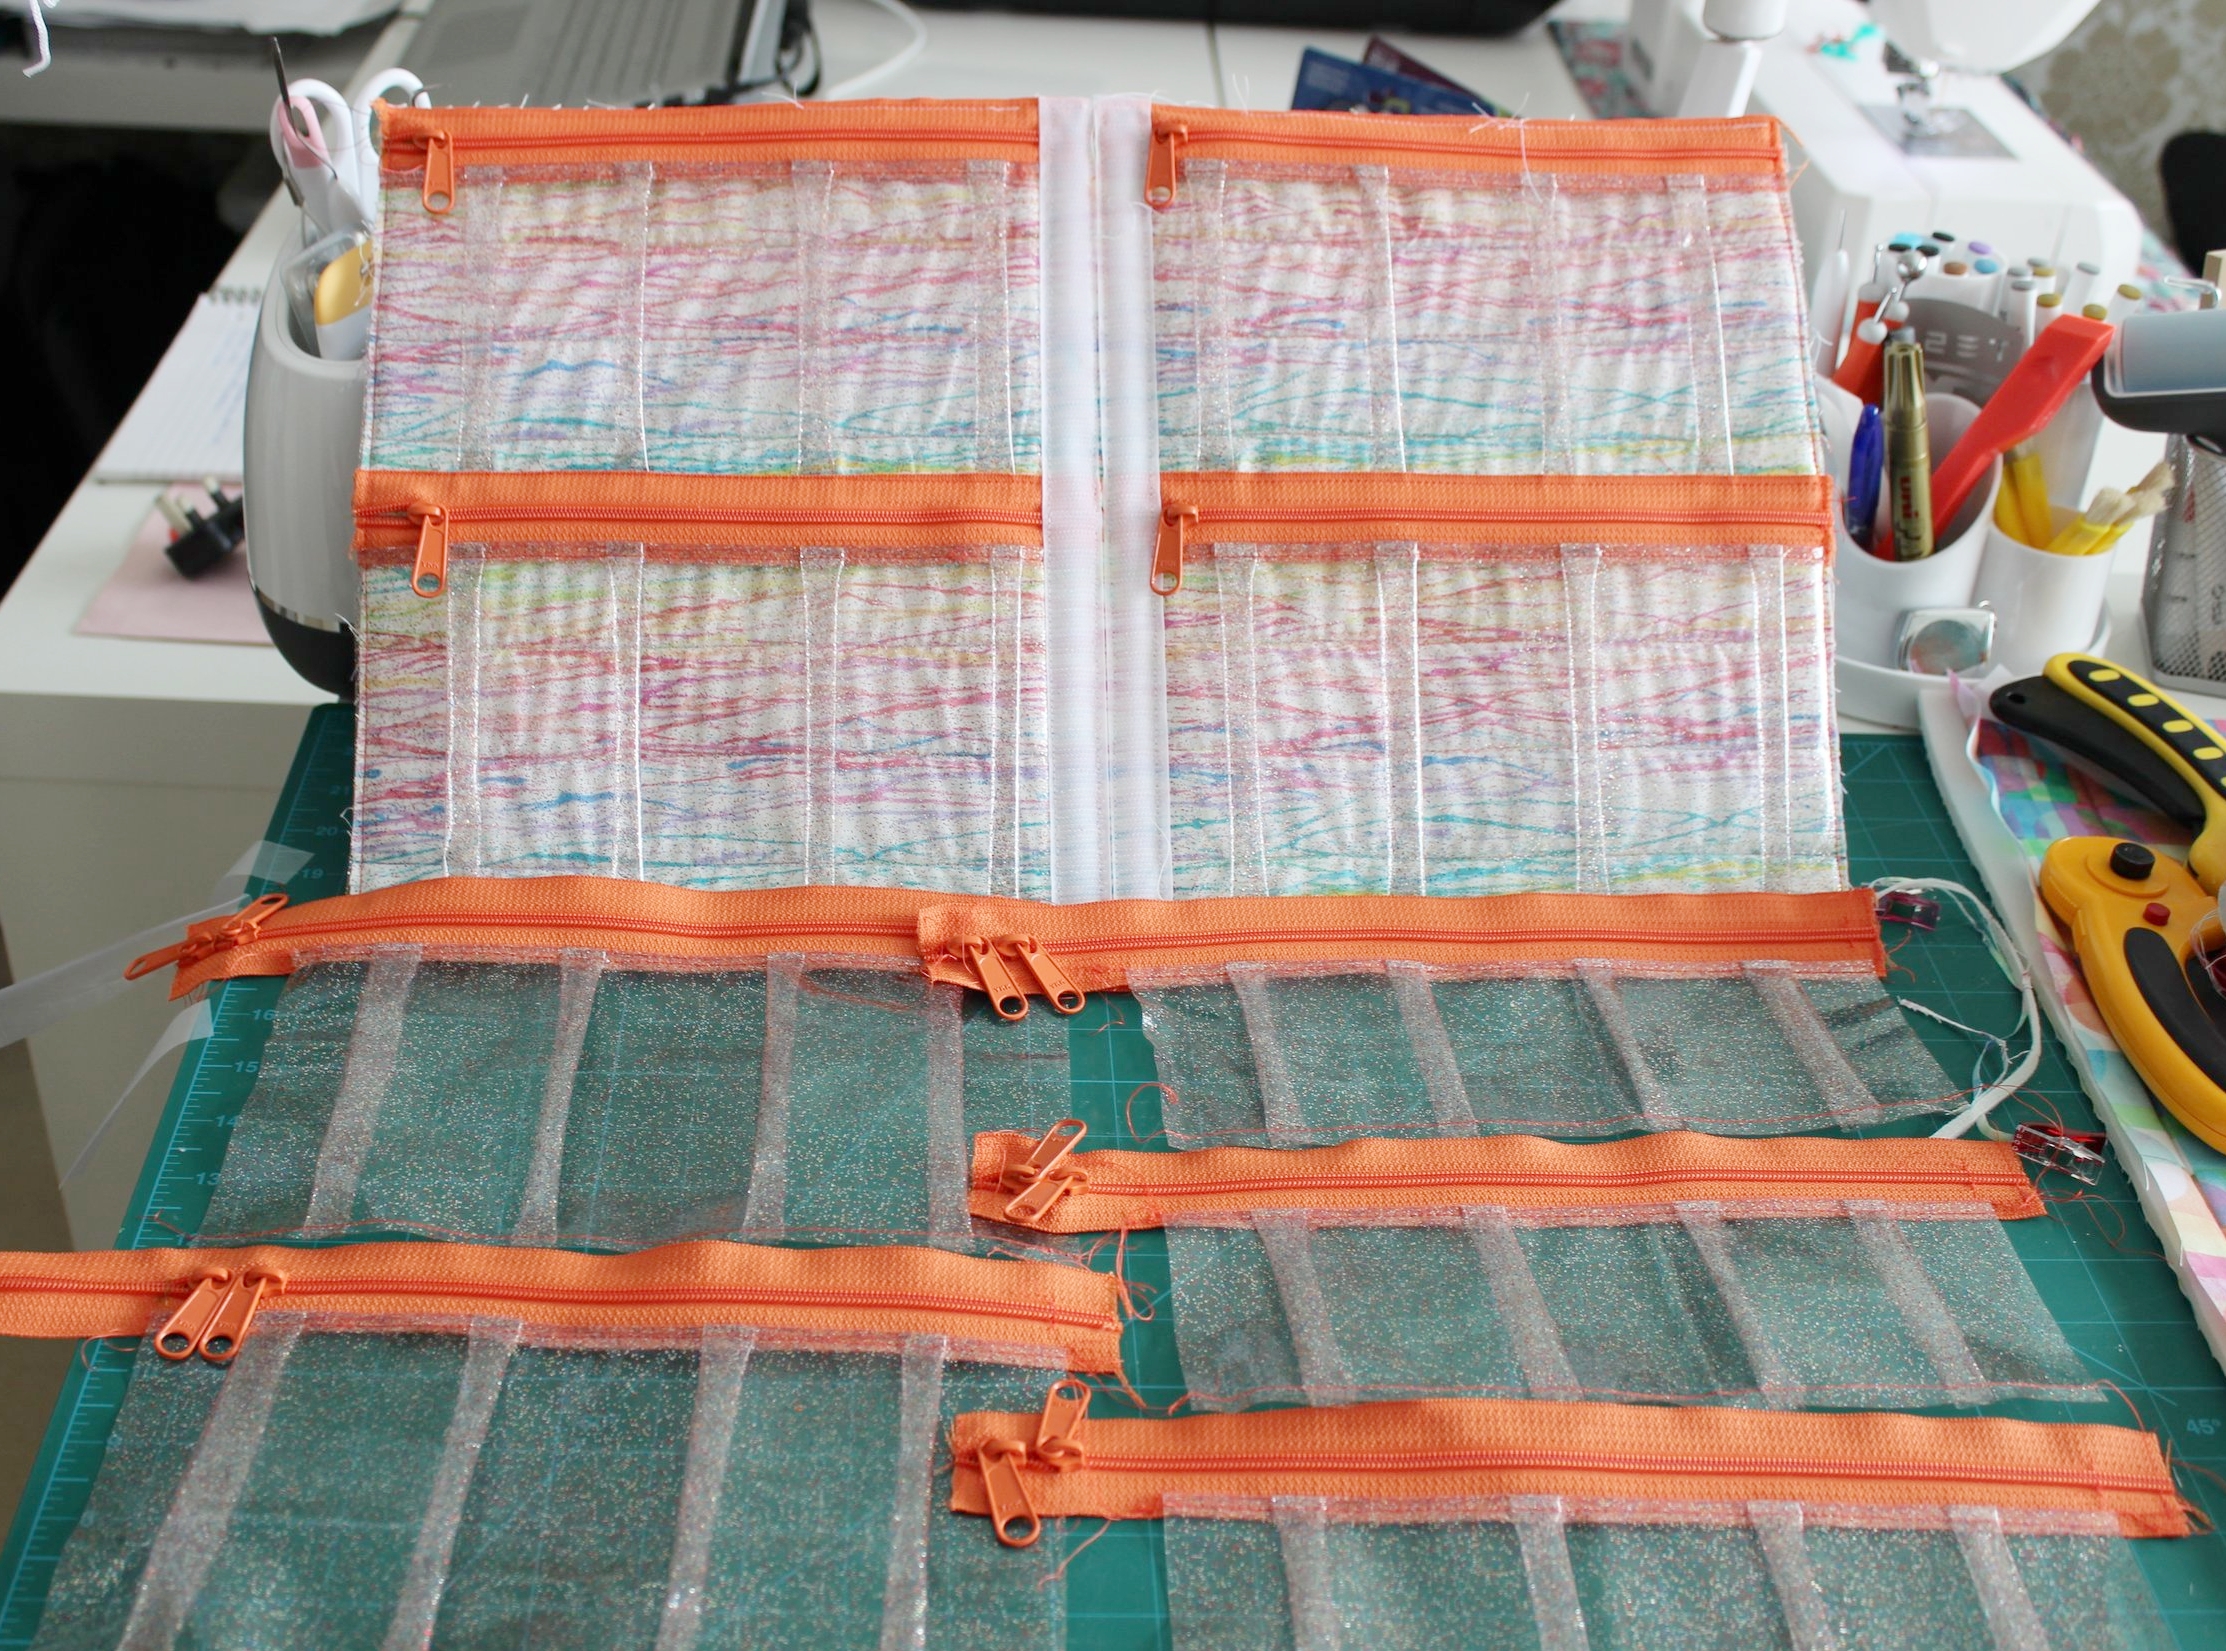
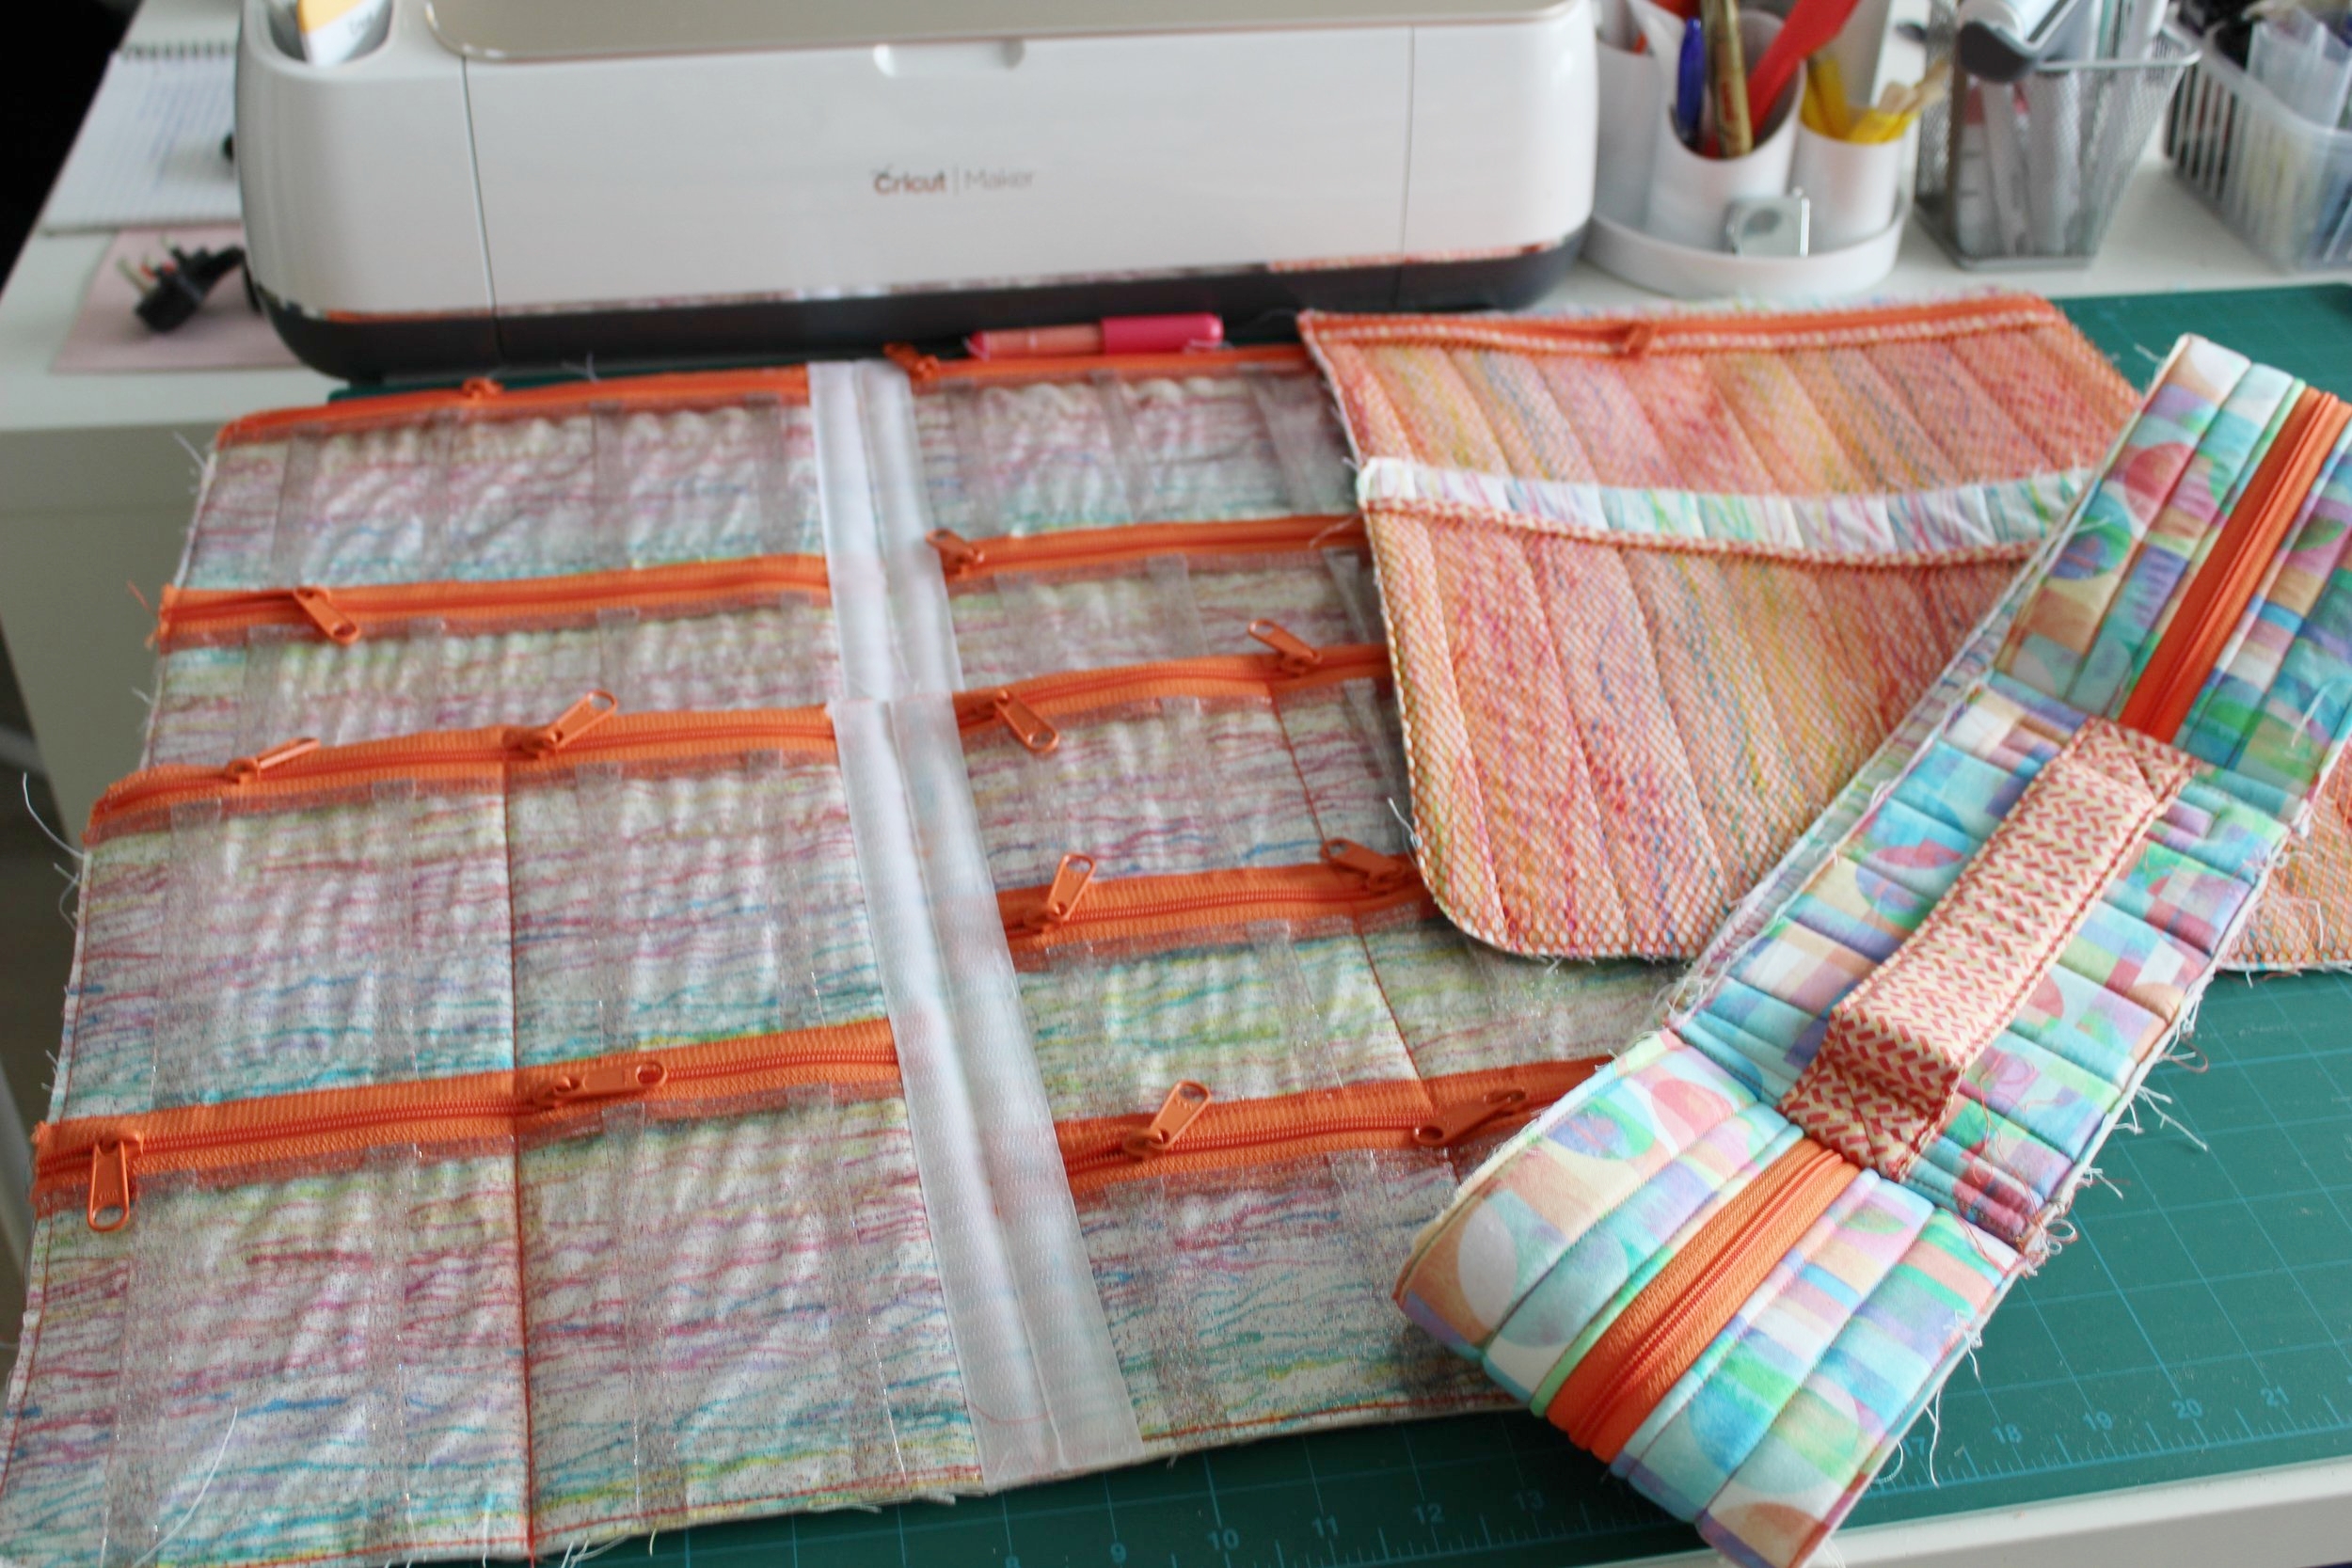
I moved onto the front and back pockets which uses the zipper chain. With the zipper by the yard you have to put all the zipper pulls on first using an uncut end. Really messy if you don't. At this point I had to decide what combination of inside pockets I was going to make. You mark the point of each zip, sew a line of stitching either side and then cut up.
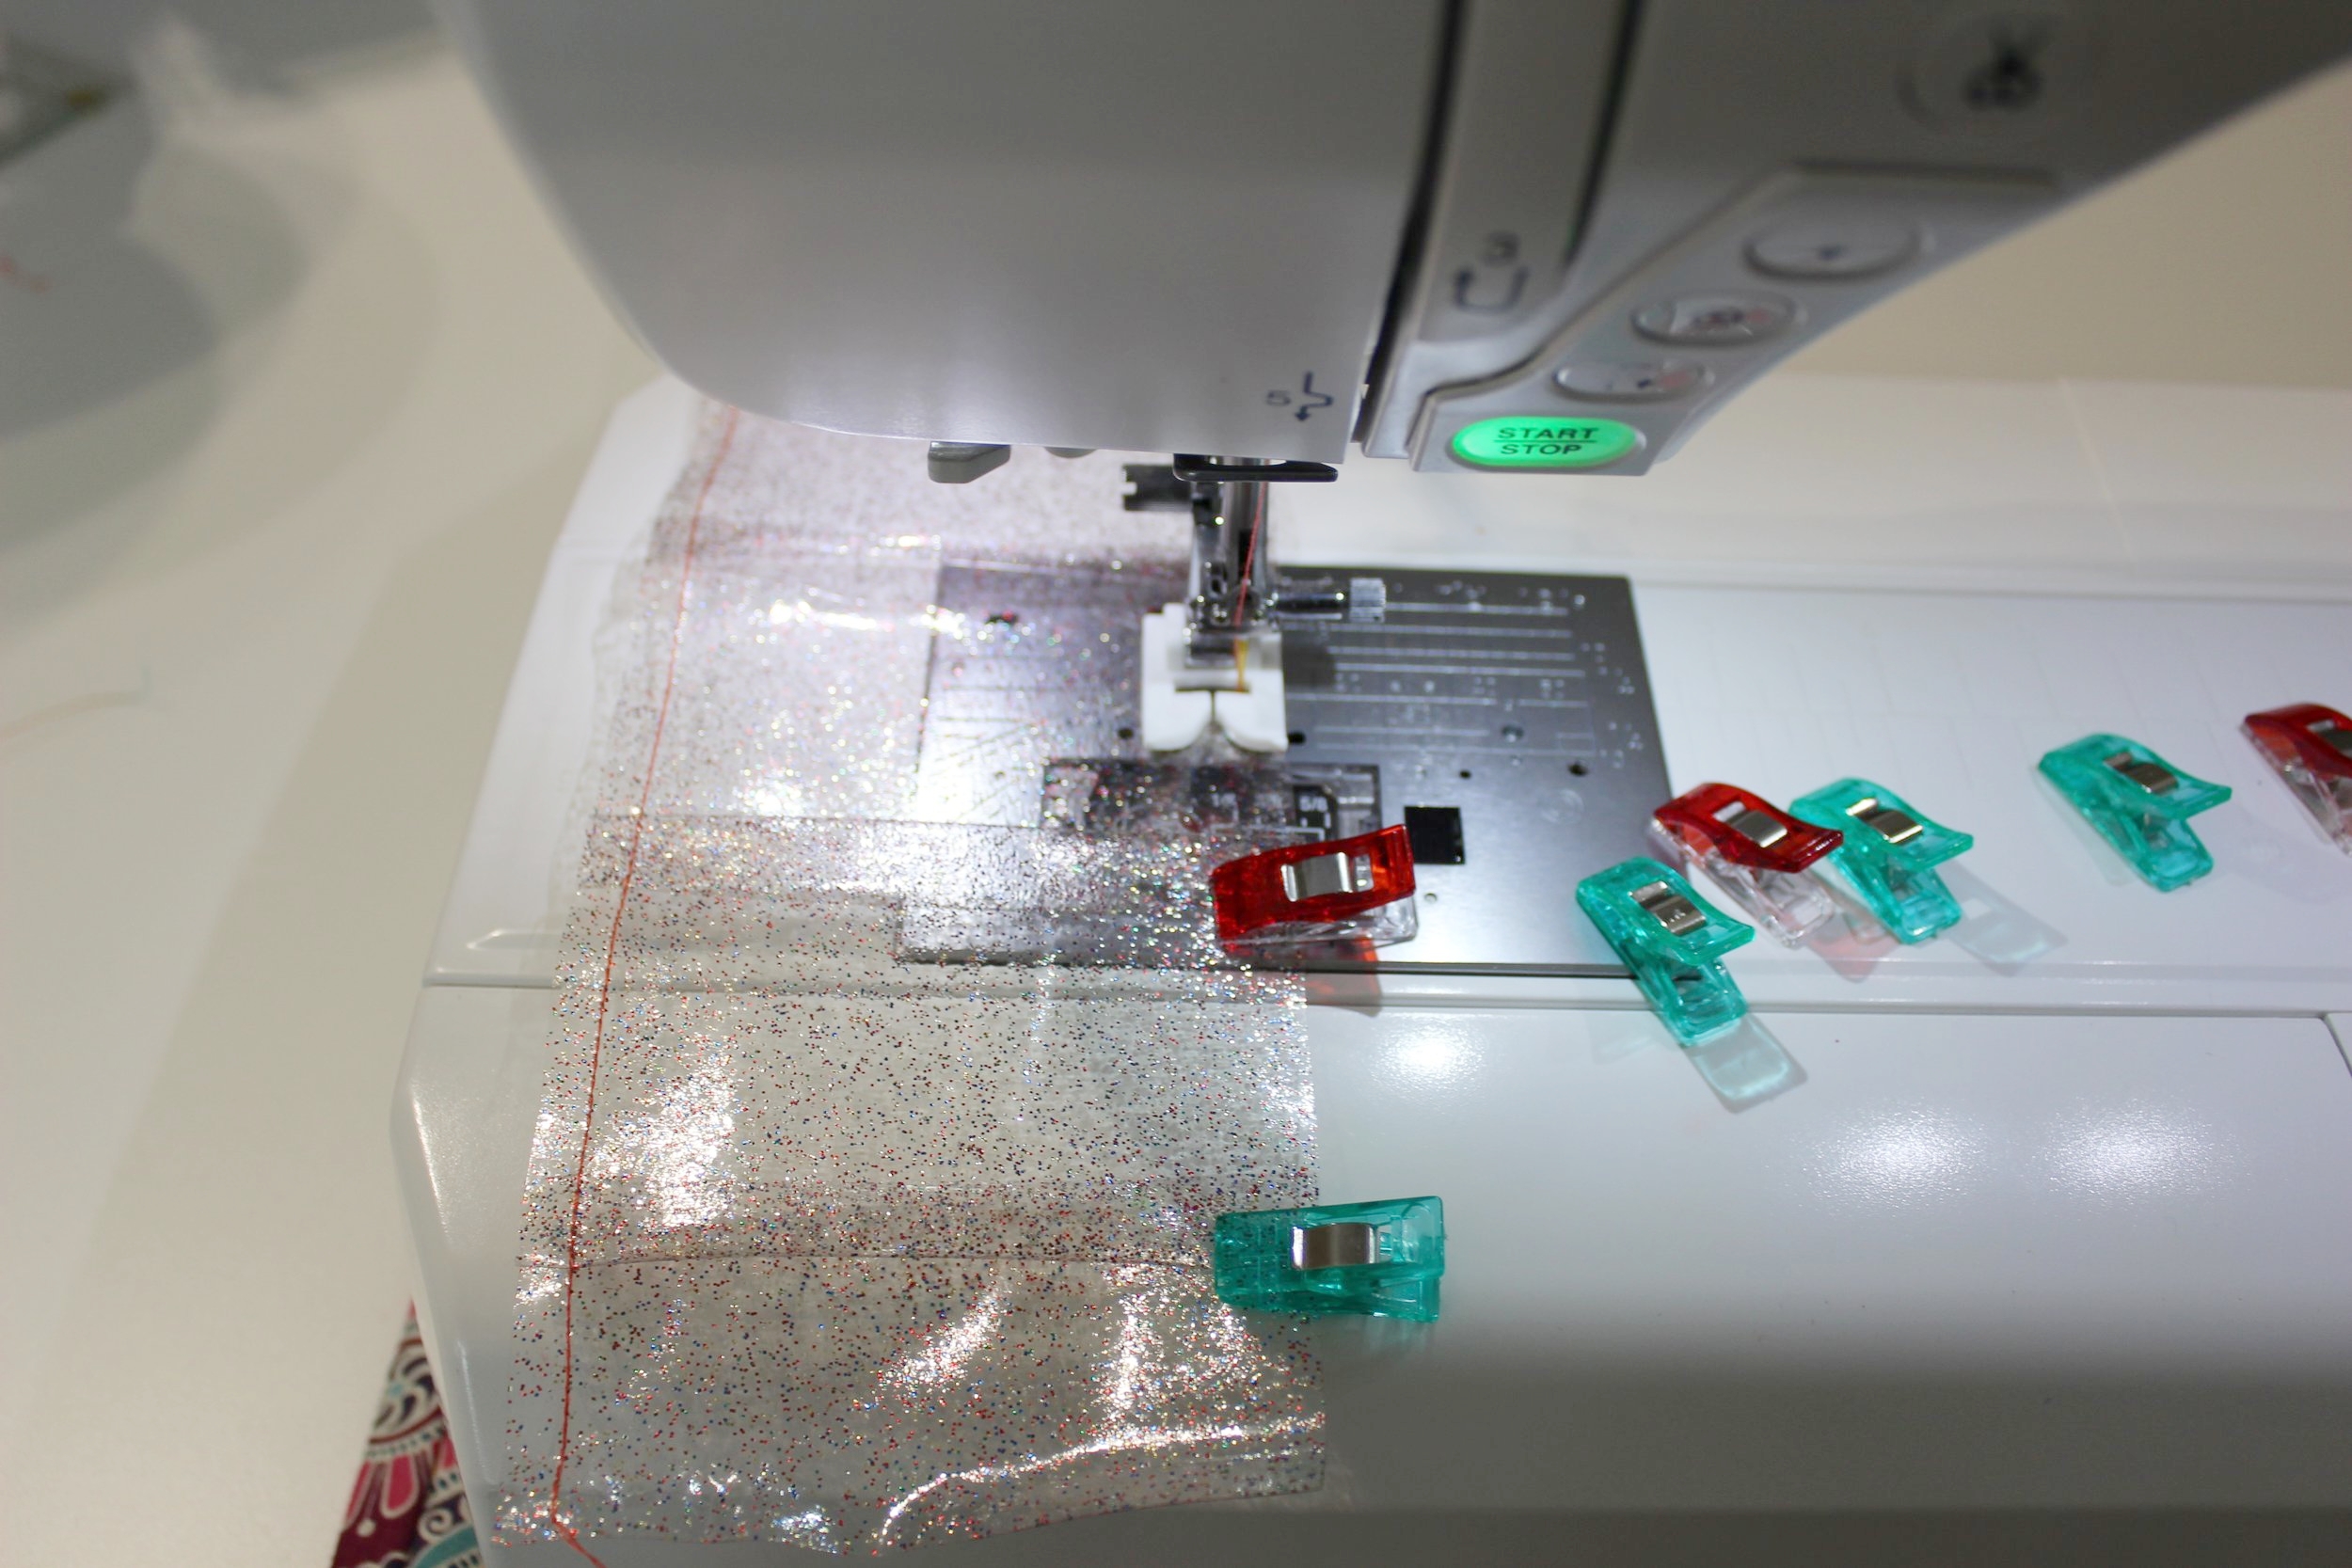
Front and back pockets done I moved on to the vinyl pockets. There is a handy template which I stuck onto cardboard. Having carefully folded all nine up I basted in place using a Teflon foot (I bought it a while ago but never used). Then you attach all the zips before attaching to the folders.
Once the pockets are in you apply the velcro. I used my fabric glue stick to hold in place and switched to white thread. Again hard going through two sets of velco and stabiliser. All the parts ready it was time to put together. You can use clips but I have some strong pins which I preferred to use. Nothing moves with these. You make one side and then the other. There was quite a nifty way to make the binding.

You then apply the binding along the same stitch line. Most of corners worked out but I did go back and redo a couple of them as you are moving quite a bit of bulk around the corners. There is also a good technique for joining the binding which I always have to think twice about before I cut. It was quite a session to finish the binding but it was quite a relief when I had finished. Then just the zipper pulls to do. I felt exhausted but just got to the point where I had to finish.

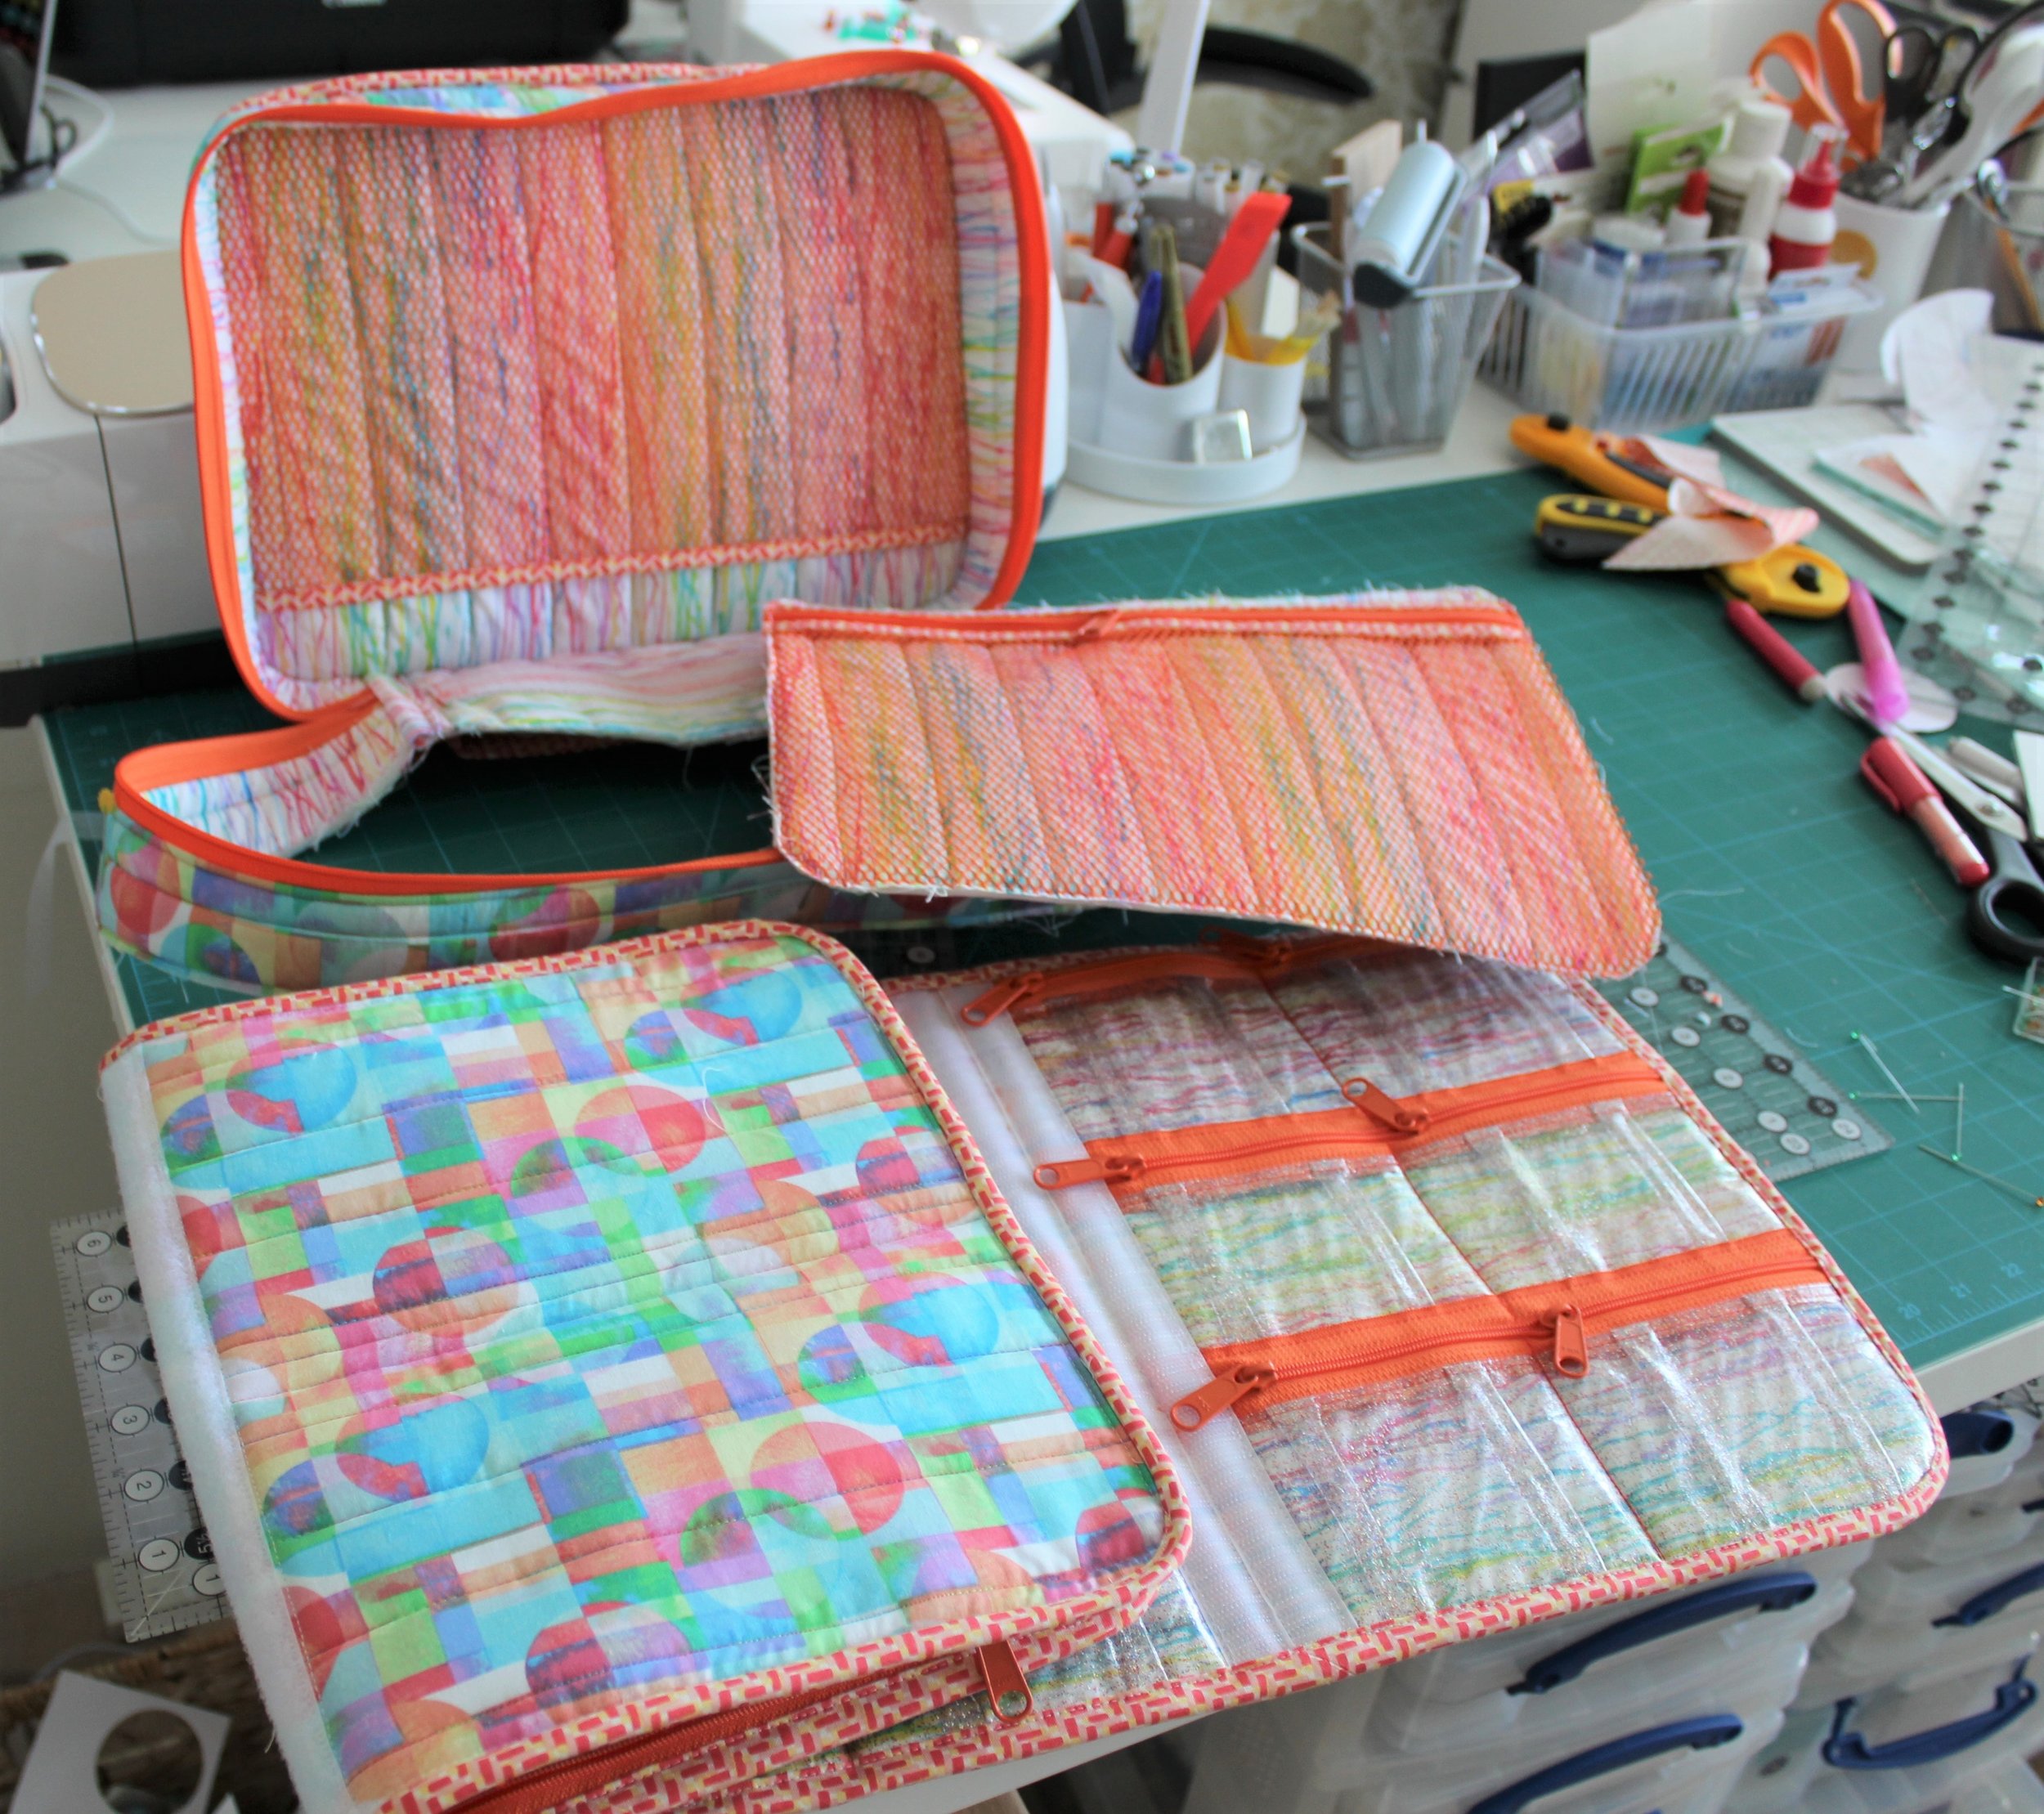
It looks absolutely fabulous. I just hope I find some classes to go to so I can use. Otherwise a very expensive make.
