More Lingerie
Deciding what to do next became more of a problem over Christmas as the arrival of the Cricut Maker and the Sizzix Big Shot brought even more possibilities. So many new skills to learn. I was quite glad when the kit I bought on discount arrived from Costura Secret shop. Instagram is great for promotion alerts.

Bra and Pantie Kit
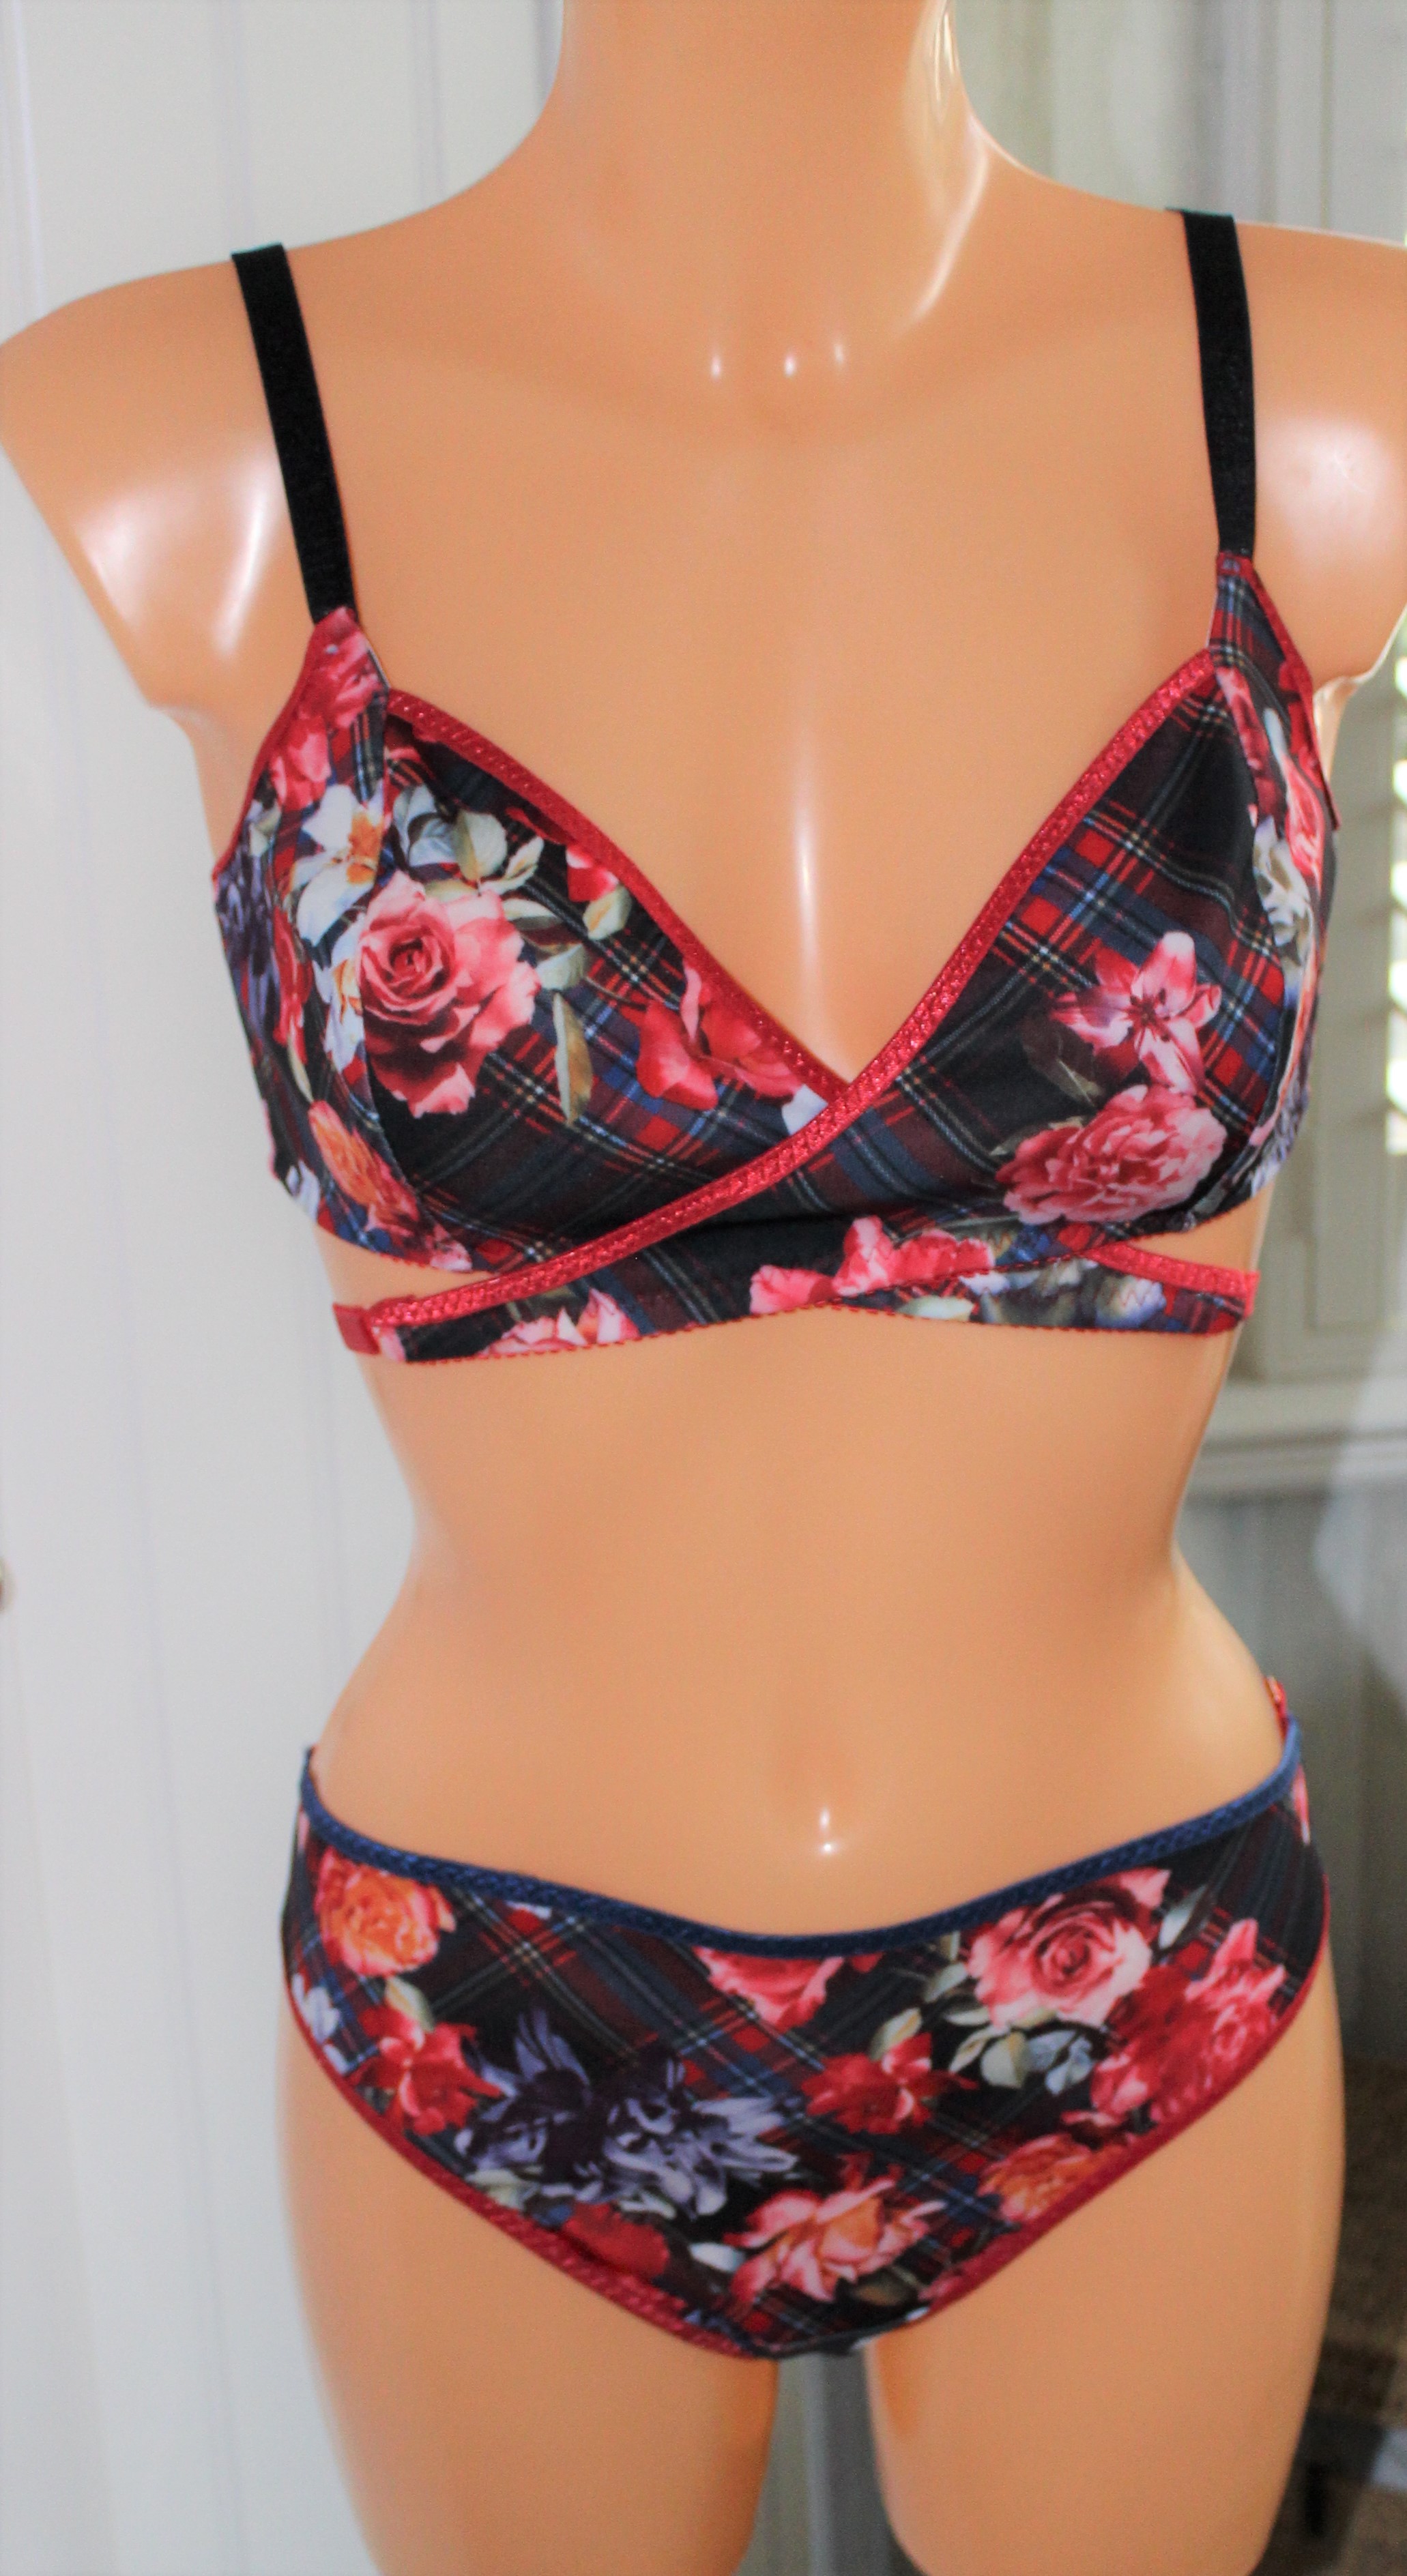
Everyone seems to be using Scuba for lingerie so I thought I would give it a try. This fabric had caught my eye on Instagram and I bought on a deal over Christmas. The description does give a list of bras patterns that would be suitable. When the kit arrived the plush elastic for the bra band was only 3/8" and not 1/2" which I would use for the underarm not a bra band. For some the fabric for the gusset was not cotton may be an issue.
I did have all the patterns mentioned but I had been thinking of trying the wrap around version of Willow bra pattern by Evie La Luve. There is plenty of fabric and foe to make what you want. I did need extra strapping and findings included a front closure for the back strap. So the back strap had to be red and I swapped out the gold findings for rose gold (from Evie La luves' etsy shop) as I had everything I needed in this colour.
The bralette is a "C" cup fitting. I didn't make a trial version as I use this brand of patterns quite a lot and have a good idea of how they fit. I crossed over two sizes so I made the smaller one as the pattern doesn't have a back closure which I usually end up adjusting,

Once everything is cut out you baste the fabric to the lining of the centre front pieces before attaching foe. You could just use temporary adhesive but in this instance I used a silk thread which pulls out easily without leaving any marks. The pattern is specific about how much foe to cut. I always add 1/2" each end as I find fitting to the edge fiddly and then trim excess.
You then enclose this seam between the fabric and lining of the side front. To reduce the bulk the instructions tell you to grade the seam cutting the lining fabric shortest and press. I left the same length as the lining is quite sheer and I didn't want to be able to see the dark fabric on the inside of the bra. Once pressed the seam was fine.

After repeating for the other side you enclose the side front between the fabric and lining back. Just the strapping to put on now.


I always switch to my walking foot when making and applying straps because of the bulk. I also find using a fabric glue pen helps keep the strap in place as I sew. Nothing worse than wonky straps.
The patterns says to use 5/8" rings for the main front pieces. I didn't have any this size and the 1/2" ones I did use didn't cause any problems.
The fit is pretty good although I did have to make the straps quite short.
Then I had to choose what panties to make. I remembered that the Frankie pattern has a version with a dip back and strap that would match the bralette. You can make this pattern in so may variations. I chose to do the fabric front with foe and lace back.

I usually play around with the placement of the lace so that the seam line falls at the low point of the lace. I then cut one side and flip over to find the mirror image. Perfect! As the lace is so fiddly I always use a stretch stitch to sew the back seam before I serge The next step is to enclose the front between fabric and lining gusset and then apply foe to the leg openings. I also made the back strap at this point whilst Ihad red thread in the machine.

Again I use a stretch stitch before I serge when I attach front to back and side seams. Although I had plenty of red foe left I used navy as I thought it would look better with the lace.
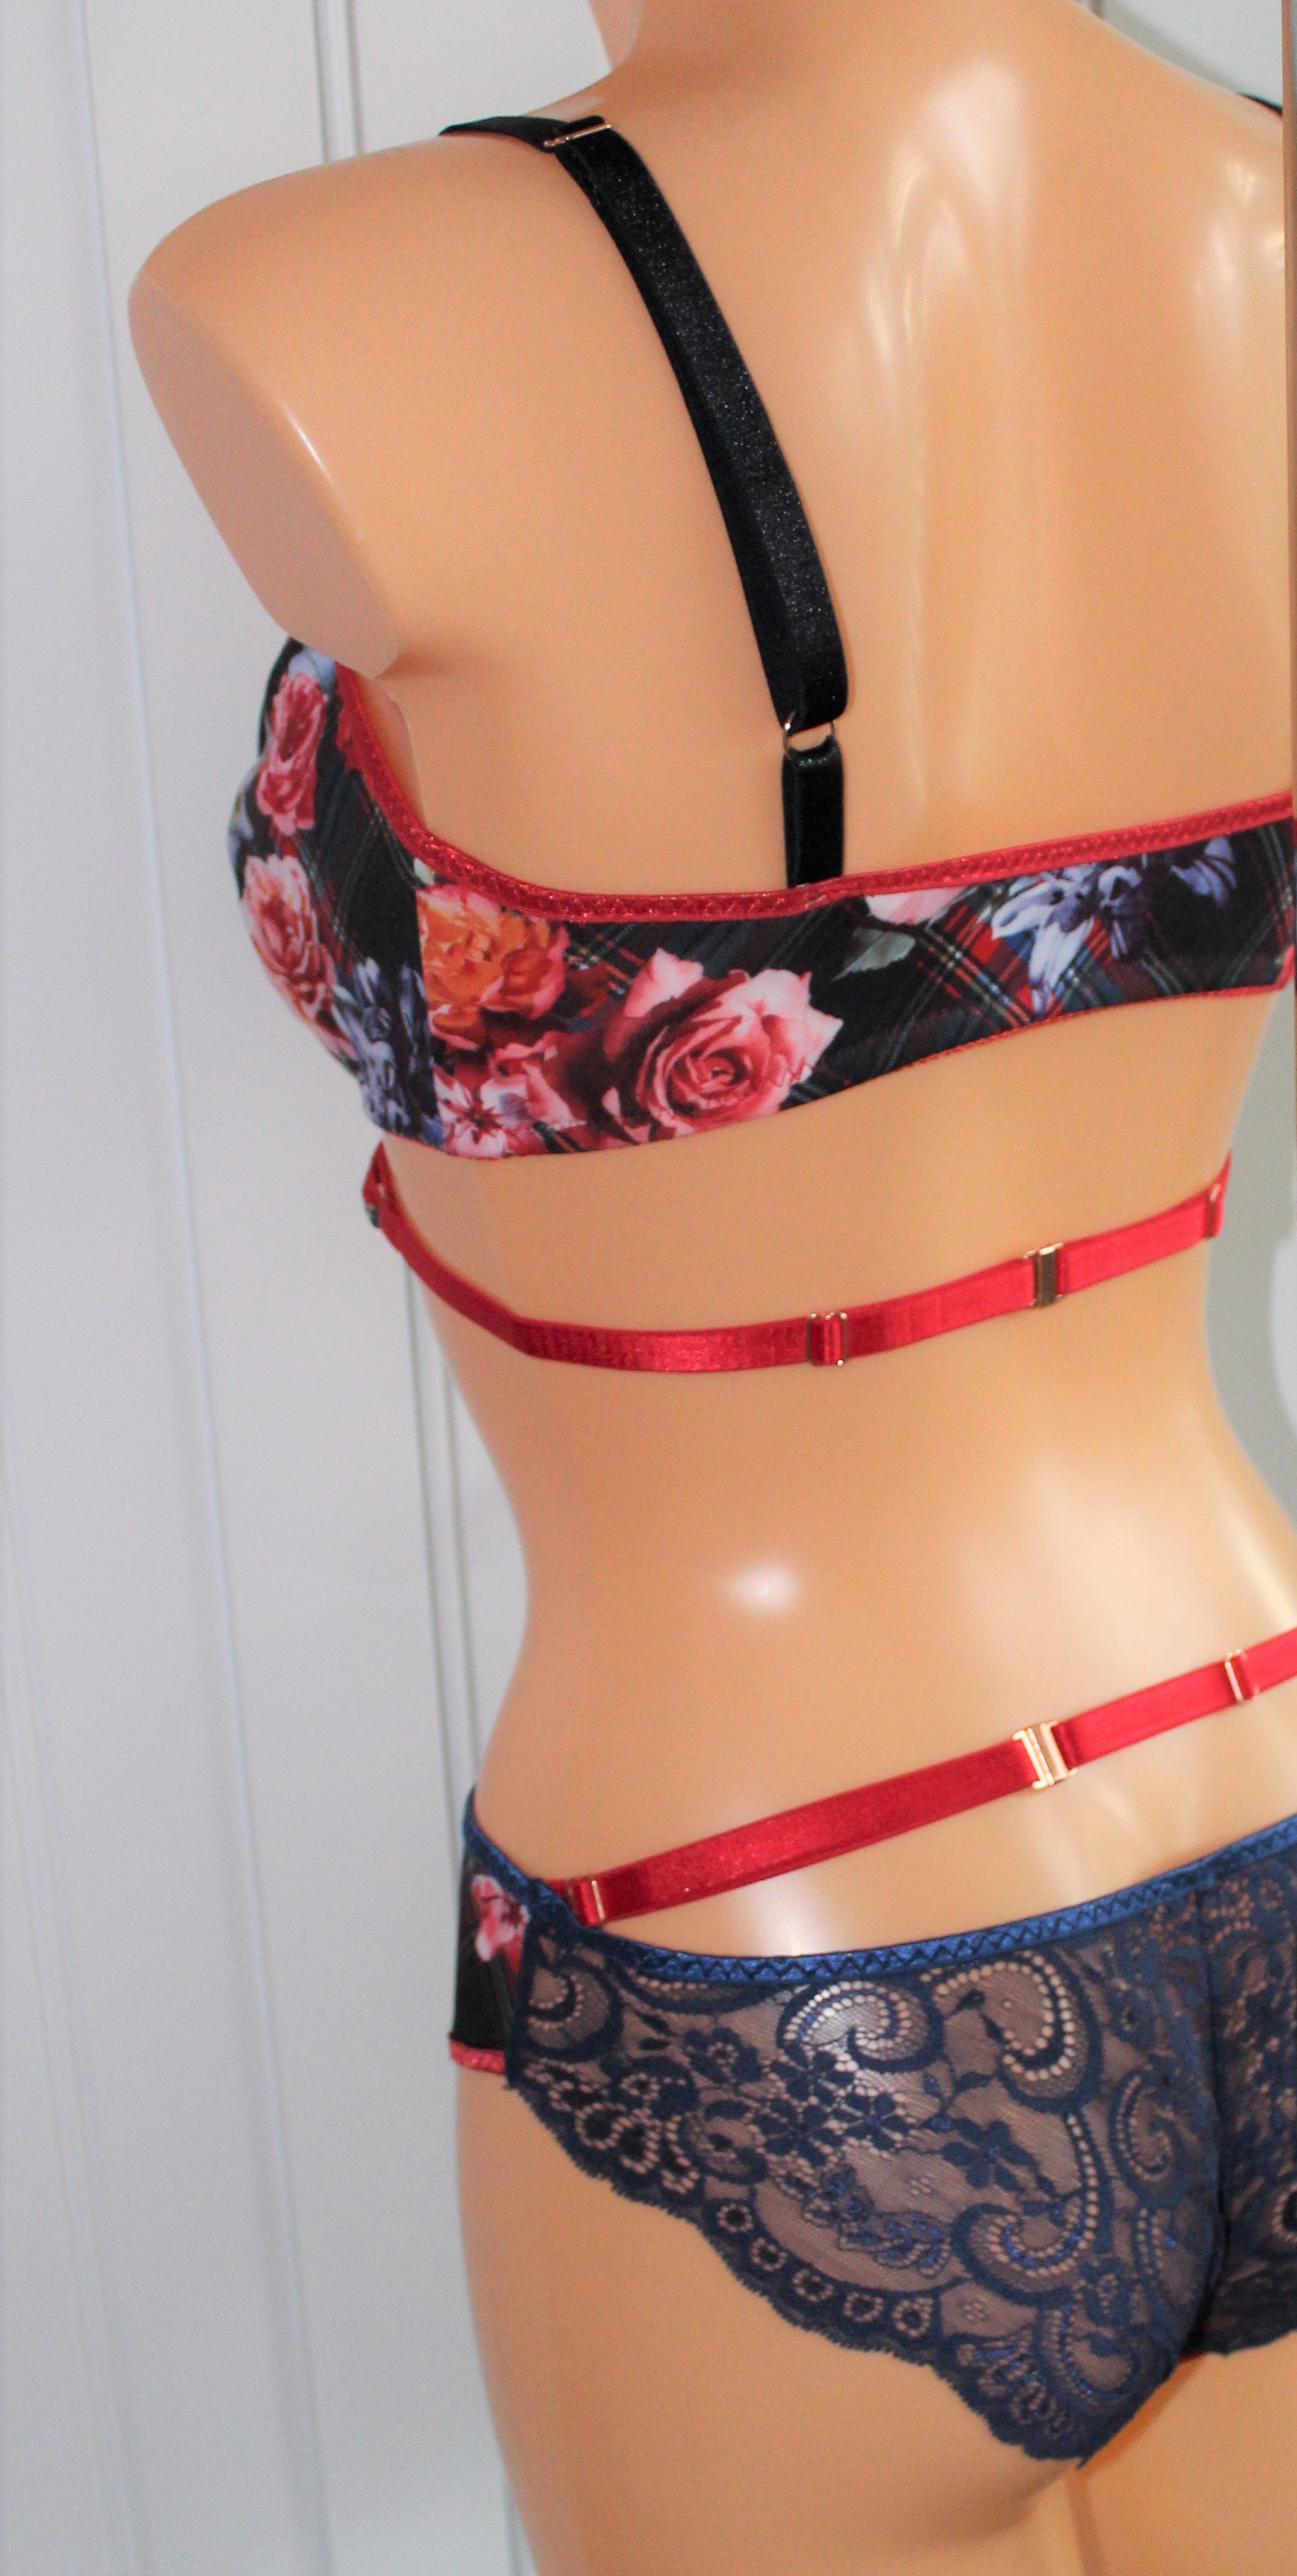
Looks fabulous and I think my FOE technique is so much better.