Kelly Anorak - Making Up
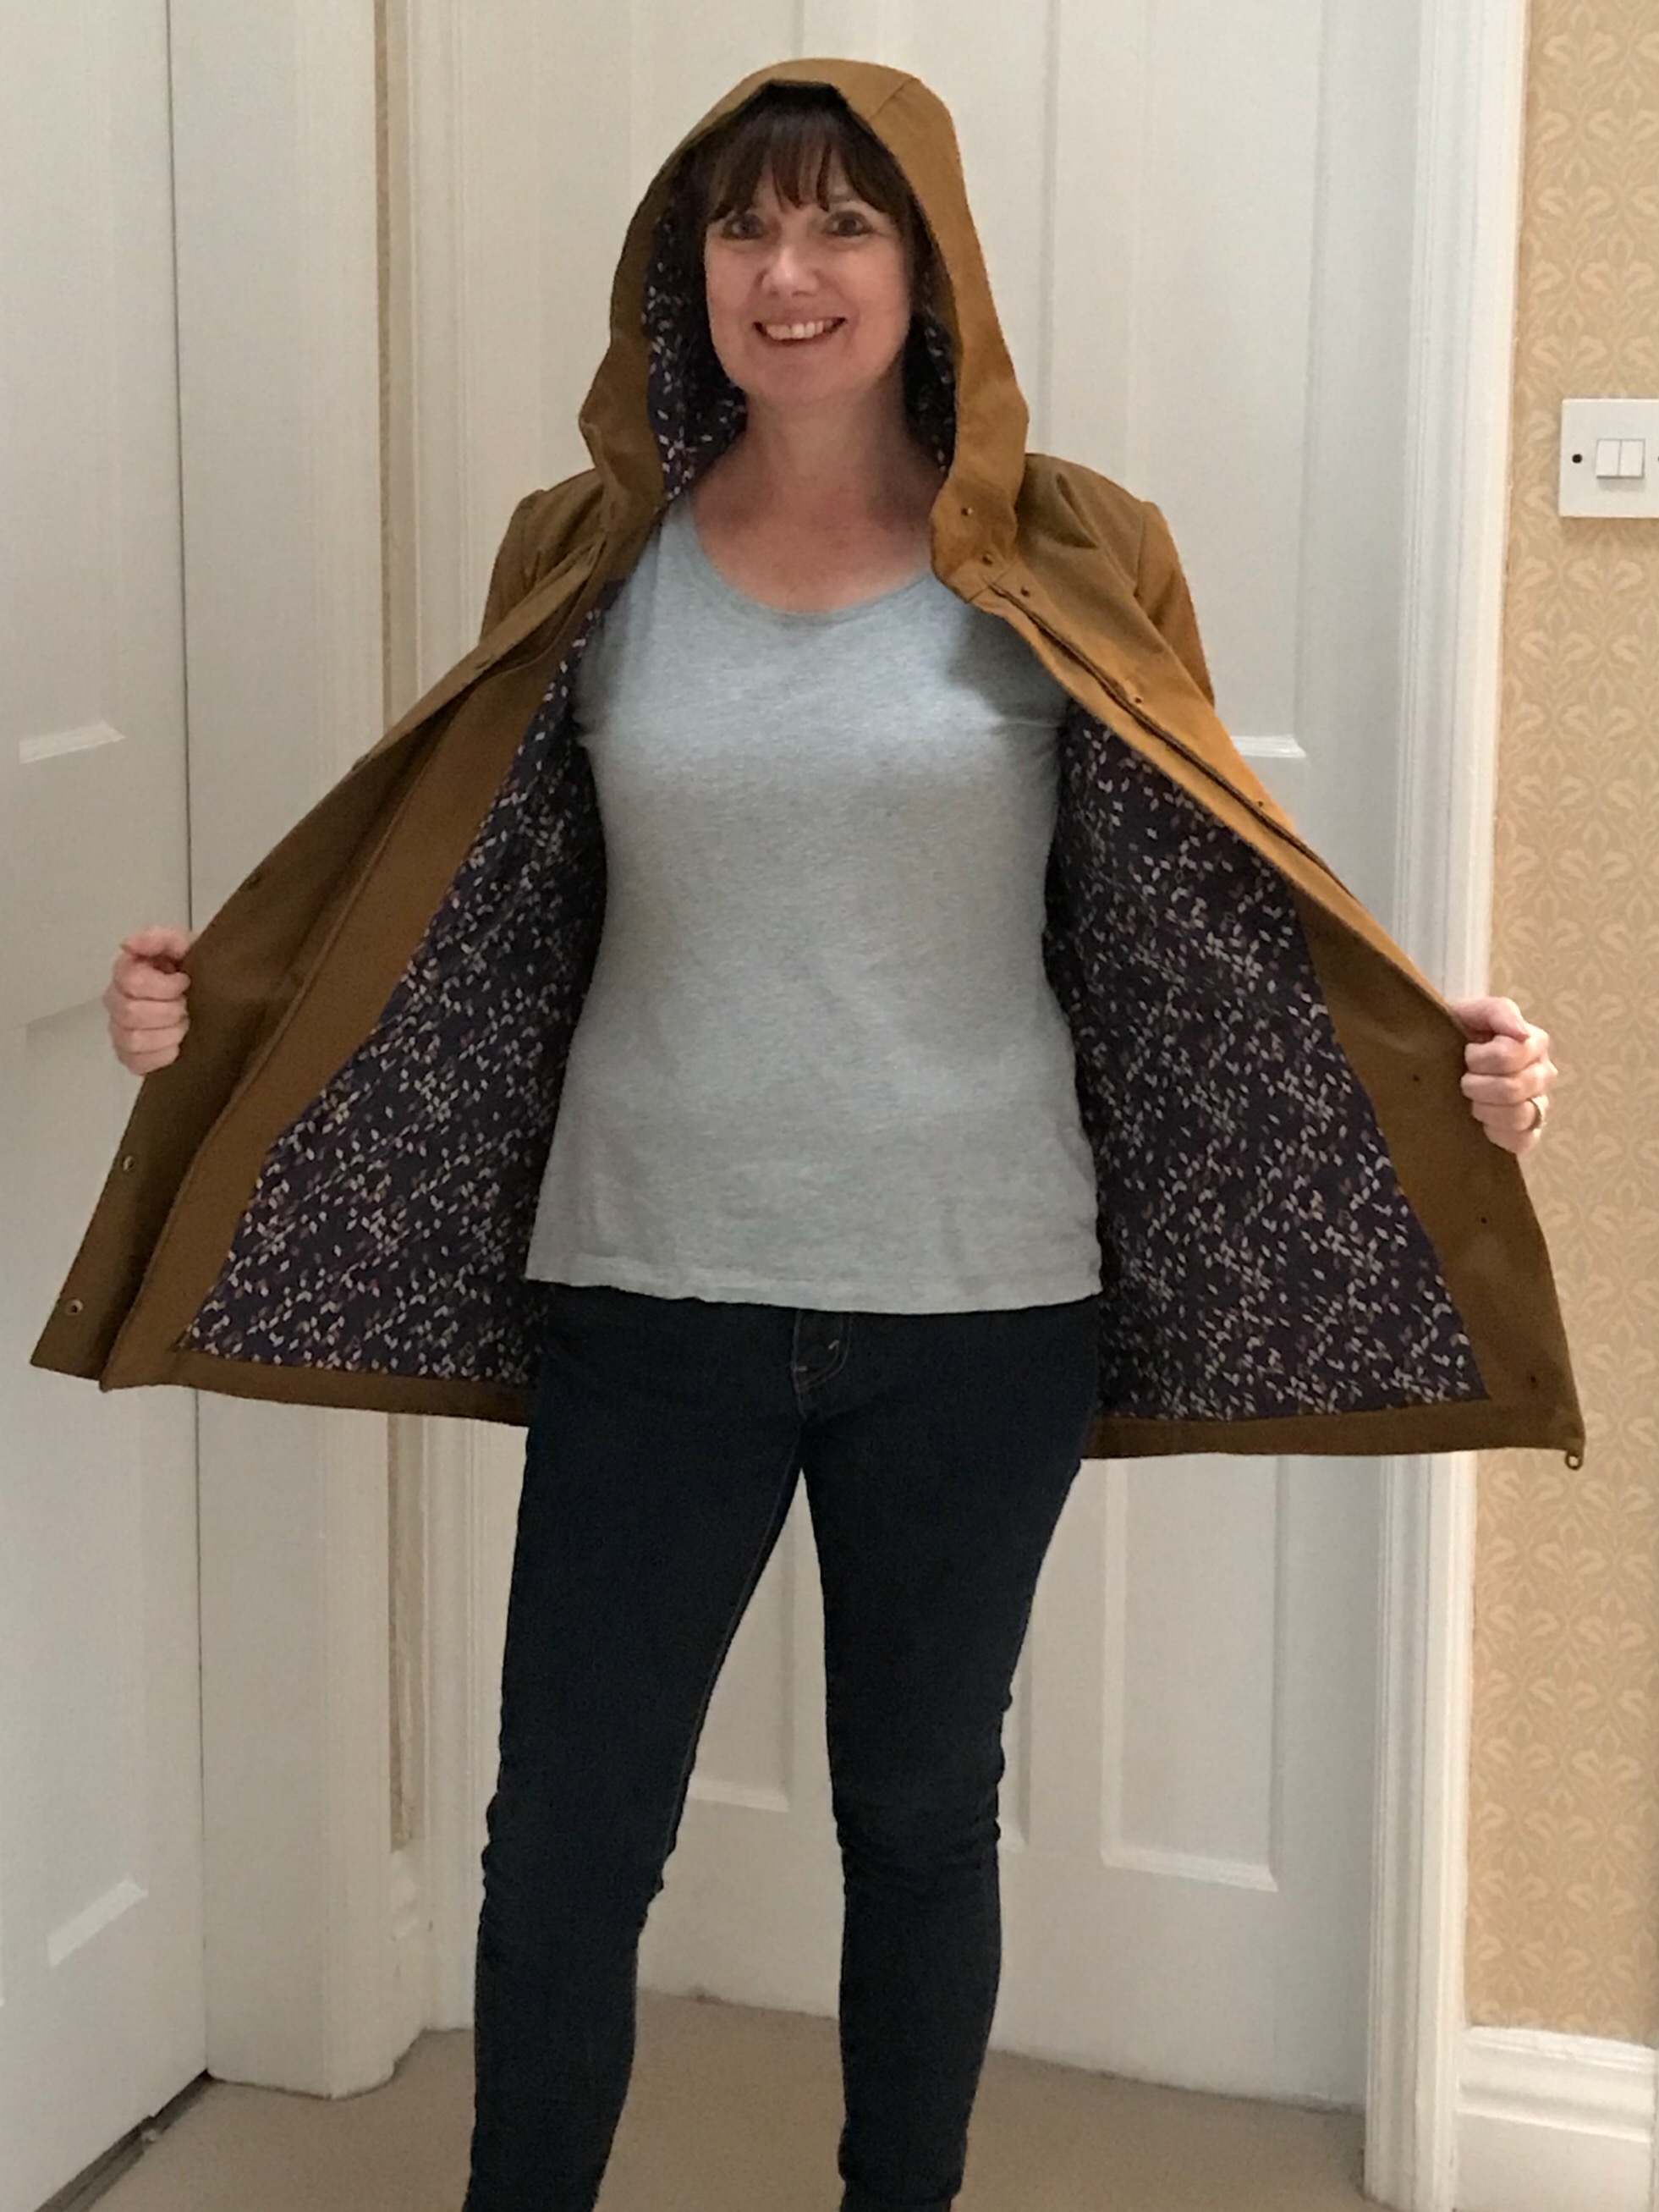
Finally got to start sewing today. Out of sequence with the pattern I did the lining bits first as I had the blue cotton in the machine. I also thought I would see how well the hood and sleeves went together before sewing the waxed cotton. The walking foot came out for the understitching as I had a lot of bulk especially on the back pleat. Fitted together pretty well.


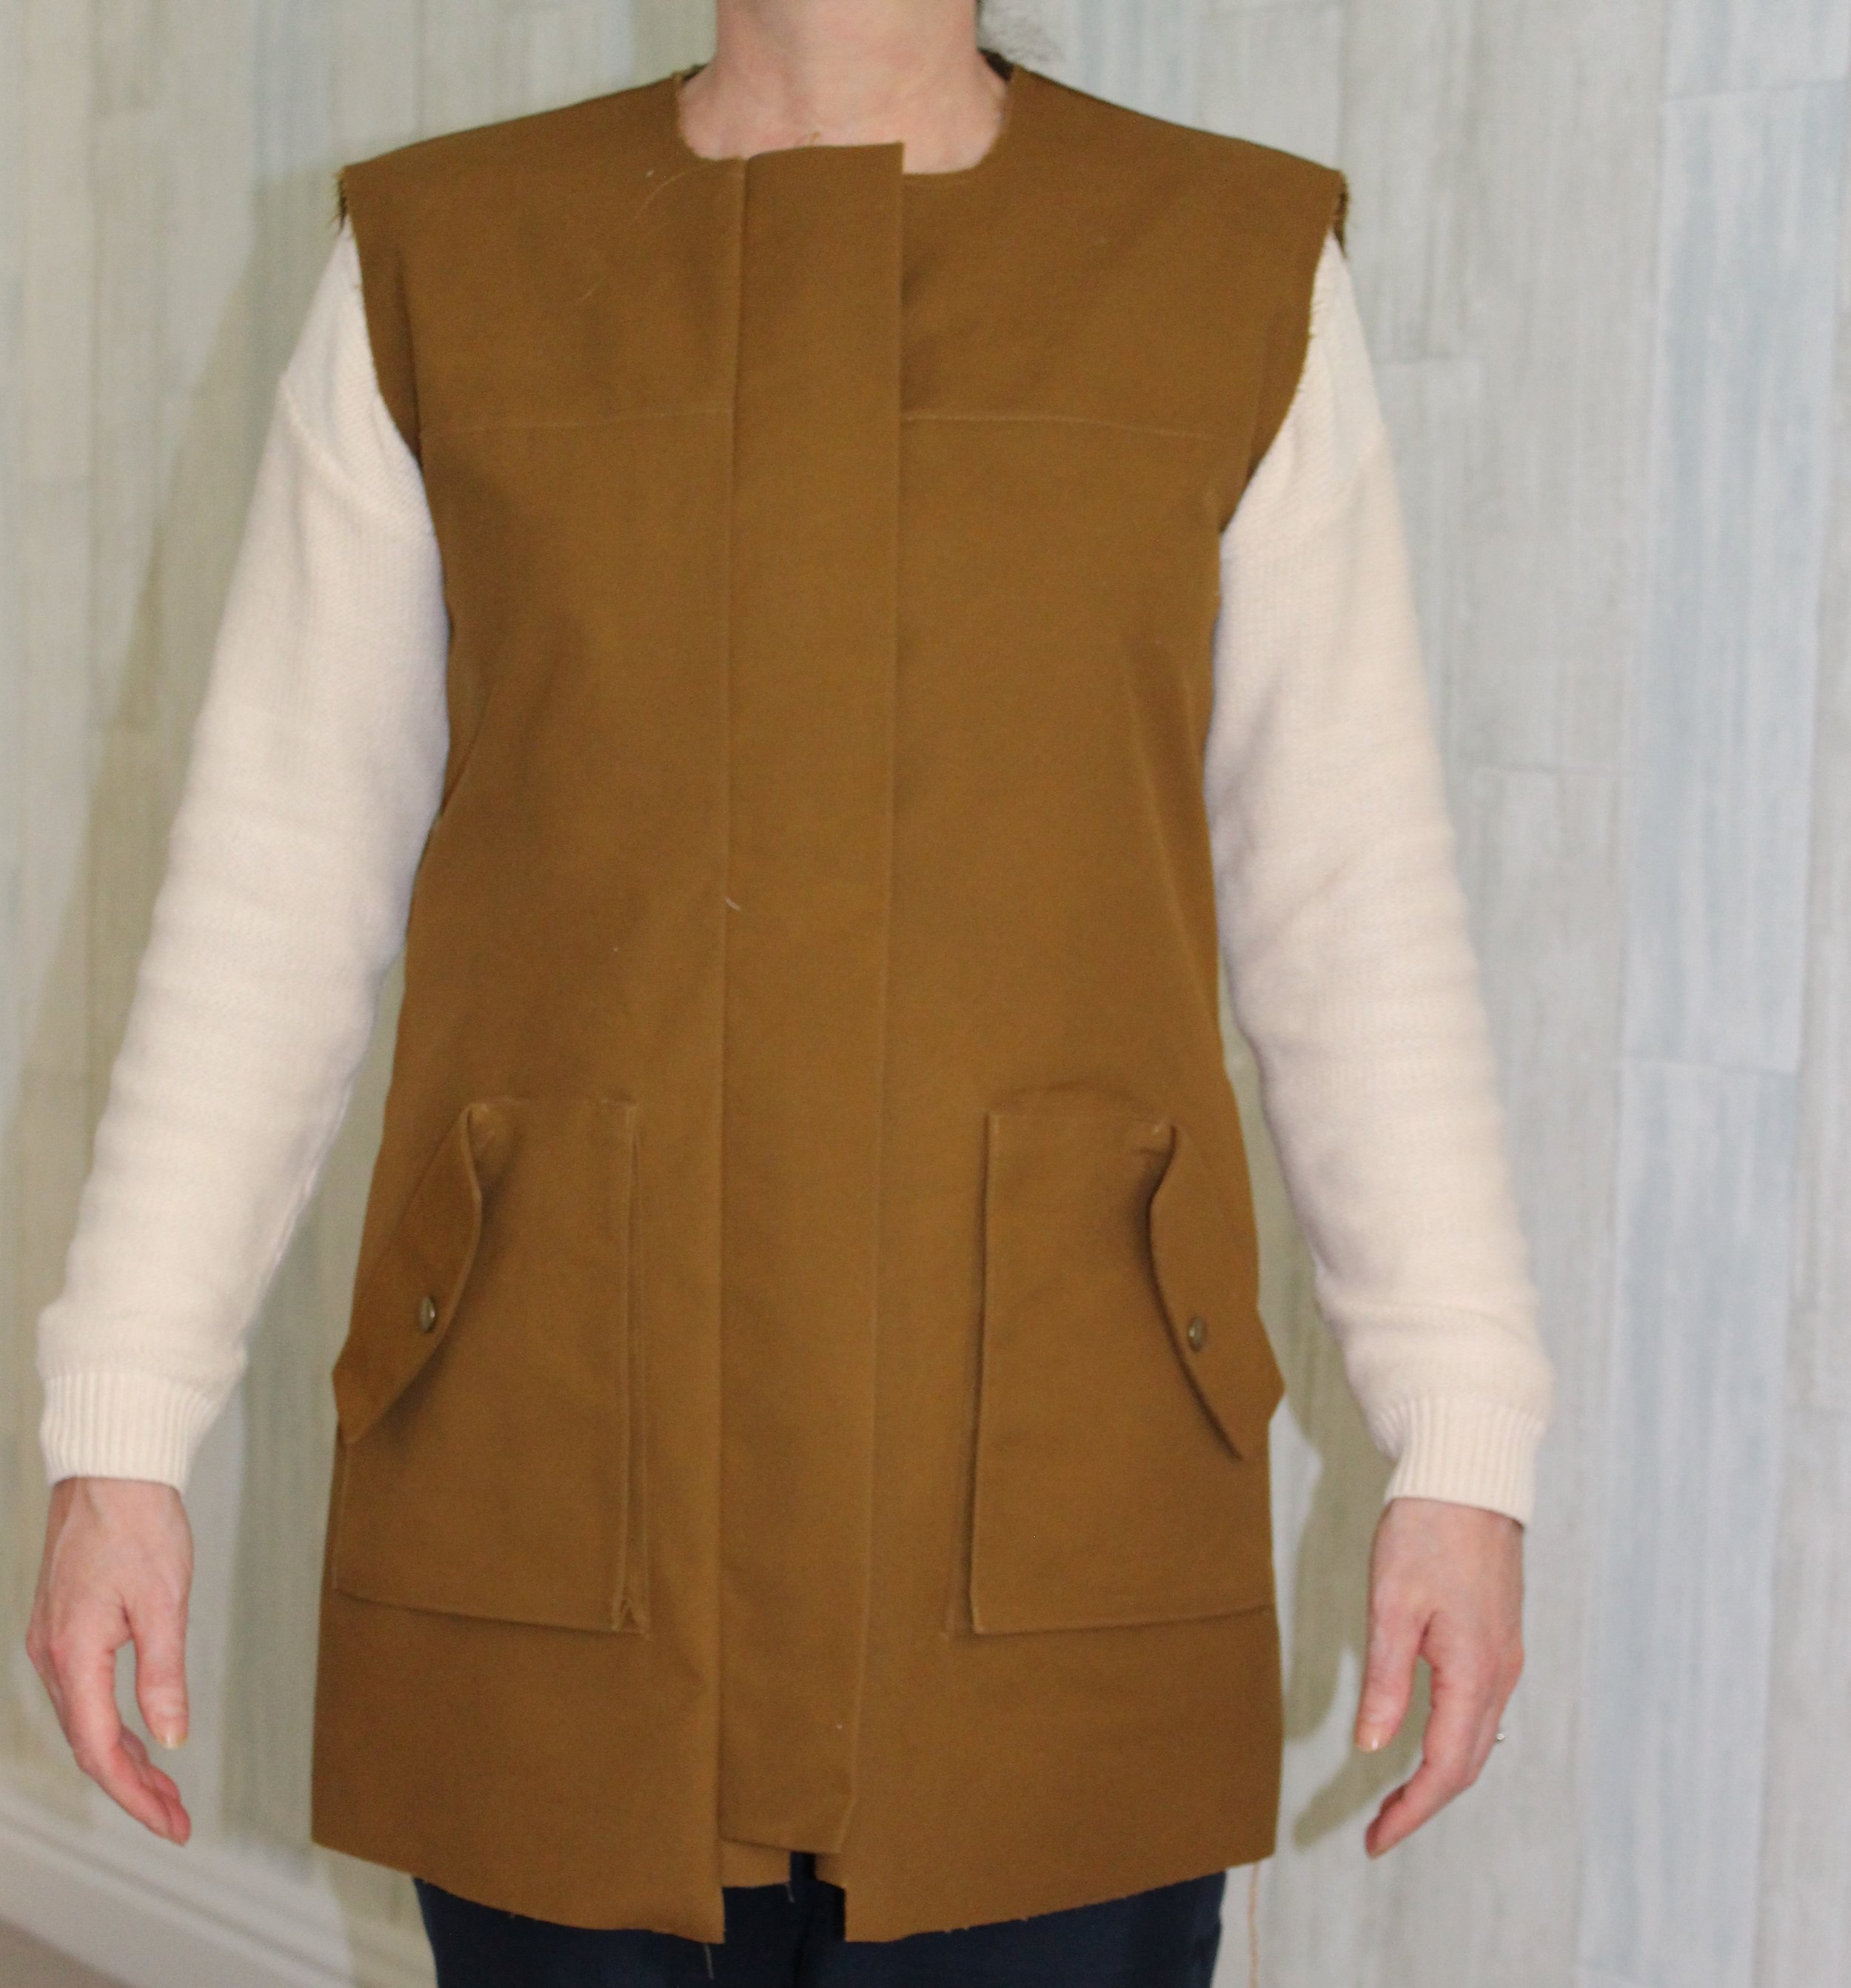
The first step is the back yoke followed by the front yokes. I used a faux flat fell seam for the front yokes as my fabric is so bulky. Even my overlocker felt the strain. Then the fun starts with the pockets. I did resort to the Closet Case blog on the gusset packet as I didn't find the instructions clear enough. to feel comfortable. There is a snap fastener to keep the fold over flap in place. The pocket side is hard to reach with the Prym pliers. I did try both the tool that came with the fasteners as well as the tripod but wouldn't go through the fabric. I brought in some brute force who then got the fabric caught and put two holes in my pocket. So I started again and managed to make two pockets in the same direction. Third time lucky and still married! Feeling nervous I attached the pockets to the fronts. At least I managed to get these on straight and the bulk does flatten when pressed.

Next step is to attach the fronts to the back. I had decided not to put in the drawstring waist and I had already made the jacket and hood lining so I moved on to the sleeves. The sleeves went together well although I could only top stitch the fist seam. I am not sure that you could topstitch the closed sleeve in any size. Then I tried to inset the sleeves. What a disaster. My material just wasn't playing ball and after undoing twice I went with what I had.
In between undoings I did the zip and the hood. The easing in the hood was a doddle after the sleeves and once pressed and topstitched looked pretty good. I marked the sewing line for the two curves when I attached the hood to the hood lining as I wanted to ensure the curves matched perfectly. It can be difficult to keep on the seam allowance when sewing such tight corners.

Moving on to the zip. I put on the right placket. Then you insert the zip to the right facing. Now this is where I have an issue with the pattern. It tells you to line up the zip edge with facing edge. You have to sew on the seam allowance and make sure you leave room to open the zip. My zip was not wide enough. to do this. Worried the zip would be in the wrong place I again resorted to a tutorial on inserting the zipper placket. In the tutorial it does say to move your zip in from the edge so you can sew at the correct seam allowance.
So I drew a line where it needed to be. Instead of pinning zips I use double sided tape as zips always seem to move around. I did read the rest of the tutorial as again this gave clarity to the instructions. Although I had to remember that the part about finishing the facings is if you are not lining. Took care to make sure the left side matched by fastening and marking on the zip where it should meet top, bottom and front yoke. Yes it all matched. Phew!
The finish was in sight or so I thought. After pressing up the hems the next step is too attach the lining. Again I had an issue with the instructions. It says the lining is shorter than the facings. Mine were the same length. So I got out the pattern pieces and yes they are the same length. I think is should say shorter than the body of the coat.
Then you attach the hood to the jacket body. You have to do this in two parts because of the right placket. A lot of fabric to go through but after clipping, it went in well. I tried to use clover clips to hold the layers in place but they slide off when you get close to the machine foot so I stuck with pins. I actually managed to get blood on the inside of the hood so I resorted to basting in place after I found a needle sharp enough to go through all that fabric.
Again because of the placket it is not possible to stitch the neckline of the lining to the neckline in one go. You wrap the collar lining facing around the neckline seam sandwiching the jacket and lining neckline in between. You stitch along the seam allowance for as far as you can go on both sides. Tight for me with all the bulk of the fabric.
After attaching the sleeve linings to the jacket sleeve you turn to the right side and slip stitch the open neckline . I added a hanging loop at this point. To secure everything in place you top stitch along the neckline. I just went real slow and it came out very neat. it is optional to topstitch around the perimeter of the hood but I didn't bother in case I messed up the tight curves. The lining sits along the crease of the hem and you topstitch through to hold in place.
Finally the metal snaps. I carefully checked the markings before I punched through on the right side. I then fastened the coat and marked the left placement by marking through the hole. The only issue I had was the bottom hood snap where the right side had to go through so many layers.
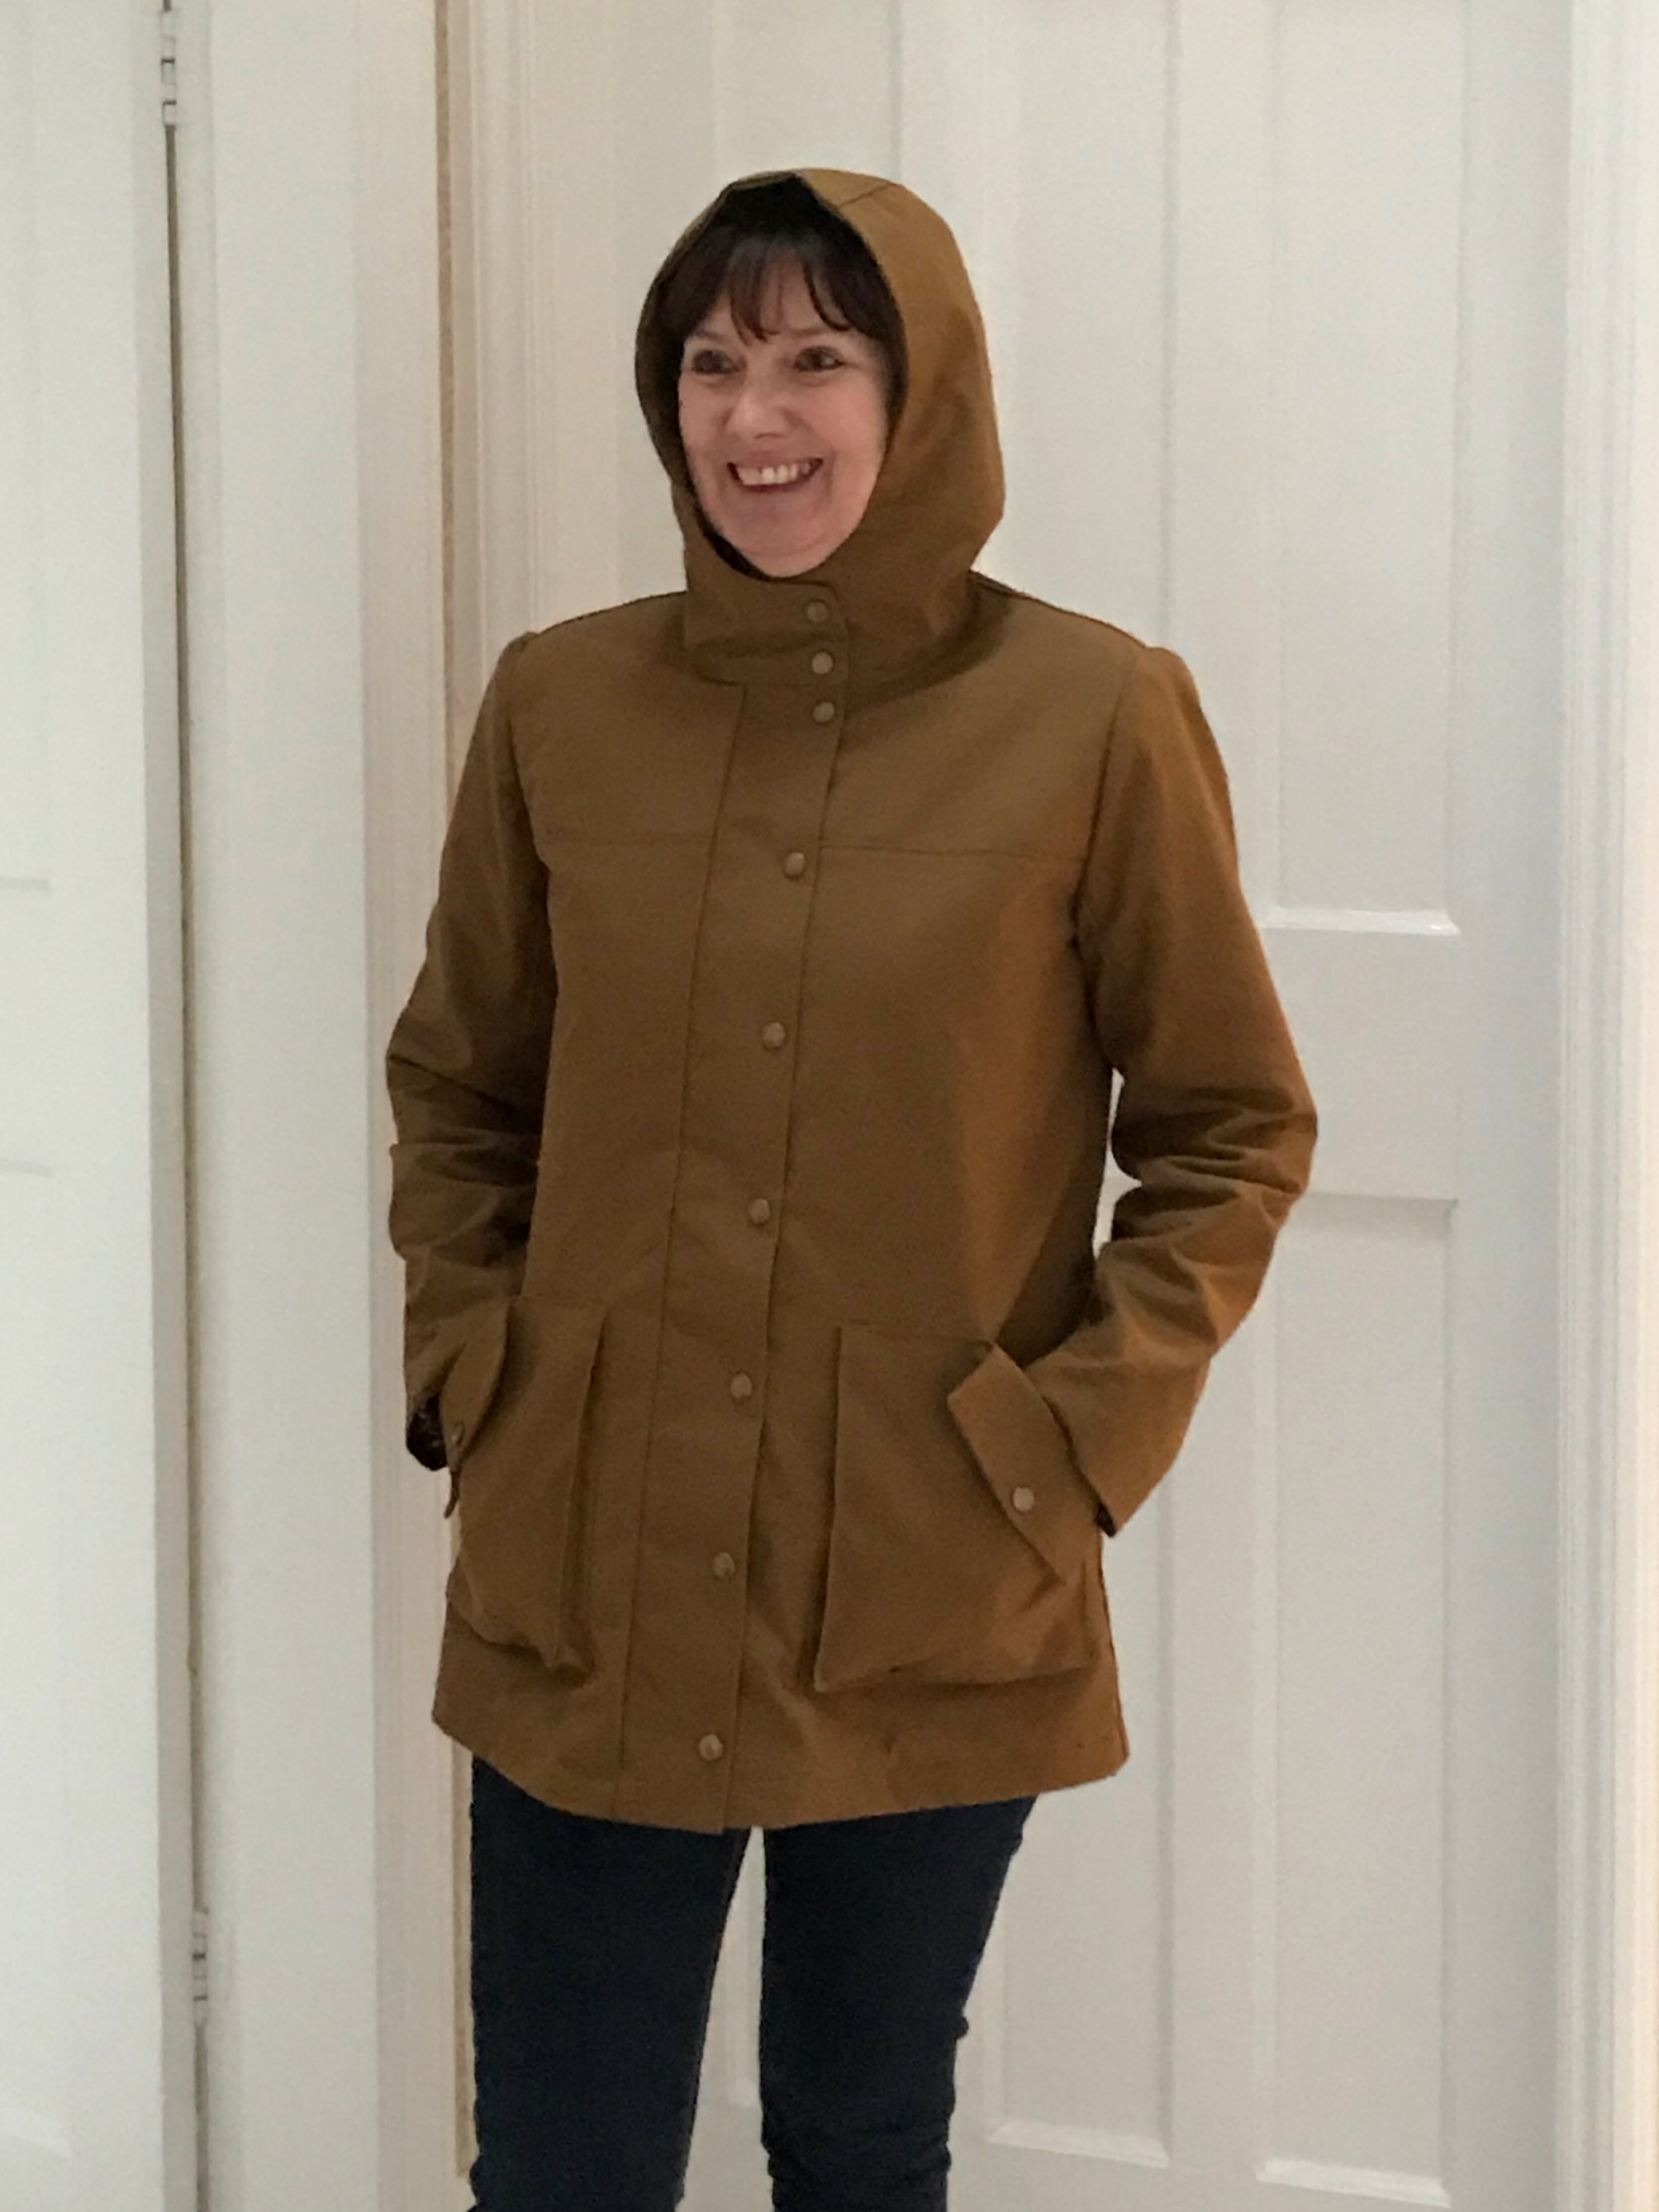
All done. The coat looks amazing. The hood fits perfectly and the pockets are just right for me. The fit is a little snug as I had quilted the lining but ever so cosy.